Authentic Empanada Recipe: A Taste of Latin Flavour

empanada recipe

The Perfect Empanada Recipe: A Taste of Latin Flavour

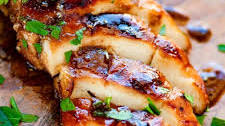
Empanadas are a beloved dish in Latin American cuisine, known for their delicious fillings and crispy pastry shells. Whether you prefer them baked or fried, empanadas are a versatile treat that can be enjoyed as a snack or a meal. Here, we share a classic empanada recipe that will transport your taste buds to the vibrant streets of Latin America.

Ingredients:

  • 2 cups all-purpose flour
  • 1/2 teaspoon salt
  • 1/2 cup cold unsalted butter, cubed
  • 1/4 – 1/2 cup cold water
  • 1 tablespoon olive oil
  • 1 small onion, finely chopped
  • 2 cloves garlic, minced
  • 1 red bell pepper, diced
  • 250g ground beef or chicken
  • 1 teaspoon cumin
  • Salt and pepper to taste
  • 1/4 cup pitted green olives, sliced
  • 2 hard-boiled eggs, chopped

Instructions:

  1. Prepare the Dough:
  2. – In a large bowl, combine the flour and salt.

    – Add the cubed butter and rub it into the flour mixture until it resembles breadcrumbs.

    – Slowly add the cold water and mix until the dough comes together.

    – Shape the dough into a ball, wrap it in cling film, and refrigerate for 30 minutes.

  3. Make the Filling:
  4. – In a pan, heat olive oil over medium heat.

    – Add the onion and garlic, sauté until softened.

    – Stir in the bell pepper and cook for another 3-4 minutes.

    – Add the ground beef or chicken, cumin, salt, and pepper. Cook until browned.

    – Remove from heat and stir in olives and chopped eggs.

  5. Assemble the Empanadas:
  6. – Preheat oven to 200°C (180°C fan).

    – Roll out the dough on a floured surface to about 0.5cm thickness.

    – Using a round cutter or a small plate as a guide, cut out circles from the dough.

    – Spoon some filling onto each circle.

    – Fold over to create half-moon shapes and seal by pressing edges with a fork.

  7. Cooking Options:
  8. – To bake: Place empanadas on a baking tray lined with parchment paper. Brush with egg wash. Bake for 20-25 minutes until golden brown.

    – To fry: Heat oil in a deep pan. Fry empanadas until crispy and golden on both sides.

  9. Serve & Enjoy:
  10. – Serve hot with your favourite dipping sauce or salsa.

    – Enjoy these homemade empanadas as a delightful snack or meal that captures the essence of Latin American cuisine.

Gather your friends and family to savour these homemade empanadas filled with flavourful ingredients that will surely satisfy your cravings for authentic Latin cuisine.


Empanada Recipe FAQs: Dough Types, Cooking Methods, Common Mistakes, and Pastry Tips

  1. What dough are empanadas made of?
  2. Is it better to fry or bake empanadas?
  3. What are common empanada mistakes?
  4. What pastry is best for empanadas?
  5. Is empanada dough the same as pizza dough?

What dough are empanadas made of?

Empanadas are typically made with a simple dough consisting of all-purpose flour, salt, cold butter, and water. This dough is easy to work with and can be shaped into the perfect pastry shell for enclosing the delicious fillings that make empanadas so irresistible. The combination of these basic ingredients results in a crispy yet tender crust that complements the savoury or sweet fillings inside. Whether baked or fried, the dough used for empanadas plays a crucial role in creating a delightful culinary experience that captures the essence of this popular Latin American dish.

Is it better to fry or bake empanadas?

When it comes to preparing empanadas, the choice between frying and baking often depends on personal preference and dietary considerations. Frying empanadas typically results in a crispy, golden exterior that many find irresistible, while baking offers a healthier alternative with a slightly lighter texture. Frying may enhance the overall richness of the dish, while baking can be a convenient and less messy option. Ultimately, whether you fry or bake your empanadas, both methods can yield delicious results that cater to different tastes and dietary needs.

What are common empanada mistakes?

When preparing empanadas, there are common mistakes that can affect the final outcome of this beloved Latin American dish. One frequent error is overfilling the empanadas, which can lead to leaks during baking or frying. Another common mistake is not properly sealing the edges of the empanadas, resulting in filling spilling out during cooking. Additionally, using a dough that is too thick or too thin can impact the texture and overall taste of the empanadas. It’s essential to follow the recipe closely and pay attention to details such as dough consistency and filling distribution to ensure a successful batch of delicious empanadas.

What pastry is best for empanadas?

When it comes to choosing the best pastry for empanadas, many enthusiasts swear by a simple dough made with all-purpose flour, butter, and water. This classic pastry recipe yields a crisp and flaky shell that perfectly complements the savoury fillings of traditional empanadas. The key is to achieve a balance between a sturdy crust that holds the filling together and a light texture that melts in your mouth with each bite. Experimenting with different types of dough, such as those incorporating lard or even puff pastry, can also add unique textures and flavours to your empanadas, catering to personal preferences and culinary creativity. Ultimately, the best pastry for empanadas is one that enhances the overall taste experience while staying true to the dish’s cultural roots.

Is empanada dough the same as pizza dough?

When it comes to empanadas and pizza, the dough used for each dish differs in texture and composition. Empanada dough is typically more flaky and sturdy, designed to hold the filling securely without becoming soggy. On the other hand, pizza dough is softer and more elastic, ideal for stretching into a thin crust that bakes to perfection in a hot oven. While both doughs share basic ingredients like flour and water, their ratios and preparation methods vary significantly to suit the specific requirements of each culinary delight.

Elevate Your BBQ Game with the Ultimate Grilled Chicken Marinade

grilled chicken marinade

The Perfect Grilled Chicken Marinade: Elevate Your BBQ Game

Grilling season is upon us, and what better way to impress your guests than with a mouth-watering grilled chicken dish marinated to perfection? A good marinade can take your chicken from bland to flavourful, tender, and juicy. Let’s explore the key ingredients and steps to create the ultimate grilled chicken marinade.

Ingredients:

  • 4 boneless, skinless chicken breasts
  • 1/4 cup olive oil
  • 2 cloves of garlic, minced
  • 2 tablespoons soy sauce
  • 1 tablespoon honey
  • 1 teaspoon paprika
  • Salt and pepper to taste

Instructions:

  1. In a bowl, whisk together the olive oil, minced garlic, soy sauce, honey, paprika, salt, and pepper.
  2. Place the chicken breasts in a resealable plastic bag or shallow dish.
  3. Pour the marinade over the chicken, ensuring it is evenly coated. Seal the bag or cover the dish with plastic wrap and refrigerate for at least 30 minutes (or up to 24 hours for maximum flavour).
  4. Preheat your grill to medium-high heat.
  5. Remove the chicken from the marinade and discard any excess marinade.
  6. Grill the chicken for about 6-7 minutes per side or until fully cooked (internal temperature of 75°C).
  7. Once done, let the chicken rest for a few minutes before serving to allow the juices to redistribute.

This simple yet delicious grilled chicken marinade is sure to be a hit at your next barbecue gathering. The combination of savoury soy sauce, sweet honey, and aromatic garlic creates a harmonious blend of flavours that will leave everyone asking for seconds. So fire up that grill, marinate your chicken, and get ready to elevate your BBQ game!

Bon appétit!


Essential FAQs for Perfectly Marinated Grilled Chicken

  1. 1. How long should I marinate chicken for grilling?
  2. 2. What are the key ingredients for a grilled chicken marinade?
  3. 3. Can I use a store-bought marinade for grilled chicken?
  4. 4. Is it better to marinate chicken in the fridge or at room temperature?
  5. 5. How can I prevent my grilled chicken from drying out?
  6. 6. Are there any alternatives to olive oil in a marinade?
  7. 7. Should I pierce the chicken before marinating it?
  8. 8. Can I reuse leftover marinade?

1. How long should I marinate chicken for grilling?

When it comes to marinating chicken for grilling, the duration plays a crucial role in enhancing the flavour and tenderness of the meat. The ideal marinating time for chicken typically ranges from 30 minutes to 24 hours. While a minimum of 30 minutes allows the flavours to penetrate the surface of the chicken, longer marination periods, such as overnight, can intensify the taste and texture. It is essential to strike a balance between marinating adequately for optimal flavour infusion without over-marinating, which can result in a mushy texture. Experimenting with different marinating times can help you find the perfect balance to achieve deliciously grilled chicken every time.

2. What are the key ingredients for a grilled chicken marinade?

When it comes to creating a delicious grilled chicken marinade, the key ingredients play a crucial role in enhancing the flavour profile of the dish. Typically, a well-balanced marinade for grilled chicken includes olive oil for moisture, minced garlic for a robust aroma, soy sauce for savouriness, honey for sweetness, paprika for a hint of smokiness, and of course, salt and pepper to season to taste. These ingredients work together harmoniously to infuse the chicken with layers of taste that will leave your taste buds delighted.

3. Can I use a store-bought marinade for grilled chicken?

When it comes to marinating grilled chicken, a common query arises: Can I use a store-bought marinade? The answer is yes, you can certainly use a store-bought marinade for your grilled chicken. Store-bought marinades offer convenience and a variety of flavour options, making them a popular choice for those looking to save time without compromising on taste. However, it’s important to read the ingredients and nutritional information on the label to ensure the marinade aligns with your dietary preferences and requirements. Feel free to experiment with different store-bought marinades to discover your favourite flavours for that perfect grilled chicken dish.

4. Is it better to marinate chicken in the fridge or at room temperature?

When it comes to marinating chicken, it is generally recommended to marinate it in the fridge rather than at room temperature. Marinating chicken in the fridge helps to keep it at a safe temperature, preventing the growth of harmful bacteria. Additionally, refrigeration allows the flavours of the marinade to penetrate the chicken more effectively over a longer period, resulting in a more tender and flavourful end product. So, for optimal food safety and taste, it’s best to marinate your chicken in the fridge for a specified amount of time before grilling.

5. How can I prevent my grilled chicken from drying out?

To prevent your grilled chicken from drying out, it is essential to pay attention to both the cooking time and the marinade. Overcooking can lead to dry chicken, so be sure to cook it just until it reaches an internal temperature of 75°C. Additionally, using a well-balanced marinade with ingredients like olive oil, soy sauce, and honey can help lock in moisture and enhance the flavour of the chicken. Marinating the chicken for an adequate amount of time before grilling can make a significant difference in keeping the meat juicy and succulent. Remember to let the grilled chicken rest for a few minutes after cooking to allow the juices to redistribute before serving. By following these tips, you can enjoy perfectly moist and delicious grilled chicken every time.

6. Are there any alternatives to olive oil in a marinade?

When it comes to alternatives for olive oil in a marinade, there are several options that can impart unique flavours to your grilled chicken. One popular substitute is avocado oil, known for its mild taste and high smoke point, making it ideal for grilling. Another alternative is sesame oil, which adds a rich nutty flavour to the marinade. Additionally, you can consider using melted butter or coconut oil for a touch of richness and sweetness. Each alternative brings its own distinct profile to the marinade, offering versatility in customising the taste of your grilled chicken to suit your preferences.

7. Should I pierce the chicken before marinating it?

When it comes to marinating chicken, the question of whether to pierce the meat before marinating often arises. While some believe that piercing the chicken allows the marinade to penetrate deeper and enhance flavour, others argue that it can lead to loss of natural juices and result in drier meat. In general, it is not necessary to pierce the chicken before marinating, as a well-made marinade will still impart plenty of flavour without compromising the juiciness of the meat. Instead, focus on ensuring that the marinade covers the chicken evenly and allow an adequate marinating time for optimal results.

8. Can I reuse leftover marinade?

When it comes to reusing leftover marinade from grilled chicken, it is generally not recommended due to food safety concerns. Once raw chicken has been marinated in a mixture, it can introduce harmful bacteria. If you do wish to reuse the marinade for basting or as a sauce, it is crucial to boil it first to kill any bacteria present. However, for the best results and to ensure food safety, it is advisable to prepare a fresh batch of marinade if needed. Prioritising food hygiene and avoiding potential risks is key when handling leftover marinades in cooking practices.

Savoury Delights: Authentic Calzone Recipe Straight from Italy

The Perfect Calzone Recipe: A Taste of Italy

Calzone, a delicious folded pizza filled with a variety of tasty ingredients, is a popular dish that originated in Italy. This savoury treat is perfect for those craving a comforting meal that combines the flavours of pizza in a unique way.

Ingredients:

  • 500g pizza dough
  • 200g mozzarella cheese, shredded
  • 100g ricotta cheese
  • 100g pepperoni slices
  • 1 bell pepper, diced
  • 1 small onion, chopped
  • 2 cloves of garlic, minced
  • 1/2 teaspoon dried oregano
  • Salt and pepper to taste
  • Olive oil for brushing

Instructions:

  1. Preheat your oven to 200°C.
  2. In a pan, sauté the onion, bell pepper, and garlic until softened. Remove from heat and set aside.
  3. In a bowl, mix the mozzarella, ricotta, pepperoni slices, oregano, salt and pepper.
  4. Dust your work surface with flour and roll out the pizza dough into a circle or rectangle shape.
  5. Spoon the cheese mixture onto one half of the dough.
  6. Fold the other half of the dough over the filling and crimp the edges to seal.
  7. Brush the top of the calzone with olive oil and make small slits on top to allow steam to escape.
  8. Bake in the preheated oven for 20-25 minutes or until golden brown.
  9. Serve hot and enjoy your homemade calzone!

This calzone recipe offers a delightful combination of gooey cheese, savoury meats, and aromatic herbs all wrapped up in a crispy crust. Whether enjoyed as a quick meal or shared with friends and family during gatherings, calzones are sure to satisfy your cravings for Italian flavours.


9 Reasons to Love Calzones: Versatile, Portable, and Perfect for Any Occasion

  1. Versatile
  2. Portable
  3. Satisfying
  4. Family-friendly
  5. Great for gatherings
  6. Easy to make
  7. Creative option
  8. Comfort food
  9. Authentic Italian taste


Calzone Concerns: Calorie Content, Dough Difficulty, and Filling Fumbles

  1. Calzones can be high in calories and fat due to the cheese and meat fillings.
  2. Preparing the dough from scratch can be time-consuming and requires some skill.
  3. It may be challenging to get the perfect balance of ingredients inside the calzone, leading to a messy filling.

Versatile

The versatility of a calzone recipe lies in its ability to be customised to suit individual taste preferences. Whether you prefer a classic combination of cheeses and meats or opt for a vegetarian-friendly medley of veggies and herbs, the beauty of making calzones is that you can tailor the fillings to create a personalised culinary experience. This flexibility allows you to experiment with different ingredients, textures, and flavours, ensuring that each calzone you make is uniquely suited to your palate.

Portable

Calzones offer the convenience of portability, making them a perfect choice for those on the move. The folded nature of calzones allows for easy handling and eating without the need for utensils, making them ideal for a quick meal on the go. Whether you’re rushing to work or heading out for a picnic, calzones provide a delicious and satisfying option that can be enjoyed anywhere, anytime.

Satisfying

Indulge in the satisfying experience of a calzone, where the harmonious blend of cheese, meats, and veggies creates a hearty and fulfilling meal. With each bite, you are treated to a medley of flavours that come together to satisfy your cravings and leave you feeling content. The richness of the cheese, the savouriness of the meats, and the freshness of the veggies all contribute to making calzones a truly satisfying culinary delight that is perfect for any occasion.

Family-friendly

Calzones are undeniably family-friendly, appealing to both kids and adults with their delicious flavours and comforting appeal. The versatility of calzones allows for endless variations to suit different tastes, making them a crowd-pleaser at family gatherings or weeknight dinners. Whether filled with classic ingredients like cheese and pepperoni or customised with favourite toppings, calzones bring everyone together around the table to enjoy a satisfying and tasty meal that is sure to please even the pickiest eaters.

Great for gatherings

Calzones are a fantastic choice for gatherings and social events, making them ideal for sharing at parties or potlucks. Their convenient handheld nature and ability to be easily sliced into portions make them a crowd-pleasing option for feeding a group of people. Whether served as a main dish or cut into smaller pieces for appetisers, calzones offer a delicious and satisfying meal that can cater to various tastes and preferences, making them a versatile and practical choice for any social gathering.

Easy to make

Creating calzones is a breeze thanks to the convenience of pre-made pizza dough. With this time-saving ingredient, assembling these delicious folded pizzas becomes a quick and straightforward process. Whether you’re a seasoned cook or a beginner in the kitchen, the ease of using pre-made dough allows you to enjoy homemade calzones without the hassle of making dough from scratch. This pro of the calzone recipe makes it an accessible and convenient choice for anyone looking to whip up a satisfying meal in no time.

Creative option

For those seeking culinary creativity, the calzone recipe offers a fantastic opportunity to experiment with various ingredients and create unique flavour combinations. From swapping out traditional toppings for more unconventional choices to incorporating seasonal produce or artisanal cheeses, the calzone allows home cooks to showcase their inventiveness in the kitchen. Whether it’s adding a twist with spicy chorizo, earthy mushrooms, or sweet caramelized onions, the versatility of the calzone recipe encourages exploration and personalization, resulting in a truly bespoke dining experience that caters to individual tastes and preferences.

Comfort food

Calzones offer a comforting and indulgent eating experience that is hard to resist. The warm, cheesy filling enveloped in a crispy crust creates a sense of satisfaction and contentment with every bite. Whether enjoyed on a cozy night in or as a treat during gatherings, calzones have a way of soothing the soul and satisfying cravings for hearty, flavoursome food. This comforting aspect of calzones makes them a beloved choice for those seeking a delicious and fulfilling meal that brings joy with every bite.

Authentic Italian taste

Indulge in the authentic Italian taste of a calzone with this classic recipe. By following the steps to create this savoury delight, you can experience the rich flavours and traditional essence of Italy right in your own kitchen. From the gooey cheese to the perfectly seasoned fillings, each bite of the calzone offers a delicious reminder of the culinary heritage and warmth of Italian cuisine. Embrace the opportunity to savour a taste of Italy with every mouthful of this homemade calzone, bringing a touch of Mediterranean charm to your dining table.

Calzones can be high in calories and fat due to the cheese and meat fillings.

Calzones, while undeniably delicious, can pose a nutritional challenge as they tend to be high in calories and fat content, primarily attributed to the generous amounts of cheese and meat fillings they contain. The rich and savoury nature of these ingredients contributes to the indulgent taste of the calzone but also means that it may not be the most health-conscious choice for those watching their calorie and fat intake. It’s important to enjoy calzones in moderation and perhaps consider lighter ingredient options or portion sizes to balance out the calorie and fat content while still savouring this delectable Italian treat.

Preparing the dough from scratch can be time-consuming and requires some skill.

Preparing the dough from scratch for a calzone recipe can be seen as a drawback due to the time and skill it demands. Crafting the perfect pizza dough requires patience, precision, and a good understanding of the dough-making process. For those looking for a quick and convenient meal option, the time-consuming nature of preparing homemade dough may deter them from attempting this recipe. Additionally, mastering the art of dough-making can be challenging for beginners or those with limited experience in working with yeast-based recipes. However, despite these challenges, the satisfaction of creating a calzone from scratch and the delicious results it yields make the effort worthwhile for those willing to invest time and effort into perfecting their dough-making skills.

It may be challenging to get the perfect balance of ingredients inside the calzone, leading to a messy filling.

When preparing a calzone, one potential drawback is the difficulty in achieving the ideal balance of ingredients inside the folded dough. This challenge can result in a messy filling that may leak out during baking or serving. Ensuring that the filling is evenly distributed and not overly packed can help mitigate this issue, allowing for a neater and more enjoyable eating experience. Despite this con, mastering the art of calzone-making through practice and attention to detail can lead to delicious results that are well worth the effort.

Delightful Pumpkin Recipes to Spice Up Your Autumn Menu

pumpkin recipes

The Versatile Pumpkin: Delicious Recipes to Try

Pumpkin, a quintessential autumn ingredient, is not only perfect for carving into jack-o’-lanterns but also for creating a variety of mouth-watering dishes. From soups to desserts, the humble pumpkin can be transformed into culinary delights that will satisfy your taste buds. Here are some delightful pumpkin recipes you must try:

Pumpkin Soup

Warm up on a chilly evening with a comforting bowl of creamy pumpkin soup. Flavoured with aromatic spices like cinnamon and nutmeg, this soup is a true autumn classic.

Roasted Pumpkin Salad

Toss chunks of roasted pumpkin with fresh greens, toasted nuts, and a tangy vinaigrette for a healthy and satisfying salad that bursts with flavour and texture.

Pumpkin Risotto

Creamy arborio rice cooked with pureed pumpkin, Parmesan cheese, and a hint of sage creates a luxurious and hearty dish that is perfect for a cosy night in.

Spiced Pumpkin Bread

This moist and fragrant pumpkin bread is infused with warm spices like ginger and cloves, making it an irresistible treat for breakfast or afternoon tea.

Pumpkin Cheesecake

A velvety smooth cheesecake made with a spiced pumpkin filling on a buttery graham cracker crust is the ultimate indulgent dessert for any occasion.

Whether you prefer savoury or sweet dishes, there is no shortage of creative ways to incorporate pumpkin into your cooking repertoire. Embrace the versatility of this seasonal ingredient and let its rich flavour elevate your culinary creations!


Eight Creative Ways to Incorporate Pumpkin into Your Cooking

  1. Roast pumpkin with a drizzle of olive oil for a simple and delicious side dish.
  2. Use pumpkin puree in baking recipes like cakes, muffins, and pies for added moisture and flavour.
  3. Make a creamy pumpkin soup by blending roasted pumpkin with stock, cream, and seasonings.
  4. Try making homemade pumpkin spice blend with cinnamon, nutmeg, ginger, cloves, and allspice for seasonal recipes.
  5. Roast pumpkin seeds with seasoning for a crunchy snack or salad topper.
  6. Add diced pumpkin to curries or stews for a hearty and nutritious addition.
  7. Experiment with sweet and savoury flavour combinations by pairing pumpkin with ingredients like maple syrup, bacon, sage, or feta cheese.
  8. Freeze leftover cooked pumpkin in portions to use later in smoothies or oatmeal.

Roast pumpkin with a drizzle of olive oil for a simple and delicious side dish.

Enhance the natural sweetness and earthy flavour of pumpkin by roasting it with a drizzle of olive oil. This simple yet effective cooking method brings out the best in the pumpkin, creating a delicious side dish that is both wholesome and satisfying. The olive oil adds a subtle richness to the roasted pumpkin, making it a versatile accompaniment to any meal. Try this easy tip for a delightful way to enjoy the vibrant taste of pumpkin in a fuss-free manner.

Use pumpkin puree in baking recipes like cakes, muffins, and pies for added moisture and flavour.

Enhance the texture and taste of your baked goods by incorporating pumpkin puree into recipes such as cakes, muffins, and pies. The natural sweetness and moisture of pumpkin puree not only add depth to the flavour but also create a soft and tender crumb in your treats. Whether you’re looking to infuse a subtle autumnal essence or simply boost the overall richness of your bakes, utilising pumpkin puree is a versatile and delicious way to elevate your baking creations.

Make a creamy pumpkin soup by blending roasted pumpkin with stock, cream, and seasonings.

For a comforting autumn meal, try creating a velvety pumpkin soup by blending roasted pumpkin with flavourful stock, rich cream, and a medley of seasonings. This simple yet indulgent recipe transforms humble pumpkin into a creamy delight that is sure to warm both body and soul. The combination of roasted pumpkin’s natural sweetness with the savoury depth of stock and the luxurious touch of cream results in a soup that is both comforting and satisfying. Perfect for chilly evenings or festive gatherings, this creamy pumpkin soup is a delightful way to savour the flavours of the season.

Try making homemade pumpkin spice blend with cinnamon, nutmeg, ginger, cloves, and allspice for seasonal recipes.

Elevate your autumn culinary creations by experimenting with a homemade pumpkin spice blend. Combine fragrant cinnamon, warming nutmeg, zesty ginger, aromatic cloves, and sweet allspice to create a versatile seasoning that will add depth and warmth to your seasonal recipes. Whether you’re baking pumpkin pies, brewing spiced lattes, or whipping up pumpkin soups, this custom blend will infuse your dishes with a delightful medley of flavours that capture the essence of fall.

Roast pumpkin seeds with seasoning for a crunchy snack or salad topper.

Enhance your pumpkin culinary experience by utilising every part of this versatile ingredient. After carving out your pumpkin for cooking, don’t discard the seeds! Instead, roast them with a sprinkle of seasoning for a delightful crunchy snack or a flavourful salad topper. The roasted pumpkin seeds add a satisfying crunch and a burst of savoury goodness to your dishes, elevating them to a whole new level of deliciousness. So next time you prepare a pumpkin recipe, remember to save and roast the seeds for an extra special treat that will leave your taste buds wanting more.

Add diced pumpkin to curries or stews for a hearty and nutritious addition.

Enhance the heartiness and nutritional value of your curries or stews by incorporating diced pumpkin into the mix. The tender texture of pumpkin complements the rich flavours of spices and other ingredients, adding a delightful sweetness to the dish. Not only does this addition lend a comforting depth to your meal, but it also provides a boost of vitamins and fibre, making it a wholesome choice for a satisfying and nourishing meal.

Experiment with sweet and savoury flavour combinations by pairing pumpkin with ingredients like maple syrup, bacon, sage, or feta cheese.

Discover a world of culinary possibilities by exploring the delightful interplay of sweet and savoury flavours in your pumpkin recipes. Elevate your dishes by combining the earthy sweetness of pumpkin with ingredients such as rich maple syrup, crispy bacon, fragrant sage, or tangy feta cheese. These unexpected pairings will add depth and complexity to your creations, transforming simple pumpkin dishes into gourmet delights that will tantalise your taste buds.

Freeze leftover cooked pumpkin in portions to use later in smoothies or oatmeal.

When it comes to making the most of your pumpkin recipes, a handy tip is to freeze any leftover cooked pumpkin in convenient portions. By freezing it, you can easily incorporate this versatile ingredient into future creations like smoothies or oatmeal. Whether blended into a creamy breakfast smoothie or stirred into hearty oatmeal for added flavour and nutrition, having frozen pumpkin on hand ensures that you can enjoy its delicious taste long after the autumn season has passed.

Authentic Pizza Recipe: A Taste of Italy in Your Kitchen

pizza recipe

The Perfect Pizza Recipe

Who can resist the delicious combination of gooey cheese, tangy tomato sauce, and a crispy crust? Pizza is a beloved dish enjoyed by people all around the world. Making your own pizza at home is not only fun but also allows you to customize it to your liking. Here’s a simple yet mouth-watering pizza recipe that will have you coming back for more.

Ingredients:

  • 300g strong white bread flour
  • 1 tsp instant yeast
  • 1 tsp salt
  • 1 tbsp olive oil
  • 200ml passata
  • A handful of fresh basil leaves
  • 125g mozzarella, torn into small pieces
  • A handful of cherry tomatoes, halved
  • A drizzle of olive oil
  • Salt and pepper to taste

Instructions:

  1. In a bowl, mix the flour, yeast, and salt. Add the olive oil and 200ml warm water. Mix until it forms a dough.
  2. Knead the dough on a floured surface for about 10 minutes until smooth and elastic. Place in a lightly oiled bowl, cover with a tea towel, and leave to rise for 1 hour.
  3. Preheat your oven to 240°C/fan 220°C/gas mark 8. Roll out the dough on a floured surface to your desired thickness.


    Spread the passata over the base, leaving a small border for the crust. Tear the basil leaves over the sauce.


    Scatter over the mozzarella pieces and cherry tomatoes. Drizzle with olive oil and season with salt and pepper.


    Bake in the preheated oven for 8-10 minutes or until the crust is golden and crispy.


Essential Tips and FAQs for Perfecting Your Homemade Pizza Recipe

  1. 1. How do I make pizza dough from scratch?
  2. 2. What is the best flour to use for pizza dough?
  3. 3. How long should I let the pizza dough rise?
  4. 4. Can I use a different sauce instead of passata for my pizza?
  5. 5. What are some popular pizza topping combinations?
  6. 6. How can I achieve a crispy crust on my homemade pizza?
  7. 7. Is it necessary to preheat the oven before baking the pizza?

1. How do I make pizza dough from scratch?

For those eager to create their own pizza dough from scratch, the process is simpler than you might think. To start, combine strong white bread flour with instant yeast and a pinch of salt in a bowl. Add a generous drizzle of olive oil and warm water to the mixture, stirring until it forms a cohesive dough. Knead the dough on a floured surface for around 10 minutes until it becomes smooth and elastic. Let the dough rise in a lightly oiled bowl for about an hour until it doubles in size. Once risen, roll out the dough to your desired thickness before adding your favourite toppings for a truly homemade pizza experience.

2. What is the best flour to use for pizza dough?

When it comes to making the perfect pizza dough, choosing the right flour is crucial. The best flour to use for pizza dough is strong white bread flour. This type of flour has a higher protein content compared to all-purpose flour, which helps create a chewy and elastic texture in the dough once baked. Strong white bread flour also provides better structure and rise, resulting in a crispy yet airy crust that complements the toppings beautifully. Its versatility and ability to hold up well to high temperatures make it a popular choice among pizza enthusiasts looking to achieve that authentic pizzeria taste at home.

3. How long should I let the pizza dough rise?

When it comes to letting pizza dough rise, the ideal duration can vary depending on the recipe and desired crust texture. In general, allowing the pizza dough to rise for about 1 to 2 hours at room temperature can help develop flavour and create a light and airy crust. However, some recipes may call for longer proofing times in the fridge to enhance the dough’s structure and taste. It’s essential to follow the specific instructions provided in your chosen recipe to achieve the perfect balance of flavours and textures in your homemade pizza.

4. Can I use a different sauce instead of passata for my pizza?

For those looking to experiment with different flavours, substituting passata with an alternative sauce can offer a unique twist to your pizza recipe. While passata provides a traditional tomato base, options like pesto, barbecue sauce, or even a creamy white sauce can add a whole new dimension of taste to your pizza. The choice of sauce can greatly influence the overall flavour profile of the dish, allowing for endless creative possibilities to cater to individual preferences and culinary creativity.

When it comes to popular pizza topping combinations, the options are endless and can cater to a wide range of tastes. Classic choices like pepperoni and mushroom, margherita with fresh basil and mozzarella, or Hawaiian with ham and pineapple are always crowd-pleasers. For those craving a more gourmet experience, toppings like prosciutto and arugula, BBQ chicken with red onions, or a Mediterranean mix of olives, feta cheese, and sun-dried tomatoes offer a delicious twist. Whether you prefer traditional flavours or more adventurous blends, experimenting with different topping combinations is part of the fun of creating your perfect pizza.

6. How can I achieve a crispy crust on my homemade pizza?

To achieve a crispy crust on your homemade pizza, there are a few key tips to keep in mind. Firstly, make sure to preheat your oven to a high temperature, around 240°C/fan 220°C/gas mark 8, as this will help create that desired crispiness. Secondly, roll out your pizza dough thinly and evenly to ensure even cooking and a crunchy base. Additionally, using a pizza stone or baking tray preheated in the oven can help mimic the effect of a traditional pizza oven and result in a crispier crust. Finally, avoid overloading your pizza with toppings, as excess moisture can make the crust soggy – instead, opt for a balance of ingredients that enhance flavour without compromising texture. By following these steps, you can enjoy a delicious homemade pizza with a perfectly crispy crust every time.

7. Is it necessary to preheat the oven before baking the pizza?

Preheating the oven before baking a pizza is crucial to achieving the perfect result. By preheating the oven, you ensure that the cooking temperature is consistent from the moment you place the pizza inside. This helps in creating a crispy crust while ensuring that the toppings cook evenly. Without preheating, the pizza may not cook properly, resulting in a soggy or undercooked base. Therefore, to enjoy a delicious and well-cooked pizza, it is highly recommended to preheat your oven before baking.

Exploring Creative Salad Recipes: A Culinary Adventure

salad recipes

The Art of Salad Making: Delicious Recipes to Try

Salads are a versatile and healthy option for any meal. Whether you’re looking for a light lunch, a side dish, or a refreshing starter, there’s a salad recipe to suit every taste. Here are three delicious salad recipes to inspire your culinary creations:

Greek Salad

This classic Mediterranean salad is bursting with fresh flavours and vibrant colours. To make a Greek salad, simply combine chopped cucumbers, tomatoes, red onions, bell peppers, olives, and feta cheese in a bowl. Drizzle with olive oil, sprinkle with oregano and salt, and toss gently to mix. Serve chilled for a taste of the sunny Greek Isles.

Quinoa Salad

For a nutritious and satisfying salad option, try making a quinoa salad. Cook quinoa according to package instructions and let it cool. Mix in diced avocado, cherry tomatoes, cucumber, red onion, and fresh herbs like parsley and mint. Dress with lemon juice, olive oil, salt, and pepper for a zesty finish.

Caprese Salad

This Italian classic celebrates the simplicity of fresh ingredients. Layer slices of ripe tomatoes, creamy mozzarella cheese, and fragrant basil leaves on a plate. Drizzle with balsamic glaze or vinegar and extra virgin olive oil. Season with salt and pepper to taste for an elegant yet effortless salad.

Experiment with different combinations of vegetables, fruits, proteins, nuts, seeds, and dressings to create your own signature salads. The possibilities are endless when it comes to crafting delicious salads that not only tantalise your taste buds but also nourish your body.

So next time you’re in the mood for something light yet satisfying, whip up one of these tantalising salad recipes and enjoy the fresh flavours that nature has to offer.


Top 5 FAQs on Crafting Delicious and Nutritious Salads

  1. 1. What are some easy salad recipes for beginners?
  2. 2. How can I make a healthy and filling salad?
  3. 3. What are some popular salad dressings to try?
  4. 4. Are there any vegetarian or vegan salad recipes available?
  5. 5. Can you suggest creative ways to add protein to a salad?

1. What are some easy salad recipes for beginners?

For beginners looking to venture into the world of salad-making, there are plenty of simple and delicious recipes to try. One easy option is a classic garden salad, consisting of crisp lettuce, cherry tomatoes, cucumber slices, and a light vinaigrette dressing. Another beginner-friendly recipe is a Caesar salad, made with romaine lettuce, croutons, Parmesan cheese, and Caesar dressing. For those seeking a more substantial option, a pasta salad with cooked pasta, assorted vegetables, and a creamy dressing can be a satisfying choice. These straightforward recipes provide a great starting point for novice cooks to experiment with different ingredients and flavours in their salad creations.

2. How can I make a healthy and filling salad?

Creating a healthy and filling salad is all about balancing nutritious ingredients that provide both satisfaction and nourishment. Start by choosing a variety of fresh vegetables, such as leafy greens, cucumbers, bell peppers, and tomatoes, to form the base of your salad. Incorporate lean proteins like grilled chicken, chickpeas, or tofu for added satiety. Include complex carbohydrates like quinoa, sweet potatoes, or whole grains to boost energy levels. Enhance the flavour with a sprinkle of nuts or seeds for crunch and a drizzle of homemade vinaigrette made with olive oil and vinegar. By combining a mix of colourful vegetables, proteins, and healthy fats, you can create a delicious and well-rounded salad that leaves you feeling satisfied and nourished.

When it comes to enhancing the flavours of your salads, there are several popular salad dressings worth trying. From the creamy richness of Caesar dressing to the tangy zest of balsamic vinaigrette, there is a dressing to suit every taste preference. Other popular options include zesty Italian dressing, sweet and savoury honey mustard dressing, and light and refreshing lemon herb dressing. Experimenting with different salad dressings can elevate your salad experience, adding depth and complexity to your favourite greens and ingredients.

4. Are there any vegetarian or vegan salad recipes available?

For those seeking vegetarian or vegan salad recipes, there is a plethora of delicious options to explore. From vibrant vegetable medleys to protein-packed grain salads, the world of plant-based salads is both diverse and flavourful. Incorporating ingredients like fresh greens, colourful fruits and vegetables, nuts, seeds, legumes, and plant-based proteins such as tofu or tempeh can result in a satisfying and nutritious salad that caters to vegetarian and vegan preferences. Whether you’re looking for a light and refreshing side dish or a hearty main course, these vegetarian and vegan salad recipes offer a creative and cruelty-free way to enjoy the goodness of fresh produce.

5. Can you suggest creative ways to add protein to a salad?

Incorporating protein into salads is a great way to make them more filling and nutritious. There are numerous creative ways to add protein to your salad, such as including grilled chicken, sliced hard-boiled eggs, chickpeas, tofu, quinoa, or even nuts and seeds like almonds or sunflower seeds. These ingredients not only enhance the flavour and texture of the salad but also provide essential nutrients that help keep you satisfied for longer. Experimenting with different sources of protein can elevate your salad game and turn a simple dish into a well-rounded and satisfying meal.

Savoury Delights: A Delectable Meatball Recipe for Every Occasion

meatball recipe

The Perfect Meatball Recipe: A Culinary Delight

Meatballs are a classic dish that never fails to satisfy the taste buds. Whether served with pasta, in a sandwich, or on their own, meatballs are a versatile and delicious option for any meal. If you’re looking to elevate your culinary skills and impress your guests, look no further than this perfect meatball recipe.

Ingredients:

  • 500g minced beef
  • 1 onion, finely chopped
  • 2 cloves of garlic, minced
  • 1/2 cup breadcrumbs
  • 1/4 cup grated Parmesan cheese
  • 1 egg
  • 1 teaspoon dried oregano
  • Salt and pepper to taste
  • Olive oil for frying

Instructions:

  1. In a large bowl, combine the minced beef, onion, garlic, breadcrumbs, Parmesan cheese, egg, oregano, salt, and pepper. Mix well until all ingredients are evenly incorporated.
  2. Using your hands, shape the mixture into small meatballs of equal size.
  3. Heat olive oil in a pan over medium heat. Add the meatballs in batches and cook until browned on all sides.
  4. Once cooked through, remove the meatballs from the pan and place them on a paper towel to drain any excess oil.

    Serve hot with your favourite sauce or accompaniment.

These homemade meatballs are sure to be a hit at your next gathering. The combination of flavours and textures will leave everyone coming back for more. Enjoy the satisfaction of creating a delicious meal from scratch with this perfect meatball recipe!


7 Essential Tips for Perfectly Flavoured and Tender Meatballs

  1. Use a combination of beef and pork mince for best flavour.
  2. Add finely chopped onions and garlic to enhance the taste.
  3. Mix in breadcrumbs soaked in milk to keep the meatballs moist.
  4. Season generously with salt, pepper, and herbs like parsley or oregano.
  5. Roll the meatballs gently to avoid making them dense and tough.
  6. Brown the meatballs in a hot pan before finishing cooking in sauce for extra flavour.
  7. Allow the meatballs to rest for a few minutes before serving to let the flavours settle.

Use a combination of beef and pork mince for best flavour.

For the best flavour in your meatball recipe, consider using a combination of beef and pork mince. The blend of these two meats adds depth and richness to the dish, creating a more complex and satisfying taste experience. The beef provides a robust flavour, while the pork adds tenderness and juiciness to the meatballs. By combining these two types of mince, you can elevate the overall taste profile of your meatballs and impress your guests with a delicious culinary creation.

Add finely chopped onions and garlic to enhance the taste.

To enhance the flavour profile of your meatball recipe, consider adding finely chopped onions and garlic. These aromatic ingredients not only bring a depth of flavour to the dish but also provide a subtle sweetness and savouriness that complement the meat perfectly. The onions add a tender texture, while the garlic infuses a rich, earthy taste. Incorporating these elements into your meatball mixture will elevate the overall taste and ensure a satisfying culinary experience for you and your guests.

Mix in breadcrumbs soaked in milk to keep the meatballs moist.

To ensure your meatballs turn out moist and tender, a helpful tip is to mix breadcrumbs soaked in milk into the meat mixture. The breadcrumbs act as a binding agent while the milk adds moisture, resulting in meatballs that are juicy and flavourful. This simple yet effective technique helps to prevent the meatballs from becoming dry during cooking, enhancing their overall texture and taste. Give this tip a try next time you prepare meatballs for a delectable dining experience.

Season generously with salt, pepper, and herbs like parsley or oregano.

For a flavourful and aromatic twist to your meatball recipe, remember to season generously with a blend of salt, pepper, and fragrant herbs such as parsley or oregano. These simple yet essential additions not only enhance the taste of the meatballs but also elevate the overall dining experience. The combination of savoury seasoning and aromatic herbs will create a delicious harmony that will leave your taste buds craving for more.

Roll the meatballs gently to avoid making them dense and tough.

When preparing your meatball recipe, it is essential to handle the mixture with care. A helpful tip to keep in mind is to roll the meatballs gently. By doing so, you can avoid compacting the meat too tightly, which can result in dense and tough meatballs. This simple technique helps maintain a light and tender texture, ensuring that your meatballs turn out perfectly succulent and flavourful.

Brown the meatballs in a hot pan before finishing cooking in sauce for extra flavour.

For an extra burst of flavour, a great tip to enhance your meatball recipe is to brown the meatballs in a hot pan before finishing cooking them in sauce. This step not only adds a rich caramelized exterior to the meatballs but also helps seal in the juices, resulting in a more succulent and flavourful end result. By taking the time to brown the meatballs first, you’ll elevate the overall taste and texture of your dish, making it a truly memorable culinary experience for all who indulge.

Allow the meatballs to rest for a few minutes before serving to let the flavours settle.

Allowing the meatballs to rest for a few minutes before serving is a crucial step in ensuring that the flavours fully develop and harmonize. This short resting period allows the juices to redistribute within the meatballs, resulting in a more tender and flavourful bite. By exercising patience and letting the meatballs settle, you enhance the overall dining experience, allowing your guests to savour every delicious aspect of this delectable dish.

Delicious Paella Recipe: A Taste of Spain in Your Kitchen

paella recipe

The Perfect Paella Recipe

Paella is a beloved Spanish dish that has captured the hearts and taste buds of people around the world. This iconic dish, originating from Valencia, is a delicious medley of rice, saffron, vegetables, and various proteins. Here’s how you can recreate the magic of authentic paella in your own kitchen.

Ingredients:

  • 400g paella rice
  • 800ml chicken or vegetable stock
  • 200g chicken thighs, diced
  • 150g chorizo sausage, sliced
  • 1 onion, finely chopped
  • 2 garlic cloves, minced
  • 1 red bell pepper, sliced
  • 100g green beans, trimmed and halved
  • A pinch of saffron threads
  • Salt and pepper to taste
  • Olive oil for cooking

Instructions:

  1. In a paella pan or large skillet, heat olive oil over medium heat. Add the chicken and chorizo, and cook until browned.
  2. Add the onion, garlic, red pepper, and green beans to the pan. Sauté until the vegetables are softened.

    Note: Traditional paella pans are wide and shallow to allow the rice to cook evenly.

Buen provecho!

Buen provecho!

Buen provecho!

Buen provecho!

Buen provecho!


Essential Paella FAQs: Rice, Ingredients, Cooking Techniques, and Alternatives

  1. 1. What type of rice is best for paella?
  2. 2. Can I make paella without saffron?
  3. 3. Is seafood essential in a traditional paella recipe?
  4. 4. How do I achieve the perfect socarrat in my paella?
  5. 5. Can I use a regular skillet instead of a paella pan?
  6. 6. Are there any vegetarian or vegan alternatives to the classic paella recipe?

1. What type of rice is best for paella?

When it comes to making paella, choosing the right type of rice is crucial to achieving the perfect texture and flavour. The best rice for paella is a short-grain variety such as Bomba or Calasparra rice. These types of rice are able to absorb more liquid without becoming mushy, resulting in a dish with distinct grains that are not overly sticky. The unique texture of these rice varieties helps to create the signature consistency of paella, allowing it to soak up the rich flavours of the broth and ingredients while remaining firm and separate.

2. Can I make paella without saffron?

Many people wonder whether they can make paella without saffron, a key ingredient known for its distinct flavour and vibrant colour. While saffron plays a significant role in traditional paella recipes, it is possible to create a delicious variation of the dish without it. You can experiment with alternative seasonings or spices to add depth and complexity to your paella, ensuring that it still captures the essence of this iconic Spanish dish.

3. Is seafood essential in a traditional paella recipe?

In a traditional paella recipe, seafood is often considered a key ingredient that adds depth and richness to the dish. While seafood, such as prawns, mussels, and squid, is commonly included in seafood paella variations, it is not necessarily essential in all traditional paella recipes. The beauty of paella lies in its versatility, allowing for different regional and personal interpretations. Some traditional paellas may focus more on chicken, rabbit, or vegetables as the main ingredients, showcasing the diverse culinary influences found across various regions of Spain. Ultimately, whether seafood is included or not, what truly matters is the careful balance of flavours and textures that make each paella unique and delicious.

4. How do I achieve the perfect socarrat in my paella?

Achieving the perfect socarrat in your paella is a key element to mastering this iconic Spanish dish. Socarrat refers to the caramelized crust that forms on the bottom of the paella pan, adding a depth of flavour and texture to the dish. To achieve the coveted socarrat, it is essential to increase the heat towards the end of cooking, allowing the rice to crisp up and develop that characteristic golden-brown crust. Patience and attention are crucial as you listen for the sizzling sound that indicates the socarrat is forming. By mastering this technique, you can elevate your paella to an authentic and delicious culinary experience.

5. Can I use a regular skillet instead of a paella pan?

When it comes to making paella, using a regular skillet as a substitute for a traditional paella pan is possible, but it may affect the final result. Paella pans are wide and shallow, allowing the rice to cook evenly and develop that signature socarrat (crispy bottom layer). A regular skillet may not provide the same surface area for the rice to spread out, potentially leading to uneven cooking or a lack of that coveted crispy texture. However, if a paella pan is not available, a skillet can still be used with some adjustments in cooking time and technique to achieve a delicious paella dish.

6. Are there any vegetarian or vegan alternatives to the classic paella recipe?

For those seeking vegetarian or vegan alternatives to the classic paella recipe, there are indeed delicious options available. Instead of using meat or seafood, you can incorporate a variety of plant-based ingredients such as artichokes, mushrooms, peas, and bell peppers to create a flavoursome and satisfying dish. By replacing chicken or seafood stock with vegetable stock and omitting animal products, you can enjoy a mouth-watering vegetarian or vegan paella that retains the essence of this iconic Spanish dish while catering to different dietary preferences.

Unlocking Success: Your Comprehensive Guide to a Keto Meal Plan

keto meal plan

The Ultimate Guide to a Keto Meal Plan

Following a ketogenic diet can be a great way to achieve weight loss and improve overall health. A keto meal plan focuses on high-fat, moderate-protein, and low-carb foods to put your body in a state of ketosis, where it burns fat for energy instead of carbohydrates.

Benefits of a Keto Meal Plan

Weight Loss: By reducing carb intake, your body switches to burning fat for fuel, leading to effective weight loss.

Improved Energy Levels: Ketones produced during ketosis provide a steady source of energy, avoiding the energy crashes associated with high-carb diets.

Better Mental Clarity: Many people report improved focus and mental clarity when following a keto meal plan.

Sample Keto Meal Plan

Breakfast: Scrambled eggs cooked in butter with avocado slices.

Lunch: Grilled chicken salad with olive oil dressing and feta cheese.

Snack: Handful of almonds or celery sticks with cream cheese.

Dinner: Baked salmon with asparagus sautéed in coconut oil.

Tips for Success

  • Adequate Hydration: Drink plenty of water to stay hydrated and support digestion.
  • Moderate Protein Intake: Ensure your protein intake is moderate to avoid hindering ketosis.
  • Incorporate Healthy Fats: Include sources of healthy fats like avocados, nuts, and olive oil in your meals.
  • Avoid Processed Foods: Stick to whole, unprocessed foods to maximise the benefits of the keto diet.

Remember that consulting with a healthcare professional or nutritionist before starting any new diet plan is always recommended. With dedication and proper planning, a keto meal plan can help you achieve your health goals effectively.


9 Essential Tips for Crafting a Successful Keto Meal Plan

  1. Focus on consuming high-fat foods like avocados, nuts, and seeds.
  2. Limit your intake of carbohydrates, especially from sources like bread, pasta, and sugary foods.
  3. Include a moderate amount of protein in your meals from sources like meat, fish, and tofu.
  4. Opt for healthy fats such as olive oil, coconut oil, and butter in cooking.
  5. Incorporate low-carb vegetables like spinach, broccoli, and cauliflower into your dishes.
  6. Stay hydrated by drinking plenty of water throughout the day.
  7. Plan your meals in advance to ensure you have keto-friendly options available.
  8. Monitor your nutrient intake to avoid any deficiencies while on a keto diet.
  9. Consult with a healthcare professional before starting a keto meal plan if you have any health concerns.

Focus on consuming high-fat foods like avocados, nuts, and seeds.

When following a keto meal plan, it is essential to focus on consuming high-fat foods such as avocados, nuts, and seeds. These nutrient-dense foods not only provide the necessary fats to support ketosis but also offer a variety of vitamins, minerals, and antioxidants that are beneficial for overall health. Incorporating avocados, nuts, and seeds into your meals can help you feel satiated and satisfied while reaping the benefits of a ketogenic diet.

Limit your intake of carbohydrates, especially from sources like bread, pasta, and sugary foods.

When following a keto meal plan, it is crucial to limit your intake of carbohydrates, particularly from sources such as bread, pasta, and sugary foods. These high-carb items can hinder the process of ketosis, where the body switches to burning fat for energy. By reducing consumption of these foods and focusing on high-fat and low-carb options, you can effectively maintain ketosis and reap the benefits of a ketogenic diet.

Include a moderate amount of protein in your meals from sources like meat, fish, and tofu.

To optimise the effectiveness of your keto meal plan, it is essential to include a moderate amount of protein in your meals sourced from options such as meat, fish, and tofu. Protein plays a crucial role in maintaining muscle mass and supporting overall health while following a ketogenic diet. By incorporating these protein-rich foods into your meals, you can ensure that your body receives the necessary nutrients for sustained energy levels and optimal functioning.

Opt for healthy fats such as olive oil, coconut oil, and butter in cooking.

When following a keto meal plan, it is essential to opt for healthy fats like olive oil, coconut oil, and butter in your cooking. These sources of fats not only add flavour to your meals but also provide the necessary fuel for your body during ketosis. By incorporating these healthy fats into your cooking, you can support your weight loss goals and promote overall well-being on a ketogenic diet.

Incorporate low-carb vegetables like spinach, broccoli, and cauliflower into your dishes.

Incorporating low-carb vegetables such as spinach, broccoli, and cauliflower into your dishes is a smart way to add essential nutrients while keeping your carb intake in check on a keto meal plan. These vegetables not only provide vitamins and minerals but also contribute to the overall flavour and texture of your meals. By including a variety of nutrient-dense veggies, you can create satisfying and balanced keto-friendly dishes that support your health goals.

Stay hydrated by drinking plenty of water throughout the day.

Staying hydrated is a crucial aspect of a successful keto meal plan. By drinking plenty of water throughout the day, you not only support your body’s overall hydration needs but also aid in digestion and the process of ketosis. Water helps to flush out toxins, regulate body temperature, and maintain optimal bodily functions. Ensuring adequate hydration can also help prevent common side effects such as headaches and fatigue that may occur when transitioning to a ketogenic diet. Remember to make water your go-to beverage choice to stay on track with your keto journey and promote overall well-being.

Plan your meals in advance to ensure you have keto-friendly options available.

Planning your meals in advance is a crucial tip for successfully following a keto meal plan. By preparing and organising your meals ahead of time, you can ensure that you always have keto-friendly options available when hunger strikes. This approach helps you avoid impulsive food choices and makes it easier to stay on track with your dietary goals. Whether it’s meal prepping for the week or simply planning out your daily menu, taking the time to strategise your meals can set you up for success on your keto journey.

Monitor your nutrient intake to avoid any deficiencies while on a keto diet.

It is crucial to monitor your nutrient intake carefully when following a keto meal plan to prevent any potential deficiencies. Since the diet restricts certain food groups, such as high-carb fruits and grains, it’s important to ensure you are getting essential vitamins and minerals from other sources. Incorporating a variety of nutrient-dense foods like leafy greens, nuts, and seeds can help maintain a balanced diet and support overall health while on a ketogenic regimen.

Consult with a healthcare professional before starting a keto meal plan if you have any health concerns.

It is crucial to consult with a healthcare professional before embarking on a keto meal plan, especially if you have any underlying health concerns. Seeking guidance from a doctor or nutritionist can help ensure that the diet is safe and suitable for your individual needs. They can provide valuable insights and recommendations tailored to your health status, helping you approach the keto meal plan in a way that promotes both weight loss and overall well-being.

Wholesome Delights: Explore These Healthy Salad Recipes

healthy salad recipes

Delicious and Nutritious: Healthy Salad Recipes to Try

Salads are a fantastic way to incorporate a variety of nutrients into your diet while enjoying a burst of fresh flavours. Whether you’re looking for a light lunch or a vibrant side dish, these healthy salad recipes are sure to tantalise your taste buds.

Greek Quinoa Salad

Ingredients:

  • 1 cup cooked quinoa
  • Cherry tomatoes, halved
  • Cucumber, diced
  • Red onion, thinly sliced
  • Feta cheese, crumbled
  • Kalamata olives
  • Fresh parsley, chopped
  • Olive oil and lemon dressing

Instructions:

  1. In a large bowl, combine quinoa, tomatoes, cucumber, red onion, feta cheese, olives, and parsley.
  2. Toss the salad with olive oil and lemon dressing until well coated.
  3. Serve chilled and enjoy!

Kale and Avocado Salad

Ingredients:

  • Fresh kale leaves, destemmed and chopped
  • Ripe avocado, diced
  • Cranberries or pomegranate seeds for sweetness

Instructions:

– In a large bowl mix kale leaves with diced avocado.

– Add cranberries or pomegranate seeds for extra sweetness.

– Drizzle with a light vinaigrette dressing.

– Toss gently to combine all ingredients.

– Serve as a healthy and refreshing salad option.

These healthy salad recipes are not only nutritious but also bursting with flavour. Whether you’re following a specific diet or simply looking to add more greens to your meals, these salads are perfect for any occasion. Get creative with your ingredients and enjoy the benefits of eating fresh and wholesome foods!

Bon appétit!


Six Tips for Crafting Nutritious and Delicious Salads

  1. Include a variety of colourful vegetables for different nutrients.
  2. Add protein sources like grilled chicken, boiled eggs, or chickpeas for a filling salad.
  3. Use healthy fats such as avocado slices, nuts, or seeds to boost flavour and nutrition.
  4. Opt for homemade dressings using olive oil and vinegar instead of store-bought ones high in added sugars and preservatives.
  5. Experiment with fresh herbs like basil, mint, or coriander to enhance the taste of your salad.
  6. Consider adding whole grains like quinoa or brown rice to increase the fibre content and make the salad more satisfying.

Include a variety of colourful vegetables for different nutrients.

Including a variety of colourful vegetables in your salads is a great tip for boosting the nutritional value of your meal. Different coloured vegetables contain a range of nutrients, vitamins, and antioxidants that are essential for maintaining good health. By incorporating a rainbow of veggies like red peppers, yellow bell peppers, green spinach, purple cabbage, and orange carrots, you can ensure that you’re getting a diverse array of beneficial compounds to support your well-being. So, next time you prepare a salad, remember to mix and match different coloured vegetables to create a visually appealing dish that’s also packed with essential nutrients.

Add protein sources like grilled chicken, boiled eggs, or chickpeas for a filling salad.

Enhance the nutritional value and satiety of your salads by incorporating protein-rich sources such as grilled chicken, boiled eggs, or chickpeas. These additions not only contribute to a more filling meal but also provide essential nutrients to support your overall health and energy levels. Including protein in your salads can help you feel satisfied for longer periods and maintain muscle mass, making it a smart choice for those seeking a balanced and wholesome diet.

Use healthy fats such as avocado slices, nuts, or seeds to boost flavour and nutrition.

Incorporating healthy fats like avocado slices, nuts, or seeds into your salads is a simple yet effective way to enhance both the flavour and nutritional value of your meal. Not only do these ingredients add a satisfying crunch and richness to your salad, but they also provide essential nutrients such as omega-3 fatty acids and vitamin E. By including these healthy fats in your salad recipes, you can elevate the taste profile while reaping the benefits of a well-rounded and nourishing dish.

Opt for homemade dressings using olive oil and vinegar instead of store-bought ones high in added sugars and preservatives.

When preparing healthy salad recipes, a valuable tip is to opt for homemade dressings featuring olive oil and vinegar over store-bought alternatives that are often laden with added sugars and preservatives. By creating your own dressings, you can control the quality of ingredients used and avoid unnecessary additives that may compromise the nutritional value of your salad. Olive oil and vinegar not only enhance the flavour of your salads but also offer numerous health benefits, making them a wholesome choice for dressing up your greens.

Experiment with fresh herbs like basil, mint, or coriander to enhance the taste of your salad.

Enhance the flavour profile of your salads by experimenting with an array of fresh herbs such as basil, mint, or coriander. These aromatic additions not only bring a burst of freshness to your dish but also elevate the overall taste experience. Whether you’re looking to add a subtle hint of sweetness with basil, a refreshing kick with mint, or a zesty twist with coriander, incorporating these herbs into your salad recipes can take your culinary creations to the next level. Embrace the versatility and vibrancy that fresh herbs offer and transform your salads into delightful and nutritious masterpieces.

Consider adding whole grains like quinoa or brown rice to increase the fibre content and make the salad more satisfying.

To enhance the nutritional value of your salads, incorporating whole grains such as quinoa or brown rice is a smart choice. These grains not only boost the fibre content of the salad but also contribute to a more satisfying and filling meal. By adding whole grains, you can create a healthy salad that not only tastes delicious but also provides long-lasting energy and promotes overall well-being.