Classic Meat Pie Recipe: A Comforting British Favourite

meat pie recipe

Classic Beef and Ale Pie Recipe

A golden, crisp pastry crust filled with tender beef in a rich, savoury gravy makes this classic meat pie ideal for a comforting family meal. The filling can be prepared ahead, giving the flavours time to develop and making assembly straightforward.

Preparation and cooking time

  • Preparation: 25 minutes
  • Cooking: 2 hours 30 minutes
  • Serves: 6

Ingredients

  • 2 tbsp vegetable oil
  • 900g stewing beef, cut into bite-sized pieces
  • 2 tbsp plain flour, seasoned with salt and black pepper
  • 1 large onion, finely chopped
  • 2 carrots, peeled and diced
  • 2 celery sticks, diced
  • 2 tbsp tomato purée
  • 330ml ale or stout
  • 300ml beef stock
  • 1 tsp fresh thyme leaves, or ½ tsp dried thyme
  • 1 bay leaf
  • 1 sheet ready-rolled puff pastry, about 320g
  • 1 egg, beaten

Method

  1. Brown the beef: Toss the beef in the seasoned flour. Heat the oil in a large, heavy-based pan over a medium-high heat. Brown the beef in batches, then set it aside.
  2. Cook the vegetables: Add the onion, carrots and celery to the pan. Cook for 5–7 minutes, stirring occasionally, until softened. Stir in the tomato purée and cook for another minute.
  3. Make the filling: Pour in the ale and scrape the bottom of the pan to loosen any browned bits. Add the stock, thyme and bay leaf, then return the beef to the pan. Bring to a gentle simmer.
  4. Simmer until tender: Cover and cook gently for about 1 hour 45 minutes to 2 hours, stirring now and then, until the beef is tender and the gravy has thickened. Remove the bay leaf and leave the filling to cool. Taste and adjust the seasoning.
  5. Prepare the pie: Heat the oven to 200°C (180°C fan)/400°F/Gas Mark 6. Spoon the cooled filling into a pie dish. Lay the pastry over the top, trimming any excess. Press the edges to seal and make a small hole in the centre to let steam escape.
  6. Glaze and bake: Brush the pastry with beaten egg. Bake for 25–30 minutes, until puffed and golden. Leave to stand for 5 minutes before serving.

Tips for a great meat pie

  • Let the filling cool before adding the pastry; hot filling can make it soft and difficult to handle.
  • If the gravy is too thin, simmer the filling uncovered for a few minutes before cooling.
  • For a family-friendly version without alcohol, replace the ale with extra beef stock.
  • Serve with mashed potatoes, peas or seasonal greens.

This hearty beef pie is best served hot from the oven, when the pastry is crisp and the filling is rich and tender. Any leftovers can be cooled, covered and refrigerated, then reheated thoroughly before serving.


Top Tips for Perfect Meat Pies: Best Cuts, Baking Advice, and More

  1. What cut of meat is best for a meat pie?
  2. How do you stop the pastry from getting soggy?
  3. Can you make a meat pie ahead of time?
  4. How long should you bake a meat pie?
  5. Can you freeze a meat pie?

What cut of meat is best for a meat pie?

For a tender, flavourful meat pie, choose a well-marbled cut that becomes soft during slow cooking, such as beef chuck, braising steak or shin. These cuts develop a rich flavour and make a succulent filling when simmered gently until tender. For a quicker pie, use leftover roast meat, but take care not to overcook it, as it may become dry.

How do you stop the pastry from getting soggy?

To help keep the pastry crisp, let the meat filling cool completely before assembling the pie, and make sure the gravy is thick rather than watery. Avoid overfilling, cut a small steam vent in the pastry, and bake the pie in a fully preheated oven. If the filling is particularly moist, try brushing the base with beaten egg and letting it dry briefly before adding the filling.

Can you make a meat pie ahead of time?

Yes, you can make a meat pie ahead of time. Prepare and cook the filling, then let it cool completely before assembling the pie. Cover and refrigerate it for up to two days, or freeze it for longer storage. For the best pastry, add it just before baking; if the pie is already assembled, keep it covered in the fridge and bake within a day, adding a little extra time if it goes into the oven cold.

How long should you bake a meat pie?

Bake a meat pie in a preheated oven at 200°C (180°C fan)/400°F/Gas Mark 6 for around 25–30 minutes, or until the pastry is risen and golden and the filling is piping hot. If the filling is already hot when assembled, it may need less time; a pie made with cold filling may take a little longer. Follow the pastry packet instructions where available, and cover the top loosely with foil if it browns too quickly.

Can you freeze a meat pie?

Yes, you can freeze a meat pie. For the best results, freeze it before baking: assemble the pie, wrap it well and freeze for up to three months. Bake from frozen, adding extra cooking time and covering the pastry with foil if it browns too quickly; make sure the filling is piping hot all the way through before serving. You can also freeze a baked pie once it has cooled completely. Wrap it securely, thaw it in the fridge and reheat thoroughly in the oven.

Classic Cottage Pie Recipe: A Comforting British Family Favourite

cottage pie recipe

Classic Cottage Pie Recipe

Cottage pie is a comforting British favourite: savoury minced beef cooked with vegetables in a rich gravy, then topped with creamy mashed potato and baked until golden. It is often confused with shepherd’s pie, but the traditional distinction is simple: cottage pie is made with beef, while shepherd’s pie is made with lamb.

This recipe serves four to six and is ideal for a relaxed family meal. It can also be made ahead and baked when you are ready to eat.

Preparation and cooking time

  • Preparation: 25 minutes
  • Cooking: 50 minutes
  • Serves: 4–6

Ingredients

For the filling

  • 1 tablespoon vegetable oil
  • 1 onion, finely chopped
  • 2 carrots, diced
  • 500g beef mince
  • 2 tablespoons tomato purée
  • 1 tablespoon plain flour
  • 1 teaspoon Worcestershire sauce
  • 400ml beef stock
  • 100g frozen peas
  • 1 teaspoon dried thyme, or a few fresh sprigs
  • Salt and freshly ground black pepper

For the potato topping

  • 900g floury potatoes, such as Maris Piper or King Edward, peeled and cut into chunks
  • 50g butter
  • About 100ml milk, warmed
  • 50g mature Cheddar, grated (optional)
  • Salt and freshly ground black pepper

Method

  1. Cook the potatoes. Put the potatoes in a large pan of cold, salted water. Bring to the boil, then simmer for 15–20 minutes, or until tender. Drain well and leave them to steam-dry for a minute.
  2. Make the filling. Meanwhile, heat the oil in a large frying pan or saucepan over a medium heat. Add the onion and carrots and cook for 6–8 minutes, stirring occasionally, until softened.
  3. Add the beef mince and cook for 5–7 minutes, breaking it up with a spoon, until browned. Stir in the tomato purée and flour and cook for a minute.
  4. Pour in the beef stock and add the Worcestershire sauce and thyme. Stir well, bring to a gentle simmer and cook for 20–25 minutes, until the sauce has thickened. Stir in the peas for the final few minutes. Season to taste.
  5. Mash the potatoes. Mash the drained potatoes with the butter and enough warm milk to make a smooth, fluffy mash. Season with salt and pepper. Stir in the grated Cheddar, if using.
  6. Assemble the pie. Heat the oven to 200°C (180°C fan)/400°F/gas mark 6. Spoon the beef filling into an ovenproof dish. Spread the mash evenly over the top, taking it right to the edges. Roughen the surface with a fork to help it turn golden.
  7. Bake. Place the dish on a baking tray and bake for 25–30 minutes, until bubbling around the edges and golden on top. Leave it to stand for 5 minutes before serving.

Tips for a delicious cottage pie

  • Allow the filling to simmer until thick. If it is too runny, the potato topping may sink into it.
  • For extra flavour, add a splash of red wine with the stock, or stir in a teaspoon of mustard.
  • Make the topping crispier by brushing it with a little melted butter before baking.
  • Serve with steamed greens, cabbage or green beans.

Make-ahead and storage

The filling can be prepared a day ahead and kept covered in the fridge. Assemble the pie once the filling has cooled, then refrigerate it until needed. Add a little extra baking time if cooking it straight from the fridge, and make sure it is piping hot all the way through.

Leftovers can be stored in a covered container in the fridge for up to three days. Reheat thoroughly until steaming hot. Cottage pie can also be frozen; for the best texture, freeze it before baking, then defrost it in the fridge before cooking.


Everything You Need to Know About Making the Perfect Cottage Pie: FAQs Answered

  1. What is the difference between cottage pie and shepherd’s pie?
  2. What ingredients do you need to make cottage pie?
  3. How do you make the mashed potato topping creamy?
  4. How long should cottage pie bake in the oven?
  5. Can you make cottage pie ahead of time?
  6. Can cottage pie be frozen?
  7. How do you stop cottage pie filling from becoming watery?
  8. What should you serve with cottage pie?

What is the difference between cottage pie and shepherd’s pie?

The main difference between cottage pie and shepherd’s pie is the meat: cottage pie is traditionally made with minced beef, while shepherd’s pie uses minced lamb. Both are topped with mashed potato and baked until golden, and their fillings often include vegetables, gravy and herbs.

What ingredients do you need to make cottage pie?

To make cottage pie, you’ll need beef mince, onion, carrots, peas, beef stock, tomato purée, Worcestershire sauce and a little flour to thicken the filling. Season it with salt, pepper and thyme, then top with mashed potatoes made from floury potatoes, butter and milk. Mature Cheddar is optional, but adds a savoury finish to the topping.

How do you make the mashed potato topping creamy?

For a creamy mashed potato topping, use floury potatoes such as Maris Piper or King Edward, and cook them until completely tender. Drain them well and let them steam-dry briefly, then mash while hot with butter and warm milk, adding the milk gradually until the mash is smooth and fluffy. Avoid overworking the potatoes, as this can make them gluey. Season well, and stir in a little grated Cheddar or a spoonful of cream for extra richness, if you like.

How long should cottage pie bake in the oven?

Cottage pie should usually bake in a preheated oven at 200°C (180°C fan)/400°F/gas mark 6 for 25–30 minutes, until the filling is bubbling around the edges and the potato topping is golden. If the pie has been chilled, allow a little extra time and check that it is piping hot all the way through before serving.

Can you make cottage pie ahead of time?

Yes, cottage pie is ideal for making ahead. Prepare the filling and mashed potato, assemble the pie, then cover and refrigerate it for up to 24 hours before baking. You can also bake it in advance and reheat it until piping hot throughout. If baking straight from the fridge, allow a little extra time in the oven, and check that the centre is thoroughly heated before serving.

Can cottage pie be frozen?

Yes, cottage pie freezes well. For the best results, let it cool completely, then cover it tightly or transfer it to a freezer-safe container and freeze for up to three months. You can freeze it before or after baking, though freezing before baking usually gives the potato topping a better texture. Defrost overnight in the fridge, then bake until piping hot throughout. If reheating a cooked pie, make sure it is thoroughly hot before serving.

How do you stop cottage pie filling from becoming watery?

To stop cottage pie filling from becoming watery, simmer it uncovered until the sauce has reduced and thickened before adding it to the baking dish. A little plain flour stirred into the browned mince can help, too. Avoid adding too much stock, and let frozen vegetables thaw and drain before using them. The filling should be moist but not runny; if it looks thin, cook it for a few more minutes before topping with mash.

What should you serve with cottage pie?

Cottage pie pairs beautifully with simple vegetables that balance its rich, savoury filling. Try serving it with steamed green beans, peas, broccoli or cabbage, or add roasted carrots for extra sweetness. A crisp green salad can make the meal feel lighter, while a little extra gravy is always welcome.

Easy Teriyaki Sauce Recipe: A Glossy, Savoury-Sweet Homemade Favourite

teriyaki sauce recipe

Easy Teriyaki Sauce Recipe

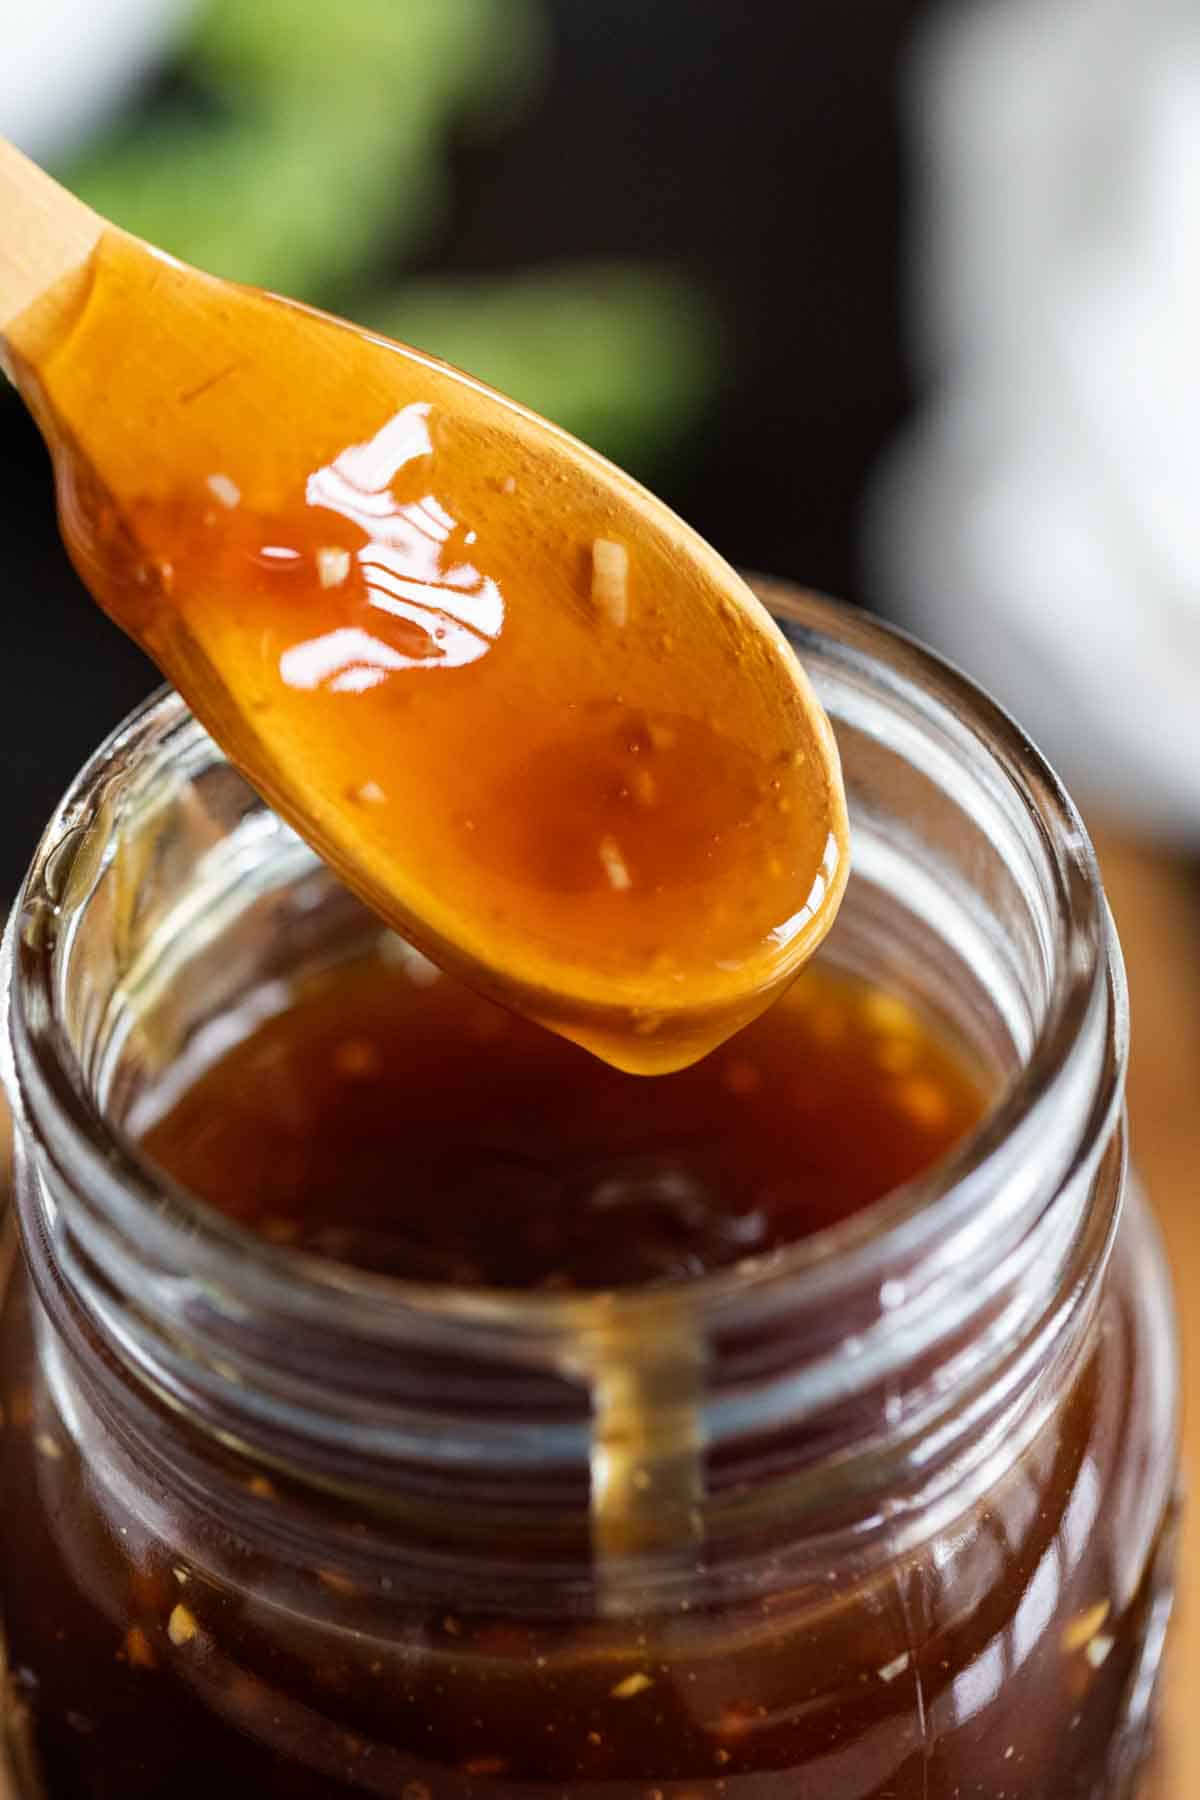
Glossy, savoury and gently sweet, homemade teriyaki sauce is simple to make and far more versatile than its reputation as a glaze suggests. Use it to coat grilled chicken, salmon, tofu or vegetables, or serve it as a dipping sauce. This quick recipe uses a handful of ingredients and takes about 15 minutes.

What is teriyaki sauce?

Teriyaki refers to a Japanese cooking method in which food is grilled or broiled and coated with a shiny glaze. The sauce is commonly made with soy sauce, mirin, sake and sugar. As it simmers, it reduces to a savoury-sweet glaze that clings beautifully to food.

Ingredients

  • 120 ml soy sauce
  • 120 ml mirin
  • 60 ml sake
  • 2 tablespoons caster sugar, or to taste
  • 1 teaspoon finely grated fresh ginger, optional
  • 1 small garlic clove, finely grated, optional

For a thicker sauce (optional): mix 1 teaspoon cornflour with 1 tablespoon cold water.

Method

  1. Put the soy sauce, mirin, sake and sugar in a small saucepan. Add the ginger and garlic, if using.
  2. Set the pan over a medium heat and stir until the sugar dissolves.
  3. Bring the mixture to a gentle simmer. Cook for 8–12 minutes, stirring occasionally, until it has reduced slightly and looks glossy. It will thicken further as it cools.
  4. For a thicker, more pourable sauce, stir in the cornflour mixture. Simmer for 1–2 minutes, stirring constantly, until the sauce reaches your preferred consistency.
  5. Remove from the heat. Strain out the ginger and garlic if you would like a smooth sauce, then leave to cool before using or storing.

Tips for the best teriyaki sauce

  • Adjust the sweetness: start with 2 tablespoons of sugar, then add a little more if you prefer a sweeter glaze.
  • Let it reduce: simmering concentrates the flavour and creates a glossy finish. Avoid boiling it rapidly, as it can reduce too far or taste too salty.
  • Use cornflour only if needed: a traditional-style sauce thickens through reduction, while cornflour gives a quicker, thicker result.
  • Choose low-salt soy sauce if preferred: this makes it easier to control the saltiness, especially when using the sauce as a dip.
  • For a gluten-free version: use certified gluten-free tamari and check that the mirin and sake are suitable.

How to use it

Brush the sauce over food towards the end of cooking so the sugars do not burn. It works particularly well with grilled chicken, salmon, prawns, tofu and aubergine. You can also stir a spoonful through fried rice or noodles, or serve it in a small bowl as a dip.

Storage

Once cooled, transfer the sauce to a clean, sealed jar and refrigerate. Use within one week, and always use a clean spoon when serving. If the sauce has been in contact with raw meat or fish, do not return it to the jar; discard it or bring it to a full boil before serving.


Essential Guide to Homemade Teriyaki Sauce: Ingredients, Preparation, and Pairing Tips

  1. What ingredients do you need to make teriyaki sauce?
  2. How do you make teriyaki sauce from scratch?
  3. How can you thicken homemade teriyaki sauce?
  4. Can you make teriyaki sauce without mirin or sake?
  5. How long does homemade teriyaki sauce keep in the fridge?
  6. What foods go well with teriyaki sauce?

What ingredients do you need to make teriyaki sauce?

To make a simple teriyaki sauce, you’ll need soy sauce, mirin, sake and sugar. These ingredients create its characteristic savoury-sweet flavour and glossy finish. Freshly grated ginger and garlic are optional additions for extra depth, while a little cornflour mixed with cold water can be used to thicken the sauce if desired.

How do you make teriyaki sauce from scratch?

To make teriyaki sauce from scratch, combine soy sauce, mirin, sake and sugar in a small saucepan. Warm over a medium heat, stirring until the sugar dissolves, then simmer gently for 8–12 minutes until the sauce reduces and turns glossy. For a thicker sauce, stir in a little cornflour mixed with cold water and simmer for another minute or two. Let it cool before using; it will thicken further as it cools.

How can you thicken homemade teriyaki sauce?

To thicken homemade teriyaki sauce, simmer it gently until it reduces and becomes glossy; it will thicken further as it cools. For a quicker, thicker result, mix one teaspoon of cornflour with one tablespoon of cold water, then stir it into the simmering sauce a little at a time. Cook for a minute or two, stirring, until it reaches the consistency you like.

Can you make teriyaki sauce without mirin or sake?

Yes, you can make teriyaki sauce without mirin or sake. For a mirin substitute, use an equal amount of water or apple juice with a little extra sugar; for sake, use water or unsalted stock. The flavour will be slightly different, but soy sauce, sugar, ginger and garlic will still make a tasty glaze. Adjust the sweetness to taste, then simmer until the sauce reaches your preferred consistency.

How long does homemade teriyaki sauce keep in the fridge?

Homemade teriyaki sauce will usually keep in the fridge for up to one week when stored in a clean, airtight container. Let it cool before refrigerating, and use a clean spoon each time you serve it. If it has been in contact with raw meat, fish or their juices, don’t pour it back into the container; discard it, or boil it thoroughly before using.

What foods go well with teriyaki sauce?

Teriyaki sauce pairs well with grilled or pan-fried chicken, salmon, beef and prawns, as well as tofu and vegetables such as broccoli, aubergine and peppers. It also adds a savoury-sweet flavour to rice bowls, stir-fries and noodles. Brush it onto food near the end of cooking so the sugars do not burn, or serve it on the side as a dip.

Chuck Roast Recipes: Three Comforting Ways to Cook a Flavourful Cut

chuck roast recipes

Chuck Roast Recipes: Three Comforting Ways to Cook This Flavourful Cut

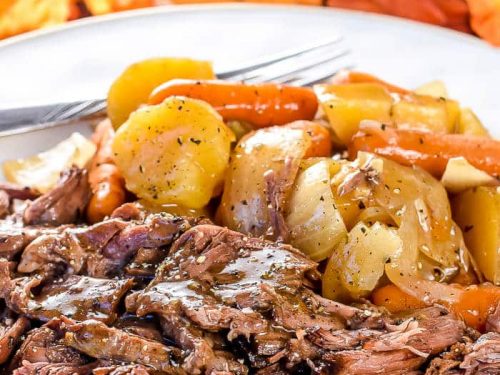
Chuck roast is a well-marbled cut of beef from the shoulder. It can be a little tough when cooked quickly, but long, gentle cooking breaks down its connective tissue and makes the meat tender, rich and full of flavour. That makes it ideal for Sunday lunch, slow-cooker suppers and dishes that can be prepared ahead.

For the best results, brown the beef before braising, keep it moist and cook it until a fork slides easily into the meat. The recipes below offer three simple ways to enjoy chuck roast: a classic pot roast, slow-cooked shredded beef and a warming red-wine braise.

Classic Chuck Roast Pot Roast

This traditional one-pot meal combines tender beef with potatoes, carrots and a savoury cooking liquid. Serve it straight from the casserole dish, with the juices spooned over the top.

Ingredients

  • 1.5 kg chuck roast
  • Salt and freshly ground black pepper
  • 2 tablespoons vegetable oil
  • 1 large onion, cut into wedges
  • 2 tablespoons plain flour
  • 2 tablespoons tomato purée
  • 500 ml beef stock
  • 2 sprigs of fresh thyme
  • 2 bay leaves
  • 500 g waxy potatoes, halved if large
  • 300 g carrots, cut into thick chunks

Method

  1. Heat the oven to 160°C, or 140°C fan. Pat the beef dry and season it generously with salt and pepper.
  2. Heat the oil in a large, ovenproof casserole over a medium-high heat. Brown the beef on all sides, then transfer it to a plate.
  3. Add the onion to the casserole and cook for 3–4 minutes. Stir in the flour and tomato purée, then gradually pour in the stock, scraping up any browned bits from the base.
  4. Return the beef to the casserole. Add the thyme and bay leaves. The liquid should come about halfway up the meat; add a little water if needed.
  5. Cover and cook in the oven for 2½ hours. Add the potatoes and carrots, then cook for a further 60–90 minutes, until the beef is very tender and the vegetables are cooked through.
  6. Remove the herbs and let the roast rest for 10 minutes before slicing or pulling it apart. Spoon over the cooking juices to serve.

Slow-Cooker Shredded Chuck Roast

Shredded beef is a versatile option for sandwiches, tacos, baked potatoes or rice bowls. A slow cooker keeps the preparation straightforward: brown the meat first for extra flavour, then let it cook gently until it falls apart.

Ingredients

  • 1.5 kg chuck roast
  • Salt and freshly ground black pepper
  • 1 tablespoon vegetable oil
  • 1 onion, finely sliced
  • 250 ml beef stock
  • 2 tablespoons Worcestershire sauce
  • 1 tablespoon tomato purée
  • 1 teaspoon smoked paprika
  • 1 teaspoon dried oregano

Method

  1. Season the beef with salt and pepper. Heat the oil in a frying pan and brown the joint on all sides.
  2. Put the onion in the slow cooker and place the beef on top. Whisk together the stock, Worcestershire sauce, tomato purée, smoked paprika and oregano, then pour the mixture around the meat.
  3. Cover and cook on low for 8–10 hours or on high for 4–6 hours, until the beef is tender enough to shred easily.
  4. Transfer the beef to a board and shred it with two forks. Stir it back into the cooking juices and taste for seasoning.

Serve the shredded beef in soft rolls with coleslaw, or spoon it into warm tortillas with salsa and fresh coriander. Refrigerate leftovers promptly and use them within three days.

Chuck Roast Braised with Red Wine

Red wine, stock and aromatic vegetables create a deeply savoury sauce in this slow-braised version. It works well for a relaxed dinner with mashed potatoes or crusty bread.

Ingredients

  • 1.5 kg chuck roast
  • Salt and freshly ground black pepper
  • 2 tablespoons olive oil
  • 1 onion, chopped
  • 2 carrots, chopped
  • 2 celery sticks, chopped
  • 2 tablespoons plain flour
  • 300 ml dry red wine
  • 300 ml beef stock
  • 2 sprigs of rosemary
  • 2 bay leaves

Method

  1. Heat the oven to 160°C, or 140°C fan. Season the beef. Warm the olive oil in a heavy casserole and brown the meat thoroughly on all sides. Set aside.
  2. Add the onion, carrots and celery to the casserole and cook for about 5 minutes, stirring occasionally. Sprinkle over the flour and stir for 1 minute.
  3. Pour in the wine a little at a time, scraping the base of the pan. Add the stock, rosemary and bay leaves, then return the beef to the casserole.
  4. Cover and braise for 3–3½ hours, turning the beef once, until it is tender. If the sauce seems thin, remove the meat when cooked and simmer the liquid uncovered until it reaches the consistency you like.
  5. Rest the beef for 10 minutes, then slice or pull it into pieces. Serve with the sauce and your choice of potatoes or bread.

Tips for Tender Chuck Roast

  • Brown the meat well. A deep brown crust adds flavour to both the beef and the cooking liquid.
  • Cook it gently. Chuck roast is best suited to low, slow cooking rather than a quick, high-temperature roast.
  • Allow enough time. The beef is ready when it is tender throughout, not simply when it reaches a particular cooking time. Larger or thicker joints may need longer.
  • Keep some liquid in the pot. Braising does not require the meat to be fully submerged, but there should be enough liquid to create steam and prevent the base from drying out.
  • Rest before serving. A short rest makes the meat easier to carve and gives the juices time to settle.

Whether you choose a classic pot roast, convenient slow-cooker beef or a wine-rich braise, chuck roast rewards patient cooking. Make a little extra and the leftovers can become sandwiches, pies or a quick meal tossed through pasta the next day.


Frequently Asked Questions About Cooking Chuck Roast: Tips and Techniques for Tender, Delicious Meals

  1. What is chuck roast called in the UK?
  2. What is the best way to cook chuck roast so it becomes tender?
  3. How long should chuck roast cook in the oven?
  4. Can you cook chuck roast in a slow cooker?
  5. Should chuck roast be seared before slow cooking or braising?
  6. What temperature should chuck roast reach to become fall-apart tender?
  7. What can you serve with chuck roast?

What is chuck roast called in the UK?

In the UK, “chuck roast” is not a widely used name for a standard supermarket cut. The closest equivalent is usually beef chuck or shoulder of beef; for a slow-cooked joint, ask a butcher for a boneless beef shoulder suitable for braising. “Braising steak” comes from a similar area, but it is often sold in slices or pieces rather than as a roasting joint.

What is the best way to cook chuck roast so it becomes tender?

The best way to make chuck roast tender is to cook it slowly with a little liquid, using a covered casserole in a low oven or a slow cooker. First, pat the beef dry and brown it on all sides to build flavour. Add stock or another braising liquid, cover and cook gently until the meat is fork-tender and easy to pull apart—usually around 3–4 hours in a low oven, or 8–10 hours on a slow-cooker’s low setting, depending on the size of the joint. Avoid rushing the cooking: chuck contains connective tissue that needs time to soften.

How long should chuck roast cook in the oven?

Chuck roast is best cooked slowly in a covered casserole at 160°C (140°C fan) for around 3–4 hours, depending on the size and thickness of the joint. Add enough stock or other braising liquid to keep the meat moist, and check that it is fork-tender before serving; if it still feels firm, return it to the oven and continue cooking in 30-minute intervals.

Can you cook chuck roast in a slow cooker?

Yes, chuck roast is ideal for a slow cooker. Its marbling and connective tissue break down during long, gentle cooking, leaving the beef tender and easy to pull apart. For extra flavour, brown the joint in a hot pan first, then add it to the slow cooker with a little stock, seasoning and any vegetables or herbs you like. Cook on low for around 8–10 hours or on high for 4–6 hours, until the meat is fork-tender; timings can vary depending on the size of the joint and your appliance.

Should chuck roast be seared before slow cooking or braising?

Searing chuck roast before slow cooking or braising is recommended, though not essential. Browning the meat in a hot pan develops a rich, savoury crust that adds depth to the finished dish and its cooking liquid. Pat the roast dry first, season it, then sear it on all sides; transfer it to the slow cooker or braising pot and continue with the recipe. If you’re short on time, you can skip this step—the beef will still become tender when cooked slowly, but the flavour may be less complex.

What temperature should chuck roast reach to become fall-apart tender?

For chuck roast to become fall-apart tender, aim for an internal temperature of about 90–96°C. At this range, the connective tissue has had time to break down, although cooking time and the size of the joint also matter. Rather than relying on temperature alone, check that a fork or probe slides into the meat easily; if it still feels firm, continue cooking gently and check again.

What can you serve with chuck roast?

Chuck roast pairs well with sides that soak up its rich, savoury juices. Try mashed potatoes, roast potatoes, buttered noodles or crusty bread, alongside vegetables such as carrots, green beans, peas or cabbage. For a lighter balance, serve it with a crisp green salad. If the roast is cooked with potatoes and carrots, add a simple extra side such as steamed greens or bread.

High Protein Breakfast Ideas for a Filling Start to the Day

high protein breakfast

High-Protein Breakfast: Simple Ideas to Start the Day

A high-protein breakfast can be a satisfying way to begin the day. Protein helps build and maintain muscles and is needed for many other functions in the body. Including a source of protein in your morning meal may also help it feel more filling, especially when paired with fibre-rich foods such as fruit, vegetables or wholegrains.

There is no single perfect breakfast for everyone. Your appetite, routine, food preferences and overall diet all matter. The ideas below can be adapted to suit different tastes and budgets.

What counts as a high-protein breakfast?

A high-protein breakfast includes a substantial protein source, such as eggs, dairy, fish, meat, tofu, beans or lentils. The amount of protein in a meal will depend on the ingredients and portion sizes, so check food labels if you want to keep track.

It can help to build a balanced plate rather than focusing on protein alone. Add wholegrain carbohydrates for energy and fibre, and include fruit or vegetables where you can.

High-protein breakfast ideas

  • Greek yoghurt with oats and fruit: Choose plain Greek yoghurt and top it with oats, berries and a small handful of nuts or seeds.
  • Eggs on wholemeal toast: Scrambled, boiled or poached eggs pair well with wholemeal toast, tomatoes, mushrooms or spinach.
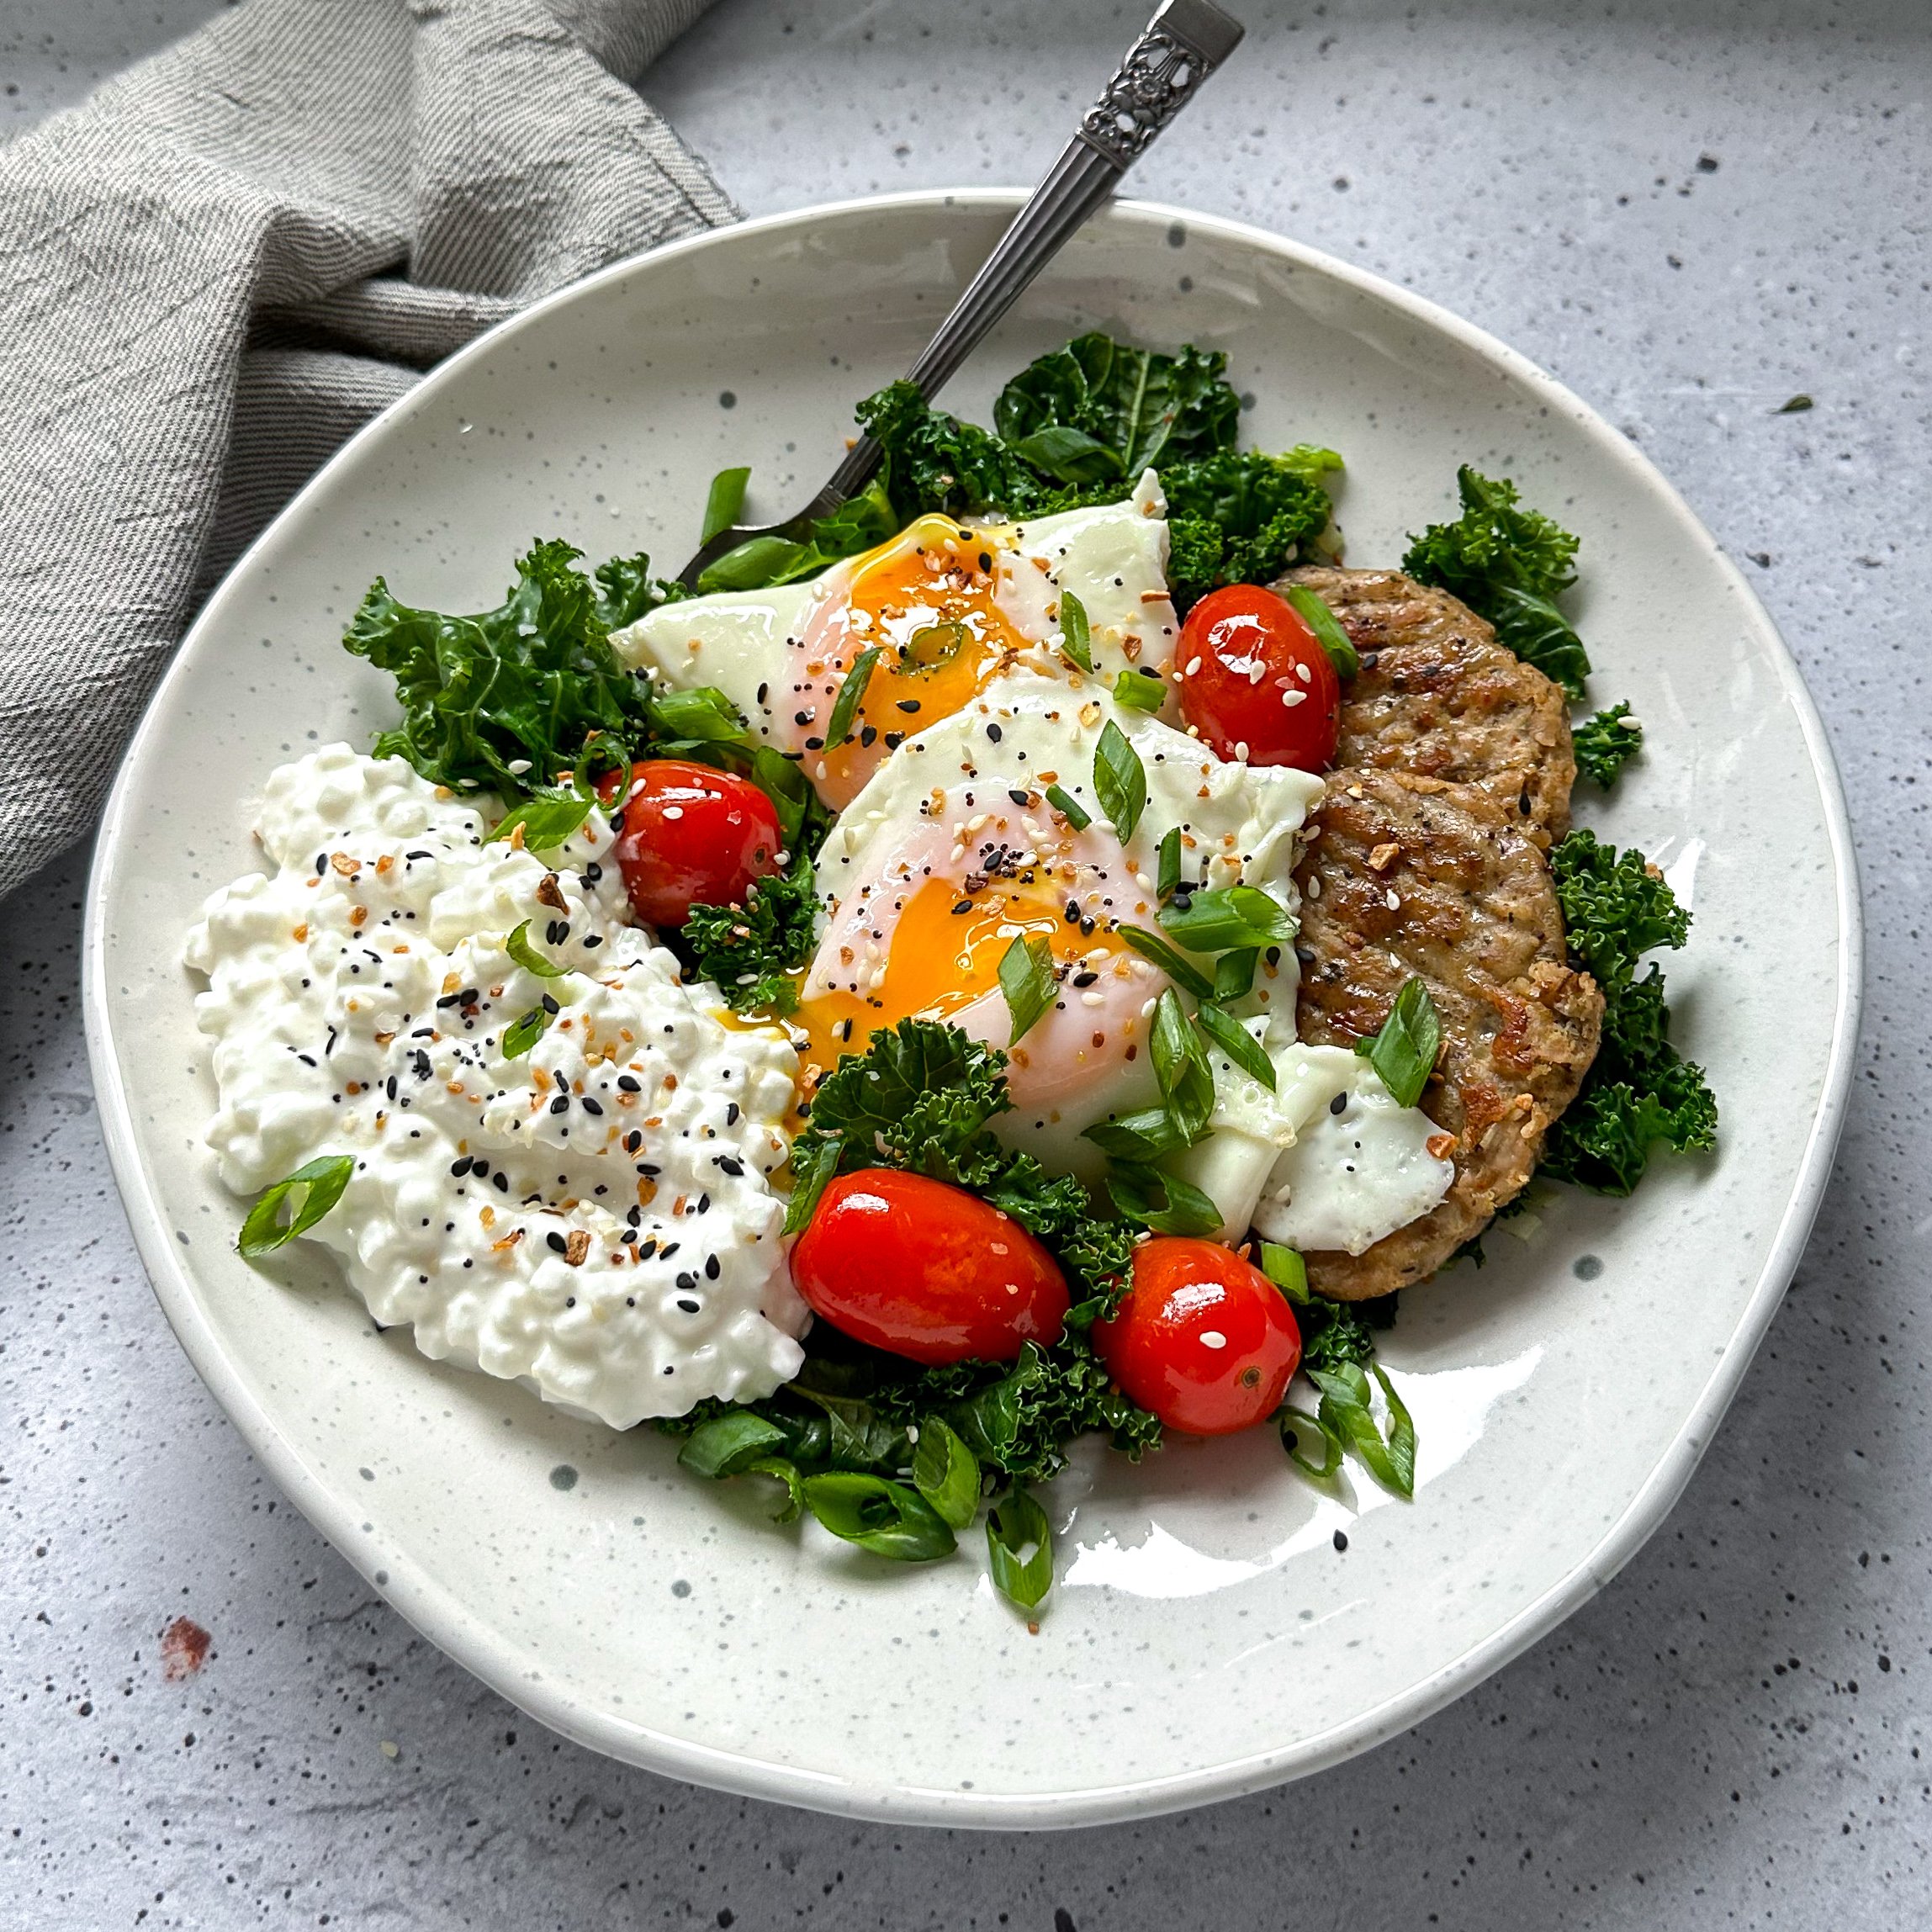
  • Cottage cheese on toast: Add sliced tomatoes, cucumber or avocado for extra flavour and texture.
  • Smoked salmon and eggs: Serve with rye or wholemeal bread and a side of greens. Smoked fish can be high in salt, so enjoy it as part of a varied diet.
  • Tofu scramble: Crumble tofu into a pan with vegetables and seasoning, then serve with toast or warm flatbread.
  • Beans on wholemeal toast: Beans provide protein as well as fibre, making this a filling and affordable option.
  • Overnight oats with yoghurt: Mix oats with milk or fortified soya drink and yoghurt, then leave in the fridge overnight. Add fruit and seeds before serving.
  • Breakfast wrap: Fill a wholemeal wrap with eggs, beans or tofu, plus vegetables and a little cheese or salsa.

Plant-based protein options

A protein-rich breakfast does not have to include meat, fish or dairy. Tofu, beans, lentils, nuts, seeds and soya products can all contribute protein. Fortified soya drinks and soya yoghurt are useful alternatives to dairy; compare labels, as protein content and added sugars vary between products.

For a more substantial plant-based meal, combine a protein source with wholegrains. For example, try beans with wholemeal toast, tofu with brown rice, or soya yoghurt with oats and nuts.

Making breakfast work on busy mornings

A nutritious breakfast need not take long to prepare. Try boiling eggs in advance, preparing overnight oats the evening before, or keeping yoghurt, fruit and nuts ready to combine. Leftovers can also work well: a portion of beans, tofu or vegetables can be reheated and served with toast.

If you are not hungry first thing, you do not have to force yourself to eat immediately. A breakfast you can take with you, or a later first meal, may fit your routine better.

Keep the bigger picture in mind

Protein is one part of a healthy diet. A breakfast with a mix of protein, fibre and other nourishing ingredients can offer variety and help keep you satisfied, but no single meal determines your overall health. Choose foods you enjoy and can include comfortably in your usual routine.

If you have specific dietary needs or a health condition that affects what you eat, a registered dietitian or other qualified healthcare professional can provide advice tailored to you.


6 Tips for a Protein-Packed Breakfast to Start Your Day Right

  1. Add eggs to wholegrain toast for a filling start.
  2. Choose Greek yoghurt with nuts and berries.
  3. Stir protein-rich seeds into porridge.
  4. Try cottage cheese with fruit or toast.
  5. Make a quick omelette with leftover vegetables.
  6. Check labels on breakfast cereals for protein and added sugar.

Add eggs to wholegrain toast for a filling start.

Add eggs to wholegrain toast for a simple, filling start to the day. Eggs provide protein, while wholegrain bread adds fibre and steady-release carbohydrates. Serve with tomatoes, mushrooms or spinach for extra flavour and a portion of vegetables.

Choose Greek yoghurt with nuts and berries.

Choose Greek yoghurt with nuts and berries for a quick, satisfying high-protein breakfast. Greek yoghurt provides protein, while nuts add crunch and healthy fats, and berries bring natural sweetness, fibre and flavour. For extra texture, sprinkle over a few oats or seeds.

Stir protein-rich seeds into porridge.

Stir protein-rich seeds, such as chia, hemp or pumpkin seeds, into your porridge for an easy breakfast boost. They add a pleasant crunch and pair well with fruit, yoghurt or a little nut butter. Start with a small spoonful and adjust to taste, as seeds can also add plenty of fibre and energy.

Try cottage cheese with fruit or toast.

Try cottage cheese with fruit or toast for a quick, versatile high-protein breakfast. Pair it with berries or sliced peach for a fresh, lightly sweet option, or spread it on wholemeal toast and add tomatoes or cucumber for something savoury. Choose the combination you enjoy most, and check the label if you’d like to compare protein levels between brands.

Make a quick omelette with leftover vegetables.

Make a quick omelette with leftover vegetables for an easy, protein-rich breakfast that helps reduce food waste. Beat a couple of eggs, pour them into a heated non-stick pan, then add chopped cooked vegetables such as spinach, peppers, mushrooms or courgette. Cook until the eggs are set, fold and serve with wholemeal toast for a more filling meal.

Check labels on breakfast cereals for protein and added sugar.

Check the labels on breakfast cereals for both protein and added sugar, as products can vary considerably. Compare the figures per 100 g to make a fair comparison, and check the serving size too. Choose a cereal with more protein and less added sugar where possible, then serve it with milk, yoghurt, nuts or seeds for an extra protein boost.

Indulge in the Classic Comfort of Chicken Pot Pie

chicken pot pie

The Comforting Classic: Chicken Pot Pie

Chicken pot pie is a beloved dish that has been comforting families for generations. This savoury pie, filled with tender chicken, vegetables, and a creamy sauce, is the epitome of home-cooked goodness.

The origins of chicken pot pie can be traced back to medieval England, where it was known as “potage.” Over time, the dish evolved into the familiar pie we know today, with a flaky pastry crust that encases a hearty filling.

One of the key elements of a delicious chicken pot pie is the filling. Typically, diced chicken is combined with carrots, peas, onions, and celery in a rich and flavourful sauce made from broth and cream. Seasoned with herbs like thyme and parsley, the filling is then poured into a pastry-lined dish and topped with another layer of pastry before being baked to golden perfection.

When the bubbling pie emerges from the oven, its irresistible aroma fills the kitchen, beckoning everyone to gather around the table. The first bite reveals a symphony of textures and flavours – the tender chicken, the sweetness of the vegetables, and the buttery richness of the crust.

Chicken pot pie is not just a meal; it’s a reminder of simpler times and cherished traditions. Whether enjoyed on a cold winter’s night or as part of a family gathering, this classic dish never fails to bring comfort and joy to those who savour it.

So next time you’re craving some old-fashioned comfort food, why not whip up a batch of homemade chicken pot pie? With its timeless appeal and heartwarming flavours, it’s sure to become a favourite in your household too.


9 Essential Tips for the Perfect Chicken Pot Pie

  1. Ensure the chicken is cooked through before adding it to the pie
  2. Use a mix of white and dark meat for a more flavourful filling
  3. Add some chopped vegetables like carrots, peas, and celery for extra texture
  4. Season the filling well with herbs like thyme, rosemary, and parsley
  5. Consider using puff pastry for a flakier crust
  6. Brush the top of the pie with egg wash before baking for a golden finish
  7. Let the pie cool slightly before serving to allow the filling to set
  8. Serve with a side salad or steamed greens for a balanced meal
  9. Store any leftovers in an airtight container in the fridge

Ensure the chicken is cooked through before adding it to the pie

It is crucial to ensure that the chicken is thoroughly cooked before adding it to the chicken pot pie. Properly cooked chicken not only enhances the safety of the dish but also contributes to its overall taste and texture. By cooking the chicken until it is tender and no longer pink inside, you guarantee that each bite of the pie is not only delicious but also safe to eat. This simple yet essential tip ensures that your chicken pot pie is a delightful and satisfying culinary experience for all who enjoy it.

Use a mix of white and dark meat for a more flavourful filling

For a more flavourful filling in your chicken pot pie, consider using a mix of white and dark meat. Combining the tender white meat with the richer, more robust flavour of dark meat adds depth and complexity to the filling. The contrast in textures and tastes creates a harmonious balance that elevates the overall taste experience of this classic dish. Give this tip a try to enhance the savouriness of your chicken pot pie and delight your taste buds with every bite.

Add some chopped vegetables like carrots, peas, and celery for extra texture

To enhance the texture and flavour of your chicken pot pie, consider incorporating a medley of chopped vegetables such as carrots, peas, and celery. These colourful additions not only provide a delightful crunch but also infuse the filling with a burst of freshness. The combination of tender chicken with the vibrant vegetables creates a harmonious balance that elevates the overall dining experience, making each bite a satisfying and wholesome delight.

Season the filling well with herbs like thyme, rosemary, and parsley

To enhance the flavour profile of your chicken pot pie, it is recommended to season the filling generously with a blend of aromatic herbs such as thyme, rosemary, and parsley. These herbs not only add depth and complexity to the dish but also infuse it with a delightful fragrance that will tantalise your taste buds. The combination of thyme’s earthy notes, rosemary’s piney essence, and parsley’s fresh undertones creates a harmonious balance that elevates the overall taste of the pie. Don’t underestimate the power of herbs in transforming a simple chicken pot pie into a culinary masterpiece that is sure to impress even the most discerning palates.

Consider using puff pastry for a flakier crust

When making chicken pot pie, a helpful tip to achieve a flakier crust is to consider using puff pastry. The light and airy layers of puff pastry can add a delightful crunch and texture to the pie, enhancing the overall eating experience. By opting for puff pastry as the crust for your chicken pot pie, you can elevate this classic dish to new heights of deliciousness, making each bite a truly indulgent treat.

Brush the top of the pie with egg wash before baking for a golden finish

To achieve a beautifully golden finish on your chicken pot pie, a simple yet effective tip is to brush the top of the pie with an egg wash before baking. This technique not only adds a glossy sheen to the pastry but also helps create that perfect crisp and golden crust that is both visually appealing and deliciously satisfying. The egg wash seals in the flavours and textures of the filling while enhancing the overall presentation of the dish, making each bite as delightful to look at as it is to taste.

Let the pie cool slightly before serving to allow the filling to set

Allowing the chicken pot pie to cool slightly before serving is a crucial tip that enhances the overall dining experience. By giving the pie a few moments to rest, the filling has the opportunity to set and thicken, ensuring that each slice holds together beautifully. This simple step not only helps in serving neat portions but also allows the flavours to meld together, resulting in a more cohesive and satisfying bite. So, exercise a bit of patience and let the pie cool for a few minutes before indulging in its delicious warmth.

Serve with a side salad or steamed greens for a balanced meal

For a well-rounded dining experience, consider pairing your delectable chicken pot pie with a refreshing side salad or a serving of steamed greens. The crispness of the salad or the vibrant colours of the greens not only complement the richness of the pie but also add a healthy and nutritious element to your meal. This combination provides a perfect balance of flavours and textures, ensuring that every bite is not only satisfying but also nourishing.

Store any leftovers in an airtight container in the fridge

To keep your chicken pot pie fresh and delicious for longer, remember to store any leftovers in an airtight container in the fridge. This simple tip helps maintain the flavours and textures of the pie, ensuring that you can enjoy another comforting serving whenever you’re ready. Proper storage not only preserves the taste but also keeps the dish safe to eat for an extended period, allowing you to savour every bite of this classic favourite.

Savour the Flavour: Authentic Bulalo Recipe for a Taste of Filipino Comfort

bulalo recipe

The Perfect Bulalo Recipe: A Taste of Filipino Comfort Food

Originating from the Philippines, bulalo is a hearty and flavourful beef soup that warms both the body and soul. This traditional dish is beloved for its rich broth, tender beef shanks, and assortment of vegetables. Here’s how you can recreate this comforting meal in your own kitchen.

Ingredients:

  • 2 lbs beef shank, cut into serving pieces
  • 1 medium onion, quartered
  • 3 cloves garlic, crushed
  • 2 litres water
  • 2 corn cobs, cut into thirds
  • 1 small cabbage, quartered
  • 3 medium potatoes, peeled and halved
  • Salt and pepper to taste

Instructions:

  1. In a large pot, bring water to a boil.
  2. Add beef shank, onion, garlic, salt, and pepper. Simmer for 2-3 hours or until the beef is tender.
  3. Add more water if needed to maintain desired broth consistency.
  4. Add potatoes and cook until tender.
  5. Add corn cobs and cabbage. Simmer for another 5-10 minutes.
  6. Serve hot with steamed rice on the side.

Whether enjoyed on a chilly evening or as a comforting meal during gatherings with loved ones, bulalo is sure to delight your taste buds. Embrace the warmth and heartiness of this Filipino classic by trying out this recipe today!


Discover the Comfort and Flavour of Bulalo: A Hearty Beef Soup Recipe with a Taste of Filipino Culture

  1. 1. Hearty and comforting beef soup.
  2. 2. Rich and flavourful broth that is perfect for warming up.
  3. 3. Tender and succulent beef shanks add a meaty texture to the dish.
  4. 4. Assortment of vegetables like corn, cabbage, and potatoes provide a balanced meal.
  5. 5. Easy-to-follow recipe that can be prepared at home.
  6. 6. Ideal for gatherings or family meals due to its generous serving size.
  7. 7. Versatile dish that can be adjusted to suit personal preferences in terms of seasoning and ingredients.
  8. 8. Offers a taste of Filipino cuisine and culture, introducing new flavours to your palate.


Challenges of Preparing Bulalo: Time, Fat Content, Dietary Restrictions, and Broth Skimming

  1. Long cooking time required to tenderize the beef shank.
  2. High in fat content due to the use of beef shank.
  3. May not be suitable for vegetarians or individuals on a low-sodium diet.
  4. Requires careful skimming of excess fat from the broth for a healthier dish.

1. Hearty and comforting beef soup.

The bulalo recipe offers a delightful pro with its hearty and comforting beef soup. This traditional Filipino dish is renowned for its rich and flavourful broth that is sure to warm both the body and soul. The tender beef shanks, paired with an array of vegetables, create a satisfying and nourishing meal that brings a sense of comfort and contentment with every spoonful. Whether enjoyed on a cold day or as a gathering with loved ones, the bulalo’s heartiness makes it a perfect choice for those seeking a fulfilling and soothing dining experience.

2. Rich and flavourful broth that is perfect for warming up.

Indulge in the comforting allure of bulalo with its standout feature of a rich and flavourful broth that promises to warm you up from the inside out. This hearty soup boasts a depth of taste that comes from simmering beef shanks, onions, and garlic for hours, creating a savoury base that is both soothing and satisfying. With each spoonful, the aromatic essence of the broth envelops your senses, making it an ideal choice for those seeking a soul-nourishing meal on chilly days or simply craving a taste of Filipino comfort food.

3. Tender and succulent beef shanks add a meaty texture to the dish.

The inclusion of tender and succulent beef shanks in the bulalo recipe enhances the overall texture of the dish, providing a rich and meaty element that complements the hearty broth and vegetables. The slow cooking process allows the beef shanks to become incredibly tender, making each bite a satisfying and flavourful experience. This meaty addition not only adds depth to the dish but also elevates its overall taste, making bulalo a truly comforting and indulgent meal for any occasion.

4. Assortment of vegetables like corn, cabbage, and potatoes provide a balanced meal.

The inclusion of a variety of vegetables such as corn, cabbage, and potatoes in the bulalo recipe not only enhances the flavour profile of the dish but also offers a well-rounded and balanced meal. These nutritious vegetables add depth to the broth and complement the tender beef shanks, creating a harmonious blend of textures and tastes. With its combination of hearty ingredients, bulalo provides a wholesome dining experience that is both satisfying and nourishing.

5. Easy-to-follow recipe that can be prepared at home.

Indulge in the culinary delight of bulalo with this easy-to-follow recipe that can be effortlessly prepared at home. Whether you’re a seasoned cook or a novice in the kitchen, recreating this traditional Filipino dish is a breeze. With simple ingredients and clear instructions, you can savour the rich flavours of bulalo without the need for advanced cooking skills. Treat yourself and your loved ones to a homemade bowl of comfort with this accessible recipe that brings warmth and satisfaction to your dining table.

6. Ideal for gatherings or family meals due to its generous serving size.

Bulalo’s generous serving size makes it an ideal dish for gatherings or family meals. Its hearty portions ensure that everyone around the table can enjoy a satisfying and comforting meal together. Whether shared during festive celebrations or casual get-togethers, bulalo brings people closer through its delicious flavours and communal dining experience. The abundance of this traditional Filipino soup fosters a sense of warmth and togetherness, making it a perfect choice for creating lasting memories with loved ones.

7. Versatile dish that can be adjusted to suit personal preferences in terms of seasoning and ingredients.

Bulalo is a versatile dish that offers the flexibility to be adjusted according to individual preferences when it comes to seasoning and ingredients. Whether you prefer a richer broth, spicier flavours, or a specific selection of vegetables, this Filipino comfort food can easily accommodate your personal taste. By allowing for customisation, bulalo becomes not just a traditional recipe, but a canvas for culinary creativity and personalisation, making it a beloved dish that can be tailored to suit various palates and dietary needs.

8. Offers a taste of Filipino cuisine and culture, introducing new flavours to your palate.

Indulging in a bowl of bulalo not only satisfies your hunger but also offers a delightful taste of Filipino cuisine and culture. This traditional dish introduces new and exciting flavours to your palate, allowing you to experience the unique blend of ingredients that make Filipino food so special. From the rich broth to the tender beef shanks and hearty vegetables, bulalo encapsulates the essence of Filipino culinary traditions, inviting you on a culinary journey that is both delicious and enlightening.

Long cooking time required to tenderize the beef shank.

One drawback of preparing bulalo is the extended cooking time needed to tenderize the beef shank. Due to the toughness of the cut, the meat requires a prolonged simmering period to achieve that melt-in-your-mouth texture that is characteristic of a well-made bulalo. While the wait may be lengthy, the end result of succulent and flavourful beef shank in a hearty broth makes it a worthwhile and comforting dish for those who appreciate the time and effort put into creating this Filipino favourite.

High in fat content due to the use of beef shank.

Indulging in the deliciousness of bulalo comes with a con to consider – its high fat content attributed to the use of beef shank. While the marbled fat adds depth and flavour to the broth, it also contributes to the richness of the dish. For those mindful of their fat intake, moderation and balance in enjoying this Filipino comfort food may be key. Consider opting for leaner cuts of beef or adjusting portion sizes to savour the essence of bulalo while being mindful of dietary preferences.

May not be suitable for vegetarians or individuals on a low-sodium diet.

While bulalo is a delightful and nourishing dish loved by many, it may not be suitable for vegetarians or individuals following a low-sodium diet. The main ingredients of bulalo, such as beef shanks and broth, are not compatible with vegetarian dietary preferences. Additionally, the rich flavour of bulalo often comes from the use of salt and seasoning, which may not align with the restrictions of a low-sodium diet. It’s important for individuals with specific dietary needs to consider alternative options that cater to their requirements while still enjoying delicious meals.

Requires careful skimming of excess fat from the broth for a healthier dish.

To ensure a healthier final dish, one significant con of preparing bulalo is the need for meticulous skimming of excess fat from the broth. This process can be time-consuming and requires attention to detail to achieve a lighter and more nutritious soup. However, by taking the extra step to remove the fat, you can elevate the overall health benefits of the dish and create a more balanced and wholesome dining experience.

Savouring the Exquisite Flavours of Armenian Meals

armenian meals

The Delightful Flavours of Armenian Meals

Armenian cuisine is a vibrant tapestry of flavours, reflecting the rich history and cultural influences of this ancient land. From hearty stews to delicate pastries, Armenian meals are a celebration of fresh ingredients and time-honoured recipes.

One iconic dish that embodies the essence of Armenian cooking is dolma. Grape leaves stuffed with a tantalising mixture of rice, minced meat, and aromatic herbs, dolma is a true culinary masterpiece. Served with a dollop of creamy yogurt, this dish is a symphony of textures and tastes.

Another beloved favourite is khorovats, the traditional Armenian barbecue. Skewers of marinated meat sizzle over open flames, infusing the air with mouth-watering aromas. Whether it’s succulent lamb or juicy chicken, khorovats is a must-try for any food enthusiast.

No Armenian meal is complete without lavash, the soft and thin flatbread that accompanies every dish. Baked in clay ovens called tonirs, lavash has a delicate texture and subtle flavour that perfectly complements the bold spices and robust flavours of Armenian cuisine.

To satisfy your sweet tooth, indulge in pakhlava, the decadent Armenian version of baklava. Layers of flaky pastry are filled with chopped nuts and drenched in fragrant honey syrup, creating a dessert that is both indulgent and irresistible.

Whether you’re exploring bustling markets in Yerevan or dining in a cosy village tavern, Armenian meals offer a sensory journey like no other. Each bite tells a story of tradition, craftsmanship, and above all, hospitality – because in Armenia, sharing a meal is sharing a piece of heart.


Exploring the Richness of Armenian Cuisine: 7 Reasons to Savour Its Flavours and Traditions

  1. Rich in flavour and aroma, reflecting a blend of cultural influences
  2. Utilizes fresh and wholesome ingredients like herbs, vegetables, and meats
  3. Offers a wide variety of vegetarian and vegan options for diverse dietary preferences
  4. Incorporates traditional cooking methods such as clay oven baking for authentic taste
  5. Includes iconic dishes like dolma and khorovats that are beloved worldwide
  6. Accompanied by lavash, a versatile flatbread perfect for dipping or wrapping
  7. Features indulgent desserts like pakhlava that satisfy any sweet craving


Considerations When Exploring Armenian Cuisine: Balancing Tradition with Modern Dietary Needs

  1. Some traditional Armenian dishes can be high in calories and fat, which may not align with certain dietary preferences.
  2. Armenian meals often involve lengthy preparation times, making them less convenient for those with busy schedules.
  3. Certain Armenian dishes may contain ingredients that are uncommon or difficult to find outside of Armenia, limiting accessibility for home cooks.
  4. The strong flavours and spices used in Armenian cuisine may not appeal to individuals who prefer milder tastes.
  5. For those with specific dietary restrictions or allergies, navigating the varied ingredients in Armenian meals can pose a challenge.

Rich in flavour and aroma, reflecting a blend of cultural influences

Armenian meals are a culinary delight, renowned for being rich in flavour and aroma. Each dish is a testament to the diverse cultural influences that have shaped Armenian cuisine over centuries. From the aromatic spices of the Middle East to the hearty ingredients of Eastern Europe, Armenian meals offer a harmonious blend of tastes that captivate the senses and tell a story of tradition and innovation. The vibrant flavours and tantalising scents that emanate from Armenian dishes truly showcase the country’s unique culinary heritage and its ability to bring people together through food.

Utilizes fresh and wholesome ingredients like herbs, vegetables, and meats

Armenian meals stand out for their use of fresh and wholesome ingredients, such as fragrant herbs, vibrant vegetables, and high-quality meats. By prioritising the use of locally sourced produce, Armenian cuisine not only ensures a burst of flavour in every bite but also promotes a healthy and balanced diet. The emphasis on fresh ingredients not only enhances the taste of the dishes but also reflects the commitment to quality and authenticity that defines Armenian culinary traditions.

Offers a wide variety of vegetarian and vegan options for diverse dietary preferences

Armenian meals stand out for their inclusivity, offering a diverse array of vegetarian and vegan options that cater to a wide range of dietary preferences. From hearty bean stews to flavourful lentil dishes, Armenian cuisine embraces plant-based ingredients with creativity and flair. Whether you’re a committed vegan or simply looking to explore meat-free alternatives, Armenian meals provide a delicious and satisfying experience that celebrates the abundance of fresh produce and wholesome flavours.

Incorporates traditional cooking methods such as clay oven baking for authentic taste

Armenian meals stand out for their authenticity by incorporating traditional cooking methods such as clay oven baking. This age-old technique infuses dishes with a unique and unmistakable flavour that captures the essence of Armenian cuisine. The use of clay ovens not only imparts a rich, smoky aroma to the food but also ensures even cooking and retention of natural juices, resulting in dishes that are tender, succulent, and bursting with traditional taste. Embracing these time-honoured practices adds a layer of cultural significance to Armenian meals, making each bite a nostalgic journey back to the roots of this culinary heritage.

Includes iconic dishes like dolma and khorovats that are beloved worldwide

Armenian meals boast a notable pro by encompassing iconic dishes such as dolma and khorovats, which have garnered adoration and recognition on a global scale. Dolma, with its delectable blend of grape leaves, rice, minced meat, and herbs, represents a culinary masterpiece that captivates palates worldwide. Similarly, khorovats, the traditional Armenian barbecue featuring skewers of marinated meat cooked to perfection over open flames, has become a beloved favourite among food enthusiasts everywhere. These renowned dishes not only showcase the rich flavours of Armenia but also serve as ambassadors of its gastronomic excellence across borders.

Accompanied by lavash, a versatile flatbread perfect for dipping or wrapping

Accompanied by lavash, a versatile flatbread perfect for dipping or wrapping, Armenian meals offer a unique dining experience that engages all the senses. The soft and thin texture of lavash serves as the ideal vessel for scooping up rich stews, savouring grilled meats, or simply enjoying on its own. Its subtle flavour enhances the taste of every dish it accompanies, adding an extra layer of authenticity to the culinary journey through Armenia’s vibrant gastronomy. Lavash embodies the spirit of communal eating, inviting diners to tear and share this traditional bread while savouring the diverse flavours of Armenian cuisine.

Features indulgent desserts like pakhlava that satisfy any sweet craving

Armenian cuisine boasts a delightful array of indulgent desserts, with pakhlava standing out as a true gem that never fails to satisfy any sweet craving. This rich and decadent treat features layers of flaky pastry filled with chopped nuts and generously soaked in fragrant honey syrup. Each bite of pakhlava offers a perfect balance of textures and flavours, making it a beloved dessert choice for those with a penchant for sweetness. Whether enjoyed alongside a cup of strong Armenian coffee or as a standalone delight, pakhlava epitomises the exquisite craftsmanship and culinary richness of Armenian sweets.

Some traditional Armenian dishes can be high in calories and fat, which may not align with certain dietary preferences.

While traditional Armenian dishes are known for their rich and indulgent flavours, it is important to note that some of these culinary delights can be high in calories and fat. For individuals with specific dietary preferences or health concerns, the richness of certain Armenian meals may not align with their nutritional goals. It is advisable to enjoy these dishes in moderation or explore lighter alternatives to fully appreciate the diverse and delicious offerings of Armenian cuisine without compromising personal dietary choices.

Armenian meals often involve lengthy preparation times, making them less convenient for those with busy schedules.

Armenian meals, while rich in flavour and tradition, often require extensive preparation that may not align with the fast-paced lifestyles of individuals with busy schedules. From marinating meats to slow-cooking stews, the intricate processes involved in crafting authentic Armenian dishes demand time and patience. This aspect can pose a challenge for those seeking quick and convenient meal options. However, for those willing to invest the time and effort, the reward of savouring a homemade Armenian feast is truly unparalleled in its depth of taste and cultural significance.

Certain Armenian dishes may contain ingredients that are uncommon or difficult to find outside of Armenia, limiting accessibility for home cooks.

For those outside of Armenia, one challenge when preparing Armenian meals lies in sourcing certain ingredients that are unique to Armenian cuisine. From specialty herbs to regional spices, these elements can be uncommon or hard to find in local markets, limiting accessibility for home cooks looking to recreate authentic Armenian dishes. This hurdle may require some creativity or substitutions to capture the true essence of Armenian flavours, making the culinary journey a bit more adventurous and rewarding for those eager to explore this vibrant cuisine beyond its borders.

The strong flavours and spices used in Armenian cuisine may not appeal to individuals who prefer milder tastes.

For those who prefer milder tastes, the bold flavours and spices characteristic of Armenian cuisine may pose a culinary challenge. The robust seasonings and intense aromatics that define Armenian dishes can be overpowering for palates accustomed to subtler flavours. While some may find the richness of Armenian meals invigorating, others may find it overwhelming. It’s important to note that the strong essence of spices like cumin, paprika, and garlic in Armenian cooking may not align with everyone’s taste preferences, making it necessary for individuals seeking a more delicate dining experience to approach Armenian cuisine with caution.

For those with specific dietary restrictions or allergies, navigating the varied ingredients in Armenian meals can pose a challenge.

For individuals with specific dietary restrictions or allergies, the diverse array of ingredients found in Armenian meals can present a significant challenge. From the use of nuts and dairy products to the presence of certain spices and grains, deciphering the contents of traditional Armenian dishes may require careful attention and communication with food preparers. While Armenian cuisine offers a rich tapestry of flavours and textures, those with dietary limitations may need to exercise caution and seek alternative options to fully enjoy the culinary delights of this vibrant culture.

Delicious Vegan Dinner Recipes to Satisfy Your Plant-Based Cravings

vegan dinner recipes

Vegan Dinner Recipes: Delicious Plant-Based Dishes to Try

Are you looking to add more plant-based meals to your dinner rotation? Vegan dinner recipes offer a variety of delicious options that are not only nutritious but also bursting with flavour. Whether you’re a seasoned vegan or just looking to incorporate more meatless meals into your diet, these recipes are sure to satisfy your taste buds.

Roasted Vegetable Quinoa Bowl

This hearty bowl combines roasted seasonal vegetables with protein-packed quinoa for a filling and nutritious meal. Drizzle with a tangy balsamic vinaigrette for an extra burst of flavour.

Vegan Lentil Curry

A comforting and aromatic lentil curry is perfect for a cosy night in. Packed with spices, lentils, and creamy coconut milk, this dish is sure to warm you up from the inside out.

Chickpea Spinach Stuffed Sweet Potatoes

Baked sweet potatoes stuffed with a flavourful mix of chickpeas, spinach, and spices make for a satisfying and nutrient-rich dinner option. Top with a dollop of dairy-free yogurt for added creaminess.

Vegan Mushroom Stroganoff

This creamy mushroom stroganoff is a vegan twist on the classic comfort food dish. Rich in umami flavours and served over pasta or rice, it’s sure to become a new favourite in your meal repertoire.

Spicy Black Bean Tacos

Spice up your dinner routine with these zesty black bean tacos. Packed with protein and topped with fresh salsa and avocado, they are perfect for a quick and satisfying weeknight meal.

These vegan dinner recipes showcase the endless possibilities of plant-based cooking. Whether you’re craving something hearty and comforting or light and refreshing, there’s a vegan dish out there waiting to be enjoyed.

Experiment with different ingredients, flavours, and cooking techniques to discover your favourite vegan dinners that will nourish both your body and soul.


8 Tips for Creating Delicious and Nutritious Vegan Dinners

  1. Experiment with different plant-based proteins like tofu, tempeh, lentils, and chickpeas.
  2. Incorporate a variety of vegetables to ensure a balanced meal with plenty of nutrients.
  3. Try using herbs and spices to add flavour without relying on animal products.
  4. Explore international cuisines for vegan-friendly dishes that are naturally plant-based.
  5. Don’t forget about grains like quinoa, brown rice, and whole wheat pasta for filling meals.
  6. Get creative with sauces and dressings made from ingredients like nut butters, tahini, or avocado.
  7. Consider adding nuts and seeds for extra texture and healthy fats in your vegan dinners.
  8. Plan ahead by batch cooking or preparing ingredients in advance to make weeknight dinners easier.

Experiment with different plant-based proteins like tofu, tempeh, lentils, and chickpeas.

To elevate your vegan dinner repertoire, consider experimenting with a diverse array of plant-based proteins such as tofu, tempeh, lentils, and chickpeas. These versatile ingredients not only offer a substantial source of protein but also bring unique textures and flavours to your dishes. Whether you’re stir-frying marinated tofu, grilling tempeh for a smoky twist, simmering hearty lentils in a curry, or roasting crispy chickpeas for added crunch, incorporating these plant-based proteins can add depth and variety to your meals while keeping them deliciously satisfying and nutritious.

Incorporate a variety of vegetables to ensure a balanced meal with plenty of nutrients.

When exploring vegan dinner recipes, it is essential to incorporate a diverse selection of vegetables to create a well-rounded meal that is rich in nutrients. By including a variety of colourful vegetables such as leafy greens, vibrant bell peppers, hearty root vegetables, and nutrient-dense cruciferous veggies, you can ensure that your dinner not only tastes delicious but also provides your body with essential vitamins, minerals, and antioxidants. Embracing a rainbow of plant-based ingredients guarantees a balanced and nourishing dining experience that promotes overall health and vitality.

Try using herbs and spices to add flavour without relying on animal products.

Enhancing the taste of vegan dinner recipes can be effortlessly achieved by incorporating a diverse array of herbs and spices. By leveraging the aromatic profiles of herbs like basil, thyme, and rosemary, alongside spices such as cumin, paprika, and turmeric, one can elevate the flavours of plant-based dishes without the need for animal products. These natural seasonings not only bring depth and richness to meals but also provide a healthy and vibrant alternative to traditional seasoning methods. Embracing herbs and spices is a wonderful way to infuse your vegan dinners with creativity and deliciousness while staying true to a plant-based lifestyle.

Explore international cuisines for vegan-friendly dishes that are naturally plant-based.

When seeking vegan dinner recipes, consider exploring international cuisines for a diverse range of plant-based dishes that are inherently vegan-friendly. Many cultures around the world have culinary traditions that heavily feature fruits, vegetables, legumes, and grains, making it easier to find delicious vegan options. From Mediterranean mezze to Asian stir-fries and Latin American bean dishes, venturing into global cuisine can introduce you to a wealth of flavours and cooking techniques that celebrate the natural goodness of plant-based ingredients.

Don’t forget about grains like quinoa, brown rice, and whole wheat pasta for filling meals.

When exploring vegan dinner recipes, it’s essential to incorporate a variety of grains such as quinoa, brown rice, and whole wheat pasta into your meals. These wholesome grains not only add a satisfying element to your dishes but also provide essential nutrients and fibre for a well-rounded meal. Whether used as a base for stir-fries, salads, or casseroles, grains can elevate the heartiness of your vegan dinners while keeping you full and nourished.

Get creative with sauces and dressings made from ingredients like nut butters, tahini, or avocado.

When exploring vegan dinner recipes, one valuable tip is to get creative with sauces and dressings crafted from ingredients such as nut butters, tahini, or avocado. These versatile and flavourful additions can elevate the taste profile of your dishes, providing richness and depth without the need for dairy or animal products. Whether drizzled over roasted vegetables, tossed with grains, or used as a dip for plant-based proteins, these homemade sauces and dressings can truly enhance the overall dining experience while keeping your meals vibrant and satisfying.

Consider adding nuts and seeds for extra texture and healthy fats in your vegan dinners.

When exploring vegan dinner recipes, incorporating nuts and seeds can elevate both the texture and nutritional value of your meals. These crunchy additions not only provide a satisfying crunch but also contribute healthy fats, protein, and essential nutrients to your dishes. Whether sprinkled on top for a finishing touch or blended into sauces for added richness, nuts and seeds offer a versatile way to enhance the flavour profile and overall appeal of your plant-based dinners.

Plan ahead by batch cooking or preparing ingredients in advance to make weeknight dinners easier.

Planning ahead is key when it comes to incorporating vegan dinner recipes into your weeknight routine. By batch cooking or preparing ingredients in advance, you can streamline the cooking process and ensure that a delicious and nutritious meal is always within reach. Whether it’s chopping vegetables, cooking grains, or prepping sauces, taking the time to get organised will make it easier to whip up a satisfying vegan dinner even on the busiest of evenings. This simple tip can help you stay on track with your plant-based eating goals and enjoy stress-free meals throughout the week.

Creative Sandwich Ideas to Spice Up Your Lunch Routine

sandwich ideas

Sandwich Ideas to Elevate Your Lunch Game

When it comes to quick and satisfying meals, sandwiches are a go-to option for many. However, the classic ham and cheese or PB&J can get a bit mundane after a while. If you’re looking to shake up your lunch routine, here are some creative sandwich ideas that will take your taste buds on a delicious journey:

Caprese Panini

Layer slices of fresh mozzarella, ripe tomatoes, and basil leaves between two slices of ciabatta bread. Drizzle with balsamic glaze and grill until the cheese is melty and the bread is crispy. A taste of Italy in every bite!

Spicy Chicken Avocado Wrap

Toss shredded spicy chicken with diced avocado, lettuce, and a squeeze of lime juice. Wrap it all up in a whole wheat tortilla for a zesty and satisfying meal on the go.

Mediterranean Veggie Sandwich

Spread hummus on whole grain bread and top with roasted red peppers, cucumber slices, feta cheese crumbles, and a handful of arugula. This sandwich is packed with flavourful ingredients that will transport you to the sunny shores of the Mediterranean.

BBQ Pulled Pork Slider

Pile tender pulled pork onto mini slider buns and top with coleslaw for a sweet and tangy barbecue treat. Perfect for picnics or summer gatherings!

Tuna Salad Stuffed Pita

Mix canned tuna with Greek yogurt, diced celery, red onion, and a squeeze of lemon juice. Stuff the creamy tuna salad into a whole wheat pita pocket along with crunchy lettuce leaves for a light yet satisfying sandwich option.

With these creative sandwich ideas at your disposal, you’ll never have to settle for a boring lunch again. Experiment with different flavours, textures, and ingredients to create your own signature sandwiches that will keep you coming back for more.

Discover more delicious recipes at voce-armena.info!


9 Creative Tips for Crafting Delicious Sandwiches

  1. Try different types of bread like wholemeal, sourdough, or baguette for variety.
  2. Mix and match fillings such as meats, cheeses, vegetables, and spreads to create unique combinations.
  3. Consider adding texture with ingredients like crispy lettuce, crunchy pickles, or toasted nuts.
  4. Experiment with condiments like mustard, mayonnaise, pesto, or hummus for added flavour.
  5. Layer ingredients strategically to prevent the sandwich from becoming soggy too quickly.
  6. Don’t forget to season your fillings with salt, pepper, herbs or spices to enhance the taste.
  7. Cut sandwiches into different shapes like triangles or squares for a fun presentation.
  8. Wrap sandwiches tightly in parchment paper or foil to keep them fresh if you’re taking them on-the-go.
  9. Get creative with leftovers by turning them into delicious sandwich fillings instead of letting them go to waste.

Try different types of bread like wholemeal, sourdough, or baguette for variety.

For those looking to elevate their sandwich game, a simple yet effective tip is to experiment with different types of bread. Opting for wholemeal for a nutty flavour and added fibre, sourdough for its tangy taste and chewy texture, or a crusty baguette for a satisfying crunch can truly transform the overall sandwich experience. The choice of bread can complement the fillings and enhance the flavours, offering a delightful variety to your lunchtime routine.

Mix and match fillings such as meats, cheeses, vegetables, and spreads to create unique combinations.

To elevate your sandwich game, a key tip is to mix and match fillings like meats, cheeses, vegetables, and spreads to craft distinctive and mouth-watering combinations. By experimenting with various ingredients, you can create sandwiches that are not only delicious but also reflect your personal taste preferences. Whether you prefer classic pairings or bold flavour fusions, the possibilities are endless when you embrace the art of combining different elements to achieve a truly unique culinary experience.

Consider adding texture with ingredients like crispy lettuce, crunchy pickles, or toasted nuts.

To elevate your sandwich game, think about incorporating a variety of textures into your creations. Adding crispy lettuce, crunchy pickles, or toasted nuts not only enhances the overall mouthfeel of the sandwich but also brings a delightful contrast to each bite. The crunchiness of these ingredients can complement softer fillings and bread, providing a satisfying and dynamic eating experience that will leave your taste buds wanting more. Experimenting with different textures is a simple yet effective way to take your sandwiches to the next level.

Experiment with condiments like mustard, mayonnaise, pesto, or hummus for added flavour.

To elevate your sandwich game, don’t be afraid to get creative with condiments. Whether you prefer the tangy kick of mustard, the creamy richness of mayonnaise, the aromatic punch of pesto, or the earthy depth of hummus, experimenting with different condiments can add a whole new dimension of flavour to your sandwiches. From classic pairings to bold combinations, finding the perfect condiment for your sandwich can take your lunch experience to the next level.

Layer ingredients strategically to prevent the sandwich from becoming soggy too quickly.

To ensure your sandwich stays fresh and delicious for longer, it’s essential to layer the ingredients strategically. By placing moisture-rich components like tomatoes or pickles between layers of dry ingredients such as lettuce or cheese, you can prevent the bread from becoming soggy too quickly. This simple yet effective technique helps maintain the sandwich’s texture and flavour, allowing you to enjoy every bite without worrying about a mushy mess.

Don’t forget to season your fillings with salt, pepper, herbs or spices to enhance the taste.

Enhancing the taste of your sandwiches is as simple as seasoning your fillings with a touch of salt, pepper, herbs, or spices. These small additions can elevate the flavours of your ingredients and create a more dynamic and satisfying eating experience. Whether you’re adding a sprinkle of fresh herbs for a burst of freshness or a pinch of warming spices for an extra kick, don’t underestimate the power of seasoning to transform a basic sandwich into a culinary delight.

Cut sandwiches into different shapes like triangles or squares for a fun presentation.

Enhance the appeal of your sandwiches by incorporating a simple yet effective tip: cut them into various shapes such as triangles or squares. This playful presentation adds a touch of creativity to your meal, making it visually appealing and enjoyable for both children and adults alike. Whether you’re hosting a gathering or preparing a lunchbox, experimenting with different shapes can elevate the overall dining experience and bring a fun twist to your sandwich creations.

Wrap sandwiches tightly in parchment paper or foil to keep them fresh if you’re taking them on-the-go.

When preparing sandwiches for on-the-go enjoyment, a handy tip to ensure their freshness is to wrap them tightly in parchment paper or foil. This simple yet effective method helps to maintain the integrity of the sandwich, keeping it intact and delicious until you’re ready to savour it. Whether you’re heading to work, a picnic, or a day out exploring, securely wrapping your sandwiches will help preserve their flavours and textures for a satisfying meal anytime, anywhere.

Get creative with leftovers by turning them into delicious sandwich fillings instead of letting them go to waste.

Don’t let your leftovers go to waste – get creative by transforming them into mouth-watering sandwich fillings. Whether it’s last night’s roast chicken, grilled vegetables, or even a scoop of curry, repurposing leftovers for sandwiches adds a whole new dimension to your meal. By giving your leftovers a tasty makeover between two slices of bread, you not only reduce food waste but also treat yourself to a delightful and satisfying lunchtime experience. So next time you find yourself with leftover goodies in the fridge, consider reinventing them as sandwich fillings for a delicious and eco-friendly meal solution.