Easy Crockpot Chili Recipe for a Hearty, Hands-Off Dinner
crockpot chili recipe

Easy Crockpot Chilli Recipe

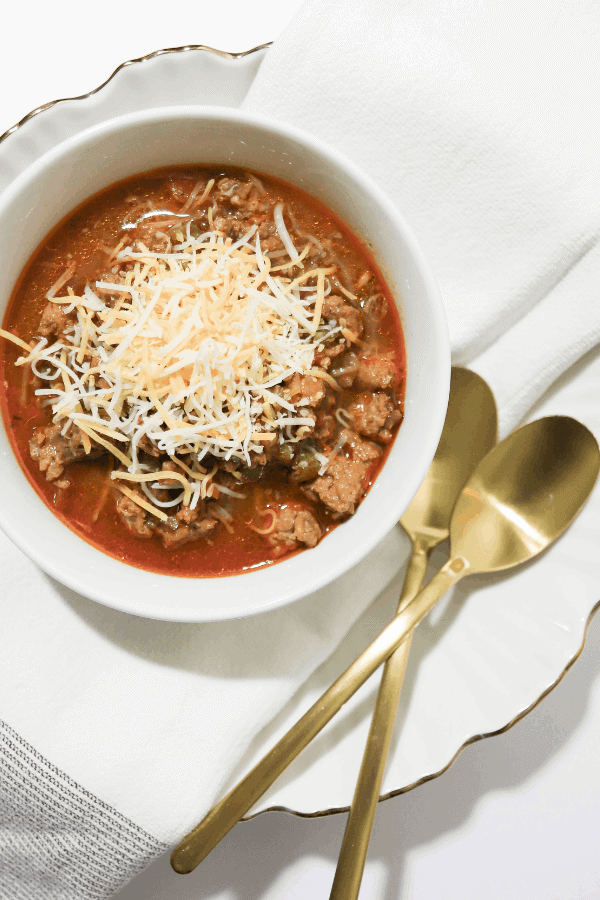
This hearty Crockpot chilli is ideal for a relaxed supper, a weekend gathering or a meal to prepare ahead. Let it cook slowly until the beef is tender and the flavours have had time to mingle. Serve it with rice, jacket potatoes, tortilla chips or warm bread.

Serves: 6

Preparation time: 20 minutes

Cooking time: 6–8 hours on low or 3–4 hours on high

Ingredients

  • 1 tablespoon vegetable oil
  • 500g beef mince
  • 1 large onion, finely chopped
  • 1 red pepper, diced
  • 2 garlic cloves, crushed
  • 2 tablespoons tomato purée
  • 2 teaspoons ground cumin
  • 2 teaspoons paprika
  • 1–2 teaspoons chilli powder, to taste
  • 1 teaspoon dried oregano
  • 400g tin chopped tomatoes
  • 400g tin kidney beans, drained and rinsed
  • 200ml beef stock
  • Salt and freshly ground black pepper

Method

  1. Brown the mince. Heat the oil in a frying pan over a medium-high heat. Add the beef mince and cook for 5–7 minutes, breaking it up with a wooden spoon, until browned. Drain off excess fat if needed.
  2. Soften the vegetables. Add the onion and red pepper to the pan and cook for 3–4 minutes. Stir in the garlic and tomato purée, then cook for another minute.
  3. Add the spices. Mix in the cumin, paprika, chilli powder and oregano. Season with a little salt and pepper.
  4. Fill the slow cooker. Transfer the mixture to the Crockpot. Add the chopped tomatoes, kidney beans and beef stock, then stir to combine.
  5. Cook slowly. Cover and cook on low for 6–8 hours or on high for 3–4 hours. Check the seasoning before serving.

Serving Suggestions

Serve the chilli with fluffy rice, baked potatoes or tortilla chips. Add toppings such as grated cheddar, a spoonful of soured cream, sliced spring onions, avocado or fresh coriander. For a lighter option, serve it with a crisp green salad.

Tips for the Best Slow Cooker Chilli

  • Brown the mince first. This adds flavour and helps prevent excess fat from collecting in the slow cooker.
  • Adjust the heat. Start with one teaspoon of chilli powder, then add more next time if you prefer a hotter chilli. You can also serve fresh chilli on the side.
  • Keep the lid on. Each time the lid is lifted, heat escapes and the cooking time can increase.
  • Thicken if needed. If the chilli is thinner than you would like, remove the lid for the final 20–30 minutes, if your slow cooker instructions allow. Alternatively, mash a few of the beans into the sauce.

Variations

For a meat-free version, replace the beef with extra beans, lentils or plant-based mince, and use vegetable stock. Black beans or pinto beans work well alongside kidney beans. You can also stir in sweetcorn during the final 30 minutes of cooking.

Storing and Reheating

Cool leftovers promptly and store them in a covered container in the fridge for up to three days. Reheat until piping hot, either in a saucepan or in the microwave, stirring well. The chilli can also be frozen in portions for up to three months; defrost it in the fridge before reheating.


Essential Tips and FAQs for Perfecting Your Crockpot Chilli Recipe

  1. Can I put raw beef in a crockpot for chili?
  2. Can you slow cook chili for 10 hours?
  3. Can you put raw mince in a slow cooker for chilli?
  4. Is Chilli better in crockpot or stove?
  5. Can chili cook on low for 8 hours?
  6. How to make chili in a slow cooker?
  7. What is the secret to really good chili?
  8. How do you make homemade chili taste better?

Can I put raw beef in a crockpot for chili?

Yes, you can put raw beef mince straight into a Crockpot when making chilli, provided it cooks fully and reaches a safe temperature. However, browning it in a pan first is recommended: it adds richer flavour, improves the texture and lets you drain away excess fat. If adding it raw, break the mince up well and make sure the slow cooker is not overfilled.

Can you slow cook chili for 10 hours?

Yes, chilli can usually be slow-cooked for 10 hours on the low setting, and the extra time can help the flavours develop. Check your slow cooker’s instructions, as temperatures vary, and make sure there is enough liquid to prevent the chilli becoming too thick. For the best texture, use beef mince that has been browned first and avoid cooking the beans for longer than necessary if you prefer them to hold their shape. Keep the lid on during cooking, and refrigerate any leftovers promptly.

Can you put raw mince in a slow cooker for chilli?

Yes, you can add raw mince straight to a slow cooker when making chilli, provided it cooks thoroughly and the appliance is used according to its instructions. However, browning the mince in a frying pan first is recommended: it adds flavour, breaks up clumps and lets you drain off excess fat before adding it to the slow cooker.

Is Chilli better in crockpot or stove?

Whether chilli is better in a crockpot or on the hob depends on your time and taste. A crockpot cooks it slowly and gently, giving the flavours plenty of time to develop while requiring little attention—ideal for a hands-off meal. Cooking chilli on the hob is quicker and makes it easier to adjust the seasoning or thicken the sauce as it simmers. Both methods can produce a delicious result, so choose the crockpot for convenience and the hob when you want more control.

Can chili cook on low for 8 hours?

Yes, chilli can usually cook on low for 8 hours in a slow cooker, and the extended cooking time helps the flavours develop. Make sure there is enough liquid to prevent it drying out, and keep the lid on while it cooks. Slow cookers vary, so check your manufacturer’s guidance and avoid leaving the chilli on a warm setting for too long once it is cooked.

How to make chili in a slow cooker?

To make chilli in a slow cooker, brown the mince in a frying pan first, then add it to the slow cooker with chopped onion, pepper, garlic, spices, chopped tomatoes, beans and stock. Stir everything together, cover and cook on low for 6–8 hours or on high for 3–4 hours, until rich and well flavoured. Taste and adjust the seasoning before serving with rice, jacket potatoes or your favourite toppings.

What is the secret to really good chili?

The secret to really good chilli is building layers of flavour and giving them time to develop. Brown the mince and soften the onions before adding them to the slow cooker, then toast the spices briefly to bring out their aroma. Use good-quality tomatoes and stock, season carefully, and let the chilli cook slowly so the flavours meld together. Taste before serving and adjust the seasoning or heat as needed; a splash of vinegar or a squeeze of lime can add a welcome final lift.

How do you make homemade chili taste better?

To make homemade chilli taste better, build flavour at every stage: brown the mince well, then cook the onion, pepper and garlic until softened before adding the spices and tomato purée. Let the spices toast briefly, and give the chilli plenty of time to cook slowly so the flavours can deepen. Taste before serving and adjust with salt, pepper and extra chilli; a small splash of Worcestershire sauce or a pinch of sugar can also balance the tomatoes. Finish with a squeeze of lime or a little fresh coriander, and add toppings such as grated cheese or soured cream for extra richness.

Classic Meat Pie Recipe: A Comforting British Favourite

meat pie recipe

Classic Beef and Ale Pie Recipe

A golden, crisp pastry crust filled with tender beef in a rich, savoury gravy makes this classic meat pie ideal for a comforting family meal. The filling can be prepared ahead, giving the flavours time to develop and making assembly straightforward.

Preparation and cooking time

  • Preparation: 25 minutes
  • Cooking: 2 hours 30 minutes
  • Serves: 6

Ingredients

  • 2 tbsp vegetable oil
  • 900g stewing beef, cut into bite-sized pieces
  • 2 tbsp plain flour, seasoned with salt and black pepper
  • 1 large onion, finely chopped
  • 2 carrots, peeled and diced
  • 2 celery sticks, diced
  • 2 tbsp tomato purée
  • 330ml ale or stout
  • 300ml beef stock
  • 1 tsp fresh thyme leaves, or ½ tsp dried thyme
  • 1 bay leaf
  • 1 sheet ready-rolled puff pastry, about 320g
  • 1 egg, beaten

Method

  1. Brown the beef: Toss the beef in the seasoned flour. Heat the oil in a large, heavy-based pan over a medium-high heat. Brown the beef in batches, then set it aside.
  2. Cook the vegetables: Add the onion, carrots and celery to the pan. Cook for 5–7 minutes, stirring occasionally, until softened. Stir in the tomato purée and cook for another minute.
  3. Make the filling: Pour in the ale and scrape the bottom of the pan to loosen any browned bits. Add the stock, thyme and bay leaf, then return the beef to the pan. Bring to a gentle simmer.
  4. Simmer until tender: Cover and cook gently for about 1 hour 45 minutes to 2 hours, stirring now and then, until the beef is tender and the gravy has thickened. Remove the bay leaf and leave the filling to cool. Taste and adjust the seasoning.
  5. Prepare the pie: Heat the oven to 200°C (180°C fan)/400°F/Gas Mark 6. Spoon the cooled filling into a pie dish. Lay the pastry over the top, trimming any excess. Press the edges to seal and make a small hole in the centre to let steam escape.
  6. Glaze and bake: Brush the pastry with beaten egg. Bake for 25–30 minutes, until puffed and golden. Leave to stand for 5 minutes before serving.

Tips for a great meat pie

  • Let the filling cool before adding the pastry; hot filling can make it soft and difficult to handle.
  • If the gravy is too thin, simmer the filling uncovered for a few minutes before cooling.
  • For a family-friendly version without alcohol, replace the ale with extra beef stock.
  • Serve with mashed potatoes, peas or seasonal greens.

This hearty beef pie is best served hot from the oven, when the pastry is crisp and the filling is rich and tender. Any leftovers can be cooled, covered and refrigerated, then reheated thoroughly before serving.


Top Tips for Perfect Meat Pies: Best Cuts, Baking Advice, and More

  1. What cut of meat is best for a meat pie?
  2. How do you stop the pastry from getting soggy?
  3. Can you make a meat pie ahead of time?
  4. How long should you bake a meat pie?
  5. Can you freeze a meat pie?

What cut of meat is best for a meat pie?

For a tender, flavourful meat pie, choose a well-marbled cut that becomes soft during slow cooking, such as beef chuck, braising steak or shin. These cuts develop a rich flavour and make a succulent filling when simmered gently until tender. For a quicker pie, use leftover roast meat, but take care not to overcook it, as it may become dry.

How do you stop the pastry from getting soggy?

To help keep the pastry crisp, let the meat filling cool completely before assembling the pie, and make sure the gravy is thick rather than watery. Avoid overfilling, cut a small steam vent in the pastry, and bake the pie in a fully preheated oven. If the filling is particularly moist, try brushing the base with beaten egg and letting it dry briefly before adding the filling.

Can you make a meat pie ahead of time?

Yes, you can make a meat pie ahead of time. Prepare and cook the filling, then let it cool completely before assembling the pie. Cover and refrigerate it for up to two days, or freeze it for longer storage. For the best pastry, add it just before baking; if the pie is already assembled, keep it covered in the fridge and bake within a day, adding a little extra time if it goes into the oven cold.

How long should you bake a meat pie?

Bake a meat pie in a preheated oven at 200°C (180°C fan)/400°F/Gas Mark 6 for around 25–30 minutes, or until the pastry is risen and golden and the filling is piping hot. If the filling is already hot when assembled, it may need less time; a pie made with cold filling may take a little longer. Follow the pastry packet instructions where available, and cover the top loosely with foil if it browns too quickly.

Can you freeze a meat pie?

Yes, you can freeze a meat pie. For the best results, freeze it before baking: assemble the pie, wrap it well and freeze for up to three months. Bake from frozen, adding extra cooking time and covering the pastry with foil if it browns too quickly; make sure the filling is piping hot all the way through before serving. You can also freeze a baked pie once it has cooled completely. Wrap it securely, thaw it in the fridge and reheat thoroughly in the oven.

Easy Swiss Steak Recipe: Tender Beef in Rich Tomato Gravy

swiss steak recipe

Swiss Steak Recipe

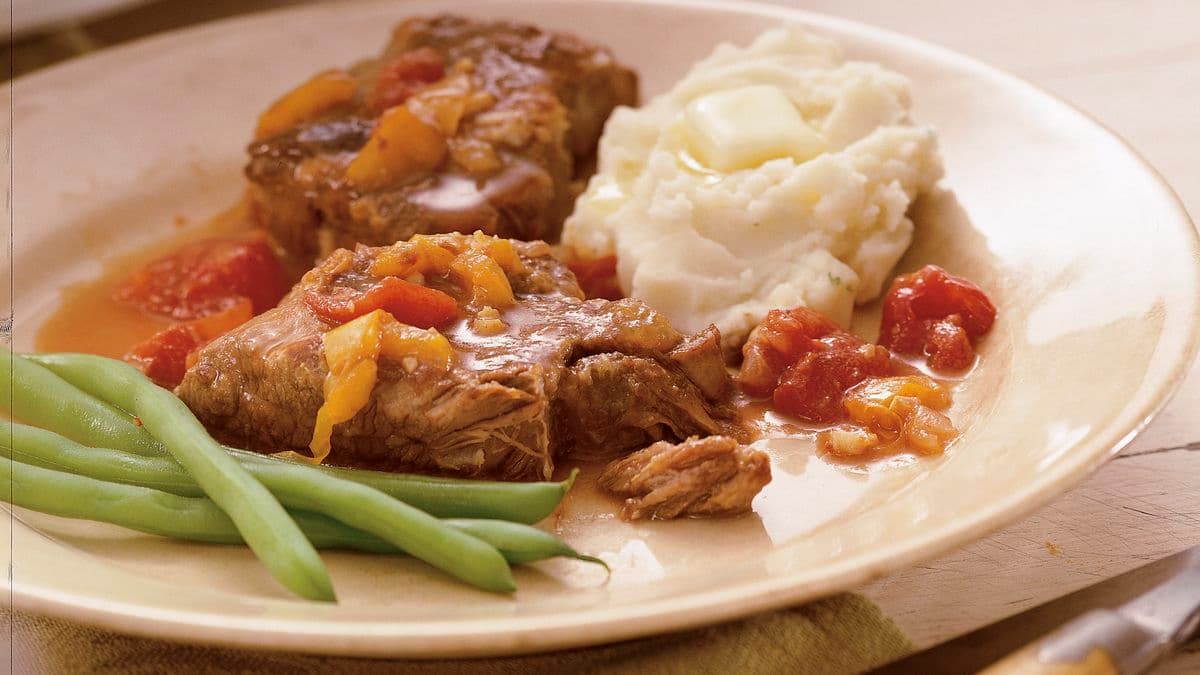
Swiss steak is a comforting dish of tenderised beef slowly braised in a rich tomato and vegetable sauce. Despite its name, it is not a Swiss dish: “swissing” refers to a method of tenderising meat by pounding or rolling it. This straightforward version uses braising steak and a gentle oven cook to create a hearty meal with plenty of savoury gravy.

Serves and preparation time

Serves: 4

Preparation: 20 minutes

Cooking: 2–2½ hours

Ingredients

  • 700g braising steak, cut into 4 portions
  • 3 tablespoons plain flour
  • 1 teaspoon paprika
  • ½ teaspoon salt, plus extra to taste
  • ¼ teaspoon black pepper
  • 2 tablespoons vegetable oil
  • 1 large onion, thinly sliced
  • 1 green pepper, sliced
  • 2 carrots, peeled and diced
  • 2 garlic cloves, finely chopped
  • 400g tin chopped tomatoes
  • 250ml beef stock
  • 1 tablespoon Worcestershire sauce
  • 1 teaspoon dried thyme

Method

  1. Heat the oven to 160°C (140°C fan, Gas Mark 3).
  2. Mix the flour, paprika, salt and pepper on a plate. Lightly coat each piece of beef, then use a meat mallet or rolling pin to gently pound the flour into the meat. If the steak is already cut thinly, simply coat it in the seasoned flour.
  3. Heat the oil in a large, ovenproof casserole over a medium-high heat. Brown the beef in batches for 2–3 minutes on each side, adding a little more oil if needed. Transfer the browned pieces to a plate.
  4. Add the onion, pepper and carrots to the casserole. Cook for about 5 minutes, stirring, until they begin to soften. Stir in the garlic and cook for 30 seconds.
  5. Add the tomatoes, beef stock, Worcestershire sauce and thyme. Scrape the bottom of the casserole to loosen any browned bits, then return the beef and any juices to the pan. The liquid should mostly cover the meat; add a splash of water or stock if necessary.
  6. Bring the sauce to a gentle simmer. Cover the casserole and transfer it to the oven. Cook for 2–2½ hours, or until the beef is very tender. Check occasionally and add a little liquid if the sauce becomes too thick.
  7. Taste the sauce and adjust the seasoning before serving.

What to serve with Swiss steak

Serve Swiss steak with mashed potatoes, rice or buttered noodles to soak up the tomato gravy. Steamed green beans, cabbage or a simple green salad make good accompaniments.

Tips for tender, flavourful steak

  • Choose the right cut: Braising steak, such as chuck or blade, becomes tender during slow cooking and gives the sauce a full flavour.
  • Brown the beef well: A good sear adds depth to the finished sauce. Avoid crowding the pan; brown the meat in batches.
  • Keep the heat gentle: A slow, covered cook helps break down the tougher fibres. The sauce should simmer gently rather than boil hard.
  • Make it ahead: The flavour often improves after a night in the fridge. Cool leftovers promptly, refrigerate in a covered container and reheat thoroughly.


Deliciously Tender Swiss Steak: A Comforting and Versatile Recipe for Easy, Make-Ahead Meals

  1. Tender, slow-cooked beef
  2. Rich, savoury tomato gravy
  3. Simple, familiar ingredients
  4. Easy oven-braising method
  5. Great for make-ahead meals
  6. Comforting and filling
  7. Pairs well with mash or rice
  8. Easy to adapt with extra vegetables


Challenges of Preparing Traditional Swiss Steak: Time, Ingredients, and Taste Considerations

  1. Requires a long, slow cooking time.
  2. Needs a suitable cut of braising steak.
  3. Can be too rich for some tastes.
  4. Uses several ingredients and steps.

Tender, slow-cooked beef

Slow cooking is what makes Swiss steak so wonderfully tender. As the beef gently braises in the tomato-rich sauce, its tougher fibres gradually soften, leaving each piece succulent and easy to cut. The meat also absorbs the savoury flavours of the vegetables, herbs and stock, making every bite comforting and full of flavour.

Rich, savoury tomato gravy

The rich, savoury tomato gravy is one of the best things about Swiss steak. As the beef slowly braises, its juices mingle with the tomatoes, vegetables and herbs to create a deeply flavoured sauce that is both comforting and satisfying. Spoon it generously over the tender steak, mashed potatoes, rice or noodles to make the most of every drop.

Simple, familiar ingredients

Swiss steak is made with simple, familiar ingredients that are easy to find in most supermarkets, such as braising steak, onions, carrots, tinned tomatoes and stock. There is no need for specialist equipment or hard-to-source seasonings, making it an approachable recipe for a cosy midweek dinner or a relaxed weekend meal.

Easy oven-braising method

The oven-braising method makes Swiss steak easy to prepare: once the beef has been browned and the sauce assembled, simply cover the casserole and let it cook gently in the oven. The steady, even heat helps tenderise the meat and develop a rich sauce, while requiring little attention—leaving you free to prepare the rest of the meal.

Great for make-ahead meals

Swiss steak is ideal for make-ahead meals because its flavour deepens as it rests. Cook it a day in advance, let it cool, then cover and refrigerate. When you’re ready to eat, reheat it gently on the hob or in the oven until piping hot, adding a splash of stock or water if the sauce has thickened. It’s a convenient, comforting dinner for busy evenings.

Comforting and filling

Swiss steak is the kind of comforting, filling meal that feels right at the end of a long day. Slowly braised beef becomes tender and satisfying, while the rich tomato and vegetable sauce adds plenty of flavour. Serve it with mashed potatoes, rice or buttered noodles to make the most of the hearty gravy and turn this simple recipe into a nourishing family supper.

Pairs well with mash or rice

Swiss steak pairs beautifully with creamy mashed potatoes or fluffy rice, both of which soak up its rich tomato gravy. Choose mash for a comforting, hearty meal, or rice for a simple alternative that lets the tender beef and savoury sauce take centre stage.

Easy to adapt with extra vegetables

Swiss steak is easy to adapt with extra vegetables, making it a handy way to use what you have in the fridge. Add sliced mushrooms, celery, courgette or extra peppers to the pan, adjusting the quantity to suit your taste. Heartier vegetables can go in with the onions and carrots, while softer ones are best added later so they keep their shape. The vegetables cook slowly in the tomato and beef juices, adding colour, flavour and texture to the dish.

Requires a long, slow cooking time.

One drawback of Swiss steak is the long, slow cooking time. The beef needs to braise for around two to two and a half hours to become tender, so it is not the best choice when you need a quick meal. You’ll need to plan ahead, although most of the cooking is hands-off.

Needs a suitable cut of braising steak.

One drawback of Swiss steak is that it needs a suitable cut of braising steak, such as chuck or blade, to become tender during the long, slow cooking. Leaner or quicker-cooking cuts may turn dry or tough, while the right cut can sometimes be harder to find or more expensive.

Can be too rich for some tastes.

Swiss steak’s slow-cooked beef and rich tomato gravy can feel quite heavy, particularly when served with mashed potatoes or other hearty sides. If you prefer lighter flavours, use a leaner cut of beef, skim excess fat from the sauce and serve it with steamed vegetables or a crisp salad. Adding a little extra tomato or stock can also help balance the richness.

Uses several ingredients and steps.

One drawback of Swiss steak is that it takes several ingredients and steps to prepare. You’ll need to season and tenderise the beef, brown it, cook the vegetables and make the sauce before leaving everything to braise slowly. It’s not especially difficult, but it can feel time-consuming if you’re looking for a quick meal or a recipe with minimal washing-up.

Chuck Roast Recipes: Three Comforting Ways to Cook a Flavourful Cut

chuck roast recipes

Chuck Roast Recipes: Three Comforting Ways to Cook This Flavourful Cut

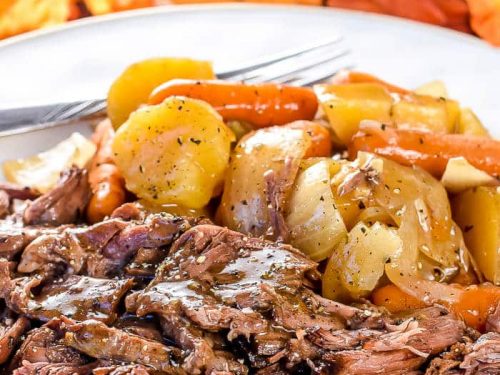
Chuck roast is a well-marbled cut of beef from the shoulder. It can be a little tough when cooked quickly, but long, gentle cooking breaks down its connective tissue and makes the meat tender, rich and full of flavour. That makes it ideal for Sunday lunch, slow-cooker suppers and dishes that can be prepared ahead.

For the best results, brown the beef before braising, keep it moist and cook it until a fork slides easily into the meat. The recipes below offer three simple ways to enjoy chuck roast: a classic pot roast, slow-cooked shredded beef and a warming red-wine braise.

Classic Chuck Roast Pot Roast

This traditional one-pot meal combines tender beef with potatoes, carrots and a savoury cooking liquid. Serve it straight from the casserole dish, with the juices spooned over the top.

Ingredients

  • 1.5 kg chuck roast
  • Salt and freshly ground black pepper
  • 2 tablespoons vegetable oil
  • 1 large onion, cut into wedges
  • 2 tablespoons plain flour
  • 2 tablespoons tomato purée
  • 500 ml beef stock
  • 2 sprigs of fresh thyme
  • 2 bay leaves
  • 500 g waxy potatoes, halved if large
  • 300 g carrots, cut into thick chunks

Method

  1. Heat the oven to 160°C, or 140°C fan. Pat the beef dry and season it generously with salt and pepper.
  2. Heat the oil in a large, ovenproof casserole over a medium-high heat. Brown the beef on all sides, then transfer it to a plate.
  3. Add the onion to the casserole and cook for 3–4 minutes. Stir in the flour and tomato purée, then gradually pour in the stock, scraping up any browned bits from the base.
  4. Return the beef to the casserole. Add the thyme and bay leaves. The liquid should come about halfway up the meat; add a little water if needed.
  5. Cover and cook in the oven for 2½ hours. Add the potatoes and carrots, then cook for a further 60–90 minutes, until the beef is very tender and the vegetables are cooked through.
  6. Remove the herbs and let the roast rest for 10 minutes before slicing or pulling it apart. Spoon over the cooking juices to serve.

Slow-Cooker Shredded Chuck Roast

Shredded beef is a versatile option for sandwiches, tacos, baked potatoes or rice bowls. A slow cooker keeps the preparation straightforward: brown the meat first for extra flavour, then let it cook gently until it falls apart.

Ingredients

  • 1.5 kg chuck roast
  • Salt and freshly ground black pepper
  • 1 tablespoon vegetable oil
  • 1 onion, finely sliced
  • 250 ml beef stock
  • 2 tablespoons Worcestershire sauce
  • 1 tablespoon tomato purée
  • 1 teaspoon smoked paprika
  • 1 teaspoon dried oregano

Method

  1. Season the beef with salt and pepper. Heat the oil in a frying pan and brown the joint on all sides.
  2. Put the onion in the slow cooker and place the beef on top. Whisk together the stock, Worcestershire sauce, tomato purée, smoked paprika and oregano, then pour the mixture around the meat.
  3. Cover and cook on low for 8–10 hours or on high for 4–6 hours, until the beef is tender enough to shred easily.
  4. Transfer the beef to a board and shred it with two forks. Stir it back into the cooking juices and taste for seasoning.

Serve the shredded beef in soft rolls with coleslaw, or spoon it into warm tortillas with salsa and fresh coriander. Refrigerate leftovers promptly and use them within three days.

Chuck Roast Braised with Red Wine

Red wine, stock and aromatic vegetables create a deeply savoury sauce in this slow-braised version. It works well for a relaxed dinner with mashed potatoes or crusty bread.

Ingredients

  • 1.5 kg chuck roast
  • Salt and freshly ground black pepper
  • 2 tablespoons olive oil
  • 1 onion, chopped
  • 2 carrots, chopped
  • 2 celery sticks, chopped
  • 2 tablespoons plain flour
  • 300 ml dry red wine
  • 300 ml beef stock
  • 2 sprigs of rosemary
  • 2 bay leaves

Method

  1. Heat the oven to 160°C, or 140°C fan. Season the beef. Warm the olive oil in a heavy casserole and brown the meat thoroughly on all sides. Set aside.
  2. Add the onion, carrots and celery to the casserole and cook for about 5 minutes, stirring occasionally. Sprinkle over the flour and stir for 1 minute.
  3. Pour in the wine a little at a time, scraping the base of the pan. Add the stock, rosemary and bay leaves, then return the beef to the casserole.
  4. Cover and braise for 3–3½ hours, turning the beef once, until it is tender. If the sauce seems thin, remove the meat when cooked and simmer the liquid uncovered until it reaches the consistency you like.
  5. Rest the beef for 10 minutes, then slice or pull it into pieces. Serve with the sauce and your choice of potatoes or bread.

Tips for Tender Chuck Roast

  • Brown the meat well. A deep brown crust adds flavour to both the beef and the cooking liquid.
  • Cook it gently. Chuck roast is best suited to low, slow cooking rather than a quick, high-temperature roast.
  • Allow enough time. The beef is ready when it is tender throughout, not simply when it reaches a particular cooking time. Larger or thicker joints may need longer.
  • Keep some liquid in the pot. Braising does not require the meat to be fully submerged, but there should be enough liquid to create steam and prevent the base from drying out.
  • Rest before serving. A short rest makes the meat easier to carve and gives the juices time to settle.

Whether you choose a classic pot roast, convenient slow-cooker beef or a wine-rich braise, chuck roast rewards patient cooking. Make a little extra and the leftovers can become sandwiches, pies or a quick meal tossed through pasta the next day.


Frequently Asked Questions About Cooking Chuck Roast: Tips and Techniques for Tender, Delicious Meals

  1. What is chuck roast called in the UK?
  2. What is the best way to cook chuck roast so it becomes tender?
  3. How long should chuck roast cook in the oven?
  4. Can you cook chuck roast in a slow cooker?
  5. Should chuck roast be seared before slow cooking or braising?
  6. What temperature should chuck roast reach to become fall-apart tender?
  7. What can you serve with chuck roast?

What is chuck roast called in the UK?

In the UK, “chuck roast” is not a widely used name for a standard supermarket cut. The closest equivalent is usually beef chuck or shoulder of beef; for a slow-cooked joint, ask a butcher for a boneless beef shoulder suitable for braising. “Braising steak” comes from a similar area, but it is often sold in slices or pieces rather than as a roasting joint.

What is the best way to cook chuck roast so it becomes tender?

The best way to make chuck roast tender is to cook it slowly with a little liquid, using a covered casserole in a low oven or a slow cooker. First, pat the beef dry and brown it on all sides to build flavour. Add stock or another braising liquid, cover and cook gently until the meat is fork-tender and easy to pull apart—usually around 3–4 hours in a low oven, or 8–10 hours on a slow-cooker’s low setting, depending on the size of the joint. Avoid rushing the cooking: chuck contains connective tissue that needs time to soften.

How long should chuck roast cook in the oven?

Chuck roast is best cooked slowly in a covered casserole at 160°C (140°C fan) for around 3–4 hours, depending on the size and thickness of the joint. Add enough stock or other braising liquid to keep the meat moist, and check that it is fork-tender before serving; if it still feels firm, return it to the oven and continue cooking in 30-minute intervals.

Can you cook chuck roast in a slow cooker?

Yes, chuck roast is ideal for a slow cooker. Its marbling and connective tissue break down during long, gentle cooking, leaving the beef tender and easy to pull apart. For extra flavour, brown the joint in a hot pan first, then add it to the slow cooker with a little stock, seasoning and any vegetables or herbs you like. Cook on low for around 8–10 hours or on high for 4–6 hours, until the meat is fork-tender; timings can vary depending on the size of the joint and your appliance.

Should chuck roast be seared before slow cooking or braising?

Searing chuck roast before slow cooking or braising is recommended, though not essential. Browning the meat in a hot pan develops a rich, savoury crust that adds depth to the finished dish and its cooking liquid. Pat the roast dry first, season it, then sear it on all sides; transfer it to the slow cooker or braising pot and continue with the recipe. If you’re short on time, you can skip this step—the beef will still become tender when cooked slowly, but the flavour may be less complex.

What temperature should chuck roast reach to become fall-apart tender?

For chuck roast to become fall-apart tender, aim for an internal temperature of about 90–96°C. At this range, the connective tissue has had time to break down, although cooking time and the size of the joint also matter. Rather than relying on temperature alone, check that a fork or probe slides into the meat easily; if it still feels firm, continue cooking gently and check again.

What can you serve with chuck roast?

Chuck roast pairs well with sides that soak up its rich, savoury juices. Try mashed potatoes, roast potatoes, buttered noodles or crusty bread, alongside vegetables such as carrots, green beans, peas or cabbage. For a lighter balance, serve it with a crisp green salad. If the roast is cooked with potatoes and carrots, add a simple extra side such as steamed greens or bread.

Traditional Shepherd’s Pie Recipe: A Taste of British Comfort

shepherd's pie recipe

The Classic Shepherd’s Pie Recipe

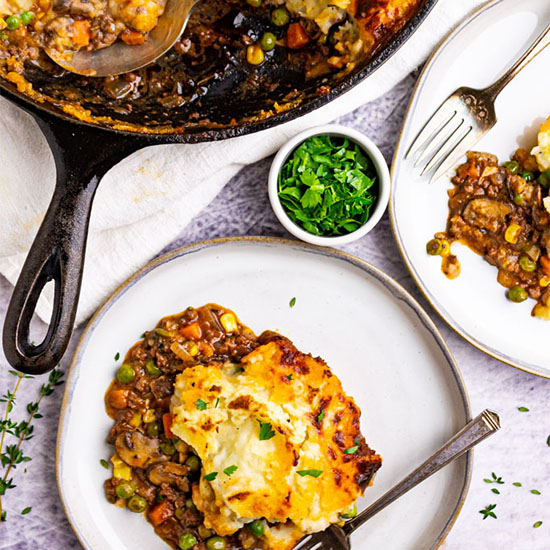
Shepherd’s Pie is a comforting and hearty dish that has been a favourite in British households for generations. Made with minced lamb or beef, topped with creamy mashed potatoes, this dish is the epitome of comfort food.

Ingredients:

  • 500g minced lamb or beef
  • 1 onion, finely chopped
  • 2 carrots, diced
  • 2 cloves of garlic, minced
  • 400g tin of chopped tomatoes
  • 200ml beef stock
  • 1 tbsp Worcestershire sauce
  • Salt and pepper to taste
  • 900g potatoes, peeled and chopped
  • 50g butter
  • 100ml milk

Instructions:

  1. In a large pan, brown the minced meat over medium heat. Add the onions, carrots, and garlic, and cook until softened.
  2. Pour in the chopped tomatoes and beef stock. Add Worcestershire sauce, salt, and pepper. Simmer for 20-30 minutes until the mixture thickens.


Five Essential Tips for the Perfect Shepherd’s Pie

  1. Use minced lamb for a traditional shepherd’s pie flavour.
  2. Add Worcestershire sauce for an extra depth of flavour.
  3. Top the pie with creamy mashed potatoes for a comforting finish.
  4. Include finely chopped carrots and peas in the filling for added texture and nutrients.
  5. Bake the shepherd’s pie until the top is golden brown and crispy.

Use minced lamb for a traditional shepherd’s pie flavour.

For an authentic and traditional taste in your shepherd’s pie, opt for minced lamb as the key ingredient. Minced lamb brings a rich and distinctive flavour that is synonymous with classic shepherd’s pie recipes. The unique savour of lamb adds depth to the dish, enhancing its overall appeal and making each bite a delightful experience. Choose minced lamb to capture the true essence of this beloved British comfort food.

Add Worcestershire sauce for an extra depth of flavour.

For an extra depth of flavour in your Shepherd’s Pie, consider adding Worcestershire sauce to the meat mixture. This classic condiment enhances the savoury profile of the dish, adding a rich and tangy note that complements the minced lamb or beef perfectly. Just a tablespoon of Worcestershire sauce can elevate the overall taste and make your Shepherd’s Pie even more delicious and satisfying.

Top the pie with creamy mashed potatoes for a comforting finish.

To enhance the comforting appeal of your shepherd’s pie, ensure to top it with a generous layer of creamy mashed potatoes. This final touch not only adds a velvety texture to the dish but also creates a satisfying and homely finish that perfectly complements the savoury meat filling. The creamy mashed potatoes provide a delightful contrast to the rich flavours below, making each bite a truly comforting experience.

Include finely chopped carrots and peas in the filling for added texture and nutrients.

For an extra layer of texture and nutrients in your shepherd’s pie, consider adding finely chopped carrots and peas to the filling. Not only do these colourful vegetables enhance the visual appeal of the dish, but they also provide a boost of vitamins and fibre. The carrots add a subtle sweetness, while the peas contribute a pop of freshness, creating a well-balanced and wholesome filling that complements the savoury meat perfectly.

Bake the shepherd’s pie until the top is golden brown and crispy.

For a perfect finishing touch to your shepherd’s pie, bake it in the oven until the top is beautifully golden brown and crispy. This not only adds a delightful crunch to each bite but also enhances the visual appeal of the dish. The contrast between the creamy mashed potatoes and the crispy top creates a textural sensation that will have your taste buds dancing with joy. Be sure to keep an eye on it while baking to achieve that ideal balance of crispiness without burning.

Hearty Oxtail Recipe: A Delicious Dish to Savour

oxtail recipe

The Perfect Oxtail Recipe: A Hearty and Delicious Dish

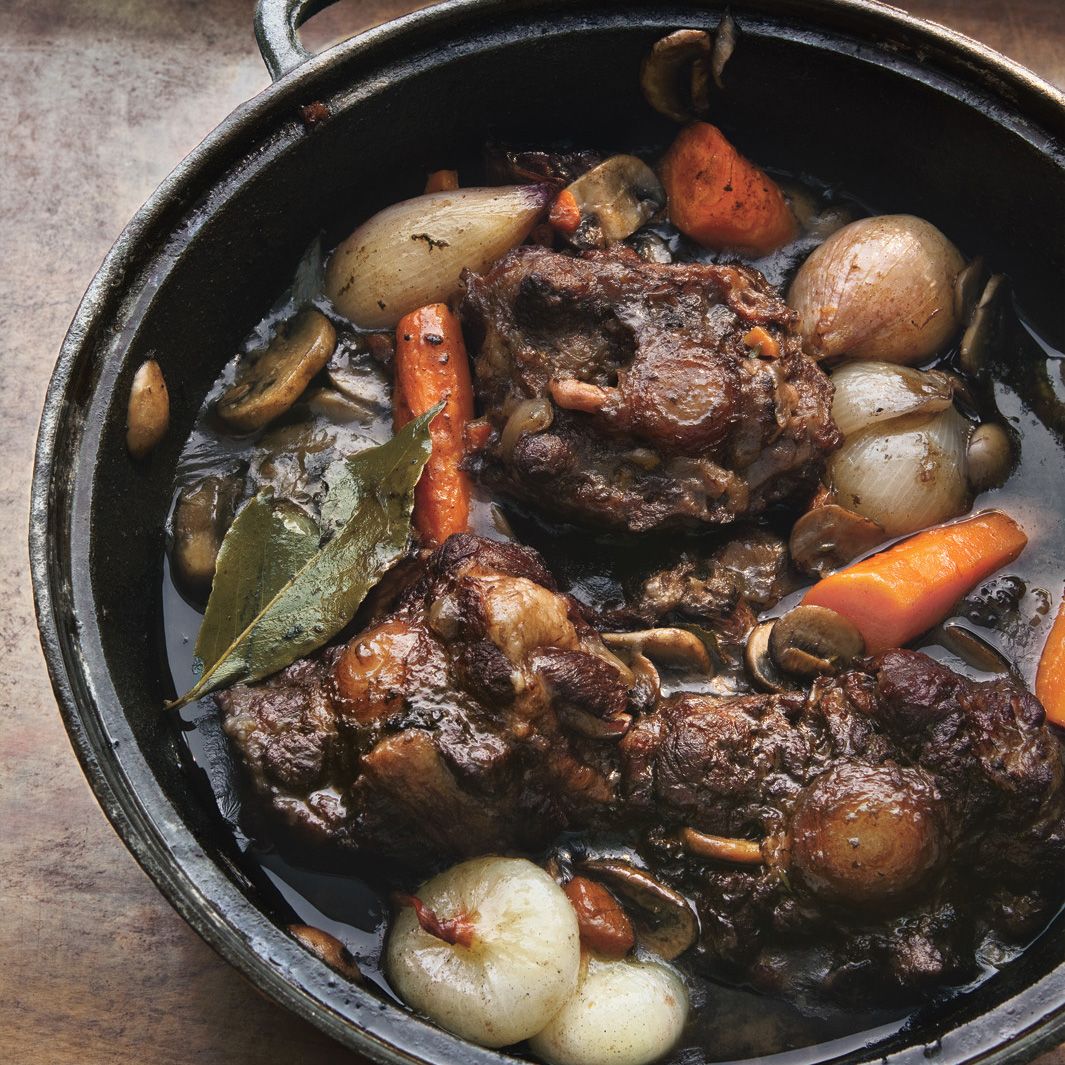
Oxtail is a cut of beef that is known for its rich, flavourful meat. When cooked properly, oxtail becomes tender and succulent, making it a popular choice for hearty stews and braised dishes. Here, we present a delicious oxtail recipe that will surely impress your family and friends.

Ingredients:

  • 2 kg oxtail pieces
  • 2 onions, chopped
  • 3 carrots, sliced
  • 3 celery sticks, chopped
  • 4 cloves of garlic, minced
  • 2 bay leaves
  • 1 sprig of thyme
  • 500ml beef stock
  • 400g chopped tomatoes
  • Salt and pepper to taste
  • Olive oil for cooking

Instructions:

  1. Season the oxtail pieces with salt and pepper.
  2. In a large pot, heat some olive oil over medium-high heat. Brown the oxtail pieces on all sides until they are nicely seared. Remove the oxtail from the pot and set aside.
  3. In the same pot, add the onions, carrots, celery, and garlic. Cook until the vegetables are softened.
  4. Return the oxtail to the pot and add the bay leaves, thyme, beef stock, and chopped tomatoes. Bring to a simmer.


  5. Cover the pot with a lid and let it simmer gently for about 3-4 hours or until the oxtail is tender.


  6. Taste and adjust seasoning with salt and pepper as needed.


  7. Serve the oxtail hot with your choice of side dishes such as mashed potatoes or crusty bread.


This oxtail recipe is perfect for a cosy night in or a special occasion. The slow cooking process allows the flavours to develop beautifully, resulting in a dish that is both comforting and impressive. Try this recipe today and savour the deliciousness of tender oxtail stew!


Top 6 FAQs About Cooking and Enjoying Oxtail

  1. Why does my stomach hurt after eating oxtail?
  2. How to make simple oxtail stew?
  3. What do you soak oxtails in before cooking?
  4. How does it take to cook oxtail?
  5. What’s the best way to cook an oxtail?
  6. What kind of meat is oxtail?

Why does my stomach hurt after eating oxtail?

If you experience stomach discomfort after eating oxtail, it may be due to the richness and fattiness of the meat. Oxtail is a cut known for its high fat content, which can be heavy on the digestive system for some individuals. To reduce the likelihood of stomach issues, it is advisable to consume oxtail in moderation and pair it with lighter side dishes that can help balance out the richness of the meat. Additionally, ensuring that the oxtail is cooked thoroughly and properly may also aid in easier digestion. If stomach discomfort persists, it is recommended to consult a healthcare professional for personalised advice and guidance.

How to make simple oxtail stew?

For those seeking a straightforward and delicious oxtail dish, making a simple oxtail stew is the perfect choice. To create this hearty stew, start by browning seasoned oxtail pieces in a pot. Then, sauté onions, carrots, celery, and garlic until softened before adding the oxtail back to the pot along with bay leaves, thyme, beef stock, and chopped tomatoes. Let the stew simmer gently for a few hours until the oxtail becomes tender and flavourful. Adjust seasoning to taste and serve hot with your preferred accompaniments for a comforting meal that is sure to satisfy.

What do you soak oxtails in before cooking?

Before cooking oxtails, it is common practice to soak them in cold water for at least 1-2 hours. This soaking process helps to remove any excess blood or impurities from the meat, resulting in a cleaner and clearer broth or sauce when cooking. Some people also add a splash of vinegar or lemon juice to the soaking water to further aid in the cleansing process. By taking the time to soak oxtails before cooking, you can ensure that your final dish is not only delicious but also free from any unwanted flavors or textures.

How does it take to cook oxtail?

Cooking oxtail requires patience and time to achieve the desired tenderness and flavour. Typically, oxtail needs to be cooked slowly over a low heat for an extended period to allow the tough meat to become tender and succulent. On average, oxtail can take around 3-4 hours of simmering to reach the perfect consistency. This slow cooking process allows the meat to absorb the flavours of the seasonings and ingredients in the dish, resulting in a rich and delicious final product that is well worth the wait.

What’s the best way to cook an oxtail?

When it comes to cooking oxtail, the best way to achieve tender, flavourful meat is through slow braising or stewing. This method allows the tough connective tissues in the oxtail to break down slowly, resulting in a melt-in-your-mouth texture and rich taste. By searing the oxtail first to enhance its flavour and then simmering it with aromatic vegetables, herbs, and liquids over low heat for several hours, you can create a delicious dish that showcases the unique qualities of this cut of beef. Patience is key when cooking oxtail, as allowing it to cook slowly and gently will yield the best results in terms of both texture and taste.

What kind of meat is oxtail?

Oxtail is a flavoursome and gelatin-rich meat that comes from the tail of cattle. Despite its name, oxtail does not necessarily come from oxen but can be sourced from various types of beef cattle. The meat is prized for its rich flavour and tender texture when cooked slowly, making it a popular choice for hearty stews and braised dishes. Oxtail is often used in traditional recipes around the world, adding depth and complexity to dishes with its unique taste and succulent quality.