Easy Crockpot Chili Recipe for a Hearty, Hands-Off Dinner
crockpot chili recipe

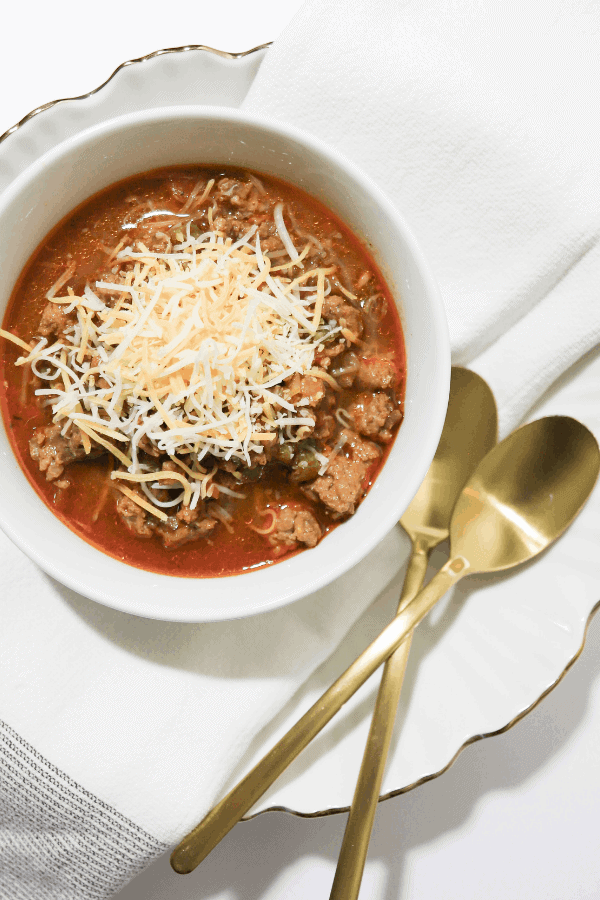
Easy Crockpot Chilli Recipe

This hearty Crockpot chilli is ideal for a relaxed supper, a weekend gathering or a meal to prepare ahead. Let it cook slowly until the beef is tender and the flavours have had time to mingle. Serve it with rice, jacket potatoes, tortilla chips or warm bread.

Serves: 6

Preparation time: 20 minutes

Cooking time: 6–8 hours on low or 3–4 hours on high

Ingredients

  • 1 tablespoon vegetable oil
  • 500g beef mince
  • 1 large onion, finely chopped
  • 1 red pepper, diced
  • 2 garlic cloves, crushed
  • 2 tablespoons tomato purée
  • 2 teaspoons ground cumin
  • 2 teaspoons paprika
  • 1–2 teaspoons chilli powder, to taste
  • 1 teaspoon dried oregano
  • 400g tin chopped tomatoes
  • 400g tin kidney beans, drained and rinsed
  • 200ml beef stock
  • Salt and freshly ground black pepper

Method

  1. Brown the mince. Heat the oil in a frying pan over a medium-high heat. Add the beef mince and cook for 5–7 minutes, breaking it up with a wooden spoon, until browned. Drain off excess fat if needed.
  2. Soften the vegetables. Add the onion and red pepper to the pan and cook for 3–4 minutes. Stir in the garlic and tomato purée, then cook for another minute.
  3. Add the spices. Mix in the cumin, paprika, chilli powder and oregano. Season with a little salt and pepper.
  4. Fill the slow cooker. Transfer the mixture to the Crockpot. Add the chopped tomatoes, kidney beans and beef stock, then stir to combine.
  5. Cook slowly. Cover and cook on low for 6–8 hours or on high for 3–4 hours. Check the seasoning before serving.

Serving Suggestions

Serve the chilli with fluffy rice, baked potatoes or tortilla chips. Add toppings such as grated cheddar, a spoonful of soured cream, sliced spring onions, avocado or fresh coriander. For a lighter option, serve it with a crisp green salad.

Tips for the Best Slow Cooker Chilli

  • Brown the mince first. This adds flavour and helps prevent excess fat from collecting in the slow cooker.
  • Adjust the heat. Start with one teaspoon of chilli powder, then add more next time if you prefer a hotter chilli. You can also serve fresh chilli on the side.
  • Keep the lid on. Each time the lid is lifted, heat escapes and the cooking time can increase.
  • Thicken if needed. If the chilli is thinner than you would like, remove the lid for the final 20–30 minutes, if your slow cooker instructions allow. Alternatively, mash a few of the beans into the sauce.

Variations

For a meat-free version, replace the beef with extra beans, lentils or plant-based mince, and use vegetable stock. Black beans or pinto beans work well alongside kidney beans. You can also stir in sweetcorn during the final 30 minutes of cooking.

Storing and Reheating

Cool leftovers promptly and store them in a covered container in the fridge for up to three days. Reheat until piping hot, either in a saucepan or in the microwave, stirring well. The chilli can also be frozen in portions for up to three months; defrost it in the fridge before reheating.


Essential Tips and FAQs for Perfecting Your Crockpot Chilli Recipe

  1. Can I put raw beef in a crockpot for chili?
  2. Can you slow cook chili for 10 hours?
  3. Can you put raw mince in a slow cooker for chilli?
  4. Is Chilli better in crockpot or stove?
  5. Can chili cook on low for 8 hours?
  6. How to make chili in a slow cooker?
  7. What is the secret to really good chili?
  8. How do you make homemade chili taste better?

Can I put raw beef in a crockpot for chili?

Yes, you can put raw beef mince straight into a Crockpot when making chilli, provided it cooks fully and reaches a safe temperature. However, browning it in a pan first is recommended: it adds richer flavour, improves the texture and lets you drain away excess fat. If adding it raw, break the mince up well and make sure the slow cooker is not overfilled.

Can you slow cook chili for 10 hours?

Yes, chilli can usually be slow-cooked for 10 hours on the low setting, and the extra time can help the flavours develop. Check your slow cooker’s instructions, as temperatures vary, and make sure there is enough liquid to prevent the chilli becoming too thick. For the best texture, use beef mince that has been browned first and avoid cooking the beans for longer than necessary if you prefer them to hold their shape. Keep the lid on during cooking, and refrigerate any leftovers promptly.

Can you put raw mince in a slow cooker for chilli?

Yes, you can add raw mince straight to a slow cooker when making chilli, provided it cooks thoroughly and the appliance is used according to its instructions. However, browning the mince in a frying pan first is recommended: it adds flavour, breaks up clumps and lets you drain off excess fat before adding it to the slow cooker.

Is Chilli better in crockpot or stove?

Whether chilli is better in a crockpot or on the hob depends on your time and taste. A crockpot cooks it slowly and gently, giving the flavours plenty of time to develop while requiring little attention—ideal for a hands-off meal. Cooking chilli on the hob is quicker and makes it easier to adjust the seasoning or thicken the sauce as it simmers. Both methods can produce a delicious result, so choose the crockpot for convenience and the hob when you want more control.

Can chili cook on low for 8 hours?

Yes, chilli can usually cook on low for 8 hours in a slow cooker, and the extended cooking time helps the flavours develop. Make sure there is enough liquid to prevent it drying out, and keep the lid on while it cooks. Slow cookers vary, so check your manufacturer’s guidance and avoid leaving the chilli on a warm setting for too long once it is cooked.

How to make chili in a slow cooker?

To make chilli in a slow cooker, brown the mince in a frying pan first, then add it to the slow cooker with chopped onion, pepper, garlic, spices, chopped tomatoes, beans and stock. Stir everything together, cover and cook on low for 6–8 hours or on high for 3–4 hours, until rich and well flavoured. Taste and adjust the seasoning before serving with rice, jacket potatoes or your favourite toppings.

What is the secret to really good chili?

The secret to really good chilli is building layers of flavour and giving them time to develop. Brown the mince and soften the onions before adding them to the slow cooker, then toast the spices briefly to bring out their aroma. Use good-quality tomatoes and stock, season carefully, and let the chilli cook slowly so the flavours meld together. Taste before serving and adjust the seasoning or heat as needed; a splash of vinegar or a squeeze of lime can add a welcome final lift.

How do you make homemade chili taste better?

To make homemade chilli taste better, build flavour at every stage: brown the mince well, then cook the onion, pepper and garlic until softened before adding the spices and tomato purée. Let the spices toast briefly, and give the chilli plenty of time to cook slowly so the flavours can deepen. Taste before serving and adjust with salt, pepper and extra chilli; a small splash of Worcestershire sauce or a pinch of sugar can also balance the tomatoes. Finish with a squeeze of lime or a little fresh coriander, and add toppings such as grated cheese or soured cream for extra richness.

Homemade Chicken Pot Pie: A Comforting Classic with Golden, Flaky Pastry

homemade chicken pot pie

Homemade Chicken Pot Pie

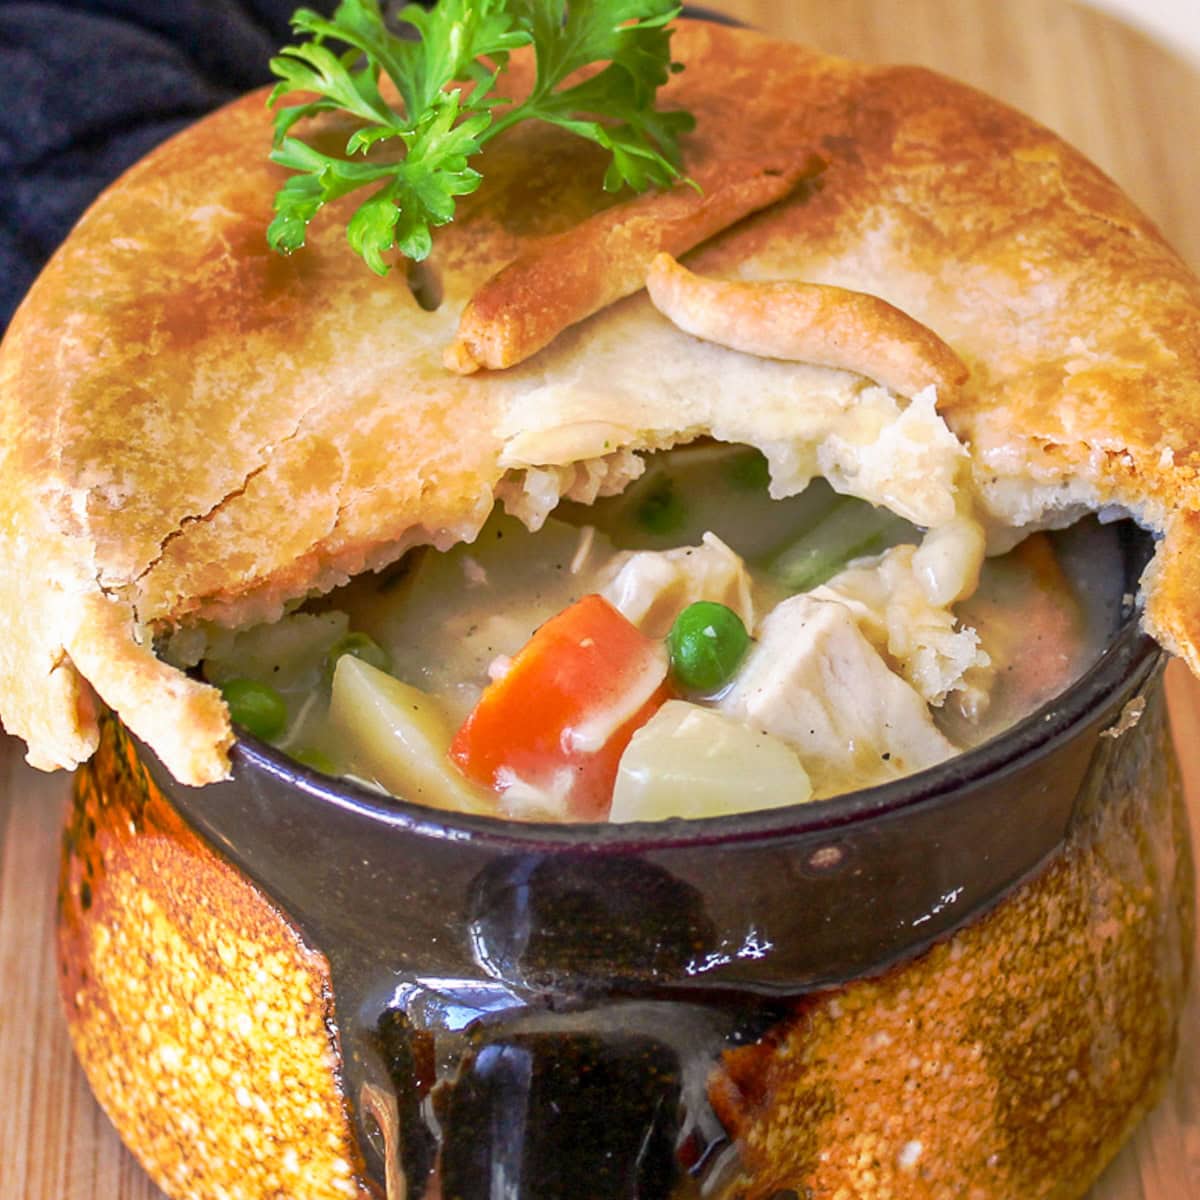
Golden, flaky pastry wrapped around tender chicken and vegetables in a creamy sauce makes chicken pot pie a comforting favourite. It is a satisfying meal for a chilly evening, and a useful way to turn leftover cooked chicken into something special. This version has a crisp pastry lid and a rich, savoury filling.

At a glance

  • Serves: 6
  • Preparation time: 30 minutes
  • Cooking time: 45 minutes

Ingredients

For the pastry

  • 250g plain flour, plus extra for rolling
  • 125g cold unsalted butter, cut into cubes
  • A pinch of salt
  • 4–6 tablespoons cold water
  • 1 egg, beaten, for glazing

For the filling

  • 40g butter
  • 1 onion, finely chopped
  • 2 carrots, peeled and diced
  • 2 celery sticks, diced
  • 40g plain flour
  • 500ml chicken stock
  • 150ml double cream or whole milk
  • 500g cooked chicken, cut into bite-sized pieces
  • 150g frozen peas
  • 1 teaspoon fresh thyme leaves, or ½ teaspoon dried thyme
  • Salt and freshly ground black pepper

Method

  1. Make the pastry. Put the flour and salt into a bowl. Rub in the cold butter with your fingertips until the mixture resembles breadcrumbs. Add the cold water a little at a time, mixing until the dough just comes together. Shape it into a flat disc, wrap and chill for at least 30 minutes.

  2. Cook the vegetables. Melt the butter in a large saucepan over a medium heat. Add the onion, carrots and celery and cook for 8–10 minutes, stirring now and then, until beginning to soften.

  3. Make the sauce. Stir in the flour and cook for 1 minute. Gradually pour in the chicken stock, stirring to keep the sauce smooth. Bring to a gentle simmer and cook for 5–7 minutes, until thickened. Stir in the cream or milk, chicken, peas and thyme. Season to taste, then leave the filling to cool slightly.

  4. Prepare the pie. Heat the oven to 200°C (180°C fan) or Gas Mark 6. Spoon the filling into a deep pie dish. On a lightly floured surface, roll out the pastry until it is slightly larger than the dish.

  5. Add the pastry lid. Brush the rim of the dish with a little beaten egg. Lay the pastry over the filling and press the edges down to seal. Trim away any excess and crimp the edge with your fingers or a fork. Cut a small slit in the centre to let steam escape, then brush the pastry with beaten egg.

  6. Bake. Place the pie on a baking tray and bake for 30–35 minutes, until the pastry is puffed and deep golden and the filling is bubbling. Leave it to stand for 10 minutes before serving.

Tips for a delicious pie

  • Cool the filling before adding the pastry. A hot filling can soften the pastry before it has a chance to bake.
  • Keep the pastry as cool as possible while working with it, and handle it gently for a tender, flaky result.
  • For extra flavour, use leftover roast chicken and include any meat from the legs as well as the breast.
  • Put the pie dish on a baking tray to catch any filling that bubbles over.
  • Make sure the filling is piping hot throughout before serving. If using freshly cooked chicken, it should reach a safe internal temperature of 75°C.

What to serve with chicken pot pie

Chicken pot pie is a hearty meal on its own, but it also goes well with steamed greens, tender-stem broccoli or a crisp green salad. For an especially comforting supper, serve it with buttery mashed potatoes.

Storing and reheating

Cool leftovers promptly and store them in a covered container in the fridge for up to two days. Reheat until piping hot throughout. The pie can also be assembled ahead of time: keep the filling and pastry separate in the fridge, then add the pastry lid and bake when ready.


Understanding Homemade Chicken Pot Pie: Ingredients, Crust, and Creamy Filling Explained

  1. What is the crust on a pot pie made of?
  2. What is chicken pot pie filling made of?
  3. What is chicken pot pie gravy made of?
  4. What are the main ingredients of chicken pot pie?
  5. What is the sauce made of in chicken pot pie?
  6. What makes chicken pot pie creamy?

What is the crust on a pot pie made of?

The crust on a homemade chicken pot pie is usually made from plain flour, cold butter, a pinch of salt and just enough cold water to bring the mixture together. This creates a tender, flaky pastry lid. Some recipes use ready-made shortcrust or puff pastry instead, while others add a bottom crust as well as a lid.

What is chicken pot pie filling made of?

Chicken pot pie filling is typically made with cooked chicken, vegetables such as carrots, peas, onion and celery, and a creamy sauce. The sauce is often thickened with flour and made using butter, chicken stock and milk or cream, then seasoned with salt, pepper and herbs such as thyme. Ingredients can be varied to suit your taste or make use of leftover vegetables.

What is chicken pot pie gravy made of?

Chicken pot pie gravy is usually made by cooking butter and flour together to form a roux, then gradually whisking in chicken stock until smooth and thick. Cream or milk adds richness, while salt, pepper and herbs such as thyme provide flavour. The chicken and vegetables are stirred through the sauce before the pie is topped with pastry and baked.

What are the main ingredients of chicken pot pie?

The main ingredients in a homemade chicken pot pie are cooked chicken, vegetables such as carrots, peas, onion and celery, and a creamy sauce made with butter, flour and chicken stock. These are topped with pastry—often shortcrust or puff pastry—and baked until golden. Seasonings such as thyme, salt and black pepper add extra flavour.

What is the sauce made of in chicken pot pie?

The sauce in chicken pot pie is usually made from butter, flour and chicken stock, with milk or cream added for a smooth, rich finish. The butter and flour are cooked together to make a roux, then the stock is stirred in gradually until the sauce thickens. Seasonings such as salt, black pepper and thyme add extra flavour.

What makes chicken pot pie creamy?

Chicken pot pie gets its creamy texture from a thickened sauce made with butter, flour and chicken stock, finished with double cream or whole milk. The butter and flour form a roux, which helps the sauce thicken, while the dairy adds richness and a smooth finish. For an extra-creamy filling, stir in a little more cream, but keep the sauce thick enough to hold its shape beneath the pastry.

Classic Fish Pie Recipe: A Comforting British Favourite

fish pie recipe

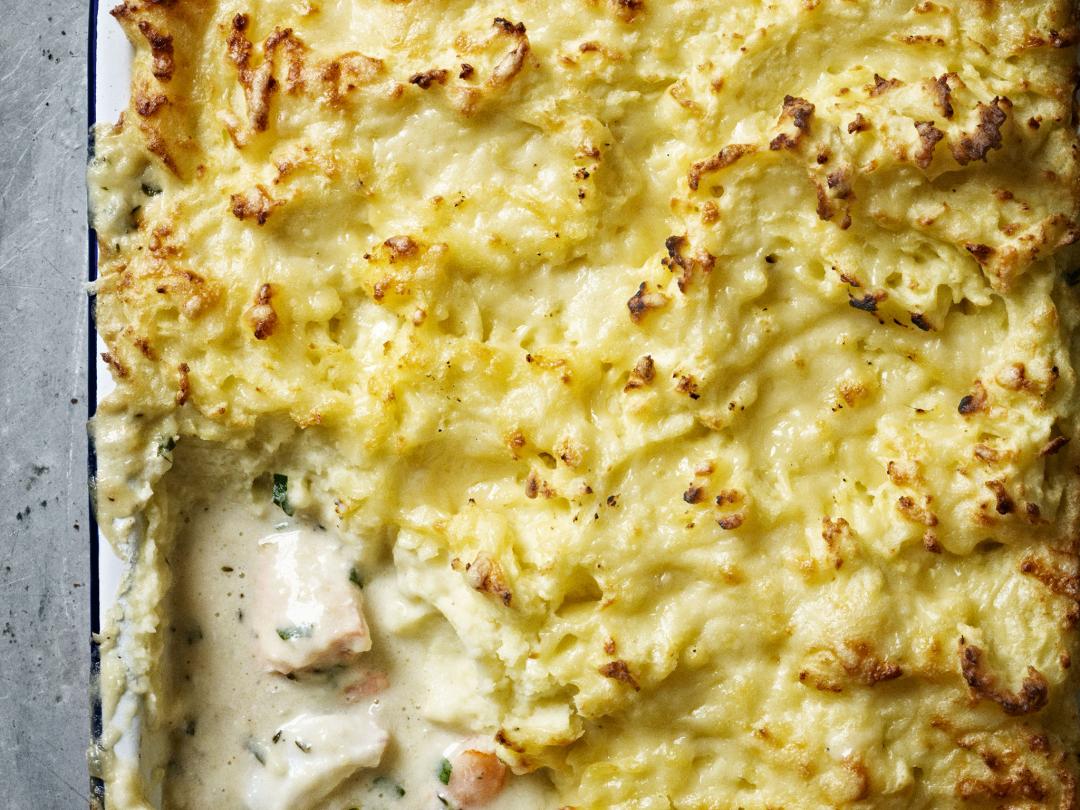
Classic Fish Pie Recipe

Comforting, creamy and topped with golden mashed potato, fish pie is a British favourite that makes a satisfying family meal. This version combines flaky white fish and salmon in a simple parsley sauce. Serve it straight from the oven with peas or greens.

Serves: 4–6

Preparation time: 25 minutes

Cooking time: 35 minutes

Ingredients

For the topping

  • 900g floury potatoes, peeled and cut into chunks
  • 40g butter
  • 3–4 tbsp milk
  • Salt and freshly ground black pepper

For the filling

  • 600g mixed fish, such as cod, smoked haddock and salmon, cut into bite-sized pieces
  • 40g butter
  • 40g plain flour
  • 500ml milk
  • 1 tsp Dijon mustard, optional
  • 2 tbsp chopped fresh parsley
  • 100g frozen peas, optional
  • Salt and freshly ground black pepper

Method

  1. Cook the potatoes. Put the potatoes in a saucepan, cover with cold salted water and bring to the boil. Simmer for 15–20 minutes, or until tender. Drain well, then mash with the butter and enough milk to make a smooth topping. Season to taste.
  2. Make the sauce. Melt the butter in a saucepan over a medium heat. Stir in the flour and cook for 1 minute, stirring constantly. Gradually add the milk, whisking as you go to keep the sauce smooth. Bring to a gentle simmer and cook for 3–5 minutes, until thickened.
  3. Season and add the filling. Stir the mustard, if using, and parsley into the sauce. Season with pepper and a little salt, taking care if using smoked fish. Fold in the fish and peas.
  4. Assemble the pie. Heat the oven to 200°C (180°C fan)/400°F/Gas Mark 6. Spoon the fish mixture into an ovenproof dish. Spread the mashed potato over the top, taking it right to the edges. Rough up the surface with a fork to help it turn golden.
  5. Bake. Place the dish on a baking tray and bake for 25–30 minutes, until bubbling around the edges and golden on top. Leave to stand for a few minutes before serving.

Tips for a Great Fish Pie

  • Use a mix of fish for contrasting flavours and textures. Check carefully for bones before adding it to the dish.
  • For a richer sauce, replace a little of the milk with cream.
  • Grated cheese can be mixed into the mash or sprinkled over the top before baking.
  • If preparing the pie ahead, cool the filling before assembling and refrigerate it. Bake until piping hot throughout.

Serve your fish pie with steamed greens, buttered cabbage or a simple side salad for an easy, comforting supper.


9 Reasons Why Fish Pie is the Ultimate Comfort Dish

  1. Comforting and warming
  2. Creamy, satisfying filling
  3. Golden, fluffy potato topping
  4. Easy to customise with different fish
  5. A good way to include vegetables
  6. Ideal for family meals
  7. Can be prepared ahead
  8. Pairs well with simple greens
  9. Makes delicious leftovers


7 Drawbacks of Preparing the Classic Fish Pie Recipe

  1. Takes time to prepare.
  2. Uses several pans and utensils.
  3. Can be rich and filling.
  4. Fresh fish may be expensive.
  5. Smoked fish can make it salty.
  6. The topping may brown unevenly.
  7. Leftovers can dry out when reheated.

Comforting and warming

Fish pie is the ultimate comfort food: its creamy fish filling and soft, golden mashed-potato topping make every mouthful warming and satisfying. Served fresh from the oven, it’s a cosy choice for chilly evenings and relaxed family meals.

Creamy, satisfying filling

The creamy filling is what makes fish pie so comforting and satisfying. A smooth, gently seasoned sauce brings together the flaky fish and tender vegetables, adding plenty of flavour without overpowering the ingredients. Paired with its golden potato topping, it makes a hearty dish that’s perfect for a cosy family meal.

Golden, fluffy potato topping

A golden, fluffy potato topping makes this fish pie especially inviting. Lightly mash the potatoes with butter and milk, then rough up the surface with a fork before baking. The ridges turn crisp and golden in the oven, while the soft, pillowy mash underneath pairs beautifully with the creamy fish filling.

Easy to customise with different fish

One of the best things about fish pie is how easy it is to tailor to your taste or what you have available. Use cod, haddock, salmon or smoked fish, or combine a few varieties for a more varied flavour and texture. Just choose fish that will hold up well in the sauce, remove any skin and check carefully for bones before cooking.

A good way to include vegetables

Fish pie is an easy way to add more vegetables to a family meal. Stir peas, sweetcorn, spinach or finely chopped leeks into the creamy filling, or serve it with a side of greens. The flavours blend naturally with the fish and sauce, making vegetables a welcome part of a comforting, satisfying dish.

Ideal for family meals

Fish pie is ideal for family meals because it’s comforting, filling and easy to serve straight from the oven. The creamy fish filling and soft potato topping are popular with a range of ages, while peas or other vegetables can be added to make it a complete one-dish dinner. It’s also simple to prepare in a larger baking dish, making it a practical choice when feeding a crowd.

Can be prepared ahead

One of the great advantages of fish pie is that it can be prepared ahead, making mealtimes easier on busy days. Assemble the pie, cover it and keep it in the fridge until you’re ready to cook. When baking from chilled, allow extra time and check that it is piping hot all the way through before serving.

Pairs well with simple greens

Fish pie pairs beautifully with simple greens, such as peas, steamed broccoli or green beans. Their fresh flavour and gentle crunch balance the pie’s creamy filling and golden potato topping, making the meal feel lighter without taking attention away from the main dish.

Makes delicious leftovers

Fish pie makes delicious leftovers, as the flavours have time to mingle and deepen overnight. Once cooled, cover and refrigerate it promptly, then reheat only the portion you need until piping hot throughout. It’s just as comforting the next day, served on its own or with fresh greens.

Takes time to prepare.

One drawback of fish pie is that it takes time to prepare. You’ll need to cook and mash the potatoes, make the sauce, prepare the fish and assemble the dish before it goes into the oven. Although much of the work is straightforward, it may not be the quickest choice for a busy weeknight.

Uses several pans and utensils.

One drawback of this fish pie recipe is that it uses several pans and utensils: you’ll need equipment for boiling and mashing the potatoes, making the sauce and assembling the pie. This can mean more washing-up than a simpler one-pot meal.

Can be rich and filling.

Fish pie can be rich and filling, particularly when it’s made with a creamy sauce, buttery mash and plenty of cheese. A generous portion may feel quite heavy, so serve it with lighter sides such as steamed greens or a crisp salad, and adjust the amount of butter or cream to suit your taste.

Fresh fish may be expensive.

Fresh fish can be expensive, particularly if you choose premium varieties such as salmon or smoked haddock. This can make fish pie a costly meal, but using affordable options such as frozen fish, white fish fillets or supermarket fish pie mix can help keep the price down without sacrificing flavour.

Smoked fish can make it salty.

Smoked fish adds a distinctive, savoury flavour to fish pie, but it can also make the filling quite salty. Taste the sauce before adding any extra salt, and consider using a milder fish or a smaller amount of smoked fish if you prefer a less salty pie.

The topping may brown unevenly.

The mashed potato topping can brown unevenly, leaving some patches golden while others stay pale. This may happen if the mash is spread at different thicknesses or the oven has hot spots. For a more even finish, smooth the topping into a consistent layer, rough it lightly with a fork and rotate the dish halfway through baking if needed.

Leftovers can dry out when reheated.

Fish pie can lose its creamy texture when reheated, as the fish and mashed-potato topping may dry out. To help prevent this, cover the dish and warm it gently in the oven until piping hot throughout; adding a splash of milk or cream to the filling before reheating can also help restore its moisture.

Easy Chicken Pot Pie Recipe with Golden, Flaky Pastry

chicken pot pie recipe

Chicken Pot Pie Recipe

Golden, flaky pastry and a creamy chicken filling make chicken pot pie a comforting meal for any day of the week. This straightforward version uses cooked chicken and ready-rolled puff pastry, so it’s easy to prepare without compromising on flavour. Serve it hot with greens or a crisp salad.

Serves: 4–6

Preparation time: 20 minutes

Cooking time: 35 minutes

Ingredients

  • 1 tablespoon olive oil or butter
  • 1 onion, finely chopped
  • 2 carrots, diced
  • 150g mushrooms, sliced (optional)
  • 2 tablespoons plain flour
  • 400ml chicken stock
  • 150ml milk
  • 1 teaspoon Dijon mustard
  • ½ teaspoon dried thyme
  • 300g cooked chicken, shredded or chopped
  • 100g frozen peas
  • Salt and freshly ground black pepper
  • 1 sheet ready-rolled puff pastry, about 320g
  • 1 egg, beaten, for glazing

Method

  1. Heat the oil or butter in a large saucepan over a medium heat. Add the onion and carrots and cook for 5 minutes, stirring occasionally. If using mushrooms, add them and cook for a further 3 minutes.
  2. Stir in the flour and cook for 1 minute. Gradually pour in the stock, stirring all the time to prevent lumps. Add the milk, mustard and thyme, then simmer for 5–7 minutes until the sauce has thickened.
  3. Stir in the cooked chicken and peas. Season with salt and pepper, then remove the pan from the heat. Leave the filling to cool slightly while you prepare the pastry.
  4. Heat the oven to 200°C (180°C fan, Gas Mark 6). Spoon the filling into a medium ovenproof pie dish.
  5. Lay the pastry over the dish. Trim away any excess and press the edges gently to seal. Cut a small slit in the centre to let steam escape. Brush the top with beaten egg.
  6. Bake for 25–30 minutes, until the pastry is puffed and deep golden and the filling is piping hot. Leave to stand for 5 minutes before serving.

Tips for a Great Chicken Pot Pie

Make sure the filling has cooled a little before adding the pastry; this helps it stay crisp. For extra flavour, use leftover roast chicken and add a handful of chopped parsley. You can also swap the peas for sweetcorn or include diced celery with the onion and carrots.

To prepare the pie ahead, make the filling and refrigerate it for up to a day. Add the pastry just before baking. Leftovers can be stored in the fridge for up to 2 days and reheated thoroughly until piping hot.


Essential FAQs for Perfecting Your Chicken Pot Pie Recipe

  1. What ingredients do I need to make chicken pot pie?
  2. How do I make chicken pot pie from scratch?
  3. Can I use cooked or leftover chicken in chicken pot pie?
  4. What pastry is best for chicken pot pie?
  5. How do I stop the bottom of the pastry from going soggy?
  6. How long should I bake chicken pot pie, and at what temperature?
  7. Can I make chicken pot pie ahead of time?
  8. Can chicken pot pie be frozen, and how should I reheat it?
  9. What can I serve with chicken pot pie?

What ingredients do I need to make chicken pot pie?

To make chicken pot pie, you’ll need cooked chicken, puff pastry, onion, carrots, chicken stock, milk, plain flour, butter or olive oil, and seasonings such as salt, black pepper and thyme. Peas add a touch of sweetness, while mushrooms and Dijon mustard are optional extras for extra flavour. A beaten egg is useful for brushing over the pastry before baking, giving it a golden finish.

How do I make chicken pot pie from scratch?

To make chicken pot pie from scratch, cook diced onion, carrots and any other vegetables you like in a little butter or oil, then stir in flour and gradually add chicken stock and milk to create a creamy sauce. Add cooked chicken, peas and herbs, season to taste, and spoon the filling into a pie dish. Cover with homemade shortcrust or puff pastry, seal the edges, cut a small slit in the top and brush with beaten egg. Bake at 200°C (180°C fan) until the pastry is golden and the filling is piping hot, usually around 25–35 minutes.

Can I use cooked or leftover chicken in chicken pot pie?

Yes, cooked or leftover chicken works perfectly in chicken pot pie. Shred or chop it into bite-sized pieces, then stir it into the sauce with the vegetables just before assembling the pie. As the chicken is already cooked, there’s no need to simmer it for long—just make sure the filling is piping hot before baking. Leftover roast chicken is especially tasty, and it’s a handy way to make use of leftovers.

What pastry is best for chicken pot pie?

Puff pastry is a popular choice for chicken pot pie because it bakes into a light, crisp, golden topping with minimal effort. Shortcrust pastry is another good option, especially if you prefer a sturdier, more traditional crust; use it for the lid or to line the dish. Whichever you choose, add the pastry once the filling has cooled slightly to help prevent a soggy base.

How do I stop the bottom of the pastry from going soggy?

To help keep the bottom pastry crisp, let the filling cool before assembling the pie, as hot filling creates steam that can make the pastry soggy. Make sure the sauce is thick rather than runny, and avoid overfilling the dish. For extra insurance, preheat a sturdy baking tray in the oven and place the pie dish on it; the direct heat helps cook the base. You can also blind-bake a pastry base for 10–15 minutes before adding the filling, especially if you’re making a deep pie.

How long should I bake chicken pot pie, and at what temperature?

Bake chicken pot pie in a preheated oven at 200°C (180°C fan, Gas Mark 6) for about 25–30 minutes, or until the pastry is puffed and golden and the filling is piping hot. If the filling is cold or the pie is particularly deep, it may need a little longer; cover the pastry loosely with foil if it begins to brown too quickly. Allow the pie to stand for a few minutes before serving.

Can I make chicken pot pie ahead of time?

Yes, you can prepare chicken pot pie ahead of time. Make the filling, let it cool completely, then cover and refrigerate it for up to 24 hours. For the best, crispest pastry, add it just before baking. If you assemble the whole pie in advance, keep it covered in the fridge and bake it within a day; it may need a few extra minutes in the oven. Ensure the filling is piping hot before serving.

Can chicken pot pie be frozen, and how should I reheat it?

Yes, chicken pot pie can be frozen, either baked or unbaked. For the best pastry, freeze the unbaked pie well wrapped for up to 2–3 months, then thaw it overnight in the fridge before baking until golden and piping hot throughout. To freeze a baked pie, cool it completely, wrap it tightly and freeze; thaw in the fridge, then reheat in an oven at 180°C (160°C fan, Gas Mark 4) until piping hot in the centre. Cover loosely with foil if the pastry browns too quickly, and reheat leftovers only once.

What can I serve with chicken pot pie?

Chicken pot pie is rich and comforting, so it pairs well with simple, fresh sides. Try steamed green beans, peas, broccoli or roasted seasonal vegetables, or serve it with a crisp green salad dressed with a light vinaigrette. If you’d like something heartier, buttery mashed potatoes work well, though the pastry and creamy filling may be filling enough on their own.

Tasty Recipes for Every Occasion: Simple, Delicious Ideas to Try at Home

tasty recipes

Tasty Recipes to Bring Everyone to the Table

Good food does not have to be complicated. With fresh ingredients, a few store-cupboard staples and a little time, you can make satisfying dishes for a weeknight supper or a relaxed weekend meal. Here are three tasty recipes to inspire your next kitchen adventure.

Roasted Tomato and Basil Pasta

Sweet roasted tomatoes, fragrant basil and a touch of garlic make this simple pasta a reliable favourite.

Ingredients

  • 300g cherry tomatoes
  • 2 tbsp olive oil
  • 2 garlic cloves, thinly sliced
  • 250g pasta
  • A handful of fresh basil leaves
  • 30g finely grated Parmesan, plus extra to serve
  • Salt and freshly ground black pepper

Method

  1. Heat the oven to 200°C, or 180°C for a fan oven. Put the tomatoes and garlic in a roasting dish, drizzle with olive oil, and season.
  2. Roast for 20–25 minutes, until the tomatoes are soft and starting to burst.
  3. Meanwhile, cook the pasta in a pan of salted boiling water according to the packet instructions. Drain, reserving a small mug of the cooking water.
  4. Toss the pasta with the roasted tomatoes, Parmesan and a splash of cooking water. Tear in the basil and serve with extra cheese.

Golden-Spiced Chickpea and Coconut Curry

This comforting curry is full of warming spices and creamy coconut. Serve it with rice or warm flatbreads.

Ingredients

  • 1 tbsp vegetable oil
  • 1 onion, finely chopped
  • 2 garlic cloves, crushed
  • 1 tbsp curry powder
  • 400g tin of chickpeas, drained and rinsed
  • 400g tin of chopped tomatoes
  • 200ml coconut milk
  • 100g spinach
  • Salt and black pepper
  • Cooked rice or flatbreads, to serve

Method

  1. Warm the oil in a large saucepan over a medium heat. Add the onion and cook for 5–7 minutes, until soft.
  2. Stir in the garlic and curry powder, then cook for another minute.
  3. Add the chickpeas, tomatoes and coconut milk. Bring to a gentle simmer and cook for 15 minutes, stirring occasionally.
  4. Stir in the spinach until wilted. Season to taste and serve with rice or flatbreads.

Apple and Cinnamon Crumble

Warm, tender fruit beneath a crisp, buttery topping makes this classic pudding especially welcome on a chilly evening.

Ingredients

  • 5 medium eating apples, peeled, cored and sliced
  • 2 tbsp caster sugar
  • 1 tsp ground cinnamon
  • 150g plain flour
  • 100g cold butter, cut into cubes
  • 75g demerara sugar
  • 40g rolled oats

Method

  1. Heat the oven to 190°C, or 170°C for a fan oven. Arrange the apples in a baking dish and sprinkle with the caster sugar and cinnamon.
  2. Rub the flour and butter together with your fingertips until the mixture resembles breadcrumbs. Stir in the demerara sugar and oats.
  3. Spoon the crumble topping over the apples and bake for 35–40 minutes, until golden and bubbling.
  4. Leave to stand for a few minutes, then serve with custard, cream or ice cream.

Make Each Recipe Your Own

Recipes are a starting point, not a set of rules. Add extra vegetables to the curry, swap the basil for parsley in the pasta, or mix a handful of chopped nuts into the crumble topping. Taste as you cook, adjust the seasoning, and enjoy discovering the combinations that suit you best.


Tasty Recipes: 8 FAQs on Easy Meals, Flavour and Safe Storage

  1. What are some easy tasty recipes for beginners?
  2. How can I make a meal taste better without adding lots of salt?
  3. What are the best quick recipes for busy weeknights?
  4. How can I adapt recipes to use ingredients I already have?
  5. What are some tasty vegetarian recipes for the whole family?
  6. How can I make a recipe healthier without losing flavour?
  7. What are the best ways to store leftovers safely?
  8. Can I freeze homemade meals, and how should I reheat them?

What are some easy tasty recipes for beginners?

Beginners can start with simple recipes that use a few familiar ingredients and straightforward methods. Try tomato and basil pasta, a vegetable omelette, or a chickpea curry made with tinned tomatoes and ready-made spices. These dishes are easy to adapt, so you can add your favourite vegetables, herbs or cheese. Follow the steps in order, taste as you cook, and remember that a little practice makes preparing tasty meals easier.

How can I make a meal taste better without adding lots of salt?

To make a meal taste better without adding lots of salt, build flavour with herbs, spices, garlic, onion, ginger or chilli, and brighten dishes with a squeeze of lemon or a splash of vinegar. Toasting spices and browning ingredients can add extra depth, while tomatoes, mushrooms and Parmesan bring savoury umami flavour. Taste as you cook and adjust gradually; fresh herbs stirred in at the end can make a dish especially lively.

What are the best quick recipes for busy weeknights?

The best quick recipes for busy weeknights are simple, satisfying dishes that use familiar ingredients and take around 30 minutes or less to prepare. Try a vegetable stir-fry with noodles, tomato and basil pasta, quick chickpea curry, or tray-baked salmon and vegetables. Save time by using tinned beans, frozen vegetables and ready-cooked grains, and choose recipes with minimal washing-up. A little meal planning—such as preparing ingredients ahead or keeping a few versatile staples in the cupboard—can make getting a tasty supper on the table much easier.

How can I adapt recipes to use ingredients I already have?

To adapt a recipe, start by identifying the role each ingredient plays: vegetables add flavour and texture, herbs and spices bring aroma, while fats and liquids help bind or cook the dish. Swap like for like where possible—for example, use one root vegetable in place of another, or replace fresh herbs with a smaller amount of dried herbs. Tinned beans can stand in for other pulses, and yoghurt or milk may work instead of cream in some recipes. Add substitutions gradually, taste as you go, and adjust the cooking time if your ingredients are larger, smaller or contain more moisture. For baking, follow the quantities more closely, as changing the balance of flour, fat, sugar and liquid can affect the result.

What are some tasty vegetarian recipes for the whole family?

Tasty vegetarian meals the whole family can enjoy include creamy tomato pasta, homemade vegetable lasagne, mild chickpea curry with rice, and colourful roasted vegetable traybakes. For a fun option, try build-your-own wraps or tacos with beans, grated cheese, salad and a choice of toppings, so everyone can make a plate to suit their tastes. Use familiar ingredients, keep spices mild and serve sauces or extras on the side to make mealtimes more flexible.

How can I make a recipe healthier without losing flavour?

You can make a recipe healthier without losing flavour by making small, thoughtful changes rather than removing everything you enjoy. Add extra vegetables, beans or lentils for fibre and nutrients, and use herbs, spices, citrus, garlic or vinegar to boost taste while reducing salt. Try grilling, baking or roasting instead of deep-frying, and replace some cream or butter with plain yoghurt, olive oil or a lighter alternative. Taste as you go, adjusting the seasoning and texture until the dish is still satisfying.

What are the best ways to store leftovers safely?

Store leftovers in clean, shallow, airtight containers and refrigerate them within one to two hours of cooking, keeping your fridge at 5°C or below. Eat refrigerated leftovers within two days, or freeze them if you will not use them in time. Defrost frozen food in the fridge and use it within 24 hours, then reheat leftovers only once until piping hot all the way through. Cooked rice needs extra care: cool it quickly, refrigerate promptly and eat within 24 hours.

Can I freeze homemade meals, and how should I reheat them?

Yes, most homemade meals can be frozen, although dishes with a high water content or delicate sauces may change texture. Cool food quickly, divide it into airtight, freezer-safe containers, label it with the date and freeze it promptly. For best quality, use it within about three months. Defrost meals in the fridge overnight, or use your microwave’s defrost setting, then reheat until piping hot throughout, stirring where possible. You can reheat some dishes from frozen, but allow extra time and check the centre is thoroughly hot before serving. Avoid reheating food more than once.

Mincemeat Pie: A Much-Loved British Christmas Treat

mincemeat pie

Mincemeat Pie: A Much-Loved British Christmas Treat

Few flavours are more closely associated with a British Christmas than mincemeat pie. These small, golden pastries are filled with a fragrant mixture of dried fruit, citrus peel, spices and sugar. Despite its name, modern mincemeat usually contains no meat at all.

What is mincemeat?

Mincemeat is a rich, sweet filling traditionally made with ingredients such as raisins, currants, sultanas, chopped apple, candied peel, spices and suet. Brandy or another spirit is often added, though alcohol-free versions are also widely available. The mixture is left to mature so the flavours can mingle, making it a convenient filling to prepare ahead of the festive season.

The name reflects the filling’s history. Early versions of mincemeat combined chopped meat with fruit and spices. Over time, the meat became less common, and the sweet fruit mixture familiar today took its place. Some modern recipes still use suet, while others use butter or a vegetable alternative.

A Christmas tradition

Mincemeat pies have been part of British festive food for centuries. Their ingredients once carried associations with celebration and abundance, and the pies gradually became a seasonal staple. Today, they are sold in bakeries and supermarkets throughout the Christmas period and are also a favourite to make at home.

They are usually made with shortcrust pastry, though puff pastry is sometimes used. The filling is enclosed in a pastry case or topped with a smaller pastry lid, then baked until golden. Some bakers add a star-shaped lid, while others finish the pies with a dusting of icing sugar.

How to serve mincemeat pies

Mincemeat pies can be enjoyed warm or at room temperature. They are often served with a little cream, brandy butter, custard or ice cream. A cup of tea is a classic accompaniment, while mulled wine or coffee also pairs well with their sweet, spiced flavour.

Making them at home

For homemade pies, prepare or buy mincemeat and use it to fill pastry-lined tins. Avoid overfilling, as the mixture can bubble up during baking. Add a pastry lid, seal the edges and make a small slit in each top to let steam escape. Bake until the pastry is crisp and golden, then leave the pies to cool slightly before serving.

There is plenty of room to adapt the recipe. You can choose vegetarian or vegan pastry and filling, use alcohol-free mincemeat, or add extra citrus zest for a brighter flavour. However they are made, mincemeat pies remain a simple and satisfying way to bring the taste of Christmas to the table.


Top Tips for Perfecting Your Mincemeat Pie

  1. Chill the pastry before rolling it out.
  2. Use a little flour to prevent sticking.
  3. Spoon mincemeat in without overfilling.
  4. Brush the pastry tops with milk or beaten egg.
  5. Bake until golden, then cool before serving.

Chill the pastry before rolling it out.

Chilling the pastry before rolling it out helps keep the fat firm, making it easier to handle and less likely to stick or tear. Wrap it and refrigerate for around 20–30 minutes, then let it soften slightly if it feels too hard to roll. The result is pastry that holds its shape better and bakes into a tender, crumbly case for your mincemeat pies.

Use a little flour to prevent sticking.

Dust your work surface and rolling pin with a little flour before rolling out the pastry to help prevent it sticking. Use only a light sprinkling, as too much flour can make the pastry dry and tough.

Spoon mincemeat in without overfilling.

Spoon the mincemeat into each pastry case, leaving a little space at the top. It can bubble up as the pies bake, so avoid overfilling to help prevent the filling from spilling out and the pastry edges from becoming sticky.

Brush the pastry tops with milk or beaten egg.

Before baking, brush the pastry tops with a little milk or beaten egg. Milk gives the pies a gentle golden finish, while beaten egg creates a deeper colour and a glossy sheen. Use a light, even coating and try not to let it run down the sides, as this can make the pastry stick to the tin.

Bake until golden, then cool before serving.

Bake the mincemeat pies until the pastry is crisp and golden. Once out of the oven, leave them to cool for a few minutes before serving; the filling will be extremely hot, and cooling also helps the pies hold their shape. Enjoy them warm or at room temperature, perhaps with cream, custard or a dusting of icing sugar.

Classic Meat Pie Recipe: A Comforting British Favourite

meat pie recipe

Classic Beef and Ale Pie Recipe

A golden, crisp pastry crust filled with tender beef in a rich, savoury gravy makes this classic meat pie ideal for a comforting family meal. The filling can be prepared ahead, giving the flavours time to develop and making assembly straightforward.

Preparation and cooking time

  • Preparation: 25 minutes
  • Cooking: 2 hours 30 minutes
  • Serves: 6

Ingredients

  • 2 tbsp vegetable oil
  • 900g stewing beef, cut into bite-sized pieces
  • 2 tbsp plain flour, seasoned with salt and black pepper
  • 1 large onion, finely chopped
  • 2 carrots, peeled and diced
  • 2 celery sticks, diced
  • 2 tbsp tomato purée
  • 330ml ale or stout
  • 300ml beef stock
  • 1 tsp fresh thyme leaves, or ½ tsp dried thyme
  • 1 bay leaf
  • 1 sheet ready-rolled puff pastry, about 320g
  • 1 egg, beaten

Method

  1. Brown the beef: Toss the beef in the seasoned flour. Heat the oil in a large, heavy-based pan over a medium-high heat. Brown the beef in batches, then set it aside.
  2. Cook the vegetables: Add the onion, carrots and celery to the pan. Cook for 5–7 minutes, stirring occasionally, until softened. Stir in the tomato purée and cook for another minute.
  3. Make the filling: Pour in the ale and scrape the bottom of the pan to loosen any browned bits. Add the stock, thyme and bay leaf, then return the beef to the pan. Bring to a gentle simmer.
  4. Simmer until tender: Cover and cook gently for about 1 hour 45 minutes to 2 hours, stirring now and then, until the beef is tender and the gravy has thickened. Remove the bay leaf and leave the filling to cool. Taste and adjust the seasoning.
  5. Prepare the pie: Heat the oven to 200°C (180°C fan)/400°F/Gas Mark 6. Spoon the cooled filling into a pie dish. Lay the pastry over the top, trimming any excess. Press the edges to seal and make a small hole in the centre to let steam escape.
  6. Glaze and bake: Brush the pastry with beaten egg. Bake for 25–30 minutes, until puffed and golden. Leave to stand for 5 minutes before serving.

Tips for a great meat pie

  • Let the filling cool before adding the pastry; hot filling can make it soft and difficult to handle.
  • If the gravy is too thin, simmer the filling uncovered for a few minutes before cooling.
  • For a family-friendly version without alcohol, replace the ale with extra beef stock.
  • Serve with mashed potatoes, peas or seasonal greens.

This hearty beef pie is best served hot from the oven, when the pastry is crisp and the filling is rich and tender. Any leftovers can be cooled, covered and refrigerated, then reheated thoroughly before serving.


Top Tips for Perfect Meat Pies: Best Cuts, Baking Advice, and More

  1. What cut of meat is best for a meat pie?
  2. How do you stop the pastry from getting soggy?
  3. Can you make a meat pie ahead of time?
  4. How long should you bake a meat pie?
  5. Can you freeze a meat pie?

What cut of meat is best for a meat pie?

For a tender, flavourful meat pie, choose a well-marbled cut that becomes soft during slow cooking, such as beef chuck, braising steak or shin. These cuts develop a rich flavour and make a succulent filling when simmered gently until tender. For a quicker pie, use leftover roast meat, but take care not to overcook it, as it may become dry.

How do you stop the pastry from getting soggy?

To help keep the pastry crisp, let the meat filling cool completely before assembling the pie, and make sure the gravy is thick rather than watery. Avoid overfilling, cut a small steam vent in the pastry, and bake the pie in a fully preheated oven. If the filling is particularly moist, try brushing the base with beaten egg and letting it dry briefly before adding the filling.

Can you make a meat pie ahead of time?

Yes, you can make a meat pie ahead of time. Prepare and cook the filling, then let it cool completely before assembling the pie. Cover and refrigerate it for up to two days, or freeze it for longer storage. For the best pastry, add it just before baking; if the pie is already assembled, keep it covered in the fridge and bake within a day, adding a little extra time if it goes into the oven cold.

How long should you bake a meat pie?

Bake a meat pie in a preheated oven at 200°C (180°C fan)/400°F/Gas Mark 6 for around 25–30 minutes, or until the pastry is risen and golden and the filling is piping hot. If the filling is already hot when assembled, it may need less time; a pie made with cold filling may take a little longer. Follow the pastry packet instructions where available, and cover the top loosely with foil if it browns too quickly.

Can you freeze a meat pie?

Yes, you can freeze a meat pie. For the best results, freeze it before baking: assemble the pie, wrap it well and freeze for up to three months. Bake from frozen, adding extra cooking time and covering the pastry with foil if it browns too quickly; make sure the filling is piping hot all the way through before serving. You can also freeze a baked pie once it has cooled completely. Wrap it securely, thaw it in the fridge and reheat thoroughly in the oven.

Slow Cooker Pulled Pork: A Simple, Tender Recipe for Easy Meals

slow cooker pulled pork

Slow Cooker Pulled Pork

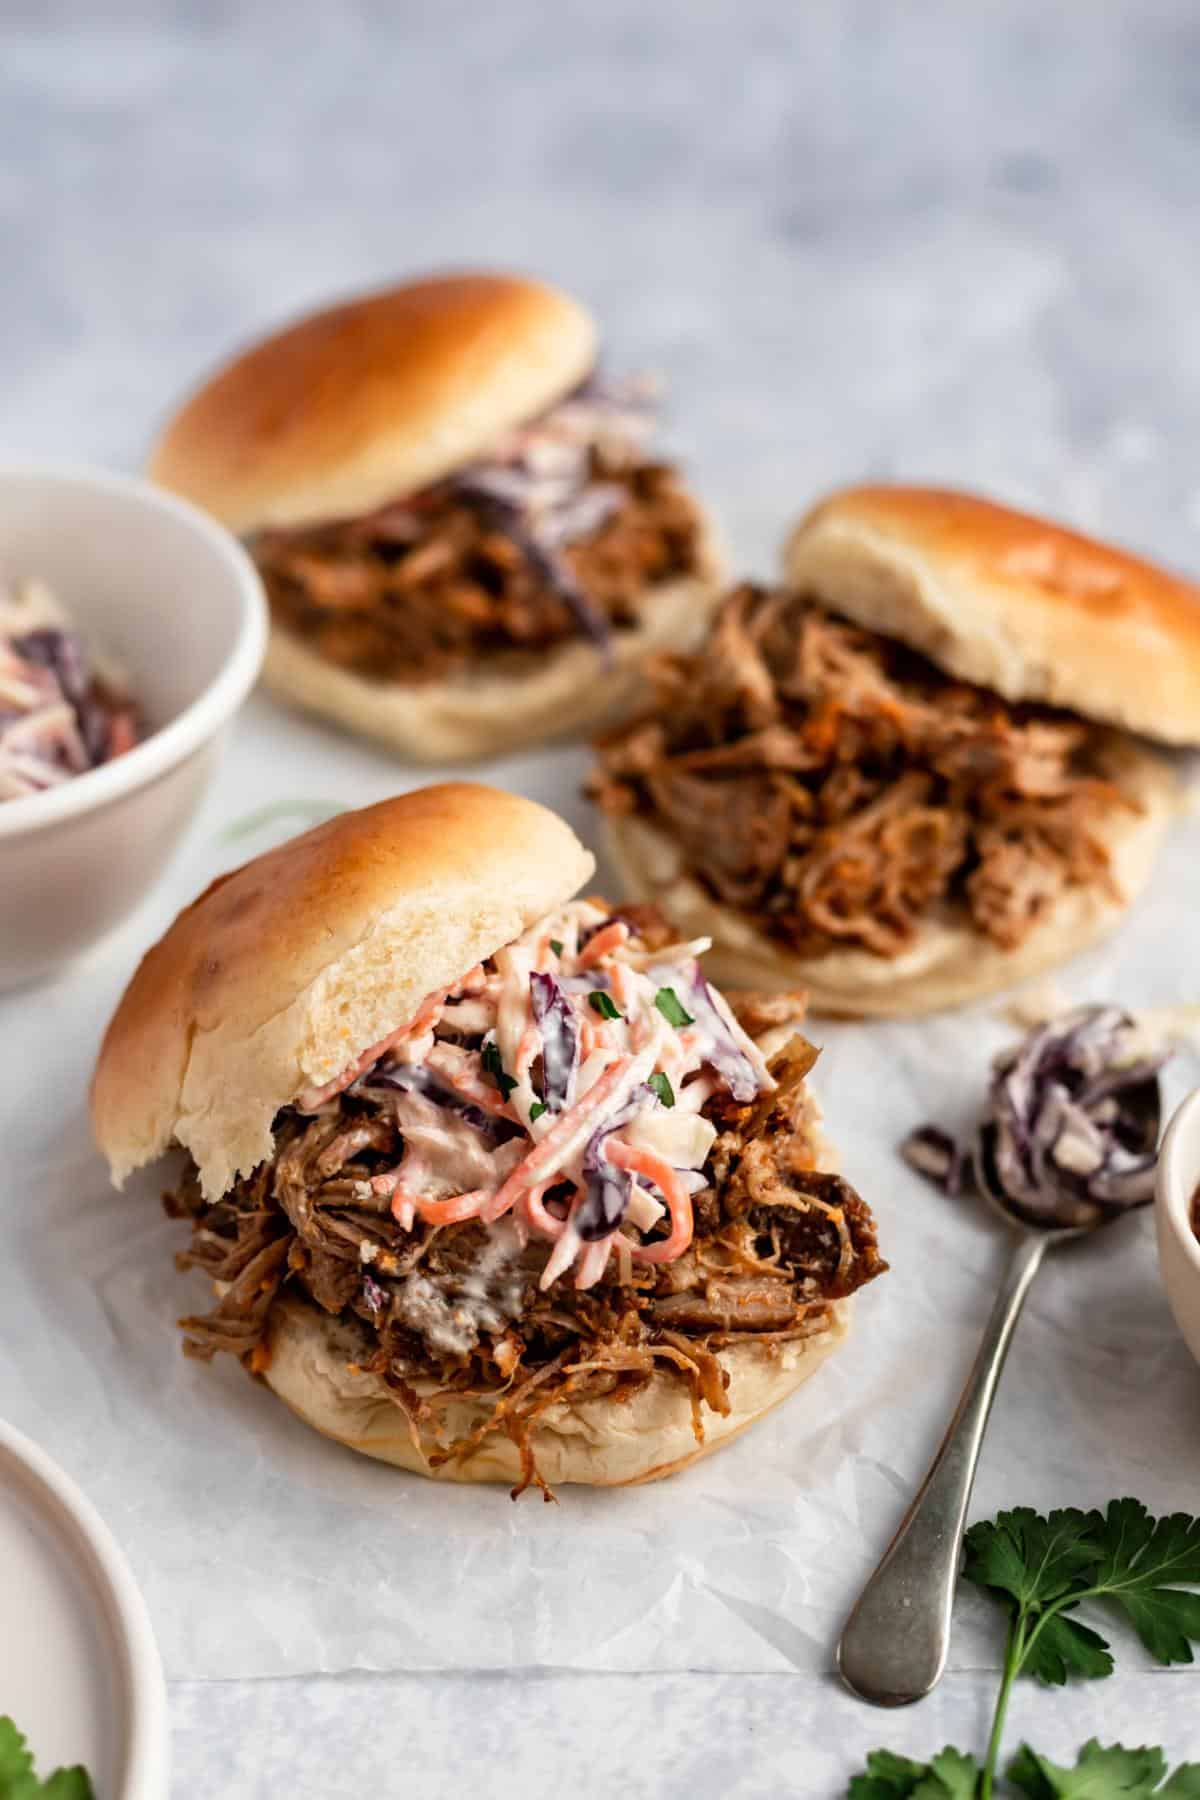
Slow cooker pulled pork is a simple, satisfying dish that turns an inexpensive cut of pork into tender, flavour-packed meat. A few minutes of preparation in the morning can leave you with pork that is ready to shred by dinnertime — ideal for sandwiches, wraps, tacos or a hearty meal with sides.

Why use a slow cooker?

Pork shoulder is well suited to slow cooking. Its marbling and connective tissue gradually soften over several hours, giving the meat its characteristic juicy texture. The gentle cooking also allows the seasoning to permeate the pork. For best results, choose a boneless or bone-in pork shoulder, sometimes labelled pork butt; leaner cuts such as pork loin are more likely to dry out.

Ingredients

  • 1.5–2kg pork shoulder, rind and excess fat removed
  • 2 teaspoons smoked paprika
  • 1 teaspoon ground cumin
  • 1 teaspoon garlic granules
  • 1 teaspoon onion granules
  • 1 tablespoon soft brown sugar
  • 1 teaspoon salt
  • ½ teaspoon black pepper
  • 1 onion, sliced
  • 150ml apple juice, cider or chicken stock
  • 2 tablespoons cider vinegar
  • 150–200ml barbecue sauce, plus extra to serve

Method

  1. Make the seasoning. Mix the paprika, cumin, garlic granules, onion granules, sugar, salt and pepper in a small bowl. Pat the pork dry, then rub the seasoning all over it.
  2. Prepare the slow cooker. Scatter the sliced onion over the base. Pour in the apple juice, cider or stock and the cider vinegar.
  3. Cook the pork. Place the pork on top of the onions. Cover and cook on low for 8–10 hours or on high for 5–6 hours, until the meat is very tender and pulls apart easily with a fork. Cooking times vary between slow cookers.
  4. Shred the meat. Transfer the pork to a large dish and remove any bones or large pieces of fat. Shred the meat with two forks. If it does not shred easily, return it to the slow cooker and continue cooking until tender.
  5. Finish with sauce. Skim excess fat from the cooking liquid if needed. Stir some of the liquid and the barbecue sauce through the shredded pork, adding a little at a time until it is moist but not swimming in sauce. Taste and adjust the seasoning.

Tips for the best pulled pork

  • Keep the lid on. Lifting the lid releases heat and can extend the cooking time.
  • Use only a modest amount of liquid. Pork releases its own juices as it cooks, so the meat does not need to be submerged.
  • Check for tenderness, not just the clock. The pork is ready when it pulls apart easily. A low-and-slow cook generally needs to take the meat well beyond the minimum safe temperature for pork so that it becomes tender enough to shred.
  • Add the barbecue sauce at the end. This keeps its flavour fresh and makes it easier to control how saucy the finished pork is.
  • For a crisp finish, spread the shredded pork on a baking tray and grill it for a few minutes, watching carefully. Spoon over a little cooking liquid or sauce first to help keep it moist.

How to serve slow cooker pulled pork

Serve it in soft rolls with crunchy coleslaw and pickles, or pile it into tacos with lime, coriander and sliced onions. It also works well with jacket potatoes, rice or a crisp green salad. Offer extra barbecue sauce at the table so everyone can add as much as they like.

Storing and reheating

Cool leftovers promptly and store them in a covered container in the fridge, where they will keep for up to three days. Reheat until steaming hot throughout, adding a splash of water or cooking liquid if the pork seems dry. Pulled pork can also be frozen in portions; defrost it in the fridge before reheating.

With a well-marbled shoulder, a balanced spice rub and a little patience, slow cooker pulled pork is an easy way to make a generous meal with very little hands-on effort.


Slow Cooker Pulled Pork FAQs: Cooking Times, Methods and Liquids

  1. How long does it take for a pulled pork to cook in a slow cooker?
  2. What is the best way to cook pulled pork in a slow cooker?
  3. What is the best liquid for pulled pork in a slow cooker?
  4. Do you have to put liquid in a slow cooker for pulled pork?

How long does it take for a pulled pork to cook in a slow cooker?

A pork shoulder usually takes 8–10 hours on the low setting or 5–6 hours on high, though timings vary depending on the size of the joint and your slow cooker. It is ready when the meat is very tender and pulls apart easily with a fork; if it is still firm, cook it for longer and check again.

What is the best way to cook pulled pork in a slow cooker?

The best way to cook pulled pork in a slow cooker is to use a well-marbled pork shoulder, season it generously, then cook it with a small amount of stock, cider or apple juice. Cook on low for 8–10 hours, or on high for 5–6 hours, until the meat is very tender and shreds easily with two forks; timings vary by slow cooker and joint size. Keep the lid on while it cooks, and stir barbecue sauce through the shredded pork at the end, adding a little cooking liquid to keep it moist.

What is the best liquid for pulled pork in a slow cooker?

Apple juice or cider is a popular choice for slow cooker pulled pork, adding a gentle sweetness that complements the meat and spices. Chicken stock also works well for a more savoury flavour, and a splash of cider vinegar can add welcome sharpness. You only need a small amount—around 150–250ml for a typical pork shoulder—as the pork releases plenty of its own juices while cooking.

Do you have to put liquid in a slow cooker for pulled pork?

You don’t need to add much liquid when making pulled pork in a slow cooker, as the pork releases plenty of juices as it cooks. However, a small splash of stock, cider or apple juice can add flavour and help prevent the bottom from drying out. Avoid covering the meat with liquid, as this can dilute the flavour and make the finished pork watery.

The Ultimate Key Lime Pie Recipe: A Classic, Creamy Citrus Dessert

key lime pie recipe

Key Lime Pie Recipe

Bright, creamy and refreshingly tart, key lime pie is a classic American dessert with a buttery biscuit base and a smooth citrus filling. This version uses readily available limes and is simple to prepare at home. For the best result, chill the pie thoroughly before serving.

Preparation time: 20 minutes

Baking time: 20 minutes

Chilling time: At least 4 hours

Serves: 8

Ingredients

For the base

  • 250g digestive biscuits
  • 100g unsalted butter, melted
  • 1 tablespoon caster sugar

For the filling

  • 4 large egg yolks
  • 1 x 397g tin sweetened condensed milk
  • Finely grated zest of 2 limes
  • 120ml fresh lime juice, from about 4–6 limes

To serve

  • Whipped cream
  • Extra lime zest or thin lime slices

Method

  1. Prepare the tin. Heat the oven to 175°C (155°C fan). Lightly grease a 23cm pie dish or loose-bottomed tart tin.
  2. Make the base. Crush the digestive biscuits into fine crumbs. Stir in the melted butter and caster sugar until evenly combined. Press the mixture firmly over the base and up the sides of the tin.
  3. Bake the base. Bake for 8–10 minutes, then set aside to cool slightly while you make the filling.
  4. Mix the filling. In a bowl, whisk the egg yolks until slightly thickened. Whisk in the condensed milk, lime zest and lime juice until smooth.
  5. Fill and bake. Pour the filling into the biscuit crust and bake for 10–12 minutes, until the edges are set but the centre still has a slight wobble.
  6. Cool and chill. Leave the pie to cool to room temperature, then cover and refrigerate for at least 4 hours, or until thoroughly set.
  7. Serve. Top with whipped cream and a little extra lime zest or a few slices of lime.

Tips for the Best Key Lime Pie

  • Choose fresh juice. Freshly squeezed lime juice gives the filling its clean, lively flavour. Key limes are small and aromatic, but regular limes work well too.
  • Don’t overbake. The filling should retain a gentle wobble in the centre when it comes out of the oven. It will continue to set as it cools.
  • Allow plenty of chilling time. A well-chilled pie slices more neatly and has a firmer, creamier texture.
  • Make it ahead. The pie can be prepared the day before serving. Add the whipped cream shortly before bringing it to the table.

With its crisp biscuit crust and tangy, silky filling, this key lime pie makes a refreshing finish to a meal. Serve it cold, with a generous spoonful of cream to balance the citrus.


Expert Tips and Common Pitfalls: Key Lime Pie Recipes by Mary Berry and Jamie Oliver

  1. How does Mary Berry make key lime pie?
  2. What is Jamie Oliver’s best key lime pie recipe?
  3. What is the secret to a good key lime pie?
  4. What are some common mistakes when making key lime pie?

How does Mary Berry make key lime pie?

Mary Berry’s key lime pie is typically made with a crumbly digestive-biscuit base and a smooth filling of egg yolks, sweetened condensed milk, lime zest and fresh lime juice. The base is baked first, then filled and baked briefly until the centre is just set. Once cooled, the pie is chilled before serving, often with whipped cream. For exact quantities and timings, follow the particular Mary Berry recipe you’re using, as versions may differ.

What is Jamie Oliver’s best key lime pie recipe?

There’s no single recipe that can objectively be called Jamie Oliver’s “best” key lime pie, and recipes can change over time. For an authentic version, look for a key lime pie recipe published on Jamie Oliver’s official website or in one of his cookbooks, and follow its quantities and method closely. The classic style pairs a crisp biscuit base with a creamy, tangy lime filling; allow plenty of time for the pie to chill before serving.

What is the secret to a good key lime pie?

The secret to a good key lime pie is balancing its sharp, fresh citrus flavour with a smooth, creamy filling and a crisp biscuit base. Use freshly squeezed lime juice and finely grated zest for the brightest taste, and mix the filling just until smooth. Take care not to overbake it: the centre should still have a slight wobble, as it will continue to set while cooling. Finally, chill the pie thoroughly before serving for the best texture and cleanest slices.

What are some common mistakes when making key lime pie?

Common mistakes when making key lime pie include using bottled lime juice, which can make the filling taste less fresh, and adding too much juice, which may stop it setting properly. Avoid overbaking: the centre should still have a slight wobble when the pie comes out of the oven, as it will firm up while cooling. It’s also important to let the pie chill for at least four hours before serving; cutting it too soon can leave the filling soft. Finally, press the biscuit crumbs firmly into the tin so the base holds together when sliced.

Easy Homemade Pie Crust Recipe for Sweet and Savoury Pies

pie crust recipe

Easy Homemade Pie Crust Recipe

A good pie crust should be crisp, tender and easy to handle. This classic shortcrust pastry uses just a few everyday ingredients and works well for both sweet and savoury pies. Keep everything cool, handle the dough gently and you’ll have a dependable crust ready for your favourite filling.

Ingredients

Makes enough pastry for one 23cm pie crust, or a covered pie with a top and base.

  • 250g plain flour, plus extra for dusting
  • 125g cold unsalted butter, cut into small cubes
  • A pinch of salt
  • 3–5 tablespoons cold water
  • Optional, for a sweet crust: 1 tablespoon caster sugar

Method

  1. Mix the dry ingredients. Put the flour and salt in a large bowl. If making a sweet pie, add the caster sugar.
  2. Rub in the butter. Add the cold butter and rub it into the flour with your fingertips until the mixture resembles fine breadcrumbs. Work quickly so the butter stays cool.
  3. Bring the dough together. Add the cold water a tablespoon at a time, mixing gently with a table knife. Stop as soon as the dough begins to hold together; it should not feel sticky.
  4. Chill. Shape the dough into a flat disc, wrap it and refrigerate for at least 30 minutes. Chilling makes it easier to roll and helps prevent shrinkage during baking.
  5. Roll out the pastry. Lightly flour the work surface and rolling pin. Roll the dough from the centre outwards, turning it regularly, until it is about 3mm thick and large enough to line your pie dish.
  6. Line the dish. Lift the pastry over the dish, easing it into the corners without stretching it. Trim the edges, leaving a little overhang if you plan to add a pastry lid. Chill again for 15–20 minutes before baking or filling.

How to Blind Bake a Pie Crust

Blind baking is useful when the filling needs less time in the oven than the pastry, or when it is added cold after baking.

  1. Heat the oven to 200°C, 180°C fan or gas mark 6.
  2. Prick the chilled pastry base lightly with a fork. Line it with baking paper and fill with baking beans or uncooked rice.
  3. Bake for 15 minutes. Carefully remove the paper and weights, then bake for a further 5–8 minutes, until the base looks dry and lightly golden.

Tips for a Crisp, Tender Crust

  • Use cold butter and cold water, and avoid overworking the dough.
  • Add water gradually. Different flours absorb different amounts, so you may not need all of it.
  • Chill the pastry before rolling and again after lining the dish.
  • If the dough cracks while rolling, press it back together rather than adding lots of extra flour.
  • For a richer, more tender crust, replace a tablespoon of the water with cold milk or add one egg yolk.

Storing the Pastry

The wrapped dough will keep in the fridge for up to two days. It can also be frozen for up to three months; defrost it overnight in the fridge before rolling. Once baked, the crust is best used on the day, when it is at its crispest.

With a little patience and a light touch, homemade pie crust is simple to make and brings a lovely buttery finish to sweet and savoury bakes alike.


7 Tips for Perfectly Flaky Pie Pastry

  1. Use cold butter for a flaky crust.
  2. Weigh ingredients for reliable results.
  3. Rub butter in until it resembles breadcrumbs.
  4. Add ice-cold water a little at a time.
  5. Handle the dough as little as possible.
  6. Chill the dough before rolling it out.
  7. Blind-bake the crust to prevent a soggy base.

Use cold butter for a flaky crust.

Use cold butter for a flaky pie crust. As the pastry bakes, the butter melts and releases steam, creating delicate layers in the dough. Cut it into small cubes straight from the fridge and work it into the flour quickly, using your fingertips, so it stays cool. If the mixture starts to feel warm or soft, chill it before continuing.

Weigh ingredients for reliable results.

For a reliable pie crust, weigh your ingredients rather than relying on cups or estimates. Accurate amounts help you keep the right balance of flour, butter and water, so the pastry is easier to handle and turns out tender and crisp. Use cold ingredients, and add the water gradually, as you may need slightly more or less depending on your flour.

Rub butter in until it resembles breadcrumbs.

Rub the cold butter into the flour using your fingertips until the mixture looks like fine breadcrumbs. Keep the movement light and work quickly, so the butter does not warm up too much. This helps create a tender, flaky pastry; if a few small pieces of butter remain, that’s perfectly fine.

Add ice-cold water a little at a time.

Add ice-cold water a little at a time when bringing your pastry dough together. Start with one tablespoon and mix gently before adding more, stopping as soon as the dough holds together. Using too much water can make the crust tough, while keeping it cold helps prevent the butter from melting and keeps the pastry tender and flaky.

Handle the dough as little as possible.

Handle pie dough as little as possible to keep the crust tender and flaky. Overworking it develops the flour’s gluten, which can make the pastry tough and cause it to shrink as it bakes. Mix only until the dough just comes together, and avoid kneading it; if it becomes warm or sticky, wrap it and chill it briefly before rolling.

Chill the dough before rolling it out.

Chilling the dough before rolling it out helps the butter firm up, making the pastry easier to handle and less likely to stick or tear. It also gives the flour time to absorb the moisture, resulting in a smoother dough and a more tender crust. Wrap the dough and refrigerate it for at least 30 minutes, then let it soften slightly at room temperature if it feels too firm to roll.

Blind-bake the crust to prevent a soggy base.

Blind-baking the pie crust helps prevent a soggy base, particularly when the filling is moist or needs less time in the oven than the pastry. Line the chilled pastry with baking paper, fill it with baking beans or uncooked rice, and bake until the edges are set. Remove the paper and weights, then return the crust to the oven for a few minutes so the base dries and turns lightly golden before adding the filling.