Homemade Chicken Pot Pie: A Comforting Classic with Golden, Flaky Pastry
homemade chicken pot pie

Homemade Chicken Pot Pie

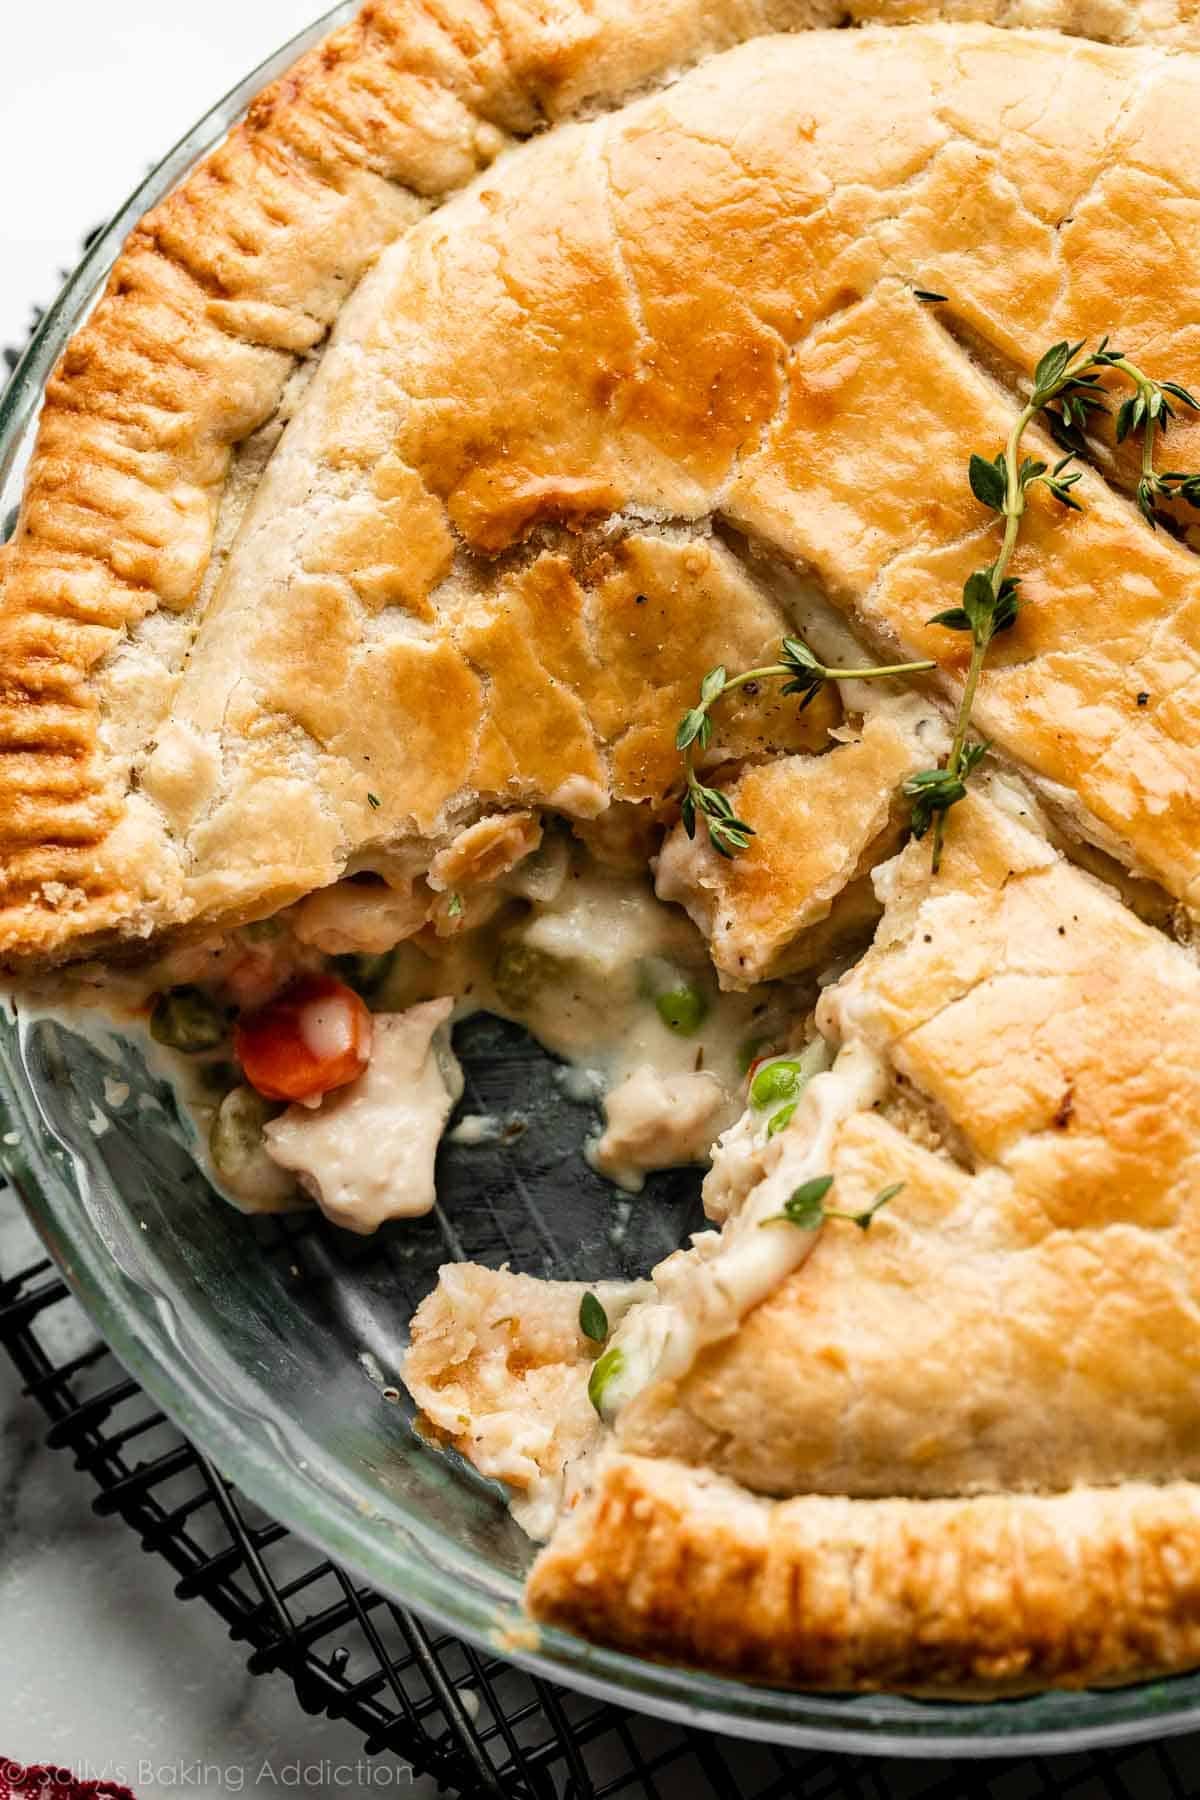
Golden, flaky pastry wrapped around tender chicken and vegetables in a creamy sauce makes chicken pot pie a comforting favourite. It is a satisfying meal for a chilly evening, and a useful way to turn leftover cooked chicken into something special. This version has a crisp pastry lid and a rich, savoury filling.

At a glance

  • Serves: 6
  • Preparation time: 30 minutes
  • Cooking time: 45 minutes

Ingredients

For the pastry

  • 250g plain flour, plus extra for rolling
  • 125g cold unsalted butter, cut into cubes
  • A pinch of salt
  • 4–6 tablespoons cold water
  • 1 egg, beaten, for glazing

For the filling

  • 40g butter
  • 1 onion, finely chopped
  • 2 carrots, peeled and diced
  • 2 celery sticks, diced
  • 40g plain flour
  • 500ml chicken stock
  • 150ml double cream or whole milk
  • 500g cooked chicken, cut into bite-sized pieces
  • 150g frozen peas
  • 1 teaspoon fresh thyme leaves, or ½ teaspoon dried thyme
  • Salt and freshly ground black pepper

Method

  1. Make the pastry. Put the flour and salt into a bowl. Rub in the cold butter with your fingertips until the mixture resembles breadcrumbs. Add the cold water a little at a time, mixing until the dough just comes together. Shape it into a flat disc, wrap and chill for at least 30 minutes.

  2. Cook the vegetables. Melt the butter in a large saucepan over a medium heat. Add the onion, carrots and celery and cook for 8–10 minutes, stirring now and then, until beginning to soften.

  3. Make the sauce. Stir in the flour and cook for 1 minute. Gradually pour in the chicken stock, stirring to keep the sauce smooth. Bring to a gentle simmer and cook for 5–7 minutes, until thickened. Stir in the cream or milk, chicken, peas and thyme. Season to taste, then leave the filling to cool slightly.

  4. Prepare the pie. Heat the oven to 200°C (180°C fan) or Gas Mark 6. Spoon the filling into a deep pie dish. On a lightly floured surface, roll out the pastry until it is slightly larger than the dish.

  5. Add the pastry lid. Brush the rim of the dish with a little beaten egg. Lay the pastry over the filling and press the edges down to seal. Trim away any excess and crimp the edge with your fingers or a fork. Cut a small slit in the centre to let steam escape, then brush the pastry with beaten egg.

  6. Bake. Place the pie on a baking tray and bake for 30–35 minutes, until the pastry is puffed and deep golden and the filling is bubbling. Leave it to stand for 10 minutes before serving.

Tips for a delicious pie

  • Cool the filling before adding the pastry. A hot filling can soften the pastry before it has a chance to bake.
  • Keep the pastry as cool as possible while working with it, and handle it gently for a tender, flaky result.
  • For extra flavour, use leftover roast chicken and include any meat from the legs as well as the breast.
  • Put the pie dish on a baking tray to catch any filling that bubbles over.
  • Make sure the filling is piping hot throughout before serving. If using freshly cooked chicken, it should reach a safe internal temperature of 75°C.

What to serve with chicken pot pie

Chicken pot pie is a hearty meal on its own, but it also goes well with steamed greens, tender-stem broccoli or a crisp green salad. For an especially comforting supper, serve it with buttery mashed potatoes.

Storing and reheating

Cool leftovers promptly and store them in a covered container in the fridge for up to two days. Reheat until piping hot throughout. The pie can also be assembled ahead of time: keep the filling and pastry separate in the fridge, then add the pastry lid and bake when ready.


Understanding Homemade Chicken Pot Pie: Ingredients, Crust, and Creamy Filling Explained

  1. What is the crust on a pot pie made of?
  2. What is chicken pot pie filling made of?
  3. What is chicken pot pie gravy made of?
  4. What are the main ingredients of chicken pot pie?
  5. What is the sauce made of in chicken pot pie?
  6. What makes chicken pot pie creamy?

What is the crust on a pot pie made of?

The crust on a homemade chicken pot pie is usually made from plain flour, cold butter, a pinch of salt and just enough cold water to bring the mixture together. This creates a tender, flaky pastry lid. Some recipes use ready-made shortcrust or puff pastry instead, while others add a bottom crust as well as a lid.

What is chicken pot pie filling made of?

Chicken pot pie filling is typically made with cooked chicken, vegetables such as carrots, peas, onion and celery, and a creamy sauce. The sauce is often thickened with flour and made using butter, chicken stock and milk or cream, then seasoned with salt, pepper and herbs such as thyme. Ingredients can be varied to suit your taste or make use of leftover vegetables.

What is chicken pot pie gravy made of?

Chicken pot pie gravy is usually made by cooking butter and flour together to form a roux, then gradually whisking in chicken stock until smooth and thick. Cream or milk adds richness, while salt, pepper and herbs such as thyme provide flavour. The chicken and vegetables are stirred through the sauce before the pie is topped with pastry and baked.

What are the main ingredients of chicken pot pie?

The main ingredients in a homemade chicken pot pie are cooked chicken, vegetables such as carrots, peas, onion and celery, and a creamy sauce made with butter, flour and chicken stock. These are topped with pastry—often shortcrust or puff pastry—and baked until golden. Seasonings such as thyme, salt and black pepper add extra flavour.

What is the sauce made of in chicken pot pie?

The sauce in chicken pot pie is usually made from butter, flour and chicken stock, with milk or cream added for a smooth, rich finish. The butter and flour are cooked together to make a roux, then the stock is stirred in gradually until the sauce thickens. Seasonings such as salt, black pepper and thyme add extra flavour.

What makes chicken pot pie creamy?

Chicken pot pie gets its creamy texture from a thickened sauce made with butter, flour and chicken stock, finished with double cream or whole milk. The butter and flour form a roux, which helps the sauce thicken, while the dairy adds richness and a smooth finish. For an extra-creamy filling, stir in a little more cream, but keep the sauce thick enough to hold its shape beneath the pastry.


Mincemeat Pie: A Much-Loved British Christmas Treat

mincemeat pie

Mincemeat Pie: A Much-Loved British Christmas Treat

Few flavours are more closely associated with a British Christmas than mincemeat pie. These small, golden pastries are filled with a fragrant mixture of dried fruit, citrus peel, spices and sugar. Despite its name, modern mincemeat usually contains no meat at all.

What is mincemeat?

Mincemeat is a rich, sweet filling traditionally made with ingredients such as raisins, currants, sultanas, chopped apple, candied peel, spices and suet. Brandy or another spirit is often added, though alcohol-free versions are also widely available. The mixture is left to mature so the flavours can mingle, making it a convenient filling to prepare ahead of the festive season.

The name reflects the filling’s history. Early versions of mincemeat combined chopped meat with fruit and spices. Over time, the meat became less common, and the sweet fruit mixture familiar today took its place. Some modern recipes still use suet, while others use butter or a vegetable alternative.

A Christmas tradition

Mincemeat pies have been part of British festive food for centuries. Their ingredients once carried associations with celebration and abundance, and the pies gradually became a seasonal staple. Today, they are sold in bakeries and supermarkets throughout the Christmas period and are also a favourite to make at home.

They are usually made with shortcrust pastry, though puff pastry is sometimes used. The filling is enclosed in a pastry case or topped with a smaller pastry lid, then baked until golden. Some bakers add a star-shaped lid, while others finish the pies with a dusting of icing sugar.

How to serve mincemeat pies

Mincemeat pies can be enjoyed warm or at room temperature. They are often served with a little cream, brandy butter, custard or ice cream. A cup of tea is a classic accompaniment, while mulled wine or coffee also pairs well with their sweet, spiced flavour.

Making them at home

For homemade pies, prepare or buy mincemeat and use it to fill pastry-lined tins. Avoid overfilling, as the mixture can bubble up during baking. Add a pastry lid, seal the edges and make a small slit in each top to let steam escape. Bake until the pastry is crisp and golden, then leave the pies to cool slightly before serving.

There is plenty of room to adapt the recipe. You can choose vegetarian or vegan pastry and filling, use alcohol-free mincemeat, or add extra citrus zest for a brighter flavour. However they are made, mincemeat pies remain a simple and satisfying way to bring the taste of Christmas to the table.


Top Tips for Perfecting Your Mincemeat Pie

  1. Chill the pastry before rolling it out.
  2. Use a little flour to prevent sticking.
  3. Spoon mincemeat in without overfilling.
  4. Brush the pastry tops with milk or beaten egg.
  5. Bake until golden, then cool before serving.

Chill the pastry before rolling it out.

Chilling the pastry before rolling it out helps keep the fat firm, making it easier to handle and less likely to stick or tear. Wrap it and refrigerate for around 20–30 minutes, then let it soften slightly if it feels too hard to roll. The result is pastry that holds its shape better and bakes into a tender, crumbly case for your mincemeat pies.

Use a little flour to prevent sticking.

Dust your work surface and rolling pin with a little flour before rolling out the pastry to help prevent it sticking. Use only a light sprinkling, as too much flour can make the pastry dry and tough.

Spoon mincemeat in without overfilling.

Spoon the mincemeat into each pastry case, leaving a little space at the top. It can bubble up as the pies bake, so avoid overfilling to help prevent the filling from spilling out and the pastry edges from becoming sticky.

Brush the pastry tops with milk or beaten egg.

Before baking, brush the pastry tops with a little milk or beaten egg. Milk gives the pies a gentle golden finish, while beaten egg creates a deeper colour and a glossy sheen. Use a light, even coating and try not to let it run down the sides, as this can make the pastry stick to the tin.

Bake until golden, then cool before serving.

Bake the mincemeat pies until the pastry is crisp and golden. Once out of the oven, leave them to cool for a few minutes before serving; the filling will be extremely hot, and cooling also helps the pies hold their shape. Enjoy them warm or at room temperature, perhaps with cream, custard or a dusting of icing sugar.

The Ultimate Key Lime Pie Recipe: A Classic, Creamy Citrus Dessert

key lime pie recipe

Key Lime Pie Recipe

Bright, creamy and refreshingly tart, key lime pie is a classic American dessert with a buttery biscuit base and a smooth citrus filling. This version uses readily available limes and is simple to prepare at home. For the best result, chill the pie thoroughly before serving.

Preparation time: 20 minutes

Baking time: 20 minutes

Chilling time: At least 4 hours

Serves: 8

Ingredients

For the base

  • 250g digestive biscuits
  • 100g unsalted butter, melted
  • 1 tablespoon caster sugar

For the filling

  • 4 large egg yolks
  • 1 x 397g tin sweetened condensed milk
  • Finely grated zest of 2 limes
  • 120ml fresh lime juice, from about 4–6 limes

To serve

  • Whipped cream
  • Extra lime zest or thin lime slices

Method

  1. Prepare the tin. Heat the oven to 175°C (155°C fan). Lightly grease a 23cm pie dish or loose-bottomed tart tin.
  2. Make the base. Crush the digestive biscuits into fine crumbs. Stir in the melted butter and caster sugar until evenly combined. Press the mixture firmly over the base and up the sides of the tin.
  3. Bake the base. Bake for 8–10 minutes, then set aside to cool slightly while you make the filling.
  4. Mix the filling. In a bowl, whisk the egg yolks until slightly thickened. Whisk in the condensed milk, lime zest and lime juice until smooth.
  5. Fill and bake. Pour the filling into the biscuit crust and bake for 10–12 minutes, until the edges are set but the centre still has a slight wobble.
  6. Cool and chill. Leave the pie to cool to room temperature, then cover and refrigerate for at least 4 hours, or until thoroughly set.
  7. Serve. Top with whipped cream and a little extra lime zest or a few slices of lime.

Tips for the Best Key Lime Pie

  • Choose fresh juice. Freshly squeezed lime juice gives the filling its clean, lively flavour. Key limes are small and aromatic, but regular limes work well too.
  • Don’t overbake. The filling should retain a gentle wobble in the centre when it comes out of the oven. It will continue to set as it cools.
  • Allow plenty of chilling time. A well-chilled pie slices more neatly and has a firmer, creamier texture.
  • Make it ahead. The pie can be prepared the day before serving. Add the whipped cream shortly before bringing it to the table.

With its crisp biscuit crust and tangy, silky filling, this key lime pie makes a refreshing finish to a meal. Serve it cold, with a generous spoonful of cream to balance the citrus.


Expert Tips and Common Pitfalls: Key Lime Pie Recipes by Mary Berry and Jamie Oliver

  1. How does Mary Berry make key lime pie?
  2. What is Jamie Oliver’s best key lime pie recipe?
  3. What is the secret to a good key lime pie?
  4. What are some common mistakes when making key lime pie?

How does Mary Berry make key lime pie?

Mary Berry’s key lime pie is typically made with a crumbly digestive-biscuit base and a smooth filling of egg yolks, sweetened condensed milk, lime zest and fresh lime juice. The base is baked first, then filled and baked briefly until the centre is just set. Once cooled, the pie is chilled before serving, often with whipped cream. For exact quantities and timings, follow the particular Mary Berry recipe you’re using, as versions may differ.

What is Jamie Oliver’s best key lime pie recipe?

There’s no single recipe that can objectively be called Jamie Oliver’s “best” key lime pie, and recipes can change over time. For an authentic version, look for a key lime pie recipe published on Jamie Oliver’s official website or in one of his cookbooks, and follow its quantities and method closely. The classic style pairs a crisp biscuit base with a creamy, tangy lime filling; allow plenty of time for the pie to chill before serving.

What is the secret to a good key lime pie?

The secret to a good key lime pie is balancing its sharp, fresh citrus flavour with a smooth, creamy filling and a crisp biscuit base. Use freshly squeezed lime juice and finely grated zest for the brightest taste, and mix the filling just until smooth. Take care not to overbake it: the centre should still have a slight wobble, as it will continue to set while cooling. Finally, chill the pie thoroughly before serving for the best texture and cleanest slices.

What are some common mistakes when making key lime pie?

Common mistakes when making key lime pie include using bottled lime juice, which can make the filling taste less fresh, and adding too much juice, which may stop it setting properly. Avoid overbaking: the centre should still have a slight wobble when the pie comes out of the oven, as it will firm up while cooling. It’s also important to let the pie chill for at least four hours before serving; cutting it too soon can leave the filling soft. Finally, press the biscuit crumbs firmly into the tin so the base holds together when sliced.

Easy Spanakopita Recipe: Crispy Greek Spinach and Feta Pie

spanakopita recipe

Spanakopita: A Classic Greek Spinach and Feta Pie

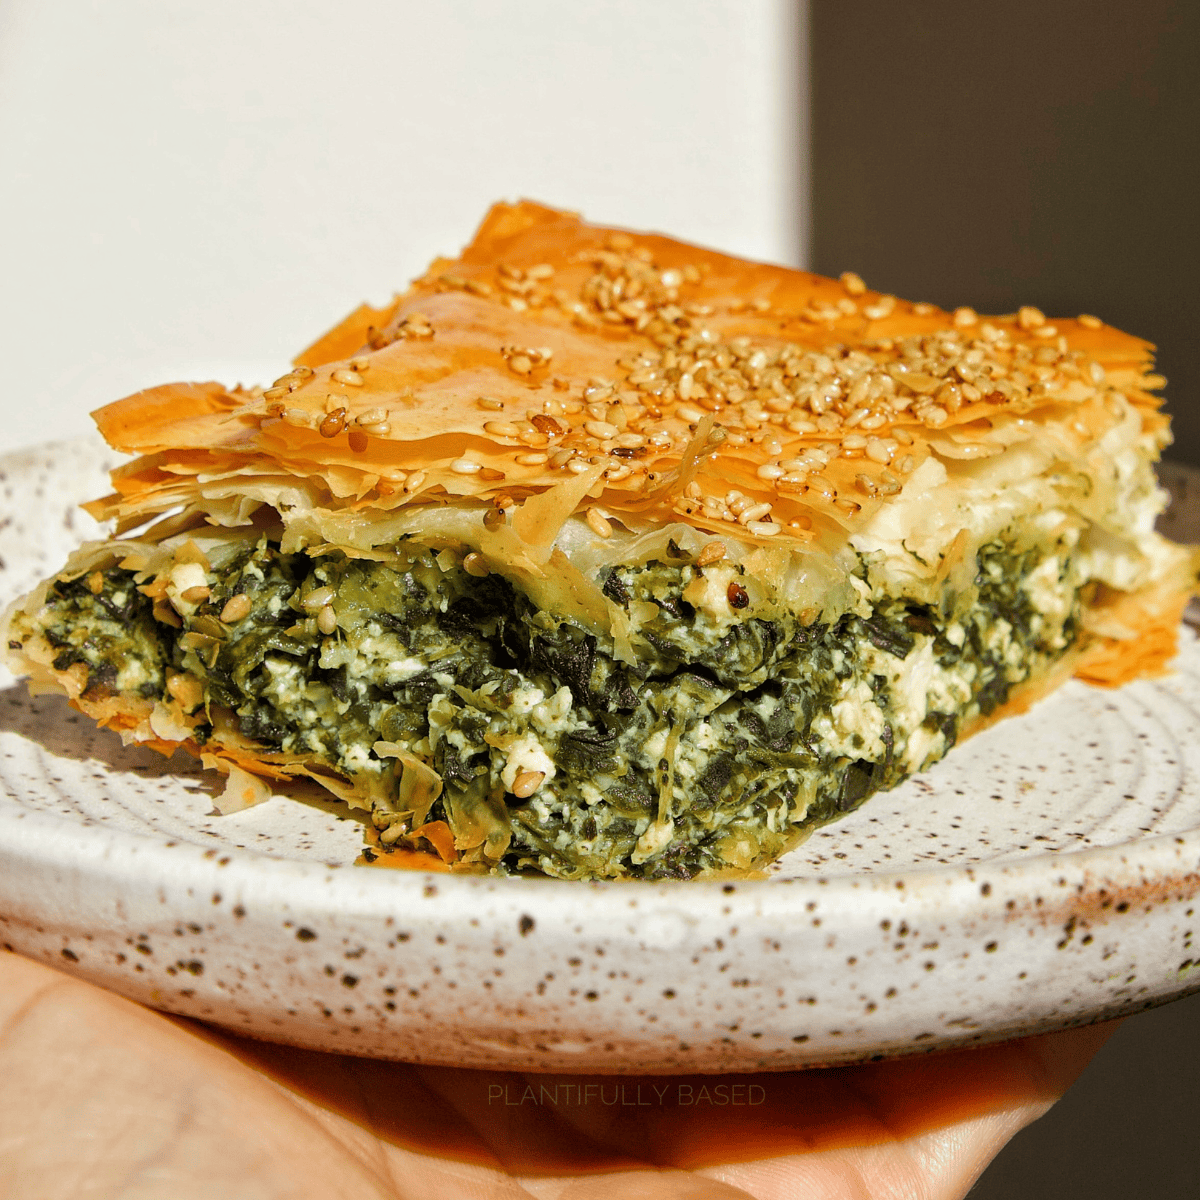
Golden, crisp and filled with savoury spinach, herbs and tangy feta, spanakopita is one of Greece’s best-loved pies. It makes a satisfying lunch, a sharing dish for a gathering or a tasty addition to a mezze spread. This version uses ready-made filo pastry for a straightforward bake at home.

Serves: 6–8

Preparation time: 25 minutes

Cooking time: 40–45 minutes

Ingredients

  • 700g fresh spinach, or 450g frozen spinach, defrosted
  • 2 tablespoons olive oil, plus extra for brushing
  • 1 medium onion, finely chopped
  • 4 spring onions, thinly sliced
  • 2 garlic cloves, finely chopped
  • 200g feta, crumbled
  • 2 eggs, lightly beaten
  • Small handful of fresh dill, finely chopped
  • Small handful of flat-leaf parsley, finely chopped
  • ¼ teaspoon grated nutmeg (optional)
  • Freshly ground black pepper
  • 8–10 sheets filo pastry
  • 50g butter, melted, or extra olive oil

Method

  1. Prepare the spinach. If using fresh spinach, wilt it in batches in a large pan over a medium heat. Transfer to a colander and leave to cool. If using defrosted frozen spinach, place it in a clean tea towel and squeeze out as much liquid as possible. Chop the spinach roughly.
  2. Cook the aromatics. Heat the olive oil in a frying pan. Add the onion and spring onions and cook for 5–7 minutes, until soft. Stir in the garlic and cook for another minute. Leave the mixture to cool slightly.
  3. Make the filling. Put the spinach, onion mixture, feta, eggs, dill and parsley in a bowl. Add the nutmeg, if using, and a good grind of black pepper. Mix gently. Taste before adding salt, as feta can be quite salty.
  4. Prepare the pastry. Heat the oven to 190°C (170°C fan, Gas Mark 5). Lightly oil a baking tin, approximately 23 x 33cm. Keep the filo covered with a clean, slightly damp tea towel while you work so it does not dry out.
  5. Layer the base. Lay one sheet of filo in the tin, letting any excess hang over the sides. Brush lightly with melted butter or olive oil. Add another sheet at a slight angle and brush again. Repeat until you have used about half of the pastry.
  6. Add the filling. Spoon the spinach mixture over the pastry and spread it into an even layer.
  7. Top the pie. Layer the remaining filo sheets over the filling, brushing each with butter or oil. Fold the overhanging pastry over the top to form a neat edge. Brush the surface generously and score the top lightly into portions with a sharp knife, taking care not to cut all the way through the filling.
  8. Bake. Bake for 40–45 minutes, until the pastry is deeply golden and crisp. Leave the pie to rest for 10 minutes before cutting and serving.

Tips for a crisp, flavourful spanakopita

  • Remove excess moisture. Wet spinach can make the pastry soggy, so squeeze it thoroughly after wilting or defrosting.
  • Work quickly with filo. Keep unused sheets covered and brush each layer lightly; too much butter or oil can make the pastry heavy.
  • Make it ahead. Assemble the pie, cover and refrigerate it for a few hours before baking. You can also bake it in advance and reheat it in the oven to bring back its crispness.
  • Serve it simply. Spanakopita is delicious warm or at room temperature, with a crisp salad, olives or a spoonful of Greek yoghurt.

With its flaky layers and bright, herby filling, spanakopita is a versatile pie that is easy to share. Cut it into generous squares for a main meal or smaller pieces for a buffet or picnic.


Top 5 FAQs About Spanakopita: Ingredients, Serving Suggestions, and Tips for a Crispy Delight

  1. Why is the bottom of my spanakopita soggy?
  2. What are the main ingredients of spanakopita?
  3. How do you keep spanakopita crispy?
  4. What is traditionally served with spanakopita?
  5. What do Greeks eat with spanakopita?

Why is the bottom of my spanakopita soggy?

A soggy bottom is usually caused by excess moisture in the spinach or by the pie not baking long enough. Squeeze wilted or defrosted spinach very thoroughly before mixing the filling, and avoid adding any liquid left in the pan. Make sure the oven is fully preheated and bake the spanakopita until the base and top are crisp and golden; using a metal baking tin and placing it on a lower oven shelf can also help the bottom cook through. Allow the pie to rest briefly before slicing so the filling can settle.

What are the main ingredients of spanakopita?

The main ingredients in spanakopita are spinach, feta cheese and filo pastry. The filling is often flavoured with onion, spring onions, garlic and fresh herbs such as dill and parsley, then bound with egg. Olive oil or melted butter is brushed between the filo layers to help them turn crisp and golden as the pie bakes.

How do you keep spanakopita crispy?

To keep spanakopita crispy, squeeze as much liquid as possible from the spinach before mixing the filling, as excess moisture can soften the pastry. Brush the filo lightly with melted butter or olive oil between layers, and bake until deeply golden. Once cooked, leave the pie uncovered while it cools; covering it traps steam and makes the pastry soggy. Reheat leftovers in the oven rather than the microwave to restore their crispness.

What is traditionally served with spanakopita?

Spanakopita is traditionally served warm or at room temperature, often as part of a Greek meal alongside a crisp salad, olives and other small dishes such as tzatziki. It can also be enjoyed on its own as a light lunch or snack, with a squeeze of lemon for a fresh, tangy finish.

What do Greeks eat with spanakopita?

Greeks often enjoy spanakopita on its own as a snack or light meal, but it also pairs well with a fresh Greek salad, olives and a little tzatziki or plain Greek yoghurt. As part of a larger meal, it can be served alongside grilled meat or fish and other small dishes, such as dips and roasted vegetables. It is delicious warm or at room temperature.

Delicious Spaghetti Squash Recipes to Elevate Your Culinary Experience

spaghetti squash recipes

The Versatile and Delicious Spaghetti Squash: 3 Recipes to Try

Spaghetti squash, also known as vegetable spaghetti, is a unique and versatile ingredient that can be used in a variety of dishes. Its mild flavour and noodle-like texture make it a popular choice for those looking to add a healthy twist to their meals. Here are three delicious spaghetti squash recipes to inspire your next culinary adventure:

Spaghetti Squash Carbonara

Ingredients:

  • 1 medium spaghetti squash
  • 4 slices of bacon, chopped
  • 2 eggs
  • 1/2 cup grated Parmesan cheese
  • Salt and pepper to taste

Instructions:

  1. Cut the spaghetti squash in half lengthwise and remove the seeds.
  2. Bake the squash in the oven at 200°C for 40-50 minutes until tender.
  3. Meanwhile, cook the bacon in a pan until crispy.
  4. In a bowl, whisk together the eggs and Parmesan cheese.
  5. Once the squash is cooked, use a fork to scrape out the flesh into “noodles”.
  6. Toss the spaghetti squash noodles with the bacon and egg mixture until well combined.
  7. Season with salt and pepper before serving.

Spaghetti Squash Pad Thai

Spaghetti Squash Primavera

Whether you’re craving a comforting pasta dish or looking for a lighter alternative, spaghetti squash is sure to impress with its versatility. Give these recipes a try and discover the endless possibilities this humble vegetable has to offer!


8 Essential Tips for Perfecting Spaghetti Squash Dishes

  1. 1. When cooking spaghetti squash, pierce it with a fork and microwave for a few minutes to make it easier to cut in half.
  2. 2. Scoop out the seeds from the centre of the squash before baking or steaming.
  3. 3. Roast spaghetti squash with olive oil, salt, and pepper for a simple and delicious flavour.
  4. 4. Use a fork to scrape out the cooked flesh of the squash into strands resembling spaghetti.
  5. 5. Serve spaghetti squash with your favourite pasta sauce or toppings like cheese and herbs.
  6. 6. Try using spaghetti squash as a low-carb alternative to pasta in dishes like carbonara or bolognese.
  7. 7. Experiment with different seasonings such as garlic, basil, or red pepper flakes to enhance the taste of your spaghetti squash dish.
  8. 8. Store any leftover cooked spaghetti squash in an airtight container in the fridge for up to 3-5 days.

1. When cooking spaghetti squash, pierce it with a fork and microwave for a few minutes to make it easier to cut in half.

When preparing spaghetti squash, a helpful tip is to pierce it with a fork and microwave it for a few minutes before cutting it in half. This simple technique can make the squash easier to handle and cut, saving you time and effort in the kitchen. By softening the squash slightly, you can navigate through its tough skin more smoothly, ensuring a hassle-free cooking experience. Give this method a try to streamline your spaghetti squash preparation process and enjoy delicious meals with ease.

2. Scoop out the seeds from the centre of the squash before baking or steaming.

To ensure a successful preparation of spaghetti squash recipes, it is essential to follow the tip of scooping out the seeds from the centre of the squash before baking or steaming. By removing the seeds, you not only create space for seasonings and other ingredients to enhance the flavour but also prevent them from interfering with the desired texture of the squash “noodles”. This simple step helps in achieving a delicious and well-balanced dish that showcases the natural goodness of spaghetti squash.

3. Roast spaghetti squash with olive oil, salt, and pepper for a simple and delicious flavour.

For a simple and delicious flavour, try roasting spaghetti squash with olive oil, salt, and pepper. This easy method enhances the natural sweetness of the squash while adding a subtle richness from the olive oil. The combination of these basic ingredients brings out the best in the spaghetti squash, creating a versatile base for various recipes.

4. Use a fork to scrape out the cooked flesh of the squash into strands resembling spaghetti.

To enhance your spaghetti squash recipes, a helpful tip is to use a fork to scrape out the cooked flesh of the squash into strands resembling spaghetti. This simple technique not only gives the dish its name but also creates a satisfying texture that mimics traditional pasta. By transforming the squash into delicate strands, you can elevate your culinary creations with a healthy and nutritious twist that is both visually appealing and delicious.

5. Serve spaghetti squash with your favourite pasta sauce or toppings like cheese and herbs.

When exploring spaghetti squash recipes, a delightful tip to enhance your culinary experience is to serve the cooked squash with your preferred pasta sauce or toppings, such as a rich marinara sauce, creamy Alfredo sauce, or even a simple garlic and olive oil drizzle. Adding a sprinkle of cheese and fresh herbs like basil or parsley can further elevate the dish, creating a harmonious blend of flavours that will surely tantalise your taste buds. This versatile approach allows you to customise your spaghetti squash meal to suit your preferences and experiment with different combinations for a truly satisfying dining experience.

6. Try using spaghetti squash as a low-carb alternative to pasta in dishes like carbonara or bolognese.

For a healthier twist on classic pasta dishes such as carbonara or bolognese, consider using spaghetti squash as a low-carb alternative. By swapping traditional pasta for spaghetti squash “noodles,” you can enjoy the same comforting flavours while reducing your carbohydrate intake. The mild flavour and noodle-like texture of spaghetti squash make it a versatile ingredient that pairs well with rich sauces, creating a satisfying and nutritious meal option. Give it a try and discover a delicious way to lighten up your favourite pasta recipes.

7. Experiment with different seasonings such as garlic, basil, or red pepper flakes to enhance the taste of your spaghetti squash dish.

When exploring spaghetti squash recipes, it’s essential to embrace experimentation with various seasonings like garlic, basil, or red pepper flakes. These aromatic additions can elevate the flavour profile of your spaghetti squash dish, adding depth and complexity to each bite. By incorporating different seasonings, you can customise your recipe to suit your taste preferences and create a culinary experience that is uniquely yours.

8. Store any leftover cooked spaghetti squash in an airtight container in the fridge for up to 3-5 days.

When preparing spaghetti squash recipes, it is essential to store any leftover cooked squash properly to maintain its freshness and flavour. To do so, simply place the cooked spaghetti squash in an airtight container and store it in the refrigerator. This storage method ensures that the squash remains delicious for up to 3-5 days, allowing you to enjoy the leftovers in future meals without compromising on taste or quality.

Discover Simple and Delicious Easy Chicken Recipes to Try Today

easy chicken recipes

Delicious and Easy Chicken Recipes to Try at Home

Chicken is a versatile meat that can be used in a variety of dishes, from comforting stews to zesty stir-fries. If you’re looking for simple yet tasty chicken recipes to whip up in your kitchen, look no further! Here are a few ideas to get you started:

Lemon Herb Roast Chicken

Marinate a whole chicken with a mixture of lemon juice, garlic, herbs like rosemary and thyme, salt, and pepper. Roast it in the oven until golden brown and juicy. Serve with roasted vegetables for a complete meal.

Chicken Stir-Fry with Vegetables

Slice chicken breast into strips and stir-fry with your favourite vegetables like bell peppers, broccoli, and snow peas. Add soy sauce, ginger, and garlic for flavour. Serve over steamed rice for a quick and nutritious dinner.

Creamy Chicken Pasta

Cook pasta according to package instructions. In a separate pan, sauté diced chicken breast with onions and mushrooms. Add cream, parmesan cheese, and herbs like parsley or basil. Toss the cooked pasta in the creamy sauce and enjoy!

BBQ Chicken Quesadillas

Shred leftover cooked chicken and mix it with BBQ sauce. Spread the mixture on tortillas along with cheese and sliced onions. Cook the quesadillas on a griddle until crispy on both sides. Cut into wedges and serve with sour cream or guacamole.

These easy chicken recipes are perfect for busy weeknights or lazy weekends when you want a delicious homemade meal without spending hours in the kitchen. Feel free to customise them with your favourite ingredients and spices to suit your taste!


Six Simple Tips for Delicious and Easy Chicken Recipes

  1. Marinate chicken in yogurt and spices for added flavour and tenderness.
  2. Use a meat thermometer to ensure chicken is cooked through but still juicy.
  3. Experiment with different herbs and seasonings to create unique flavour profiles.
  4. Try grilling or baking chicken for a healthier cooking method compared to frying.
  5. Consider using boneless, skinless chicken breasts for quicker cooking times.
  6. Don’t be afraid to try new recipes and techniques to keep things interesting!

Marinate chicken in yogurt and spices for added flavour and tenderness.

Enhance the flavour and tenderness of your chicken dishes by marinating the meat in a mixture of yogurt and spices. The acidity of the yogurt helps to tenderise the chicken while infusing it with a rich and aromatic blend of seasonings. This simple yet effective technique not only adds depth to the taste but also ensures that your chicken remains juicy and succulent when cooked. Try marinating your chicken in yogurt and spices for a delicious twist on traditional recipes that will leave your taste buds craving more.

Use a meat thermometer to ensure chicken is cooked through but still juicy.

Using a meat thermometer is a crucial tip when preparing easy chicken recipes. By checking the internal temperature of the chicken, you can ensure that it is cooked through thoroughly while still retaining its juiciness. This simple tool takes the guesswork out of cooking chicken, helping you achieve perfect results every time. Whether you’re roasting, grilling, or pan-searing chicken, a meat thermometer is your best ally in creating delicious and safe meals for yourself and your loved ones.

Experiment with different herbs and seasonings to create unique flavour profiles.

When exploring easy chicken recipes, a valuable tip is to experiment with various herbs and seasonings to craft distinctive flavour profiles. By incorporating a blend of herbs like rosemary, thyme, or basil, along with seasonings such as garlic, paprika, or cumin, you can elevate the taste of your chicken dishes and add a personal touch to each recipe. Whether you prefer a zesty and tangy marinade or a fragrant herb rub, the possibilities are endless when it comes to creating delicious and unique flavours for your chicken meals.

Try grilling or baking chicken for a healthier cooking method compared to frying.

When exploring easy chicken recipes, opting for grilling or baking the chicken can significantly enhance the healthiness of your meal compared to frying. Grilling or baking helps retain the natural flavours of the chicken while reducing the amount of added fats and oils typically used in frying. This cooking method also results in a deliciously tender and juicy chicken with a nice crispy exterior, making it a healthier and equally satisfying alternative to traditional frying techniques.

Consider using boneless, skinless chicken breasts for quicker cooking times.

When preparing easy chicken recipes, a helpful tip to expedite cooking times is to opt for boneless, skinless chicken breasts. These cuts of chicken cook faster compared to bone-in varieties, making them ideal for busy weeknights or when you’re short on time. By using boneless, skinless chicken breasts in your recipes, you can enjoy a delicious meal without compromising on flavour or tenderness.

Don’t be afraid to try new recipes and techniques to keep things interesting!

Don’t be afraid to try new recipes and techniques when exploring easy chicken recipes. Experimenting with different flavours, cooking methods, and ingredients can help keep your meals exciting and fresh. Whether it’s testing out a unique marinade, incorporating unconventional spices, or trying a new cooking technique, embracing creativity in the kitchen can lead to delicious discoveries and elevate your culinary skills. So, don’t hesitate to step out of your comfort zone and infuse some creativity into your chicken dishes to make mealtime more enjoyable and flavourful.

Delightful Pumpkin Recipes to Spice Up Your Autumn Menu

pumpkin recipes

The Versatile Pumpkin: Delicious Recipes to Try

Pumpkin, a quintessential autumn ingredient, is not only perfect for carving into jack-o’-lanterns but also for creating a variety of mouth-watering dishes. From soups to desserts, the humble pumpkin can be transformed into culinary delights that will satisfy your taste buds. Here are some delightful pumpkin recipes you must try:

Pumpkin Soup

Warm up on a chilly evening with a comforting bowl of creamy pumpkin soup. Flavoured with aromatic spices like cinnamon and nutmeg, this soup is a true autumn classic.

Roasted Pumpkin Salad

Toss chunks of roasted pumpkin with fresh greens, toasted nuts, and a tangy vinaigrette for a healthy and satisfying salad that bursts with flavour and texture.

Pumpkin Risotto

Creamy arborio rice cooked with pureed pumpkin, Parmesan cheese, and a hint of sage creates a luxurious and hearty dish that is perfect for a cosy night in.

Spiced Pumpkin Bread

This moist and fragrant pumpkin bread is infused with warm spices like ginger and cloves, making it an irresistible treat for breakfast or afternoon tea.

Pumpkin Cheesecake

A velvety smooth cheesecake made with a spiced pumpkin filling on a buttery graham cracker crust is the ultimate indulgent dessert for any occasion.

Whether you prefer savoury or sweet dishes, there is no shortage of creative ways to incorporate pumpkin into your cooking repertoire. Embrace the versatility of this seasonal ingredient and let its rich flavour elevate your culinary creations!


Eight Creative Ways to Incorporate Pumpkin into Your Cooking

  1. Roast pumpkin with a drizzle of olive oil for a simple and delicious side dish.
  2. Use pumpkin puree in baking recipes like cakes, muffins, and pies for added moisture and flavour.
  3. Make a creamy pumpkin soup by blending roasted pumpkin with stock, cream, and seasonings.
  4. Try making homemade pumpkin spice blend with cinnamon, nutmeg, ginger, cloves, and allspice for seasonal recipes.
  5. Roast pumpkin seeds with seasoning for a crunchy snack or salad topper.
  6. Add diced pumpkin to curries or stews for a hearty and nutritious addition.
  7. Experiment with sweet and savoury flavour combinations by pairing pumpkin with ingredients like maple syrup, bacon, sage, or feta cheese.
  8. Freeze leftover cooked pumpkin in portions to use later in smoothies or oatmeal.

Roast pumpkin with a drizzle of olive oil for a simple and delicious side dish.

Enhance the natural sweetness and earthy flavour of pumpkin by roasting it with a drizzle of olive oil. This simple yet effective cooking method brings out the best in the pumpkin, creating a delicious side dish that is both wholesome and satisfying. The olive oil adds a subtle richness to the roasted pumpkin, making it a versatile accompaniment to any meal. Try this easy tip for a delightful way to enjoy the vibrant taste of pumpkin in a fuss-free manner.

Use pumpkin puree in baking recipes like cakes, muffins, and pies for added moisture and flavour.

Enhance the texture and taste of your baked goods by incorporating pumpkin puree into recipes such as cakes, muffins, and pies. The natural sweetness and moisture of pumpkin puree not only add depth to the flavour but also create a soft and tender crumb in your treats. Whether you’re looking to infuse a subtle autumnal essence or simply boost the overall richness of your bakes, utilising pumpkin puree is a versatile and delicious way to elevate your baking creations.

Make a creamy pumpkin soup by blending roasted pumpkin with stock, cream, and seasonings.

For a comforting autumn meal, try creating a velvety pumpkin soup by blending roasted pumpkin with flavourful stock, rich cream, and a medley of seasonings. This simple yet indulgent recipe transforms humble pumpkin into a creamy delight that is sure to warm both body and soul. The combination of roasted pumpkin’s natural sweetness with the savoury depth of stock and the luxurious touch of cream results in a soup that is both comforting and satisfying. Perfect for chilly evenings or festive gatherings, this creamy pumpkin soup is a delightful way to savour the flavours of the season.

Try making homemade pumpkin spice blend with cinnamon, nutmeg, ginger, cloves, and allspice for seasonal recipes.

Elevate your autumn culinary creations by experimenting with a homemade pumpkin spice blend. Combine fragrant cinnamon, warming nutmeg, zesty ginger, aromatic cloves, and sweet allspice to create a versatile seasoning that will add depth and warmth to your seasonal recipes. Whether you’re baking pumpkin pies, brewing spiced lattes, or whipping up pumpkin soups, this custom blend will infuse your dishes with a delightful medley of flavours that capture the essence of fall.

Roast pumpkin seeds with seasoning for a crunchy snack or salad topper.

Enhance your pumpkin culinary experience by utilising every part of this versatile ingredient. After carving out your pumpkin for cooking, don’t discard the seeds! Instead, roast them with a sprinkle of seasoning for a delightful crunchy snack or a flavourful salad topper. The roasted pumpkin seeds add a satisfying crunch and a burst of savoury goodness to your dishes, elevating them to a whole new level of deliciousness. So next time you prepare a pumpkin recipe, remember to save and roast the seeds for an extra special treat that will leave your taste buds wanting more.

Add diced pumpkin to curries or stews for a hearty and nutritious addition.

Enhance the heartiness and nutritional value of your curries or stews by incorporating diced pumpkin into the mix. The tender texture of pumpkin complements the rich flavours of spices and other ingredients, adding a delightful sweetness to the dish. Not only does this addition lend a comforting depth to your meal, but it also provides a boost of vitamins and fibre, making it a wholesome choice for a satisfying and nourishing meal.

Experiment with sweet and savoury flavour combinations by pairing pumpkin with ingredients like maple syrup, bacon, sage, or feta cheese.

Discover a world of culinary possibilities by exploring the delightful interplay of sweet and savoury flavours in your pumpkin recipes. Elevate your dishes by combining the earthy sweetness of pumpkin with ingredients such as rich maple syrup, crispy bacon, fragrant sage, or tangy feta cheese. These unexpected pairings will add depth and complexity to your creations, transforming simple pumpkin dishes into gourmet delights that will tantalise your taste buds.

Freeze leftover cooked pumpkin in portions to use later in smoothies or oatmeal.

When it comes to making the most of your pumpkin recipes, a handy tip is to freeze any leftover cooked pumpkin in convenient portions. By freezing it, you can easily incorporate this versatile ingredient into future creations like smoothies or oatmeal. Whether blended into a creamy breakfast smoothie or stirred into hearty oatmeal for added flavour and nutrition, having frozen pumpkin on hand ensures that you can enjoy its delicious taste long after the autumn season has passed.

Delightful Baking Recipes: A Culinary Journey in the Kitchen

baking recipes

The Art of Baking: Exploring Delicious Baking Recipes

Baking is not just a culinary technique; it’s a form of art that delights the senses and brings people together. Whether you’re a seasoned baker or a novice in the kitchen, exploring new baking recipes can be a rewarding experience that results in mouth-watering creations.

Classic Baking Recipes

From fluffy sponge cakes to golden-brown bread loaves, classic baking recipes have stood the test of time for a reason. Traditional recipes like Victoria sponge, chocolate chip cookies, and banana bread evoke feelings of comfort and nostalgia, making them perfect for cosy gatherings or simple indulgence.

Exploring Global Flavours

One of the joys of baking is its ability to transport us to different parts of the world through taste. Experimenting with global flavours such as French croissants, Italian tiramisu, or Middle Eastern baklava can introduce exciting new dimensions to your baking repertoire and broaden your culinary horizons.

Baking for Special Occasions

Whether it’s a birthday celebration, festive holiday, or simply a weekend treat, baking for special occasions adds an extra layer of joy and festivity to the event. Impress your loved ones with decadent cakes, intricate pastries, or themed cupcakes that reflect the spirit of the occasion.

The Joy of Sharing

One of the most rewarding aspects of baking is sharing your creations with others. Whether you gift homemade cookies to a friend, host a bake sale for charity, or simply treat your family to freshly baked goods, the act of sharing food created with love fosters connection and warmth.

So why not roll up your sleeves, preheat the oven, and embark on a culinary adventure filled with delightful aromas and delectable treats? Explore new baking recipes, unleash your creativity in the kitchen, and savour the joy that comes from creating something truly special.


9 Essential Tips for Perfect Baking Results Every Time

  1. Always preheat your oven before baking.
  2. Follow the recipe measurements accurately for best results.
  3. Use room temperature ingredients for even mixing and better texture.
  4. Sift dry ingredients like flour to avoid lumps in your batter.
  5. Don’t overmix the batter to prevent a tough or dense final product.
  6. Grease and line your baking pans to easily remove the baked goods later.
  7. Rotate your pans halfway through baking for even cooking in ovens with uneven heat distribution.
  8. Allow baked goods to cool completely before decorating or frosting them.
  9. Store baked items properly in airtight containers to maintain freshness.

Always preheat your oven before baking.

To achieve optimal results when baking, it is essential to always preheat your oven before placing your creations inside. Preheating ensures that the oven reaches the desired temperature, allowing your bakes to cook evenly and thoroughly from the moment they enter the heat. This simple yet crucial step sets the foundation for successful baking, helping you create perfectly risen cakes, golden-brown cookies, and delicious pastries every time. Remember, a well-preheated oven is the key to unlocking the full potential of your baking recipes.

Follow the recipe measurements accurately for best results.

To achieve the best results in your baking endeavours, it is essential to follow the recipe measurements accurately. Baking is a precise science where even small deviations in ingredient quantities can significantly impact the final outcome. By carefully measuring each ingredient as specified in the recipe, you ensure that your creations turn out just right – with the perfect texture, flavour, and consistency. Embracing this tip not only enhances the quality of your baked goods but also helps you hone your skills as a baker.

Use room temperature ingredients for even mixing and better texture.

To achieve optimal results in your baking endeavours, it is essential to utilise room temperature ingredients. By allowing ingredients like eggs, butter, and milk to reach room temperature before incorporating them into your recipes, you promote even mixing and enhance the texture of your baked goods. Room temperature ingredients blend more seamlessly, creating a harmonious batter or dough that bakes evenly and yields a superior final product. Embracing this simple tip can elevate the quality of your baked creations and ensure a delightful outcome for both you and those who have the pleasure of enjoying your delicious treats.

Sift dry ingredients like flour to avoid lumps in your batter.

To ensure a smooth and lump-free batter, it is essential to sift dry ingredients such as flour before incorporating them into your baking recipes. Sifting not only helps break up any clumps or impurities in the flour but also aerates it, resulting in a lighter and more evenly textured final product. By taking the time to sift your dry ingredients, you can enhance the overall quality and consistency of your bakes, creating a delightful culinary experience for both yourself and those who get to enjoy your delicious creations.

Don’t overmix the batter to prevent a tough or dense final product.

When it comes to baking recipes, a crucial tip to remember is to avoid overmixing the batter. Overmixing can lead to a tough or dense final product, as excessive mixing develops gluten in the flour, resulting in a less tender texture. By gently folding the ingredients together until just combined, you can ensure that your baked goods turn out light, airy, and perfectly moist. Embracing this tip not only enhances the overall quality of your creations but also showcases your attention to detail and dedication to producing delectable treats.

Grease and line your baking pans to easily remove the baked goods later.

To ensure effortless removal of your baked goods and maintain their perfect shape, it is essential to grease and line your baking pans before pouring in the batter. This simple yet crucial tip not only prevents sticking but also facilitates smooth release, allowing you to showcase your creations beautifully. By taking this extra step, you can avoid frustrating mishaps and ensure that your baked treats come out looking as delightful as they taste.

Rotate your pans halfway through baking for even cooking in ovens with uneven heat distribution.

To ensure even cooking in ovens with uneven heat distribution, a helpful tip is to rotate your pans halfway through the baking process. By rotating the pans, you allow the baked goods to receive consistent heat from different areas of the oven, resulting in a more uniform and perfectly cooked outcome. This simple technique can make a significant difference in the quality and consistency of your baked creations, ensuring that each bite is just as delicious as the last.

Allow baked goods to cool completely before decorating or frosting them.

Allowing baked goods to cool completely before decorating or frosting them is a crucial tip in the world of baking. Patience is key when it comes to achieving the perfect finish on your creations. By allowing cakes, cookies, or pastries to cool thoroughly, you ensure that the frosting or decorations adhere properly without melting or becoming runny. This simple step not only enhances the visual appeal of your baked goods but also contributes to their overall taste and texture, resulting in a more professional and satisfying end product.

Store baked items properly in airtight containers to maintain freshness.

To ensure the longevity of your baked creations and preserve their freshness, it is essential to store them in airtight containers. By sealing your baked items in airtight containers, you can protect them from exposure to air and moisture, which can lead to staleness or spoilage. This simple yet effective tip not only helps maintain the flavour and texture of your baked goods but also extends their shelf life, allowing you to enjoy them for longer periods. So, remember to invest in quality airtight containers to keep your delicious treats at their best for as long as possible.

Discover Nutritious and Delicious Healthy Chicken Recipes

healthy chicken recipes

Delicious and Healthy Chicken Recipes to Try

Chicken is a versatile and lean source of protein that can be the star of many nutritious meals. If you’re looking for healthy chicken recipes to add to your culinary repertoire, look no further. Here are some delicious options to inspire your next meal:

Grilled Lemon Herb Chicken

This simple yet flavourful dish involves marinating chicken breasts in a mixture of lemon juice, olive oil, garlic, and fresh herbs before grilling them to perfection. Serve with a side of roasted vegetables for a complete and healthy meal.

Baked Pesto Chicken

Coat chicken thighs with a generous amount of basil pesto and bake until tender and juicy. This dish is packed with flavour and pairs well with a fresh salad or whole grain pasta.

Honey Garlic Chicken Stir-Fry

Create a quick and delicious stir-fry by sautéing chicken strips with colourful bell peppers, snap peas, and a sweet-savoury honey garlic sauce. Serve over brown rice or quinoa for a satisfying meal.

Greek Yogurt Chicken Salad

Combine cooked shredded chicken with Greek yogurt, diced cucumbers, cherry tomatoes, and dill for a light and refreshing salad that’s perfect for lunch or as a sandwich filling.

Coconut Curry Chicken Skewers

Marinate chicken chunks in coconut milk, curry powder, and lime juice before threading them onto skewers and grilling until charred and aromatic. Enjoy these skewers with a side of coconut rice for an exotic twist.

These are just a few examples of the many ways you can prepare healthy and delicious chicken dishes at home. Experiment with different ingredients and flavours to discover your own favourite recipes that will nourish your body while satisfying your taste buds.


Top FAQs on Healthy Chicken Recipes: Cooking Tips, Low-Fat Ideas, and Flavourful Enhancements

  1. 1. What are some healthy ways to cook chicken?
  2. 2. Can you recommend low-fat chicken recipes?
  3. 3. How can I make grilled chicken more flavourful without adding unhealthy ingredients?
  4. 4. Are there any quick and easy healthy chicken recipes for busy weeknights?
  5. 5. What are some creative salad ideas using cooked chicken?
  6. 6. Do you have any recommendations for healthy marinades or sauces to use with chicken?

1. What are some healthy ways to cook chicken?

When it comes to preparing chicken in a healthy manner, there are several cooking methods to consider. Grilling or baking chicken without the use of excessive oil can help retain its natural flavours while keeping it lean. Another option is to poach or steam chicken for a moist and tender result without added fats. Stir-frying with minimal oil and plenty of vegetables is also a healthy way to cook chicken, ensuring a balanced and nutritious meal. By choosing these cooking techniques and pairing chicken with wholesome ingredients, you can enjoy delicious and healthy chicken dishes that contribute to your overall well-being.

2. Can you recommend low-fat chicken recipes?

For those seeking low-fat options when it comes to chicken recipes, there are plenty of delicious and healthy choices to explore. Opting for lean cuts of chicken, such as skinless breasts or thighs, and preparing them using methods like grilling, baking, or steaming can help reduce the overall fat content. Incorporating plenty of herbs, spices, and citrus flavours can add depth to the dish without relying on excessive fats. Consider dishes like grilled lemon herb chicken or baked pesto chicken for a satisfying meal that is both nutritious and flavourful. By making mindful ingredient choices and cooking techniques, you can enjoy a range of low-fat chicken recipes that support your health goals without compromising on taste.

3. How can I make grilled chicken more flavourful without adding unhealthy ingredients?

When looking to enhance the flavour of grilled chicken without compromising its healthiness, there are several simple yet effective methods to consider. One approach is to use a marinade or dry rub made from a combination of herbs, spices, and citrus juices, such as lemon or lime, to infuse the chicken with bold flavours. Another option is to incorporate aromatic ingredients like garlic, ginger, and onion into the marinade for an extra boost of taste. Additionally, grilling chicken over charcoal or wood chips can impart a smoky essence that elevates its overall flavour profile. By experimenting with these natural and wholesome ingredients, you can create grilled chicken that is both delicious and nutritious.

4. Are there any quick and easy healthy chicken recipes for busy weeknights?

For those seeking quick and easy healthy chicken recipes to whip up on busy weeknights, there are plenty of options available. From simple grilled chicken salads to flavourful one-pan chicken and vegetable bakes, there are recipes that can be prepared in no time without compromising on nutrition or taste. Consider marinating chicken in advance or using pre-cut vegetables to streamline the cooking process. With a bit of planning and creativity, it’s possible to enjoy a wholesome and satisfying chicken dinner even on the busiest of evenings.

5. What are some creative salad ideas using cooked chicken?

When it comes to incorporating cooked chicken into salads, the possibilities are endless. You can elevate your salad game by trying out creative combinations such as a vibrant mango and avocado chicken salad, a zesty Greek chicken salad with feta and olives, or a refreshing Asian-inspired sesame ginger chicken salad with crunchy vegetables. These innovative salad ideas not only add protein and flavour but also bring a delightful twist to your mealtime. Explore different ingredients, textures, and dressings to create a unique and satisfying dish that showcases the versatility of cooked chicken in salads.

6. Do you have any recommendations for healthy marinades or sauces to use with chicken?

When it comes to enhancing the flavour of chicken while keeping it healthy, choosing the right marinades or sauces can make all the difference. Opt for marinades made with fresh herbs, citrus juices, and olive oil for a light and zesty touch. Alternatively, consider using Greek yogurt-based sauces flavoured with garlic, lemon, and dill for a creamy yet nutritious option. Experimenting with homemade teriyaki or honey mustard sauces can also add a delicious twist to your chicken dishes without compromising on healthiness. Remember to balance flavours and ingredients to create a tasty and wholesome meal that will satisfy both your palate and your nutritional needs.