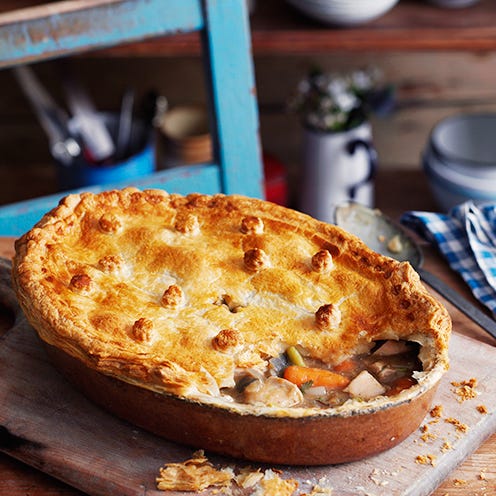
Gluten Free Pie Crust: A Reliable Guide to Tender, Crisp Pastry
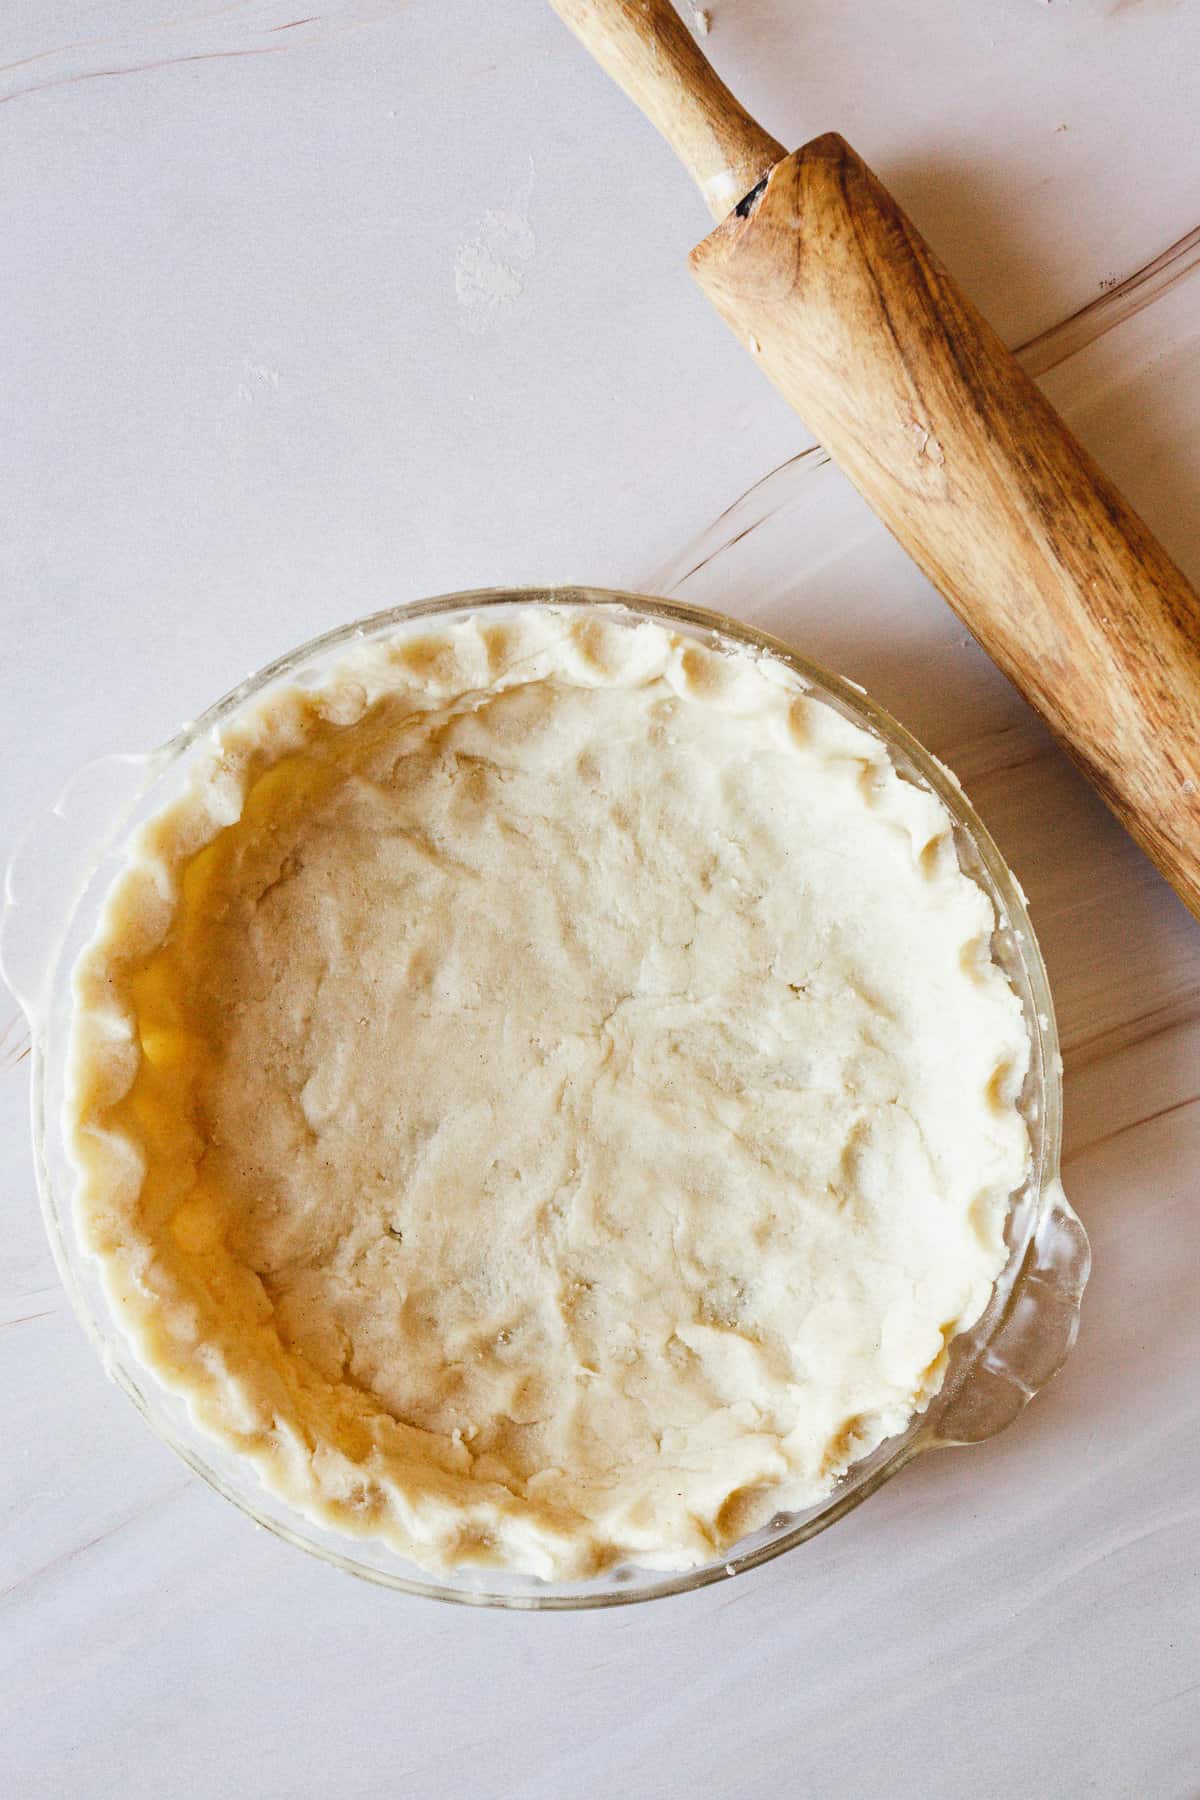
gluten free pie crust

Gluten-Free Pie Crust: A Reliable Guide

A good pie crust should be tender, crisp and easy to handle. Making one without gluten takes a little care, as gluten-free pastry can be more delicate and prone to cracking. The right flour blend, cold ingredients and a brief rest in the fridge all help create a crust that is both flavourful and practical to work with.

Ingredients

This recipe makes enough pastry for one 23cm pie dish, with a top and base, or one larger tart shell.

  • 300g gluten-free plain flour blend, ideally one containing xanthan gum
  • ½ teaspoon fine salt
  • 1 teaspoon caster sugar, optional for a sweet pie
  • 150g cold unsalted butter, cut into small cubes
  • 1 medium egg
  • 2–4 tablespoons cold water

How to Make Gluten-Free Pie Crust

  1. Combine the dry ingredients. Put the flour, salt and sugar, if using, in a large bowl and mix well.
  2. Rub in the butter. Add the cold butter and rub it into the flour with your fingertips until the mixture resembles coarse breadcrumbs. You can also use a food processor, pulsing briefly.
  3. Bring the dough together. Beat the egg and stir it into the flour mixture. Add cold water a tablespoon at a time, mixing just until the dough holds together when pressed. It may feel softer or slightly more fragile than wheat pastry.
  4. Chill. Shape the dough into a flat disc, wrap it and refrigerate for at least 30 minutes. This firms the butter and makes the pastry easier to roll.
  5. Roll the pastry. Place the dough between two sheets of baking paper and roll it out to around 3mm thick. The paper helps prevent sticking and makes it easier to lift the pastry into the tin.
  6. Line the tin. Remove the top sheet of paper, then use the lower sheet to help turn the pastry into the pie dish. Press it gently into the base and sides. Patch any cracks with small pieces of dough, pressing the joins together.
  7. Fill or blind bake. For a filled pie, add your filling and bake according to the recipe. For an unfilled shell, prick the base with a fork, line it with baking paper and fill with baking beans. Bake at 180°C fan (200°C conventional) for 15 minutes, remove the paper and beans, then bake for a further 5–10 minutes until lightly golden.

Tips for Better Gluten-Free Pastry

  • Check your flour blend. Gluten-free blends vary. If yours does not contain xanthan gum, add about ½ teaspoon to help the dough hold together.
  • Keep everything cool. Warm butter can make pastry greasy and difficult to handle. If the dough becomes soft while rolling, chill it again briefly.
  • Avoid adding too much water. Add it gradually. The dough should come together when pressed, rather than feel wet or sticky.
  • Roll between baking paper. Gluten-free dough can crack more easily than conventional pastry, so this simple step makes it easier to transfer.
  • Let it rest after baking. Allow the crust to cool slightly before cutting so it has time to firm up.

Sweet and Savoury Variations

For a sweet crust, include the caster sugar and add a little lemon zest or vanilla. For a savoury pie, leave out the sugar and add a pinch of black pepper, dried herbs or finely grated hard cheese. If you are cooking for someone with coeliac disease, check that every ingredient is labelled gluten-free and take care to avoid cross-contamination from worktops, utensils and baking tins.

With a little patience and careful handling, gluten-free pie crust can make a crisp, satisfying base for everything from fruit pies to quiches. The key is to keep the dough cool, roll it between sheets of paper and patch any small cracks rather than overworking it.


Essential Tips for Perfecting Your Gluten-Free Pie Crust: Answering Common Questions

  1. What is the best flour to use for gluten-free pie crust?
  2. Why does my gluten-free pie crust crumble or crack?
  3. How can I stop gluten-free pastry from sticking when I roll it out?
  4. Does gluten-free pie crust need xanthan gum?
  5. Can I make gluten-free pie crust without butter?
  6. Should gluten-free pie crust be chilled before baking?
  7. How do I blind bake a gluten-free pie crust?
  8. Can gluten-free pie crust be made ahead or frozen?

What is the best flour to use for gluten-free pie crust?

The best choice is usually a good-quality gluten-free plain flour blend designed for baking, ideally one that contains xanthan gum to help bind the pastry and make it easier to roll. Blends vary, so choose one with a fine texture and follow the recipe’s guidance; if the flour does not contain xanthan gum, you may need to add a small amount separately. Avoid swapping in a single flour, such as rice flour or almond flour, without adjusting the recipe, as it may produce a crumbly or dense crust.

Why does my gluten-free pie crust crumble or crack?

A gluten-free pie crust often crumbles or cracks because it lacks gluten, which normally gives pastry its stretch and structure. The dough may also be too dry, have had too little resting time, or be made with a flour blend that needs a binding agent such as xanthan gum. Add cold water a teaspoon at a time until the dough holds together when pressed, then chill it before rolling. Roll it between sheets of baking paper to make it easier to handle, and patch any small cracks with a little spare dough.

How can I stop gluten-free pastry from sticking when I roll it out?

To stop gluten-free pastry sticking, roll it between two sheets of baking paper rather than adding lots of flour, which can make the crust dry and crumbly. If the dough feels soft, chill it for 20–30 minutes before rolling, and work on a cool surface. You can also lightly dust the paper and rolling pin with gluten-free flour, but use only a little. If the pastry starts to stick or tear, chill it briefly and patch small cracks with your fingers.

Does gluten-free pie crust need xanthan gum?

Gluten-free pie crust does not always need xanthan gum, but it can help the dough hold together and make it easier to roll without cracking. Check the flour blend first: many gluten-free blends already contain xanthan gum, so adding more may make the pastry gummy or tough. If your blend has none, a small amount—around ½ teaspoon for 300g of flour—is usually enough. For a more delicate crust, you can also rely on ingredients such as egg to help bind the dough.

Can I make gluten-free pie crust without butter?

Yes, you can make gluten-free pie crust without butter. Use an equal amount of cold, firm dairy-free baking block or vegetable shortening for a similar texture, checking that it is suitable for your dietary needs. Coconut oil can also work, but may make the pastry more crumbly and add a coconut flavour. As fat substitutes vary, add the water gradually until the dough just holds together, then chill it well before rolling.

Should gluten-free pie crust be chilled before baking?

Yes, chilling gluten-free pie crust before baking is usually a good idea. Resting it in the fridge for at least 30 minutes firms the butter, helps the dough hold its shape and can reduce shrinkage in the oven. It also makes delicate pastry easier to handle. Cover the dough while it chills, and if it becomes very firm, leave it at room temperature for a few minutes before rolling or baking.

How do I blind bake a gluten-free pie crust?

To blind bake a gluten-free pie crust, chill the pastry-lined tin for about 30 minutes, then prick the base lightly with a fork. Line the crust with baking paper and fill it with baking beans or uncooked rice, making sure they reach the sides. Bake at 180°C fan (200°C conventional) for around 15 minutes, then carefully remove the paper and weights and bake for a further 5–10 minutes, until the base looks dry and lightly golden. Check the crust as it bakes, as gluten-free pastry can brown quickly; let it cool before adding the filling.

Can gluten-free pie crust be made ahead or frozen?

Yes, gluten-free pie crust can be made ahead or frozen. Wrap the dough tightly and refrigerate it for up to two days, letting it soften slightly at room temperature before rolling. To freeze, wrap the dough well and store it for up to three months; defrost it overnight in the fridge before use. You can also freeze a pastry-lined pie tin, then bake it from frozen, adding a few extra minutes to the cooking time.
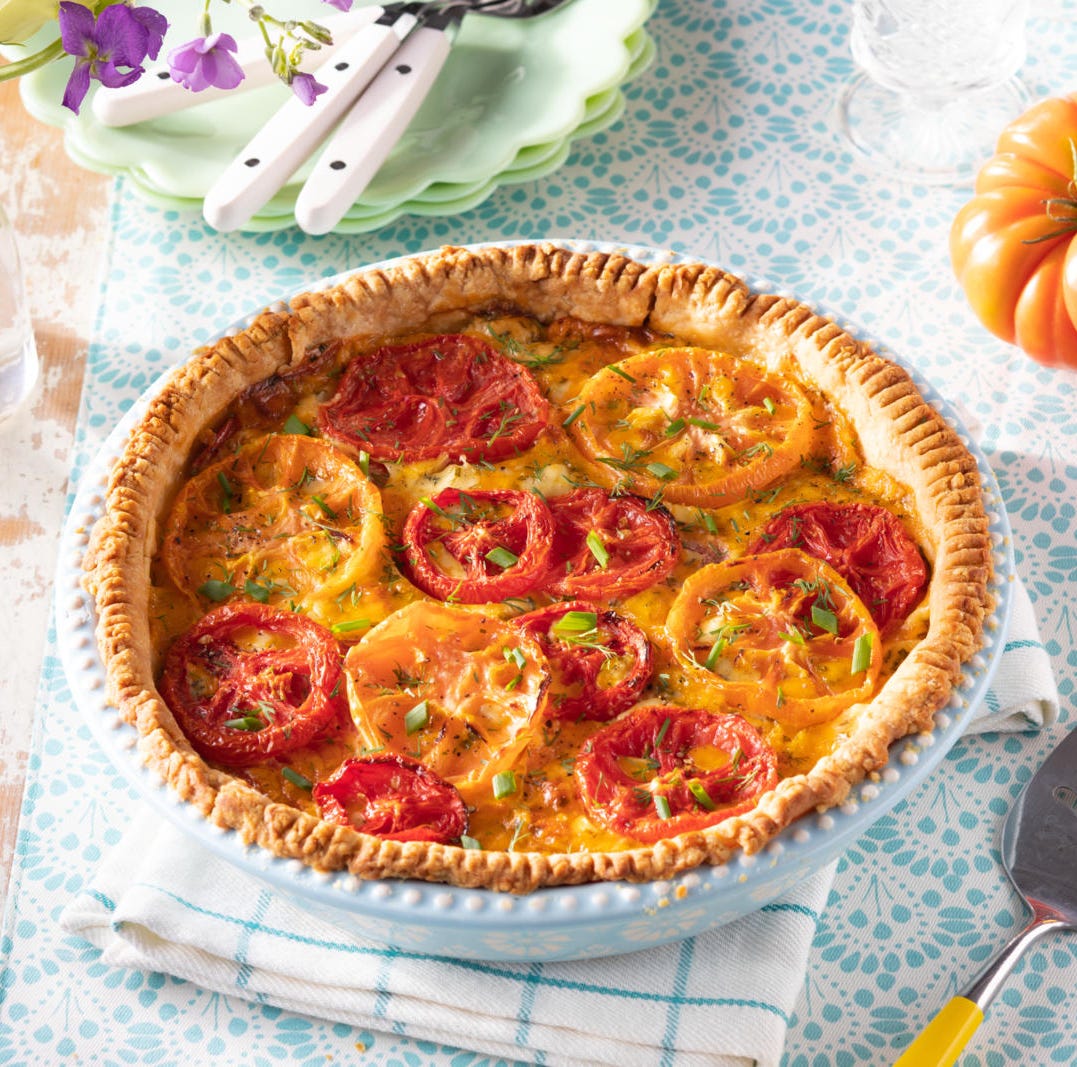
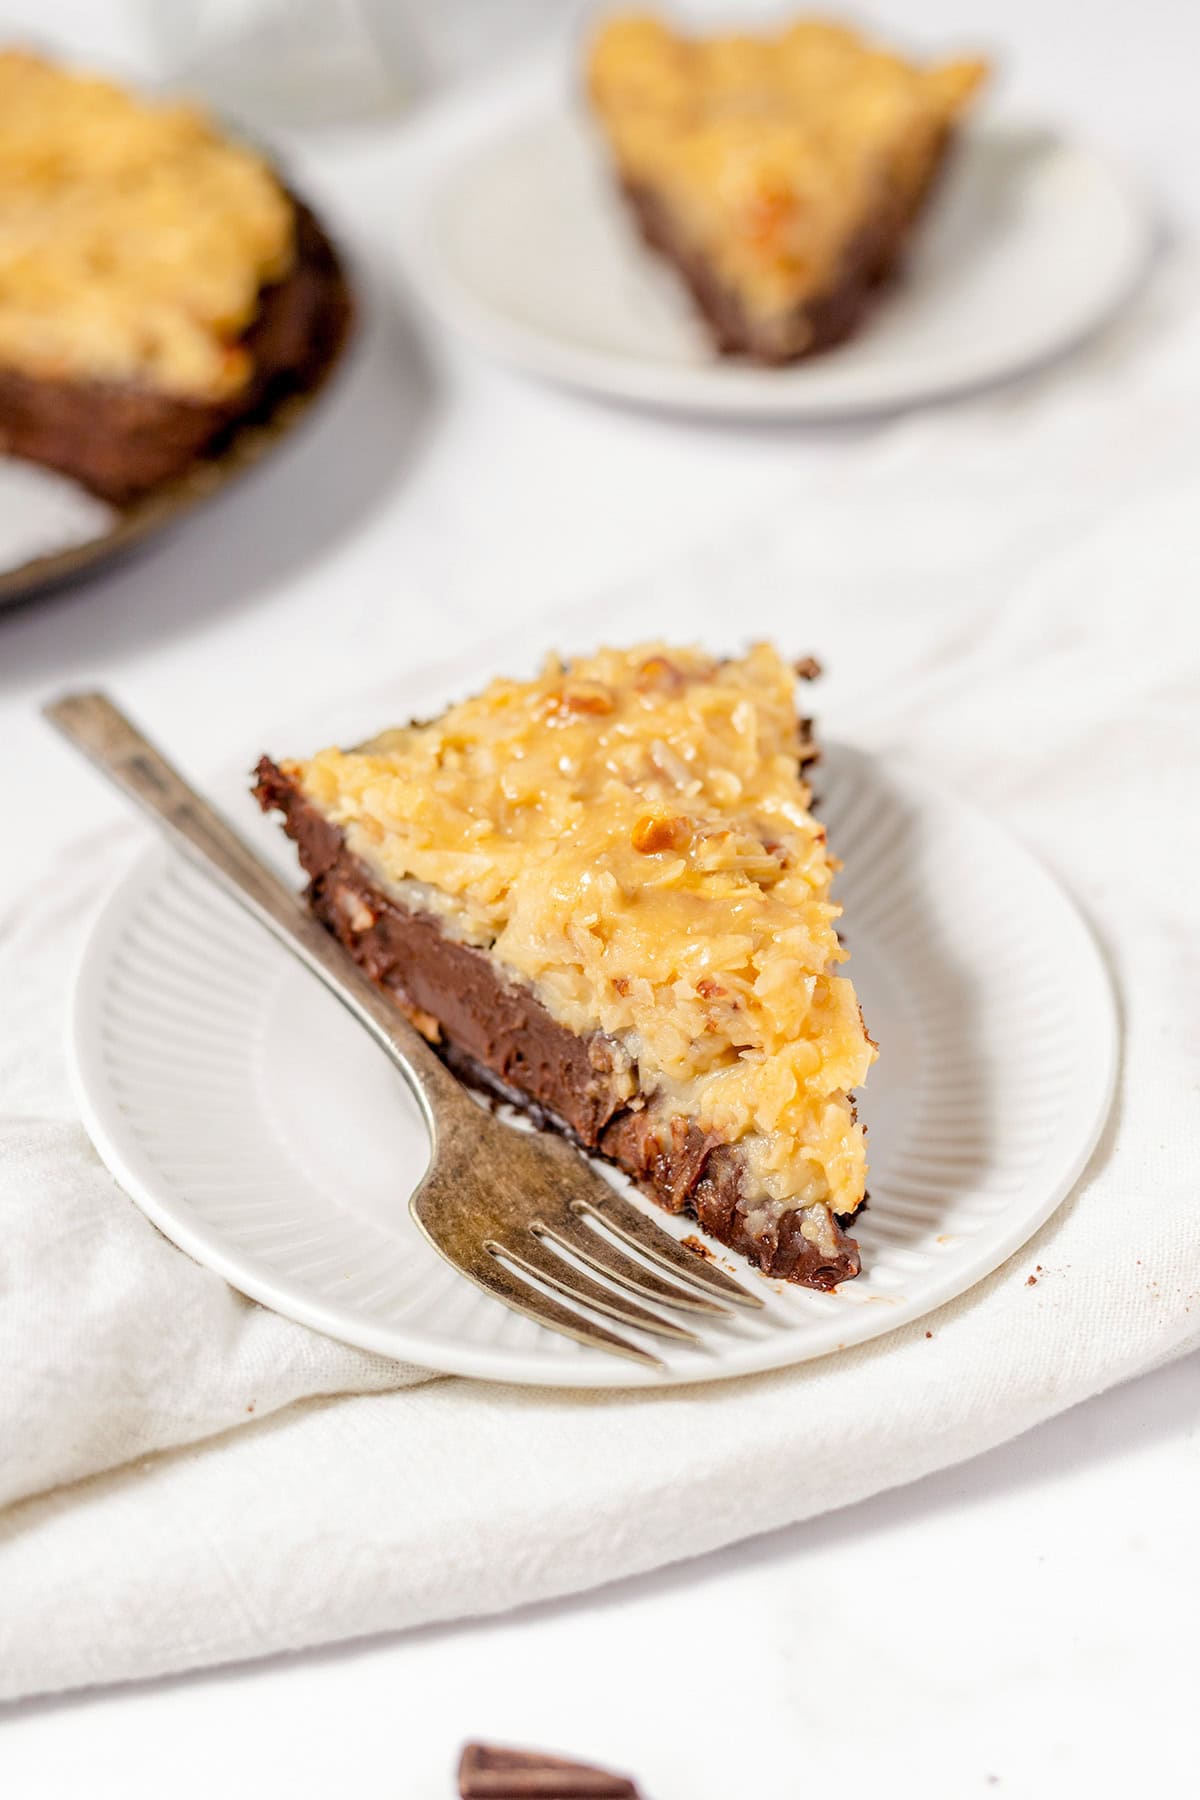
Easy Tomato Pie Recipe: A Savoury Bake for Ripe Tomatoes

tomato pie recipe

Tomato Pie Recipe

This savoury tomato pie is a lovely way to make the most of ripe, juicy tomatoes. A crisp pastry case is filled with tender tomatoes, fresh herbs and a creamy cheese topping, then baked until golden and bubbling. Serve it warm for lunch, or at room temperature as part of a picnic or light supper.

At a glance

  • Preparation time: 25 minutes, plus 30 minutes to drain the tomatoes
  • Cooking time: 35–40 minutes
  • Serves: 6

Ingredients

  • 1 sheet of ready-rolled shortcrust pastry, about 320g
  • 700g ripe tomatoes
  • 1 tsp fine salt
  • 1 small onion, finely sliced
  • 1 tbsp olive oil
  • 1 tbsp chopped fresh basil, plus extra to serve
  • 1 tbsp chopped fresh chives
  • 150g mature Cheddar, grated
  • 100g mozzarella, grated or torn into small pieces
  • 120g mayonnaise
  • ½ tsp freshly ground black pepper
  • 1 tsp Dijon mustard (optional)

Method

  1. Prepare the tomatoes. Slice the tomatoes and arrange them in a single layer on a plate or tray. Sprinkle with the salt and leave for 30 minutes. This draws out excess moisture and helps prevent a soggy pie.
  2. Heat the oven. Preheat the oven to 200°C (180°C fan)/400°F/Gas Mark 6. Place a baking tray in the oven to heat.
  3. Prepare the pastry case. Line a 23cm tart tin with the pastry, pressing it gently into the edges. Trim off any excess, prick the base with a fork and chill for 10 minutes.
  4. Blind-bake the pastry. Line the pastry with baking paper and fill with baking beans or uncooked rice. Place the tin on the hot baking tray and bake for 15 minutes. Remove the paper and beans, then bake for a further 5 minutes until the base looks dry and lightly golden.
  5. Cook the onion. While the pastry bakes, warm the olive oil in a small frying pan over a medium heat. Add the onion and cook for 5–7 minutes until soft. Set aside to cool slightly.
  6. Dry the tomatoes. Pat the tomato slices thoroughly with kitchen paper to remove as much moisture as possible.
  7. Make the topping. In a bowl, mix the Cheddar, mozzarella, mayonnaise, black pepper and mustard, if using.
  8. Assemble the pie. Spread the cooked onion over the pastry base. Add the tomatoes in an even layer, scattering the basil and chives between them. Spoon the cheese mixture over the top and spread it gently to cover.
  9. Bake. Bake for 25–30 minutes, until the topping is golden and bubbling. Leave the pie to stand for at least 15 minutes before slicing, so the filling has time to settle.
  10. Serve. Scatter with extra basil and serve warm or at room temperature.

Tips for the best tomato pie

  • Choose flavourful tomatoes. Ripe but firm tomatoes hold their shape and give the pie plenty of flavour.
  • Don’t skip the draining step. Removing excess liquid is the key to a crisp pastry base.
  • Try different cheeses. A little Parmesan can add savoury depth, while Gruyère makes a rich alternative to Cheddar.
  • Make it your own. Add a pinch of chilli flakes, a few sliced spring onions or a little fresh thyme.

How to store tomato pie

Once cooled, cover and refrigerate the pie for up to three days. Reheat slices in the oven at 180°C (160°C fan)/350°F/Gas Mark 4 until piping hot. The pastry is best on the day it is baked, but leftovers are also delicious served cold.


Everything You Need to Know About Making the Perfect Tomato Pie

  1. What is in a tomato pie?
  2. Do you have to peel tomatoes for tomato pie?
  3. How to make a simple tomato pie?
  4. How to make tomato and onion pie?
  5. What is the original tomato pie?
  6. How to make tomato pie not soggy?
  7. Do you need to peel tomatoes for tomato pie?
  8. What are the ingredients for the best tomato pie?

What is in a tomato pie?

A tomato pie typically consists of a pastry crust filled with ripe tomatoes, herbs and a savoury cheese topping. In this recipe, the filling includes sliced tomatoes, onion, basil and chives, topped with a mixture of Cheddar, mozzarella and mayonnaise. Ingredients vary between recipes, but draining the tomatoes first helps keep the pastry crisp.

Do you have to peel tomatoes for tomato pie?

No, you don’t have to peel tomatoes for tomato pie. The skins soften as the pie bakes and help the slices hold their shape. If you prefer a smoother texture, or the skins are particularly tough, peel the tomatoes before slicing. In either case, salt the slices and pat them dry before adding them to the pie to remove excess moisture and help keep the pastry crisp.

How to make a simple tomato pie?

To make a simple tomato pie, line a tart tin with shortcrust pastry and blind-bake it until lightly golden. Slice ripe tomatoes, sprinkle them with salt and leave them to drain for about 30 minutes, then pat them dry to prevent a soggy base. Arrange the tomatoes in the pastry case with a little chopped basil, and top with a mixture of grated cheese and mayonnaise. Bake at 200°C (180°C fan) for about 25–30 minutes, until golden and bubbling, then leave to rest before serving.

How to make tomato and onion pie?

To make tomato and onion pie, line a tart tin with shortcrust pastry and blind-bake it until lightly golden. Slice ripe tomatoes, sprinkle them with salt and leave them to drain for about 30 minutes, then pat dry. Soften sliced onions in a little olive oil and spread them over the pastry base, followed by the tomatoes and herbs such as basil or thyme. Top with grated Cheddar mixed with a little mayonnaise, then bake at 200°C (180°C fan)/400°F/Gas Mark 6 for 25–30 minutes, until golden and bubbling. Leave the pie to rest before slicing.

What is the original tomato pie?

The name “tomato pie” refers to more than one traditional dish. In the American South, particularly in parts of the Carolinas, it usually means a baked savoury pie made with fresh tomatoes, herbs and a creamy cheese topping in a pastry crust. In Italy, *torta di pomodoro* describes a range of tomato-filled pies, often made with regional ingredients. There is also the Sicilian-American bakery style: a thick, rectangular pizza topped with tomato sauce and usually served without cheese. So there is no single universally recognised original tomato pie; the version depends on the region and its food traditions.

How to make tomato pie not soggy?

To keep tomato pie from becoming soggy, remove as much moisture from the tomatoes as possible before baking. Slice them, sprinkle with salt and leave them to drain for about 30 minutes, then pat them dry with kitchen paper. Blind-bake the pastry case until lightly golden, and avoid overfilling it with wet ingredients. For extra protection, brush the pastry base with a thin layer of beaten egg after blind-baking, then let it set briefly before adding the filling.

Do you need to peel tomatoes for tomato pie?

No, you don’t need to peel tomatoes for tomato pie. The skins soften as the pie bakes and help the slices hold their shape. If the skins are particularly tough, you can remove them by briefly blanching the tomatoes in boiling water, then transferring them to cold water before peeling. Whichever you choose, salt and drain the sliced tomatoes first to remove excess moisture and help keep the pastry crisp.

What are the ingredients for the best tomato pie?

For the best tomato pie, use ripe but firm tomatoes, well-drained to prevent a soggy pastry base, and pair them with crisp shortcrust pastry, sweet onion, fresh basil and chives. A generous topping of mature Cheddar and mozzarella mixed with mayonnaise creates a creamy, golden finish, while black pepper and a little Dijon mustard add extra savoury flavour.

Easy Chocolate Pie Recipe: Rich, Creamy and Delicious

chocolate pie recipe

Chocolate Pie Recipe

This chocolate pie has a crisp pastry case filled with smooth, rich chocolate custard and finished with a cloud of whipped cream. It makes an indulgent dessert for a family meal or a special occasion, and can be prepared ahead of time so it is ready to serve straight from the fridge.

At a glance

  • Preparation time: 30 minutes
  • Cooking time: 35 minutes
  • Chilling time: At least 4 hours
  • Serves: 8
  • Tin: 23cm pie dish

Ingredients

For the pastry case

  • 1 sheet of ready-rolled shortcrust pastry, about 320g
  • A little plain flour, for dusting
  • Baking parchment and baking beans, for blind baking

For the chocolate filling

  • 600ml whole milk
  • 4 large egg yolks
  • 100g caster sugar
  • 40g cornflour
  • 200g dark chocolate, finely chopped
  • 30g unsalted butter, diced
  • 1 teaspoon vanilla extract
  • A pinch of fine salt

To serve

  • 200ml double cream
  • 1 tablespoon icing sugar
  • Chocolate shavings or cocoa powder, optional

Method

  1. Prepare the pastry. Heat the oven to 190°C (170°C fan)/Gas Mark 5. Lightly flour the work surface and use it to line the pie dish with the pastry. Trim the edges, prick the base with a fork and chill for 15 minutes.
  2. Blind bake the case. Line the pastry with baking parchment and fill with baking beans. Bake for 15 minutes, then carefully remove the parchment and beans. Return the case to the oven for 8–10 minutes, until dry and lightly golden. Leave to cool.
  3. Start the filling. Put the egg yolks, caster sugar and cornflour in a heatproof bowl. Whisk until smooth. Warm the milk in a saucepan over a medium heat until steaming but not boiling.
  4. Make the custard. Gradually whisk the warm milk into the egg mixture. Pour it all back into the saucepan and cook over a medium heat, whisking constantly. Once it begins to bubble and thicken, keep whisking for about 1 minute, then remove from the heat.
  5. Add the chocolate. Stir in the chopped chocolate, butter, vanilla and salt until the mixture is glossy and completely smooth. Pour the filling into the cooled pastry case and level the surface.
  6. Chill the pie. Press a piece of baking parchment or cling film gently against the surface of the filling to prevent a skin forming. Leave to cool, then refrigerate for at least 4 hours, or until firmly set.
  7. Finish and serve. Whip the double cream with the icing sugar until it forms soft peaks. Spoon or pipe it over the pie and add chocolate shavings or a dusting of cocoa powder, if you like. Slice with a warm, dry knife.

Tips for a delicious chocolate pie

  • Use chocolate you enjoy eating. Dark chocolate with around 50–70% cocoa solids gives the filling a deep flavour without making it overly sweet.
  • Keep whisking the custard as it cooks, paying particular attention to the corners of the pan, where it can catch.
  • For neat slices, make sure the pie is thoroughly chilled and wipe the knife clean between cuts.
  • The pie can be made a day ahead. Add the whipped cream shortly before serving for the freshest finish.

Storage

Cover any leftover pie and keep it in the fridge for up to 3 days. The pastry is at its crispest on the day it is made, but the chocolate filling will remain delicious and creamy.


7 Essential Tips for the Perfect Chocolate Pie

  1. Use good-quality dark chocolate for a richer filling.
  2. Blind-bake the pastry to keep the base crisp.
  3. Whisk the filling until smooth and lump-free.
  4. Bake gently to avoid a cracked top.
  5. Chill the pie for at least four hours before serving.
  6. Add a pinch of salt to balance the sweetness.
  7. Serve with lightly whipped cream or fresh berries.

Use good-quality dark chocolate for a richer filling.

For a richer, more satisfying chocolate pie, choose good-quality dark chocolate with a cocoa content of around 50–70%. It gives the filling a deep, balanced flavour and a silky texture, while helping keep it from tasting overly sweet. Chop the chocolate finely so it melts smoothly into the warm custard.

Blind-bake the pastry to keep the base crisp.

Blind-baking the pastry before adding the chocolate filling helps keep the base crisp rather than soggy. Line the pastry case with baking parchment, add baking beans and bake until the edges are set. Remove the parchment and beans, then return the case to the oven until the base is dry and lightly golden. Let it cool before adding the filling.

Whisk the filling until smooth and lump-free.

Whisk the chocolate filling continuously as it cooks to keep it smooth and lump-free. Pay particular attention to the bottom and corners of the pan, where the custard can thicken or catch. If a few small lumps remain, pass the filling through a fine sieve before pouring it into the pastry case.

Bake gently to avoid a cracked top.

Bake the chocolate pie gently to help prevent the filling from becoming too hot and cracking as it sets. Use the temperature stated in the recipe, and avoid overbaking: the centre should still have a slight wobble when you take the pie out of the oven, as it will continue to firm up while cooling.

Chill the pie for at least four hours before serving.

Chilling the chocolate pie for at least four hours gives the filling time to set, making it smooth, firm and easy to slice. For the neatest portions, leave it in the fridge until just before serving and cut it with a warm, dry knife, wiping the blade between slices.

Add a pinch of salt to balance the sweetness.

A small pinch of salt can make a big difference to your chocolate pie. It balances the sweetness of the filling and brings out the rich, complex flavour of the chocolate without making the dessert taste salty. Stir it into the warm chocolate mixture, then taste and adjust if needed.

Serve with lightly whipped cream or fresh berries.

Serve each slice of chocolate pie with a spoonful of lightly whipped cream for a soft, airy contrast to the rich filling. For a fresher finish, add a handful of fresh berries, such as raspberries or strawberries—their gentle tartness pairs beautifully with the chocolate.

Done for You SEO: A Practical Guide for Businesses

done for you seo

Done-for-You SEO: What It Is and How to Choose a Service

Search engine optimisation (SEO) can help a business attract people who are actively looking for its products or services. But doing it well takes time, specialist knowledge and consistent effort. Done-for-you SEO is an option for businesses that want expert support without managing every part of the process themselves.

What is done-for-you SEO?

Done-for-you SEO is a service in which an agency or specialist carries out agreed SEO work on a business’s behalf. The provider may research search terms, improve website pages, address technical issues, create content and monitor performance.

The exact service varies. Some providers focus on a specific task, such as technical SEO or content production, while others manage a broader campaign. It is important to check what is included rather than assume that “done for you” covers every aspect of SEO.

What might a service include?

  • SEO audit: A review of a website’s content, structure, performance and technical health.
  • Keyword research: Identifying the search terms relevant to a business and its potential customers.
  • On-page optimisation: Improving page titles, headings, copy, internal links and other page elements.
  • Technical SEO: Finding and resolving issues that may make a website harder to crawl, understand or use.
  • Content planning and creation: Developing useful pages and articles based on audience needs and search intent.
  • Local SEO: Improving visibility for relevant local searches, including the accuracy of business details across online listings.
  • Reporting: Tracking agreed measures, such as organic traffic, search visibility, leads or sales.

Potential benefits

More time for the business. Outsourcing implementation can free up staff to focus on customers, operations and other priorities.

Access to specialist skills. An experienced provider may bring knowledge of content, analytics, technical issues and search trends that would be difficult to build in-house.

A more consistent approach. SEO is rarely a one-off task. A clear plan can help a business prioritise work and keep improvements moving forward.

Support with complex websites. Larger sites, online shops and businesses operating in competitive markets may benefit from specialist analysis and implementation.

What done-for-you SEO cannot guarantee

SEO is influenced by many factors, including competition, website history, the quality of the offer and changes to search engines. No reputable provider can guarantee a particular ranking or a fixed amount of traffic by a specific date.

Results can take time, and rankings alone do not show whether a campaign is helping the business. A useful SEO programme should connect its work to meaningful outcomes, such as relevant enquiries, sales or bookings, while being clear about what it can and cannot control.

How to choose an SEO provider

  1. Ask for a clear scope. Find out which tasks are included, what will be delivered and what requires additional fees.
  2. Look for a tailored plan. Recommendations should reflect your website, audience, market and business goals—not just a standard package.
  3. Ask how progress is measured. Agree on relevant metrics and how often you will receive reports.
  4. Check how changes are approved. You should know who has access to your website and whether important content or technical changes will be reviewed before publication.
  5. Understand the approach to links. Be cautious of promises involving large quantities of paid or low-quality links. These can create risk rather than lasting value.
  6. Keep control of your assets. Your business should retain ownership of its website, analytics accounts and published content.
  7. Review communication and experience. Ask who will manage the work, how you can contact them and whether they can explain their recommendations in plain English.

Is done-for-you SEO right for your business?

It may suit a business that has a clear online presence but lacks the time or in-house expertise to manage SEO. It can also help when a website needs a structured audit or a sustained programme of improvements.

Before committing, consider your goals, budget and capacity to work with the provider. SEO often depends on input from the business, such as product knowledge, approvals and access to relevant data. Even when implementation is outsourced, collaboration still matters.

Questions to ask before signing up

  • What specific work will be completed each month?
  • What do you need from us to get started?
  • How will you prioritise recommendations?
  • How will you report on progress and business outcomes?
  • Who owns the content and work produced?
  • What happens if we decide to end the agreement?

Final thoughts

Done-for-you SEO can make specialist support more accessible and reduce the pressure on an internal team. The best service is transparent about its methods, realistic about timescales and focused on useful work—not guaranteed rankings. Compare providers carefully, agree on measurable goals and choose a partner whose recommendations make sense for your business.


Essential Tips for Choosing a Reliable ‘Done for You’ SEO Service

  1. Check what the SEO service includes before signing up.
  2. Ask for clear goals, timelines and regular reports.
  3. Make sure keyword research reflects your customers’ searches.
  4. Confirm that content is original and reviewed before publishing.
  5. Keep ownership of your website, accounts and data.
  6. Avoid providers promising instant rankings or guaranteed results.

Check what the SEO service includes before signing up.

Before signing up for a done-for-you SEO service, check exactly what is included. Providers may offer very different packages, covering anything from keyword research and technical fixes to content creation, link building and performance reports. Ask what work will be completed, how often it will be carried out, whether extra costs apply and what input they need from you. A clear scope helps you compare services fairly and avoid unexpected gaps or fees.

Ask for clear goals, timelines and regular reports.

Before choosing a done-for-you SEO service, agree on clear goals, realistic timelines and how progress will be measured. Ask the provider to explain what work they will complete, when you can expect updates and which outcomes they will track, such as relevant website visits, enquiries or sales. Regular, easy-to-understand reports help you see what has been done, assess whether the campaign is moving in the right direction and decide if priorities need to change.

Make sure keyword research reflects your customers’ searches.

Make sure your keyword research reflects the words and phrases your customers actually use when searching online. Think about the questions they ask, the problems they want to solve and the products or services they need—not just industry terminology. A done-for-you SEO provider should use this understanding to target relevant searches and create content that meets your audience’s needs, helping attract visitors who are more likely to become customers.

Confirm that content is original and reviewed before publishing.

Before publishing, confirm that all content is original, accurate and carefully reviewed. Ask your done-for-you SEO provider how they check for copied material, verify facts and ensure each piece reflects your brand’s tone and expertise. A thorough review helps protect your reputation and gives readers genuinely useful information.

Keep ownership of your website, accounts and data.

Keep ownership of your website, domain, analytics and search accounts, and any data collected through them. A done-for-you SEO provider may need access to carry out its work, but access should not mean transferring ownership. Use your own business email addresses where possible, grant only the permissions needed and make sure you can revoke them if the arrangement ends. This helps protect your digital assets and ensures you retain access to your website’s history, performance data and content.

Avoid providers promising instant rankings or guaranteed results.

Be wary of done-for-you SEO providers that promise instant rankings or guaranteed results. Search performance depends on factors such as competition, your website’s history and ongoing search engine changes, so no provider can reliably guarantee a specific position or timescale. Choose a service that explains its approach clearly, sets realistic expectations and reports on meaningful progress over time.

Family Meals: Bringing Everyone Together Around the Table

family meals

Family Meals: More Than Just Food

A family meal may seem like a simple part of the day, but sharing food can bring people together in a way few other routines do. Whether it is a quick breakfast before school, a Sunday roast or a casual supper around the kitchen table, eating together creates time to talk, listen and enjoy one another’s company.

A chance to connect

Busy schedules can make it difficult for families to spend time together. A shared meal offers a natural pause in the day. Conversations do not have to be serious or carefully planned: talking about a funny moment, a new interest or what everyone hopes to do at the weekend can help family members feel connected.

For children, mealtimes can also be a comfortable setting in which to practise conversation and learn to listen to others. For adults, they offer a chance to catch up and notice how everyone is doing. Even a short meal together can become a valued daily ritual.

Food, memories and tradition

Many family memories are tied to particular dishes. A recipe passed down through generations, a favourite birthday meal or the smell of something baking can bring back a sense of home. Preparing familiar food can help keep family traditions alive, while trying new recipes gives everyone the chance to create fresh ones.

Traditions need not be elaborate. They might involve making pancakes together, choosing a meal for Friday night or inviting relatives over for lunch once a month. What matters is the shared experience, not how impressive the menu looks.

Making mealtimes welcoming

There is no single right way to have a family meal. Some households sit at a table, while others eat together in a different part of the home. Work patterns, caring responsibilities and children’s activities can all affect when people are available. A regular meal at the same time every day may not be realistic, and that is perfectly fine.

Small steps can make shared meals easier:

  • Choose one or two meals each week when everyone is most likely to be free.
  • Keep a few simple, reliable recipes for busy days.
  • Invite family members to help with planning, cooking or laying the table.
  • Make room for different tastes and dietary needs.
  • Keep the atmosphere relaxed rather than expecting every meal to be perfect.

Cooking together

Preparing a meal can be part of the time spent together. Children might wash vegetables, stir ingredients or help set the table, depending on their age. Teenagers can choose a recipe or take responsibility for a dish, while adults can share skills and family recipes. These small tasks help everyone feel involved and can make cooking less of a burden for one person.

Cooking together also creates opportunities to learn practical skills. Measuring ingredients, following instructions and safely using kitchen equipment can all build confidence. Mistakes are part of the process—and sometimes they become the stories everyone remembers.

Making space for everyone

A good family meal is not defined by the food on the plate or the number of people at the table. Families come in many forms, and people may share meals with relatives, partners, housemates or close friends. Some may have different shifts or live far apart. A video call, a packed lunch shared during a break or a meal saved for someone who gets home later can also be meaningful ways to include one another.

Ultimately, family meals are about more than eating. They are a chance to slow down, share everyday moments and strengthen relationships. Whether the meal is homemade or brought in, formal or informal, what counts most is making time to be together.


Your Guide to Family Meals: Definitions, Ideas, and Healthy Options

  1. What is the definition of family meals?
  2. What should I eat for family meals?
  3. What are some good freezer meals?
  4. What are good family dinners?
  5. What are some good ideas for Saturday night dinner?
  6. What is family meal in a kitchen?
  7. What are some healthy and tasty meal ideas for babies?

What is the definition of family meals?

A family meal is a shared eating occasion involving members of a family or household. It may take place at breakfast, lunch or dinner, at home or elsewhere, and can be a simple, informal gathering or a more traditional sit-down meal. Beyond sharing food, family meals often offer time to talk, connect and maintain family routines.

What should I eat for family meals?

For family meals, choose balanced dishes that everyone can enjoy, such as vegetables, a source of protein like beans, eggs, fish or chicken, and potatoes, rice, pasta or bread. Simple options include vegetable pasta, soup with wholemeal bread, or a build-your-own meal with fillings served separately so each person can choose what they like. Consider allergies, dietary needs and different preferences, and remember that family meals do not need to be elaborate: easy, varied food shared together is often best.

What are some good freezer meals?

Good freezer meals are dishes that retain their flavour and texture when reheated, such as soups, stews, curries, chilli, lasagne, pasta sauces and cottage pie. Prepare a little extra when cooking, then cool it promptly and freeze it in clearly labelled, airtight, meal-sized containers. Defrost food safely in the fridge or use the microwave’s defrost setting, and reheat until piping hot throughout. Add fresh toppings, herbs or a side salad just before serving for an easy meal that feels freshly made.

What are good family dinners?

Good family dinners are meals that suit everyone’s tastes, budget and schedule, rather than complicated dishes that take hours to prepare. Try crowd-pleasers such as pasta with tomato sauce, shepherd’s pie, vegetable curry, homemade pizza, baked potatoes with a choice of toppings, or roast chicken with vegetables. One-pot meals and traybakes can make cooking and washing up easier, while serving sauces or toppings separately helps everyone tailor their plate. Involving family members in choosing or preparing dinner can also make mealtimes more enjoyable.

What are some good ideas for Saturday night dinner?

Saturday night dinner can be a chance to enjoy something a little different without making the evening complicated. Try homemade pizzas, letting everyone choose their own toppings, or make-your-own tacos with a selection of fillings and sides. For a cosy meal, a hearty pasta bake, curry or homemade burgers are easy crowd-pleasers; if the weather is fine, you could also have a barbecue. Get family members involved in choosing and preparing the food, and finish with a simple dessert such as fruit crumble or ice cream.

What is family meal in a kitchen?

In a professional kitchen, a “family meal” is a simple meal prepared for the restaurant’s staff, usually before service or during a break. The team eats together, often sharing dishes made from available ingredients, such as vegetables or leftovers that are still safe to use. It gives staff a chance to refuel, connect and enjoy a meal before returning to work; it is generally separate from the food served to customers.

What are some healthy and tasty meal ideas for babies?

Healthy, tasty meals for babies depend on their age, development and any allergies, so follow current NHS guidance and ask a health visitor or GP if you are unsure. Once your baby is ready for solid foods, offer a variety of soft, age-appropriate foods, such as mashed avocado, vegetables, lentils, beans, eggs, plain yoghurt, soft fruit, or flaked fish with the bones carefully removed. As they progress, try finely chopped or soft finger foods, such as omelette strips, tender vegetables, and small pieces of pasta. Avoid adding salt or sugar, and never give honey to babies under 12 months. Always supervise your baby while eating and prepare food in a texture and size that reduces the risk of choking.

Classic Chicken Pie Recipe with Golden Puff Pastry

chicken pie recipe

Classic Chicken Pie Recipe

A golden, flaky pastry crust and a creamy chicken filling make this comforting pie a favourite for family dinners. It is a useful way to use leftover roast chicken, and the filling can be prepared ahead to make mealtimes easier.

Serves: 4–6

Preparation time: 25 minutes

Cooking time: 35–40 minutes

Ingredients

  • 40g butter
  • 1 medium onion, finely chopped
  • 2 carrots, diced
  • 2 celery sticks, finely sliced
  • 40g plain flour
  • 400ml chicken stock
  • 150ml double cream
  • 700g cooked chicken, cut into bite-sized pieces
  • 1 tsp fresh thyme leaves, or ½ tsp dried thyme
  • Salt and freshly ground black pepper
  • 1 sheet ready-rolled puff pastry, about 320g
  • 1 egg, beaten

Method

  1. Prepare the filling. Melt the butter in a large saucepan over a medium heat. Add the onion, carrots and celery, then cook for 8–10 minutes, stirring occasionally, until softened.
  2. Make the sauce. Stir in the flour and cook for 1 minute. Gradually pour in the chicken stock, stirring well to prevent lumps. Bring to a gentle simmer and cook for 3–4 minutes, until thickened.
  3. Add the chicken. Stir in the cream, cooked chicken and thyme. Season with salt and pepper. Remove from the heat and leave the filling to cool for at least 15 minutes.
  4. Heat the oven. Preheat it to 200°C (180°C fan)/400°F/gas mark 6. Spoon the cooled filling into a pie dish, around 1.5 litres in capacity.
  5. Add the pastry. Lay the pastry over the dish and trim the edges, leaving a slight overhang. Press the pastry firmly around the rim to seal. Cut a small slit in the centre to let steam escape, then brush the top with beaten egg.
  6. Bake. Place the pie on a baking tray and bake for 35–40 minutes, until the pastry is puffed and golden and the filling is piping hot.
  7. Rest and serve. Leave the pie to stand for 5 minutes before serving. It goes well with peas, green beans or steamed vegetables.

Tips for a Better Chicken Pie

  • Let the filling cool before adding the pastry. This helps keep the pastry crisp and makes it easier to handle.
  • For extra flavour, add a handful of sliced mushrooms or a little chopped parsley to the filling.
  • If using raw chicken, cook it thoroughly before adding it to the sauce. The finished pie should be piping hot throughout.
  • Leftovers should be cooled promptly, covered and refrigerated, then reheated until piping hot. Avoid reheating them more than once.

This chicken pie is simple to adapt: use leftover roast chicken, vary the vegetables or add herbs to suit your taste. Serve it straight from the oven for a satisfying, homely meal.


Mastering Chicken Pie: Essential Tips and Recipes for the Perfect Homemade Dish

  1. How do you make a classic chicken pie from scratch?
  2. What ingredients do you need for a chicken pie?
  3. How long should you bake a chicken pie, and at what temperature?
  4. Can you make chicken pie ahead of time or freeze it?
  5. How do you stop the pastry on a chicken pie from going soggy?

How do you make a classic chicken pie from scratch?

To make a classic chicken pie from scratch, cook chopped onion, carrots and celery in butter until softened, then stir in flour and gradually add chicken stock to make a smooth, thick sauce. Add cooked chicken, a splash of cream and herbs such as thyme, and season to taste. Spoon the filling into a pie dish and let it cool slightly before covering with puff pastry. Seal the edges, cut a small slit in the top to let steam escape, brush with beaten egg and bake at 200°C (180°C fan)/400°F/gas mark 6 for 35–40 minutes, until the pastry is golden and the filling is piping hot.

What ingredients do you need for a chicken pie?

For a classic chicken pie, you’ll need cooked chicken, onion, carrots and celery for the filling, plus butter, plain flour, chicken stock and cream to make a rich sauce. Season it with thyme, salt and black pepper, then top the filling with ready-rolled puff pastry brushed with beaten egg for a golden finish.

How long should you bake a chicken pie, and at what temperature?

Bake a chicken pie in a preheated oven at 200°C (180°C fan)/400°F/gas mark 6 for around 35–40 minutes, or until the pastry is puffed and golden and the filling is piping hot throughout. If the filling is cold or the pie is particularly deep, it may need a little longer; cover the pastry loosely with foil if it begins to brown too quickly.

Can you make chicken pie ahead of time or freeze it?

Yes, chicken pie can be made ahead. Prepare the filling and keep it covered in the fridge for up to two days, then assemble and bake when needed. Alternatively, assemble the pie, wrap it well and freeze it unbaked for up to three months; bake from frozen, allowing extra time and covering the pastry if it browns too quickly. You can also freeze baked pie, once completely cooled, and thaw it overnight in the fridge before reheating until piping hot throughout. Follow food-safety guidance and avoid reheating the pie more than once.

How do you stop the pastry on a chicken pie from going soggy?

To keep the pastry crisp, let the chicken filling cool and thicken before topping it, as hot or watery filling can create steam and soften the pastry. Avoid overfilling the dish, cut a small steam vent in the pastry, and bake the pie in a fully preheated oven. For extra protection, place the pie dish on a preheated baking tray so the base heats quickly.