Homemade Chicken Pot Pie: A Comforting Classic with Golden, Flaky Pastry

homemade chicken pot pie

Homemade Chicken Pot Pie

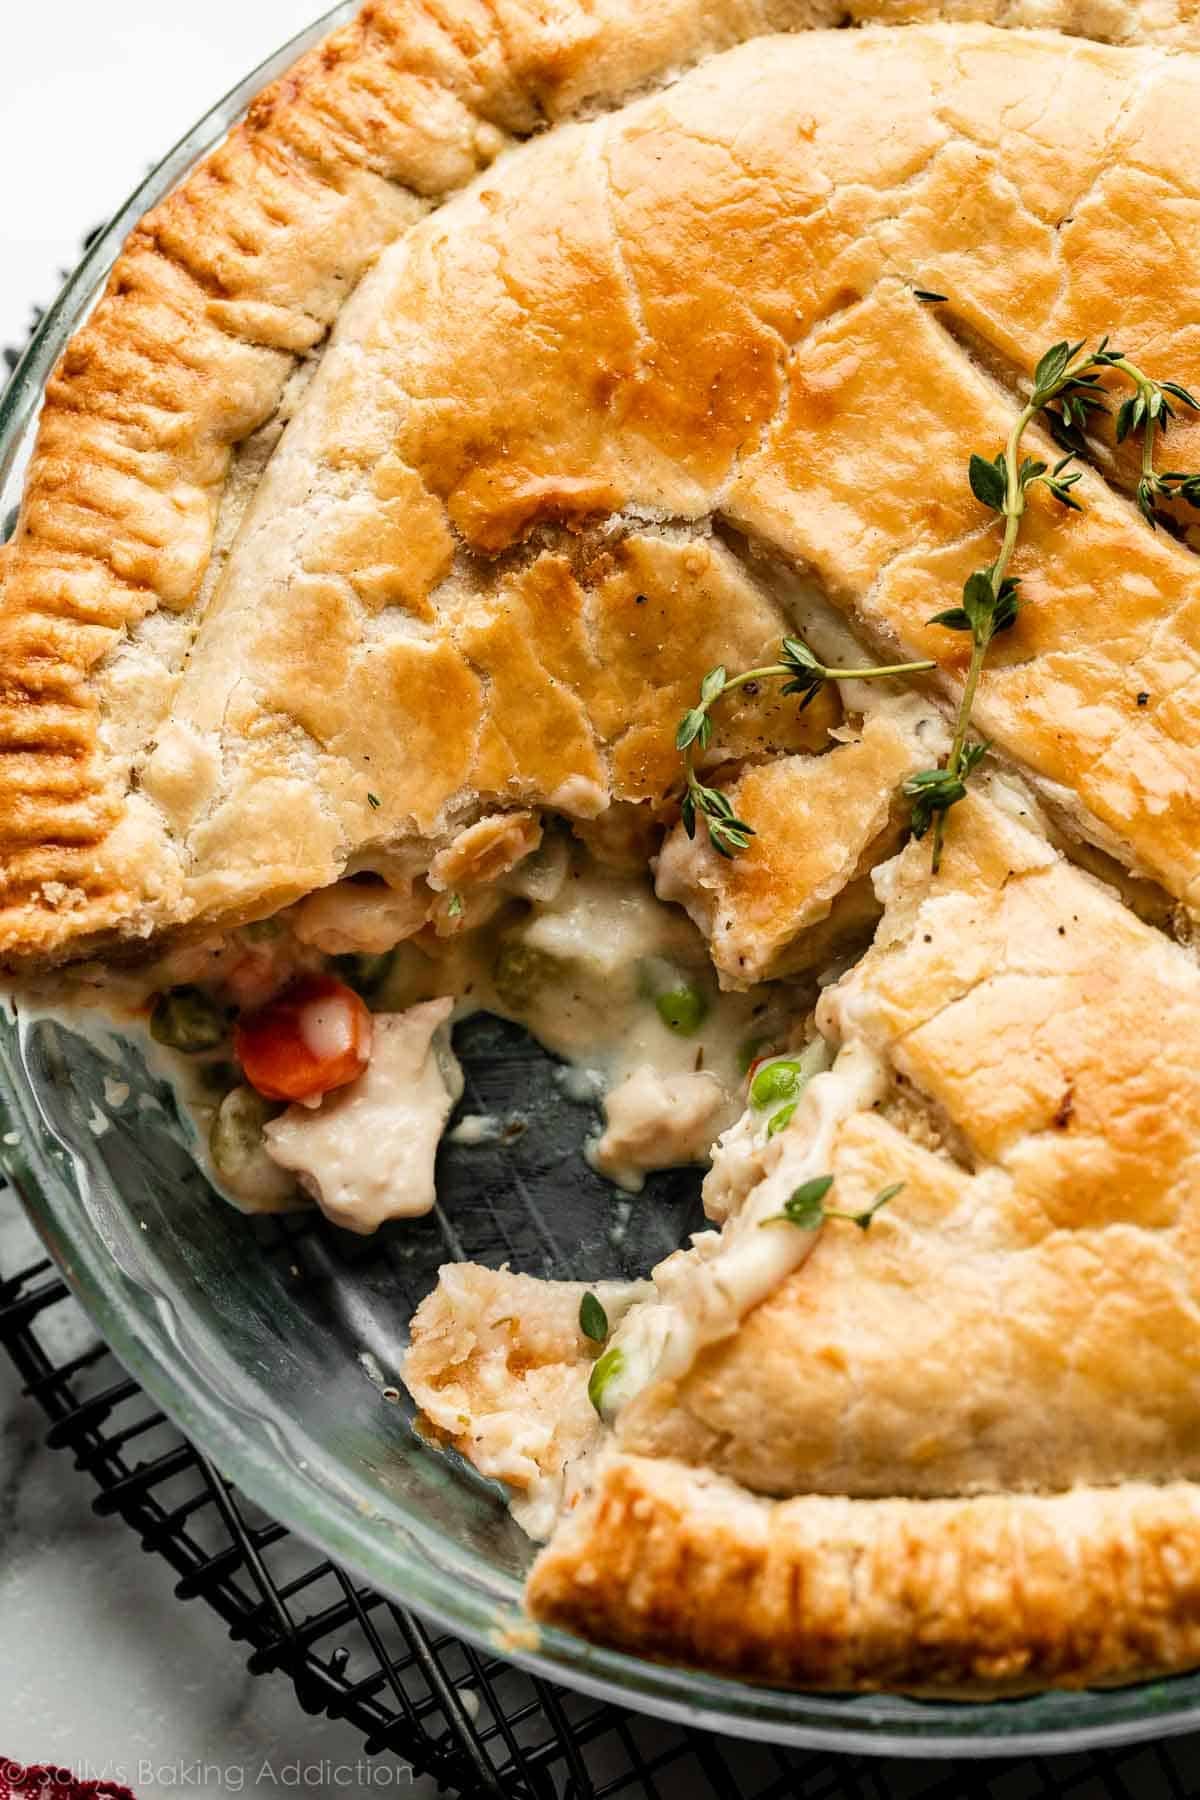
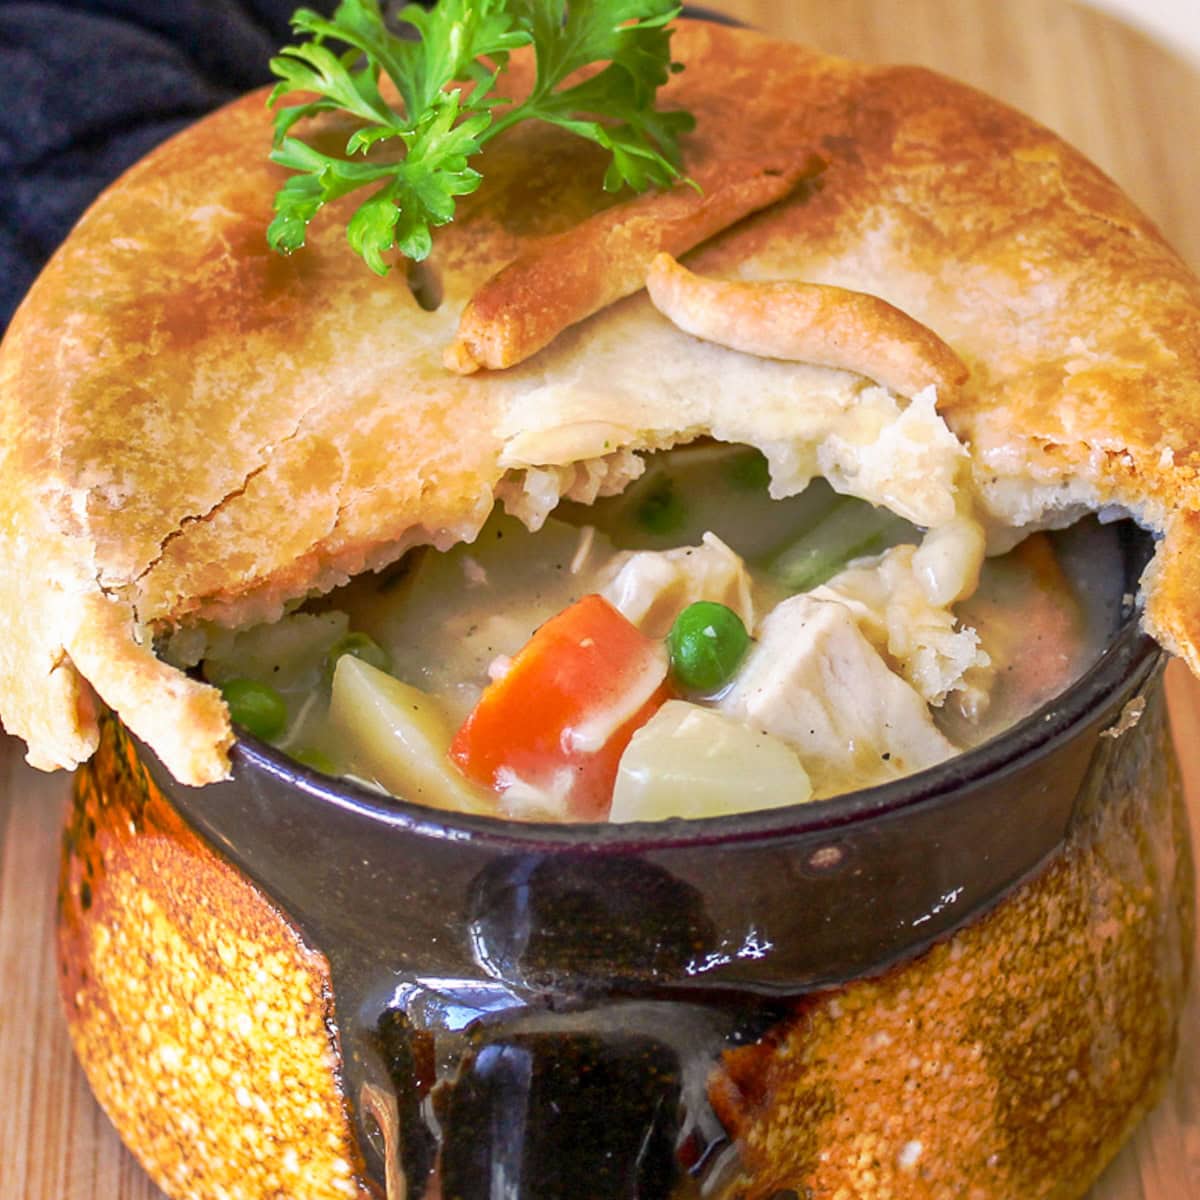
Golden, flaky pastry wrapped around tender chicken and vegetables in a creamy sauce makes chicken pot pie a comforting favourite. It is a satisfying meal for a chilly evening, and a useful way to turn leftover cooked chicken into something special. This version has a crisp pastry lid and a rich, savoury filling.

At a glance

  • Serves: 6
  • Preparation time: 30 minutes
  • Cooking time: 45 minutes

Ingredients

For the pastry

  • 250g plain flour, plus extra for rolling
  • 125g cold unsalted butter, cut into cubes
  • A pinch of salt
  • 4–6 tablespoons cold water
  • 1 egg, beaten, for glazing

For the filling

  • 40g butter
  • 1 onion, finely chopped
  • 2 carrots, peeled and diced
  • 2 celery sticks, diced
  • 40g plain flour
  • 500ml chicken stock
  • 150ml double cream or whole milk
  • 500g cooked chicken, cut into bite-sized pieces
  • 150g frozen peas
  • 1 teaspoon fresh thyme leaves, or ½ teaspoon dried thyme
  • Salt and freshly ground black pepper

Method

  1. Make the pastry. Put the flour and salt into a bowl. Rub in the cold butter with your fingertips until the mixture resembles breadcrumbs. Add the cold water a little at a time, mixing until the dough just comes together. Shape it into a flat disc, wrap and chill for at least 30 minutes.

  2. Cook the vegetables. Melt the butter in a large saucepan over a medium heat. Add the onion, carrots and celery and cook for 8–10 minutes, stirring now and then, until beginning to soften.

  3. Make the sauce. Stir in the flour and cook for 1 minute. Gradually pour in the chicken stock, stirring to keep the sauce smooth. Bring to a gentle simmer and cook for 5–7 minutes, until thickened. Stir in the cream or milk, chicken, peas and thyme. Season to taste, then leave the filling to cool slightly.

  4. Prepare the pie. Heat the oven to 200°C (180°C fan) or Gas Mark 6. Spoon the filling into a deep pie dish. On a lightly floured surface, roll out the pastry until it is slightly larger than the dish.

  5. Add the pastry lid. Brush the rim of the dish with a little beaten egg. Lay the pastry over the filling and press the edges down to seal. Trim away any excess and crimp the edge with your fingers or a fork. Cut a small slit in the centre to let steam escape, then brush the pastry with beaten egg.

  6. Bake. Place the pie on a baking tray and bake for 30–35 minutes, until the pastry is puffed and deep golden and the filling is bubbling. Leave it to stand for 10 minutes before serving.

Tips for a delicious pie

  • Cool the filling before adding the pastry. A hot filling can soften the pastry before it has a chance to bake.
  • Keep the pastry as cool as possible while working with it, and handle it gently for a tender, flaky result.
  • For extra flavour, use leftover roast chicken and include any meat from the legs as well as the breast.
  • Put the pie dish on a baking tray to catch any filling that bubbles over.
  • Make sure the filling is piping hot throughout before serving. If using freshly cooked chicken, it should reach a safe internal temperature of 75°C.

What to serve with chicken pot pie

Chicken pot pie is a hearty meal on its own, but it also goes well with steamed greens, tender-stem broccoli or a crisp green salad. For an especially comforting supper, serve it with buttery mashed potatoes.

Storing and reheating

Cool leftovers promptly and store them in a covered container in the fridge for up to two days. Reheat until piping hot throughout. The pie can also be assembled ahead of time: keep the filling and pastry separate in the fridge, then add the pastry lid and bake when ready.


Understanding Homemade Chicken Pot Pie: Ingredients, Crust, and Creamy Filling Explained

  1. What is the crust on a pot pie made of?
  2. What is chicken pot pie filling made of?
  3. What is chicken pot pie gravy made of?
  4. What are the main ingredients of chicken pot pie?
  5. What is the sauce made of in chicken pot pie?
  6. What makes chicken pot pie creamy?

What is the crust on a pot pie made of?

The crust on a homemade chicken pot pie is usually made from plain flour, cold butter, a pinch of salt and just enough cold water to bring the mixture together. This creates a tender, flaky pastry lid. Some recipes use ready-made shortcrust or puff pastry instead, while others add a bottom crust as well as a lid.

What is chicken pot pie filling made of?

Chicken pot pie filling is typically made with cooked chicken, vegetables such as carrots, peas, onion and celery, and a creamy sauce. The sauce is often thickened with flour and made using butter, chicken stock and milk or cream, then seasoned with salt, pepper and herbs such as thyme. Ingredients can be varied to suit your taste or make use of leftover vegetables.

What is chicken pot pie gravy made of?

Chicken pot pie gravy is usually made by cooking butter and flour together to form a roux, then gradually whisking in chicken stock until smooth and thick. Cream or milk adds richness, while salt, pepper and herbs such as thyme provide flavour. The chicken and vegetables are stirred through the sauce before the pie is topped with pastry and baked.

What are the main ingredients of chicken pot pie?

The main ingredients in a homemade chicken pot pie are cooked chicken, vegetables such as carrots, peas, onion and celery, and a creamy sauce made with butter, flour and chicken stock. These are topped with pastry—often shortcrust or puff pastry—and baked until golden. Seasonings such as thyme, salt and black pepper add extra flavour.

What is the sauce made of in chicken pot pie?

The sauce in chicken pot pie is usually made from butter, flour and chicken stock, with milk or cream added for a smooth, rich finish. The butter and flour are cooked together to make a roux, then the stock is stirred in gradually until the sauce thickens. Seasonings such as salt, black pepper and thyme add extra flavour.

What makes chicken pot pie creamy?

Chicken pot pie gets its creamy texture from a thickened sauce made with butter, flour and chicken stock, finished with double cream or whole milk. The butter and flour form a roux, which helps the sauce thicken, while the dairy adds richness and a smooth finish. For an extra-creamy filling, stir in a little more cream, but keep the sauce thick enough to hold its shape beneath the pastry.

Easy Chicken Pot Pie Recipe with Golden, Flaky Pastry

chicken pot pie recipe

Chicken Pot Pie Recipe

Golden, flaky pastry and a creamy chicken filling make chicken pot pie a comforting meal for any day of the week. This straightforward version uses cooked chicken and ready-rolled puff pastry, so it’s easy to prepare without compromising on flavour. Serve it hot with greens or a crisp salad.

Serves: 4–6

Preparation time: 20 minutes

Cooking time: 35 minutes

Ingredients

  • 1 tablespoon olive oil or butter
  • 1 onion, finely chopped
  • 2 carrots, diced
  • 150g mushrooms, sliced (optional)
  • 2 tablespoons plain flour
  • 400ml chicken stock
  • 150ml milk
  • 1 teaspoon Dijon mustard
  • ½ teaspoon dried thyme
  • 300g cooked chicken, shredded or chopped
  • 100g frozen peas
  • Salt and freshly ground black pepper
  • 1 sheet ready-rolled puff pastry, about 320g
  • 1 egg, beaten, for glazing

Method

  1. Heat the oil or butter in a large saucepan over a medium heat. Add the onion and carrots and cook for 5 minutes, stirring occasionally. If using mushrooms, add them and cook for a further 3 minutes.
  2. Stir in the flour and cook for 1 minute. Gradually pour in the stock, stirring all the time to prevent lumps. Add the milk, mustard and thyme, then simmer for 5–7 minutes until the sauce has thickened.
  3. Stir in the cooked chicken and peas. Season with salt and pepper, then remove the pan from the heat. Leave the filling to cool slightly while you prepare the pastry.
  4. Heat the oven to 200°C (180°C fan, Gas Mark 6). Spoon the filling into a medium ovenproof pie dish.
  5. Lay the pastry over the dish. Trim away any excess and press the edges gently to seal. Cut a small slit in the centre to let steam escape. Brush the top with beaten egg.
  6. Bake for 25–30 minutes, until the pastry is puffed and deep golden and the filling is piping hot. Leave to stand for 5 minutes before serving.

Tips for a Great Chicken Pot Pie

Make sure the filling has cooled a little before adding the pastry; this helps it stay crisp. For extra flavour, use leftover roast chicken and add a handful of chopped parsley. You can also swap the peas for sweetcorn or include diced celery with the onion and carrots.

To prepare the pie ahead, make the filling and refrigerate it for up to a day. Add the pastry just before baking. Leftovers can be stored in the fridge for up to 2 days and reheated thoroughly until piping hot.


Essential FAQs for Perfecting Your Chicken Pot Pie Recipe

  1. What ingredients do I need to make chicken pot pie?
  2. How do I make chicken pot pie from scratch?
  3. Can I use cooked or leftover chicken in chicken pot pie?
  4. What pastry is best for chicken pot pie?
  5. How do I stop the bottom of the pastry from going soggy?
  6. How long should I bake chicken pot pie, and at what temperature?
  7. Can I make chicken pot pie ahead of time?
  8. Can chicken pot pie be frozen, and how should I reheat it?
  9. What can I serve with chicken pot pie?

What ingredients do I need to make chicken pot pie?

To make chicken pot pie, you’ll need cooked chicken, puff pastry, onion, carrots, chicken stock, milk, plain flour, butter or olive oil, and seasonings such as salt, black pepper and thyme. Peas add a touch of sweetness, while mushrooms and Dijon mustard are optional extras for extra flavour. A beaten egg is useful for brushing over the pastry before baking, giving it a golden finish.

How do I make chicken pot pie from scratch?

To make chicken pot pie from scratch, cook diced onion, carrots and any other vegetables you like in a little butter or oil, then stir in flour and gradually add chicken stock and milk to create a creamy sauce. Add cooked chicken, peas and herbs, season to taste, and spoon the filling into a pie dish. Cover with homemade shortcrust or puff pastry, seal the edges, cut a small slit in the top and brush with beaten egg. Bake at 200°C (180°C fan) until the pastry is golden and the filling is piping hot, usually around 25–35 minutes.

Can I use cooked or leftover chicken in chicken pot pie?

Yes, cooked or leftover chicken works perfectly in chicken pot pie. Shred or chop it into bite-sized pieces, then stir it into the sauce with the vegetables just before assembling the pie. As the chicken is already cooked, there’s no need to simmer it for long—just make sure the filling is piping hot before baking. Leftover roast chicken is especially tasty, and it’s a handy way to make use of leftovers.

What pastry is best for chicken pot pie?

Puff pastry is a popular choice for chicken pot pie because it bakes into a light, crisp, golden topping with minimal effort. Shortcrust pastry is another good option, especially if you prefer a sturdier, more traditional crust; use it for the lid or to line the dish. Whichever you choose, add the pastry once the filling has cooled slightly to help prevent a soggy base.

How do I stop the bottom of the pastry from going soggy?

To help keep the bottom pastry crisp, let the filling cool before assembling the pie, as hot filling creates steam that can make the pastry soggy. Make sure the sauce is thick rather than runny, and avoid overfilling the dish. For extra insurance, preheat a sturdy baking tray in the oven and place the pie dish on it; the direct heat helps cook the base. You can also blind-bake a pastry base for 10–15 minutes before adding the filling, especially if you’re making a deep pie.

How long should I bake chicken pot pie, and at what temperature?

Bake chicken pot pie in a preheated oven at 200°C (180°C fan, Gas Mark 6) for about 25–30 minutes, or until the pastry is puffed and golden and the filling is piping hot. If the filling is cold or the pie is particularly deep, it may need a little longer; cover the pastry loosely with foil if it begins to brown too quickly. Allow the pie to stand for a few minutes before serving.

Can I make chicken pot pie ahead of time?

Yes, you can prepare chicken pot pie ahead of time. Make the filling, let it cool completely, then cover and refrigerate it for up to 24 hours. For the best, crispest pastry, add it just before baking. If you assemble the whole pie in advance, keep it covered in the fridge and bake it within a day; it may need a few extra minutes in the oven. Ensure the filling is piping hot before serving.

Can chicken pot pie be frozen, and how should I reheat it?

Yes, chicken pot pie can be frozen, either baked or unbaked. For the best pastry, freeze the unbaked pie well wrapped for up to 2–3 months, then thaw it overnight in the fridge before baking until golden and piping hot throughout. To freeze a baked pie, cool it completely, wrap it tightly and freeze; thaw in the fridge, then reheat in an oven at 180°C (160°C fan, Gas Mark 4) until piping hot in the centre. Cover loosely with foil if the pastry browns too quickly, and reheat leftovers only once.

What can I serve with chicken pot pie?

Chicken pot pie is rich and comforting, so it pairs well with simple, fresh sides. Try steamed green beans, peas, broccoli or roasted seasonal vegetables, or serve it with a crisp green salad dressed with a light vinaigrette. If you’d like something heartier, buttery mashed potatoes work well, though the pastry and creamy filling may be filling enough on their own.

Classic Meat Pie Recipe: A Comforting British Favourite

meat pie recipe

Classic Beef and Ale Pie Recipe

A golden, crisp pastry crust filled with tender beef in a rich, savoury gravy makes this classic meat pie ideal for a comforting family meal. The filling can be prepared ahead, giving the flavours time to develop and making assembly straightforward.

Preparation and cooking time

  • Preparation: 25 minutes
  • Cooking: 2 hours 30 minutes
  • Serves: 6

Ingredients

  • 2 tbsp vegetable oil
  • 900g stewing beef, cut into bite-sized pieces
  • 2 tbsp plain flour, seasoned with salt and black pepper
  • 1 large onion, finely chopped
  • 2 carrots, peeled and diced
  • 2 celery sticks, diced
  • 2 tbsp tomato purée
  • 330ml ale or stout
  • 300ml beef stock
  • 1 tsp fresh thyme leaves, or ½ tsp dried thyme
  • 1 bay leaf
  • 1 sheet ready-rolled puff pastry, about 320g
  • 1 egg, beaten

Method

  1. Brown the beef: Toss the beef in the seasoned flour. Heat the oil in a large, heavy-based pan over a medium-high heat. Brown the beef in batches, then set it aside.
  2. Cook the vegetables: Add the onion, carrots and celery to the pan. Cook for 5–7 minutes, stirring occasionally, until softened. Stir in the tomato purée and cook for another minute.
  3. Make the filling: Pour in the ale and scrape the bottom of the pan to loosen any browned bits. Add the stock, thyme and bay leaf, then return the beef to the pan. Bring to a gentle simmer.
  4. Simmer until tender: Cover and cook gently for about 1 hour 45 minutes to 2 hours, stirring now and then, until the beef is tender and the gravy has thickened. Remove the bay leaf and leave the filling to cool. Taste and adjust the seasoning.
  5. Prepare the pie: Heat the oven to 200°C (180°C fan)/400°F/Gas Mark 6. Spoon the cooled filling into a pie dish. Lay the pastry over the top, trimming any excess. Press the edges to seal and make a small hole in the centre to let steam escape.
  6. Glaze and bake: Brush the pastry with beaten egg. Bake for 25–30 minutes, until puffed and golden. Leave to stand for 5 minutes before serving.

Tips for a great meat pie

  • Let the filling cool before adding the pastry; hot filling can make it soft and difficult to handle.
  • If the gravy is too thin, simmer the filling uncovered for a few minutes before cooling.
  • For a family-friendly version without alcohol, replace the ale with extra beef stock.
  • Serve with mashed potatoes, peas or seasonal greens.

This hearty beef pie is best served hot from the oven, when the pastry is crisp and the filling is rich and tender. Any leftovers can be cooled, covered and refrigerated, then reheated thoroughly before serving.


Top Tips for Perfect Meat Pies: Best Cuts, Baking Advice, and More

  1. What cut of meat is best for a meat pie?
  2. How do you stop the pastry from getting soggy?
  3. Can you make a meat pie ahead of time?
  4. How long should you bake a meat pie?
  5. Can you freeze a meat pie?

What cut of meat is best for a meat pie?

For a tender, flavourful meat pie, choose a well-marbled cut that becomes soft during slow cooking, such as beef chuck, braising steak or shin. These cuts develop a rich flavour and make a succulent filling when simmered gently until tender. For a quicker pie, use leftover roast meat, but take care not to overcook it, as it may become dry.

How do you stop the pastry from getting soggy?

To help keep the pastry crisp, let the meat filling cool completely before assembling the pie, and make sure the gravy is thick rather than watery. Avoid overfilling, cut a small steam vent in the pastry, and bake the pie in a fully preheated oven. If the filling is particularly moist, try brushing the base with beaten egg and letting it dry briefly before adding the filling.

Can you make a meat pie ahead of time?

Yes, you can make a meat pie ahead of time. Prepare and cook the filling, then let it cool completely before assembling the pie. Cover and refrigerate it for up to two days, or freeze it for longer storage. For the best pastry, add it just before baking; if the pie is already assembled, keep it covered in the fridge and bake within a day, adding a little extra time if it goes into the oven cold.

How long should you bake a meat pie?

Bake a meat pie in a preheated oven at 200°C (180°C fan)/400°F/Gas Mark 6 for around 25–30 minutes, or until the pastry is risen and golden and the filling is piping hot. If the filling is already hot when assembled, it may need less time; a pie made with cold filling may take a little longer. Follow the pastry packet instructions where available, and cover the top loosely with foil if it browns too quickly.

Can you freeze a meat pie?

Yes, you can freeze a meat pie. For the best results, freeze it before baking: assemble the pie, wrap it well and freeze for up to three months. Bake from frozen, adding extra cooking time and covering the pastry with foil if it browns too quickly; make sure the filling is piping hot all the way through before serving. You can also freeze a baked pie once it has cooled completely. Wrap it securely, thaw it in the fridge and reheat thoroughly in the oven.

Easy Chicken Pot Pie: A Simple, Comforting Family Favourite

easy chicken pot pie

Easy Chicken Pot Pie

Golden, crisp pastry and a creamy chicken filling make this easy chicken pot pie a comforting favourite. Using cooked chicken and ready-rolled puff pastry keeps preparation simple, so it is ideal for a relaxed family dinner or a way to use up leftovers.

Prep time: 15 minutes

Cooking time: 30 minutes

Serves: 4

Ingredients

  • 1 tbsp olive oil or butter
  • 1 small onion, finely chopped
  • 2 carrots, peeled and diced
  • 150g frozen peas
  • 30g butter
  • 30g plain flour
  • 300ml chicken stock
  • 150ml milk
  • 350g cooked chicken, shredded or chopped
  • 1 tsp dried thyme
  • Salt and freshly ground black pepper
  • 1 sheet ready-rolled puff pastry, chilled
  • 1 egg, beaten, for glazing

Method

  1. Heat the oven. Preheat it to 200°C (180°C fan/Gas Mark 6). Lightly grease a medium pie dish.
  2. Cook the vegetables. Heat the oil or a little butter in a saucepan over a medium heat. Add the onion and carrots and cook for 5–7 minutes, stirring occasionally, until beginning to soften.
  3. Make the sauce. Add the butter. Once melted, stir in the flour and cook for 1 minute. Gradually pour in the stock, stirring well to keep the sauce smooth. Add the milk and thyme, then simmer gently for a few minutes until thickened.
  4. Add the filling. Stir in the cooked chicken and peas. Season with salt and pepper, then spoon the mixture into the prepared pie dish.
  5. Add the pastry. Lay the pastry over the dish and trim away any excess. Press the edges down to seal, then cut a small slit in the centre to let steam escape. Brush the top with beaten egg.
  6. Bake. Cook for 25–30 minutes, until the pastry is puffed and deep golden and the filling is piping hot. Leave to stand for a few minutes before serving.

Easy Variations

Use leftover roast chicken or shop-bought cooked chicken. You can swap the peas for sweetcorn, add sliced mushrooms with the onion, or use leftover cooked vegetables. For a richer filling, replace some of the milk with cream.

Helpful Tips

  • Let the filling cool slightly before adding the pastry. This helps the pastry stay crisp and makes it easier to handle.
  • If the pastry browns before the filling is hot, cover it loosely with foil and continue baking.
  • For individual pies, divide the filling between ovenproof dishes and cut the pastry to fit each one.
  • Refrigerate leftovers promptly and use within two days. Reheat until piping hot throughout.

Serve your chicken pot pie with mashed potatoes, steamed greens or a crisp green salad for a satisfying, fuss-free meal.


7 Reasons Why Easy Chicken Pot Pie is the Ultimate Comfort Dish

  1. Quick and easy to prepare
  2. Uses convenient ready-rolled pastry
  3. A comforting family favourite
  4. Great for leftover chicken
  5. Easy to customise with vegetables
  6. Crisp, golden pastry topping
  7. Makes a satisfying one-dish meal


Considerations Before Making Easy Chicken Pot Pie: 6 Potential Drawbacks

  1. Ready-made pastry may contain additives.
  2. The creamy filling can be high in calories.
  3. It takes time to bake and cool.
  4. The pastry can become soggy underneath.
  5. Suitable only if you have cooked chicken ready.
  6. Leftovers may lose their crisp pastry texture.

Quick and easy to prepare

One of the best things about an easy chicken pot pie is how quickly it comes together. With cooked chicken, a few simple ingredients and ready-rolled pastry, you can prepare the filling in minutes and let the oven do the rest. It’s a handy choice for a comforting, satisfying meal without spending hours in the kitchen.

Uses convenient ready-rolled pastry

Ready-rolled pastry makes this chicken pot pie especially easy to prepare, saving time and effort in the kitchen. Simply unroll it, place it over the filling and trim the edges for a golden, flaky topping—no mixing, rolling or extra equipment required.

A comforting family favourite

Easy chicken pot pie is a comforting family favourite, bringing everyone together over tender chicken, a creamy filling and golden, flaky pastry. Its familiar, hearty flavours make it a welcome choice for chilly evenings, relaxed Sunday dinners or whenever the family fancies a satisfying home-cooked meal.

Great for leftover chicken

Easy chicken pot pie is a brilliant way to use up leftover roast chicken. Simply shred or chop the cooked meat and stir it into the creamy filling, turning yesterday’s dinner into a comforting new meal while helping to reduce food waste.

Easy to customise with vegetables

One of the best things about easy chicken pot pie is how simple it is to customise with vegetables. Add peas, carrots, sweetcorn, mushrooms or green beans, or use up leftover cooked vegetables from another meal. Choose your favourites, adjust the quantities to suit your taste and make the most of whatever you have in the fridge.

Crisp, golden pastry topping

A crisp, golden pastry topping gives easy chicken pot pie its irresistible finishing touch. As it bakes, the pastry turns beautifully flaky on the outside while staying light and tender underneath, creating a delicious contrast with the creamy chicken filling. It looks inviting straight from the oven and adds plenty of satisfying crunch to every spoonful.

Makes a satisfying one-dish meal

Easy chicken pot pie makes a satisfying one-dish meal, bringing tender chicken, vegetables and a creamy sauce together beneath a golden pastry crust. It’s filling and comforting on its own, so there’s less need to prepare several separate dishes—though you can add a simple green salad or extra vegetables if you like.

Ready-made pastry may contain additives.

Ready-made pastry is a convenient time-saver, but some varieties may contain additives such as preservatives, emulsifiers or flavourings. Check the ingredient list if you prefer to avoid these, and compare brands, as recipes can vary. For a simpler option, choose pastry with fewer ingredients or make your own at home.

The creamy filling can be high in calories.

One drawback of easy chicken pot pie is that its creamy filling can be high in calories, particularly when made with butter, milk or cream and served beneath a generous pastry topping. For a lighter version, use reduced-fat milk, add extra vegetables and keep an eye on portion sizes.

It takes time to bake and cool.

One drawback of easy chicken pot pie is that, although it is quick to prepare, it still needs around 25–30 minutes in the oven, followed by a few minutes to cool before serving. That wait can be inconvenient on busy evenings, especially when everyone is hungry and dinner needs to be on the table quickly.

The pastry can become soggy underneath.

One drawback of an easy chicken pot pie is that the pastry can become soggy underneath, especially if the filling is very moist or still hot when the pastry is added. To help keep the base crisp, let the filling cool slightly, avoid adding too much liquid and bake the pie in a fully preheated oven until the pastry is golden and cooked through.

Suitable only if you have cooked chicken ready.

One drawback of this easy chicken pot pie is that it relies on cooked chicken being ready to use. If you only have raw chicken, you’ll need to cook it first, adding extra time and preparation to the recipe.

Leftovers may lose their crisp pastry texture.

One drawback of easy chicken pot pie is that the pastry can lose its crisp, flaky texture once the pie has been stored. Moisture from the creamy filling tends to soften the crust, so leftovers may not be quite as appealing as they are fresh from the oven. Reheating in the oven can help crisp the pastry again, although it may not fully restore its original texture.

Classic Cottage Pie Recipe: A Comforting British Family Favourite

cottage pie recipe

Classic Cottage Pie Recipe

Cottage pie is a comforting British favourite: savoury minced beef cooked with vegetables in a rich gravy, then topped with creamy mashed potato and baked until golden. It is often confused with shepherd’s pie, but the traditional distinction is simple: cottage pie is made with beef, while shepherd’s pie is made with lamb.

This recipe serves four to six and is ideal for a relaxed family meal. It can also be made ahead and baked when you are ready to eat.

Preparation and cooking time

  • Preparation: 25 minutes
  • Cooking: 50 minutes
  • Serves: 4–6

Ingredients

For the filling

  • 1 tablespoon vegetable oil
  • 1 onion, finely chopped
  • 2 carrots, diced
  • 500g beef mince
  • 2 tablespoons tomato purée
  • 1 tablespoon plain flour
  • 1 teaspoon Worcestershire sauce
  • 400ml beef stock
  • 100g frozen peas
  • 1 teaspoon dried thyme, or a few fresh sprigs
  • Salt and freshly ground black pepper

For the potato topping

  • 900g floury potatoes, such as Maris Piper or King Edward, peeled and cut into chunks
  • 50g butter
  • About 100ml milk, warmed
  • 50g mature Cheddar, grated (optional)
  • Salt and freshly ground black pepper

Method

  1. Cook the potatoes. Put the potatoes in a large pan of cold, salted water. Bring to the boil, then simmer for 15–20 minutes, or until tender. Drain well and leave them to steam-dry for a minute.
  2. Make the filling. Meanwhile, heat the oil in a large frying pan or saucepan over a medium heat. Add the onion and carrots and cook for 6–8 minutes, stirring occasionally, until softened.
  3. Add the beef mince and cook for 5–7 minutes, breaking it up with a spoon, until browned. Stir in the tomato purée and flour and cook for a minute.
  4. Pour in the beef stock and add the Worcestershire sauce and thyme. Stir well, bring to a gentle simmer and cook for 20–25 minutes, until the sauce has thickened. Stir in the peas for the final few minutes. Season to taste.
  5. Mash the potatoes. Mash the drained potatoes with the butter and enough warm milk to make a smooth, fluffy mash. Season with salt and pepper. Stir in the grated Cheddar, if using.
  6. Assemble the pie. Heat the oven to 200°C (180°C fan)/400°F/gas mark 6. Spoon the beef filling into an ovenproof dish. Spread the mash evenly over the top, taking it right to the edges. Roughen the surface with a fork to help it turn golden.
  7. Bake. Place the dish on a baking tray and bake for 25–30 minutes, until bubbling around the edges and golden on top. Leave it to stand for 5 minutes before serving.

Tips for a delicious cottage pie

  • Allow the filling to simmer until thick. If it is too runny, the potato topping may sink into it.
  • For extra flavour, add a splash of red wine with the stock, or stir in a teaspoon of mustard.
  • Make the topping crispier by brushing it with a little melted butter before baking.
  • Serve with steamed greens, cabbage or green beans.

Make-ahead and storage

The filling can be prepared a day ahead and kept covered in the fridge. Assemble the pie once the filling has cooled, then refrigerate it until needed. Add a little extra baking time if cooking it straight from the fridge, and make sure it is piping hot all the way through.

Leftovers can be stored in a covered container in the fridge for up to three days. Reheat thoroughly until steaming hot. Cottage pie can also be frozen; for the best texture, freeze it before baking, then defrost it in the fridge before cooking.


Everything You Need to Know About Making the Perfect Cottage Pie: FAQs Answered

  1. What is the difference between cottage pie and shepherd’s pie?
  2. What ingredients do you need to make cottage pie?
  3. How do you make the mashed potato topping creamy?
  4. How long should cottage pie bake in the oven?
  5. Can you make cottage pie ahead of time?
  6. Can cottage pie be frozen?
  7. How do you stop cottage pie filling from becoming watery?
  8. What should you serve with cottage pie?

What is the difference between cottage pie and shepherd’s pie?

The main difference between cottage pie and shepherd’s pie is the meat: cottage pie is traditionally made with minced beef, while shepherd’s pie uses minced lamb. Both are topped with mashed potato and baked until golden, and their fillings often include vegetables, gravy and herbs.

What ingredients do you need to make cottage pie?

To make cottage pie, you’ll need beef mince, onion, carrots, peas, beef stock, tomato purée, Worcestershire sauce and a little flour to thicken the filling. Season it with salt, pepper and thyme, then top with mashed potatoes made from floury potatoes, butter and milk. Mature Cheddar is optional, but adds a savoury finish to the topping.

How do you make the mashed potato topping creamy?

For a creamy mashed potato topping, use floury potatoes such as Maris Piper or King Edward, and cook them until completely tender. Drain them well and let them steam-dry briefly, then mash while hot with butter and warm milk, adding the milk gradually until the mash is smooth and fluffy. Avoid overworking the potatoes, as this can make them gluey. Season well, and stir in a little grated Cheddar or a spoonful of cream for extra richness, if you like.

How long should cottage pie bake in the oven?

Cottage pie should usually bake in a preheated oven at 200°C (180°C fan)/400°F/gas mark 6 for 25–30 minutes, until the filling is bubbling around the edges and the potato topping is golden. If the pie has been chilled, allow a little extra time and check that it is piping hot all the way through before serving.

Can you make cottage pie ahead of time?

Yes, cottage pie is ideal for making ahead. Prepare the filling and mashed potato, assemble the pie, then cover and refrigerate it for up to 24 hours before baking. You can also bake it in advance and reheat it until piping hot throughout. If baking straight from the fridge, allow a little extra time in the oven, and check that the centre is thoroughly heated before serving.

Can cottage pie be frozen?

Yes, cottage pie freezes well. For the best results, let it cool completely, then cover it tightly or transfer it to a freezer-safe container and freeze for up to three months. You can freeze it before or after baking, though freezing before baking usually gives the potato topping a better texture. Defrost overnight in the fridge, then bake until piping hot throughout. If reheating a cooked pie, make sure it is thoroughly hot before serving.

How do you stop cottage pie filling from becoming watery?

To stop cottage pie filling from becoming watery, simmer it uncovered until the sauce has reduced and thickened before adding it to the baking dish. A little plain flour stirred into the browned mince can help, too. Avoid adding too much stock, and let frozen vegetables thaw and drain before using them. The filling should be moist but not runny; if it looks thin, cook it for a few more minutes before topping with mash.

What should you serve with cottage pie?

Cottage pie pairs beautifully with simple vegetables that balance its rich, savoury filling. Try serving it with steamed green beans, peas, broccoli or cabbage, or add roasted carrots for extra sweetness. A crisp green salad can make the meal feel lighter, while a little extra gravy is always welcome.

Delicious Sunday Roast: Mouthwatering Rib Roast Recipe

rib roast recipe

The Perfect Rib Roast Recipe for a Delicious Sunday Roast

There’s nothing quite like the aroma of a succulent rib roast filling your kitchen on a lazy Sunday afternoon. This classic dish is a favourite for gatherings and special occasions, and with the right recipe, you can easily recreate this culinary masterpiece at home.

Ingredients:

  • 1 bone-in rib roast (about 4-5 kg)
  • 4 cloves of garlic, minced
  • 2 tablespoons of olive oil
  • Salt and pepper to taste
  • Fresh herbs (rosemary, thyme) for seasoning

Instructions:

  1. Preheat your oven to 220°C.
  2. In a small bowl, mix the minced garlic, olive oil, salt, and pepper to create a paste.
  3. Rub the garlic paste all over the rib roast, ensuring it is evenly coated.
  4. Place the seasoned roast in a roasting pan with the bone side down.
  5. Add fresh herbs on top of the roast for extra flavour.
  6. Roast the meat in the preheated oven for about 15 minutes to achieve a nice sear.
  7. Reduce the oven temperature to 160°C and continue roasting for about 2-3 hours or until a meat thermometer reads your desired level of doneness (around 55-60°C for medium-rare).
  8. Once cooked to perfection, remove the roast from the oven and let it rest for 20-30 minutes before carving.

Serve your beautifully roasted rib with Yorkshire pudding, roasted vegetables, and gravy for a traditional Sunday feast that will impress your guests. Enjoy!

This rib roast recipe is sure to become a staple in your culinary repertoire, perfect for creating memorable meals with loved ones. Give it a try and savour the delicious flavours of this classic dish!


Essential FAQs for Perfecting Your Rib Roast Recipe

  1. What is the best method to cook a rib roast?
  2. What is the secret to making perfect prime rib?
  3. What temperature do you cook a rib roast?
  4. What is the 500 rule for prime rib roast?
  5. What’s the difference between a rib roast and a prime rib?
  6. What is the cooking time for a standing rib roast?

What is the best method to cook a rib roast?

When it comes to cooking a rib roast, the best method is to start with a high-heat sear to lock in the juices and then finish it off with a slow roast at a lower temperature. This two-step process ensures that the meat is cooked evenly and remains tender and flavourful. By using fresh herbs, garlic, and seasoning to enhance the flavours, you can create a mouth-watering rib roast that will be the star of any meal. Remember to allow the roast to rest before carving to ensure maximum juiciness. With this tried-and-tested method, you can achieve a perfectly cooked rib roast that will delight your taste buds every time.

What is the secret to making perfect prime rib?

For those seeking the secret to crafting the perfect prime rib, attention to detail and quality ingredients are key. The secret lies in selecting a high-quality bone-in rib roast, allowing it to come to room temperature before cooking, and generously seasoning it with a blend of garlic, herbs, salt, and pepper. Achieving the ideal level of doneness by monitoring the internal temperature is crucial, ensuring a juicy and tender result. Letting the roast rest after cooking allows the juices to redistribute, enhancing its flavour. By following these steps diligently and with care, one can unlock the secret to creating a perfect prime rib that will delight diners with its succulence and rich taste.

What temperature do you cook a rib roast?

When cooking a rib roast, the recommended temperature for achieving a perfect result is to start with a high heat of around 220°C to create a nice sear on the meat. After the initial searing, it is advised to reduce the oven temperature to 160°C for the remainder of the cooking time. This lower temperature allows the rib roast to cook evenly and retain its juicy tenderness, ensuring that it reaches the desired level of doneness. Monitoring the internal temperature of the roast with a meat thermometer is also crucial to ensure it is cooked to your preference, typically around 55-60°C for a medium-rare finish. By following these temperature guidelines, you can enjoy a beautifully cooked rib roast that is both flavourful and succulent.

What is the 500 rule for prime rib roast?

The 500 rule for prime rib roast is a handy guideline used by many chefs to determine the cooking time for a rib roast based on its weight. According to this rule, you should initially sear the roast at 500°F (260°C) for a specific period, usually around 5-7 minutes per pound of meat. After searing, you then reduce the oven temperature to a lower setting for the remaining cooking time to ensure that the roast cooks evenly and retains its juiciness. By following the 500 rule, you can achieve a perfectly cooked prime rib roast with a deliciously caramelized exterior and tender, juicy interior that will delight your taste buds.

What’s the difference between a rib roast and a prime rib?

When it comes to the culinary world, the distinction between a rib roast and a prime rib often sparks curiosity among food enthusiasts. The key disparity lies in their preparation and presentation. A rib roast refers to the cut of beef before it is cooked, typically featuring a bone-in structure that adds flavour during roasting. On the other hand, prime rib is the term used for the same cut after it has been cooked to perfection, showcasing juicy and tender meat that is often served as a luxurious main course. Understanding this subtle contrast can enhance your appreciation for these delectable dishes and elevate your dining experience.

What is the cooking time for a standing rib roast?

When preparing a standing rib roast, the cooking time is a crucial factor in achieving the perfect level of doneness. Typically, a standing rib roast requires approximately 15 minutes of initial high-temperature roasting to create a sear on the meat. After this initial step, the oven temperature should be reduced to around 160°C for the remainder of the cooking process. The total cooking time for a standing rib roast can vary depending on factors such as the size of the roast and desired level of doneness, but as a general guideline, it may take about 2-3 hours for the roast to reach medium-rare doneness. Using a meat thermometer to monitor the internal temperature is recommended to ensure that your standing rib roast is cooked to perfection.

Indulge in the Classic Comfort of Chicken Pot Pie

chicken pot pie

The Comforting Classic: Chicken Pot Pie

Chicken pot pie is a beloved dish that has been comforting families for generations. This savoury pie, filled with tender chicken, vegetables, and a creamy sauce, is the epitome of home-cooked goodness.

The origins of chicken pot pie can be traced back to medieval England, where it was known as “potage.” Over time, the dish evolved into the familiar pie we know today, with a flaky pastry crust that encases a hearty filling.

One of the key elements of a delicious chicken pot pie is the filling. Typically, diced chicken is combined with carrots, peas, onions, and celery in a rich and flavourful sauce made from broth and cream. Seasoned with herbs like thyme and parsley, the filling is then poured into a pastry-lined dish and topped with another layer of pastry before being baked to golden perfection.

When the bubbling pie emerges from the oven, its irresistible aroma fills the kitchen, beckoning everyone to gather around the table. The first bite reveals a symphony of textures and flavours – the tender chicken, the sweetness of the vegetables, and the buttery richness of the crust.

Chicken pot pie is not just a meal; it’s a reminder of simpler times and cherished traditions. Whether enjoyed on a cold winter’s night or as part of a family gathering, this classic dish never fails to bring comfort and joy to those who savour it.

So next time you’re craving some old-fashioned comfort food, why not whip up a batch of homemade chicken pot pie? With its timeless appeal and heartwarming flavours, it’s sure to become a favourite in your household too.


9 Essential Tips for the Perfect Chicken Pot Pie

  1. Ensure the chicken is cooked through before adding it to the pie
  2. Use a mix of white and dark meat for a more flavourful filling
  3. Add some chopped vegetables like carrots, peas, and celery for extra texture
  4. Season the filling well with herbs like thyme, rosemary, and parsley
  5. Consider using puff pastry for a flakier crust
  6. Brush the top of the pie with egg wash before baking for a golden finish
  7. Let the pie cool slightly before serving to allow the filling to set
  8. Serve with a side salad or steamed greens for a balanced meal
  9. Store any leftovers in an airtight container in the fridge

Ensure the chicken is cooked through before adding it to the pie

It is crucial to ensure that the chicken is thoroughly cooked before adding it to the chicken pot pie. Properly cooked chicken not only enhances the safety of the dish but also contributes to its overall taste and texture. By cooking the chicken until it is tender and no longer pink inside, you guarantee that each bite of the pie is not only delicious but also safe to eat. This simple yet essential tip ensures that your chicken pot pie is a delightful and satisfying culinary experience for all who enjoy it.

Use a mix of white and dark meat for a more flavourful filling

For a more flavourful filling in your chicken pot pie, consider using a mix of white and dark meat. Combining the tender white meat with the richer, more robust flavour of dark meat adds depth and complexity to the filling. The contrast in textures and tastes creates a harmonious balance that elevates the overall taste experience of this classic dish. Give this tip a try to enhance the savouriness of your chicken pot pie and delight your taste buds with every bite.

Add some chopped vegetables like carrots, peas, and celery for extra texture

To enhance the texture and flavour of your chicken pot pie, consider incorporating a medley of chopped vegetables such as carrots, peas, and celery. These colourful additions not only provide a delightful crunch but also infuse the filling with a burst of freshness. The combination of tender chicken with the vibrant vegetables creates a harmonious balance that elevates the overall dining experience, making each bite a satisfying and wholesome delight.

Season the filling well with herbs like thyme, rosemary, and parsley

To enhance the flavour profile of your chicken pot pie, it is recommended to season the filling generously with a blend of aromatic herbs such as thyme, rosemary, and parsley. These herbs not only add depth and complexity to the dish but also infuse it with a delightful fragrance that will tantalise your taste buds. The combination of thyme’s earthy notes, rosemary’s piney essence, and parsley’s fresh undertones creates a harmonious balance that elevates the overall taste of the pie. Don’t underestimate the power of herbs in transforming a simple chicken pot pie into a culinary masterpiece that is sure to impress even the most discerning palates.

Consider using puff pastry for a flakier crust

When making chicken pot pie, a helpful tip to achieve a flakier crust is to consider using puff pastry. The light and airy layers of puff pastry can add a delightful crunch and texture to the pie, enhancing the overall eating experience. By opting for puff pastry as the crust for your chicken pot pie, you can elevate this classic dish to new heights of deliciousness, making each bite a truly indulgent treat.

Brush the top of the pie with egg wash before baking for a golden finish

To achieve a beautifully golden finish on your chicken pot pie, a simple yet effective tip is to brush the top of the pie with an egg wash before baking. This technique not only adds a glossy sheen to the pastry but also helps create that perfect crisp and golden crust that is both visually appealing and deliciously satisfying. The egg wash seals in the flavours and textures of the filling while enhancing the overall presentation of the dish, making each bite as delightful to look at as it is to taste.

Let the pie cool slightly before serving to allow the filling to set

Allowing the chicken pot pie to cool slightly before serving is a crucial tip that enhances the overall dining experience. By giving the pie a few moments to rest, the filling has the opportunity to set and thicken, ensuring that each slice holds together beautifully. This simple step not only helps in serving neat portions but also allows the flavours to meld together, resulting in a more cohesive and satisfying bite. So, exercise a bit of patience and let the pie cool for a few minutes before indulging in its delicious warmth.

Serve with a side salad or steamed greens for a balanced meal

For a well-rounded dining experience, consider pairing your delectable chicken pot pie with a refreshing side salad or a serving of steamed greens. The crispness of the salad or the vibrant colours of the greens not only complement the richness of the pie but also add a healthy and nutritious element to your meal. This combination provides a perfect balance of flavours and textures, ensuring that every bite is not only satisfying but also nourishing.

Store any leftovers in an airtight container in the fridge

To keep your chicken pot pie fresh and delicious for longer, remember to store any leftovers in an airtight container in the fridge. This simple tip helps maintain the flavours and textures of the pie, ensuring that you can enjoy another comforting serving whenever you’re ready. Proper storage not only preserves the taste but also keeps the dish safe to eat for an extended period, allowing you to savour every bite of this classic favourite.

Succulent Pork Loin Roast Recipe for a Memorable Meal

pork loin roast recipe

The Perfect Pork Loin Roast Recipe

Looking for a delicious and impressive dish to serve at your next gathering? A succulent pork loin roast is sure to be a crowd-pleaser. With the right seasoning and cooking technique, you can create a mouth-watering centrepiece that will have everyone coming back for seconds.

Ingredients:

  • 1 3-pound pork loin roast
  • 2 cloves of garlic, minced
  • 1 tablespoon of fresh rosemary, chopped
  • 1 tablespoon of fresh thyme, chopped
  • Salt and pepper to taste
  • Olive oil

Instructions:

  1. Preheat your oven to 180°C (350°F).
  2. In a small bowl, mix together the minced garlic, rosemary, thyme, salt, pepper, and a drizzle of olive oil to create a fragrant herb rub.
  3. Rub the herb mixture all over the pork loin roast, ensuring it is evenly coated.
  4. Place the seasoned pork loin roast in a roasting pan and roast in the preheated oven for about 1 hour or until the internal temperature reaches 63°C (145°F).
  5. Remove the pork loin roast from the oven and let it rest for 10-15 minutes before slicing.
  6. Serve your perfectly cooked pork loin roast with roasted vegetables or creamy mashed potatoes for a complete meal that will leave your guests impressed.

Whether you’re hosting a special dinner or simply craving a hearty meal, this pork loin roast recipe is guaranteed to satisfy your taste buds. Enjoy the tender meat infused with aromatic herbs and savour every bite of this culinary delight!

Bon appétit!


9 Reasons to Savour a Pork Loin Roast: A Delicious and Versatile Centrepiece

  1. Delicious and flavourful main dish
  2. Impressive centrepiece for gatherings
  3. Simple and easy to prepare
  4. Versatile – pairs well with various side dishes
  5. Tender and juicy meat when cooked correctly
  6. Aromatic herbs enhance the taste of the pork loin roast
  7. Suitable for special occasions or everyday meals
  8. Leftovers can be used in sandwiches or salads
  9. Cooking aroma fills the house with a mouth-watering scent


Considerations and Challenges of Cooking a Pork Loin Roast

  1. Pork loin roast can be prone to drying out if overcooked.
  2. Some individuals may prefer leaner cuts of meat, making pork loin roast less appealing.
  3. Preparing a pork loin roast requires careful seasoning and monitoring to ensure optimal flavour and tenderness.
  4. Cooking a large pork loin roast can take a significant amount of time, which may not be suitable for quick meals.
  5. People with dietary restrictions or preferences against pork may not find this recipe suitable.
  6. Leftover pork loin roast can sometimes lose its juiciness upon reheating.

Delicious and flavourful main dish

Indulge in the culinary delight of a perfectly cooked pork loin roast, a delicious and flavourful main dish that is sure to elevate any dining experience. The succulent meat, infused with aromatic herbs and seasonings, offers a symphony of tastes that will tantalise your taste buds with every bite. Whether served at a special gathering or enjoyed as a comforting meal at home, this pork loin roast recipe promises to impress with its rich flavours and tender texture, making it a standout choice for those seeking a memorable dining experience.

Impressive centrepiece for gatherings

When it comes to hosting gatherings, a pork loin roast recipe serves as an impressive centrepiece that never fails to captivate guests. The aroma of the seasoned pork loin roasting in the oven creates an inviting atmosphere, setting the stage for a memorable dining experience. As the perfectly cooked roast is brought to the table and elegantly carved, it becomes a focal point that draws admiration and anticipation from all attendees. With its tender texture, rich flavour, and visually appealing presentation, a pork loin roast truly elevates any gathering into a special occasion filled with culinary delight and shared enjoyment.

Simple and easy to prepare

Indulge in the culinary delight of a pork loin roast with the added benefit of its simplicity and ease of preparation. This recipe offers a straightforward approach, making it accessible even for novice cooks. With just a handful of ingredients and basic cooking techniques, you can effortlessly create a mouth-watering pork loin roast that is sure to impress your guests. Enjoy the convenience of a delicious meal without the hassle, and let the oven work its magic as you savour the delightful flavours of this classic dish.

Versatile – pairs well with various side dishes

When it comes to the pork loin roast recipe, one of its standout pros is its versatility. This delectable dish pairs exceptionally well with a wide range of side dishes, allowing you to customise your meal to suit any occasion or preference. Whether served alongside roasted vegetables for a wholesome touch, paired with creamy mashed potatoes for a comforting classic, or accompanied by a fresh salad for a lighter option, the pork loin roast effortlessly adapts to complement and enhance the flavours of diverse accompaniments. Its ability to harmonise with different sides makes it a go-to choice for creating a memorable and satisfying dining experience for all tastes.

Tender and juicy meat when cooked correctly

When prepared with precision and care, the pork loin roast recipe offers a delightful pro: tender and juicy meat that is a true delight for the senses. Through the right cooking techniques and seasoning, the pork loin roast transforms into a succulent dish that melts in your mouth with each savoured bite. The result is a culinary masterpiece that embodies perfection, promising a satisfying dining experience for all who indulge in its tender and juicy goodness.

Aromatic herbs enhance the taste of the pork loin roast

The use of aromatic herbs in this pork loin roast recipe significantly elevates the overall flavour profile of the dish. The blend of fresh rosemary, thyme, and garlic not only adds depth and complexity to the meat but also infuses it with a delightful fragrance that tantalises the senses. These herbs complement the natural richness of the pork loin, creating a harmonious marriage of flavours that is both comforting and satisfying. With each succulent bite, the herb-infused pork loin roast promises a culinary experience that is as aromatic as it is delicious.

Suitable for special occasions or everyday meals

Indulge in the versatility of the pork loin roast recipe, perfect for any occasion, whether it’s a festive celebration or a casual weekday dinner. This culinary masterpiece strikes the right balance between sophistication and simplicity, making it an ideal choice to impress guests at special gatherings or to elevate your everyday meals with its succulent flavours and tender texture. With minimal effort and maximum flavour, the pork loin roast recipe seamlessly transitions from a gourmet centerpiece to a comforting family favourite, ensuring that every bite is a delightful experience worth savouring.

Leftovers can be used in sandwiches or salads

Make the most of your pork loin roast leftovers by incorporating them into delicious sandwiches or refreshing salads. The tender and flavourful meat from the roast can add a savoury twist to your lunchtime favourites. Whether thinly sliced in a sandwich with some mustard or tossed into a vibrant salad for added protein, repurposing leftovers in this way ensures that every last bite of the delectable pork loin roast is enjoyed to the fullest.

Cooking aroma fills the house with a mouth-watering scent

The enticing aroma that fills the house while cooking a pork loin roast is truly irresistible. The mouth-watering scent of seasoned meat and herbs wafting through the air creates a warm and inviting atmosphere, heightening anticipation for the delicious meal to come. This sensory experience not only tantalizes the taste buds but also evokes feelings of comfort and satisfaction, making the act of cooking a pork loin roast a delightful sensory journey for both the chef and those eagerly awaiting the feast.

Pork loin roast can be prone to drying out if overcooked.

When preparing a pork loin roast, it is essential to exercise caution as it can easily dry out if overcooked. The lean nature of pork loin makes it susceptible to becoming tough and less juicy when subjected to high temperatures for an extended period. To avoid this common pitfall, it is advisable to monitor the cooking time diligently and use a meat thermometer to ensure the pork loin reaches the ideal internal temperature without being overdone. By taking care not to overcook the pork loin roast, you can preserve its tenderness and succulence, resulting in a delectable dish that will impress your guests.

Some individuals may prefer leaner cuts of meat, making pork loin roast less appealing.

While a pork loin roast is a delicious and versatile dish, some individuals may find it less appealing due to their preference for leaner cuts of meat. Pork loin, though tender and flavourful, does have a slightly higher fat content compared to leaner cuts like pork tenderloin. For those seeking a leaner option, alternatives such as pork tenderloin or skinless chicken breast may better suit their dietary preferences. However, with the right cooking techniques and portion control, pork loin roast can still be enjoyed as an indulgent treat for special occasions or gatherings.

Preparing a pork loin roast requires careful seasoning and monitoring to ensure optimal flavour and tenderness.

Preparing a pork loin roast demands meticulous attention to seasoning and monitoring throughout the cooking process to achieve the desired level of flavour and tenderness. From selecting the right herbs and spices to coating the roast evenly, every step plays a crucial role in enhancing the taste and texture of the dish. Additionally, monitoring the cooking time and internal temperature is essential to prevent overcooking, ensuring that the pork loin remains juicy and succulent. By dedicating time and effort to these details, one can elevate a simple pork loin roast into a culinary masterpiece that delights the senses with each bite.

Cooking a large pork loin roast can take a significant amount of time, which may not be suitable for quick meals.

When considering the preparation of a large pork loin roast, it is important to acknowledge that the cooking process can be time-consuming, making it less ideal for those seeking quick meal options. The lengthy cooking time required to ensure the roast is tender and perfectly cooked may not align with busy schedules or last-minute dinner plans. However, for those willing to invest the time and effort, the end result of a succulent and flavourful pork loin roast is well worth the wait, offering a delicious reward for patience and culinary dedication.

People with dietary restrictions or preferences against pork may not find this recipe suitable.

For individuals with dietary restrictions or preferences that exclude pork from their meals, this pork loin roast recipe may not be suitable. While the succulent flavours and juicy textures of the pork loin roast can be enticing for many, those who do not consume pork for personal, cultural, or religious reasons may need to explore alternative recipes that align with their dietary choices. It is essential to respect and accommodate diverse dietary needs when planning meals to ensure inclusivity and enjoyment for all diners.

Leftover pork loin roast can sometimes lose its juiciness upon reheating.

When it comes to the delectable pork loin roast, one potential downside to keep in mind is that leftover portions may lose some of their juiciness when reheated. While the initial serving is bursting with succulent flavours and moist texture, reheating can sometimes result in a drier consistency. To combat this, consider adding a splash of broth or gravy when reheating the pork loin roast to help retain its moisture and enhance its overall taste. Additionally, slicing the meat thinly before reheating can also aid in preserving its juiciness. With a few simple tricks, you can still enjoy the deliciousness of leftover pork loin roast without compromising on its tenderness.

Delectable Chicken Breast Recipes for a Memorable Dinner Feast

chicken breast recipes for dinner

Delicious Chicken Breast Recipes for Dinner

Chicken breast is a versatile and lean protein that can be transformed into a variety of mouth-watering dishes for dinner. Whether you prefer grilled, baked, or sautéed chicken, there’s a recipe out there to suit your taste buds. Here are three delectable chicken breast recipes to inspire your next dinner:

Lemon Herb Grilled Chicken Breast

Marinate chicken breasts in a mixture of lemon juice, olive oil, garlic, and fresh herbs such as rosemary and thyme. Grill the chicken until perfectly charred and juicy. Serve with a side of roasted vegetables for a wholesome meal.

Creamy Parmesan Baked Chicken Breast

Dip seasoned chicken breasts in a creamy mixture of parmesan cheese, mayonnaise, and breadcrumbs. Bake in the oven until the chicken is cooked through and the topping is golden brown. Pair with a green salad or pasta for a comforting dinner.

Spicy Honey Garlic Sautéed Chicken Breast

Sauté chicken breasts in a hot pan with a spicy honey garlic sauce made from soy sauce, honey, garlic, and red pepper flakes. Cook until the sauce thickens and coats the chicken beautifully. Serve over steamed rice or quinoa for an explosion of flavours.

These tantalising chicken breast recipes are sure to elevate your dinner game and impress your family or guests. Get creative in the kitchen and experiment with different seasonings and ingredients to customise these recipes to your liking.

Enjoy the deliciousness of perfectly cooked chicken breasts with these simple yet flavourful recipes!


Essential FAQs on Preparing Chicken Breast for Dinner: Tips, Substitutions, and Techniques

  1. 1. How long should I marinate chicken breast before cooking?
  2. 2. What are some healthy cooking methods for chicken breast?
  3. 3. Can I substitute chicken breast with other cuts of chicken in recipes?
  4. 4. How do I know when chicken breast is cooked thoroughly?
  5. 5. Are there any low-carb recipes using chicken breast for dinner?
  6. 6. Can I freeze cooked chicken breasts for later use?
  7. 7. What are some popular seasoning blends for seasoning grilled or bakedchicken breasts?
  8. 8.Can I use a slow cooker to cookchickenbreastsfor dinnerrecipes?

1. How long should I marinate chicken breast before cooking?

When it comes to marinating chicken breast before cooking, the ideal marinating time can vary depending on the recipe and the flavours you want to infuse into the meat. In general, it is recommended to marinate chicken breast for at least 30 minutes to allow the marinade to penetrate the meat and enhance its taste. However, for more intense flavour profiles, you can marinate chicken breast for up to 24 hours in the refrigerator. Be cautious not to over-marinate, as acidic ingredients in the marinade can break down the proteins in the chicken if left for too long. Experiment with different marinating times to find what works best for your desired taste preferences when preparing delicious chicken breast recipes for dinner.

2. What are some healthy cooking methods for chicken breast?

When it comes to preparing chicken breast in a healthy way for dinner, there are several cooking methods to consider. Grilling or baking chicken breast without excessive oil helps retain its natural flavours while keeping the dish low in added fats. Poaching chicken breast in broth or water is another healthy option that ensures the meat stays moist and tender without the need for additional oils. Additionally, opting for methods like steaming or stir-frying with minimal oil and plenty of vegetables can create a nutritious and balanced meal. These healthier cooking techniques for chicken breast allow you to enjoy a delicious dinner without compromising on taste or nutrition.

3. Can I substitute chicken breast with other cuts of chicken in recipes?

When it comes to substituting chicken breast with other cuts of chicken in recipes, it is indeed possible, but it may alter the texture and flavour of the dish. Chicken thighs, for example, are juicier and more flavourful than chicken breast, making them a suitable substitute in recipes where a richer taste is desired. Drumsticks or wings can also be used in place of chicken breast, but cooking times may vary. It’s essential to consider the characteristics of the alternative cut of chicken and adjust cooking methods accordingly to ensure a delicious outcome.

4. How do I know when chicken breast is cooked thoroughly?

When determining if chicken breast is cooked thoroughly, it is essential to rely on a reliable method to ensure both safety and optimal taste. The most accurate way to check for doneness is by using a meat thermometer. Insert the thermometer into the thickest part of the chicken breast, ensuring it does not touch any bone. The internal temperature should reach at least 75°C (165°F) for the chicken to be fully cooked and safe to eat. Additionally, cutting into the thickest part of the chicken breast and checking that the juices run clear without any pinkness is another visual indicator of doneness. By following these guidelines, you can confidently prepare delicious and perfectly cooked chicken breast dishes for a satisfying dinner.

5. Are there any low-carb recipes using chicken breast for dinner?

For those seeking low-carb options for dinner, there are plenty of delicious recipes using chicken breast that fit the bill. From grilled chicken with a side of steamed vegetables to chicken Caesar salad without croutons, the possibilities are endless. You can also try making chicken breast stuffed with spinach and feta cheese or enjoy a creamy chicken Alfredo with zucchini noodles instead of pasta. These low-carb chicken breast recipes not only cater to your dietary needs but also satisfy your taste buds with their delightful flavours and textures.

6. Can I freeze cooked chicken breasts for later use?

When it comes to the question of whether you can freeze cooked chicken breasts for later use, the answer is a resounding yes. Freezing cooked chicken breasts is a convenient way to extend their shelf life and have a quick protein option on hand for future meals. Make sure to cool the cooked chicken breasts completely before transferring them to an airtight container or freezer bag. Properly stored in the freezer, cooked chicken breasts can last for up to three months without compromising their taste or texture. Simply thaw them in the refrigerator overnight before reheating and incorporating them into your favourite chicken breast recipes for dinner.

When it comes to seasoning grilled or baked chicken breasts, there are several popular blends that can elevate the flavour profile of the dish. Some commonly used seasoning blends include a classic mix of garlic powder, onion powder, paprika, salt, and pepper for a well-rounded taste. Alternatively, you can opt for a zesty combination of lemon pepper, oregano, and thyme for a refreshing and aromatic twist. For those craving a bit of heat, a blend of cayenne pepper, chili powder, and cumin can add a spicy kick to your chicken breasts. Experimenting with different seasoning blends is key to discovering your favourite flavour profile when preparing grilled or baked chicken breasts for a delicious dinner.

8.Can I use a slow cooker to cookchickenbreastsfor dinnerrecipes?

Using a slow cooker to cook chicken breasts for dinner recipes is a convenient and popular method for many home cooks. Slow cooking chicken breasts in a crockpot can result in tender, juicy meat that easily shreds or slices for various dishes. By adding seasonings, vegetables, and liquids to the slow cooker along with the chicken breasts, you can create flavourful and effortless meals. The slow cooker allows the chicken to cook slowly over several hours, infusing it with delicious flavours and ensuring a moist texture. Whether you’re preparing a creamy chicken stew or flavourful shredded chicken tacos, using a slow cooker can simplify your dinner preparation while delivering tasty results.

Hearty Oxtail Recipe: A Delicious Dish to Savour

oxtail recipe

The Perfect Oxtail Recipe: A Hearty and Delicious Dish

Oxtail is a cut of beef that is known for its rich, flavourful meat. When cooked properly, oxtail becomes tender and succulent, making it a popular choice for hearty stews and braised dishes. Here, we present a delicious oxtail recipe that will surely impress your family and friends.

Ingredients:

  • 2 kg oxtail pieces
  • 2 onions, chopped
  • 3 carrots, sliced
  • 3 celery sticks, chopped
  • 4 cloves of garlic, minced
  • 2 bay leaves
  • 1 sprig of thyme
  • 500ml beef stock
  • 400g chopped tomatoes
  • Salt and pepper to taste
  • Olive oil for cooking

Instructions:

  1. Season the oxtail pieces with salt and pepper.
  2. In a large pot, heat some olive oil over medium-high heat. Brown the oxtail pieces on all sides until they are nicely seared. Remove the oxtail from the pot and set aside.
  3. In the same pot, add the onions, carrots, celery, and garlic. Cook until the vegetables are softened.
  4. Return the oxtail to the pot and add the bay leaves, thyme, beef stock, and chopped tomatoes. Bring to a simmer.


  5. Cover the pot with a lid and let it simmer gently for about 3-4 hours or until the oxtail is tender.


  6. Taste and adjust seasoning with salt and pepper as needed.


  7. Serve the oxtail hot with your choice of side dishes such as mashed potatoes or crusty bread.


This oxtail recipe is perfect for a cosy night in or a special occasion. The slow cooking process allows the flavours to develop beautifully, resulting in a dish that is both comforting and impressive. Try this recipe today and savour the deliciousness of tender oxtail stew!


Top 6 FAQs About Cooking and Enjoying Oxtail

  1. Why does my stomach hurt after eating oxtail?
  2. How to make simple oxtail stew?
  3. What do you soak oxtails in before cooking?
  4. How does it take to cook oxtail?
  5. What’s the best way to cook an oxtail?
  6. What kind of meat is oxtail?

Why does my stomach hurt after eating oxtail?

If you experience stomach discomfort after eating oxtail, it may be due to the richness and fattiness of the meat. Oxtail is a cut known for its high fat content, which can be heavy on the digestive system for some individuals. To reduce the likelihood of stomach issues, it is advisable to consume oxtail in moderation and pair it with lighter side dishes that can help balance out the richness of the meat. Additionally, ensuring that the oxtail is cooked thoroughly and properly may also aid in easier digestion. If stomach discomfort persists, it is recommended to consult a healthcare professional for personalised advice and guidance.

How to make simple oxtail stew?

For those seeking a straightforward and delicious oxtail dish, making a simple oxtail stew is the perfect choice. To create this hearty stew, start by browning seasoned oxtail pieces in a pot. Then, sauté onions, carrots, celery, and garlic until softened before adding the oxtail back to the pot along with bay leaves, thyme, beef stock, and chopped tomatoes. Let the stew simmer gently for a few hours until the oxtail becomes tender and flavourful. Adjust seasoning to taste and serve hot with your preferred accompaniments for a comforting meal that is sure to satisfy.

What do you soak oxtails in before cooking?

Before cooking oxtails, it is common practice to soak them in cold water for at least 1-2 hours. This soaking process helps to remove any excess blood or impurities from the meat, resulting in a cleaner and clearer broth or sauce when cooking. Some people also add a splash of vinegar or lemon juice to the soaking water to further aid in the cleansing process. By taking the time to soak oxtails before cooking, you can ensure that your final dish is not only delicious but also free from any unwanted flavors or textures.

How does it take to cook oxtail?

Cooking oxtail requires patience and time to achieve the desired tenderness and flavour. Typically, oxtail needs to be cooked slowly over a low heat for an extended period to allow the tough meat to become tender and succulent. On average, oxtail can take around 3-4 hours of simmering to reach the perfect consistency. This slow cooking process allows the meat to absorb the flavours of the seasonings and ingredients in the dish, resulting in a rich and delicious final product that is well worth the wait.

What’s the best way to cook an oxtail?

When it comes to cooking oxtail, the best way to achieve tender, flavourful meat is through slow braising or stewing. This method allows the tough connective tissues in the oxtail to break down slowly, resulting in a melt-in-your-mouth texture and rich taste. By searing the oxtail first to enhance its flavour and then simmering it with aromatic vegetables, herbs, and liquids over low heat for several hours, you can create a delicious dish that showcases the unique qualities of this cut of beef. Patience is key when cooking oxtail, as allowing it to cook slowly and gently will yield the best results in terms of both texture and taste.

What kind of meat is oxtail?

Oxtail is a flavoursome and gelatin-rich meat that comes from the tail of cattle. Despite its name, oxtail does not necessarily come from oxen but can be sourced from various types of beef cattle. The meat is prized for its rich flavour and tender texture when cooked slowly, making it a popular choice for hearty stews and braised dishes. Oxtail is often used in traditional recipes around the world, adding depth and complexity to dishes with its unique taste and succulent quality.