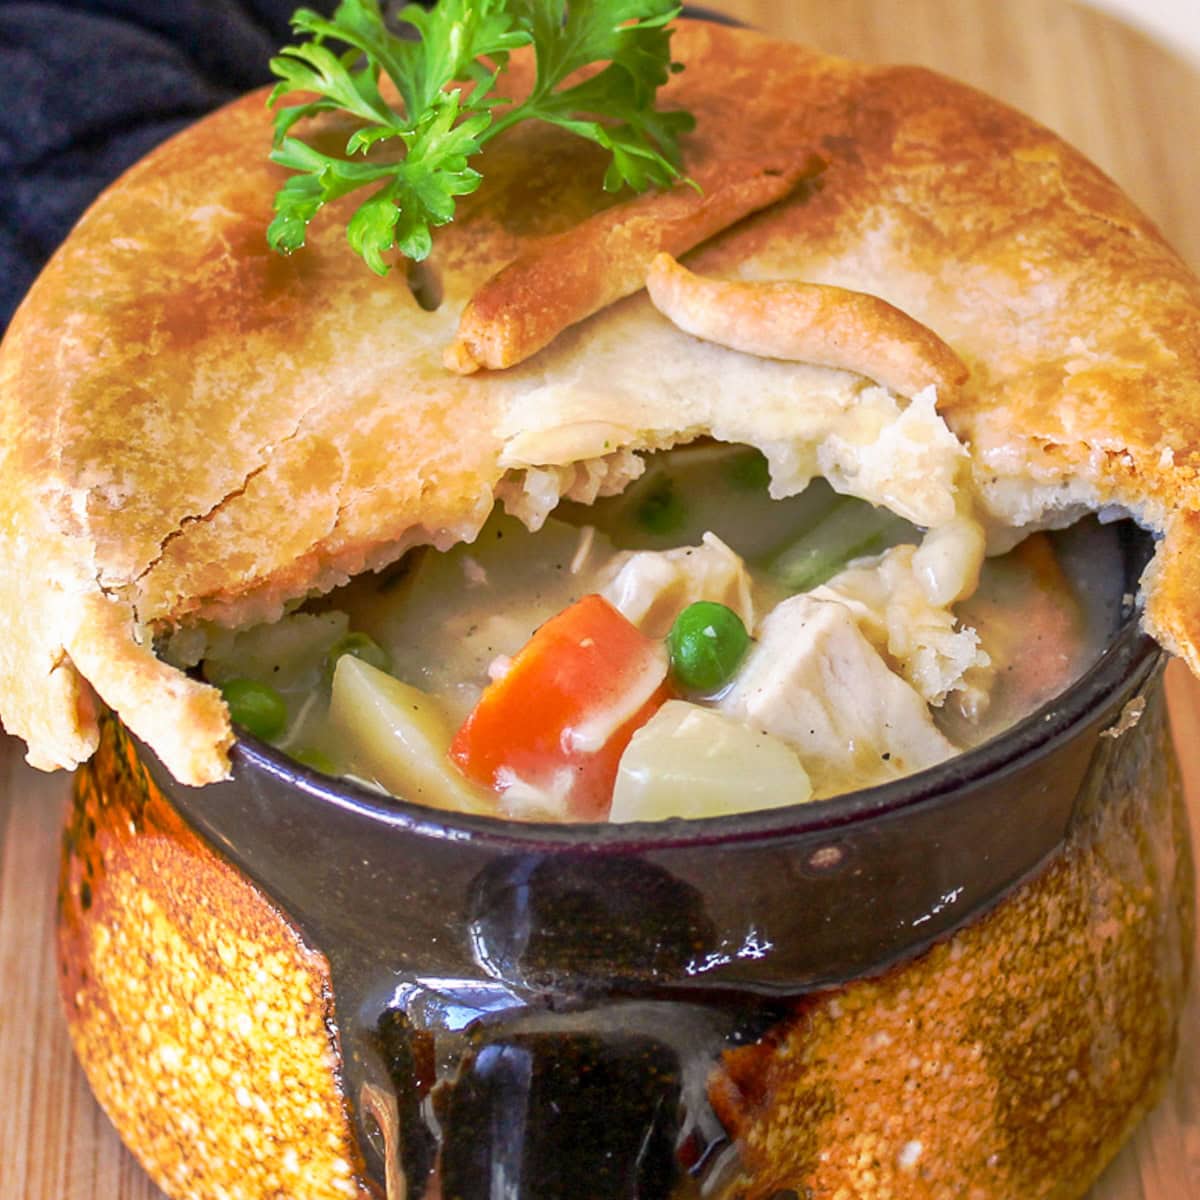
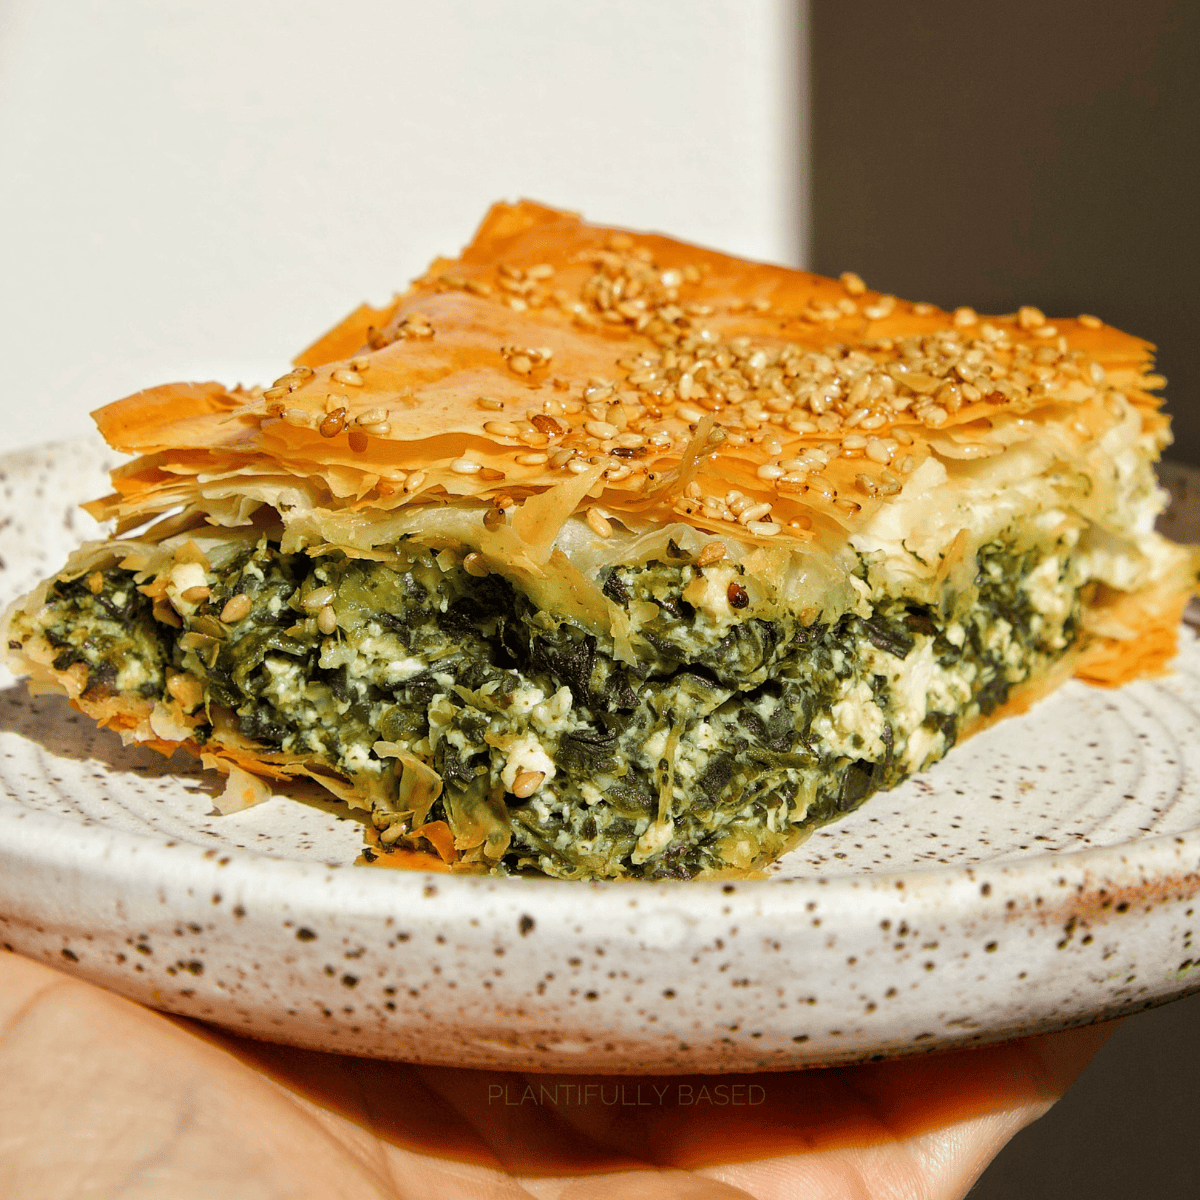
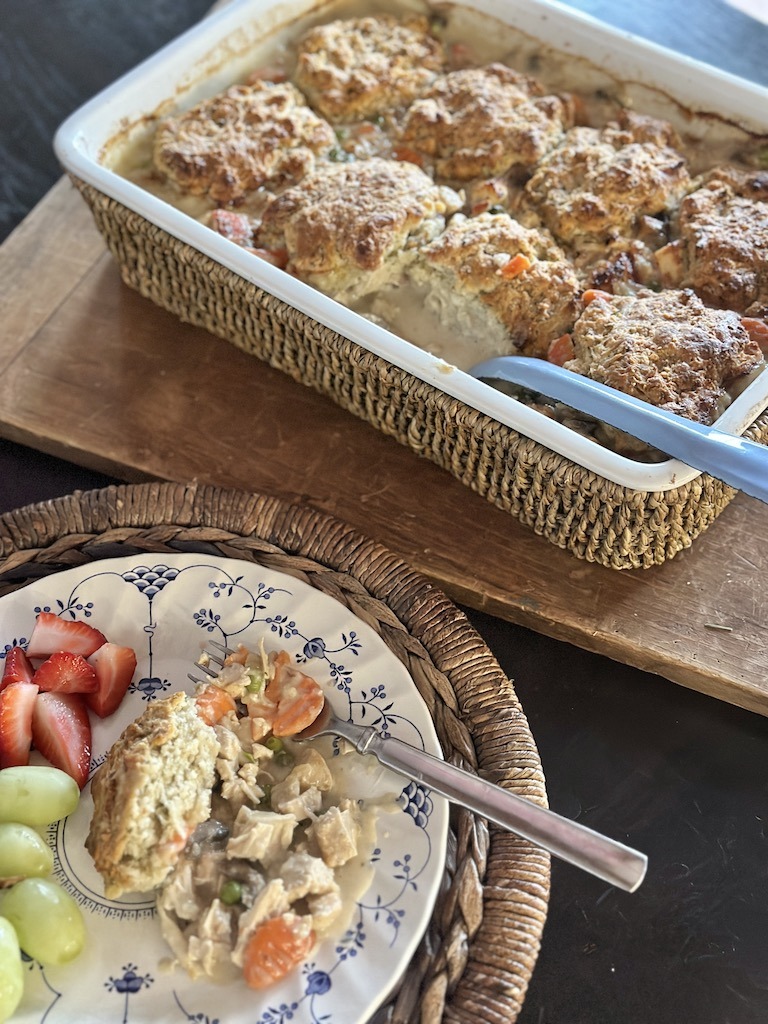
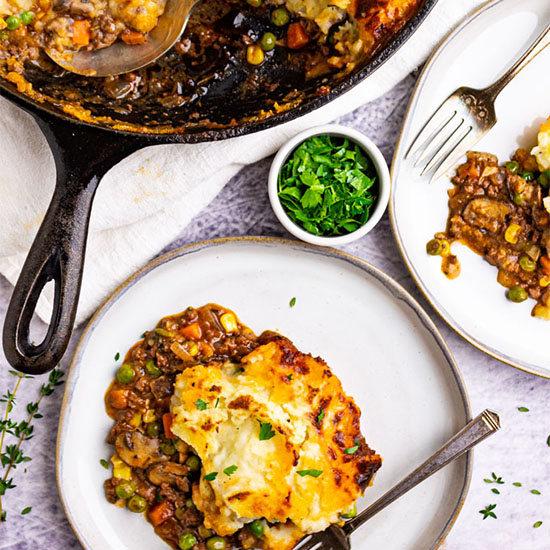
Classic Chicken Pie Recipe with Golden Puff Pastry
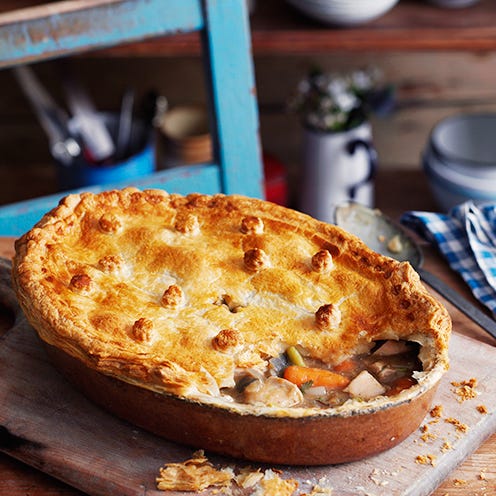
chicken pie recipe

Classic Chicken Pie Recipe

A golden, flaky pastry crust and a creamy chicken filling make this comforting pie a favourite for family dinners. It is a useful way to use leftover roast chicken, and the filling can be prepared ahead to make mealtimes easier.

Serves: 4–6

Preparation time: 25 minutes

Cooking time: 35–40 minutes

Ingredients

  • 40g butter
  • 1 medium onion, finely chopped
  • 2 carrots, diced
  • 2 celery sticks, finely sliced
  • 40g plain flour
  • 400ml chicken stock
  • 150ml double cream
  • 700g cooked chicken, cut into bite-sized pieces
  • 1 tsp fresh thyme leaves, or ½ tsp dried thyme
  • Salt and freshly ground black pepper
  • 1 sheet ready-rolled puff pastry, about 320g
  • 1 egg, beaten

Method

  1. Prepare the filling. Melt the butter in a large saucepan over a medium heat. Add the onion, carrots and celery, then cook for 8–10 minutes, stirring occasionally, until softened.
  2. Make the sauce. Stir in the flour and cook for 1 minute. Gradually pour in the chicken stock, stirring well to prevent lumps. Bring to a gentle simmer and cook for 3–4 minutes, until thickened.
  3. Add the chicken. Stir in the cream, cooked chicken and thyme. Season with salt and pepper. Remove from the heat and leave the filling to cool for at least 15 minutes.
  4. Heat the oven. Preheat it to 200°C (180°C fan)/400°F/gas mark 6. Spoon the cooled filling into a pie dish, around 1.5 litres in capacity.
  5. Add the pastry. Lay the pastry over the dish and trim the edges, leaving a slight overhang. Press the pastry firmly around the rim to seal. Cut a small slit in the centre to let steam escape, then brush the top with beaten egg.
  6. Bake. Place the pie on a baking tray and bake for 35–40 minutes, until the pastry is puffed and golden and the filling is piping hot.
  7. Rest and serve. Leave the pie to stand for 5 minutes before serving. It goes well with peas, green beans or steamed vegetables.

Tips for a Better Chicken Pie

  • Let the filling cool before adding the pastry. This helps keep the pastry crisp and makes it easier to handle.
  • For extra flavour, add a handful of sliced mushrooms or a little chopped parsley to the filling.
  • If using raw chicken, cook it thoroughly before adding it to the sauce. The finished pie should be piping hot throughout.
  • Leftovers should be cooled promptly, covered and refrigerated, then reheated until piping hot. Avoid reheating them more than once.

This chicken pie is simple to adapt: use leftover roast chicken, vary the vegetables or add herbs to suit your taste. Serve it straight from the oven for a satisfying, homely meal.


Mastering Chicken Pie: Essential Tips and Recipes for the Perfect Homemade Dish

  1. How do you make a classic chicken pie from scratch?
  2. What ingredients do you need for a chicken pie?
  3. How long should you bake a chicken pie, and at what temperature?
  4. Can you make chicken pie ahead of time or freeze it?
  5. How do you stop the pastry on a chicken pie from going soggy?

How do you make a classic chicken pie from scratch?

To make a classic chicken pie from scratch, cook chopped onion, carrots and celery in butter until softened, then stir in flour and gradually add chicken stock to make a smooth, thick sauce. Add cooked chicken, a splash of cream and herbs such as thyme, and season to taste. Spoon the filling into a pie dish and let it cool slightly before covering with puff pastry. Seal the edges, cut a small slit in the top to let steam escape, brush with beaten egg and bake at 200°C (180°C fan)/400°F/gas mark 6 for 35–40 minutes, until the pastry is golden and the filling is piping hot.

What ingredients do you need for a chicken pie?

For a classic chicken pie, you’ll need cooked chicken, onion, carrots and celery for the filling, plus butter, plain flour, chicken stock and cream to make a rich sauce. Season it with thyme, salt and black pepper, then top the filling with ready-rolled puff pastry brushed with beaten egg for a golden finish.

How long should you bake a chicken pie, and at what temperature?

Bake a chicken pie in a preheated oven at 200°C (180°C fan)/400°F/gas mark 6 for around 35–40 minutes, or until the pastry is puffed and golden and the filling is piping hot throughout. If the filling is cold or the pie is particularly deep, it may need a little longer; cover the pastry loosely with foil if it begins to brown too quickly.

Can you make chicken pie ahead of time or freeze it?

Yes, chicken pie can be made ahead. Prepare the filling and keep it covered in the fridge for up to two days, then assemble and bake when needed. Alternatively, assemble the pie, wrap it well and freeze it unbaked for up to three months; bake from frozen, allowing extra time and covering the pastry if it browns too quickly. You can also freeze baked pie, once completely cooled, and thaw it overnight in the fridge before reheating until piping hot throughout. Follow food-safety guidance and avoid reheating the pie more than once.

How do you stop the pastry on a chicken pie from going soggy?

To keep the pastry crisp, let the chicken filling cool and thicken before topping it, as hot or watery filling can create steam and soften the pastry. Avoid overfilling the dish, cut a small steam vent in the pastry, and bake the pie in a fully preheated oven. For extra protection, place the pie dish on a preheated baking tray so the base heats quickly.
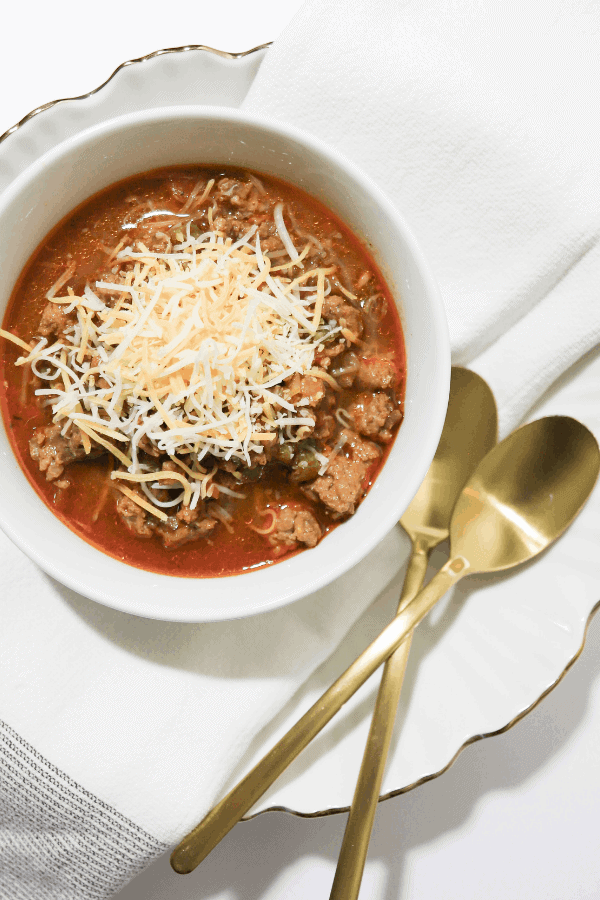

Easy Crockpot Chili Recipe for a Hearty, Hands-Off Dinner

crockpot chili recipe

Easy Crockpot Chilli Recipe

This hearty Crockpot chilli is ideal for a relaxed supper, a weekend gathering or a meal to prepare ahead. Let it cook slowly until the beef is tender and the flavours have had time to mingle. Serve it with rice, jacket potatoes, tortilla chips or warm bread.

Serves: 6

Preparation time: 20 minutes

Cooking time: 6–8 hours on low or 3–4 hours on high

Ingredients

  • 1 tablespoon vegetable oil
  • 500g beef mince
  • 1 large onion, finely chopped
  • 1 red pepper, diced
  • 2 garlic cloves, crushed
  • 2 tablespoons tomato purée
  • 2 teaspoons ground cumin
  • 2 teaspoons paprika
  • 1–2 teaspoons chilli powder, to taste
  • 1 teaspoon dried oregano
  • 400g tin chopped tomatoes
  • 400g tin kidney beans, drained and rinsed
  • 200ml beef stock
  • Salt and freshly ground black pepper

Method

  1. Brown the mince. Heat the oil in a frying pan over a medium-high heat. Add the beef mince and cook for 5–7 minutes, breaking it up with a wooden spoon, until browned. Drain off excess fat if needed.
  2. Soften the vegetables. Add the onion and red pepper to the pan and cook for 3–4 minutes. Stir in the garlic and tomato purée, then cook for another minute.
  3. Add the spices. Mix in the cumin, paprika, chilli powder and oregano. Season with a little salt and pepper.
  4. Fill the slow cooker. Transfer the mixture to the Crockpot. Add the chopped tomatoes, kidney beans and beef stock, then stir to combine.
  5. Cook slowly. Cover and cook on low for 6–8 hours or on high for 3–4 hours. Check the seasoning before serving.

Serving Suggestions

Serve the chilli with fluffy rice, baked potatoes or tortilla chips. Add toppings such as grated cheddar, a spoonful of soured cream, sliced spring onions, avocado or fresh coriander. For a lighter option, serve it with a crisp green salad.

Tips for the Best Slow Cooker Chilli

  • Brown the mince first. This adds flavour and helps prevent excess fat from collecting in the slow cooker.
  • Adjust the heat. Start with one teaspoon of chilli powder, then add more next time if you prefer a hotter chilli. You can also serve fresh chilli on the side.
  • Keep the lid on. Each time the lid is lifted, heat escapes and the cooking time can increase.
  • Thicken if needed. If the chilli is thinner than you would like, remove the lid for the final 20–30 minutes, if your slow cooker instructions allow. Alternatively, mash a few of the beans into the sauce.

Variations

For a meat-free version, replace the beef with extra beans, lentils or plant-based mince, and use vegetable stock. Black beans or pinto beans work well alongside kidney beans. You can also stir in sweetcorn during the final 30 minutes of cooking.

Storing and Reheating

Cool leftovers promptly and store them in a covered container in the fridge for up to three days. Reheat until piping hot, either in a saucepan or in the microwave, stirring well. The chilli can also be frozen in portions for up to three months; defrost it in the fridge before reheating.


Essential Tips and FAQs for Perfecting Your Crockpot Chilli Recipe

  1. Can I put raw beef in a crockpot for chili?
  2. Can you slow cook chili for 10 hours?
  3. Can you put raw mince in a slow cooker for chilli?
  4. Is Chilli better in crockpot or stove?
  5. Can chili cook on low for 8 hours?
  6. How to make chili in a slow cooker?
  7. What is the secret to really good chili?
  8. How do you make homemade chili taste better?

Can I put raw beef in a crockpot for chili?

Yes, you can put raw beef mince straight into a Crockpot when making chilli, provided it cooks fully and reaches a safe temperature. However, browning it in a pan first is recommended: it adds richer flavour, improves the texture and lets you drain away excess fat. If adding it raw, break the mince up well and make sure the slow cooker is not overfilled.

Can you slow cook chili for 10 hours?

Yes, chilli can usually be slow-cooked for 10 hours on the low setting, and the extra time can help the flavours develop. Check your slow cooker’s instructions, as temperatures vary, and make sure there is enough liquid to prevent the chilli becoming too thick. For the best texture, use beef mince that has been browned first and avoid cooking the beans for longer than necessary if you prefer them to hold their shape. Keep the lid on during cooking, and refrigerate any leftovers promptly.

Can you put raw mince in a slow cooker for chilli?

Yes, you can add raw mince straight to a slow cooker when making chilli, provided it cooks thoroughly and the appliance is used according to its instructions. However, browning the mince in a frying pan first is recommended: it adds flavour, breaks up clumps and lets you drain off excess fat before adding it to the slow cooker.

Is Chilli better in crockpot or stove?

Whether chilli is better in a crockpot or on the hob depends on your time and taste. A crockpot cooks it slowly and gently, giving the flavours plenty of time to develop while requiring little attention—ideal for a hands-off meal. Cooking chilli on the hob is quicker and makes it easier to adjust the seasoning or thicken the sauce as it simmers. Both methods can produce a delicious result, so choose the crockpot for convenience and the hob when you want more control.

Can chili cook on low for 8 hours?

Yes, chilli can usually cook on low for 8 hours in a slow cooker, and the extended cooking time helps the flavours develop. Make sure there is enough liquid to prevent it drying out, and keep the lid on while it cooks. Slow cookers vary, so check your manufacturer’s guidance and avoid leaving the chilli on a warm setting for too long once it is cooked.

How to make chili in a slow cooker?

To make chilli in a slow cooker, brown the mince in a frying pan first, then add it to the slow cooker with chopped onion, pepper, garlic, spices, chopped tomatoes, beans and stock. Stir everything together, cover and cook on low for 6–8 hours or on high for 3–4 hours, until rich and well flavoured. Taste and adjust the seasoning before serving with rice, jacket potatoes or your favourite toppings.

What is the secret to really good chili?

The secret to really good chilli is building layers of flavour and giving them time to develop. Brown the mince and soften the onions before adding them to the slow cooker, then toast the spices briefly to bring out their aroma. Use good-quality tomatoes and stock, season carefully, and let the chilli cook slowly so the flavours meld together. Taste before serving and adjust the seasoning or heat as needed; a splash of vinegar or a squeeze of lime can add a welcome final lift.

How do you make homemade chili taste better?

To make homemade chilli taste better, build flavour at every stage: brown the mince well, then cook the onion, pepper and garlic until softened before adding the spices and tomato purée. Let the spices toast briefly, and give the chilli plenty of time to cook slowly so the flavours can deepen. Taste before serving and adjust with salt, pepper and extra chilli; a small splash of Worcestershire sauce or a pinch of sugar can also balance the tomatoes. Finish with a squeeze of lime or a little fresh coriander, and add toppings such as grated cheese or soured cream for extra richness.

Homemade Chicken Pot Pie: A Comforting Classic with Golden, Flaky Pastry

homemade chicken pot pie

Homemade Chicken Pot Pie

Golden, flaky pastry wrapped around tender chicken and vegetables in a creamy sauce makes chicken pot pie a comforting favourite. It is a satisfying meal for a chilly evening, and a useful way to turn leftover cooked chicken into something special. This version has a crisp pastry lid and a rich, savoury filling.

At a glance

  • Serves: 6
  • Preparation time: 30 minutes
  • Cooking time: 45 minutes

Ingredients

For the pastry

  • 250g plain flour, plus extra for rolling
  • 125g cold unsalted butter, cut into cubes
  • A pinch of salt
  • 4–6 tablespoons cold water
  • 1 egg, beaten, for glazing

For the filling

  • 40g butter
  • 1 onion, finely chopped
  • 2 carrots, peeled and diced
  • 2 celery sticks, diced
  • 40g plain flour
  • 500ml chicken stock
  • 150ml double cream or whole milk
  • 500g cooked chicken, cut into bite-sized pieces
  • 150g frozen peas
  • 1 teaspoon fresh thyme leaves, or ½ teaspoon dried thyme
  • Salt and freshly ground black pepper

Method

  1. Make the pastry. Put the flour and salt into a bowl. Rub in the cold butter with your fingertips until the mixture resembles breadcrumbs. Add the cold water a little at a time, mixing until the dough just comes together. Shape it into a flat disc, wrap and chill for at least 30 minutes.

  2. Cook the vegetables. Melt the butter in a large saucepan over a medium heat. Add the onion, carrots and celery and cook for 8–10 minutes, stirring now and then, until beginning to soften.

  3. Make the sauce. Stir in the flour and cook for 1 minute. Gradually pour in the chicken stock, stirring to keep the sauce smooth. Bring to a gentle simmer and cook for 5–7 minutes, until thickened. Stir in the cream or milk, chicken, peas and thyme. Season to taste, then leave the filling to cool slightly.

  4. Prepare the pie. Heat the oven to 200°C (180°C fan) or Gas Mark 6. Spoon the filling into a deep pie dish. On a lightly floured surface, roll out the pastry until it is slightly larger than the dish.

  5. Add the pastry lid. Brush the rim of the dish with a little beaten egg. Lay the pastry over the filling and press the edges down to seal. Trim away any excess and crimp the edge with your fingers or a fork. Cut a small slit in the centre to let steam escape, then brush the pastry with beaten egg.

  6. Bake. Place the pie on a baking tray and bake for 30–35 minutes, until the pastry is puffed and deep golden and the filling is bubbling. Leave it to stand for 10 minutes before serving.

Tips for a delicious pie

  • Cool the filling before adding the pastry. A hot filling can soften the pastry before it has a chance to bake.
  • Keep the pastry as cool as possible while working with it, and handle it gently for a tender, flaky result.
  • For extra flavour, use leftover roast chicken and include any meat from the legs as well as the breast.
  • Put the pie dish on a baking tray to catch any filling that bubbles over.
  • Make sure the filling is piping hot throughout before serving. If using freshly cooked chicken, it should reach a safe internal temperature of 75°C.

What to serve with chicken pot pie

Chicken pot pie is a hearty meal on its own, but it also goes well with steamed greens, tender-stem broccoli or a crisp green salad. For an especially comforting supper, serve it with buttery mashed potatoes.

Storing and reheating

Cool leftovers promptly and store them in a covered container in the fridge for up to two days. Reheat until piping hot throughout. The pie can also be assembled ahead of time: keep the filling and pastry separate in the fridge, then add the pastry lid and bake when ready.


Understanding Homemade Chicken Pot Pie: Ingredients, Crust, and Creamy Filling Explained

  1. What is the crust on a pot pie made of?
  2. What is chicken pot pie filling made of?
  3. What is chicken pot pie gravy made of?
  4. What are the main ingredients of chicken pot pie?
  5. What is the sauce made of in chicken pot pie?
  6. What makes chicken pot pie creamy?

What is the crust on a pot pie made of?

The crust on a homemade chicken pot pie is usually made from plain flour, cold butter, a pinch of salt and just enough cold water to bring the mixture together. This creates a tender, flaky pastry lid. Some recipes use ready-made shortcrust or puff pastry instead, while others add a bottom crust as well as a lid.

What is chicken pot pie filling made of?

Chicken pot pie filling is typically made with cooked chicken, vegetables such as carrots, peas, onion and celery, and a creamy sauce. The sauce is often thickened with flour and made using butter, chicken stock and milk or cream, then seasoned with salt, pepper and herbs such as thyme. Ingredients can be varied to suit your taste or make use of leftover vegetables.

What is chicken pot pie gravy made of?

Chicken pot pie gravy is usually made by cooking butter and flour together to form a roux, then gradually whisking in chicken stock until smooth and thick. Cream or milk adds richness, while salt, pepper and herbs such as thyme provide flavour. The chicken and vegetables are stirred through the sauce before the pie is topped with pastry and baked.

What are the main ingredients of chicken pot pie?

The main ingredients in a homemade chicken pot pie are cooked chicken, vegetables such as carrots, peas, onion and celery, and a creamy sauce made with butter, flour and chicken stock. These are topped with pastry—often shortcrust or puff pastry—and baked until golden. Seasonings such as thyme, salt and black pepper add extra flavour.

What is the sauce made of in chicken pot pie?

The sauce in chicken pot pie is usually made from butter, flour and chicken stock, with milk or cream added for a smooth, rich finish. The butter and flour are cooked together to make a roux, then the stock is stirred in gradually until the sauce thickens. Seasonings such as salt, black pepper and thyme add extra flavour.

What makes chicken pot pie creamy?

Chicken pot pie gets its creamy texture from a thickened sauce made with butter, flour and chicken stock, finished with double cream or whole milk. The butter and flour form a roux, which helps the sauce thicken, while the dairy adds richness and a smooth finish. For an extra-creamy filling, stir in a little more cream, but keep the sauce thick enough to hold its shape beneath the pastry.

Easy Chicken Pot Pie Recipe with Golden, Flaky Pastry

chicken pot pie recipe

Chicken Pot Pie Recipe

Golden, flaky pastry and a creamy chicken filling make chicken pot pie a comforting meal for any day of the week. This straightforward version uses cooked chicken and ready-rolled puff pastry, so it’s easy to prepare without compromising on flavour. Serve it hot with greens or a crisp salad.

Serves: 4–6

Preparation time: 20 minutes

Cooking time: 35 minutes

Ingredients

  • 1 tablespoon olive oil or butter
  • 1 onion, finely chopped
  • 2 carrots, diced
  • 150g mushrooms, sliced (optional)
  • 2 tablespoons plain flour
  • 400ml chicken stock
  • 150ml milk
  • 1 teaspoon Dijon mustard
  • ½ teaspoon dried thyme
  • 300g cooked chicken, shredded or chopped
  • 100g frozen peas
  • Salt and freshly ground black pepper
  • 1 sheet ready-rolled puff pastry, about 320g
  • 1 egg, beaten, for glazing

Method

  1. Heat the oil or butter in a large saucepan over a medium heat. Add the onion and carrots and cook for 5 minutes, stirring occasionally. If using mushrooms, add them and cook for a further 3 minutes.
  2. Stir in the flour and cook for 1 minute. Gradually pour in the stock, stirring all the time to prevent lumps. Add the milk, mustard and thyme, then simmer for 5–7 minutes until the sauce has thickened.
  3. Stir in the cooked chicken and peas. Season with salt and pepper, then remove the pan from the heat. Leave the filling to cool slightly while you prepare the pastry.
  4. Heat the oven to 200°C (180°C fan, Gas Mark 6). Spoon the filling into a medium ovenproof pie dish.
  5. Lay the pastry over the dish. Trim away any excess and press the edges gently to seal. Cut a small slit in the centre to let steam escape. Brush the top with beaten egg.
  6. Bake for 25–30 minutes, until the pastry is puffed and deep golden and the filling is piping hot. Leave to stand for 5 minutes before serving.

Tips for a Great Chicken Pot Pie

Make sure the filling has cooled a little before adding the pastry; this helps it stay crisp. For extra flavour, use leftover roast chicken and add a handful of chopped parsley. You can also swap the peas for sweetcorn or include diced celery with the onion and carrots.

To prepare the pie ahead, make the filling and refrigerate it for up to a day. Add the pastry just before baking. Leftovers can be stored in the fridge for up to 2 days and reheated thoroughly until piping hot.


Essential FAQs for Perfecting Your Chicken Pot Pie Recipe

  1. What ingredients do I need to make chicken pot pie?
  2. How do I make chicken pot pie from scratch?
  3. Can I use cooked or leftover chicken in chicken pot pie?
  4. What pastry is best for chicken pot pie?
  5. How do I stop the bottom of the pastry from going soggy?
  6. How long should I bake chicken pot pie, and at what temperature?
  7. Can I make chicken pot pie ahead of time?
  8. Can chicken pot pie be frozen, and how should I reheat it?
  9. What can I serve with chicken pot pie?

What ingredients do I need to make chicken pot pie?

To make chicken pot pie, you’ll need cooked chicken, puff pastry, onion, carrots, chicken stock, milk, plain flour, butter or olive oil, and seasonings such as salt, black pepper and thyme. Peas add a touch of sweetness, while mushrooms and Dijon mustard are optional extras for extra flavour. A beaten egg is useful for brushing over the pastry before baking, giving it a golden finish.

How do I make chicken pot pie from scratch?

To make chicken pot pie from scratch, cook diced onion, carrots and any other vegetables you like in a little butter or oil, then stir in flour and gradually add chicken stock and milk to create a creamy sauce. Add cooked chicken, peas and herbs, season to taste, and spoon the filling into a pie dish. Cover with homemade shortcrust or puff pastry, seal the edges, cut a small slit in the top and brush with beaten egg. Bake at 200°C (180°C fan) until the pastry is golden and the filling is piping hot, usually around 25–35 minutes.

Can I use cooked or leftover chicken in chicken pot pie?

Yes, cooked or leftover chicken works perfectly in chicken pot pie. Shred or chop it into bite-sized pieces, then stir it into the sauce with the vegetables just before assembling the pie. As the chicken is already cooked, there’s no need to simmer it for long—just make sure the filling is piping hot before baking. Leftover roast chicken is especially tasty, and it’s a handy way to make use of leftovers.

What pastry is best for chicken pot pie?

Puff pastry is a popular choice for chicken pot pie because it bakes into a light, crisp, golden topping with minimal effort. Shortcrust pastry is another good option, especially if you prefer a sturdier, more traditional crust; use it for the lid or to line the dish. Whichever you choose, add the pastry once the filling has cooled slightly to help prevent a soggy base.

How do I stop the bottom of the pastry from going soggy?

To help keep the bottom pastry crisp, let the filling cool before assembling the pie, as hot filling creates steam that can make the pastry soggy. Make sure the sauce is thick rather than runny, and avoid overfilling the dish. For extra insurance, preheat a sturdy baking tray in the oven and place the pie dish on it; the direct heat helps cook the base. You can also blind-bake a pastry base for 10–15 minutes before adding the filling, especially if you’re making a deep pie.

How long should I bake chicken pot pie, and at what temperature?

Bake chicken pot pie in a preheated oven at 200°C (180°C fan, Gas Mark 6) for about 25–30 minutes, or until the pastry is puffed and golden and the filling is piping hot. If the filling is cold or the pie is particularly deep, it may need a little longer; cover the pastry loosely with foil if it begins to brown too quickly. Allow the pie to stand for a few minutes before serving.

Can I make chicken pot pie ahead of time?

Yes, you can prepare chicken pot pie ahead of time. Make the filling, let it cool completely, then cover and refrigerate it for up to 24 hours. For the best, crispest pastry, add it just before baking. If you assemble the whole pie in advance, keep it covered in the fridge and bake it within a day; it may need a few extra minutes in the oven. Ensure the filling is piping hot before serving.

Can chicken pot pie be frozen, and how should I reheat it?

Yes, chicken pot pie can be frozen, either baked or unbaked. For the best pastry, freeze the unbaked pie well wrapped for up to 2–3 months, then thaw it overnight in the fridge before baking until golden and piping hot throughout. To freeze a baked pie, cool it completely, wrap it tightly and freeze; thaw in the fridge, then reheat in an oven at 180°C (160°C fan, Gas Mark 4) until piping hot in the centre. Cover loosely with foil if the pastry browns too quickly, and reheat leftovers only once.

What can I serve with chicken pot pie?

Chicken pot pie is rich and comforting, so it pairs well with simple, fresh sides. Try steamed green beans, peas, broccoli or roasted seasonal vegetables, or serve it with a crisp green salad dressed with a light vinaigrette. If you’d like something heartier, buttery mashed potatoes work well, though the pastry and creamy filling may be filling enough on their own.

Easy Spanakopita Recipe: Crispy Greek Spinach and Feta Pie

spanakopita recipe

Spanakopita: A Classic Greek Spinach and Feta Pie

Golden, crisp and filled with savoury spinach, herbs and tangy feta, spanakopita is one of Greece’s best-loved pies. It makes a satisfying lunch, a sharing dish for a gathering or a tasty addition to a mezze spread. This version uses ready-made filo pastry for a straightforward bake at home.

Serves: 6–8

Preparation time: 25 minutes

Cooking time: 40–45 minutes

Ingredients

  • 700g fresh spinach, or 450g frozen spinach, defrosted
  • 2 tablespoons olive oil, plus extra for brushing
  • 1 medium onion, finely chopped
  • 4 spring onions, thinly sliced
  • 2 garlic cloves, finely chopped
  • 200g feta, crumbled
  • 2 eggs, lightly beaten
  • Small handful of fresh dill, finely chopped
  • Small handful of flat-leaf parsley, finely chopped
  • ¼ teaspoon grated nutmeg (optional)
  • Freshly ground black pepper
  • 8–10 sheets filo pastry
  • 50g butter, melted, or extra olive oil

Method

  1. Prepare the spinach. If using fresh spinach, wilt it in batches in a large pan over a medium heat. Transfer to a colander and leave to cool. If using defrosted frozen spinach, place it in a clean tea towel and squeeze out as much liquid as possible. Chop the spinach roughly.
  2. Cook the aromatics. Heat the olive oil in a frying pan. Add the onion and spring onions and cook for 5–7 minutes, until soft. Stir in the garlic and cook for another minute. Leave the mixture to cool slightly.
  3. Make the filling. Put the spinach, onion mixture, feta, eggs, dill and parsley in a bowl. Add the nutmeg, if using, and a good grind of black pepper. Mix gently. Taste before adding salt, as feta can be quite salty.
  4. Prepare the pastry. Heat the oven to 190°C (170°C fan, Gas Mark 5). Lightly oil a baking tin, approximately 23 x 33cm. Keep the filo covered with a clean, slightly damp tea towel while you work so it does not dry out.
  5. Layer the base. Lay one sheet of filo in the tin, letting any excess hang over the sides. Brush lightly with melted butter or olive oil. Add another sheet at a slight angle and brush again. Repeat until you have used about half of the pastry.
  6. Add the filling. Spoon the spinach mixture over the pastry and spread it into an even layer.
  7. Top the pie. Layer the remaining filo sheets over the filling, brushing each with butter or oil. Fold the overhanging pastry over the top to form a neat edge. Brush the surface generously and score the top lightly into portions with a sharp knife, taking care not to cut all the way through the filling.
  8. Bake. Bake for 40–45 minutes, until the pastry is deeply golden and crisp. Leave the pie to rest for 10 minutes before cutting and serving.

Tips for a crisp, flavourful spanakopita

  • Remove excess moisture. Wet spinach can make the pastry soggy, so squeeze it thoroughly after wilting or defrosting.
  • Work quickly with filo. Keep unused sheets covered and brush each layer lightly; too much butter or oil can make the pastry heavy.
  • Make it ahead. Assemble the pie, cover and refrigerate it for a few hours before baking. You can also bake it in advance and reheat it in the oven to bring back its crispness.
  • Serve it simply. Spanakopita is delicious warm or at room temperature, with a crisp salad, olives or a spoonful of Greek yoghurt.

With its flaky layers and bright, herby filling, spanakopita is a versatile pie that is easy to share. Cut it into generous squares for a main meal or smaller pieces for a buffet or picnic.


Top 5 FAQs About Spanakopita: Ingredients, Serving Suggestions, and Tips for a Crispy Delight

  1. Why is the bottom of my spanakopita soggy?
  2. What are the main ingredients of spanakopita?
  3. How do you keep spanakopita crispy?
  4. What is traditionally served with spanakopita?
  5. What do Greeks eat with spanakopita?

Why is the bottom of my spanakopita soggy?

A soggy bottom is usually caused by excess moisture in the spinach or by the pie not baking long enough. Squeeze wilted or defrosted spinach very thoroughly before mixing the filling, and avoid adding any liquid left in the pan. Make sure the oven is fully preheated and bake the spanakopita until the base and top are crisp and golden; using a metal baking tin and placing it on a lower oven shelf can also help the bottom cook through. Allow the pie to rest briefly before slicing so the filling can settle.

What are the main ingredients of spanakopita?

The main ingredients in spanakopita are spinach, feta cheese and filo pastry. The filling is often flavoured with onion, spring onions, garlic and fresh herbs such as dill and parsley, then bound with egg. Olive oil or melted butter is brushed between the filo layers to help them turn crisp and golden as the pie bakes.

How do you keep spanakopita crispy?

To keep spanakopita crispy, squeeze as much liquid as possible from the spinach before mixing the filling, as excess moisture can soften the pastry. Brush the filo lightly with melted butter or olive oil between layers, and bake until deeply golden. Once cooked, leave the pie uncovered while it cools; covering it traps steam and makes the pastry soggy. Reheat leftovers in the oven rather than the microwave to restore their crispness.

What is traditionally served with spanakopita?

Spanakopita is traditionally served warm or at room temperature, often as part of a Greek meal alongside a crisp salad, olives and other small dishes such as tzatziki. It can also be enjoyed on its own as a light lunch or snack, with a squeeze of lemon for a fresh, tangy finish.

What do Greeks eat with spanakopita?

Greeks often enjoy spanakopita on its own as a snack or light meal, but it also pairs well with a fresh Greek salad, olives and a little tzatziki or plain Greek yoghurt. As part of a larger meal, it can be served alongside grilled meat or fish and other small dishes, such as dips and roasted vegetables. It is delicious warm or at room temperature.

Easy Chicken Pot Pie: A Simple, Comforting Family Favourite

easy chicken pot pie

Easy Chicken Pot Pie

Golden, crisp pastry and a creamy chicken filling make this easy chicken pot pie a comforting favourite. Using cooked chicken and ready-rolled puff pastry keeps preparation simple, so it is ideal for a relaxed family dinner or a way to use up leftovers.

Prep time: 15 minutes

Cooking time: 30 minutes

Serves: 4

Ingredients

  • 1 tbsp olive oil or butter
  • 1 small onion, finely chopped
  • 2 carrots, peeled and diced
  • 150g frozen peas
  • 30g butter
  • 30g plain flour
  • 300ml chicken stock
  • 150ml milk
  • 350g cooked chicken, shredded or chopped
  • 1 tsp dried thyme
  • Salt and freshly ground black pepper
  • 1 sheet ready-rolled puff pastry, chilled
  • 1 egg, beaten, for glazing

Method

  1. Heat the oven. Preheat it to 200°C (180°C fan/Gas Mark 6). Lightly grease a medium pie dish.
  2. Cook the vegetables. Heat the oil or a little butter in a saucepan over a medium heat. Add the onion and carrots and cook for 5–7 minutes, stirring occasionally, until beginning to soften.
  3. Make the sauce. Add the butter. Once melted, stir in the flour and cook for 1 minute. Gradually pour in the stock, stirring well to keep the sauce smooth. Add the milk and thyme, then simmer gently for a few minutes until thickened.
  4. Add the filling. Stir in the cooked chicken and peas. Season with salt and pepper, then spoon the mixture into the prepared pie dish.
  5. Add the pastry. Lay the pastry over the dish and trim away any excess. Press the edges down to seal, then cut a small slit in the centre to let steam escape. Brush the top with beaten egg.
  6. Bake. Cook for 25–30 minutes, until the pastry is puffed and deep golden and the filling is piping hot. Leave to stand for a few minutes before serving.

Easy Variations

Use leftover roast chicken or shop-bought cooked chicken. You can swap the peas for sweetcorn, add sliced mushrooms with the onion, or use leftover cooked vegetables. For a richer filling, replace some of the milk with cream.

Helpful Tips

  • Let the filling cool slightly before adding the pastry. This helps the pastry stay crisp and makes it easier to handle.
  • If the pastry browns before the filling is hot, cover it loosely with foil and continue baking.
  • For individual pies, divide the filling between ovenproof dishes and cut the pastry to fit each one.
  • Refrigerate leftovers promptly and use within two days. Reheat until piping hot throughout.

Serve your chicken pot pie with mashed potatoes, steamed greens or a crisp green salad for a satisfying, fuss-free meal.


7 Reasons Why Easy Chicken Pot Pie is the Ultimate Comfort Dish

  1. Quick and easy to prepare
  2. Uses convenient ready-rolled pastry
  3. A comforting family favourite
  4. Great for leftover chicken
  5. Easy to customise with vegetables
  6. Crisp, golden pastry topping
  7. Makes a satisfying one-dish meal


Considerations Before Making Easy Chicken Pot Pie: 6 Potential Drawbacks

  1. Ready-made pastry may contain additives.
  2. The creamy filling can be high in calories.
  3. It takes time to bake and cool.
  4. The pastry can become soggy underneath.
  5. Suitable only if you have cooked chicken ready.
  6. Leftovers may lose their crisp pastry texture.

Quick and easy to prepare

One of the best things about an easy chicken pot pie is how quickly it comes together. With cooked chicken, a few simple ingredients and ready-rolled pastry, you can prepare the filling in minutes and let the oven do the rest. It’s a handy choice for a comforting, satisfying meal without spending hours in the kitchen.

Uses convenient ready-rolled pastry

Ready-rolled pastry makes this chicken pot pie especially easy to prepare, saving time and effort in the kitchen. Simply unroll it, place it over the filling and trim the edges for a golden, flaky topping—no mixing, rolling or extra equipment required.

A comforting family favourite

Easy chicken pot pie is a comforting family favourite, bringing everyone together over tender chicken, a creamy filling and golden, flaky pastry. Its familiar, hearty flavours make it a welcome choice for chilly evenings, relaxed Sunday dinners or whenever the family fancies a satisfying home-cooked meal.

Great for leftover chicken

Easy chicken pot pie is a brilliant way to use up leftover roast chicken. Simply shred or chop the cooked meat and stir it into the creamy filling, turning yesterday’s dinner into a comforting new meal while helping to reduce food waste.

Easy to customise with vegetables

One of the best things about easy chicken pot pie is how simple it is to customise with vegetables. Add peas, carrots, sweetcorn, mushrooms or green beans, or use up leftover cooked vegetables from another meal. Choose your favourites, adjust the quantities to suit your taste and make the most of whatever you have in the fridge.

Crisp, golden pastry topping

A crisp, golden pastry topping gives easy chicken pot pie its irresistible finishing touch. As it bakes, the pastry turns beautifully flaky on the outside while staying light and tender underneath, creating a delicious contrast with the creamy chicken filling. It looks inviting straight from the oven and adds plenty of satisfying crunch to every spoonful.

Makes a satisfying one-dish meal

Easy chicken pot pie makes a satisfying one-dish meal, bringing tender chicken, vegetables and a creamy sauce together beneath a golden pastry crust. It’s filling and comforting on its own, so there’s less need to prepare several separate dishes—though you can add a simple green salad or extra vegetables if you like.

Ready-made pastry may contain additives.

Ready-made pastry is a convenient time-saver, but some varieties may contain additives such as preservatives, emulsifiers or flavourings. Check the ingredient list if you prefer to avoid these, and compare brands, as recipes can vary. For a simpler option, choose pastry with fewer ingredients or make your own at home.

The creamy filling can be high in calories.

One drawback of easy chicken pot pie is that its creamy filling can be high in calories, particularly when made with butter, milk or cream and served beneath a generous pastry topping. For a lighter version, use reduced-fat milk, add extra vegetables and keep an eye on portion sizes.

It takes time to bake and cool.

One drawback of easy chicken pot pie is that, although it is quick to prepare, it still needs around 25–30 minutes in the oven, followed by a few minutes to cool before serving. That wait can be inconvenient on busy evenings, especially when everyone is hungry and dinner needs to be on the table quickly.

The pastry can become soggy underneath.

One drawback of an easy chicken pot pie is that the pastry can become soggy underneath, especially if the filling is very moist or still hot when the pastry is added. To help keep the base crisp, let the filling cool slightly, avoid adding too much liquid and bake the pie in a fully preheated oven until the pastry is golden and cooked through.

Suitable only if you have cooked chicken ready.

One drawback of this easy chicken pot pie is that it relies on cooked chicken being ready to use. If you only have raw chicken, you’ll need to cook it first, adding extra time and preparation to the recipe.

Leftovers may lose their crisp pastry texture.

One drawback of easy chicken pot pie is that the pastry can lose its crisp, flaky texture once the pie has been stored. Moisture from the creamy filling tends to soften the crust, so leftovers may not be quite as appealing as they are fresh from the oven. Reheating in the oven can help crisp the pastry again, although it may not fully restore its original texture.

Classic Cottage Pie Recipe: A Comforting British Family Favourite

cottage pie recipe

Classic Cottage Pie Recipe

Cottage pie is a comforting British favourite: savoury minced beef cooked with vegetables in a rich gravy, then topped with creamy mashed potato and baked until golden. It is often confused with shepherd’s pie, but the traditional distinction is simple: cottage pie is made with beef, while shepherd’s pie is made with lamb.

This recipe serves four to six and is ideal for a relaxed family meal. It can also be made ahead and baked when you are ready to eat.

Preparation and cooking time

  • Preparation: 25 minutes
  • Cooking: 50 minutes
  • Serves: 4–6

Ingredients

For the filling

  • 1 tablespoon vegetable oil
  • 1 onion, finely chopped
  • 2 carrots, diced
  • 500g beef mince
  • 2 tablespoons tomato purée
  • 1 tablespoon plain flour
  • 1 teaspoon Worcestershire sauce
  • 400ml beef stock
  • 100g frozen peas
  • 1 teaspoon dried thyme, or a few fresh sprigs
  • Salt and freshly ground black pepper

For the potato topping

  • 900g floury potatoes, such as Maris Piper or King Edward, peeled and cut into chunks
  • 50g butter
  • About 100ml milk, warmed
  • 50g mature Cheddar, grated (optional)
  • Salt and freshly ground black pepper

Method

  1. Cook the potatoes. Put the potatoes in a large pan of cold, salted water. Bring to the boil, then simmer for 15–20 minutes, or until tender. Drain well and leave them to steam-dry for a minute.
  2. Make the filling. Meanwhile, heat the oil in a large frying pan or saucepan over a medium heat. Add the onion and carrots and cook for 6–8 minutes, stirring occasionally, until softened.
  3. Add the beef mince and cook for 5–7 minutes, breaking it up with a spoon, until browned. Stir in the tomato purée and flour and cook for a minute.
  4. Pour in the beef stock and add the Worcestershire sauce and thyme. Stir well, bring to a gentle simmer and cook for 20–25 minutes, until the sauce has thickened. Stir in the peas for the final few minutes. Season to taste.
  5. Mash the potatoes. Mash the drained potatoes with the butter and enough warm milk to make a smooth, fluffy mash. Season with salt and pepper. Stir in the grated Cheddar, if using.
  6. Assemble the pie. Heat the oven to 200°C (180°C fan)/400°F/gas mark 6. Spoon the beef filling into an ovenproof dish. Spread the mash evenly over the top, taking it right to the edges. Roughen the surface with a fork to help it turn golden.
  7. Bake. Place the dish on a baking tray and bake for 25–30 minutes, until bubbling around the edges and golden on top. Leave it to stand for 5 minutes before serving.

Tips for a delicious cottage pie

  • Allow the filling to simmer until thick. If it is too runny, the potato topping may sink into it.
  • For extra flavour, add a splash of red wine with the stock, or stir in a teaspoon of mustard.
  • Make the topping crispier by brushing it with a little melted butter before baking.
  • Serve with steamed greens, cabbage or green beans.

Make-ahead and storage

The filling can be prepared a day ahead and kept covered in the fridge. Assemble the pie once the filling has cooled, then refrigerate it until needed. Add a little extra baking time if cooking it straight from the fridge, and make sure it is piping hot all the way through.

Leftovers can be stored in a covered container in the fridge for up to three days. Reheat thoroughly until steaming hot. Cottage pie can also be frozen; for the best texture, freeze it before baking, then defrost it in the fridge before cooking.


Everything You Need to Know About Making the Perfect Cottage Pie: FAQs Answered

  1. What is the difference between cottage pie and shepherd’s pie?
  2. What ingredients do you need to make cottage pie?
  3. How do you make the mashed potato topping creamy?
  4. How long should cottage pie bake in the oven?
  5. Can you make cottage pie ahead of time?
  6. Can cottage pie be frozen?
  7. How do you stop cottage pie filling from becoming watery?
  8. What should you serve with cottage pie?

What is the difference between cottage pie and shepherd’s pie?

The main difference between cottage pie and shepherd’s pie is the meat: cottage pie is traditionally made with minced beef, while shepherd’s pie uses minced lamb. Both are topped with mashed potato and baked until golden, and their fillings often include vegetables, gravy and herbs.

What ingredients do you need to make cottage pie?

To make cottage pie, you’ll need beef mince, onion, carrots, peas, beef stock, tomato purée, Worcestershire sauce and a little flour to thicken the filling. Season it with salt, pepper and thyme, then top with mashed potatoes made from floury potatoes, butter and milk. Mature Cheddar is optional, but adds a savoury finish to the topping.

How do you make the mashed potato topping creamy?

For a creamy mashed potato topping, use floury potatoes such as Maris Piper or King Edward, and cook them until completely tender. Drain them well and let them steam-dry briefly, then mash while hot with butter and warm milk, adding the milk gradually until the mash is smooth and fluffy. Avoid overworking the potatoes, as this can make them gluey. Season well, and stir in a little grated Cheddar or a spoonful of cream for extra richness, if you like.

How long should cottage pie bake in the oven?

Cottage pie should usually bake in a preheated oven at 200°C (180°C fan)/400°F/gas mark 6 for 25–30 minutes, until the filling is bubbling around the edges and the potato topping is golden. If the pie has been chilled, allow a little extra time and check that it is piping hot all the way through before serving.

Can you make cottage pie ahead of time?

Yes, cottage pie is ideal for making ahead. Prepare the filling and mashed potato, assemble the pie, then cover and refrigerate it for up to 24 hours before baking. You can also bake it in advance and reheat it until piping hot throughout. If baking straight from the fridge, allow a little extra time in the oven, and check that the centre is thoroughly heated before serving.

Can cottage pie be frozen?

Yes, cottage pie freezes well. For the best results, let it cool completely, then cover it tightly or transfer it to a freezer-safe container and freeze for up to three months. You can freeze it before or after baking, though freezing before baking usually gives the potato topping a better texture. Defrost overnight in the fridge, then bake until piping hot throughout. If reheating a cooked pie, make sure it is thoroughly hot before serving.

How do you stop cottage pie filling from becoming watery?

To stop cottage pie filling from becoming watery, simmer it uncovered until the sauce has reduced and thickened before adding it to the baking dish. A little plain flour stirred into the browned mince can help, too. Avoid adding too much stock, and let frozen vegetables thaw and drain before using them. The filling should be moist but not runny; if it looks thin, cook it for a few more minutes before topping with mash.

What should you serve with cottage pie?

Cottage pie pairs beautifully with simple vegetables that balance its rich, savoury filling. Try serving it with steamed green beans, peas, broccoli or cabbage, or add roasted carrots for extra sweetness. A crisp green salad can make the meal feel lighter, while a little extra gravy is always welcome.

Traditional Shepherd’s Pie Recipe: A Taste of British Comfort

shepherd's pie recipe

The Classic Shepherd’s Pie Recipe

Shepherd’s Pie is a comforting and hearty dish that has been a favourite in British households for generations. Made with minced lamb or beef, topped with creamy mashed potatoes, this dish is the epitome of comfort food.

Ingredients:

  • 500g minced lamb or beef
  • 1 onion, finely chopped
  • 2 carrots, diced
  • 2 cloves of garlic, minced
  • 400g tin of chopped tomatoes
  • 200ml beef stock
  • 1 tbsp Worcestershire sauce
  • Salt and pepper to taste
  • 900g potatoes, peeled and chopped
  • 50g butter
  • 100ml milk

Instructions:

  1. In a large pan, brown the minced meat over medium heat. Add the onions, carrots, and garlic, and cook until softened.
  2. Pour in the chopped tomatoes and beef stock. Add Worcestershire sauce, salt, and pepper. Simmer for 20-30 minutes until the mixture thickens.


Five Essential Tips for the Perfect Shepherd’s Pie

  1. Use minced lamb for a traditional shepherd’s pie flavour.
  2. Add Worcestershire sauce for an extra depth of flavour.
  3. Top the pie with creamy mashed potatoes for a comforting finish.
  4. Include finely chopped carrots and peas in the filling for added texture and nutrients.
  5. Bake the shepherd’s pie until the top is golden brown and crispy.

Use minced lamb for a traditional shepherd’s pie flavour.

For an authentic and traditional taste in your shepherd’s pie, opt for minced lamb as the key ingredient. Minced lamb brings a rich and distinctive flavour that is synonymous with classic shepherd’s pie recipes. The unique savour of lamb adds depth to the dish, enhancing its overall appeal and making each bite a delightful experience. Choose minced lamb to capture the true essence of this beloved British comfort food.

Add Worcestershire sauce for an extra depth of flavour.

For an extra depth of flavour in your Shepherd’s Pie, consider adding Worcestershire sauce to the meat mixture. This classic condiment enhances the savoury profile of the dish, adding a rich and tangy note that complements the minced lamb or beef perfectly. Just a tablespoon of Worcestershire sauce can elevate the overall taste and make your Shepherd’s Pie even more delicious and satisfying.

Top the pie with creamy mashed potatoes for a comforting finish.

To enhance the comforting appeal of your shepherd’s pie, ensure to top it with a generous layer of creamy mashed potatoes. This final touch not only adds a velvety texture to the dish but also creates a satisfying and homely finish that perfectly complements the savoury meat filling. The creamy mashed potatoes provide a delightful contrast to the rich flavours below, making each bite a truly comforting experience.

Include finely chopped carrots and peas in the filling for added texture and nutrients.

For an extra layer of texture and nutrients in your shepherd’s pie, consider adding finely chopped carrots and peas to the filling. Not only do these colourful vegetables enhance the visual appeal of the dish, but they also provide a boost of vitamins and fibre. The carrots add a subtle sweetness, while the peas contribute a pop of freshness, creating a well-balanced and wholesome filling that complements the savoury meat perfectly.

Bake the shepherd’s pie until the top is golden brown and crispy.

For a perfect finishing touch to your shepherd’s pie, bake it in the oven until the top is beautifully golden brown and crispy. This not only adds a delightful crunch to each bite but also enhances the visual appeal of the dish. The contrast between the creamy mashed potatoes and the crispy top creates a textural sensation that will have your taste buds dancing with joy. Be sure to keep an eye on it while baking to achieve that ideal balance of crispiness without burning.

Savour the Flavour: Authentic Bulalo Recipe for a Taste of Filipino Comfort

bulalo recipe

The Perfect Bulalo Recipe: A Taste of Filipino Comfort Food

Originating from the Philippines, bulalo is a hearty and flavourful beef soup that warms both the body and soul. This traditional dish is beloved for its rich broth, tender beef shanks, and assortment of vegetables. Here’s how you can recreate this comforting meal in your own kitchen.

Ingredients:

  • 2 lbs beef shank, cut into serving pieces
  • 1 medium onion, quartered
  • 3 cloves garlic, crushed
  • 2 litres water
  • 2 corn cobs, cut into thirds
  • 1 small cabbage, quartered
  • 3 medium potatoes, peeled and halved
  • Salt and pepper to taste

Instructions:

  1. In a large pot, bring water to a boil.
  2. Add beef shank, onion, garlic, salt, and pepper. Simmer for 2-3 hours or until the beef is tender.
  3. Add more water if needed to maintain desired broth consistency.
  4. Add potatoes and cook until tender.
  5. Add corn cobs and cabbage. Simmer for another 5-10 minutes.
  6. Serve hot with steamed rice on the side.

Whether enjoyed on a chilly evening or as a comforting meal during gatherings with loved ones, bulalo is sure to delight your taste buds. Embrace the warmth and heartiness of this Filipino classic by trying out this recipe today!


Discover the Comfort and Flavour of Bulalo: A Hearty Beef Soup Recipe with a Taste of Filipino Culture

  1. 1. Hearty and comforting beef soup.
  2. 2. Rich and flavourful broth that is perfect for warming up.
  3. 3. Tender and succulent beef shanks add a meaty texture to the dish.
  4. 4. Assortment of vegetables like corn, cabbage, and potatoes provide a balanced meal.
  5. 5. Easy-to-follow recipe that can be prepared at home.
  6. 6. Ideal for gatherings or family meals due to its generous serving size.
  7. 7. Versatile dish that can be adjusted to suit personal preferences in terms of seasoning and ingredients.
  8. 8. Offers a taste of Filipino cuisine and culture, introducing new flavours to your palate.


Challenges of Preparing Bulalo: Time, Fat Content, Dietary Restrictions, and Broth Skimming

  1. Long cooking time required to tenderize the beef shank.
  2. High in fat content due to the use of beef shank.
  3. May not be suitable for vegetarians or individuals on a low-sodium diet.
  4. Requires careful skimming of excess fat from the broth for a healthier dish.

1. Hearty and comforting beef soup.

The bulalo recipe offers a delightful pro with its hearty and comforting beef soup. This traditional Filipino dish is renowned for its rich and flavourful broth that is sure to warm both the body and soul. The tender beef shanks, paired with an array of vegetables, create a satisfying and nourishing meal that brings a sense of comfort and contentment with every spoonful. Whether enjoyed on a cold day or as a gathering with loved ones, the bulalo’s heartiness makes it a perfect choice for those seeking a fulfilling and soothing dining experience.

2. Rich and flavourful broth that is perfect for warming up.

Indulge in the comforting allure of bulalo with its standout feature of a rich and flavourful broth that promises to warm you up from the inside out. This hearty soup boasts a depth of taste that comes from simmering beef shanks, onions, and garlic for hours, creating a savoury base that is both soothing and satisfying. With each spoonful, the aromatic essence of the broth envelops your senses, making it an ideal choice for those seeking a soul-nourishing meal on chilly days or simply craving a taste of Filipino comfort food.

3. Tender and succulent beef shanks add a meaty texture to the dish.

The inclusion of tender and succulent beef shanks in the bulalo recipe enhances the overall texture of the dish, providing a rich and meaty element that complements the hearty broth and vegetables. The slow cooking process allows the beef shanks to become incredibly tender, making each bite a satisfying and flavourful experience. This meaty addition not only adds depth to the dish but also elevates its overall taste, making bulalo a truly comforting and indulgent meal for any occasion.

4. Assortment of vegetables like corn, cabbage, and potatoes provide a balanced meal.

The inclusion of a variety of vegetables such as corn, cabbage, and potatoes in the bulalo recipe not only enhances the flavour profile of the dish but also offers a well-rounded and balanced meal. These nutritious vegetables add depth to the broth and complement the tender beef shanks, creating a harmonious blend of textures and tastes. With its combination of hearty ingredients, bulalo provides a wholesome dining experience that is both satisfying and nourishing.

5. Easy-to-follow recipe that can be prepared at home.

Indulge in the culinary delight of bulalo with this easy-to-follow recipe that can be effortlessly prepared at home. Whether you’re a seasoned cook or a novice in the kitchen, recreating this traditional Filipino dish is a breeze. With simple ingredients and clear instructions, you can savour the rich flavours of bulalo without the need for advanced cooking skills. Treat yourself and your loved ones to a homemade bowl of comfort with this accessible recipe that brings warmth and satisfaction to your dining table.

6. Ideal for gatherings or family meals due to its generous serving size.

Bulalo’s generous serving size makes it an ideal dish for gatherings or family meals. Its hearty portions ensure that everyone around the table can enjoy a satisfying and comforting meal together. Whether shared during festive celebrations or casual get-togethers, bulalo brings people closer through its delicious flavours and communal dining experience. The abundance of this traditional Filipino soup fosters a sense of warmth and togetherness, making it a perfect choice for creating lasting memories with loved ones.

7. Versatile dish that can be adjusted to suit personal preferences in terms of seasoning and ingredients.

Bulalo is a versatile dish that offers the flexibility to be adjusted according to individual preferences when it comes to seasoning and ingredients. Whether you prefer a richer broth, spicier flavours, or a specific selection of vegetables, this Filipino comfort food can easily accommodate your personal taste. By allowing for customisation, bulalo becomes not just a traditional recipe, but a canvas for culinary creativity and personalisation, making it a beloved dish that can be tailored to suit various palates and dietary needs.

8. Offers a taste of Filipino cuisine and culture, introducing new flavours to your palate.

Indulging in a bowl of bulalo not only satisfies your hunger but also offers a delightful taste of Filipino cuisine and culture. This traditional dish introduces new and exciting flavours to your palate, allowing you to experience the unique blend of ingredients that make Filipino food so special. From the rich broth to the tender beef shanks and hearty vegetables, bulalo encapsulates the essence of Filipino culinary traditions, inviting you on a culinary journey that is both delicious and enlightening.

Long cooking time required to tenderize the beef shank.

One drawback of preparing bulalo is the extended cooking time needed to tenderize the beef shank. Due to the toughness of the cut, the meat requires a prolonged simmering period to achieve that melt-in-your-mouth texture that is characteristic of a well-made bulalo. While the wait may be lengthy, the end result of succulent and flavourful beef shank in a hearty broth makes it a worthwhile and comforting dish for those who appreciate the time and effort put into creating this Filipino favourite.

High in fat content due to the use of beef shank.

Indulging in the deliciousness of bulalo comes with a con to consider – its high fat content attributed to the use of beef shank. While the marbled fat adds depth and flavour to the broth, it also contributes to the richness of the dish. For those mindful of their fat intake, moderation and balance in enjoying this Filipino comfort food may be key. Consider opting for leaner cuts of beef or adjusting portion sizes to savour the essence of bulalo while being mindful of dietary preferences.

May not be suitable for vegetarians or individuals on a low-sodium diet.

While bulalo is a delightful and nourishing dish loved by many, it may not be suitable for vegetarians or individuals following a low-sodium diet. The main ingredients of bulalo, such as beef shanks and broth, are not compatible with vegetarian dietary preferences. Additionally, the rich flavour of bulalo often comes from the use of salt and seasoning, which may not align with the restrictions of a low-sodium diet. It’s important for individuals with specific dietary needs to consider alternative options that cater to their requirements while still enjoying delicious meals.

Requires careful skimming of excess fat from the broth for a healthier dish.

To ensure a healthier final dish, one significant con of preparing bulalo is the need for meticulous skimming of excess fat from the broth. This process can be time-consuming and requires attention to detail to achieve a lighter and more nutritious soup. However, by taking the extra step to remove the fat, you can elevate the overall health benefits of the dish and create a more balanced and wholesome dining experience.

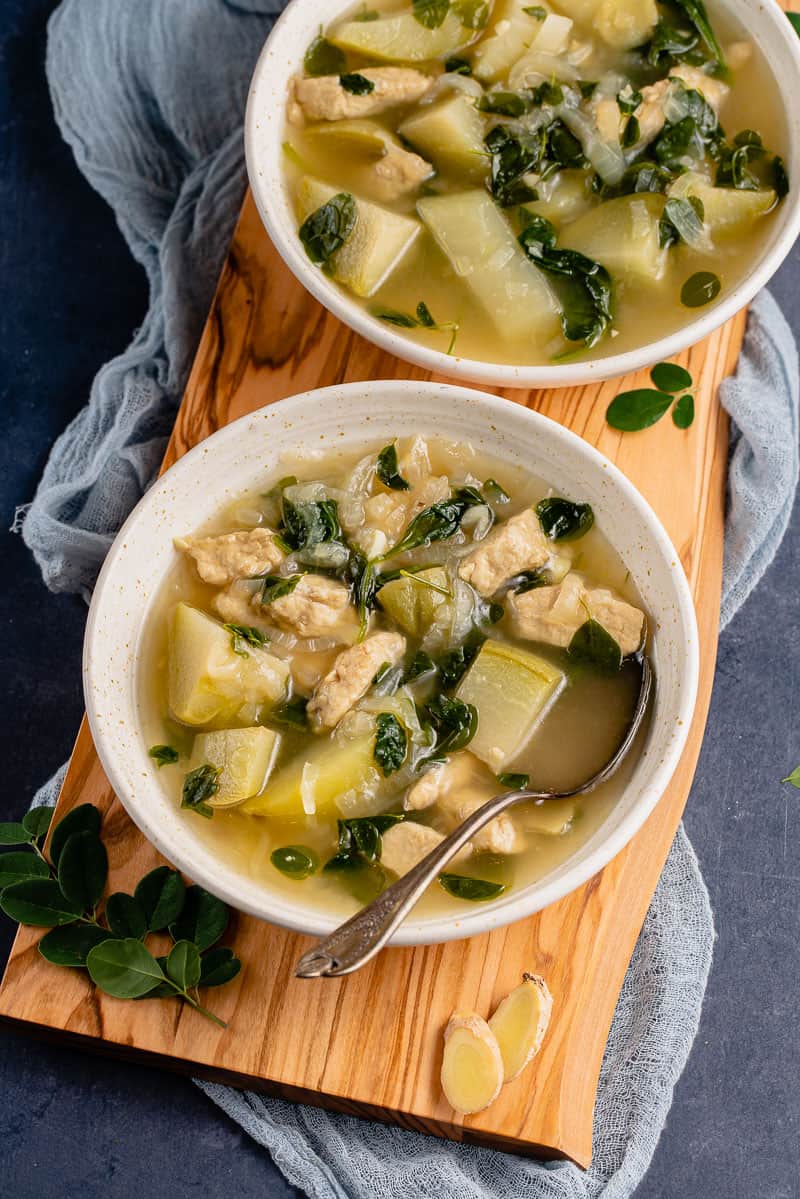
Delightful Tinola Recipe: A Taste of Filipino Comfort

tinola recipe

The Delightful Tinola Recipe: A Taste of Filipino Comfort

When it comes to Filipino comfort food, few dishes evoke the feeling of home quite like Tinola. This traditional soup is a staple in many Filipino households, loved for its light yet flavourful broth and tender chicken pieces.

Ingredients:

  • 1 whole chicken, cut into pieces
  • 2 tablespoons cooking oil
  • 4 cloves garlic, minced
  • 1 onion, sliced
  • Thumb-sized ginger, sliced thinly
  • 2-3 cups water or chicken broth
  • Green papaya or chayote, peeled and cut into chunks
  • Fish sauce and pepper to taste
  • Fresh spinach leaves for garnish

Instructions:

  1. In a pot, sauté garlic, onion, and ginger in cooking oil until fragrant.
  2. Add the chicken pieces and cook until lightly browned.
  3. Pour water or chicken broth into the pot and bring to a boil. Simmer until the chicken is tender.
  4. Add the green papaya or chayote chunks and cook until they are soft but not mushy.
  5. Season with fish sauce and pepper to taste.
  6. Garnish with fresh spinach leaves before serving hot. Enjoy your comforting bowl of Tinola!

Tinola is best enjoyed with steamed rice on the side. Its clear broth infused with ginger and garlic flavours is soothing to both the stomach and soul. Whether served during rainy days or family gatherings, Tinola never fails to bring warmth and satisfaction to those who partake in its savoury goodness.

So why not try your hand at making this beloved Filipino dish? With simple ingredients and easy steps, Tinola can easily become a regular feature on your dining table – a reminder of home-cooked comfort no matter where you may be.


Understanding Tinola: A Guide to Ingredients, Variations, and Cultural Significance

  1. What is the soup that Filipinos eat when sick?
  2. What ingredient is tinola?
  3. What is the English term for tinola?
  4. What are the ingredients in tinola?
  5. Do you put patis in tinola?
  6. Is tinola sayote or papaya better?

What is the soup that Filipinos eat when sick?

In Filipino culture, the soup that is often consumed when feeling under the weather is Tinola. This traditional dish is believed to have comforting and healing properties, making it a popular choice for those who are sick or feeling unwell. With its light yet nourishing broth, tender chicken pieces, and aromatic ginger-infused flavour, Tinola is not only a delicious meal but also a source of warmth and comfort during times of illness. Its soothing qualities and easy-to-digest ingredients make it a go-to option for providing relief and sustenance to both body and soul.

What ingredient is tinola?

Tinola, a popular Filipino dish known for its comforting qualities, typically consists of a few key ingredients that contribute to its distinctive flavour profile. The main components of a traditional tinola recipe include chicken pieces, ginger, garlic, onion, and either green papaya or chayote. These ingredients come together in a light and savoury broth that is seasoned with fish sauce and pepper to taste. The combination of these simple yet flavourful elements is what makes tinola a beloved dish in Filipino cuisine, cherished for its nourishing qualities and ability to evoke feelings of warmth and home.

What is the English term for tinola?

In Filipino cuisine, the traditional dish known as Tinola does not have a direct English translation for its name. However, Tinola is commonly referred to as a Filipino chicken soup with ginger and green papaya or chayote. The essence of Tinola lies in its light and aromatic broth infused with the flavours of ginger and garlic, creating a comforting and nourishing meal that is cherished by many. While there may not be an exact English equivalent for the term “Tinola,” its unique blend of ingredients and distinctive taste make it a beloved dish in Filipino culinary culture.

What are the ingredients in tinola?

One of the most frequently asked questions about Tinola is regarding its ingredients. The key components of this beloved Filipino dish include a whole chicken, garlic, onion, ginger, green papaya or chayote, water or chicken broth, fish sauce, pepper, and fresh spinach leaves for garnish. These simple yet essential ingredients come together to create a light and flavourful soup that is both comforting and nourishing. Each element plays a crucial role in enhancing the overall taste and aroma of Tinola, making it a true culinary delight for those who savour its traditional flavours.

Do you put patis in tinola?

In the preparation of Tinola, a traditional Filipino dish, the use of patis, a type of fish sauce, is a common practice that adds depth and savoury flavour to the broth. While some recipes may call for patis as an essential ingredient, its inclusion in Tinola can vary based on personal preference and regional variations. The addition of patis enhances the overall umami profile of the dish, complementing the chicken and vegetables with its distinctive taste. Ultimately, whether or not to put patis in Tinola is a matter of individual taste and culinary tradition, allowing for flexibility in adapting this beloved recipe to suit different palates.

Is tinola sayote or papaya better?

When it comes to the choice between using sayote (chayote) or papaya in Tinola, it ultimately boils down to personal preference. Sayote, with its mild flavour and crunchy texture, adds a refreshing element to the soup. On the other hand, papaya offers a softer texture and a slightly sweeter taste that some may find appealing. Both vegetables work well in enhancing the overall taste and texture of Tinola, so it’s worth experimenting with both options to see which one resonates more with your palate. Ultimately, whether you opt for sayote or papaya, the essence of Tinola lies in its comforting broth and tender chicken, making it a beloved Filipino dish cherished for its simplicity and heartwarming flavours.