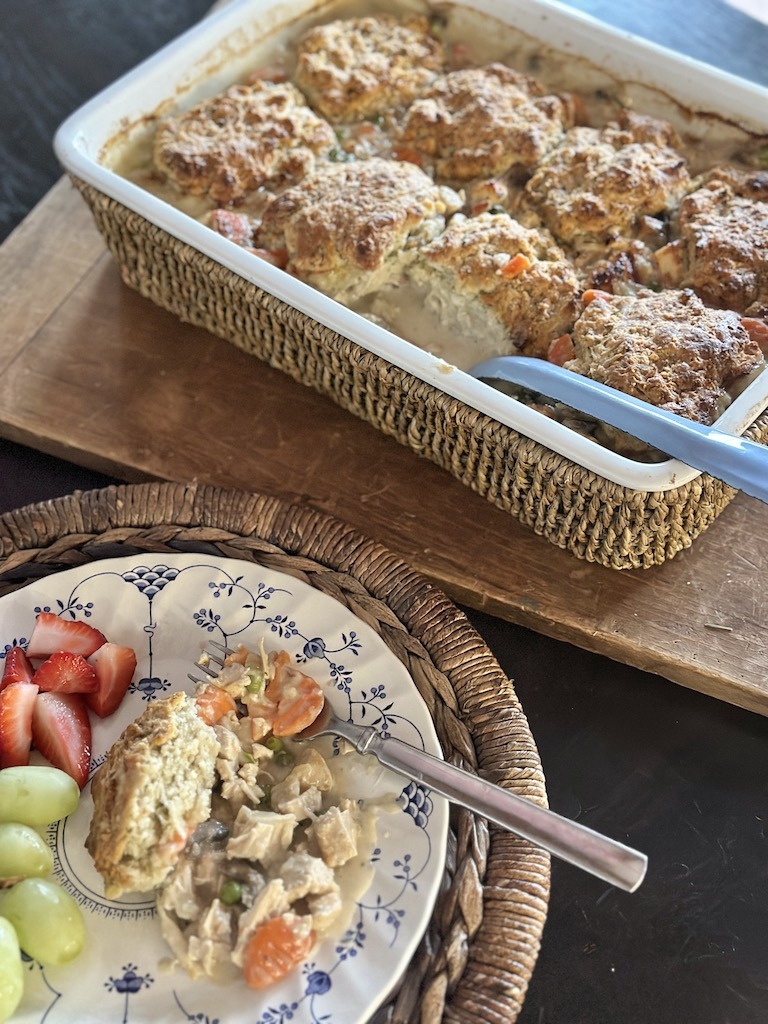
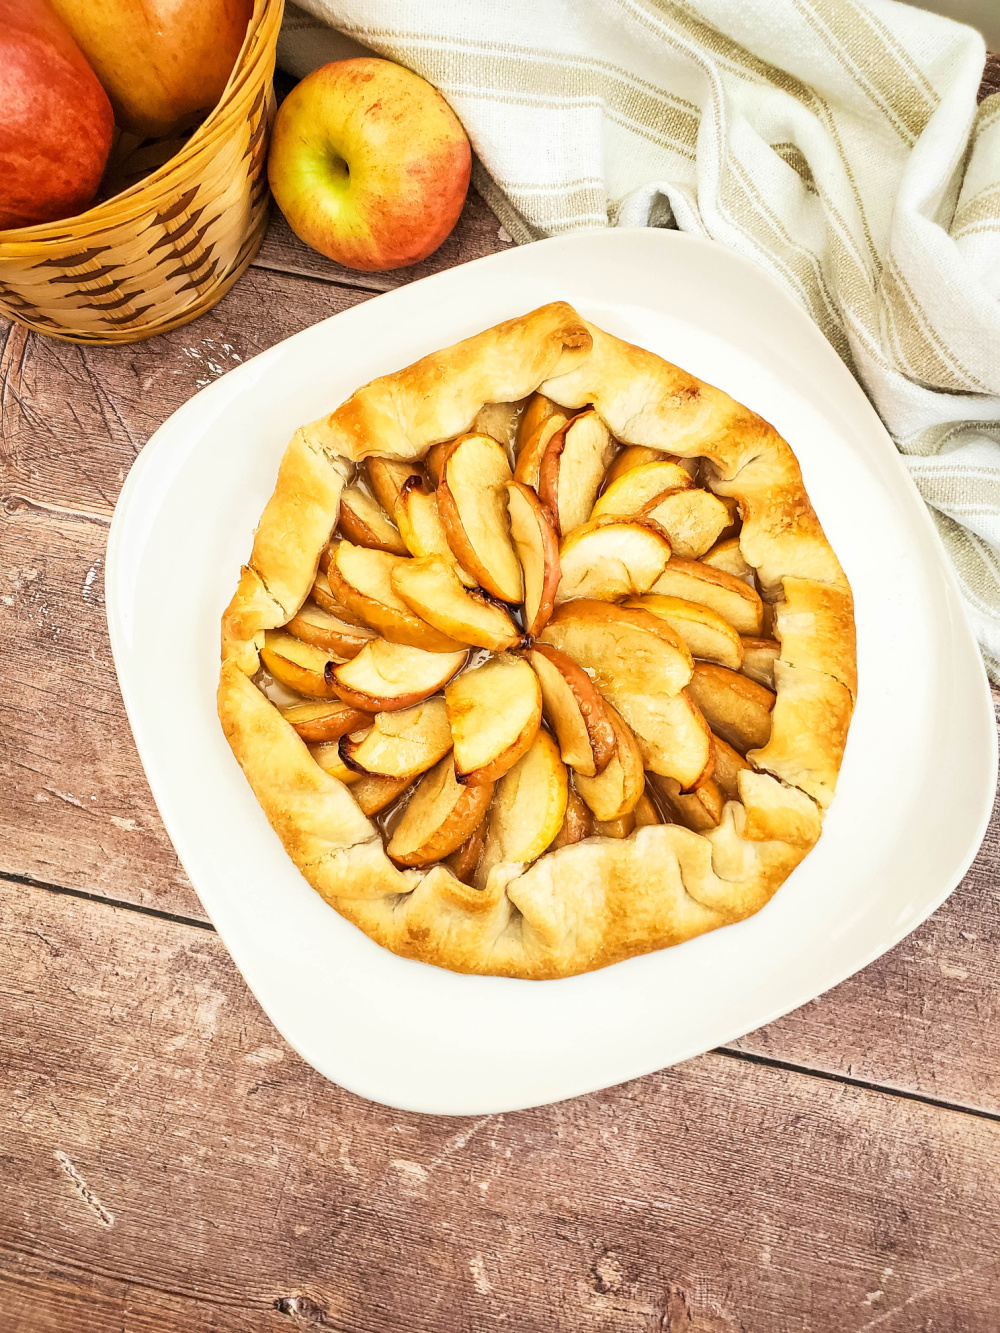
Classic Chicken Pie Recipe with Golden Puff Pastry
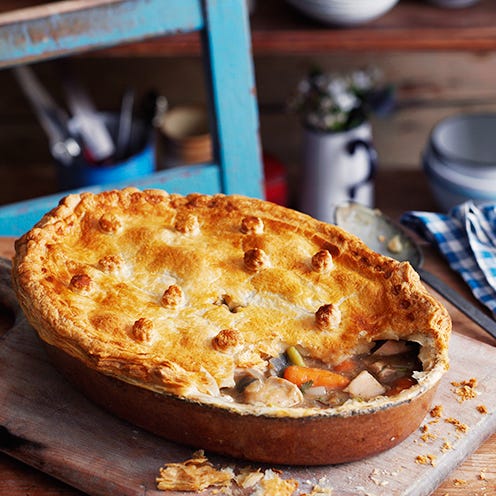
chicken pie recipe

Classic Chicken Pie Recipe

A golden, flaky pastry crust and a creamy chicken filling make this comforting pie a favourite for family dinners. It is a useful way to use leftover roast chicken, and the filling can be prepared ahead to make mealtimes easier.

Serves: 4–6

Preparation time: 25 minutes

Cooking time: 35–40 minutes

Ingredients

  • 40g butter
  • 1 medium onion, finely chopped
  • 2 carrots, diced
  • 2 celery sticks, finely sliced
  • 40g plain flour
  • 400ml chicken stock
  • 150ml double cream
  • 700g cooked chicken, cut into bite-sized pieces
  • 1 tsp fresh thyme leaves, or ½ tsp dried thyme
  • Salt and freshly ground black pepper
  • 1 sheet ready-rolled puff pastry, about 320g
  • 1 egg, beaten

Method

  1. Prepare the filling. Melt the butter in a large saucepan over a medium heat. Add the onion, carrots and celery, then cook for 8–10 minutes, stirring occasionally, until softened.
  2. Make the sauce. Stir in the flour and cook for 1 minute. Gradually pour in the chicken stock, stirring well to prevent lumps. Bring to a gentle simmer and cook for 3–4 minutes, until thickened.
  3. Add the chicken. Stir in the cream, cooked chicken and thyme. Season with salt and pepper. Remove from the heat and leave the filling to cool for at least 15 minutes.
  4. Heat the oven. Preheat it to 200°C (180°C fan)/400°F/gas mark 6. Spoon the cooled filling into a pie dish, around 1.5 litres in capacity.
  5. Add the pastry. Lay the pastry over the dish and trim the edges, leaving a slight overhang. Press the pastry firmly around the rim to seal. Cut a small slit in the centre to let steam escape, then brush the top with beaten egg.
  6. Bake. Place the pie on a baking tray and bake for 35–40 minutes, until the pastry is puffed and golden and the filling is piping hot.
  7. Rest and serve. Leave the pie to stand for 5 minutes before serving. It goes well with peas, green beans or steamed vegetables.

Tips for a Better Chicken Pie

  • Let the filling cool before adding the pastry. This helps keep the pastry crisp and makes it easier to handle.
  • For extra flavour, add a handful of sliced mushrooms or a little chopped parsley to the filling.
  • If using raw chicken, cook it thoroughly before adding it to the sauce. The finished pie should be piping hot throughout.
  • Leftovers should be cooled promptly, covered and refrigerated, then reheated until piping hot. Avoid reheating them more than once.

This chicken pie is simple to adapt: use leftover roast chicken, vary the vegetables or add herbs to suit your taste. Serve it straight from the oven for a satisfying, homely meal.


Mastering Chicken Pie: Essential Tips and Recipes for the Perfect Homemade Dish

  1. How do you make a classic chicken pie from scratch?
  2. What ingredients do you need for a chicken pie?
  3. How long should you bake a chicken pie, and at what temperature?
  4. Can you make chicken pie ahead of time or freeze it?
  5. How do you stop the pastry on a chicken pie from going soggy?

How do you make a classic chicken pie from scratch?

To make a classic chicken pie from scratch, cook chopped onion, carrots and celery in butter until softened, then stir in flour and gradually add chicken stock to make a smooth, thick sauce. Add cooked chicken, a splash of cream and herbs such as thyme, and season to taste. Spoon the filling into a pie dish and let it cool slightly before covering with puff pastry. Seal the edges, cut a small slit in the top to let steam escape, brush with beaten egg and bake at 200°C (180°C fan)/400°F/gas mark 6 for 35–40 minutes, until the pastry is golden and the filling is piping hot.

What ingredients do you need for a chicken pie?

For a classic chicken pie, you’ll need cooked chicken, onion, carrots and celery for the filling, plus butter, plain flour, chicken stock and cream to make a rich sauce. Season it with thyme, salt and black pepper, then top the filling with ready-rolled puff pastry brushed with beaten egg for a golden finish.

How long should you bake a chicken pie, and at what temperature?

Bake a chicken pie in a preheated oven at 200°C (180°C fan)/400°F/gas mark 6 for around 35–40 minutes, or until the pastry is puffed and golden and the filling is piping hot throughout. If the filling is cold or the pie is particularly deep, it may need a little longer; cover the pastry loosely with foil if it begins to brown too quickly.

Can you make chicken pie ahead of time or freeze it?

Yes, chicken pie can be made ahead. Prepare the filling and keep it covered in the fridge for up to two days, then assemble and bake when needed. Alternatively, assemble the pie, wrap it well and freeze it unbaked for up to three months; bake from frozen, allowing extra time and covering the pastry if it browns too quickly. You can also freeze baked pie, once completely cooled, and thaw it overnight in the fridge before reheating until piping hot throughout. Follow food-safety guidance and avoid reheating the pie more than once.

How do you stop the pastry on a chicken pie from going soggy?

To keep the pastry crisp, let the chicken filling cool and thicken before topping it, as hot or watery filling can create steam and soften the pastry. Avoid overfilling the dish, cut a small steam vent in the pastry, and bake the pie in a fully preheated oven. For extra protection, place the pie dish on a preheated baking tray so the base heats quickly.
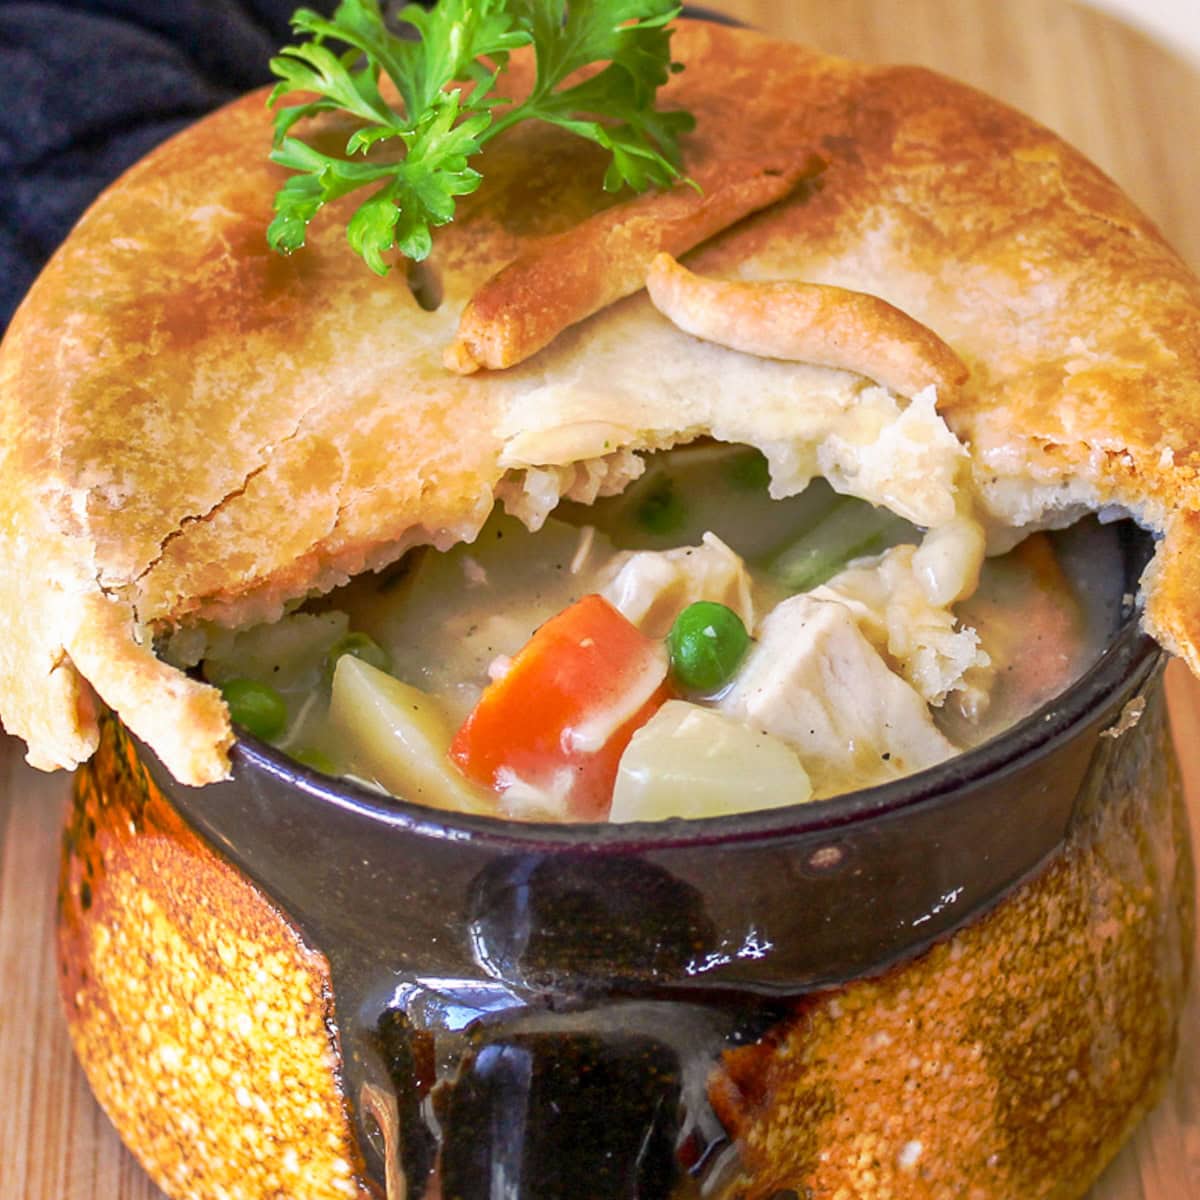
Easy Chicken Pot Pie Recipe with Golden, Flaky Pastry

chicken pot pie recipe

Chicken Pot Pie Recipe

Golden, flaky pastry and a creamy chicken filling make chicken pot pie a comforting meal for any day of the week. This straightforward version uses cooked chicken and ready-rolled puff pastry, so it’s easy to prepare without compromising on flavour. Serve it hot with greens or a crisp salad.

Serves: 4–6

Preparation time: 20 minutes

Cooking time: 35 minutes

Ingredients

  • 1 tablespoon olive oil or butter
  • 1 onion, finely chopped
  • 2 carrots, diced
  • 150g mushrooms, sliced (optional)
  • 2 tablespoons plain flour
  • 400ml chicken stock
  • 150ml milk
  • 1 teaspoon Dijon mustard
  • ½ teaspoon dried thyme
  • 300g cooked chicken, shredded or chopped
  • 100g frozen peas
  • Salt and freshly ground black pepper
  • 1 sheet ready-rolled puff pastry, about 320g
  • 1 egg, beaten, for glazing

Method

  1. Heat the oil or butter in a large saucepan over a medium heat. Add the onion and carrots and cook for 5 minutes, stirring occasionally. If using mushrooms, add them and cook for a further 3 minutes.
  2. Stir in the flour and cook for 1 minute. Gradually pour in the stock, stirring all the time to prevent lumps. Add the milk, mustard and thyme, then simmer for 5–7 minutes until the sauce has thickened.
  3. Stir in the cooked chicken and peas. Season with salt and pepper, then remove the pan from the heat. Leave the filling to cool slightly while you prepare the pastry.
  4. Heat the oven to 200°C (180°C fan, Gas Mark 6). Spoon the filling into a medium ovenproof pie dish.
  5. Lay the pastry over the dish. Trim away any excess and press the edges gently to seal. Cut a small slit in the centre to let steam escape. Brush the top with beaten egg.
  6. Bake for 25–30 minutes, until the pastry is puffed and deep golden and the filling is piping hot. Leave to stand for 5 minutes before serving.

Tips for a Great Chicken Pot Pie

Make sure the filling has cooled a little before adding the pastry; this helps it stay crisp. For extra flavour, use leftover roast chicken and add a handful of chopped parsley. You can also swap the peas for sweetcorn or include diced celery with the onion and carrots.

To prepare the pie ahead, make the filling and refrigerate it for up to a day. Add the pastry just before baking. Leftovers can be stored in the fridge for up to 2 days and reheated thoroughly until piping hot.


Essential FAQs for Perfecting Your Chicken Pot Pie Recipe

  1. What ingredients do I need to make chicken pot pie?
  2. How do I make chicken pot pie from scratch?
  3. Can I use cooked or leftover chicken in chicken pot pie?
  4. What pastry is best for chicken pot pie?
  5. How do I stop the bottom of the pastry from going soggy?
  6. How long should I bake chicken pot pie, and at what temperature?
  7. Can I make chicken pot pie ahead of time?
  8. Can chicken pot pie be frozen, and how should I reheat it?
  9. What can I serve with chicken pot pie?

What ingredients do I need to make chicken pot pie?

To make chicken pot pie, you’ll need cooked chicken, puff pastry, onion, carrots, chicken stock, milk, plain flour, butter or olive oil, and seasonings such as salt, black pepper and thyme. Peas add a touch of sweetness, while mushrooms and Dijon mustard are optional extras for extra flavour. A beaten egg is useful for brushing over the pastry before baking, giving it a golden finish.

How do I make chicken pot pie from scratch?

To make chicken pot pie from scratch, cook diced onion, carrots and any other vegetables you like in a little butter or oil, then stir in flour and gradually add chicken stock and milk to create a creamy sauce. Add cooked chicken, peas and herbs, season to taste, and spoon the filling into a pie dish. Cover with homemade shortcrust or puff pastry, seal the edges, cut a small slit in the top and brush with beaten egg. Bake at 200°C (180°C fan) until the pastry is golden and the filling is piping hot, usually around 25–35 minutes.

Can I use cooked or leftover chicken in chicken pot pie?

Yes, cooked or leftover chicken works perfectly in chicken pot pie. Shred or chop it into bite-sized pieces, then stir it into the sauce with the vegetables just before assembling the pie. As the chicken is already cooked, there’s no need to simmer it for long—just make sure the filling is piping hot before baking. Leftover roast chicken is especially tasty, and it’s a handy way to make use of leftovers.

What pastry is best for chicken pot pie?

Puff pastry is a popular choice for chicken pot pie because it bakes into a light, crisp, golden topping with minimal effort. Shortcrust pastry is another good option, especially if you prefer a sturdier, more traditional crust; use it for the lid or to line the dish. Whichever you choose, add the pastry once the filling has cooled slightly to help prevent a soggy base.

How do I stop the bottom of the pastry from going soggy?

To help keep the bottom pastry crisp, let the filling cool before assembling the pie, as hot filling creates steam that can make the pastry soggy. Make sure the sauce is thick rather than runny, and avoid overfilling the dish. For extra insurance, preheat a sturdy baking tray in the oven and place the pie dish on it; the direct heat helps cook the base. You can also blind-bake a pastry base for 10–15 minutes before adding the filling, especially if you’re making a deep pie.

How long should I bake chicken pot pie, and at what temperature?

Bake chicken pot pie in a preheated oven at 200°C (180°C fan, Gas Mark 6) for about 25–30 minutes, or until the pastry is puffed and golden and the filling is piping hot. If the filling is cold or the pie is particularly deep, it may need a little longer; cover the pastry loosely with foil if it begins to brown too quickly. Allow the pie to stand for a few minutes before serving.

Can I make chicken pot pie ahead of time?

Yes, you can prepare chicken pot pie ahead of time. Make the filling, let it cool completely, then cover and refrigerate it for up to 24 hours. For the best, crispest pastry, add it just before baking. If you assemble the whole pie in advance, keep it covered in the fridge and bake it within a day; it may need a few extra minutes in the oven. Ensure the filling is piping hot before serving.

Can chicken pot pie be frozen, and how should I reheat it?

Yes, chicken pot pie can be frozen, either baked or unbaked. For the best pastry, freeze the unbaked pie well wrapped for up to 2–3 months, then thaw it overnight in the fridge before baking until golden and piping hot throughout. To freeze a baked pie, cool it completely, wrap it tightly and freeze; thaw in the fridge, then reheat in an oven at 180°C (160°C fan, Gas Mark 4) until piping hot in the centre. Cover loosely with foil if the pastry browns too quickly, and reheat leftovers only once.

What can I serve with chicken pot pie?

Chicken pot pie is rich and comforting, so it pairs well with simple, fresh sides. Try steamed green beans, peas, broccoli or roasted seasonal vegetables, or serve it with a crisp green salad dressed with a light vinaigrette. If you’d like something heartier, buttery mashed potatoes work well, though the pastry and creamy filling may be filling enough on their own.

Classic Meat Pie Recipe: A Comforting British Favourite

meat pie recipe

Classic Beef and Ale Pie Recipe

A golden, crisp pastry crust filled with tender beef in a rich, savoury gravy makes this classic meat pie ideal for a comforting family meal. The filling can be prepared ahead, giving the flavours time to develop and making assembly straightforward.

Preparation and cooking time

  • Preparation: 25 minutes
  • Cooking: 2 hours 30 minutes
  • Serves: 6

Ingredients

  • 2 tbsp vegetable oil
  • 900g stewing beef, cut into bite-sized pieces
  • 2 tbsp plain flour, seasoned with salt and black pepper
  • 1 large onion, finely chopped
  • 2 carrots, peeled and diced
  • 2 celery sticks, diced
  • 2 tbsp tomato purée
  • 330ml ale or stout
  • 300ml beef stock
  • 1 tsp fresh thyme leaves, or ½ tsp dried thyme
  • 1 bay leaf
  • 1 sheet ready-rolled puff pastry, about 320g
  • 1 egg, beaten

Method

  1. Brown the beef: Toss the beef in the seasoned flour. Heat the oil in a large, heavy-based pan over a medium-high heat. Brown the beef in batches, then set it aside.
  2. Cook the vegetables: Add the onion, carrots and celery to the pan. Cook for 5–7 minutes, stirring occasionally, until softened. Stir in the tomato purée and cook for another minute.
  3. Make the filling: Pour in the ale and scrape the bottom of the pan to loosen any browned bits. Add the stock, thyme and bay leaf, then return the beef to the pan. Bring to a gentle simmer.
  4. Simmer until tender: Cover and cook gently for about 1 hour 45 minutes to 2 hours, stirring now and then, until the beef is tender and the gravy has thickened. Remove the bay leaf and leave the filling to cool. Taste and adjust the seasoning.
  5. Prepare the pie: Heat the oven to 200°C (180°C fan)/400°F/Gas Mark 6. Spoon the cooled filling into a pie dish. Lay the pastry over the top, trimming any excess. Press the edges to seal and make a small hole in the centre to let steam escape.
  6. Glaze and bake: Brush the pastry with beaten egg. Bake for 25–30 minutes, until puffed and golden. Leave to stand for 5 minutes before serving.

Tips for a great meat pie

  • Let the filling cool before adding the pastry; hot filling can make it soft and difficult to handle.
  • If the gravy is too thin, simmer the filling uncovered for a few minutes before cooling.
  • For a family-friendly version without alcohol, replace the ale with extra beef stock.
  • Serve with mashed potatoes, peas or seasonal greens.

This hearty beef pie is best served hot from the oven, when the pastry is crisp and the filling is rich and tender. Any leftovers can be cooled, covered and refrigerated, then reheated thoroughly before serving.


Top Tips for Perfect Meat Pies: Best Cuts, Baking Advice, and More

  1. What cut of meat is best for a meat pie?
  2. How do you stop the pastry from getting soggy?
  3. Can you make a meat pie ahead of time?
  4. How long should you bake a meat pie?
  5. Can you freeze a meat pie?

What cut of meat is best for a meat pie?

For a tender, flavourful meat pie, choose a well-marbled cut that becomes soft during slow cooking, such as beef chuck, braising steak or shin. These cuts develop a rich flavour and make a succulent filling when simmered gently until tender. For a quicker pie, use leftover roast meat, but take care not to overcook it, as it may become dry.

How do you stop the pastry from getting soggy?

To help keep the pastry crisp, let the meat filling cool completely before assembling the pie, and make sure the gravy is thick rather than watery. Avoid overfilling, cut a small steam vent in the pastry, and bake the pie in a fully preheated oven. If the filling is particularly moist, try brushing the base with beaten egg and letting it dry briefly before adding the filling.

Can you make a meat pie ahead of time?

Yes, you can make a meat pie ahead of time. Prepare and cook the filling, then let it cool completely before assembling the pie. Cover and refrigerate it for up to two days, or freeze it for longer storage. For the best pastry, add it just before baking; if the pie is already assembled, keep it covered in the fridge and bake within a day, adding a little extra time if it goes into the oven cold.

How long should you bake a meat pie?

Bake a meat pie in a preheated oven at 200°C (180°C fan)/400°F/Gas Mark 6 for around 25–30 minutes, or until the pastry is risen and golden and the filling is piping hot. If the filling is already hot when assembled, it may need less time; a pie made with cold filling may take a little longer. Follow the pastry packet instructions where available, and cover the top loosely with foil if it browns too quickly.

Can you freeze a meat pie?

Yes, you can freeze a meat pie. For the best results, freeze it before baking: assemble the pie, wrap it well and freeze for up to three months. Bake from frozen, adding extra cooking time and covering the pastry with foil if it browns too quickly; make sure the filling is piping hot all the way through before serving. You can also freeze a baked pie once it has cooled completely. Wrap it securely, thaw it in the fridge and reheat thoroughly in the oven.

Easy Chicken Pot Pie: A Simple, Comforting Family Favourite

easy chicken pot pie

Easy Chicken Pot Pie

Golden, crisp pastry and a creamy chicken filling make this easy chicken pot pie a comforting favourite. Using cooked chicken and ready-rolled puff pastry keeps preparation simple, so it is ideal for a relaxed family dinner or a way to use up leftovers.

Prep time: 15 minutes

Cooking time: 30 minutes

Serves: 4

Ingredients

  • 1 tbsp olive oil or butter
  • 1 small onion, finely chopped
  • 2 carrots, peeled and diced
  • 150g frozen peas
  • 30g butter
  • 30g plain flour
  • 300ml chicken stock
  • 150ml milk
  • 350g cooked chicken, shredded or chopped
  • 1 tsp dried thyme
  • Salt and freshly ground black pepper
  • 1 sheet ready-rolled puff pastry, chilled
  • 1 egg, beaten, for glazing

Method

  1. Heat the oven. Preheat it to 200°C (180°C fan/Gas Mark 6). Lightly grease a medium pie dish.
  2. Cook the vegetables. Heat the oil or a little butter in a saucepan over a medium heat. Add the onion and carrots and cook for 5–7 minutes, stirring occasionally, until beginning to soften.
  3. Make the sauce. Add the butter. Once melted, stir in the flour and cook for 1 minute. Gradually pour in the stock, stirring well to keep the sauce smooth. Add the milk and thyme, then simmer gently for a few minutes until thickened.
  4. Add the filling. Stir in the cooked chicken and peas. Season with salt and pepper, then spoon the mixture into the prepared pie dish.
  5. Add the pastry. Lay the pastry over the dish and trim away any excess. Press the edges down to seal, then cut a small slit in the centre to let steam escape. Brush the top with beaten egg.
  6. Bake. Cook for 25–30 minutes, until the pastry is puffed and deep golden and the filling is piping hot. Leave to stand for a few minutes before serving.

Easy Variations

Use leftover roast chicken or shop-bought cooked chicken. You can swap the peas for sweetcorn, add sliced mushrooms with the onion, or use leftover cooked vegetables. For a richer filling, replace some of the milk with cream.

Helpful Tips

  • Let the filling cool slightly before adding the pastry. This helps the pastry stay crisp and makes it easier to handle.
  • If the pastry browns before the filling is hot, cover it loosely with foil and continue baking.
  • For individual pies, divide the filling between ovenproof dishes and cut the pastry to fit each one.
  • Refrigerate leftovers promptly and use within two days. Reheat until piping hot throughout.

Serve your chicken pot pie with mashed potatoes, steamed greens or a crisp green salad for a satisfying, fuss-free meal.


7 Reasons Why Easy Chicken Pot Pie is the Ultimate Comfort Dish

  1. Quick and easy to prepare
  2. Uses convenient ready-rolled pastry
  3. A comforting family favourite
  4. Great for leftover chicken
  5. Easy to customise with vegetables
  6. Crisp, golden pastry topping
  7. Makes a satisfying one-dish meal


Considerations Before Making Easy Chicken Pot Pie: 6 Potential Drawbacks

  1. Ready-made pastry may contain additives.
  2. The creamy filling can be high in calories.
  3. It takes time to bake and cool.
  4. The pastry can become soggy underneath.
  5. Suitable only if you have cooked chicken ready.
  6. Leftovers may lose their crisp pastry texture.

Quick and easy to prepare

One of the best things about an easy chicken pot pie is how quickly it comes together. With cooked chicken, a few simple ingredients and ready-rolled pastry, you can prepare the filling in minutes and let the oven do the rest. It’s a handy choice for a comforting, satisfying meal without spending hours in the kitchen.

Uses convenient ready-rolled pastry

Ready-rolled pastry makes this chicken pot pie especially easy to prepare, saving time and effort in the kitchen. Simply unroll it, place it over the filling and trim the edges for a golden, flaky topping—no mixing, rolling or extra equipment required.

A comforting family favourite

Easy chicken pot pie is a comforting family favourite, bringing everyone together over tender chicken, a creamy filling and golden, flaky pastry. Its familiar, hearty flavours make it a welcome choice for chilly evenings, relaxed Sunday dinners or whenever the family fancies a satisfying home-cooked meal.

Great for leftover chicken

Easy chicken pot pie is a brilliant way to use up leftover roast chicken. Simply shred or chop the cooked meat and stir it into the creamy filling, turning yesterday’s dinner into a comforting new meal while helping to reduce food waste.

Easy to customise with vegetables

One of the best things about easy chicken pot pie is how simple it is to customise with vegetables. Add peas, carrots, sweetcorn, mushrooms or green beans, or use up leftover cooked vegetables from another meal. Choose your favourites, adjust the quantities to suit your taste and make the most of whatever you have in the fridge.

Crisp, golden pastry topping

A crisp, golden pastry topping gives easy chicken pot pie its irresistible finishing touch. As it bakes, the pastry turns beautifully flaky on the outside while staying light and tender underneath, creating a delicious contrast with the creamy chicken filling. It looks inviting straight from the oven and adds plenty of satisfying crunch to every spoonful.

Makes a satisfying one-dish meal

Easy chicken pot pie makes a satisfying one-dish meal, bringing tender chicken, vegetables and a creamy sauce together beneath a golden pastry crust. It’s filling and comforting on its own, so there’s less need to prepare several separate dishes—though you can add a simple green salad or extra vegetables if you like.

Ready-made pastry may contain additives.

Ready-made pastry is a convenient time-saver, but some varieties may contain additives such as preservatives, emulsifiers or flavourings. Check the ingredient list if you prefer to avoid these, and compare brands, as recipes can vary. For a simpler option, choose pastry with fewer ingredients or make your own at home.

The creamy filling can be high in calories.

One drawback of easy chicken pot pie is that its creamy filling can be high in calories, particularly when made with butter, milk or cream and served beneath a generous pastry topping. For a lighter version, use reduced-fat milk, add extra vegetables and keep an eye on portion sizes.

It takes time to bake and cool.

One drawback of easy chicken pot pie is that, although it is quick to prepare, it still needs around 25–30 minutes in the oven, followed by a few minutes to cool before serving. That wait can be inconvenient on busy evenings, especially when everyone is hungry and dinner needs to be on the table quickly.

The pastry can become soggy underneath.

One drawback of an easy chicken pot pie is that the pastry can become soggy underneath, especially if the filling is very moist or still hot when the pastry is added. To help keep the base crisp, let the filling cool slightly, avoid adding too much liquid and bake the pie in a fully preheated oven until the pastry is golden and cooked through.

Suitable only if you have cooked chicken ready.

One drawback of this easy chicken pot pie is that it relies on cooked chicken being ready to use. If you only have raw chicken, you’ll need to cook it first, adding extra time and preparation to the recipe.

Leftovers may lose their crisp pastry texture.

One drawback of easy chicken pot pie is that the pastry can lose its crisp, flaky texture once the pie has been stored. Moisture from the creamy filling tends to soften the crust, so leftovers may not be quite as appealing as they are fresh from the oven. Reheating in the oven can help crisp the pastry again, although it may not fully restore its original texture.

Delightful Apple Tart Recipe for a Sweet Treat

apple tart recipe

The Perfect Apple Tart Recipe

Indulge in the delightful flavours of a classic apple tart with this easy-to-follow recipe. Whether you’re a seasoned baker or a novice in the kitchen, this dessert is sure to impress your family and friends.

Ingredients:

  • 6-8 medium-sized apples (peeled, cored, and thinly sliced)
  • 1 sheet of ready-rolled puff pastry
  • 50g unsalted butter, melted
  • 3 tbsp brown sugar
  • 1 tsp ground cinnamon
  • A pinch of nutmeg
  • Apricot jam for glazing

Instructions:

  1. Preheat your oven to 200°C (180°C fan).
  2. Roll out the puff pastry on a floured surface and transfer it to a baking tray lined with parchment paper.
  3. In a bowl, mix the melted butter, brown sugar, cinnamon, and nutmeg until well combined.
  4. Spread this mixture evenly over the puff pastry, leaving a small border around the edges.
  5. Arrange the apple slices on top of the pastry in an overlapping pattern.
  6. Bake in the preheated oven for 25-30 minutes or until the pastry is golden brown and the apples are tender.
  7. Remove from the oven and brush the top of the tart with warm apricot jam for a glossy finish.
  8. >

    li>Serve warm with a dollop of whipped cream or a scoop of vanilla ice cream.

p>Note: Feel free to experiment by adding raisins, almonds or a drizzle of caramel sauce to make this apple tart your own!

p>Bon appétit!


Eight Reasons to Love This Easy and Versatile Apple Tart Recipe

  1. Deliciously sweet and tangy flavour combination of apples and cinnamon.
  2. Easy-to-follow recipe suitable for both experienced bakers and beginners.
  3. Requires simple ingredients that are readily available in most kitchens.
  4. Quick to prepare, making it a perfect dessert option for last-minute gatherings.
  5. Versatile dish that can be enjoyed warm or cold, with or without accompaniments.
  6. Impressive presentation that is sure to wow guests at dinner parties or special occasions.
  7. Can be easily customised by adding nuts, raisins, or a drizzle of caramel for extra indulgence.
  8. Leftovers (if any!) can be stored in the fridge and enjoyed the next day for a tasty treat.


Considerations Before Baking: Potential Drawbacks of an Apple Tart Recipe

  1. Requires peeling and slicing multiple apples, which can be time-consuming.
  2. Puff pastry may not always bake evenly, resulting in some parts being undercooked.
  3. High sugar content from brown sugar and apricot jam may not be suitable for individuals with dietary restrictions.
  4. Leftover apple tart may become soggy when stored in the refrigerator.
  5. Nutritional value is relatively low due to the high amount of butter and sugar used in the recipe.
  6. May not be suitable for those who are allergic to ingredients like nuts or cinnamon.

Deliciously sweet and tangy flavour combination of apples and cinnamon.

Experience the perfect harmony of flavours in our apple tart recipe, where the sweetness of ripe apples meets the warm spiciness of cinnamon. This delightful blend creates a tantalising balance between sweet and tangy notes, making every bite a truly indulgent treat for your taste buds.

Easy-to-follow recipe suitable for both experienced bakers and beginners.

This apple tart recipe offers a pro that makes it appealing to both experienced bakers and beginners alike. With clear and straightforward instructions, this recipe is easy to follow, guiding bakers of all levels through the steps with ease. Whether you’re a seasoned baker looking for a quick dessert option or a novice eager to try your hand at baking, this recipe ensures a delicious outcome that will impress your taste buds and guests.

Requires simple ingredients that are readily available in most kitchens.

Creating a delicious apple tart is made even more appealing by the fact that this recipe requires simple ingredients that are readily available in most kitchens. With just a few basic items like apples, puff pastry, butter, sugar, and spices, anyone can embark on the journey of baking a delectable apple tart without the need for special or hard-to-find ingredients. This accessibility makes it convenient for home cooks to whip up this delightful dessert whenever the craving strikes, adding a touch of sweetness to any occasion effortlessly.

Quick to prepare, making it a perfect dessert option for last-minute gatherings.

When it comes to the apple tart recipe, one of its standout advantages is its quick preparation time. This makes it an ideal dessert option for those impromptu gatherings or last-minute dinner parties. With simple steps and readily available ingredients, you can whip up a delicious apple tart in no time, impressing your guests with a homemade treat that is both visually appealing and irresistibly tasty. The convenience and speed of this recipe make it a go-to choice for any occasion where you need a delightful dessert in a pinch.

Versatile dish that can be enjoyed warm or cold, with or without accompaniments.

Indulge in the versatility of this apple tart recipe, a dish that can be savoured in various ways. Whether enjoyed warm straight out of the oven, or chilled for a refreshing treat, this dessert caters to different preferences. It can be relished on its own for a simple delight, or paired with accompaniments like whipped cream or ice cream for an extra touch of indulgence. The adaptability of this apple tart makes it a perfect choice for any occasion, offering a delightful experience however you choose to enjoy it.

Impressive presentation that is sure to wow guests at dinner parties or special occasions.

Elevate your hosting game with the apple tart recipe’s standout feature: its impressive presentation that is guaranteed to dazzle guests at dinner parties or special occasions. The beautifully arranged layers of thinly sliced apples atop a golden puff pastry base not only promise a visual feast but also hint at the delicious flavours waiting to be savoured. Whether as a show-stopping dessert or a centrepiece on the dining table, this apple tart is sure to leave a lasting impression and make any gathering truly memorable.

Can be easily customised by adding nuts, raisins, or a drizzle of caramel for extra indulgence.

Elevate the indulgence of our apple tart recipe by customising it with your favourite additions. Whether you prefer the crunch of nuts, the sweetness of raisins, or the decadence of caramel, these extra touches can take your dessert to a whole new level. Feel free to experiment and make this apple tart uniquely yours by incorporating these delicious enhancements.

Leftovers (if any!) can be stored in the fridge and enjoyed the next day for a tasty treat.

When it comes to the apple tart recipe, one of its appealing advantages is the option to store any leftovers in the fridge for a delectable treat the following day. This means that you can savour the delicious flavours of the tart beyond its initial serving, allowing you to enjoy a delightful dessert without any waste. Simply refrigerate the remaining slices and look forward to indulging in a tasty and convenient snack whenever you desire.

Requires peeling and slicing multiple apples, which can be time-consuming.

Peeling and slicing multiple apples for this apple tart recipe can be quite time-consuming and laborious. The process of preparing the apples may deter those looking for a quick and easy dessert option. However, the effort put into meticulously arranging the apple slices pays off in the end result, as each bite of the tart showcases the sweet and tender fruit. For those willing to invest the time and attention to detail, the delicious outcome is well worth the extra effort.

Puff pastry may not always bake evenly, resulting in some parts being undercooked.

One potential drawback of preparing an apple tart using puff pastry is the inconsistency in baking. Due to the nature of puff pastry, there is a risk that it may not bake evenly, leading to certain areas remaining undercooked while others turn golden brown. This uneven baking can affect the overall texture and presentation of the tart, potentially detracting from the perfect balance of flavours that one would expect. To mitigate this issue, it is crucial to monitor the tart closely during baking and consider techniques such as pre-baking the pastry or adjusting oven temperature for a more uniform outcome.

High sugar content from brown sugar and apricot jam may not be suitable for individuals with dietary restrictions.

The apple tart recipe, while delicious and indulgent, may pose a challenge for individuals with dietary restrictions due to its high sugar content from brown sugar and apricot jam. Those who need to monitor their sugar intake or follow specific dietary guidelines may find this dessert unsuitable. It’s important to consider alternative sweeteners or modifications to adapt the recipe to accommodate different dietary needs without compromising on taste and enjoyment.

Leftover apple tart may become soggy when stored in the refrigerator.

When storing leftover apple tart in the refrigerator, one potential downside to be mindful of is the risk of it becoming soggy. The moisture from the apples can seep into the pastry over time, compromising its texture and overall appeal. To prevent this, consider placing a paper towel or a piece of parchment paper between the tart and its storage container to absorb excess moisture. Additionally, reheating the apple tart in the oven before serving can help revive its crispness and freshness.

Nutritional value is relatively low due to the high amount of butter and sugar used in the recipe.

While apple tart is undeniably a delicious treat, one downside to consider is its relatively low nutritional value. This is primarily attributed to the significant amounts of butter and sugar required in the recipe. The indulgent nature of these ingredients can contribute to higher calorie and fat content, which may not align with a balanced diet. It’s important to enjoy apple tart in moderation and perhaps explore alternative recipes that incorporate healthier substitutes to enhance its nutritional profile.

May not be suitable for those who are allergic to ingredients like nuts or cinnamon.

Individuals with allergies to ingredients such as nuts or cinnamon should exercise caution when considering this apple tart recipe. The presence of these allergens in the dish may pose a risk to those with sensitivities or intolerances. It is important for individuals with specific dietary restrictions to carefully review the recipe and potentially seek alternative ingredients or substitutes to ensure their safety and enjoyment of the dessert.