Easy Tomato Pie Recipe: A Savoury Bake for Ripe Tomatoes
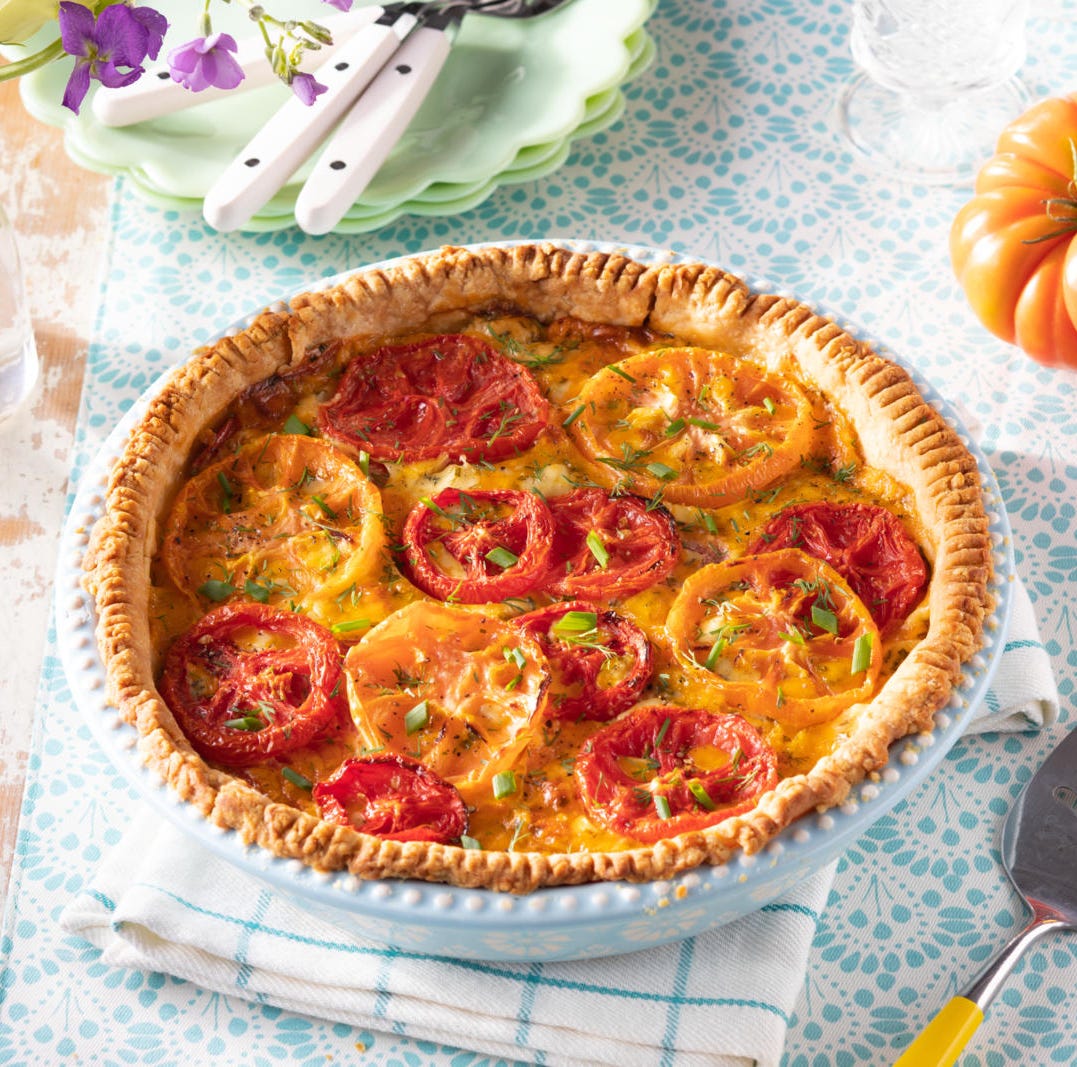
tomato pie recipe

Tomato Pie Recipe

This savoury tomato pie is a lovely way to make the most of ripe, juicy tomatoes. A crisp pastry case is filled with tender tomatoes, fresh herbs and a creamy cheese topping, then baked until golden and bubbling. Serve it warm for lunch, or at room temperature as part of a picnic or light supper.

At a glance

  • Preparation time: 25 minutes, plus 30 minutes to drain the tomatoes
  • Cooking time: 35–40 minutes
  • Serves: 6

Ingredients

  • 1 sheet of ready-rolled shortcrust pastry, about 320g
  • 700g ripe tomatoes
  • 1 tsp fine salt
  • 1 small onion, finely sliced
  • 1 tbsp olive oil
  • 1 tbsp chopped fresh basil, plus extra to serve
  • 1 tbsp chopped fresh chives
  • 150g mature Cheddar, grated
  • 100g mozzarella, grated or torn into small pieces
  • 120g mayonnaise
  • ½ tsp freshly ground black pepper
  • 1 tsp Dijon mustard (optional)

Method

  1. Prepare the tomatoes. Slice the tomatoes and arrange them in a single layer on a plate or tray. Sprinkle with the salt and leave for 30 minutes. This draws out excess moisture and helps prevent a soggy pie.
  2. Heat the oven. Preheat the oven to 200°C (180°C fan)/400°F/Gas Mark 6. Place a baking tray in the oven to heat.
  3. Prepare the pastry case. Line a 23cm tart tin with the pastry, pressing it gently into the edges. Trim off any excess, prick the base with a fork and chill for 10 minutes.
  4. Blind-bake the pastry. Line the pastry with baking paper and fill with baking beans or uncooked rice. Place the tin on the hot baking tray and bake for 15 minutes. Remove the paper and beans, then bake for a further 5 minutes until the base looks dry and lightly golden.
  5. Cook the onion. While the pastry bakes, warm the olive oil in a small frying pan over a medium heat. Add the onion and cook for 5–7 minutes until soft. Set aside to cool slightly.
  6. Dry the tomatoes. Pat the tomato slices thoroughly with kitchen paper to remove as much moisture as possible.
  7. Make the topping. In a bowl, mix the Cheddar, mozzarella, mayonnaise, black pepper and mustard, if using.
  8. Assemble the pie. Spread the cooked onion over the pastry base. Add the tomatoes in an even layer, scattering the basil and chives between them. Spoon the cheese mixture over the top and spread it gently to cover.
  9. Bake. Bake for 25–30 minutes, until the topping is golden and bubbling. Leave the pie to stand for at least 15 minutes before slicing, so the filling has time to settle.
  10. Serve. Scatter with extra basil and serve warm or at room temperature.

Tips for the best tomato pie

  • Choose flavourful tomatoes. Ripe but firm tomatoes hold their shape and give the pie plenty of flavour.
  • Don’t skip the draining step. Removing excess liquid is the key to a crisp pastry base.
  • Try different cheeses. A little Parmesan can add savoury depth, while Gruyère makes a rich alternative to Cheddar.
  • Make it your own. Add a pinch of chilli flakes, a few sliced spring onions or a little fresh thyme.

How to store tomato pie

Once cooled, cover and refrigerate the pie for up to three days. Reheat slices in the oven at 180°C (160°C fan)/350°F/Gas Mark 4 until piping hot. The pastry is best on the day it is baked, but leftovers are also delicious served cold.


Everything You Need to Know About Making the Perfect Tomato Pie

  1. What is in a tomato pie?
  2. Do you have to peel tomatoes for tomato pie?
  3. How to make a simple tomato pie?
  4. How to make tomato and onion pie?
  5. What is the original tomato pie?
  6. How to make tomato pie not soggy?
  7. Do you need to peel tomatoes for tomato pie?
  8. What are the ingredients for the best tomato pie?

What is in a tomato pie?

A tomato pie typically consists of a pastry crust filled with ripe tomatoes, herbs and a savoury cheese topping. In this recipe, the filling includes sliced tomatoes, onion, basil and chives, topped with a mixture of Cheddar, mozzarella and mayonnaise. Ingredients vary between recipes, but draining the tomatoes first helps keep the pastry crisp.

Do you have to peel tomatoes for tomato pie?

No, you don’t have to peel tomatoes for tomato pie. The skins soften as the pie bakes and help the slices hold their shape. If you prefer a smoother texture, or the skins are particularly tough, peel the tomatoes before slicing. In either case, salt the slices and pat them dry before adding them to the pie to remove excess moisture and help keep the pastry crisp.

How to make a simple tomato pie?

To make a simple tomato pie, line a tart tin with shortcrust pastry and blind-bake it until lightly golden. Slice ripe tomatoes, sprinkle them with salt and leave them to drain for about 30 minutes, then pat them dry to prevent a soggy base. Arrange the tomatoes in the pastry case with a little chopped basil, and top with a mixture of grated cheese and mayonnaise. Bake at 200°C (180°C fan) for about 25–30 minutes, until golden and bubbling, then leave to rest before serving.

How to make tomato and onion pie?

To make tomato and onion pie, line a tart tin with shortcrust pastry and blind-bake it until lightly golden. Slice ripe tomatoes, sprinkle them with salt and leave them to drain for about 30 minutes, then pat dry. Soften sliced onions in a little olive oil and spread them over the pastry base, followed by the tomatoes and herbs such as basil or thyme. Top with grated Cheddar mixed with a little mayonnaise, then bake at 200°C (180°C fan)/400°F/Gas Mark 6 for 25–30 minutes, until golden and bubbling. Leave the pie to rest before slicing.

What is the original tomato pie?

The name “tomato pie” refers to more than one traditional dish. In the American South, particularly in parts of the Carolinas, it usually means a baked savoury pie made with fresh tomatoes, herbs and a creamy cheese topping in a pastry crust. In Italy, *torta di pomodoro* describes a range of tomato-filled pies, often made with regional ingredients. There is also the Sicilian-American bakery style: a thick, rectangular pizza topped with tomato sauce and usually served without cheese. So there is no single universally recognised original tomato pie; the version depends on the region and its food traditions.

How to make tomato pie not soggy?

To keep tomato pie from becoming soggy, remove as much moisture from the tomatoes as possible before baking. Slice them, sprinkle with salt and leave them to drain for about 30 minutes, then pat them dry with kitchen paper. Blind-bake the pastry case until lightly golden, and avoid overfilling it with wet ingredients. For extra protection, brush the pastry base with a thin layer of beaten egg after blind-baking, then let it set briefly before adding the filling.

Do you need to peel tomatoes for tomato pie?

No, you don’t need to peel tomatoes for tomato pie. The skins soften as the pie bakes and help the slices hold their shape. If the skins are particularly tough, you can remove them by briefly blanching the tomatoes in boiling water, then transferring them to cold water before peeling. Whichever you choose, salt and drain the sliced tomatoes first to remove excess moisture and help keep the pastry crisp.

What are the ingredients for the best tomato pie?

For the best tomato pie, use ripe but firm tomatoes, well-drained to prevent a soggy pastry base, and pair them with crisp shortcrust pastry, sweet onion, fresh basil and chives. A generous topping of mature Cheddar and mozzarella mixed with mayonnaise creates a creamy, golden finish, while black pepper and a little Dijon mustard add extra savoury flavour.
Easy Chocolate Pie Recipe: Rich, Creamy and Delicious

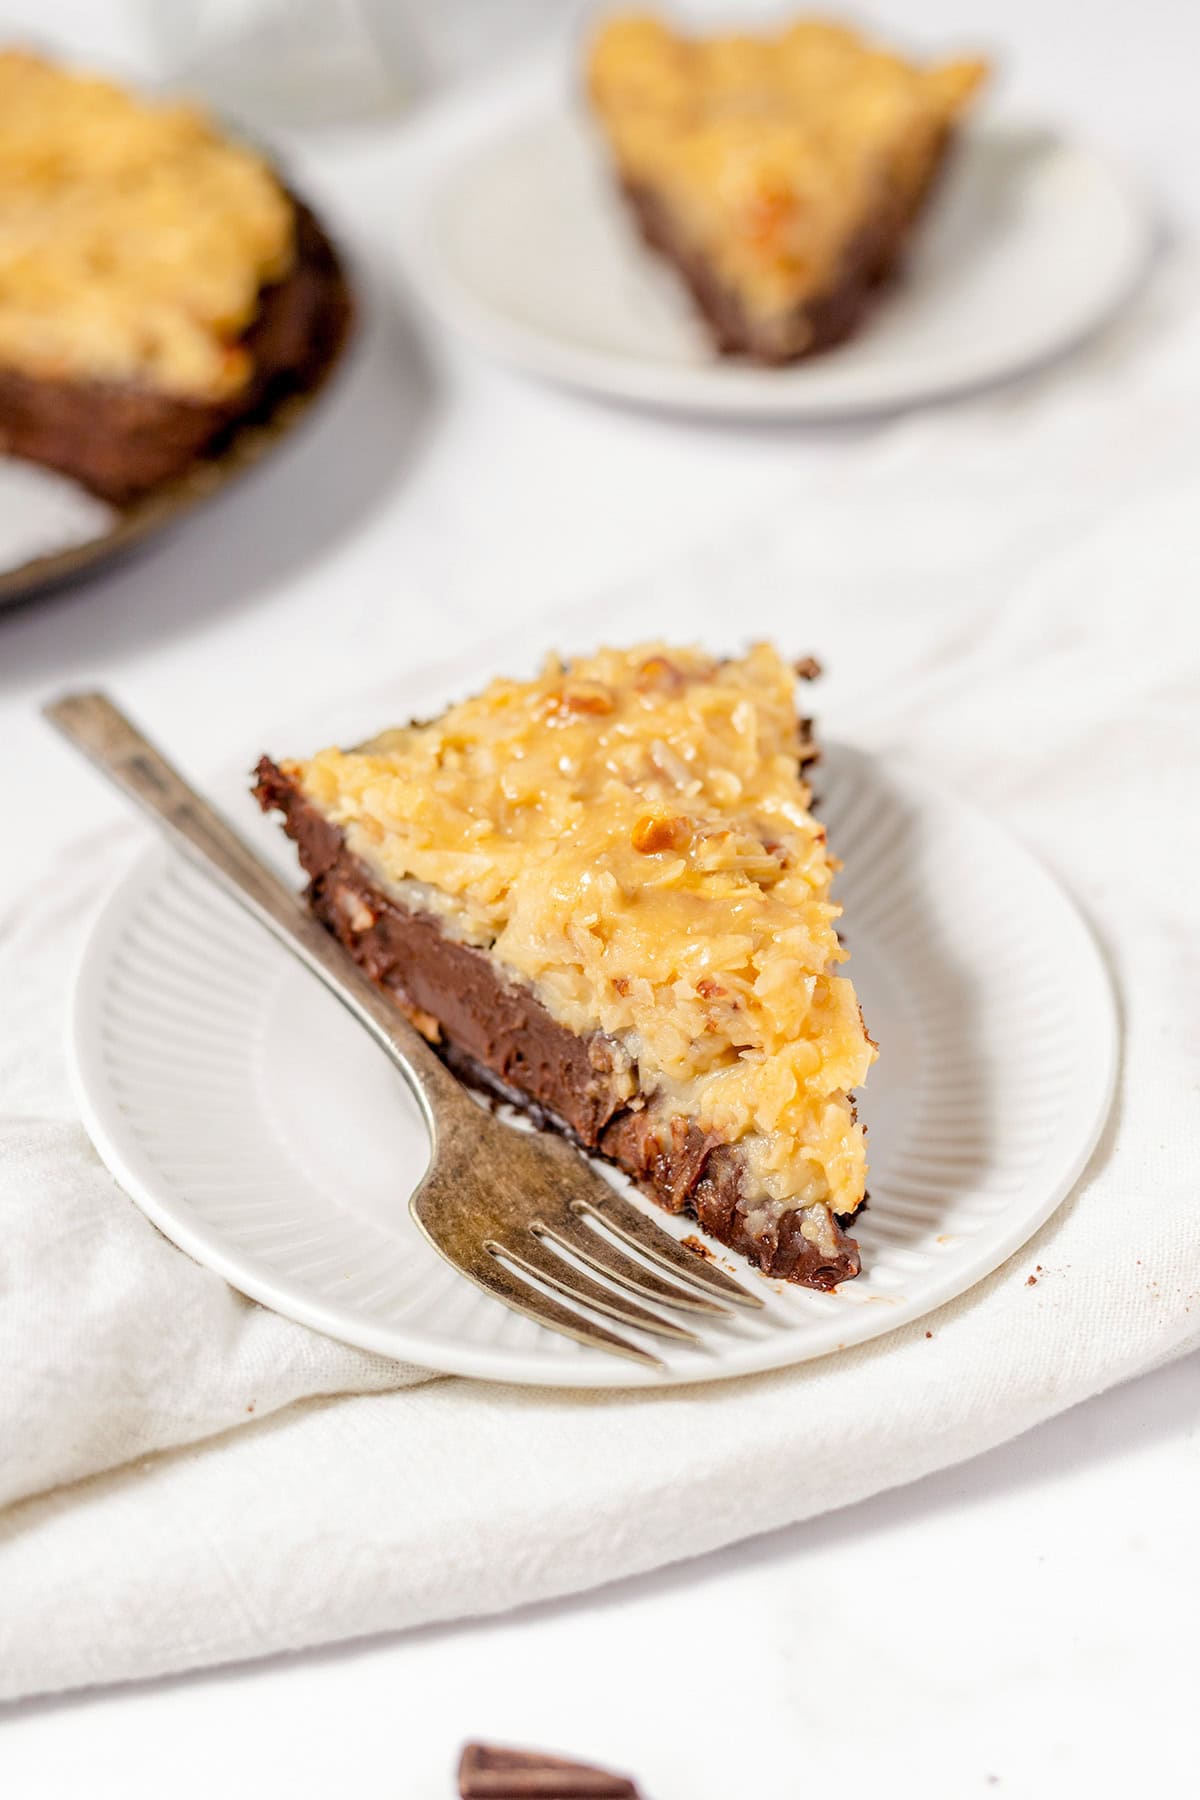
chocolate pie recipe

Chocolate Pie Recipe

This chocolate pie has a crisp pastry case filled with smooth, rich chocolate custard and finished with a cloud of whipped cream. It makes an indulgent dessert for a family meal or a special occasion, and can be prepared ahead of time so it is ready to serve straight from the fridge.

At a glance

  • Preparation time: 30 minutes
  • Cooking time: 35 minutes
  • Chilling time: At least 4 hours
  • Serves: 8
  • Tin: 23cm pie dish

Ingredients

For the pastry case

  • 1 sheet of ready-rolled shortcrust pastry, about 320g
  • A little plain flour, for dusting
  • Baking parchment and baking beans, for blind baking

For the chocolate filling

  • 600ml whole milk
  • 4 large egg yolks
  • 100g caster sugar
  • 40g cornflour
  • 200g dark chocolate, finely chopped
  • 30g unsalted butter, diced
  • 1 teaspoon vanilla extract
  • A pinch of fine salt

To serve

  • 200ml double cream
  • 1 tablespoon icing sugar
  • Chocolate shavings or cocoa powder, optional

Method

  1. Prepare the pastry. Heat the oven to 190°C (170°C fan)/Gas Mark 5. Lightly flour the work surface and use it to line the pie dish with the pastry. Trim the edges, prick the base with a fork and chill for 15 minutes.
  2. Blind bake the case. Line the pastry with baking parchment and fill with baking beans. Bake for 15 minutes, then carefully remove the parchment and beans. Return the case to the oven for 8–10 minutes, until dry and lightly golden. Leave to cool.
  3. Start the filling. Put the egg yolks, caster sugar and cornflour in a heatproof bowl. Whisk until smooth. Warm the milk in a saucepan over a medium heat until steaming but not boiling.
  4. Make the custard. Gradually whisk the warm milk into the egg mixture. Pour it all back into the saucepan and cook over a medium heat, whisking constantly. Once it begins to bubble and thicken, keep whisking for about 1 minute, then remove from the heat.
  5. Add the chocolate. Stir in the chopped chocolate, butter, vanilla and salt until the mixture is glossy and completely smooth. Pour the filling into the cooled pastry case and level the surface.
  6. Chill the pie. Press a piece of baking parchment or cling film gently against the surface of the filling to prevent a skin forming. Leave to cool, then refrigerate for at least 4 hours, or until firmly set.
  7. Finish and serve. Whip the double cream with the icing sugar until it forms soft peaks. Spoon or pipe it over the pie and add chocolate shavings or a dusting of cocoa powder, if you like. Slice with a warm, dry knife.

Tips for a delicious chocolate pie

  • Use chocolate you enjoy eating. Dark chocolate with around 50–70% cocoa solids gives the filling a deep flavour without making it overly sweet.
  • Keep whisking the custard as it cooks, paying particular attention to the corners of the pan, where it can catch.
  • For neat slices, make sure the pie is thoroughly chilled and wipe the knife clean between cuts.
  • The pie can be made a day ahead. Add the whipped cream shortly before serving for the freshest finish.

Storage

Cover any leftover pie and keep it in the fridge for up to 3 days. The pastry is at its crispest on the day it is made, but the chocolate filling will remain delicious and creamy.


7 Essential Tips for the Perfect Chocolate Pie

  1. Use good-quality dark chocolate for a richer filling.
  2. Blind-bake the pastry to keep the base crisp.
  3. Whisk the filling until smooth and lump-free.
  4. Bake gently to avoid a cracked top.
  5. Chill the pie for at least four hours before serving.
  6. Add a pinch of salt to balance the sweetness.
  7. Serve with lightly whipped cream or fresh berries.

Use good-quality dark chocolate for a richer filling.

For a richer, more satisfying chocolate pie, choose good-quality dark chocolate with a cocoa content of around 50–70%. It gives the filling a deep, balanced flavour and a silky texture, while helping keep it from tasting overly sweet. Chop the chocolate finely so it melts smoothly into the warm custard.

Blind-bake the pastry to keep the base crisp.

Blind-baking the pastry before adding the chocolate filling helps keep the base crisp rather than soggy. Line the pastry case with baking parchment, add baking beans and bake until the edges are set. Remove the parchment and beans, then return the case to the oven until the base is dry and lightly golden. Let it cool before adding the filling.

Whisk the filling until smooth and lump-free.

Whisk the chocolate filling continuously as it cooks to keep it smooth and lump-free. Pay particular attention to the bottom and corners of the pan, where the custard can thicken or catch. If a few small lumps remain, pass the filling through a fine sieve before pouring it into the pastry case.

Bake gently to avoid a cracked top.

Bake the chocolate pie gently to help prevent the filling from becoming too hot and cracking as it sets. Use the temperature stated in the recipe, and avoid overbaking: the centre should still have a slight wobble when you take the pie out of the oven, as it will continue to firm up while cooling.

Chill the pie for at least four hours before serving.

Chilling the chocolate pie for at least four hours gives the filling time to set, making it smooth, firm and easy to slice. For the neatest portions, leave it in the fridge until just before serving and cut it with a warm, dry knife, wiping the blade between slices.

Add a pinch of salt to balance the sweetness.

A small pinch of salt can make a big difference to your chocolate pie. It balances the sweetness of the filling and brings out the rich, complex flavour of the chocolate without making the dessert taste salty. Stir it into the warm chocolate mixture, then taste and adjust if needed.

Serve with lightly whipped cream or fresh berries.

Serve each slice of chocolate pie with a spoonful of lightly whipped cream for a soft, airy contrast to the rich filling. For a fresher finish, add a handful of fresh berries, such as raspberries or strawberries—their gentle tartness pairs beautifully with the chocolate.

Mincemeat Pie: A Much-Loved British Christmas Treat

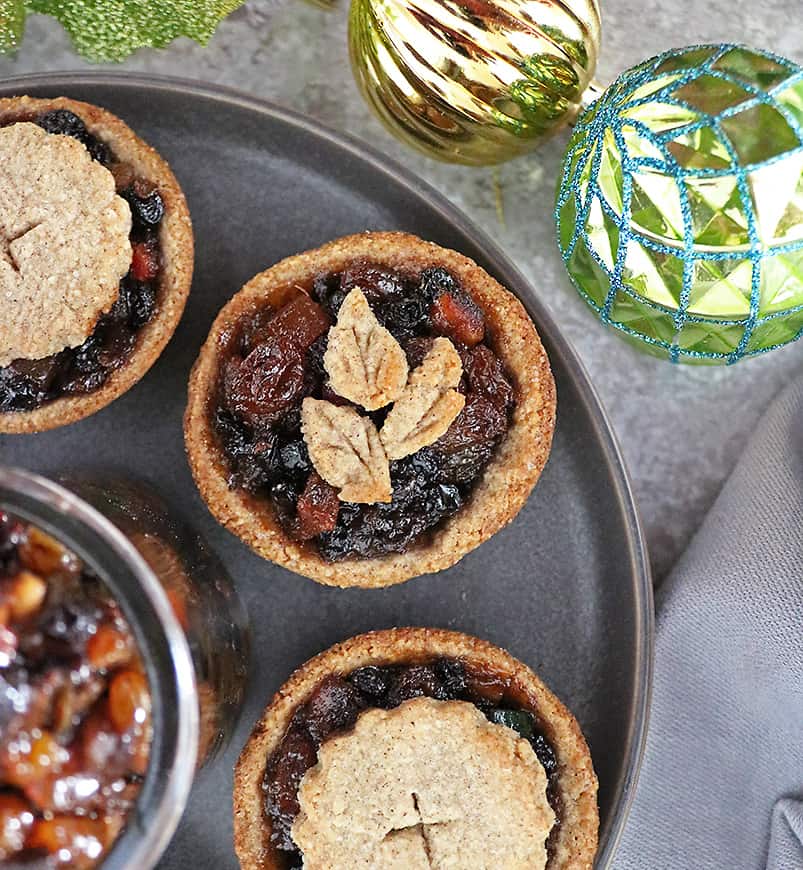
mincemeat pie

Mincemeat Pie: A Much-Loved British Christmas Treat

Few flavours are more closely associated with a British Christmas than mincemeat pie. These small, golden pastries are filled with a fragrant mixture of dried fruit, citrus peel, spices and sugar. Despite its name, modern mincemeat usually contains no meat at all.

What is mincemeat?

Mincemeat is a rich, sweet filling traditionally made with ingredients such as raisins, currants, sultanas, chopped apple, candied peel, spices and suet. Brandy or another spirit is often added, though alcohol-free versions are also widely available. The mixture is left to mature so the flavours can mingle, making it a convenient filling to prepare ahead of the festive season.

The name reflects the filling’s history. Early versions of mincemeat combined chopped meat with fruit and spices. Over time, the meat became less common, and the sweet fruit mixture familiar today took its place. Some modern recipes still use suet, while others use butter or a vegetable alternative.

A Christmas tradition

Mincemeat pies have been part of British festive food for centuries. Their ingredients once carried associations with celebration and abundance, and the pies gradually became a seasonal staple. Today, they are sold in bakeries and supermarkets throughout the Christmas period and are also a favourite to make at home.

They are usually made with shortcrust pastry, though puff pastry is sometimes used. The filling is enclosed in a pastry case or topped with a smaller pastry lid, then baked until golden. Some bakers add a star-shaped lid, while others finish the pies with a dusting of icing sugar.

How to serve mincemeat pies

Mincemeat pies can be enjoyed warm or at room temperature. They are often served with a little cream, brandy butter, custard or ice cream. A cup of tea is a classic accompaniment, while mulled wine or coffee also pairs well with their sweet, spiced flavour.

Making them at home

For homemade pies, prepare or buy mincemeat and use it to fill pastry-lined tins. Avoid overfilling, as the mixture can bubble up during baking. Add a pastry lid, seal the edges and make a small slit in each top to let steam escape. Bake until the pastry is crisp and golden, then leave the pies to cool slightly before serving.

There is plenty of room to adapt the recipe. You can choose vegetarian or vegan pastry and filling, use alcohol-free mincemeat, or add extra citrus zest for a brighter flavour. However they are made, mincemeat pies remain a simple and satisfying way to bring the taste of Christmas to the table.


Top Tips for Perfecting Your Mincemeat Pie

  1. Chill the pastry before rolling it out.
  2. Use a little flour to prevent sticking.
  3. Spoon mincemeat in without overfilling.
  4. Brush the pastry tops with milk or beaten egg.
  5. Bake until golden, then cool before serving.

Chill the pastry before rolling it out.

Chilling the pastry before rolling it out helps keep the fat firm, making it easier to handle and less likely to stick or tear. Wrap it and refrigerate for around 20–30 minutes, then let it soften slightly if it feels too hard to roll. The result is pastry that holds its shape better and bakes into a tender, crumbly case for your mincemeat pies.

Use a little flour to prevent sticking.

Dust your work surface and rolling pin with a little flour before rolling out the pastry to help prevent it sticking. Use only a light sprinkling, as too much flour can make the pastry dry and tough.

Spoon mincemeat in without overfilling.

Spoon the mincemeat into each pastry case, leaving a little space at the top. It can bubble up as the pies bake, so avoid overfilling to help prevent the filling from spilling out and the pastry edges from becoming sticky.

Brush the pastry tops with milk or beaten egg.

Before baking, brush the pastry tops with a little milk or beaten egg. Milk gives the pies a gentle golden finish, while beaten egg creates a deeper colour and a glossy sheen. Use a light, even coating and try not to let it run down the sides, as this can make the pastry stick to the tin.

Bake until golden, then cool before serving.

Bake the mincemeat pies until the pastry is crisp and golden. Once out of the oven, leave them to cool for a few minutes before serving; the filling will be extremely hot, and cooling also helps the pies hold their shape. Enjoy them warm or at room temperature, perhaps with cream, custard or a dusting of icing sugar.

How to Bake a Classic Mince Pie Recipe for the Festive Season

mince pie recipe

The Perfect Mince Pie Recipe for the Festive Season

As the festive season approaches, there’s nothing quite like the aroma of freshly baked mince pies wafting through the house. These delightful treats are a staple of Christmas celebrations, loved for their sweet and spicy filling encased in buttery pastry. If you’re looking to impress your family and friends with homemade mince pies this year, look no further than this simple yet delicious recipe.

Ingredients:

  • Shortcrust pastry (store-bought or homemade)
  • Mincemeat filling
  • Milk or beaten egg (for glazing)
  • Icing sugar (for dusting)

Instructions:

  1. Preheat your oven to 200°C (180°C fan).
  2. Roll out the shortcrust pastry on a floured surface and use a round cutter to cut out circles for the bases of your mince pies.
  3. Place the pastry circles into a greased muffin tin, pressing them gently to line the base and sides.
  4. Spoon a generous amount of mincemeat filling into each pastry case.
  5. Roll out more pastry and cut out slightly smaller circles for the pie lids. You can get creative with lattice designs or simple tops with a small slit for steam to escape.
  6. Place the lids on top of the mincemeat-filled bases, pressing the edges together to seal.
  7. Brush each pie with milk or beaten egg for a golden finish.
  8. Bake in the preheated oven for 15-20 minutes or until the pastry is golden brown and crisp.
  9. Once baked, remove from the oven and allow to cool slightly before dusting with icing sugar.
  10. Serve warm with a dollop of cream or brandy butter for an extra indulgent touch.

These homemade mince pies are sure to be a hit at any festive gathering. The combination of buttery pastry and spiced mincemeat filling is simply irresistible. So why not roll up your sleeves, put on some festive music, and enjoy the process of creating these delectable treats that capture the essence of Christmas?


Seven Reasons to Savour the Classic Mince Pie: A Festive Favourite

  1. Delightfully festive treat enjoyed during the Christmas season.
  2. Simple recipe that can be easily made at home with basic ingredients.
  3. Buttery pastry complements the sweet and spicy mincemeat filling perfectly.
  4. Versatile – can be served warm or cold, with cream or brandy butter.
  5. Great for sharing with family and friends at gatherings or as gifts.
  6. Can be customized with creative pastry designs for a personal touch.
  7. Evokes a sense of tradition and nostalgia, making it a beloved holiday classic.


Challenges of Homemade Mince Pies: Time, Calories, Dietary Concerns, Taste Preferences, and Freshness

  1. Time-consuming to make from scratch, especially if preparing homemade pastry and mincemeat filling.
  2. High in calories and sugar due to the buttery pastry and sweet mincemeat filling.
  3. May not be suitable for those with dietary restrictions or allergies, such as gluten intolerance or nut allergies.
  4. Some people may find the combination of sweet and savoury flavours in mince pies unappealing.
  5. Leftover mince pies can lose their freshness quickly, requiring consumption within a few days.

Delightfully festive treat enjoyed during the Christmas season.

Indulge in the delightfully festive treat of mince pies, a beloved tradition enjoyed during the Christmas season. These delectable pastries encapsulate the spirit of the holidays with their sweet and spiced mincemeat filling encased in buttery pastry. Whether savoured alongside a cup of hot cocoa by a crackling fire or shared among loved ones at a festive gathering, mince pies evoke feelings of warmth and joy, making them a cherished part of the seasonal celebrations.

Simple recipe that can be easily made at home with basic ingredients.

Creating homemade mince pies is a joy with this recipe, as it offers a simple yet delicious approach using basic ingredients that are likely already in your kitchen. From the buttery shortcrust pastry to the sweet and spiced mincemeat filling, this recipe allows you to effortlessly craft these festive treats in the comfort of your own home. Whether you’re a seasoned baker or just starting out, the ease of preparation makes it accessible for anyone looking to add a touch of homemade goodness to their holiday celebrations.

Buttery pastry complements the sweet and spicy mincemeat filling perfectly.

The buttery pastry in this mince pie recipe serves as a delightful counterpart to the sweet and spicy mincemeat filling, creating a harmonious balance of flavours and textures. The richness of the pastry enhances the aromatic blend of fruits, spices, and brandy in the filling, resulting in a delectable combination that is both comforting and indulgent. With each bite, the buttery crust melts in your mouth while the fragrant mincemeat tantalises your taste buds, making it a truly irresistible treat for the festive season.

Versatile – can be served warm or cold, with cream or brandy butter.

One of the key advantages of this mince pie recipe is its versatility. These delectable treats can be enjoyed in various ways, whether served warm or cold. For a comforting winter indulgence, pair them with a generous dollop of cream to complement the rich flavours. Alternatively, elevate the experience with a decadent touch by serving them alongside brandy butter, adding a luxurious twist to this traditional festive delight. The flexibility in serving options makes these mince pies a versatile and crowd-pleasing addition to any seasonal gathering.

Great for sharing with family and friends at gatherings or as gifts.

Indulging in homemade mince pies is not just a treat for the taste buds but also a heartwarming experience perfect for sharing with loved ones. Whether enjoyed together at festive gatherings or wrapped up as thoughtful gifts, these delectable treats evoke a sense of togetherness and joy. The act of baking and sharing mince pies with family and friends creates cherished moments and spreads the spirit of the season, making them a delightful addition to any celebration or gift-giving occasion.

Can be customized with creative pastry designs for a personal touch.

Elevating the charm of mince pies lies in the ability to customise them with creative pastry designs, adding a personal touch to each delectable treat. Whether opting for intricate lattice patterns, festive shapes, or simple yet elegant toppings, the opportunity to showcase creativity knows no bounds. This pro not only allows for a visually appealing presentation but also infuses each mince pie with a unique flair that reflects the maker’s individual style and artistry. The art of pastry design transforms these traditional treats into bespoke creations that are as delightful to behold as they are to savour.

Evokes a sense of tradition and nostalgia, making it a beloved holiday classic.

The beauty of a mince pie recipe lies in its ability to evoke a sense of tradition and nostalgia, making it a beloved holiday classic. With each bite, one is transported back to cherished memories of festive seasons past, where the aroma of warm spices and buttery pastry filled the air. The act of baking and sharing mince pies brings families and friends together, creating a heartwarming connection to the customs and joys of the holiday season. It is this timeless appeal that makes mince pies not just a treat for the taste buds, but a symbol of enduring traditions and treasured moments shared with loved ones.

Time-consuming to make from scratch, especially if preparing homemade pastry and mincemeat filling.

Creating mince pies from scratch can be a time-consuming process, particularly when opting to make homemade pastry and mincemeat filling. Crafting the perfect buttery pastry requires precision and patience, while preparing the spiced mincemeat filling demands a careful balance of flavours. From rolling out the dough to simmering the filling, each step in the homemade mince pie journey requires attention to detail. Despite the time investment, the end result of freshly baked mince pies is well worth the effort, offering a taste of tradition and warmth that store-bought alternatives simply cannot replicate.

High in calories and sugar due to the buttery pastry and sweet mincemeat filling.

Indulging in mince pies comes with a con worth considering – their high calorie and sugar content. The buttery pastry and sweet mincemeat filling that make these treats so irresistible also contribute to their calorie-dense nature. While they are a delightful festive treat, it’s important to enjoy them in moderation to balance the intake of sugar and calories during the holiday season. Opting for smaller portions or exploring healthier ingredient alternatives can help savour the traditional taste of mince pies while being mindful of dietary considerations.

May not be suitable for those with dietary restrictions or allergies, such as gluten intolerance or nut allergies.

It’s important to note that while mince pies are a beloved Christmas treat, they may not be suitable for individuals with dietary restrictions or allergies, such as gluten intolerance or nut allergies. The traditional recipe for mince pies typically includes pastry made with wheat flour and sometimes contains nuts in the mincemeat filling. For those with specific dietary needs, it’s advisable to explore alternative recipes or pre-made options that cater to gluten-free or nut-free requirements to ensure everyone can enjoy a festive treat without compromising their health.

Some people may find the combination of sweet and savoury flavours in mince pies unappealing.

For some individuals, the juxtaposition of sweet and savoury flavours in mince pies may not align with their taste preferences. The traditional blend of sweet mincemeat filling and buttery pastry can be off-putting to those who prefer more distinct flavour profiles. The unique combination may challenge some palates, leading them to find the overall taste experience of mince pies unappealing. However, for those who appreciate the harmonious balance of sweet and savoury notes, mince pies remain a beloved festive treat that captures the essence of Christmas traditions.

Leftover mince pies can lose their freshness quickly, requiring consumption within a few days.

One downside of making mince pies is that any leftovers may lose their freshness relatively quickly, typically needing to be consumed within a few days of baking. The buttery pastry and moist mincemeat filling can start to lose their appeal as the days go by, potentially affecting the overall taste and texture of the pies. To fully enjoy the flavour and quality of mince pies, it’s best to savour them soon after baking or consider freezing any extras for longer-term storage.