Easy Chocolate Pie Recipe: Rich, Creamy and Delicious
chocolate pie recipe

Chocolate Pie Recipe

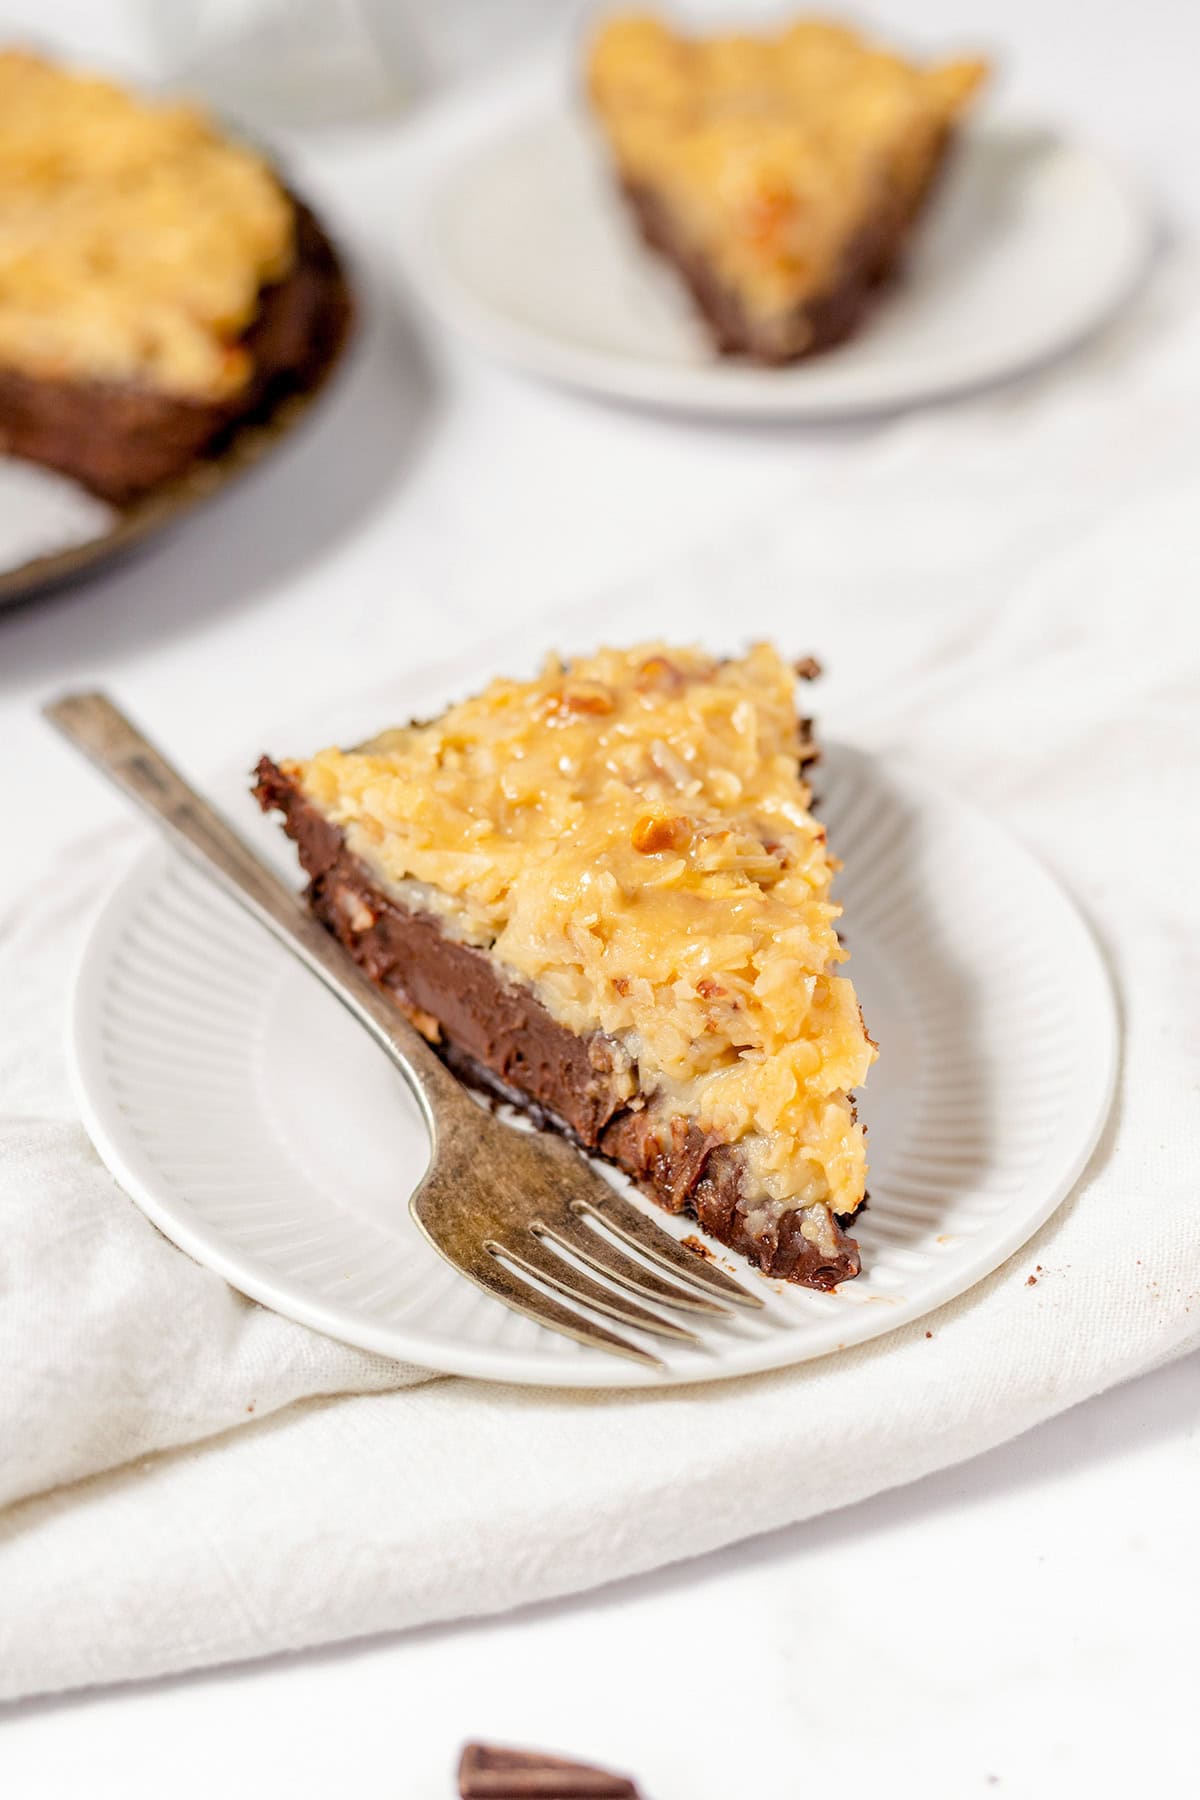
This chocolate pie has a crisp pastry case filled with smooth, rich chocolate custard and finished with a cloud of whipped cream. It makes an indulgent dessert for a family meal or a special occasion, and can be prepared ahead of time so it is ready to serve straight from the fridge.

At a glance

  • Preparation time: 30 minutes
  • Cooking time: 35 minutes
  • Chilling time: At least 4 hours
  • Serves: 8
  • Tin: 23cm pie dish

Ingredients

For the pastry case

  • 1 sheet of ready-rolled shortcrust pastry, about 320g
  • A little plain flour, for dusting
  • Baking parchment and baking beans, for blind baking

For the chocolate filling

  • 600ml whole milk
  • 4 large egg yolks
  • 100g caster sugar
  • 40g cornflour
  • 200g dark chocolate, finely chopped
  • 30g unsalted butter, diced
  • 1 teaspoon vanilla extract
  • A pinch of fine salt

To serve

  • 200ml double cream
  • 1 tablespoon icing sugar
  • Chocolate shavings or cocoa powder, optional

Method

  1. Prepare the pastry. Heat the oven to 190°C (170°C fan)/Gas Mark 5. Lightly flour the work surface and use it to line the pie dish with the pastry. Trim the edges, prick the base with a fork and chill for 15 minutes.
  2. Blind bake the case. Line the pastry with baking parchment and fill with baking beans. Bake for 15 minutes, then carefully remove the parchment and beans. Return the case to the oven for 8–10 minutes, until dry and lightly golden. Leave to cool.
  3. Start the filling. Put the egg yolks, caster sugar and cornflour in a heatproof bowl. Whisk until smooth. Warm the milk in a saucepan over a medium heat until steaming but not boiling.
  4. Make the custard. Gradually whisk the warm milk into the egg mixture. Pour it all back into the saucepan and cook over a medium heat, whisking constantly. Once it begins to bubble and thicken, keep whisking for about 1 minute, then remove from the heat.
  5. Add the chocolate. Stir in the chopped chocolate, butter, vanilla and salt until the mixture is glossy and completely smooth. Pour the filling into the cooled pastry case and level the surface.
  6. Chill the pie. Press a piece of baking parchment or cling film gently against the surface of the filling to prevent a skin forming. Leave to cool, then refrigerate for at least 4 hours, or until firmly set.
  7. Finish and serve. Whip the double cream with the icing sugar until it forms soft peaks. Spoon or pipe it over the pie and add chocolate shavings or a dusting of cocoa powder, if you like. Slice with a warm, dry knife.

Tips for a delicious chocolate pie

  • Use chocolate you enjoy eating. Dark chocolate with around 50–70% cocoa solids gives the filling a deep flavour without making it overly sweet.
  • Keep whisking the custard as it cooks, paying particular attention to the corners of the pan, where it can catch.
  • For neat slices, make sure the pie is thoroughly chilled and wipe the knife clean between cuts.
  • The pie can be made a day ahead. Add the whipped cream shortly before serving for the freshest finish.

Storage

Cover any leftover pie and keep it in the fridge for up to 3 days. The pastry is at its crispest on the day it is made, but the chocolate filling will remain delicious and creamy.


7 Essential Tips for the Perfect Chocolate Pie

  1. Use good-quality dark chocolate for a richer filling.
  2. Blind-bake the pastry to keep the base crisp.
  3. Whisk the filling until smooth and lump-free.
  4. Bake gently to avoid a cracked top.
  5. Chill the pie for at least four hours before serving.
  6. Add a pinch of salt to balance the sweetness.
  7. Serve with lightly whipped cream or fresh berries.

Use good-quality dark chocolate for a richer filling.

For a richer, more satisfying chocolate pie, choose good-quality dark chocolate with a cocoa content of around 50–70%. It gives the filling a deep, balanced flavour and a silky texture, while helping keep it from tasting overly sweet. Chop the chocolate finely so it melts smoothly into the warm custard.

Blind-bake the pastry to keep the base crisp.

Blind-baking the pastry before adding the chocolate filling helps keep the base crisp rather than soggy. Line the pastry case with baking parchment, add baking beans and bake until the edges are set. Remove the parchment and beans, then return the case to the oven until the base is dry and lightly golden. Let it cool before adding the filling.

Whisk the filling until smooth and lump-free.

Whisk the chocolate filling continuously as it cooks to keep it smooth and lump-free. Pay particular attention to the bottom and corners of the pan, where the custard can thicken or catch. If a few small lumps remain, pass the filling through a fine sieve before pouring it into the pastry case.

Bake gently to avoid a cracked top.

Bake the chocolate pie gently to help prevent the filling from becoming too hot and cracking as it sets. Use the temperature stated in the recipe, and avoid overbaking: the centre should still have a slight wobble when you take the pie out of the oven, as it will continue to firm up while cooling.

Chill the pie for at least four hours before serving.

Chilling the chocolate pie for at least four hours gives the filling time to set, making it smooth, firm and easy to slice. For the neatest portions, leave it in the fridge until just before serving and cut it with a warm, dry knife, wiping the blade between slices.

Add a pinch of salt to balance the sweetness.

A small pinch of salt can make a big difference to your chocolate pie. It balances the sweetness of the filling and brings out the rich, complex flavour of the chocolate without making the dessert taste salty. Stir it into the warm chocolate mixture, then taste and adjust if needed.

Serve with lightly whipped cream or fresh berries.

Serve each slice of chocolate pie with a spoonful of lightly whipped cream for a soft, airy contrast to the rich filling. For a fresher finish, add a handful of fresh berries, such as raspberries or strawberries—their gentle tartness pairs beautifully with the chocolate.
The Best Oatmeal Chocolate Chip Cookies: Chewy, Chocolatey and Easy to Bake

oatmeal chocolate chip cookies

Oatmeal Chocolate Chip Cookies

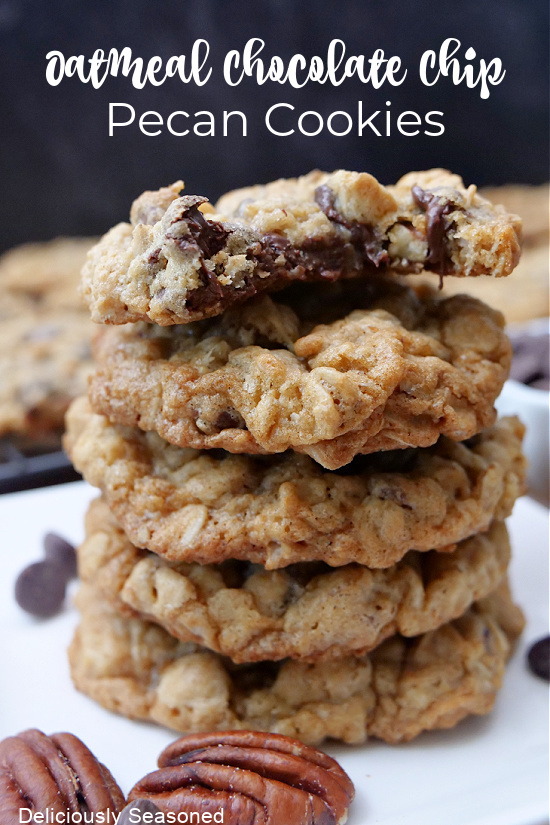
Chewy in the middle, lightly crisp at the edges and packed with chocolate, oatmeal chocolate chip cookies are a comforting favourite. Rolled oats give them a hearty texture, while brown sugar adds a gentle caramel flavour. They are simple to make and just as welcome with a cup of tea as they are as an afternoon treat.

What makes a good oatmeal chocolate chip cookie?

The secret is a balance of texture and flavour. Rolled oats add substance without making the cookies heavy, and a mixture of brown and caster sugar helps create soft centres with golden edges. Chilling the dough before baking is optional, but it can help the cookies hold their shape and develop a richer flavour.

Ingredients

  • 150g unsalted butter, softened
  • 100g soft brown sugar
  • 75g caster sugar
  • 1 large egg
  • 1 teaspoon vanilla extract
  • 125g plain flour
  • ½ teaspoon bicarbonate of soda
  • ½ teaspoon fine salt
  • 150g rolled oats
  • 150g chocolate chips or chopped chocolate

Method

  1. Heat the oven to 180°C (160°C fan, Gas Mark 4). Line two baking trays with baking paper.
  2. Beat the softened butter with the brown and caster sugars until creamy. Mix in the egg and vanilla extract.
  3. In a separate bowl, combine the flour, bicarbonate of soda and salt. Stir this into the butter mixture until just combined.
  4. Fold in the rolled oats and chocolate. Avoid overmixing, which can make the cookies tougher.
  5. For thicker cookies, cover and chill the dough for 30 minutes. This step can be skipped if time is short.
  6. Roll the dough into balls, using about one tablespoon for each, and place them on the trays with plenty of space between them. Gently flatten each ball slightly.
  7. Bake for 10–12 minutes, until the edges are golden and the centres still look a little soft.
  8. Leave the cookies on the trays for five minutes, then transfer them to a wire rack to cool.

Tips for the best results

Use rolled oats for a chewy texture; instant oats tend to produce a softer, less distinct crumb. Dark, milk or white chocolate all work well, and chopped chocolate creates lovely pockets that melt into the dough. For extra flavour, add a pinch of cinnamon or a handful of chopped walnuts.

Take the cookies out while their centres are still slightly soft. They will continue to set as they cool, leaving them tender rather than dry. Store them in an airtight container at room temperature for up to five days, or freeze the unbaked dough balls for freshly baked cookies whenever the craving strikes.


Oatmeal Chocolate Chip Cookies: 9 Frequently Asked Questions

  1. How do you make oatmeal chocolate chip cookies?
  2. What ingredients do you need for oatmeal chocolate chip cookies?
  3. Can you use porridge oats instead of rolled oats in oatmeal chocolate chip cookies?
  4. Why are my oatmeal chocolate chip cookies spreading too much?
  5. How do you keep oatmeal chocolate chip cookies soft and chewy?
  6. Should you chill oatmeal chocolate chip cookie dough before baking?
  7. How long should oatmeal chocolate chip cookies bake for?
  8. Can you freeze oatmeal chocolate chip cookie dough?
  9. How should you store oatmeal chocolate chip cookies to keep them fresh?

How do you make oatmeal chocolate chip cookies?

To make oatmeal chocolate chip cookies, cream softened butter with brown and caster sugar, then beat in an egg and a little vanilla extract. Stir in plain flour, bicarbonate of soda and salt, followed by rolled oats and chocolate chips. Spoon the dough into balls on a lined baking tray, leaving space for them to spread, and bake at 180°C (160°C fan) for about 10–12 minutes, until the edges are golden but the centres are still soft. Leave them to cool on the tray for a few minutes before transferring to a rack.

What ingredients do you need for oatmeal chocolate chip cookies?

Oatmeal chocolate chip cookies typically need rolled oats, plain flour, butter, brown and caster sugar, an egg, vanilla extract, bicarbonate of soda and a little salt. Chocolate chips or chopped chocolate provide the chocolatey pieces, while optional extras such as cinnamon, nuts or raisins can add flavour and texture.

Can you use porridge oats instead of rolled oats in oatmeal chocolate chip cookies?

Yes, you can use porridge oats instead of rolled oats in oatmeal chocolate chip cookies. As porridge oats are usually finer, they’ll give the cookies a softer, less chewy texture and may absorb moisture more quickly. For the closest result, use the same weight and avoid instant porridge sachets, which may contain added sugar, salt or flavourings.

Why are my oatmeal chocolate chip cookies spreading too much?

Oatmeal chocolate chip cookies may spread too much if the butter is too warm or melted, the dough hasn’t been chilled, or there is too little flour or too much sugar. Make sure to measure the ingredients accurately, use softened butter rather than runny butter, and chill the dough for 30 minutes before baking. It can also help to check that the oven is fully preheated and to bake the cookies on a cool tray, as a warm tray can cause the dough to spread before it sets.

How do you keep oatmeal chocolate chip cookies soft and chewy?

To keep oatmeal chocolate chip cookies soft and chewy, avoid overbaking them: take them out when the edges are golden but the centres still look slightly soft, as they will continue to set on the tray. Using more brown sugar than caster sugar helps retain moisture, while rolled oats give the cookies their chewy texture. Store the cooled cookies in an airtight container to keep them fresh.

Chilling oatmeal chocolate chip cookie dough is optional, but it can improve the cookies. A rest of around 30 minutes in the fridge helps the oats absorb moisture and firms the butter, so the cookies are less likely to spread too much and may have a chewier texture and deeper flavour. If you prefer a thinner, softer cookie or are short on time, you can bake the dough straight away; keep an eye on them, as they may need slightly less time in the oven.

How long should oatmeal chocolate chip cookies bake for?

Oatmeal chocolate chip cookies usually take 10–12 minutes to bake in an oven preheated to 180°C (160°C fan). They are ready when the edges are lightly golden but the centres still look slightly soft; they will continue to set as they cool. For evenly baked cookies, leave space between them on the baking tray and check them towards the end of the cooking time, as ovens and cookie sizes can vary.

Yes, oatmeal chocolate chip cookie dough freezes well. Shape it into individual balls and arrange them on a lined tray, then freeze until firm before transferring them to a sealed freezer-safe container or bag. They’ll keep for up to three months. Bake straight from frozen, adding a couple of minutes to the usual baking time, and check that the edges are golden and the centres are just set.

How should you store oatmeal chocolate chip cookies to keep them fresh?

Store oatmeal chocolate chip cookies in an airtight container at room temperature, once they have cooled completely. They should stay soft and fresh for around five days; adding a small piece of bread to the container can help prevent them from drying out. For longer storage, freeze the cookies in a sealed freezer-safe container for up to three months, then thaw at room temperature before serving.

Easy Homemade Cranberry Sauce Recipe for a Festive Feast

cranberry sauce recipe

Easy Homemade Cranberry Sauce

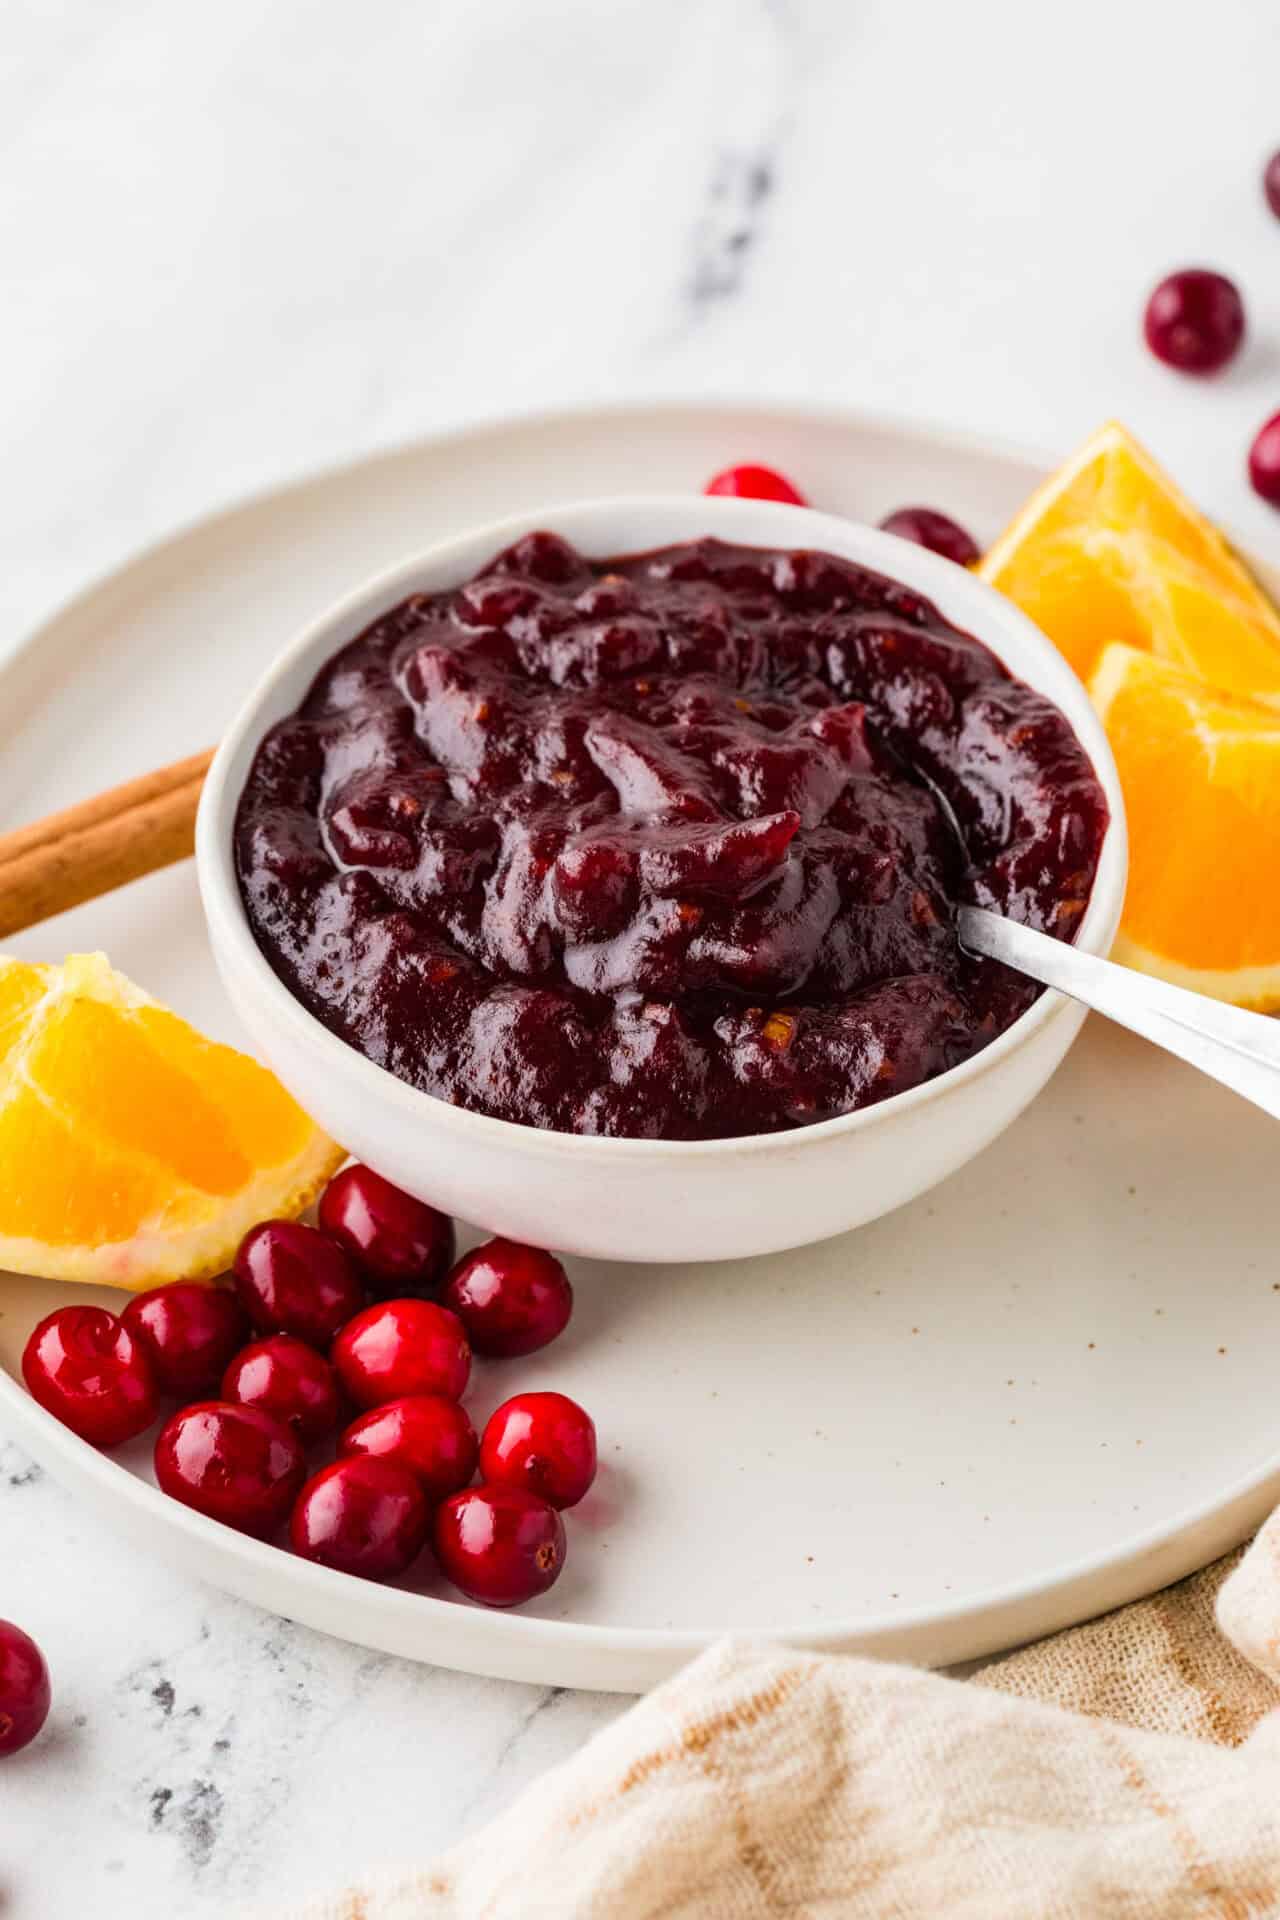
Bright, tangy and gently sweet, cranberry sauce is a classic accompaniment to roast turkey, chicken and other festive dishes. It is quick to make at home, needs just a handful of ingredients and can be prepared ahead of time.

Ingredients

  • 300g fresh or frozen cranberries
  • 150g caster sugar
  • 150ml water
  • Finely grated zest of 1 orange
  • 1 tablespoon orange juice
  • A pinch of salt

Method

  1. Put the sugar and water into a medium saucepan. Warm over a low heat, stirring until the sugar has dissolved.
  2. Add the cranberries, orange zest, orange juice and salt. Bring the mixture to a gentle simmer.
  3. Cook for 10–15 minutes, stirring occasionally, until most of the berries have burst and the sauce has thickened. It will become thicker as it cools.
  4. Taste and adjust the sweetness or sharpness if needed. Add a little more sugar for a sweeter sauce, or a squeeze of orange juice for extra brightness.
  5. Remove from the heat and leave to cool. Spoon into a serving bowl, or transfer to a clean container and refrigerate.

Tips for the Best Cranberry Sauce

Frozen cranberries can be used straight from the freezer; they may need a few extra minutes to soften. For a smoother sauce, mash the berries with a fork or briefly blend the cooked mixture. For a chunkier texture, stop cooking as soon as the berries have burst and the sauce looks glossy.

You can also add a cinnamon stick while the sauce simmers, then remove it before serving. A little finely grated ginger or a splash of port makes a warming variation.

Make-Ahead and Storage

Cranberry sauce is ideal for making ahead. Once cooled, cover and keep it in the fridge for up to one week. Serve chilled or bring it to room temperature before serving. Stir well after refrigeration, as the sauce will set slightly.

Serving Suggestions

Serve this homemade cranberry sauce with roast turkey, chicken or baked ham. It is also delicious in sandwiches, alongside a cheeseboard, or spooned over leftover roast vegetables.


8 Tips for Perfect Homemade Cranberry Sauce

  1. Use fresh or frozen cranberries; no need to thaw frozen ones.
  2. Rinse fresh cranberries and discard any bruised berries.
  3. Add orange zest and juice for a bright citrus flavour.
  4. Adjust the sugar to balance the berries’ sharpness.
  5. Simmer gently until most berries burst and the sauce thickens.
  6. Stir often to stop the sauce catching on the pan.
  7. Remember it thickens further as it cools.
  8. Make it ahead and refrigerate in a covered container.

Use fresh or frozen cranberries; no need to thaw frozen ones.

Fresh and frozen cranberries both work well in this recipe. If using frozen berries, add them straight to the pan without thawing first. They may take a little longer to soften and burst as the sauce simmers, so cook until the berries have broken down and the mixture has thickened to your liking.

Rinse fresh cranberries and discard any bruised berries.

Rinse the fresh cranberries under cold running water, then pick through them and discard any that are bruised, shrivelled or damaged. This quick check helps ensure your sauce has a fresh flavour and an even texture.

Add orange zest and juice for a bright citrus flavour.

Adding orange zest and juice gives cranberry sauce a bright, fresh citrus flavour that complements the berries’ natural sharpness. The zest brings fragrant orange oils, while the juice adds gentle sweetness and tang. Stir both into the pan as the cranberries simmer, then taste and adjust the balance to suit your preference.

Adjust the sugar to balance the berries’ sharpness.

Taste the sauce as it cooks and adjust the sugar to suit your preference. Cranberries can be quite sharp, so add a little more sugar if the flavour is too tart, stirring until it dissolves before tasting again. For a less sweet sauce with a brighter, tangier flavour, use less sugar. Keep in mind that the sauce will taste slightly sharper when warm and thicken as it cools.

Simmer gently until most berries burst and the sauce thickens.

Simmer the cranberries gently, stirring occasionally, until most of the berries have burst and the mixture has thickened. This usually takes around 10–15 minutes. Keep in mind that the sauce will become thicker as it cools, so take it off the heat while it is still slightly looser than you’d like.

Stir often to stop the sauce catching on the pan.

Stir the cranberry sauce regularly as it simmers to prevent the fruit and sugar from sticking to the bottom of the pan and catching. A gentle, frequent stir also helps the cranberries cook evenly and the sauce thicken to a smooth, glossy consistency.

Remember it thickens further as it cools.

Keep in mind that cranberry sauce will thicken further as it cools, so take it off the heat while it is still slightly looser than you’d like. This helps prevent it from becoming too firm once chilled.

Make it ahead and refrigerate in a covered container.

Cranberry sauce is easy to prepare ahead, making it one less thing to do on the day. Once it has cooled, transfer it to a clean, covered container and refrigerate for up to a week. The sauce will thicken as it chills, so give it a good stir before serving, and let it come to room temperature if you prefer a softer texture.

Chocolate Crinkle Cookies: A Fudgy, Crackled Favourite for Every Occasion

chocolate crinkle cookies

Chocolate Crinkle Cookies: Little Bites of Fudgy Joy

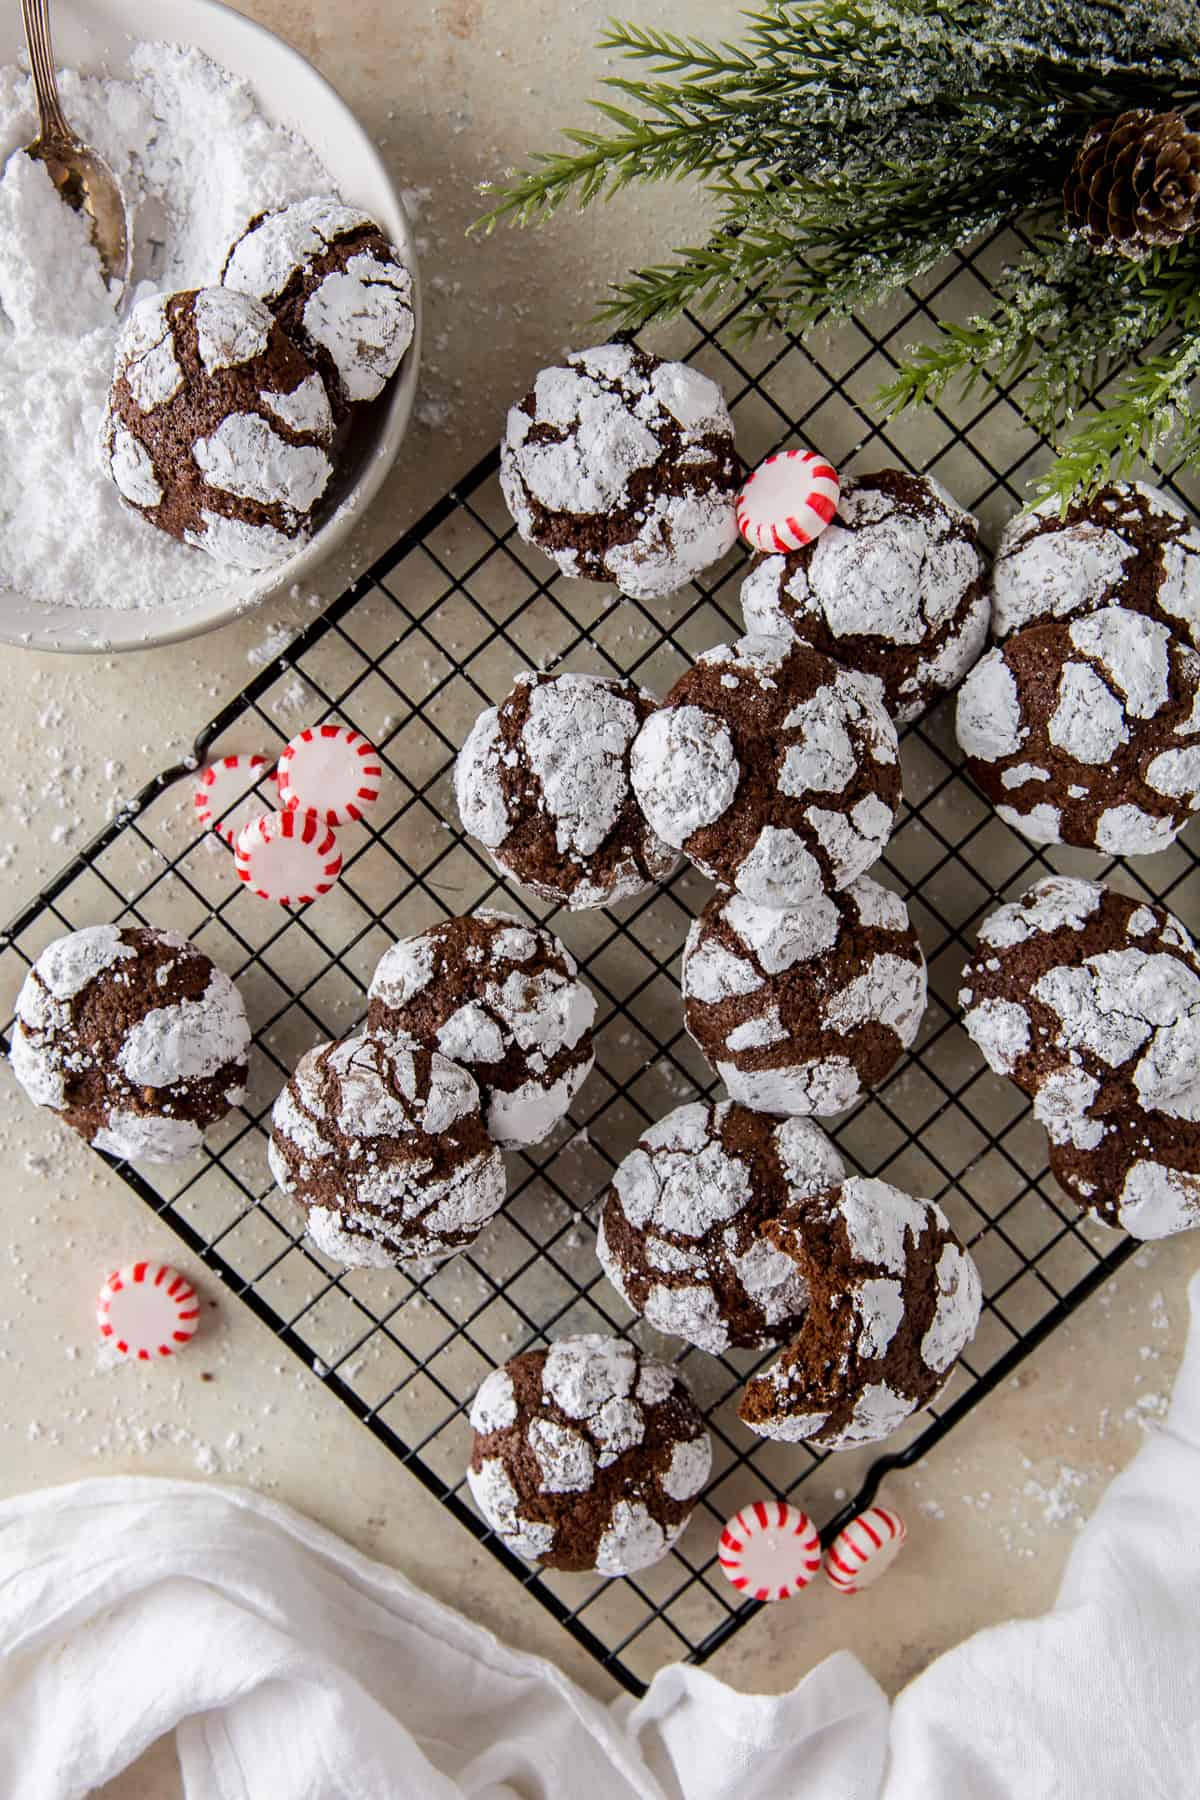
With their soft, chocolate-rich centres and snowy, cracked tops, chocolate crinkle cookies are as lovely to look at as they are to eat. As they bake, the dark dough spreads and splits, revealing a dusting of icing sugar beneath. The result is a striking, craggy finish and a soft, brownie-like middle.

These cookies are a popular treat during the festive season, but there is no need to save them for a special occasion. They are simple to make, need no special equipment and pair beautifully with a cup of tea or coffee.

What makes them crinkle?

The distinctive cracked surface comes from rolling the chilled dough in icing sugar before baking. The outside of each ball begins to set in the oven while the dough beneath continues to spread. As it expands, the sugar-coated surface breaks into pale patches and dark chocolate cracks.

Chilling the dough is important. It makes the mixture easier to handle and helps the cookies keep their shape long enough to develop their characteristic crinkles.

Chocolate crinkle cookie recipe

This recipe makes about 20 cookies.

Ingredients

  • 200g caster sugar
  • 60ml neutral-flavoured oil, such as sunflower oil
  • 2 large eggs
  • 1 teaspoon vanilla extract
  • 60g cocoa powder
  • 125g plain flour
  • 1 teaspoon baking powder
  • ¼ teaspoon salt
  • About 75g icing sugar, for coating

Method

  1. In a large bowl, whisk together the caster sugar and oil. Beat in the eggs, one at a time, then stir in the vanilla extract.
  2. Sift in the cocoa powder, flour, baking powder and salt. Mix until a thick, sticky dough forms.
  3. Cover the bowl and chill the dough for at least 2 hours, or until firm enough to roll. It can also be chilled overnight.
  4. Heat the oven to 180°C (160°C fan) and line two baking trays with baking paper. Put the icing sugar in a shallow bowl.
  5. Roll the dough into balls about the size of a walnut. Coat each ball generously in icing sugar, then arrange them on the trays with space between each one.
  6. Bake for 10–12 minutes. The edges should look set, while the centres will still be soft. Leave the cookies on the trays for a few minutes before transferring them to a wire rack to cool.

Tips for the best results

  • Chill thoroughly: If the dough becomes sticky while you are rolling it, return it to the fridge for a little longer.
  • Use plenty of icing sugar: A generous coating helps create a clear contrast between the white surface and dark cracks.
  • Do not overbake: The cookies will continue to firm up as they cool. Taking them out while the centres are still soft keeps them fudgy.
  • Try a flavour twist: A little orange zest, a pinch of espresso powder or a small amount of ground cinnamon can complement the cocoa.

Serving and storing

Chocolate crinkle cookies are delicious once cooled, but they are especially tempting when the centres are still a little warm. Serve them on their own, alongside fresh fruit, or with a scoop of vanilla ice cream for an easy dessert.

Store the cooled cookies in an airtight container at room temperature for up to five days. For freshly baked cookies whenever the mood strikes, roll the dough into balls and freeze them before coating. Defrost in the fridge, roll in icing sugar and bake as directed.

Simple, rich and wonderfully crackled, chocolate crinkle cookies are a cheerful addition to any baking tin—and a reliable favourite for chocolate lovers of all ages.


6 Reasons to Love Chocolate Crinkle Cookies

  1. Rich chocolate flavour.
  2. Soft, fudgy centres.
  3. Delightful crackled tops.
  4. Easy to make at home.
  5. Lovely with tea or coffee.
  6. Perfect for sharing.


Four Drawbacks of Chocolate Crinkle Cookies

  1. Can be very sweet.
  2. Dough needs chilling time.
  3. Easy to overbake and dry out.
  4. Icing sugar can make a mess.

Rich chocolate flavour.

Chocolate crinkle cookies deliver a wonderfully rich chocolate flavour in every bite. Cocoa powder gives the dough its deep, indulgent taste, while the soft, fudgy centre makes each cookie feel almost like a little brownie. Their sweetness is balanced by the cocoa’s gentle bitterness, creating a treat that satisfies chocolate cravings without needing elaborate ingredients or toppings.

Soft, fudgy centres.

One of the best things about chocolate crinkle cookies is their soft, fudgy centres. While the outside bakes into a delicate, lightly crisp shell, the middle stays rich and tender, with a texture reminiscent of a brownie. That contrast makes every bite especially satisfying and keeps the cookies deliciously moist.

Delightful crackled tops.

One of the most appealing features of chocolate crinkle cookies is their delightful crackled tops. As the cookies bake, the dough expands and splits through its coating of icing sugar, creating a beautiful pattern of snowy white and rich chocolate brown. Each cookie has its own distinctive finish, making them as charming to serve as they are delicious to eat.

Easy to make at home.

Chocolate crinkle cookies are easy to make at home, even for beginner bakers. The ingredients are simple and readily available, and the dough comes together without any special equipment. After chilling, roll it into balls, coat them in icing sugar and bake until the tops crack. It’s a straightforward process that delivers impressive-looking, fudgy cookies with very little fuss.

Lovely with tea or coffee.

Chocolate crinkle cookies are a lovely companion to a cup of tea or coffee. Their soft, fudgy centres and rich cocoa flavour pair beautifully with a hot drink, making them an inviting treat for an afternoon break or a relaxed catch-up with friends.

Perfect for sharing.

Chocolate crinkle cookies are perfect for sharing, whether you’re taking a tin to a family gathering, bringing a homemade treat to work or offering something sweet to friends over tea. Their bite-sized shape makes them easy to serve, and their snowy, cracked tops look inviting arranged on a plate. Since the recipe makes a generous batch, there’s usually enough for everyone to enjoy.

Can be very sweet.

Chocolate crinkle cookies can be very sweet, particularly because the rich cocoa dough is coated in icing sugar before baking. For those who prefer a more balanced flavour, reduce the sugar slightly or use dark, unsweetened cocoa powder to bring out the chocolate’s natural bitterness.

Dough needs chilling time.

One drawback of chocolate crinkle cookies is that the dough needs time to chill before baking. This step makes it easier to handle and helps the cookies keep their shape, but it means you cannot enjoy them straight away. Remember to plan ahead, or make the dough in advance and leave it in the fridge until you are ready to bake.

Easy to overbake and dry out.

Chocolate crinkle cookies can be easy to overbake, as their dark colour makes it difficult to judge when they are done. Leave them in the oven for too long and their soft, fudgy centres can quickly turn dry and crumbly. For the best texture, take them out when the edges look set but the middles are still slightly soft; they will continue to firm up as they cool.

Icing sugar can make a mess.

One small drawback of chocolate crinkle cookies is the icing sugar, which can quickly dust the worktop, your hands and even the floor. Rolling each piece of sticky dough in sugar is part of what gives the cookies their signature snowy, cracked finish, but it can be a messy job. Using a shallow bowl and lining the baking tray with baking paper can help keep the clean-up to a minimum.

Delightful Homemade Cake Recipe: A Guide to Baking Sweet Perfection

cake recipe

The Perfect Victoria Sponge Cake Recipe

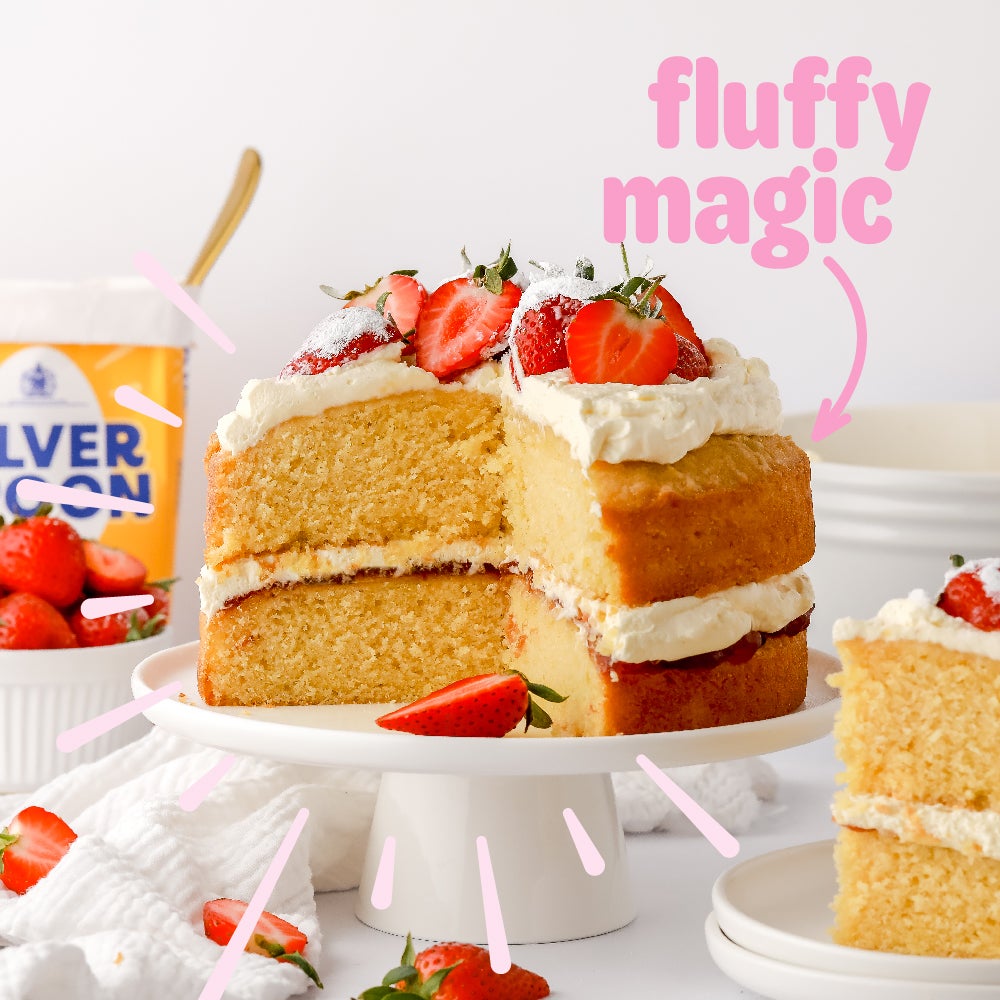
Indulge in the classic delight of a homemade Victoria Sponge cake with this simple and delicious recipe. Whether you’re hosting a tea party or simply craving a sweet treat, this cake is sure to impress.

Ingredients:

  • 200g unsalted butter, softened
  • 200g caster sugar
  • 4 medium eggs
  • 200g self-raising flour
  • 1 tsp baking powder
  • 2 tbsp milk
  • Raspberry jam and whipped cream, to fill
  • Icing sugar, for dusting

Instructions:

  1. Preheat your oven to 180°C (160°C fan) and grease two 20cm round cake tins.
  2. In a large bowl, cream together the butter and sugar until light and fluffy.
  3. Add the eggs one at a time, beating well after each addition.
  4. Sift in the flour and baking powder, then gently fold into the mixture until well combined. Add the milk to loosen the batter slightly.

    li>Divide the batter evenly between the prepared cake tins and smooth the tops with a spatula.

    li>Bake in the preheated oven for 20-25 minutes or until golden and springy to the touch.

    li>Allow the cakes to cool in their tins for 5 minutes before transferring them to a wire rack to cool completely.

    li>To assemble the cake, spread raspberry jam on one layer and whipped cream on top of it. Place the second layer on top.

    li>Dust with icing sugar before serving. Enjoy your delicious homemade Victoria Sponge cake!

This Victoria Sponge cake is a timeless classic that never fails to impress. With its light and fluffy texture complemented by sweet jam and cream filling, it’s perfect for any occasion. So why not roll up your sleeves, preheat that oven, and treat yourself to a slice of homemade goodness?

Bon appétit!


Essential Tips and Tricks for Perfecting Your Cake Baking Skills: Answers to Common Questions

  1. 1. How do I make a basic sponge cake?
  2. 2. What are the essential ingredients for a classic Victoria Sponge cake?
  3. 3. Can I substitute self-raising flour with plain flour in a cake recipe?
  4. 4. How can I prevent my cake from being too dry?
  5. 5. What is the best method for creaming butter and sugar when baking a cake?
  6. 6. How do I know when my cake is fully baked and ready to be taken out of the oven?
  7. 7. Is it necessary to preheat the oven before baking a cake?
  8. 8. What are some creative ideas for decorating a homemade cake?
  9. 9. Are there any tips for storing leftover cake to keep it fresh?

1. How do I make a basic sponge cake?

For those wondering how to make a basic sponge cake, the process is surprisingly straightforward. Start by creaming together softened butter and caster sugar until light and fluffy. Then, gradually add eggs one at a time, ensuring each is well incorporated. Sift in self-raising flour and baking powder, gently folding them into the mixture. A touch of milk can be added to achieve the desired consistency. Divide the batter between cake tins, bake until golden and springy, then allow to cool before filling with jam and cream. This simple recipe results in a light, airy sponge cake that is perfect for any occasion.

2. What are the essential ingredients for a classic Victoria Sponge cake?

When it comes to baking a classic Victoria Sponge cake, the essential ingredients you’ll need include unsalted butter for richness, caster sugar for sweetness, eggs for structure, self-raising flour for lightness, baking powder for a bit of lift, and a touch of milk to bring everything together. These key components come together to create a soft and moist sponge that serves as the perfect base for layering with raspberry jam and whipped cream. Mastering the balance of these ingredients is crucial in achieving that quintessential Victoria Sponge cake texture and flavour that everyone loves.

3. Can I substitute self-raising flour with plain flour in a cake recipe?

When it comes to baking cakes, the choice between self-raising flour and plain flour can impact the texture and rise of your final product. While self-raising flour already contains a raising agent, such as baking powder, plain flour does not. If you find yourself without self-raising flour, you can create a substitute by adding baking powder to plain flour. However, it’s essential to adjust the quantities carefully to ensure the right balance of ingredients for your cake recipe. Experimenting with different flour options can lead to variations in texture and density, so it’s advisable to follow the recipe closely for best results.

4. How can I prevent my cake from being too dry?

To prevent your cake from turning out too dry, there are a few key tips to keep in mind. Firstly, make sure not to overmix the batter, as this can result in a tough and dry texture. Be sure to measure your ingredients accurately and follow the recipe instructions closely. Additionally, avoid overbaking the cake by regularly checking it towards the end of the baking time and using a toothpick to test for doneness. If the toothpick comes out clean with a few crumbs attached, it’s ready to be taken out of the oven. Lastly, consider adding ingredients like sour cream, buttermilk, or applesauce to help maintain moisture in your cake. By following these guidelines, you can ensure a moist and delicious cake every time you bake.

5. What is the best method for creaming butter and sugar when baking a cake?

When baking a cake, the best method for creaming butter and sugar is to ensure that the butter is at room temperature for optimal results. Start by placing softened unsalted butter and caster sugar in a mixing bowl. Using an electric mixer or wooden spoon, beat the butter and sugar together until light and fluffy. This process incorporates air into the mixture, resulting in a lighter texture for your cake. It is essential to cream the butter and sugar adequately to create a smooth and uniform base for your cake batter, which will ultimately contribute to a moist and tender crumb in the finished cake.

6. How do I know when my cake is fully baked and ready to be taken out of the oven?

To determine if your cake is fully baked and ready to be taken out of the oven, you can use a few simple techniques. Firstly, check the colour of the cake – it should be golden brown and evenly baked. You can also insert a skewer or toothpick into the centre of the cake; if it comes out clean with no wet batter sticking to it, your cake is likely done. Additionally, gently press the top of the cake – if it springs back when touched, it’s a good indicator that it’s fully baked. Remember that every oven is different, so keep an eye on your cake towards the end of the baking time to ensure it is not overcooked.

7. Is it necessary to preheat the oven before baking a cake?

Preheating the oven before baking a cake is essential for achieving the best results. A preheated oven ensures that the cake batter starts to cook immediately upon entering the oven, helping the cake rise evenly and develop the desired texture. Without preheating, the baking time and temperature may be inconsistent, leading to an undercooked or unevenly baked cake. Therefore, to ensure your cake bakes perfectly and turns out delicious every time, it is highly recommended to preheat your oven before starting the baking process.

8. What are some creative ideas for decorating a homemade cake?

When it comes to decorating a homemade cake, the possibilities are endless for unleashing your creativity. Some innovative ideas include using fresh fruits like berries or citrus slices as vibrant toppings, creating intricate designs with piped buttercream frosting, or adding edible flowers for a touch of elegance. Alternatively, you can experiment with chocolate ganache drips, colourful sprinkles, or even personalised fondant decorations to make your cake truly unique and visually stunning. Let your imagination run wild and have fun turning your homemade creation into a work of art that not only tastes delicious but also looks absolutely spectacular.

9. Are there any tips for storing leftover cake to keep it fresh?

When it comes to storing leftover cake to maintain its freshness, there are a few handy tips to keep in mind. Firstly, ensure that the cake is completely cooled before storing it. Once cooled, wrap the cake tightly in cling film or place it in an airtight container to prevent it from drying out. For cakes with frosting, refrigeration may be necessary to preserve the frosting’s texture. If you plan to store the cake for an extended period, consider freezing individual slices wrapped in parchment paper and placed in a freezer-safe bag. By following these storage tips, you can enjoy your leftover cake for longer while still savoring its delicious taste and texture.

Delightful Cupcake Recipe: A Sweet Treat for Every Occasion

cupcake recipe

The Perfect Cupcake Recipe

Indulge your sweet tooth with our delicious cupcake recipe that is sure to impress your friends and family. Whether you’re a baking enthusiast or a novice in the kitchen, these cupcakes are easy to make and guaranteed to satisfy your cravings.

Ingredients:

  • 150g self-raising flour
  • 150g caster sugar
  • 150g unsalted butter, softened
  • 3 eggs
  • 1 tsp vanilla extract
  • A pinch of salt
  • 100g icing sugar for decoration

Instructions:

  1. Preheat your oven to 180°C and line a cupcake tray with paper cases.
  2. In a mixing bowl, cream together the butter and sugar until light and fluffy.
  3. Add the eggs one at a time, beating well after each addition. Stir in the vanilla extract.
  4. Sift in the flour and salt, then gently fold into the mixture until just combined. Be careful not to overmix.
  5. Spoon the batter into the paper cases, filling each one about two-thirds full.
  6. Bake in the preheated oven for 15-20 minutes or until a skewer inserted into the centre comes out clean.

    Once baked, remove from the oven and allow to cool completely on a wire rack.

    Sift icing sugar over the cupcakes for decoration before serving.

Enjoy!

These delightful cupcakes are perfect for any occasion. Whether you’re hosting a party or simply treating yourself, this recipe is sure to be a hit. Get creative with different toppings or fillings to make them your own!


8 Essential Tips for Perfect Cupcakes Every Time

  1. Ensure all ingredients are at room temperature before starting.
  2. Use a good quality, high-fat butter for a moist and rich texture.
  3. Do not overmix the batter to avoid dense cupcakes.
  4. Fill cupcake liners only two-thirds full to allow room for rising.
  5. Preheat your oven to the correct temperature for even baking.
  6. Rotate your cupcake tray halfway through baking for uniform browning.
  7. Allow cupcakes to cool completely before frosting to prevent melting.
  8. Get creative with decorations like sprinkles, fruits, or edible flowers.

Ensure all ingredients are at room temperature before starting.

To achieve the perfect texture and consistency in your cupcakes, it is essential to ensure that all ingredients are at room temperature before beginning the baking process. When ingredients like butter, eggs, and milk are at room temperature, they blend together more easily, resulting in a smoother batter. This step not only helps to create a uniform mixture but also promotes even baking, leading to cupcakes that are moist and delicious. So remember to plan ahead and allow your ingredients to come to room temperature before diving into this delightful cupcake recipe for optimal results.

Use a good quality, high-fat butter for a moist and rich texture.

For a truly indulgent and decadent cupcake experience, it is essential to use a high-quality, high-fat butter in your recipe. The richness and moisture that this type of butter provides will elevate the texture of your cupcakes, resulting in a melt-in-your-mouth sensation with every bite. Investing in good quality butter is a simple yet effective way to ensure that your cupcakes turn out moist, rich, and utterly delicious.

Do not overmix the batter to avoid dense cupcakes.

To ensure light and fluffy cupcakes, it is crucial not to overmix the batter. Overmixing can lead to dense cupcakes as it develops the gluten in the flour, resulting in a tough texture. To achieve the perfect consistency, gently fold the ingredients together until just combined. This simple tip will help you create cupcakes that are moist, airy, and utterly irresistible.

Fill cupcake liners only two-thirds full to allow room for rising.

When preparing your cupcakes, it’s essential to fill the cupcake liners only two-thirds full. This tip ensures that there is ample space for the batter to rise and expand during baking, resulting in perfectly fluffy and well-formed cupcakes. By following this guideline, you can achieve a desirable cupcake texture and shape, making your sweet treats visually appealing and delightful to eat. Remember, a little attention to detail goes a long way in creating bakery-worthy cupcakes at home.

Preheat your oven to the correct temperature for even baking.

To ensure your cupcakes turn out perfectly baked and with a consistent texture, it is essential to preheat your oven to the correct temperature before placing them inside. Preheating allows the cupcakes to start baking immediately at the desired temperature, promoting even cooking throughout. This step not only helps in achieving a uniform rise and golden crust but also ensures that the cupcakes are cooked through without being under or overdone. So, remember to preheat your oven to the recommended temperature stated in the recipe for delicious and evenly baked cupcakes every time.

Rotate your cupcake tray halfway through baking for uniform browning.

To ensure even browning and consistent baking of your cupcakes, a helpful tip is to rotate your cupcake tray halfway through the baking process. By rotating the tray, you allow each cupcake to be exposed to the heat of the oven more evenly, resulting in a beautifully golden-brown finish across all your cupcakes. This simple technique can make a significant difference in the appearance and taste of your baked treats, ensuring that they come out perfectly every time.

Allow cupcakes to cool completely before frosting to prevent melting.

To ensure that your cupcakes turn out perfectly, it’s essential to allow them to cool completely before frosting. This step is crucial in preventing the frosting from melting or sliding off the cupcakes. By giving the cupcakes enough time to cool, you’ll not only achieve a better texture but also maintain the integrity of your delicious creations. Patience is key when it comes to baking, and taking the time to let your cupcakes cool will result in a beautifully finished treat that is sure to impress.

Get creative with decorations like sprinkles, fruits, or edible flowers.

Elevate your cupcakes to the next level by embracing creativity in your decorations. Whether you opt for colourful sprinkles, fresh fruits, or delicate edible flowers, adding a touch of flair to your cupcakes can transform them into works of art. Experiment with different combinations and arrangements to create visually stunning treats that not only taste delicious but also delight the eyes. Let your imagination run wild and turn your cupcakes into a showcase of your personal style and creativity.