Delightful Homemade Cake Recipe: A Guide to Baking Sweet Perfection
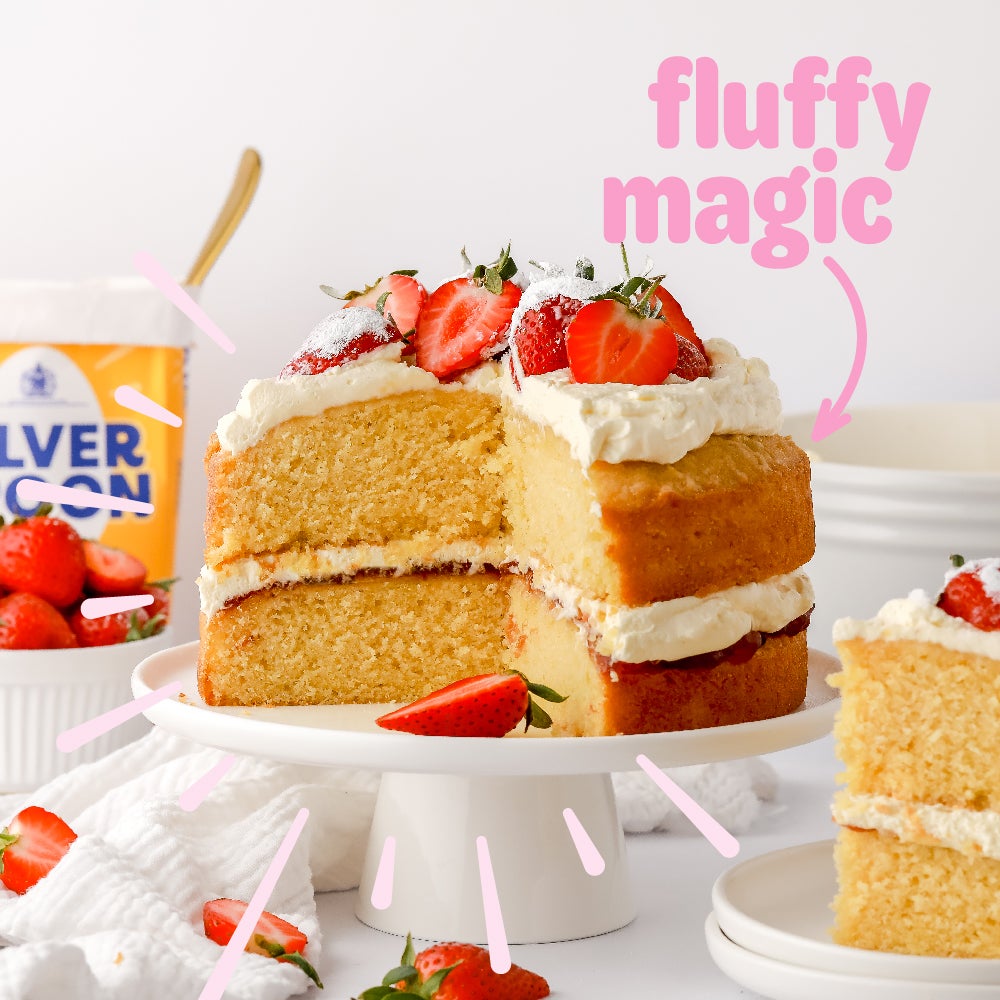
The Perfect Victoria Sponge Cake Recipe
Indulge in the classic delight of a homemade Victoria Sponge cake with this simple and delicious recipe. Whether you’re hosting a tea party or simply craving a sweet treat, this cake is sure to impress.
Ingredients:
- 200g unsalted butter, softened
- 200g caster sugar
- 4 medium eggs
- 200g self-raising flour
- 1 tsp baking powder
- 2 tbsp milk
- Raspberry jam and whipped cream, to fill
- Icing sugar, for dusting
Instructions:
- Preheat your oven to 180°C (160°C fan) and grease two 20cm round cake tins.
- In a large bowl, cream together the butter and sugar until light and fluffy.
- Add the eggs one at a time, beating well after each addition.
- Sift in the flour and baking powder, then gently fold into the mixture until well combined. Add the milk to loosen the batter slightly.
li>Divide the batter evenly between the prepared cake tins and smooth the tops with a spatula.
li>Bake in the preheated oven for 20-25 minutes or until golden and springy to the touch.
li>Allow the cakes to cool in their tins for 5 minutes before transferring them to a wire rack to cool completely.
li>To assemble the cake, spread raspberry jam on one layer and whipped cream on top of it. Place the second layer on top.
li>Dust with icing sugar before serving. Enjoy your delicious homemade Victoria Sponge cake!
This Victoria Sponge cake is a timeless classic that never fails to impress. With its light and fluffy texture complemented by sweet jam and cream filling, it’s perfect for any occasion. So why not roll up your sleeves, preheat that oven, and treat yourself to a slice of homemade goodness?
Bon appétit!
Essential Tips and Tricks for Perfecting Your Cake Baking Skills: Answers to Common Questions
- 1. How do I make a basic sponge cake?
- 2. What are the essential ingredients for a classic Victoria Sponge cake?
- 3. Can I substitute self-raising flour with plain flour in a cake recipe?
- 4. How can I prevent my cake from being too dry?
- 5. What is the best method for creaming butter and sugar when baking a cake?
- 6. How do I know when my cake is fully baked and ready to be taken out of the oven?
- 7. Is it necessary to preheat the oven before baking a cake?
- 8. What are some creative ideas for decorating a homemade cake?
- 9. Are there any tips for storing leftover cake to keep it fresh?
1. How do I make a basic sponge cake?
For those wondering how to make a basic sponge cake, the process is surprisingly straightforward. Start by creaming together softened butter and caster sugar until light and fluffy. Then, gradually add eggs one at a time, ensuring each is well incorporated. Sift in self-raising flour and baking powder, gently folding them into the mixture. A touch of milk can be added to achieve the desired consistency. Divide the batter between cake tins, bake until golden and springy, then allow to cool before filling with jam and cream. This simple recipe results in a light, airy sponge cake that is perfect for any occasion.
2. What are the essential ingredients for a classic Victoria Sponge cake?
When it comes to baking a classic Victoria Sponge cake, the essential ingredients you’ll need include unsalted butter for richness, caster sugar for sweetness, eggs for structure, self-raising flour for lightness, baking powder for a bit of lift, and a touch of milk to bring everything together. These key components come together to create a soft and moist sponge that serves as the perfect base for layering with raspberry jam and whipped cream. Mastering the balance of these ingredients is crucial in achieving that quintessential Victoria Sponge cake texture and flavour that everyone loves.
3. Can I substitute self-raising flour with plain flour in a cake recipe?
When it comes to baking cakes, the choice between self-raising flour and plain flour can impact the texture and rise of your final product. While self-raising flour already contains a raising agent, such as baking powder, plain flour does not. If you find yourself without self-raising flour, you can create a substitute by adding baking powder to plain flour. However, it’s essential to adjust the quantities carefully to ensure the right balance of ingredients for your cake recipe. Experimenting with different flour options can lead to variations in texture and density, so it’s advisable to follow the recipe closely for best results.
4. How can I prevent my cake from being too dry?
To prevent your cake from turning out too dry, there are a few key tips to keep in mind. Firstly, make sure not to overmix the batter, as this can result in a tough and dry texture. Be sure to measure your ingredients accurately and follow the recipe instructions closely. Additionally, avoid overbaking the cake by regularly checking it towards the end of the baking time and using a toothpick to test for doneness. If the toothpick comes out clean with a few crumbs attached, it’s ready to be taken out of the oven. Lastly, consider adding ingredients like sour cream, buttermilk, or applesauce to help maintain moisture in your cake. By following these guidelines, you can ensure a moist and delicious cake every time you bake.
5. What is the best method for creaming butter and sugar when baking a cake?
When baking a cake, the best method for creaming butter and sugar is to ensure that the butter is at room temperature for optimal results. Start by placing softened unsalted butter and caster sugar in a mixing bowl. Using an electric mixer or wooden spoon, beat the butter and sugar together until light and fluffy. This process incorporates air into the mixture, resulting in a lighter texture for your cake. It is essential to cream the butter and sugar adequately to create a smooth and uniform base for your cake batter, which will ultimately contribute to a moist and tender crumb in the finished cake.
6. How do I know when my cake is fully baked and ready to be taken out of the oven?
To determine if your cake is fully baked and ready to be taken out of the oven, you can use a few simple techniques. Firstly, check the colour of the cake – it should be golden brown and evenly baked. You can also insert a skewer or toothpick into the centre of the cake; if it comes out clean with no wet batter sticking to it, your cake is likely done. Additionally, gently press the top of the cake – if it springs back when touched, it’s a good indicator that it’s fully baked. Remember that every oven is different, so keep an eye on your cake towards the end of the baking time to ensure it is not overcooked.
7. Is it necessary to preheat the oven before baking a cake?
Preheating the oven before baking a cake is essential for achieving the best results. A preheated oven ensures that the cake batter starts to cook immediately upon entering the oven, helping the cake rise evenly and develop the desired texture. Without preheating, the baking time and temperature may be inconsistent, leading to an undercooked or unevenly baked cake. Therefore, to ensure your cake bakes perfectly and turns out delicious every time, it is highly recommended to preheat your oven before starting the baking process.
8. What are some creative ideas for decorating a homemade cake?
When it comes to decorating a homemade cake, the possibilities are endless for unleashing your creativity. Some innovative ideas include using fresh fruits like berries or citrus slices as vibrant toppings, creating intricate designs with piped buttercream frosting, or adding edible flowers for a touch of elegance. Alternatively, you can experiment with chocolate ganache drips, colourful sprinkles, or even personalised fondant decorations to make your cake truly unique and visually stunning. Let your imagination run wild and have fun turning your homemade creation into a work of art that not only tastes delicious but also looks absolutely spectacular.
9. Are there any tips for storing leftover cake to keep it fresh?
When it comes to storing leftover cake to maintain its freshness, there are a few handy tips to keep in mind. Firstly, ensure that the cake is completely cooled before storing it. Once cooled, wrap the cake tightly in cling film or place it in an airtight container to prevent it from drying out. For cakes with frosting, refrigeration may be necessary to preserve the frosting’s texture. If you plan to store the cake for an extended period, consider freezing individual slices wrapped in parchment paper and placed in a freezer-safe bag. By following these storage tips, you can enjoy your leftover cake for longer while still savoring its delicious taste and texture.