Delightful Homemade Cake Recipe: A Guide to Baking Sweet Perfection

cake recipe

The Perfect Victoria Sponge Cake Recipe

Indulge in the classic delight of a homemade Victoria Sponge cake with this simple and delicious recipe. Whether you’re hosting a tea party or simply craving a sweet treat, this cake is sure to impress.

Ingredients:

  • 200g unsalted butter, softened
  • 200g caster sugar
  • 4 medium eggs
  • 200g self-raising flour
  • 1 tsp baking powder
  • 2 tbsp milk
  • Raspberry jam and whipped cream, to fill
  • Icing sugar, for dusting

Instructions:

  1. Preheat your oven to 180°C (160°C fan) and grease two 20cm round cake tins.
  2. In a large bowl, cream together the butter and sugar until light and fluffy.
  3. Add the eggs one at a time, beating well after each addition.
  4. Sift in the flour and baking powder, then gently fold into the mixture until well combined. Add the milk to loosen the batter slightly.

    li>Divide the batter evenly between the prepared cake tins and smooth the tops with a spatula.

    li>Bake in the preheated oven for 20-25 minutes or until golden and springy to the touch.

    li>Allow the cakes to cool in their tins for 5 minutes before transferring them to a wire rack to cool completely.

    li>To assemble the cake, spread raspberry jam on one layer and whipped cream on top of it. Place the second layer on top.

    li>Dust with icing sugar before serving. Enjoy your delicious homemade Victoria Sponge cake!

This Victoria Sponge cake is a timeless classic that never fails to impress. With its light and fluffy texture complemented by sweet jam and cream filling, it’s perfect for any occasion. So why not roll up your sleeves, preheat that oven, and treat yourself to a slice of homemade goodness?

Bon appétit!


Essential Tips and Tricks for Perfecting Your Cake Baking Skills: Answers to Common Questions

  1. 1. How do I make a basic sponge cake?
  2. 2. What are the essential ingredients for a classic Victoria Sponge cake?
  3. 3. Can I substitute self-raising flour with plain flour in a cake recipe?
  4. 4. How can I prevent my cake from being too dry?
  5. 5. What is the best method for creaming butter and sugar when baking a cake?
  6. 6. How do I know when my cake is fully baked and ready to be taken out of the oven?
  7. 7. Is it necessary to preheat the oven before baking a cake?
  8. 8. What are some creative ideas for decorating a homemade cake?
  9. 9. Are there any tips for storing leftover cake to keep it fresh?

1. How do I make a basic sponge cake?

For those wondering how to make a basic sponge cake, the process is surprisingly straightforward. Start by creaming together softened butter and caster sugar until light and fluffy. Then, gradually add eggs one at a time, ensuring each is well incorporated. Sift in self-raising flour and baking powder, gently folding them into the mixture. A touch of milk can be added to achieve the desired consistency. Divide the batter between cake tins, bake until golden and springy, then allow to cool before filling with jam and cream. This simple recipe results in a light, airy sponge cake that is perfect for any occasion.

2. What are the essential ingredients for a classic Victoria Sponge cake?

When it comes to baking a classic Victoria Sponge cake, the essential ingredients you’ll need include unsalted butter for richness, caster sugar for sweetness, eggs for structure, self-raising flour for lightness, baking powder for a bit of lift, and a touch of milk to bring everything together. These key components come together to create a soft and moist sponge that serves as the perfect base for layering with raspberry jam and whipped cream. Mastering the balance of these ingredients is crucial in achieving that quintessential Victoria Sponge cake texture and flavour that everyone loves.

3. Can I substitute self-raising flour with plain flour in a cake recipe?

When it comes to baking cakes, the choice between self-raising flour and plain flour can impact the texture and rise of your final product. While self-raising flour already contains a raising agent, such as baking powder, plain flour does not. If you find yourself without self-raising flour, you can create a substitute by adding baking powder to plain flour. However, it’s essential to adjust the quantities carefully to ensure the right balance of ingredients for your cake recipe. Experimenting with different flour options can lead to variations in texture and density, so it’s advisable to follow the recipe closely for best results.

4. How can I prevent my cake from being too dry?

To prevent your cake from turning out too dry, there are a few key tips to keep in mind. Firstly, make sure not to overmix the batter, as this can result in a tough and dry texture. Be sure to measure your ingredients accurately and follow the recipe instructions closely. Additionally, avoid overbaking the cake by regularly checking it towards the end of the baking time and using a toothpick to test for doneness. If the toothpick comes out clean with a few crumbs attached, it’s ready to be taken out of the oven. Lastly, consider adding ingredients like sour cream, buttermilk, or applesauce to help maintain moisture in your cake. By following these guidelines, you can ensure a moist and delicious cake every time you bake.

5. What is the best method for creaming butter and sugar when baking a cake?

When baking a cake, the best method for creaming butter and sugar is to ensure that the butter is at room temperature for optimal results. Start by placing softened unsalted butter and caster sugar in a mixing bowl. Using an electric mixer or wooden spoon, beat the butter and sugar together until light and fluffy. This process incorporates air into the mixture, resulting in a lighter texture for your cake. It is essential to cream the butter and sugar adequately to create a smooth and uniform base for your cake batter, which will ultimately contribute to a moist and tender crumb in the finished cake.

6. How do I know when my cake is fully baked and ready to be taken out of the oven?

To determine if your cake is fully baked and ready to be taken out of the oven, you can use a few simple techniques. Firstly, check the colour of the cake – it should be golden brown and evenly baked. You can also insert a skewer or toothpick into the centre of the cake; if it comes out clean with no wet batter sticking to it, your cake is likely done. Additionally, gently press the top of the cake – if it springs back when touched, it’s a good indicator that it’s fully baked. Remember that every oven is different, so keep an eye on your cake towards the end of the baking time to ensure it is not overcooked.

7. Is it necessary to preheat the oven before baking a cake?

Preheating the oven before baking a cake is essential for achieving the best results. A preheated oven ensures that the cake batter starts to cook immediately upon entering the oven, helping the cake rise evenly and develop the desired texture. Without preheating, the baking time and temperature may be inconsistent, leading to an undercooked or unevenly baked cake. Therefore, to ensure your cake bakes perfectly and turns out delicious every time, it is highly recommended to preheat your oven before starting the baking process.

8. What are some creative ideas for decorating a homemade cake?

When it comes to decorating a homemade cake, the possibilities are endless for unleashing your creativity. Some innovative ideas include using fresh fruits like berries or citrus slices as vibrant toppings, creating intricate designs with piped buttercream frosting, or adding edible flowers for a touch of elegance. Alternatively, you can experiment with chocolate ganache drips, colourful sprinkles, or even personalised fondant decorations to make your cake truly unique and visually stunning. Let your imagination run wild and have fun turning your homemade creation into a work of art that not only tastes delicious but also looks absolutely spectacular.

9. Are there any tips for storing leftover cake to keep it fresh?

When it comes to storing leftover cake to maintain its freshness, there are a few handy tips to keep in mind. Firstly, ensure that the cake is completely cooled before storing it. Once cooled, wrap the cake tightly in cling film or place it in an airtight container to prevent it from drying out. For cakes with frosting, refrigeration may be necessary to preserve the frosting’s texture. If you plan to store the cake for an extended period, consider freezing individual slices wrapped in parchment paper and placed in a freezer-safe bag. By following these storage tips, you can enjoy your leftover cake for longer while still savoring its delicious taste and texture.

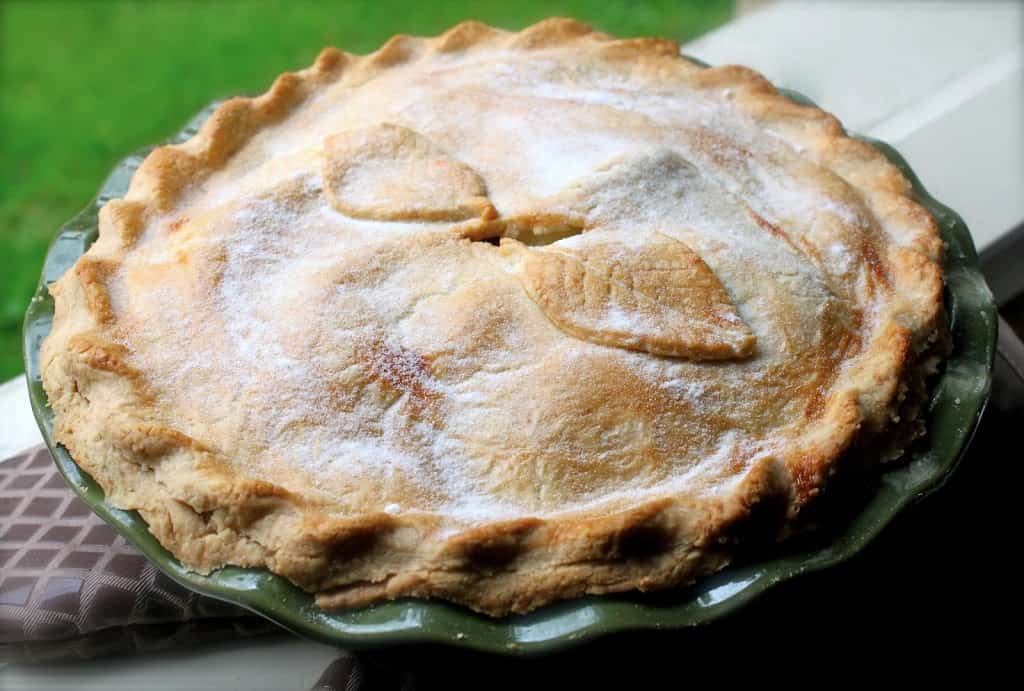
The Ultimate Guide to the Best Apple Pie Recipe: A Delicious Classic

best apple pie recipe

The Best Apple Pie Recipe: A Delicious Classic

There’s nothing quite like a homemade apple pie – the perfect combination of sweet, tangy apples and buttery pastry. If you’re looking to impress your friends and family with a classic dessert, look no further than this tried and tested apple pie recipe.

Ingredients:

  • 6-7 large apples, peeled, cored, and sliced
  • 1 cup granulated sugar
  • 1/4 cup all-purpose flour
  • 1 teaspoon ground cinnamon
  • 1/4 teaspoon ground nutmeg
  • A pinch of salt
  • 2 tablespoons butter, diced
  • 2 9-inch pie crusts (homemade or store-bought)

Instructions:

  1. Preheat your oven to 200°C (400°F).
  2. In a large bowl, combine the sliced apples, sugar, flour, cinnamon, nutmeg, and salt. Mix well to coat the apples evenly.
  3. Place one pie crust in a 9-inch pie dish. Fill it with the apple mixture and dot with diced butter.
  4. Cover the filling with the second pie crust. Seal the edges by crimping them together with a fork or your fingers.
  5. Cut slits in the top crust to allow steam to escape during baking.
  6. Bake the pie for 45-50 minutes or until the crust is golden brown and the filling is bubbling.

This apple pie is best served warm with a scoop of vanilla ice cream or a dollop of whipped cream. Enjoy this timeless dessert that never fails to delight!

Bon appétit!


Unveiling the Secrets: FAQs on Crafting the Perfect Apple Pie

  1. Why does McDonald’s apple pie taste so good?
  2. What are the common mistakes when baking apple pie?
  3. What is the secret to a perfect apple pie?
  4. Why are McDonald’s apple pies so good?
  5. What is the secret to a good apple pie?
  6. What is the secret ingredient in apple pie?
  7. Should you cook apples before putting them in a pie?
  8. What is the best thickener for apple pie filling?

Why does McDonald’s apple pie taste so good?

The secret to why McDonald’s apple pie tastes so good lies in its unique blend of flavours and textures. McDonald’s apple pie is known for its crispy, golden-brown pastry that encases tender, sweetened apple filling. The combination of warm cinnamon-spiced apples and flaky crust creates a comforting and familiar taste that appeals to many. Additionally, the convenience and consistency of McDonald’s apple pie have made it a popular choice for those craving a delicious dessert on the go.

What are the common mistakes when baking apple pie?

When baking an apple pie, there are a few common mistakes that can easily be made. One of the most frequent errors is not properly pre-cooking the apples before baking the pie, which can result in unevenly cooked or crunchy apples. Another mistake is overloading the pie with filling, causing it to overflow and make a mess in the oven. Using a soggy bottom crust or not sealing the edges properly can also lead to a less-than-perfect apple pie. Lastly, failing to allow the pie to cool sufficiently before slicing into it can result in a runny filling. By being mindful of these common pitfalls, you can ensure your apple pie turns out beautifully every time.

What is the secret to a perfect apple pie?

When it comes to achieving the perfect apple pie, the secret lies in striking the ideal balance of flavours and textures. The key is to use a combination of sweet and tart apples for depth of flavour, along with just the right amount of sugar and spices to enhance the natural sweetness of the fruit. Additionally, ensuring that the pie crust is flaky and buttery is essential to complementing the juicy apple filling. Attention to detail in every step, from selecting high-quality ingredients to mastering the baking process, is what sets apart a truly exceptional apple pie.

Why are McDonald’s apple pies so good?

McDonald’s apple pies have gained popularity for their unique appeal due to a combination of factors. The crispy, flaky crust encasing the sweet, cinnamon-spiced apple filling creates a comforting and familiar taste that many enjoy. Additionally, the convenience and consistency of McDonald’s apple pies make them a convenient treat for on-the-go snacking. The nostalgic charm of this classic dessert, coupled with its affordability and accessibility at McDonald’s outlets worldwide, contributes to why many people find McDonald’s apple pies so appealing and satisfying.

What is the secret to a good apple pie?

When it comes to creating a truly exceptional apple pie, the secret lies in achieving the perfect balance of flavours and textures. The key to a good apple pie is selecting the right variety of apples – opt for a mix of sweet and tart apples for a well-rounded taste. Additionally, incorporating just the right amount of spices like cinnamon and nutmeg can elevate the flavour profile. Lastly, ensuring that the pastry is flaky and buttery, while also properly sealing the pie to prevent sogginess, is crucial in creating a delicious apple pie that will have everyone coming back for more.

What is the secret ingredient in apple pie?

When it comes to the secret ingredient in apple pie, the answer often lies in a delicate balance of spices. While some may swear by a hint of lemon juice or a splash of vanilla extract, the true magic of a delicious apple pie is often found in the perfect blend of cinnamon and nutmeg. These warm, aromatic spices not only enhance the natural sweetness of the apples but also add depth and complexity to the flavour profile. So, if you’re looking to elevate your apple pie game, don’t underestimate the power of these classic spices as they work their magic in every slice.

Should you cook apples before putting them in a pie?

When considering whether to cook apples before putting them in a pie, it ultimately depends on personal preference and the desired texture of the final dish. Cooking the apples beforehand can help soften them and release their juices, resulting in a more tender filling. However, some recipes call for using raw apples to retain a firmer texture and more distinct apple flavor. Experimenting with both methods can help you determine which approach suits your taste preferences best when baking the perfect apple pie.

What is the best thickener for apple pie filling?

When it comes to achieving the perfect consistency for apple pie filling, the best thickener to use is often a matter of personal preference. However, one of the most commonly recommended thickeners for apple pie filling is all-purpose flour. Flour helps to absorb excess liquid from the apples as they bake, resulting in a thick and gooey filling that holds together well. Alternatively, cornstarch is another popular option as it creates a clear and glossy filling without altering the taste of the apples. Experimenting with different thickeners can help you find the ideal texture that suits your taste buds when making a delicious apple pie.

Delicious Homemade Barbecue Sauce Recipe for Your Grilling Delights

barbecue sauce recipe

The Perfect BBQ Sauce Recipe for Your Grilling Adventures

One of the essential elements of a successful barbecue is the sauce that coats your meats, adding flavour and depth to every bite. Making your own BBQ sauce at home is not only easy but also allows you to customise it to suit your taste preferences. Here’s a delicious recipe for a classic barbecue sauce that will elevate your grilling game:

Ingredients:

  • 1 cup ketchup
  • 1/2 cup brown sugar
  • 1/4 cup apple cider vinegar
  • 2 tablespoons Worcestershire sauce
  • 1 tablespoon Dijon mustard
  • 1 teaspoon garlic powder
  • 1 teaspoon onion powder
  • Salt and pepper to taste

Instructions:

  1. In a saucepan, combine the ketchup, brown sugar, apple cider vinegar, Worcestershire sauce, Dijon mustard, garlic powder, and onion powder.
  2. Cook over medium heat, stirring occasionally, until the mixture comes to a simmer.
  3. Reduce the heat to low and let the sauce simmer for about 10-15 minutes, allowing the flavours to meld together.
  4. Taste the sauce and adjust the seasoning with salt and pepper according to your preference.
  5. Your homemade BBQ sauce is now ready to be slathered on ribs, chicken, or burgers during your next grilling session. Store any leftover sauce in an airtight container in the refrigerator for up to a week.

Experiment with additional ingredients such as honey for sweetness or cayenne pepper for heat to create your signature barbecue sauce. Whether you prefer tangy or sweet flavours, this versatile recipe can be adapted to suit any palate. Enjoy!


7 Benefits of a Homemade Barbecue Sauce Recipe for Flavourful Grilling

  1. Enhances the flavour of grilled meats and vegetables
  2. Allows for customisation to suit personal taste preferences
  3. Simple and easy to make at home with basic ingredients
  4. Adds a delicious finishing touch to barbecue dishes
  5. Provides a tangy, sweet, or spicy element to your meals
  6. Can be stored for future use, making meal prep convenient
  7. Offers versatility in pairing with various grilled foods


Challenges of Crafting the Perfect Homemade Barbecue Sauce

  1. Homemade barbecue sauce can be time-consuming to prepare, especially if you prefer a more complex flavour profile.
  2. Some ingredients required for BBQ sauce may not be readily available in all households, leading to additional shopping trips.
  3. Adjusting the seasoning of homemade BBQ sauce to achieve the perfect balance of flavours can be challenging for inexperienced cooks.

Enhances the flavour of grilled meats and vegetables

Indulge your taste buds with the delectable enhancement that homemade barbecue sauce brings to your grilled meats and vegetables. This flavourful concoction adds a tantalising depth to every bite, elevating the natural goodness of your favourite grilled dishes. Whether generously brushed over succulent meats or drizzled on charred vegetables, this versatile sauce is sure to delight your palate and take your BBQ experience to a whole new level.

Allows for customisation to suit personal taste preferences

The beauty of making your own barbecue sauce at home lies in its versatility, allowing you to tailor the flavours to perfectly match your personal taste preferences. By adjusting the levels of sweetness, tanginess, spiciness, or smokiness, you can create a customised sauce that complements your grilled meats just the way you like it. Whether you prefer a sweeter profile with a hint of heat or a tangy and robust sauce, the ability to customise every ingredient ensures that your barbecue experience is truly tailored to your liking.

Simple and easy to make at home with basic ingredients

Creating your own barbecue sauce at home is a delightful experience, thanks to its simplicity and ease of preparation using basic ingredients. With just a few pantry staples like ketchup, brown sugar, vinegar, and spices, you can whip up a delicious sauce that enhances the flavour of your grilled dishes. This accessible recipe empowers you to customise the sauce to your liking while ensuring a homemade touch that elevates your barbecue to a whole new level.

Adds a delicious finishing touch to barbecue dishes

Enhancing the flavour profile of grilled meats and vegetables, a homemade barbecue sauce serves as the perfect finishing touch to elevate your barbecue dishes. Its rich and tangy notes complement the smoky essence of barbecued fare, adding a layer of depth and complexity that tantalises the taste buds. Whether brushed onto ribs, drizzled over burgers, or used as a dipping sauce for chicken skewers, the addition of this delectable condiment enhances the overall dining experience, turning a simple meal into a culinary delight that is sure to impress guests and family alike.

Provides a tangy, sweet, or spicy element to your meals

Elevate your meals with the versatile barbecue sauce recipe that offers a delightful blend of tangy, sweet, or spicy flavours. Whether you crave a zesty kick, a hint of sweetness, or a fiery heat, this sauce has got you covered. With just a drizzle or generous slather of this homemade concoction, your dishes will be transformed into mouth-watering delights that tantalize your taste buds with every bite.

Can be stored for future use, making meal prep convenient

By preparing your own barbecue sauce using this recipe, you can enjoy the convenience of storing it for future use, simplifying meal prep and saving time in the kitchen. Having a batch of homemade BBQ sauce readily available allows you to effortlessly enhance the flavour of your grilled dishes whenever needed. Simply store the sauce in an airtight container in the refrigerator, and you’ll have a delicious condiment on hand to elevate your meals with minimal effort. This added convenience ensures that you can enjoy the rich flavours of homemade barbecue sauce whenever cravings strike, making cooking and meal planning a breeze.

Offers versatility in pairing with various grilled foods

The beauty of this barbecue sauce recipe lies in its versatility, offering a perfect complement to a wide range of grilled foods. Whether you’re grilling succulent ribs, juicy chicken, or flavourful burgers, this sauce enhances the taste of each dish with its rich and tangy flavour profile. Its adaptability allows it to pair seamlessly with different meats and vegetables, making it a go-to condiment for all your grilling adventures. With this sauce in your culinary arsenal, you can effortlessly elevate the taste of any grilled dish and delight your taste buds with each bite.

Homemade barbecue sauce can be time-consuming to prepare, especially if you prefer a more complex flavour profile.

Creating your own homemade barbecue sauce can be a time-consuming process, particularly if you are aiming for a more intricate and nuanced flavour profile. The careful selection and combination of various ingredients, along with the simmering and blending process, can require a significant amount of time and effort. However, the end result is often well worth the investment, as the depth of flavour and personal touch that comes with homemade barbecue sauce can truly elevate your grilling experience to a whole new level.

Some ingredients required for BBQ sauce may not be readily available in all households, leading to additional shopping trips.

When preparing a barbecue sauce from scratch, one potential drawback is that some of the ingredients needed may not be commonly found in every household pantry. This can result in the need for additional shopping trips to acquire items such as Worcestershire sauce, Dijon mustard, or apple cider vinegar. While these ingredients enhance the flavour profile of the sauce, their availability may vary, requiring extra effort to source them before embarking on the recipe. Despite this inconvenience, the end result of a homemade barbecue sauce is often well worth the extra steps taken to gather all the necessary components.

Adjusting the seasoning of homemade BBQ sauce to achieve the perfect balance of flavours can be challenging for inexperienced cooks.

Achieving the ideal balance of flavours in homemade BBQ sauce by adjusting the seasoning can present a challenge for inexperienced cooks. The intricate interplay of sweet, tangy, spicy, and savoury elements requires a delicate touch and a nuanced palate to ensure that the sauce strikes the right chord. For those new to crafting their own barbecue sauces, experimenting with different seasonings in small increments and tasting along the way can help in mastering the art of flavour harmonisation. With practice and patience, even novice cooks can gradually develop the skills needed to create a personalised BBQ sauce that hits all the right notes.

Authentic Pizza Recipe: A Taste of Italy in Your Kitchen

pizza recipe

The Perfect Pizza Recipe

Who can resist the delicious combination of gooey cheese, tangy tomato sauce, and a crispy crust? Pizza is a beloved dish enjoyed by people all around the world. Making your own pizza at home is not only fun but also allows you to customize it to your liking. Here’s a simple yet mouth-watering pizza recipe that will have you coming back for more.

Ingredients:

  • 300g strong white bread flour
  • 1 tsp instant yeast
  • 1 tsp salt
  • 1 tbsp olive oil
  • 200ml passata
  • A handful of fresh basil leaves
  • 125g mozzarella, torn into small pieces
  • A handful of cherry tomatoes, halved
  • A drizzle of olive oil
  • Salt and pepper to taste

Instructions:

  1. In a bowl, mix the flour, yeast, and salt. Add the olive oil and 200ml warm water. Mix until it forms a dough.
  2. Knead the dough on a floured surface for about 10 minutes until smooth and elastic. Place in a lightly oiled bowl, cover with a tea towel, and leave to rise for 1 hour.
  3. Preheat your oven to 240°C/fan 220°C/gas mark 8. Roll out the dough on a floured surface to your desired thickness.


    Spread the passata over the base, leaving a small border for the crust. Tear the basil leaves over the sauce.


    Scatter over the mozzarella pieces and cherry tomatoes. Drizzle with olive oil and season with salt and pepper.


    Bake in the preheated oven for 8-10 minutes or until the crust is golden and crispy.


Essential Tips and FAQs for Perfecting Your Homemade Pizza Recipe

  1. 1. How do I make pizza dough from scratch?
  2. 2. What is the best flour to use for pizza dough?
  3. 3. How long should I let the pizza dough rise?
  4. 4. Can I use a different sauce instead of passata for my pizza?
  5. 5. What are some popular pizza topping combinations?
  6. 6. How can I achieve a crispy crust on my homemade pizza?
  7. 7. Is it necessary to preheat the oven before baking the pizza?

1. How do I make pizza dough from scratch?

For those eager to create their own pizza dough from scratch, the process is simpler than you might think. To start, combine strong white bread flour with instant yeast and a pinch of salt in a bowl. Add a generous drizzle of olive oil and warm water to the mixture, stirring until it forms a cohesive dough. Knead the dough on a floured surface for around 10 minutes until it becomes smooth and elastic. Let the dough rise in a lightly oiled bowl for about an hour until it doubles in size. Once risen, roll out the dough to your desired thickness before adding your favourite toppings for a truly homemade pizza experience.

2. What is the best flour to use for pizza dough?

When it comes to making the perfect pizza dough, choosing the right flour is crucial. The best flour to use for pizza dough is strong white bread flour. This type of flour has a higher protein content compared to all-purpose flour, which helps create a chewy and elastic texture in the dough once baked. Strong white bread flour also provides better structure and rise, resulting in a crispy yet airy crust that complements the toppings beautifully. Its versatility and ability to hold up well to high temperatures make it a popular choice among pizza enthusiasts looking to achieve that authentic pizzeria taste at home.

3. How long should I let the pizza dough rise?

When it comes to letting pizza dough rise, the ideal duration can vary depending on the recipe and desired crust texture. In general, allowing the pizza dough to rise for about 1 to 2 hours at room temperature can help develop flavour and create a light and airy crust. However, some recipes may call for longer proofing times in the fridge to enhance the dough’s structure and taste. It’s essential to follow the specific instructions provided in your chosen recipe to achieve the perfect balance of flavours and textures in your homemade pizza.

4. Can I use a different sauce instead of passata for my pizza?

For those looking to experiment with different flavours, substituting passata with an alternative sauce can offer a unique twist to your pizza recipe. While passata provides a traditional tomato base, options like pesto, barbecue sauce, or even a creamy white sauce can add a whole new dimension of taste to your pizza. The choice of sauce can greatly influence the overall flavour profile of the dish, allowing for endless creative possibilities to cater to individual preferences and culinary creativity.

When it comes to popular pizza topping combinations, the options are endless and can cater to a wide range of tastes. Classic choices like pepperoni and mushroom, margherita with fresh basil and mozzarella, or Hawaiian with ham and pineapple are always crowd-pleasers. For those craving a more gourmet experience, toppings like prosciutto and arugula, BBQ chicken with red onions, or a Mediterranean mix of olives, feta cheese, and sun-dried tomatoes offer a delicious twist. Whether you prefer traditional flavours or more adventurous blends, experimenting with different topping combinations is part of the fun of creating your perfect pizza.

6. How can I achieve a crispy crust on my homemade pizza?

To achieve a crispy crust on your homemade pizza, there are a few key tips to keep in mind. Firstly, make sure to preheat your oven to a high temperature, around 240°C/fan 220°C/gas mark 8, as this will help create that desired crispiness. Secondly, roll out your pizza dough thinly and evenly to ensure even cooking and a crunchy base. Additionally, using a pizza stone or baking tray preheated in the oven can help mimic the effect of a traditional pizza oven and result in a crispier crust. Finally, avoid overloading your pizza with toppings, as excess moisture can make the crust soggy – instead, opt for a balance of ingredients that enhance flavour without compromising texture. By following these steps, you can enjoy a delicious homemade pizza with a perfectly crispy crust every time.

7. Is it necessary to preheat the oven before baking the pizza?

Preheating the oven before baking a pizza is crucial to achieving the perfect result. By preheating the oven, you ensure that the cooking temperature is consistent from the moment you place the pizza inside. This helps in creating a crispy crust while ensuring that the toppings cook evenly. Without preheating, the pizza may not cook properly, resulting in a soggy or undercooked base. Therefore, to enjoy a delicious and well-cooked pizza, it is highly recommended to preheat your oven before baking.