Gluten Free Pie Crust: A Reliable Guide to Tender, Crisp Pastry
gluten free pie crust

Gluten-Free Pie Crust: A Reliable Guide

A good pie crust should be tender, crisp and easy to handle. Making one without gluten takes a little care, as gluten-free pastry can be more delicate and prone to cracking. The right flour blend, cold ingredients and a brief rest in the fridge all help create a crust that is both flavourful and practical to work with.

Ingredients

This recipe makes enough pastry for one 23cm pie dish, with a top and base, or one larger tart shell.

  • 300g gluten-free plain flour blend, ideally one containing xanthan gum
  • ½ teaspoon fine salt
  • 1 teaspoon caster sugar, optional for a sweet pie
  • 150g cold unsalted butter, cut into small cubes
  • 1 medium egg
  • 2–4 tablespoons cold water

How to Make Gluten-Free Pie Crust

  1. Combine the dry ingredients. Put the flour, salt and sugar, if using, in a large bowl and mix well.
  2. Rub in the butter. Add the cold butter and rub it into the flour with your fingertips until the mixture resembles coarse breadcrumbs. You can also use a food processor, pulsing briefly.
  3. Bring the dough together. Beat the egg and stir it into the flour mixture. Add cold water a tablespoon at a time, mixing just until the dough holds together when pressed. It may feel softer or slightly more fragile than wheat pastry.
  4. Chill. Shape the dough into a flat disc, wrap it and refrigerate for at least 30 minutes. This firms the butter and makes the pastry easier to roll.
  5. Roll the pastry. Place the dough between two sheets of baking paper and roll it out to around 3mm thick. The paper helps prevent sticking and makes it easier to lift the pastry into the tin.
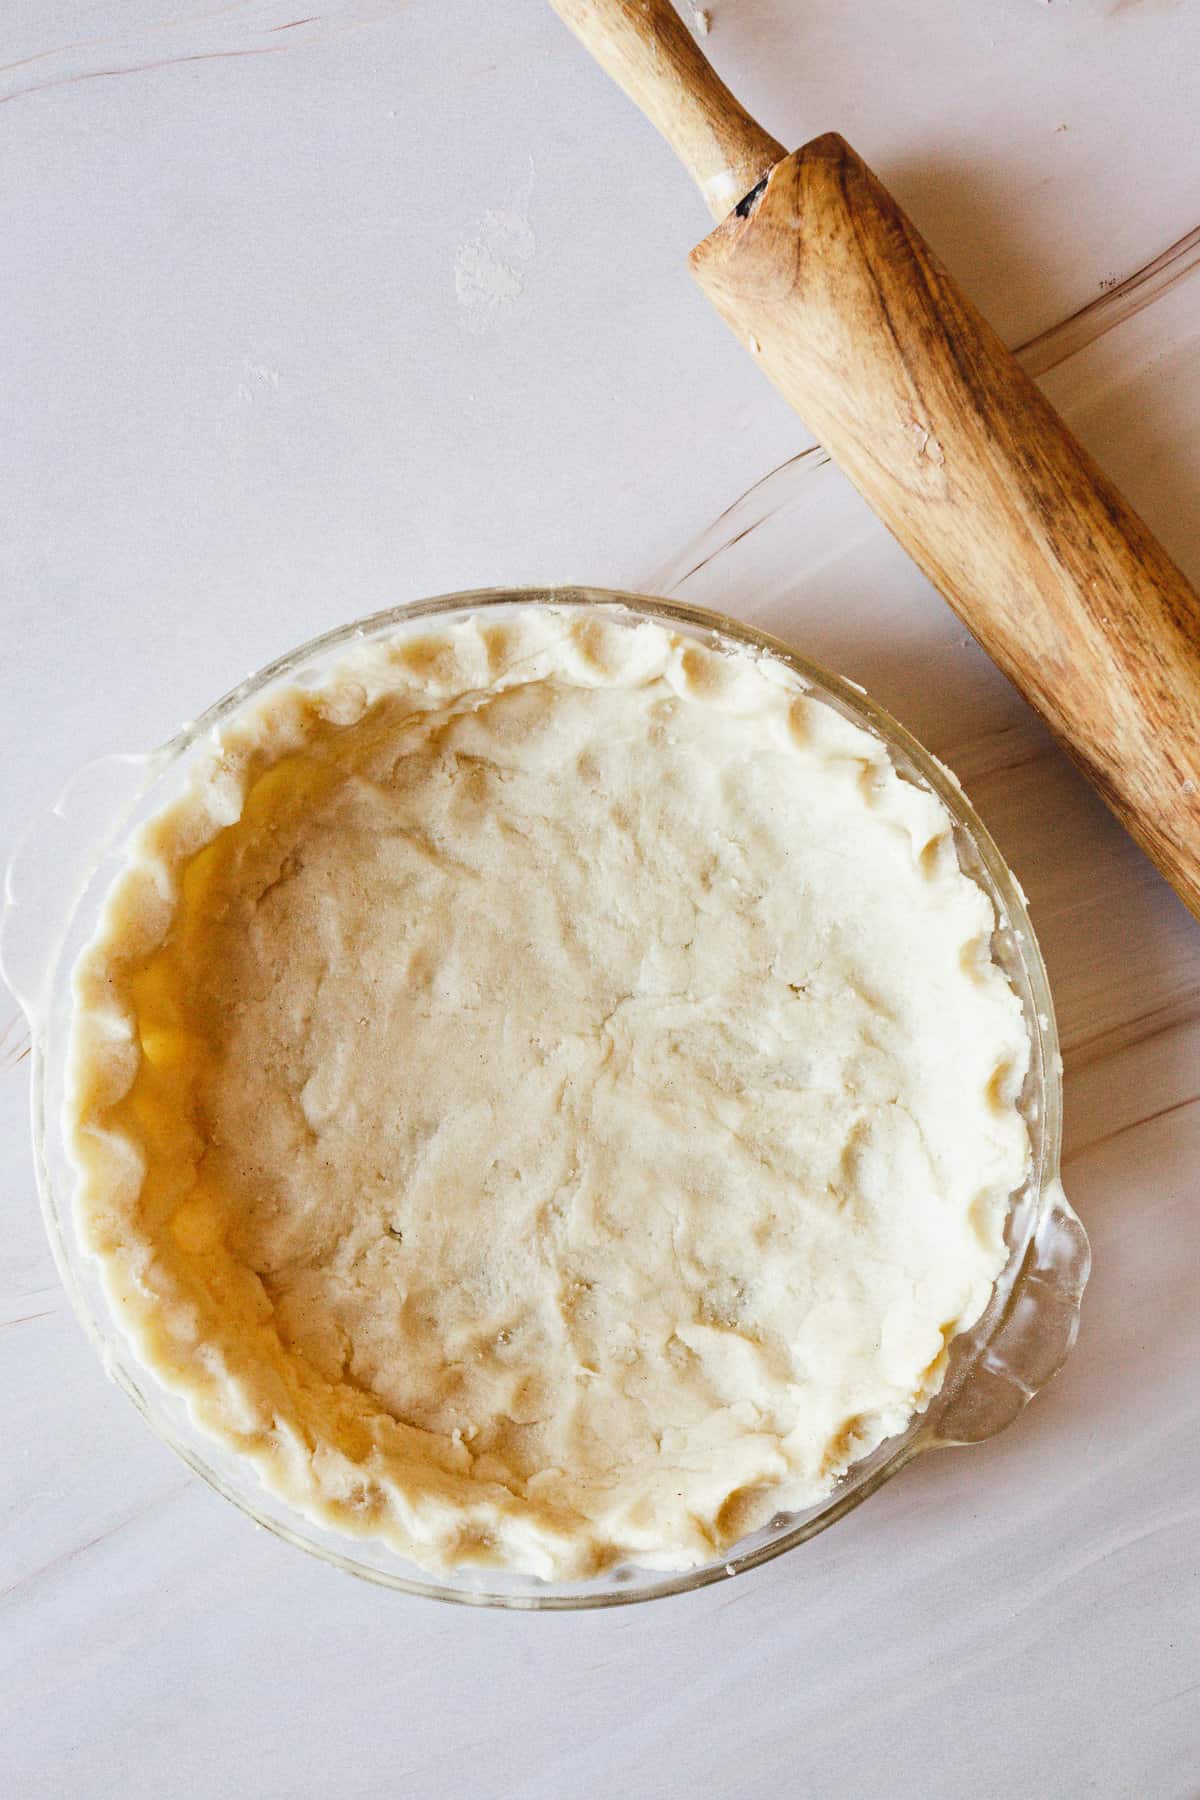
  6. Line the tin. Remove the top sheet of paper, then use the lower sheet to help turn the pastry into the pie dish. Press it gently into the base and sides. Patch any cracks with small pieces of dough, pressing the joins together.
  7. Fill or blind bake. For a filled pie, add your filling and bake according to the recipe. For an unfilled shell, prick the base with a fork, line it with baking paper and fill with baking beans. Bake at 180°C fan (200°C conventional) for 15 minutes, remove the paper and beans, then bake for a further 5–10 minutes until lightly golden.

Tips for Better Gluten-Free Pastry

  • Check your flour blend. Gluten-free blends vary. If yours does not contain xanthan gum, add about ½ teaspoon to help the dough hold together.
  • Keep everything cool. Warm butter can make pastry greasy and difficult to handle. If the dough becomes soft while rolling, chill it again briefly.
  • Avoid adding too much water. Add it gradually. The dough should come together when pressed, rather than feel wet or sticky.
  • Roll between baking paper. Gluten-free dough can crack more easily than conventional pastry, so this simple step makes it easier to transfer.
  • Let it rest after baking. Allow the crust to cool slightly before cutting so it has time to firm up.

Sweet and Savoury Variations

For a sweet crust, include the caster sugar and add a little lemon zest or vanilla. For a savoury pie, leave out the sugar and add a pinch of black pepper, dried herbs or finely grated hard cheese. If you are cooking for someone with coeliac disease, check that every ingredient is labelled gluten-free and take care to avoid cross-contamination from worktops, utensils and baking tins.

With a little patience and careful handling, gluten-free pie crust can make a crisp, satisfying base for everything from fruit pies to quiches. The key is to keep the dough cool, roll it between sheets of paper and patch any small cracks rather than overworking it.


Essential Tips for Perfecting Your Gluten-Free Pie Crust: Answering Common Questions

  1. What is the best flour to use for gluten-free pie crust?
  2. Why does my gluten-free pie crust crumble or crack?
  3. How can I stop gluten-free pastry from sticking when I roll it out?
  4. Does gluten-free pie crust need xanthan gum?
  5. Can I make gluten-free pie crust without butter?
  6. Should gluten-free pie crust be chilled before baking?
  7. How do I blind bake a gluten-free pie crust?
  8. Can gluten-free pie crust be made ahead or frozen?

What is the best flour to use for gluten-free pie crust?

The best choice is usually a good-quality gluten-free plain flour blend designed for baking, ideally one that contains xanthan gum to help bind the pastry and make it easier to roll. Blends vary, so choose one with a fine texture and follow the recipe’s guidance; if the flour does not contain xanthan gum, you may need to add a small amount separately. Avoid swapping in a single flour, such as rice flour or almond flour, without adjusting the recipe, as it may produce a crumbly or dense crust.

Why does my gluten-free pie crust crumble or crack?

A gluten-free pie crust often crumbles or cracks because it lacks gluten, which normally gives pastry its stretch and structure. The dough may also be too dry, have had too little resting time, or be made with a flour blend that needs a binding agent such as xanthan gum. Add cold water a teaspoon at a time until the dough holds together when pressed, then chill it before rolling. Roll it between sheets of baking paper to make it easier to handle, and patch any small cracks with a little spare dough.

How can I stop gluten-free pastry from sticking when I roll it out?

To stop gluten-free pastry sticking, roll it between two sheets of baking paper rather than adding lots of flour, which can make the crust dry and crumbly. If the dough feels soft, chill it for 20–30 minutes before rolling, and work on a cool surface. You can also lightly dust the paper and rolling pin with gluten-free flour, but use only a little. If the pastry starts to stick or tear, chill it briefly and patch small cracks with your fingers.

Does gluten-free pie crust need xanthan gum?

Gluten-free pie crust does not always need xanthan gum, but it can help the dough hold together and make it easier to roll without cracking. Check the flour blend first: many gluten-free blends already contain xanthan gum, so adding more may make the pastry gummy or tough. If your blend has none, a small amount—around ½ teaspoon for 300g of flour—is usually enough. For a more delicate crust, you can also rely on ingredients such as egg to help bind the dough.

Can I make gluten-free pie crust without butter?

Yes, you can make gluten-free pie crust without butter. Use an equal amount of cold, firm dairy-free baking block or vegetable shortening for a similar texture, checking that it is suitable for your dietary needs. Coconut oil can also work, but may make the pastry more crumbly and add a coconut flavour. As fat substitutes vary, add the water gradually until the dough just holds together, then chill it well before rolling.

Should gluten-free pie crust be chilled before baking?

Yes, chilling gluten-free pie crust before baking is usually a good idea. Resting it in the fridge for at least 30 minutes firms the butter, helps the dough hold its shape and can reduce shrinkage in the oven. It also makes delicate pastry easier to handle. Cover the dough while it chills, and if it becomes very firm, leave it at room temperature for a few minutes before rolling or baking.

How do I blind bake a gluten-free pie crust?

To blind bake a gluten-free pie crust, chill the pastry-lined tin for about 30 minutes, then prick the base lightly with a fork. Line the crust with baking paper and fill it with baking beans or uncooked rice, making sure they reach the sides. Bake at 180°C fan (200°C conventional) for around 15 minutes, then carefully remove the paper and weights and bake for a further 5–10 minutes, until the base looks dry and lightly golden. Check the crust as it bakes, as gluten-free pastry can brown quickly; let it cool before adding the filling.

Can gluten-free pie crust be made ahead or frozen?

Yes, gluten-free pie crust can be made ahead or frozen. Wrap the dough tightly and refrigerate it for up to two days, letting it soften slightly at room temperature before rolling. To freeze, wrap the dough well and store it for up to three months; defrost it overnight in the fridge before use. You can also freeze a pastry-lined pie tin, then bake it from frozen, adding a few extra minutes to the cooking time.
The Best Oatmeal Chocolate Chip Cookies: Chewy, Chocolatey and Easy to Bake

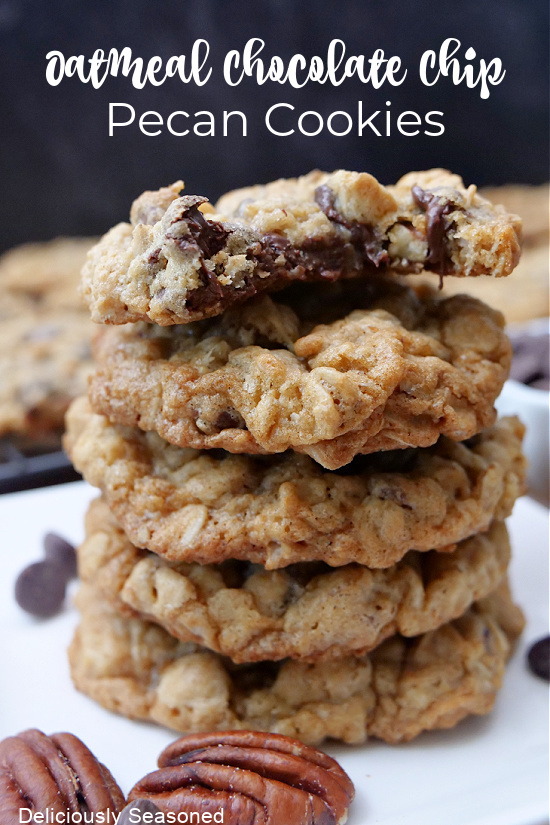
oatmeal chocolate chip cookies

Oatmeal Chocolate Chip Cookies

Chewy in the middle, lightly crisp at the edges and packed with chocolate, oatmeal chocolate chip cookies are a comforting favourite. Rolled oats give them a hearty texture, while brown sugar adds a gentle caramel flavour. They are simple to make and just as welcome with a cup of tea as they are as an afternoon treat.

What makes a good oatmeal chocolate chip cookie?

The secret is a balance of texture and flavour. Rolled oats add substance without making the cookies heavy, and a mixture of brown and caster sugar helps create soft centres with golden edges. Chilling the dough before baking is optional, but it can help the cookies hold their shape and develop a richer flavour.

Ingredients

  • 150g unsalted butter, softened
  • 100g soft brown sugar
  • 75g caster sugar
  • 1 large egg
  • 1 teaspoon vanilla extract
  • 125g plain flour
  • ½ teaspoon bicarbonate of soda
  • ½ teaspoon fine salt
  • 150g rolled oats
  • 150g chocolate chips or chopped chocolate

Method

  1. Heat the oven to 180°C (160°C fan, Gas Mark 4). Line two baking trays with baking paper.
  2. Beat the softened butter with the brown and caster sugars until creamy. Mix in the egg and vanilla extract.
  3. In a separate bowl, combine the flour, bicarbonate of soda and salt. Stir this into the butter mixture until just combined.
  4. Fold in the rolled oats and chocolate. Avoid overmixing, which can make the cookies tougher.
  5. For thicker cookies, cover and chill the dough for 30 minutes. This step can be skipped if time is short.
  6. Roll the dough into balls, using about one tablespoon for each, and place them on the trays with plenty of space between them. Gently flatten each ball slightly.
  7. Bake for 10–12 minutes, until the edges are golden and the centres still look a little soft.
  8. Leave the cookies on the trays for five minutes, then transfer them to a wire rack to cool.

Tips for the best results

Use rolled oats for a chewy texture; instant oats tend to produce a softer, less distinct crumb. Dark, milk or white chocolate all work well, and chopped chocolate creates lovely pockets that melt into the dough. For extra flavour, add a pinch of cinnamon or a handful of chopped walnuts.

Take the cookies out while their centres are still slightly soft. They will continue to set as they cool, leaving them tender rather than dry. Store them in an airtight container at room temperature for up to five days, or freeze the unbaked dough balls for freshly baked cookies whenever the craving strikes.


Oatmeal Chocolate Chip Cookies: 9 Frequently Asked Questions

  1. How do you make oatmeal chocolate chip cookies?
  2. What ingredients do you need for oatmeal chocolate chip cookies?
  3. Can you use porridge oats instead of rolled oats in oatmeal chocolate chip cookies?
  4. Why are my oatmeal chocolate chip cookies spreading too much?
  5. How do you keep oatmeal chocolate chip cookies soft and chewy?
  6. Should you chill oatmeal chocolate chip cookie dough before baking?
  7. How long should oatmeal chocolate chip cookies bake for?
  8. Can you freeze oatmeal chocolate chip cookie dough?
  9. How should you store oatmeal chocolate chip cookies to keep them fresh?

How do you make oatmeal chocolate chip cookies?

To make oatmeal chocolate chip cookies, cream softened butter with brown and caster sugar, then beat in an egg and a little vanilla extract. Stir in plain flour, bicarbonate of soda and salt, followed by rolled oats and chocolate chips. Spoon the dough into balls on a lined baking tray, leaving space for them to spread, and bake at 180°C (160°C fan) for about 10–12 minutes, until the edges are golden but the centres are still soft. Leave them to cool on the tray for a few minutes before transferring to a rack.

What ingredients do you need for oatmeal chocolate chip cookies?

Oatmeal chocolate chip cookies typically need rolled oats, plain flour, butter, brown and caster sugar, an egg, vanilla extract, bicarbonate of soda and a little salt. Chocolate chips or chopped chocolate provide the chocolatey pieces, while optional extras such as cinnamon, nuts or raisins can add flavour and texture.

Can you use porridge oats instead of rolled oats in oatmeal chocolate chip cookies?

Yes, you can use porridge oats instead of rolled oats in oatmeal chocolate chip cookies. As porridge oats are usually finer, they’ll give the cookies a softer, less chewy texture and may absorb moisture more quickly. For the closest result, use the same weight and avoid instant porridge sachets, which may contain added sugar, salt or flavourings.

Why are my oatmeal chocolate chip cookies spreading too much?

Oatmeal chocolate chip cookies may spread too much if the butter is too warm or melted, the dough hasn’t been chilled, or there is too little flour or too much sugar. Make sure to measure the ingredients accurately, use softened butter rather than runny butter, and chill the dough for 30 minutes before baking. It can also help to check that the oven is fully preheated and to bake the cookies on a cool tray, as a warm tray can cause the dough to spread before it sets.

How do you keep oatmeal chocolate chip cookies soft and chewy?

To keep oatmeal chocolate chip cookies soft and chewy, avoid overbaking them: take them out when the edges are golden but the centres still look slightly soft, as they will continue to set on the tray. Using more brown sugar than caster sugar helps retain moisture, while rolled oats give the cookies their chewy texture. Store the cooled cookies in an airtight container to keep them fresh.

Chilling oatmeal chocolate chip cookie dough is optional, but it can improve the cookies. A rest of around 30 minutes in the fridge helps the oats absorb moisture and firms the butter, so the cookies are less likely to spread too much and may have a chewier texture and deeper flavour. If you prefer a thinner, softer cookie or are short on time, you can bake the dough straight away; keep an eye on them, as they may need slightly less time in the oven.

How long should oatmeal chocolate chip cookies bake for?

Oatmeal chocolate chip cookies usually take 10–12 minutes to bake in an oven preheated to 180°C (160°C fan). They are ready when the edges are lightly golden but the centres still look slightly soft; they will continue to set as they cool. For evenly baked cookies, leave space between them on the baking tray and check them towards the end of the cooking time, as ovens and cookie sizes can vary.

Yes, oatmeal chocolate chip cookie dough freezes well. Shape it into individual balls and arrange them on a lined tray, then freeze until firm before transferring them to a sealed freezer-safe container or bag. They’ll keep for up to three months. Bake straight from frozen, adding a couple of minutes to the usual baking time, and check that the edges are golden and the centres are just set.

How should you store oatmeal chocolate chip cookies to keep them fresh?

Store oatmeal chocolate chip cookies in an airtight container at room temperature, once they have cooled completely. They should stay soft and fresh for around five days; adding a small piece of bread to the container can help prevent them from drying out. For longer storage, freeze the cookies in a sealed freezer-safe container for up to three months, then thaw at room temperature before serving.

The Best Banana Bread Recipe for a Moist, Delicious Loaf

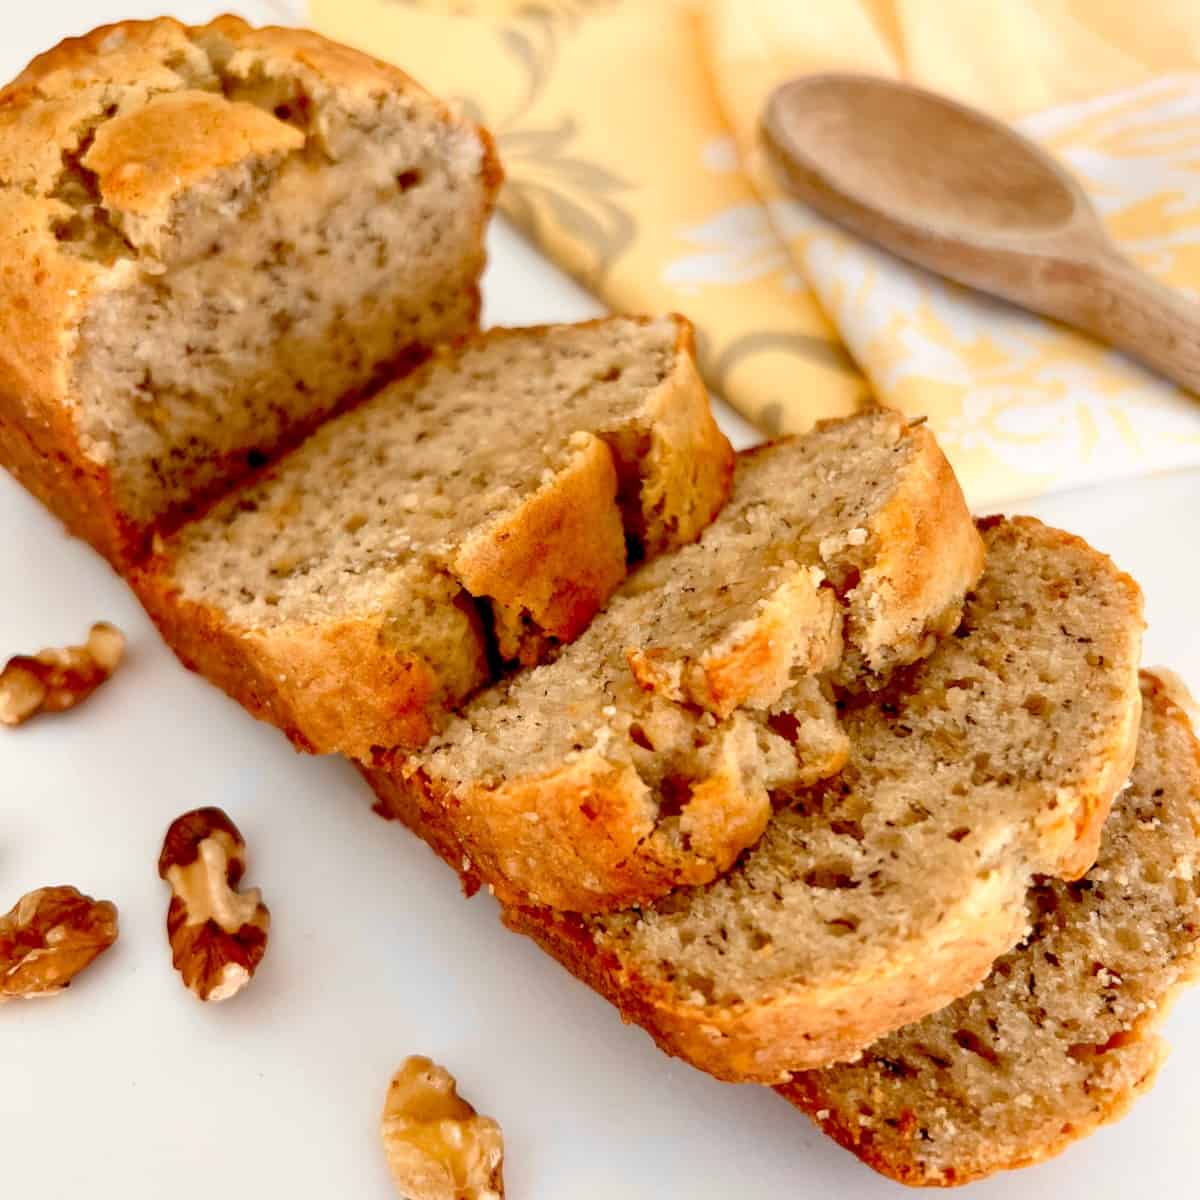
best banana bread recipe

The Best Banana Bread Recipe

Moist, tender and full of ripe banana flavour, this easy banana bread is a comforting favourite that makes the most of overripe bananas. It takes only a few minutes to prepare and is delicious served warm, toasted or simply sliced with a cup of tea.

Ingredients

Makes one loaf (about 10 slices)

  • 100g unsalted butter, melted and cooled slightly
  • 150g soft brown sugar
  • 2 large eggs
  • 1 teaspoon vanilla extract
  • 3 very ripe bananas, peeled and mashed (about 300g)
  • 250g plain flour
  • 1 teaspoon bicarbonate of soda
  • ½ teaspoon baking powder
  • ¼ teaspoon fine salt
  • 2 tablespoons milk

Optional additions: 75g chopped walnuts or chocolate chips, or ½ teaspoon ground cinnamon.

Method

  1. Heat the oven to 180°C (160°C fan)/Gas Mark 4. Grease and line a 900g (2lb) loaf tin with baking paper.
  2. In a large bowl, whisk together the melted butter and sugar. Beat in the eggs and vanilla extract, then stir in the mashed bananas.
  3. In a separate bowl, combine the flour, bicarbonate of soda, baking powder and salt. Add the dry ingredients to the banana mixture and fold together gently until just combined. Stir in the milk. If using nuts, chocolate chips or cinnamon, fold them in now.
  4. Spoon the mixture into the prepared tin and level the top. Bake for 50–60 minutes, until risen and golden. A skewer inserted into the centre should come out clean or with a few moist crumbs.
  5. Leave the loaf to cool in the tin for 10 minutes, then transfer it to a wire rack to cool completely before slicing.

Tips for Perfect Banana Bread

  • Use very ripe bananas. Bananas with plenty of brown spots are sweeter and easier to mash, giving the loaf its characteristic flavour and moisture.
  • Mix gently. Fold the flour in only until no dry streaks remain. Overmixing can make the loaf dense.
  • Check before the end of baking. If the top is browning too quickly, cover it loosely with foil for the final 10–15 minutes.
  • Let it cool before slicing. This helps the loaf set and makes neater slices.

How to Store Banana Bread

Once completely cool, keep the loaf in an airtight container at room temperature for up to three days. It can also be frozen, whole or in slices, for up to three months. Wrap it well and defrost at room temperature before serving.

Enjoy a slice as it is, or warm it gently and serve with butter. For an extra treat, toast a slice and top it with a little honey or peanut butter.


Best Banana Bread Recipe: Secrets, Common Mistakes and Bakery-Style Tips

  1. What is the secret to making good banana bread?
  2. What is the number one mistake made when making banana bread?
  3. What is the best banana bread recipe in the UK?
  4. What one ingredient makes banana bread taste like it’s from a bakery?

What is the secret to making good banana bread?

The secret to good banana bread is using very ripe bananas, ideally with plenty of brown spots, as they add natural sweetness and moisture. Measure the ingredients accurately, and fold the flour into the wet mixture just until combined to keep the loaf tender rather than dense. Finally, bake it until a skewer inserted into the centre comes out clean or with a few moist crumbs, then let it cool before slicing.

What is the number one mistake made when making banana bread?

The number one mistake when making banana bread is overmixing the batter. Once the flour has been added, fold the ingredients together gently and stop as soon as no dry streaks remain. Overworking the mixture develops the gluten in the flour, which can leave the loaf tough and dense rather than soft and tender.

What is the best banana bread recipe in the UK?

The best banana bread recipe in the UK is one that makes a moist, tender loaf with plenty of ripe banana flavour. This simple version combines mashed overripe bananas, melted butter and soft brown sugar, with plain flour and bicarbonate of soda for a light rise. Bake it at 180°C (160°C fan)/Gas Mark 4 until golden and a skewer inserted in the centre comes out clean. Add walnuts or chocolate chips if you like, and let the loaf cool before slicing.

What one ingredient makes banana bread taste like it’s from a bakery?

Browned butter is the secret ingredient that gives banana bread a rich, bakery-style flavour. Gently heat the butter until its milk solids turn golden brown and smell nutty, then let it cool before adding it to the batter. Its toasted, caramel-like notes pair beautifully with ripe bananas and make the loaf taste especially indulgent.

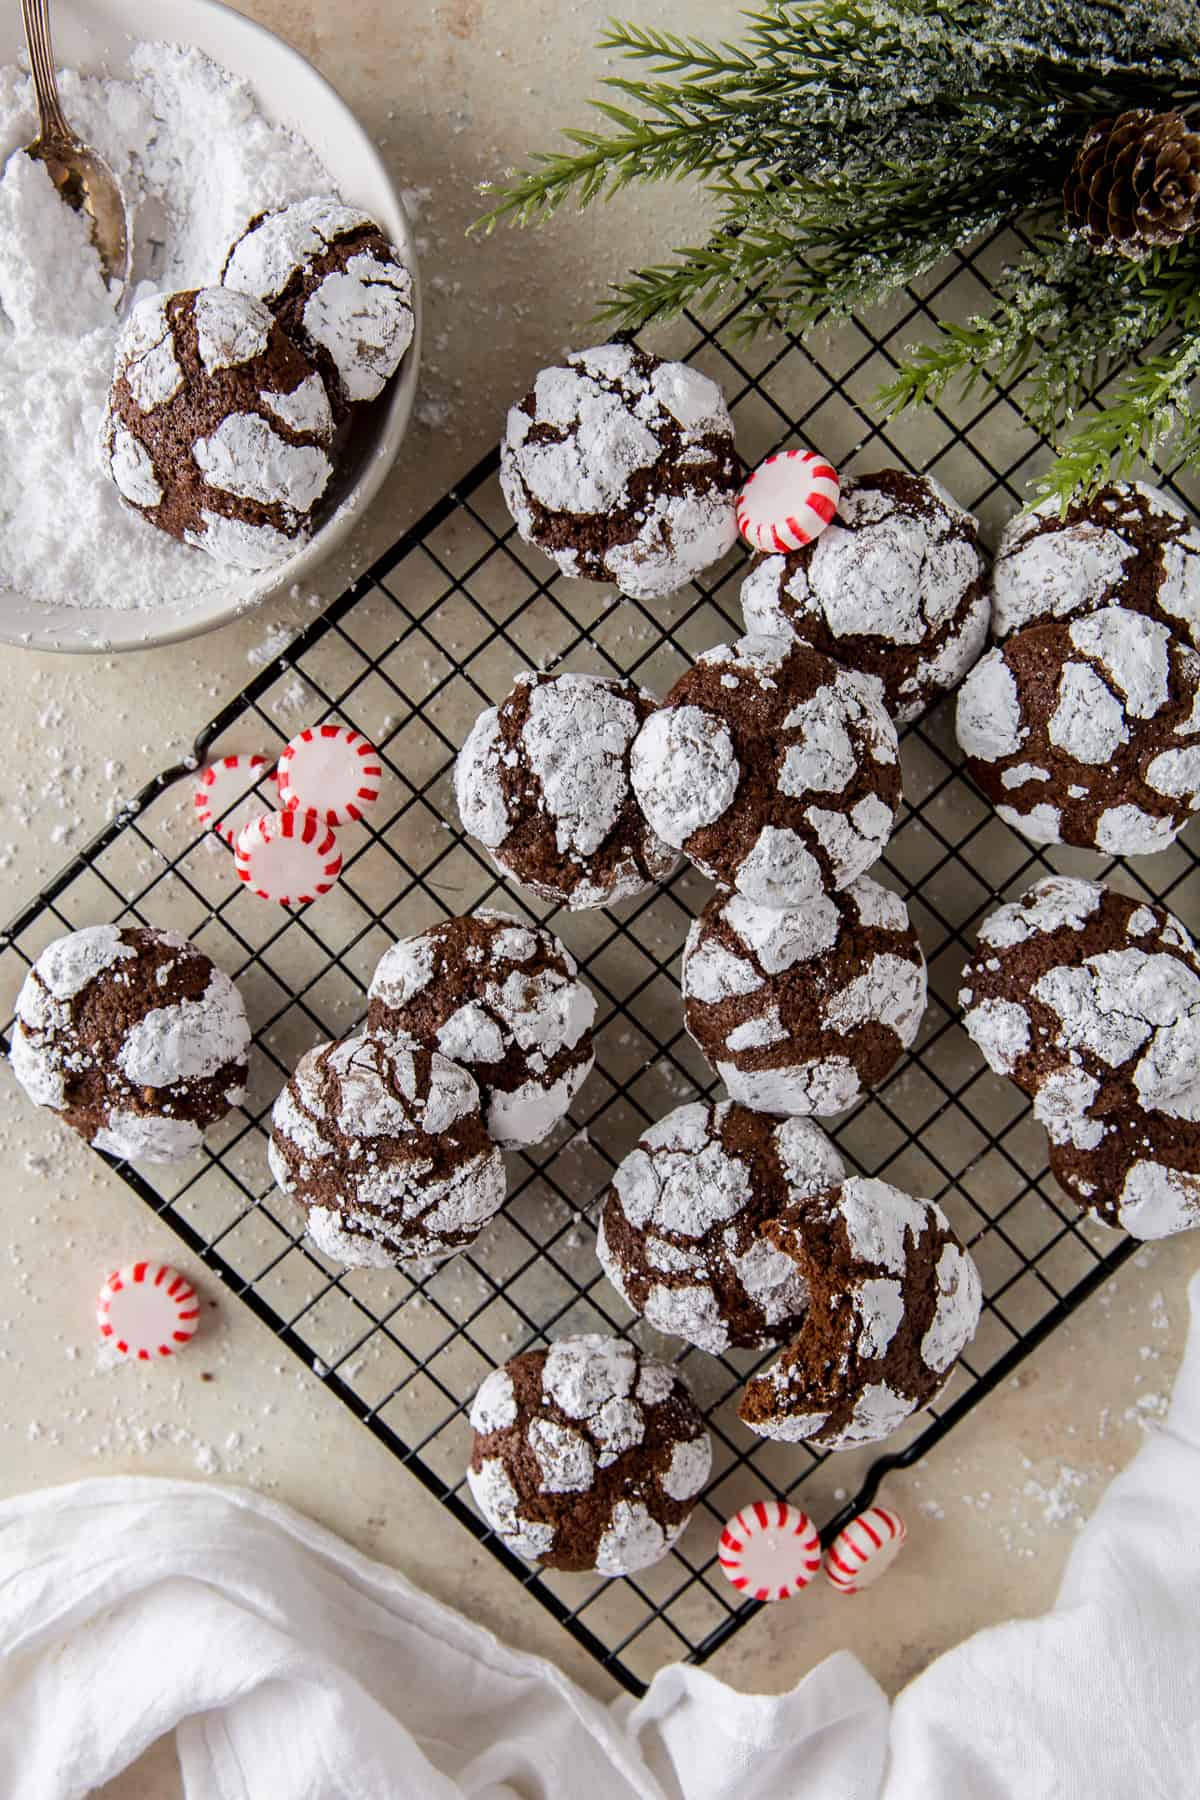
Chocolate Crinkle Cookies: A Fudgy, Crackled Favourite for Every Occasion

chocolate crinkle cookies

Chocolate Crinkle Cookies: Little Bites of Fudgy Joy

With their soft, chocolate-rich centres and snowy, cracked tops, chocolate crinkle cookies are as lovely to look at as they are to eat. As they bake, the dark dough spreads and splits, revealing a dusting of icing sugar beneath. The result is a striking, craggy finish and a soft, brownie-like middle.

These cookies are a popular treat during the festive season, but there is no need to save them for a special occasion. They are simple to make, need no special equipment and pair beautifully with a cup of tea or coffee.

What makes them crinkle?

The distinctive cracked surface comes from rolling the chilled dough in icing sugar before baking. The outside of each ball begins to set in the oven while the dough beneath continues to spread. As it expands, the sugar-coated surface breaks into pale patches and dark chocolate cracks.

Chilling the dough is important. It makes the mixture easier to handle and helps the cookies keep their shape long enough to develop their characteristic crinkles.

Chocolate crinkle cookie recipe

This recipe makes about 20 cookies.

Ingredients

  • 200g caster sugar
  • 60ml neutral-flavoured oil, such as sunflower oil
  • 2 large eggs
  • 1 teaspoon vanilla extract
  • 60g cocoa powder
  • 125g plain flour
  • 1 teaspoon baking powder
  • ¼ teaspoon salt
  • About 75g icing sugar, for coating

Method

  1. In a large bowl, whisk together the caster sugar and oil. Beat in the eggs, one at a time, then stir in the vanilla extract.
  2. Sift in the cocoa powder, flour, baking powder and salt. Mix until a thick, sticky dough forms.
  3. Cover the bowl and chill the dough for at least 2 hours, or until firm enough to roll. It can also be chilled overnight.
  4. Heat the oven to 180°C (160°C fan) and line two baking trays with baking paper. Put the icing sugar in a shallow bowl.
  5. Roll the dough into balls about the size of a walnut. Coat each ball generously in icing sugar, then arrange them on the trays with space between each one.
  6. Bake for 10–12 minutes. The edges should look set, while the centres will still be soft. Leave the cookies on the trays for a few minutes before transferring them to a wire rack to cool.

Tips for the best results

  • Chill thoroughly: If the dough becomes sticky while you are rolling it, return it to the fridge for a little longer.
  • Use plenty of icing sugar: A generous coating helps create a clear contrast between the white surface and dark cracks.
  • Do not overbake: The cookies will continue to firm up as they cool. Taking them out while the centres are still soft keeps them fudgy.
  • Try a flavour twist: A little orange zest, a pinch of espresso powder or a small amount of ground cinnamon can complement the cocoa.

Serving and storing

Chocolate crinkle cookies are delicious once cooled, but they are especially tempting when the centres are still a little warm. Serve them on their own, alongside fresh fruit, or with a scoop of vanilla ice cream for an easy dessert.

Store the cooled cookies in an airtight container at room temperature for up to five days. For freshly baked cookies whenever the mood strikes, roll the dough into balls and freeze them before coating. Defrost in the fridge, roll in icing sugar and bake as directed.

Simple, rich and wonderfully crackled, chocolate crinkle cookies are a cheerful addition to any baking tin—and a reliable favourite for chocolate lovers of all ages.


6 Reasons to Love Chocolate Crinkle Cookies

  1. Rich chocolate flavour.
  2. Soft, fudgy centres.
  3. Delightful crackled tops.
  4. Easy to make at home.
  5. Lovely with tea or coffee.
  6. Perfect for sharing.


Four Drawbacks of Chocolate Crinkle Cookies

  1. Can be very sweet.
  2. Dough needs chilling time.
  3. Easy to overbake and dry out.
  4. Icing sugar can make a mess.

Rich chocolate flavour.

Chocolate crinkle cookies deliver a wonderfully rich chocolate flavour in every bite. Cocoa powder gives the dough its deep, indulgent taste, while the soft, fudgy centre makes each cookie feel almost like a little brownie. Their sweetness is balanced by the cocoa’s gentle bitterness, creating a treat that satisfies chocolate cravings without needing elaborate ingredients or toppings.

Soft, fudgy centres.

One of the best things about chocolate crinkle cookies is their soft, fudgy centres. While the outside bakes into a delicate, lightly crisp shell, the middle stays rich and tender, with a texture reminiscent of a brownie. That contrast makes every bite especially satisfying and keeps the cookies deliciously moist.

Delightful crackled tops.

One of the most appealing features of chocolate crinkle cookies is their delightful crackled tops. As the cookies bake, the dough expands and splits through its coating of icing sugar, creating a beautiful pattern of snowy white and rich chocolate brown. Each cookie has its own distinctive finish, making them as charming to serve as they are delicious to eat.

Easy to make at home.

Chocolate crinkle cookies are easy to make at home, even for beginner bakers. The ingredients are simple and readily available, and the dough comes together without any special equipment. After chilling, roll it into balls, coat them in icing sugar and bake until the tops crack. It’s a straightforward process that delivers impressive-looking, fudgy cookies with very little fuss.

Lovely with tea or coffee.

Chocolate crinkle cookies are a lovely companion to a cup of tea or coffee. Their soft, fudgy centres and rich cocoa flavour pair beautifully with a hot drink, making them an inviting treat for an afternoon break or a relaxed catch-up with friends.

Perfect for sharing.

Chocolate crinkle cookies are perfect for sharing, whether you’re taking a tin to a family gathering, bringing a homemade treat to work or offering something sweet to friends over tea. Their bite-sized shape makes them easy to serve, and their snowy, cracked tops look inviting arranged on a plate. Since the recipe makes a generous batch, there’s usually enough for everyone to enjoy.

Can be very sweet.

Chocolate crinkle cookies can be very sweet, particularly because the rich cocoa dough is coated in icing sugar before baking. For those who prefer a more balanced flavour, reduce the sugar slightly or use dark, unsweetened cocoa powder to bring out the chocolate’s natural bitterness.

Dough needs chilling time.

One drawback of chocolate crinkle cookies is that the dough needs time to chill before baking. This step makes it easier to handle and helps the cookies keep their shape, but it means you cannot enjoy them straight away. Remember to plan ahead, or make the dough in advance and leave it in the fridge until you are ready to bake.

Easy to overbake and dry out.

Chocolate crinkle cookies can be easy to overbake, as their dark colour makes it difficult to judge when they are done. Leave them in the oven for too long and their soft, fudgy centres can quickly turn dry and crumbly. For the best texture, take them out when the edges look set but the middles are still slightly soft; they will continue to firm up as they cool.

Icing sugar can make a mess.

One small drawback of chocolate crinkle cookies is the icing sugar, which can quickly dust the worktop, your hands and even the floor. Rolling each piece of sticky dough in sugar is part of what gives the cookies their signature snowy, cracked finish, but it can be a messy job. Using a shallow bowl and lining the baking tray with baking paper can help keep the clean-up to a minimum.