Chocolate Crinkle Cookies: A Fudgy, Crackled Favourite for Every Occasion
chocolate crinkle cookies

Chocolate Crinkle Cookies: Little Bites of Fudgy Joy

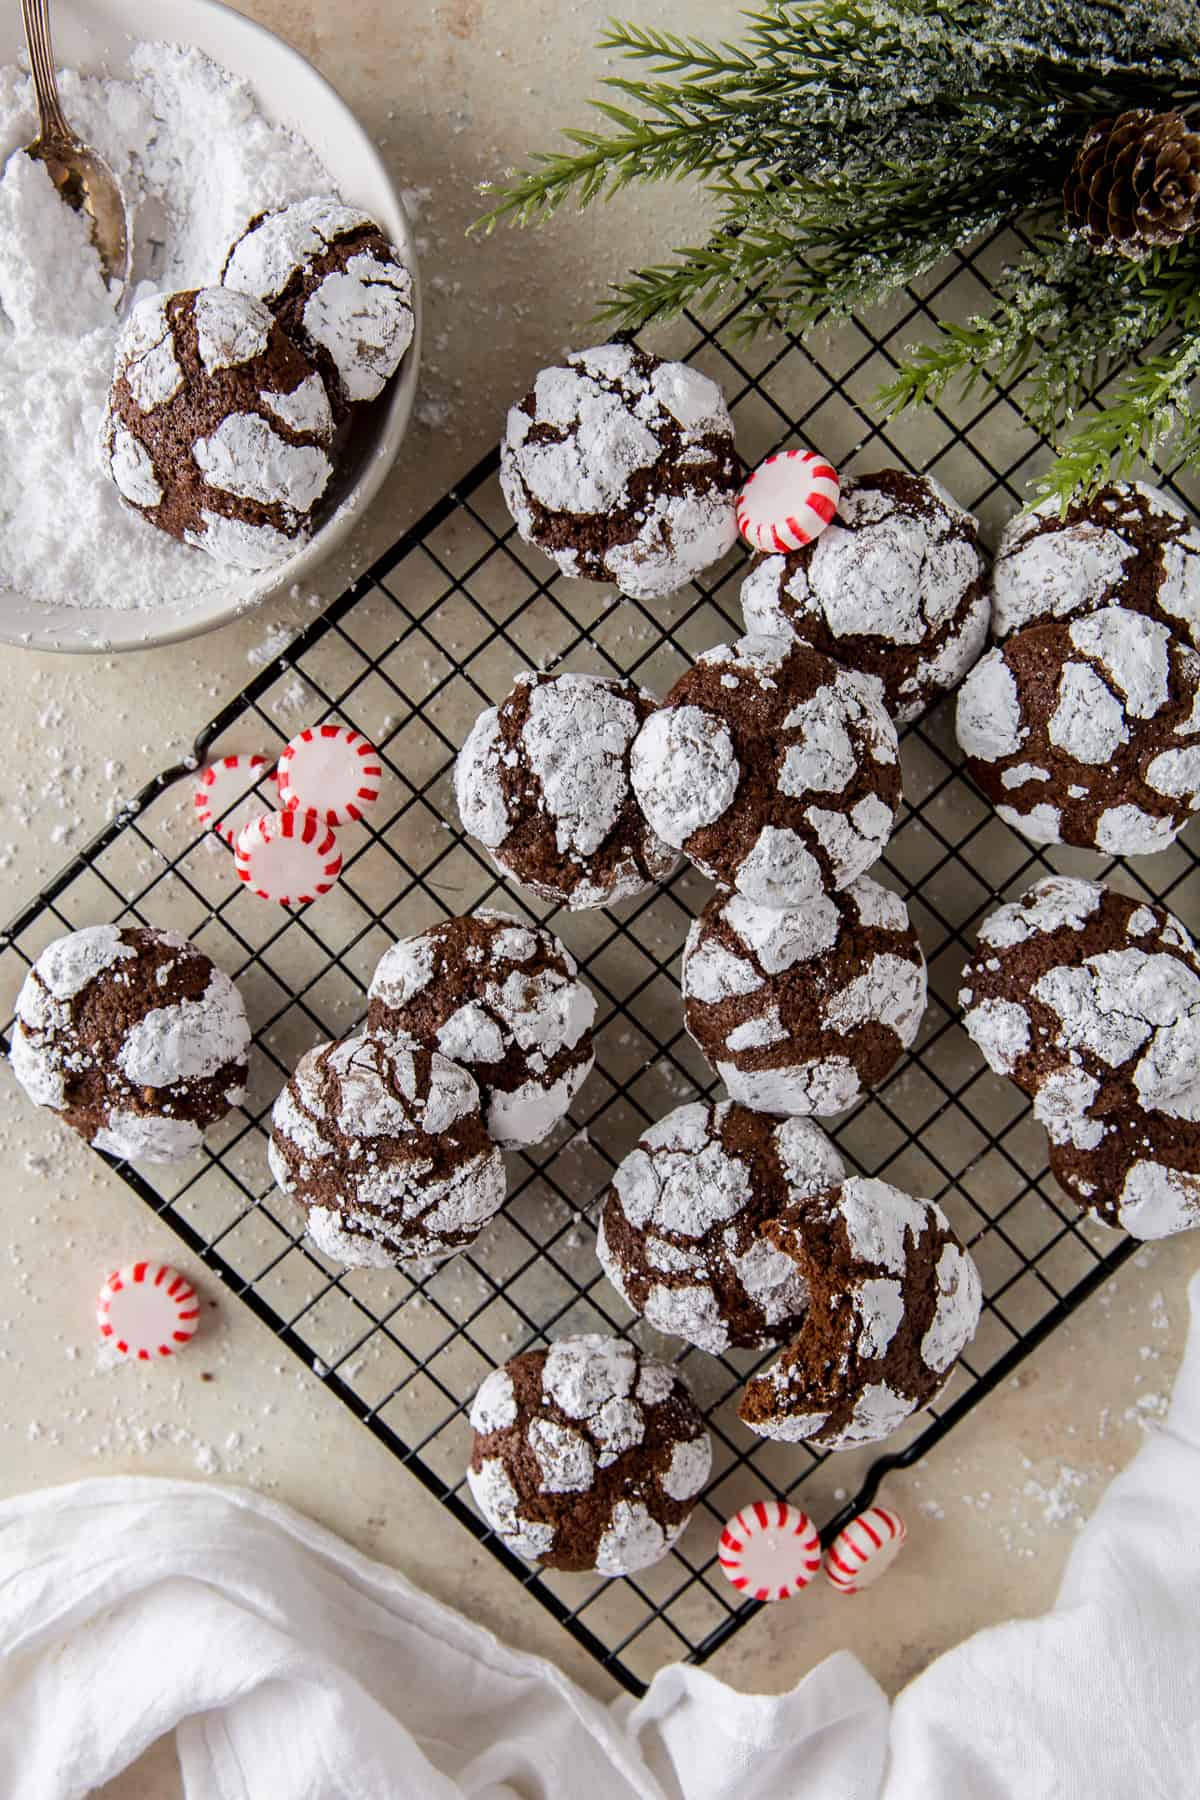
With their soft, chocolate-rich centres and snowy, cracked tops, chocolate crinkle cookies are as lovely to look at as they are to eat. As they bake, the dark dough spreads and splits, revealing a dusting of icing sugar beneath. The result is a striking, craggy finish and a soft, brownie-like middle.

These cookies are a popular treat during the festive season, but there is no need to save them for a special occasion. They are simple to make, need no special equipment and pair beautifully with a cup of tea or coffee.

What makes them crinkle?

The distinctive cracked surface comes from rolling the chilled dough in icing sugar before baking. The outside of each ball begins to set in the oven while the dough beneath continues to spread. As it expands, the sugar-coated surface breaks into pale patches and dark chocolate cracks.

Chilling the dough is important. It makes the mixture easier to handle and helps the cookies keep their shape long enough to develop their characteristic crinkles.

Chocolate crinkle cookie recipe

This recipe makes about 20 cookies.

Ingredients

  • 200g caster sugar
  • 60ml neutral-flavoured oil, such as sunflower oil
  • 2 large eggs
  • 1 teaspoon vanilla extract
  • 60g cocoa powder
  • 125g plain flour
  • 1 teaspoon baking powder
  • ¼ teaspoon salt
  • About 75g icing sugar, for coating

Method

  1. In a large bowl, whisk together the caster sugar and oil. Beat in the eggs, one at a time, then stir in the vanilla extract.
  2. Sift in the cocoa powder, flour, baking powder and salt. Mix until a thick, sticky dough forms.
  3. Cover the bowl and chill the dough for at least 2 hours, or until firm enough to roll. It can also be chilled overnight.
  4. Heat the oven to 180°C (160°C fan) and line two baking trays with baking paper. Put the icing sugar in a shallow bowl.
  5. Roll the dough into balls about the size of a walnut. Coat each ball generously in icing sugar, then arrange them on the trays with space between each one.
  6. Bake for 10–12 minutes. The edges should look set, while the centres will still be soft. Leave the cookies on the trays for a few minutes before transferring them to a wire rack to cool.

Tips for the best results

  • Chill thoroughly: If the dough becomes sticky while you are rolling it, return it to the fridge for a little longer.
  • Use plenty of icing sugar: A generous coating helps create a clear contrast between the white surface and dark cracks.
  • Do not overbake: The cookies will continue to firm up as they cool. Taking them out while the centres are still soft keeps them fudgy.
  • Try a flavour twist: A little orange zest, a pinch of espresso powder or a small amount of ground cinnamon can complement the cocoa.

Serving and storing

Chocolate crinkle cookies are delicious once cooled, but they are especially tempting when the centres are still a little warm. Serve them on their own, alongside fresh fruit, or with a scoop of vanilla ice cream for an easy dessert.

Store the cooled cookies in an airtight container at room temperature for up to five days. For freshly baked cookies whenever the mood strikes, roll the dough into balls and freeze them before coating. Defrost in the fridge, roll in icing sugar and bake as directed.

Simple, rich and wonderfully crackled, chocolate crinkle cookies are a cheerful addition to any baking tin—and a reliable favourite for chocolate lovers of all ages.


6 Reasons to Love Chocolate Crinkle Cookies

  1. Rich chocolate flavour.
  2. Soft, fudgy centres.
  3. Delightful crackled tops.
  4. Easy to make at home.
  5. Lovely with tea or coffee.
  6. Perfect for sharing.


Four Drawbacks of Chocolate Crinkle Cookies

  1. Can be very sweet.
  2. Dough needs chilling time.
  3. Easy to overbake and dry out.
  4. Icing sugar can make a mess.

Rich chocolate flavour.

Chocolate crinkle cookies deliver a wonderfully rich chocolate flavour in every bite. Cocoa powder gives the dough its deep, indulgent taste, while the soft, fudgy centre makes each cookie feel almost like a little brownie. Their sweetness is balanced by the cocoa’s gentle bitterness, creating a treat that satisfies chocolate cravings without needing elaborate ingredients or toppings.

Soft, fudgy centres.

One of the best things about chocolate crinkle cookies is their soft, fudgy centres. While the outside bakes into a delicate, lightly crisp shell, the middle stays rich and tender, with a texture reminiscent of a brownie. That contrast makes every bite especially satisfying and keeps the cookies deliciously moist.

Delightful crackled tops.

One of the most appealing features of chocolate crinkle cookies is their delightful crackled tops. As the cookies bake, the dough expands and splits through its coating of icing sugar, creating a beautiful pattern of snowy white and rich chocolate brown. Each cookie has its own distinctive finish, making them as charming to serve as they are delicious to eat.

Easy to make at home.

Chocolate crinkle cookies are easy to make at home, even for beginner bakers. The ingredients are simple and readily available, and the dough comes together without any special equipment. After chilling, roll it into balls, coat them in icing sugar and bake until the tops crack. It’s a straightforward process that delivers impressive-looking, fudgy cookies with very little fuss.

Lovely with tea or coffee.

Chocolate crinkle cookies are a lovely companion to a cup of tea or coffee. Their soft, fudgy centres and rich cocoa flavour pair beautifully with a hot drink, making them an inviting treat for an afternoon break or a relaxed catch-up with friends.

Perfect for sharing.

Chocolate crinkle cookies are perfect for sharing, whether you’re taking a tin to a family gathering, bringing a homemade treat to work or offering something sweet to friends over tea. Their bite-sized shape makes them easy to serve, and their snowy, cracked tops look inviting arranged on a plate. Since the recipe makes a generous batch, there’s usually enough for everyone to enjoy.

Can be very sweet.

Chocolate crinkle cookies can be very sweet, particularly because the rich cocoa dough is coated in icing sugar before baking. For those who prefer a more balanced flavour, reduce the sugar slightly or use dark, unsweetened cocoa powder to bring out the chocolate’s natural bitterness.

Dough needs chilling time.

One drawback of chocolate crinkle cookies is that the dough needs time to chill before baking. This step makes it easier to handle and helps the cookies keep their shape, but it means you cannot enjoy them straight away. Remember to plan ahead, or make the dough in advance and leave it in the fridge until you are ready to bake.

Easy to overbake and dry out.

Chocolate crinkle cookies can be easy to overbake, as their dark colour makes it difficult to judge when they are done. Leave them in the oven for too long and their soft, fudgy centres can quickly turn dry and crumbly. For the best texture, take them out when the edges look set but the middles are still slightly soft; they will continue to firm up as they cool.

Icing sugar can make a mess.

One small drawback of chocolate crinkle cookies is the icing sugar, which can quickly dust the worktop, your hands and even the floor. Rolling each piece of sticky dough in sugar is part of what gives the cookies their signature snowy, cracked finish, but it can be a messy job. Using a shallow bowl and lining the baking tray with baking paper can help keep the clean-up to a minimum.
Easy Buttercream Frosting Recipe for Cakes and Cupcakes

buttercream frosting recipe

Easy Buttercream Frosting Recipe

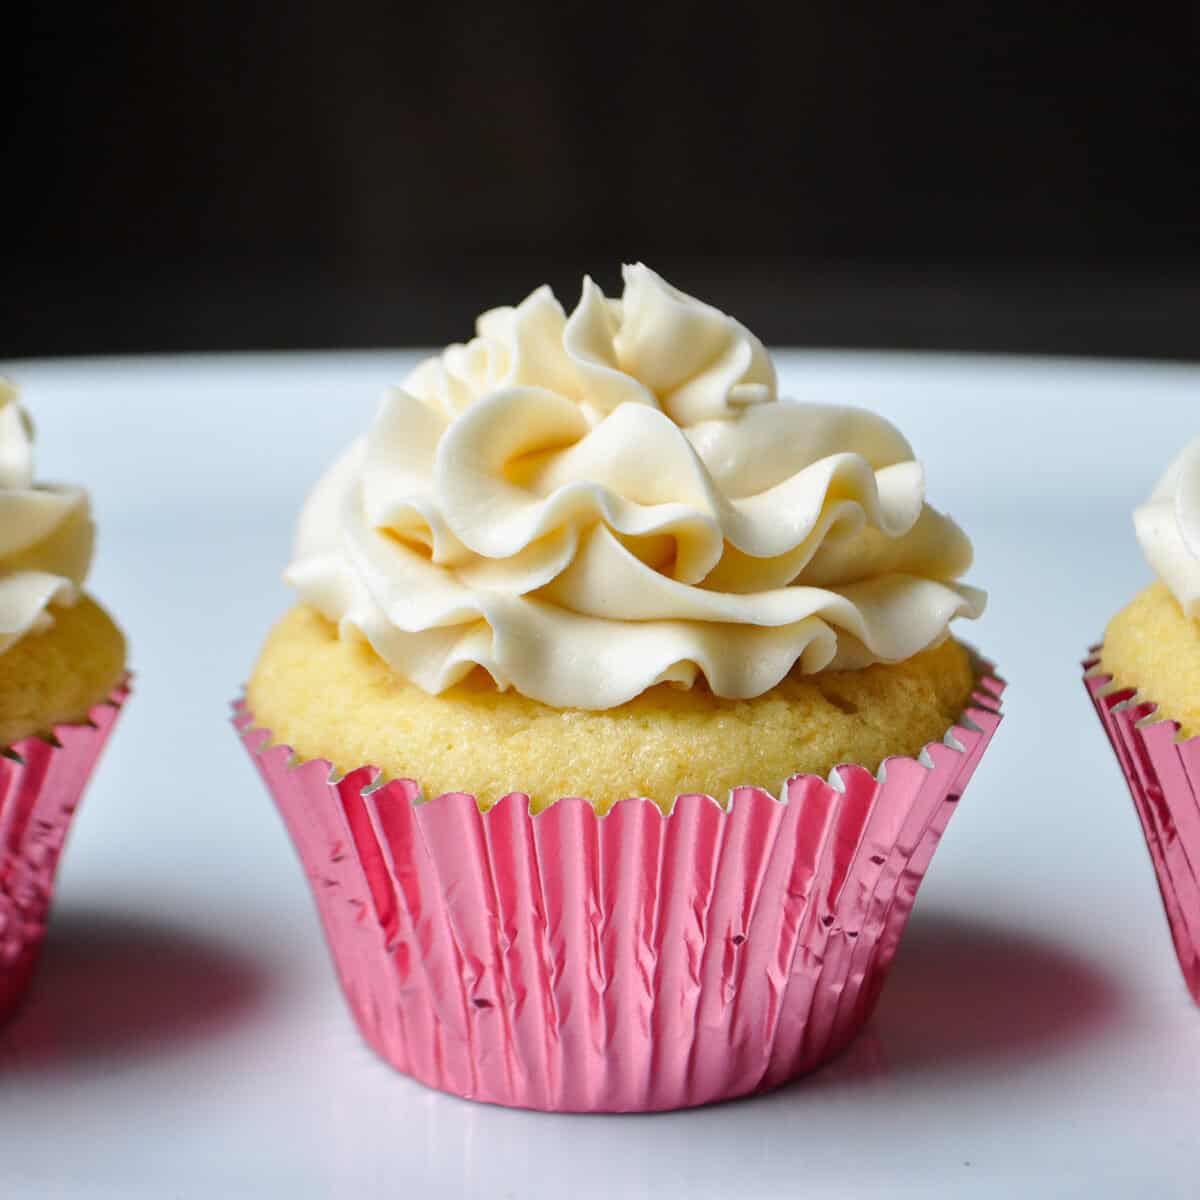
Buttercream frosting is a smooth, versatile topping for cakes, cupcakes and biscuits. This simple recipe uses just a few ingredients and can be flavoured or coloured to suit the occasion. It makes enough to generously frost 12 cupcakes or fill and cover a small 20cm cake.

Ingredients

  • 250g unsalted butter, softened
  • 500g icing sugar, sifted
  • 2–3 tablespoons milk or double cream
  • 1 teaspoon vanilla extract
  • A small pinch of salt, optional

Method

  1. Put the softened butter in a large bowl. Beat with an electric mixer for 3–5 minutes, until pale, soft and fluffy. Scrape down the sides of the bowl as needed.
  2. Add the sifted icing sugar in batches, mixing on a low speed at first to prevent it from puffing out of the bowl.
  3. Once the sugar is incorporated, add the vanilla and 2 tablespoons of milk or cream. Beat for a further 2–3 minutes until light and smooth.
  4. If the frosting is too thick, add a little more milk, half a tablespoon at a time. If it is too soft, beat in a little more sifted icing sugar.
  5. Spread or pipe the buttercream onto completely cooled cakes or cupcakes.

Tips for Smooth, Fluffy Buttercream

  • Use butter that is softened but still cool to the touch. If it is oily or melting, the frosting may become too soft.
  • Sift the icing sugar to help prevent lumps.
  • Start mixing slowly after adding the sugar, then increase the speed once it is combined.
  • For a less sweet frosting, add a pinch of salt and use a little more buttercream flavouring, such as vanilla or citrus zest.

Flavour Variations

For chocolate buttercream, replace 50g of the icing sugar with 50g of sifted cocoa powder. For a citrus version, add finely grated lemon or orange zest. You can also add food colouring a little at a time until you reach the shade you want.

Storage

Buttercream can be kept in an airtight container in the fridge for up to 5 days. Before using, bring it back to room temperature and beat it briefly until smooth and fluffy. It can also be frozen for up to 2 months; defrost it in the fridge, then allow it to soften and beat again before spreading or piping.


Buttercream Icing FAQs: Ingredients, Ratios, Techniques and Storage

  1. How do you make buttercream frosting from scratch?
  2. What ingredients do you need for buttercream frosting?
  3. What is the best ratio of butter to icing sugar for buttercream?
  4. How do you make buttercream frosting fluffy and smooth?
  5. Why is my buttercream frosting too runny, and how can I thicken it?
  6. How can you make buttercream frosting less sweet?
  7. Can you make buttercream frosting without an electric mixer?
  8. How long does buttercream frosting last, and how should it be stored?
  9. Can buttercream frosting be frozen and used later?

How do you make buttercream frosting from scratch?

To make buttercream frosting from scratch, beat softened unsalted butter until pale and fluffy, then gradually add sifted icing sugar, mixing on a low speed to avoid a cloud of sugar. Add vanilla extract and a little milk or cream, then beat until smooth and light. Adjust the consistency by adding more liquid for softer frosting or more icing sugar for a firmer finish.

What ingredients do you need for buttercream frosting?

A basic buttercream frosting needs softened unsalted butter, sifted icing sugar, a little milk or double cream, and vanilla extract for flavour. You can add a pinch of salt to balance the sweetness. Adjust the amount of milk or cream to make the frosting softer for spreading or firmer for piping.

What is the best ratio of butter to icing sugar for buttercream?

A reliable starting point for buttercream is a 1:2 ratio by weight: use one part butter to two parts icing sugar. For example, 125g butter with 250g icing sugar makes a smooth, pipeable frosting. Adjust the texture with a little milk or cream if it is too stiff, or add more icing sugar if it is too soft. The ideal ratio can vary slightly depending on the recipe and how firm you want the buttercream to be.

How do you make buttercream frosting fluffy and smooth?

To make buttercream frosting fluffy and smooth, start with softened—but not melted—butter and beat it for several minutes until pale and airy. Sift the icing sugar, then add it gradually on a low speed to avoid lumps and clouds of sugar. Once combined, add the milk or cream a little at a time and beat until the frosting is light and creamy, scraping down the bowl as needed. If it feels too thick, add a small splash of milk; if it is too soft, mix in a little more sifted icing sugar.

Why is my buttercream frosting too runny, and how can I thicken it?

Buttercream can turn runny if the butter is too warm, too much milk or cream has been added, or the frosting has been overworked in a warm kitchen. To thicken it, chill the bowl for 10–15 minutes, then beat the buttercream again; if it is still too soft, gradually mix in sifted icing sugar until it reaches the desired consistency. Avoid adding too much sugar at once, as this can make the frosting overly sweet.

How can you make buttercream frosting less sweet?

To make buttercream less sweet, add a small pinch of salt, which helps balance the sugar, or mix in a little unsweetened cocoa powder, lemon juice or cream cheese for a less sugary flavour. You can also reduce the icing sugar slightly, but add it gradually and check the texture as you go, as too little may leave the frosting soft or buttery. For a noticeably less sweet option, try Swiss meringue buttercream, which is made by whisking sugar with egg whites before adding the butter.

Can you make buttercream frosting without an electric mixer?

Yes, you can make buttercream frosting without an electric mixer, although it takes a little more time and effort. Make sure the butter is softened, then beat it vigorously with a sturdy wooden spoon or balloon whisk until smooth and creamy. Gradually add the sifted icing sugar, mixing well between additions, then stir in the vanilla and milk or cream a little at a time until the frosting reaches a spreadable consistency. For the fluffiest result, keep beating for several minutes and scrape down the sides of the bowl as you go.

How long does buttercream frosting last, and how should it be stored?

Buttercream frosting can be stored in an airtight container in the fridge for up to five days, or frozen for up to two months. Bring chilled or frozen buttercream to room temperature before using, then beat it briefly until smooth and fluffy. If it has been left out, keep it in a cool place and follow the storage guidance for its ingredients; buttercream made with perishable additions may need refrigerating sooner.

Can buttercream frosting be frozen and used later?

Yes, buttercream frosting can be frozen for up to 2 months. Place it in an airtight container or freezer-safe bag, then thaw it in the fridge overnight. Before using, let it come to room temperature and beat it briefly until smooth and fluffy again. If it looks slightly separated after thawing, a few minutes of mixing should bring it back together.

Indulge in the Ultimate Banoffee Pie Recipe for a Sweet Treat

banoffee pie recipe

The Perfect Banoffee Pie Recipe

If you’re a fan of indulgent desserts that perfectly balance sweetness and creaminess, then banoffee pie is the treat for you. This classic English dessert combines rich toffee, fresh bananas, and whipped cream on a buttery biscuit base. Here’s how you can create your own delicious banoffee pie at home:

Ingredients:

  • 250g digestive biscuits
  • 100g butter, melted
  • 397g tin of condensed milk (for caramel)
  • 2-3 ripe bananas
  • 300ml double cream
  • 1 tsp vanilla extract
  • Chocolate shavings or cocoa powder for decoration (optional)

Instructions:

  1. Start by making the caramel. Place the unopened tin of condensed milk in a saucepan filled with water and simmer for 3 hours. Make sure to keep adding water to keep the tin submerged.
  2. Crush the digestive biscuits into fine crumbs. Mix in the melted butter until well combined. Press this mixture into the base of a 20cm pie dish to form the crust. Chill in the fridge for at least 30 minutes.
  3. Once the caramel has cooled, spread it evenly over the biscuit base.
  4. Slice the bananas and layer them on top of the caramel.
  5. In a separate bowl, whip the double cream with vanilla extract until soft peaks form. Spread this over the banana layer.
  6. If desired, sprinkle chocolate shavings or dust cocoa powder over the top for decoration.

Your homemade banoffee pie is now ready to be enjoyed! This delightful dessert is perfect for sharing with friends and family or as a special treat for yourself. The combination of sweet toffee, fresh bananas, and creamy whipped cream is sure to satisfy your sweet tooth cravings.

Note: For a quicker version of caramel, you can use ready-made dulce de leche or caramel sauce instead of boiling condensed milk.


Top Tips for Crafting the Perfect Banoffee Pie

  1. Use ripe bananas for the best flavour.
  2. Make sure to chill the caramel before adding the bananas and cream.
  3. Top with grated chocolate or cocoa powder for extra indulgence.
  4. Consider using digestive biscuits for the base for a traditional touch.
  5. Drizzle some extra caramel sauce on top before serving for added sweetness.
  6. Serve chilled to allow all the flavours to meld together.

Use ripe bananas for the best flavour.

For the best flavour in your banoffee pie, it is essential to use ripe bananas. Ripe bananas not only provide a natural sweetness to the dessert but also offer a soft and creamy texture that perfectly complements the rich toffee and whipped cream layers. The ripeness of the bananas enhances the overall taste of the pie, ensuring a delicious and satisfying treat with every bite.

Make sure to chill the caramel before adding the bananas and cream.

For the perfect banoffee pie, it is crucial to chill the caramel thoroughly before layering on the bananas and whipped cream. This step ensures that the caramel sets properly, creating a stable base for the subsequent layers. By allowing the caramel to cool completely, you enhance the texture and flavour of the pie, resulting in a decadent dessert that is sure to impress your guests. Patience in chilling the caramel will ultimately lead to a banoffee pie that is both visually appealing and irresistibly delicious.

Top with grated chocolate or cocoa powder for extra indulgence.

For an added touch of indulgence to enhance your banoffee pie experience, consider generously topping it with either grated chocolate or a dusting of cocoa powder. This simple yet effective tip not only adds a delightful visual appeal but also introduces a rich chocolatey flavour that complements the sweet toffee, creamy banana, and buttery biscuit base of the pie. The combination of textures and tastes creates a truly decadent treat that is sure to impress your taste buds and elevate the overall enjoyment of this classic dessert.

Consider using digestive biscuits for the base for a traditional touch.

For a traditional touch when making banoffee pie, consider using digestive biscuits for the base. The crumbly texture and slightly sweet flavour of digestive biscuits complement the rich toffee and creamy layers of the pie perfectly. This classic choice adds an authentic touch to your banoffee pie, enhancing its overall taste and texture for a truly indulgent dessert experience.

Drizzle some extra caramel sauce on top before serving for added sweetness.

For an extra touch of indulgence and sweetness, consider drizzling some additional caramel sauce over the top of your banoffee pie just before serving. This simple yet decadent addition will elevate the flavours of the dessert, providing a luscious burst of caramel goodness with each bite. It’s a delightful finishing touch that will surely impress your guests and enhance the overall experience of enjoying this classic treat.

Serve chilled to allow all the flavours to meld together.

For the best banoffee pie experience, it is recommended to serve the dessert chilled. Allowing the pie to rest in the refrigerator helps meld together the rich toffee, fresh bananas, and creamy whipped cream layers, creating a harmonious blend of flavours and textures. The cool temperature enhances the decadent sweetness of the pie, making each bite a delightful and refreshing treat. So, be sure to refrigerate your banoffee pie before serving to enjoy its full flavour potential.