Easy Spanakopita Recipe: Crispy Greek Spinach and Feta Pie
spanakopita recipe

Spanakopita: A Classic Greek Spinach and Feta Pie

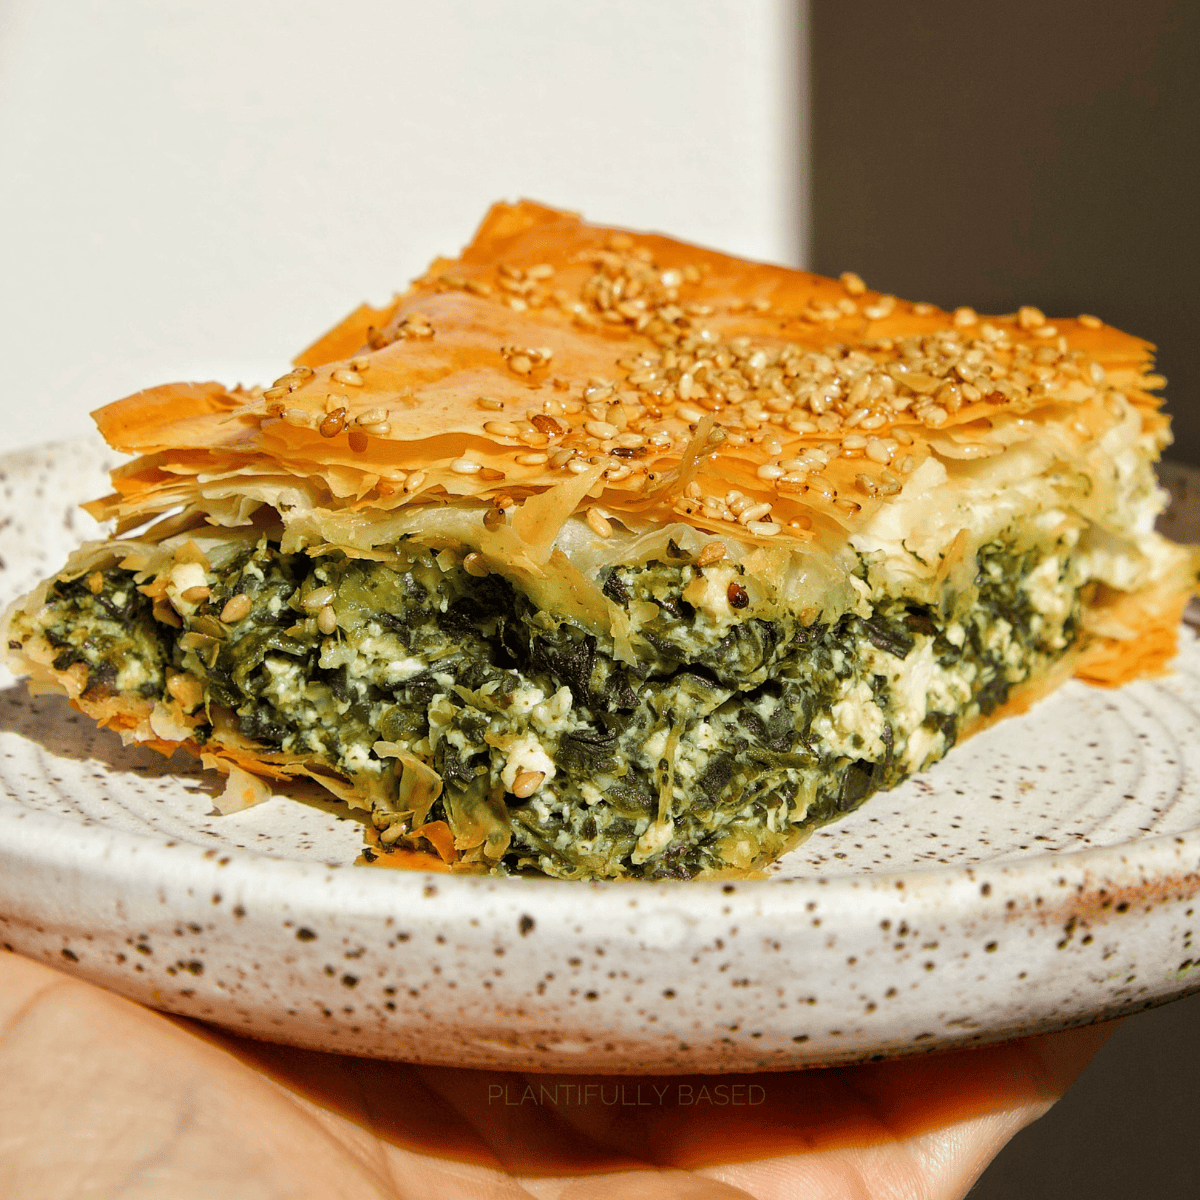
Golden, crisp and filled with savoury spinach, herbs and tangy feta, spanakopita is one of Greece’s best-loved pies. It makes a satisfying lunch, a sharing dish for a gathering or a tasty addition to a mezze spread. This version uses ready-made filo pastry for a straightforward bake at home.

Serves: 6–8

Preparation time: 25 minutes

Cooking time: 40–45 minutes

Ingredients

  • 700g fresh spinach, or 450g frozen spinach, defrosted
  • 2 tablespoons olive oil, plus extra for brushing
  • 1 medium onion, finely chopped
  • 4 spring onions, thinly sliced
  • 2 garlic cloves, finely chopped
  • 200g feta, crumbled
  • 2 eggs, lightly beaten
  • Small handful of fresh dill, finely chopped
  • Small handful of flat-leaf parsley, finely chopped
  • ¼ teaspoon grated nutmeg (optional)
  • Freshly ground black pepper
  • 8–10 sheets filo pastry
  • 50g butter, melted, or extra olive oil

Method

  1. Prepare the spinach. If using fresh spinach, wilt it in batches in a large pan over a medium heat. Transfer to a colander and leave to cool. If using defrosted frozen spinach, place it in a clean tea towel and squeeze out as much liquid as possible. Chop the spinach roughly.
  2. Cook the aromatics. Heat the olive oil in a frying pan. Add the onion and spring onions and cook for 5–7 minutes, until soft. Stir in the garlic and cook for another minute. Leave the mixture to cool slightly.
  3. Make the filling. Put the spinach, onion mixture, feta, eggs, dill and parsley in a bowl. Add the nutmeg, if using, and a good grind of black pepper. Mix gently. Taste before adding salt, as feta can be quite salty.
  4. Prepare the pastry. Heat the oven to 190°C (170°C fan, Gas Mark 5). Lightly oil a baking tin, approximately 23 x 33cm. Keep the filo covered with a clean, slightly damp tea towel while you work so it does not dry out.
  5. Layer the base. Lay one sheet of filo in the tin, letting any excess hang over the sides. Brush lightly with melted butter or olive oil. Add another sheet at a slight angle and brush again. Repeat until you have used about half of the pastry.
  6. Add the filling. Spoon the spinach mixture over the pastry and spread it into an even layer.
  7. Top the pie. Layer the remaining filo sheets over the filling, brushing each with butter or oil. Fold the overhanging pastry over the top to form a neat edge. Brush the surface generously and score the top lightly into portions with a sharp knife, taking care not to cut all the way through the filling.
  8. Bake. Bake for 40–45 minutes, until the pastry is deeply golden and crisp. Leave the pie to rest for 10 minutes before cutting and serving.

Tips for a crisp, flavourful spanakopita

  • Remove excess moisture. Wet spinach can make the pastry soggy, so squeeze it thoroughly after wilting or defrosting.
  • Work quickly with filo. Keep unused sheets covered and brush each layer lightly; too much butter or oil can make the pastry heavy.
  • Make it ahead. Assemble the pie, cover and refrigerate it for a few hours before baking. You can also bake it in advance and reheat it in the oven to bring back its crispness.
  • Serve it simply. Spanakopita is delicious warm or at room temperature, with a crisp salad, olives or a spoonful of Greek yoghurt.

With its flaky layers and bright, herby filling, spanakopita is a versatile pie that is easy to share. Cut it into generous squares for a main meal or smaller pieces for a buffet or picnic.


Top 5 FAQs About Spanakopita: Ingredients, Serving Suggestions, and Tips for a Crispy Delight

  1. Why is the bottom of my spanakopita soggy?
  2. What are the main ingredients of spanakopita?
  3. How do you keep spanakopita crispy?
  4. What is traditionally served with spanakopita?
  5. What do Greeks eat with spanakopita?

Why is the bottom of my spanakopita soggy?

A soggy bottom is usually caused by excess moisture in the spinach or by the pie not baking long enough. Squeeze wilted or defrosted spinach very thoroughly before mixing the filling, and avoid adding any liquid left in the pan. Make sure the oven is fully preheated and bake the spanakopita until the base and top are crisp and golden; using a metal baking tin and placing it on a lower oven shelf can also help the bottom cook through. Allow the pie to rest briefly before slicing so the filling can settle.

What are the main ingredients of spanakopita?

The main ingredients in spanakopita are spinach, feta cheese and filo pastry. The filling is often flavoured with onion, spring onions, garlic and fresh herbs such as dill and parsley, then bound with egg. Olive oil or melted butter is brushed between the filo layers to help them turn crisp and golden as the pie bakes.

How do you keep spanakopita crispy?

To keep spanakopita crispy, squeeze as much liquid as possible from the spinach before mixing the filling, as excess moisture can soften the pastry. Brush the filo lightly with melted butter or olive oil between layers, and bake until deeply golden. Once cooked, leave the pie uncovered while it cools; covering it traps steam and makes the pastry soggy. Reheat leftovers in the oven rather than the microwave to restore their crispness.

What is traditionally served with spanakopita?

Spanakopita is traditionally served warm or at room temperature, often as part of a Greek meal alongside a crisp salad, olives and other small dishes such as tzatziki. It can also be enjoyed on its own as a light lunch or snack, with a squeeze of lemon for a fresh, tangy finish.

What do Greeks eat with spanakopita?

Greeks often enjoy spanakopita on its own as a snack or light meal, but it also pairs well with a fresh Greek salad, olives and a little tzatziki or plain Greek yoghurt. As part of a larger meal, it can be served alongside grilled meat or fish and other small dishes, such as dips and roasted vegetables. It is delicious warm or at room temperature.
Easy Swiss Steak Recipe: Tender Beef in Rich Tomato Gravy

swiss steak recipe

Swiss Steak Recipe

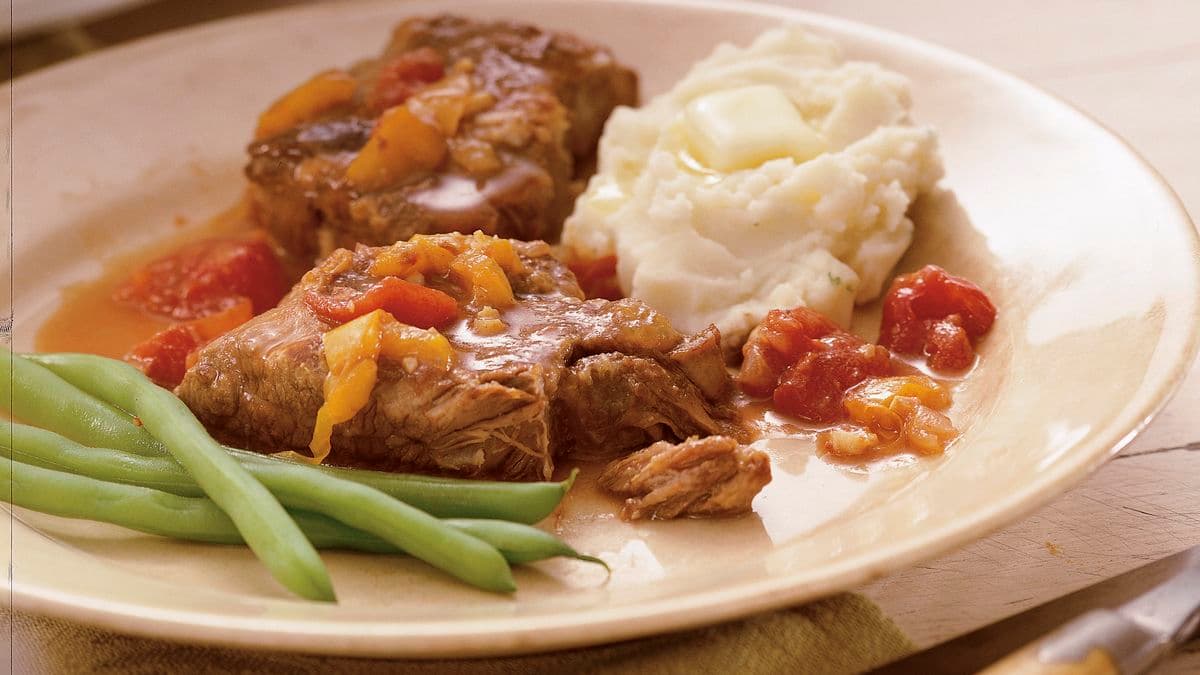
Swiss steak is a comforting dish of tenderised beef slowly braised in a rich tomato and vegetable sauce. Despite its name, it is not a Swiss dish: “swissing” refers to a method of tenderising meat by pounding or rolling it. This straightforward version uses braising steak and a gentle oven cook to create a hearty meal with plenty of savoury gravy.

Serves and preparation time

Serves: 4

Preparation: 20 minutes

Cooking: 2–2½ hours

Ingredients

  • 700g braising steak, cut into 4 portions
  • 3 tablespoons plain flour
  • 1 teaspoon paprika
  • ½ teaspoon salt, plus extra to taste
  • ¼ teaspoon black pepper
  • 2 tablespoons vegetable oil
  • 1 large onion, thinly sliced
  • 1 green pepper, sliced
  • 2 carrots, peeled and diced
  • 2 garlic cloves, finely chopped
  • 400g tin chopped tomatoes
  • 250ml beef stock
  • 1 tablespoon Worcestershire sauce
  • 1 teaspoon dried thyme

Method

  1. Heat the oven to 160°C (140°C fan, Gas Mark 3).
  2. Mix the flour, paprika, salt and pepper on a plate. Lightly coat each piece of beef, then use a meat mallet or rolling pin to gently pound the flour into the meat. If the steak is already cut thinly, simply coat it in the seasoned flour.
  3. Heat the oil in a large, ovenproof casserole over a medium-high heat. Brown the beef in batches for 2–3 minutes on each side, adding a little more oil if needed. Transfer the browned pieces to a plate.
  4. Add the onion, pepper and carrots to the casserole. Cook for about 5 minutes, stirring, until they begin to soften. Stir in the garlic and cook for 30 seconds.
  5. Add the tomatoes, beef stock, Worcestershire sauce and thyme. Scrape the bottom of the casserole to loosen any browned bits, then return the beef and any juices to the pan. The liquid should mostly cover the meat; add a splash of water or stock if necessary.
  6. Bring the sauce to a gentle simmer. Cover the casserole and transfer it to the oven. Cook for 2–2½ hours, or until the beef is very tender. Check occasionally and add a little liquid if the sauce becomes too thick.
  7. Taste the sauce and adjust the seasoning before serving.

What to serve with Swiss steak

Serve Swiss steak with mashed potatoes, rice or buttered noodles to soak up the tomato gravy. Steamed green beans, cabbage or a simple green salad make good accompaniments.

Tips for tender, flavourful steak

  • Choose the right cut: Braising steak, such as chuck or blade, becomes tender during slow cooking and gives the sauce a full flavour.
  • Brown the beef well: A good sear adds depth to the finished sauce. Avoid crowding the pan; brown the meat in batches.
  • Keep the heat gentle: A slow, covered cook helps break down the tougher fibres. The sauce should simmer gently rather than boil hard.
  • Make it ahead: The flavour often improves after a night in the fridge. Cool leftovers promptly, refrigerate in a covered container and reheat thoroughly.


Deliciously Tender Swiss Steak: A Comforting and Versatile Recipe for Easy, Make-Ahead Meals

  1. Tender, slow-cooked beef
  2. Rich, savoury tomato gravy
  3. Simple, familiar ingredients
  4. Easy oven-braising method
  5. Great for make-ahead meals
  6. Comforting and filling
  7. Pairs well with mash or rice
  8. Easy to adapt with extra vegetables


Challenges of Preparing Traditional Swiss Steak: Time, Ingredients, and Taste Considerations

  1. Requires a long, slow cooking time.
  2. Needs a suitable cut of braising steak.
  3. Can be too rich for some tastes.
  4. Uses several ingredients and steps.

Tender, slow-cooked beef

Slow cooking is what makes Swiss steak so wonderfully tender. As the beef gently braises in the tomato-rich sauce, its tougher fibres gradually soften, leaving each piece succulent and easy to cut. The meat also absorbs the savoury flavours of the vegetables, herbs and stock, making every bite comforting and full of flavour.

Rich, savoury tomato gravy

The rich, savoury tomato gravy is one of the best things about Swiss steak. As the beef slowly braises, its juices mingle with the tomatoes, vegetables and herbs to create a deeply flavoured sauce that is both comforting and satisfying. Spoon it generously over the tender steak, mashed potatoes, rice or noodles to make the most of every drop.

Simple, familiar ingredients

Swiss steak is made with simple, familiar ingredients that are easy to find in most supermarkets, such as braising steak, onions, carrots, tinned tomatoes and stock. There is no need for specialist equipment or hard-to-source seasonings, making it an approachable recipe for a cosy midweek dinner or a relaxed weekend meal.

Easy oven-braising method

The oven-braising method makes Swiss steak easy to prepare: once the beef has been browned and the sauce assembled, simply cover the casserole and let it cook gently in the oven. The steady, even heat helps tenderise the meat and develop a rich sauce, while requiring little attention—leaving you free to prepare the rest of the meal.

Great for make-ahead meals

Swiss steak is ideal for make-ahead meals because its flavour deepens as it rests. Cook it a day in advance, let it cool, then cover and refrigerate. When you’re ready to eat, reheat it gently on the hob or in the oven until piping hot, adding a splash of stock or water if the sauce has thickened. It’s a convenient, comforting dinner for busy evenings.

Comforting and filling

Swiss steak is the kind of comforting, filling meal that feels right at the end of a long day. Slowly braised beef becomes tender and satisfying, while the rich tomato and vegetable sauce adds plenty of flavour. Serve it with mashed potatoes, rice or buttered noodles to make the most of the hearty gravy and turn this simple recipe into a nourishing family supper.

Pairs well with mash or rice

Swiss steak pairs beautifully with creamy mashed potatoes or fluffy rice, both of which soak up its rich tomato gravy. Choose mash for a comforting, hearty meal, or rice for a simple alternative that lets the tender beef and savoury sauce take centre stage.

Easy to adapt with extra vegetables

Swiss steak is easy to adapt with extra vegetables, making it a handy way to use what you have in the fridge. Add sliced mushrooms, celery, courgette or extra peppers to the pan, adjusting the quantity to suit your taste. Heartier vegetables can go in with the onions and carrots, while softer ones are best added later so they keep their shape. The vegetables cook slowly in the tomato and beef juices, adding colour, flavour and texture to the dish.

Requires a long, slow cooking time.

One drawback of Swiss steak is the long, slow cooking time. The beef needs to braise for around two to two and a half hours to become tender, so it is not the best choice when you need a quick meal. You’ll need to plan ahead, although most of the cooking is hands-off.

Needs a suitable cut of braising steak.

One drawback of Swiss steak is that it needs a suitable cut of braising steak, such as chuck or blade, to become tender during the long, slow cooking. Leaner or quicker-cooking cuts may turn dry or tough, while the right cut can sometimes be harder to find or more expensive.

Can be too rich for some tastes.

Swiss steak’s slow-cooked beef and rich tomato gravy can feel quite heavy, particularly when served with mashed potatoes or other hearty sides. If you prefer lighter flavours, use a leaner cut of beef, skim excess fat from the sauce and serve it with steamed vegetables or a crisp salad. Adding a little extra tomato or stock can also help balance the richness.

Uses several ingredients and steps.

One drawback of Swiss steak is that it takes several ingredients and steps to prepare. You’ll need to season and tenderise the beef, brown it, cook the vegetables and make the sauce before leaving everything to braise slowly. It’s not especially difficult, but it can feel time-consuming if you’re looking for a quick meal or a recipe with minimal washing-up.

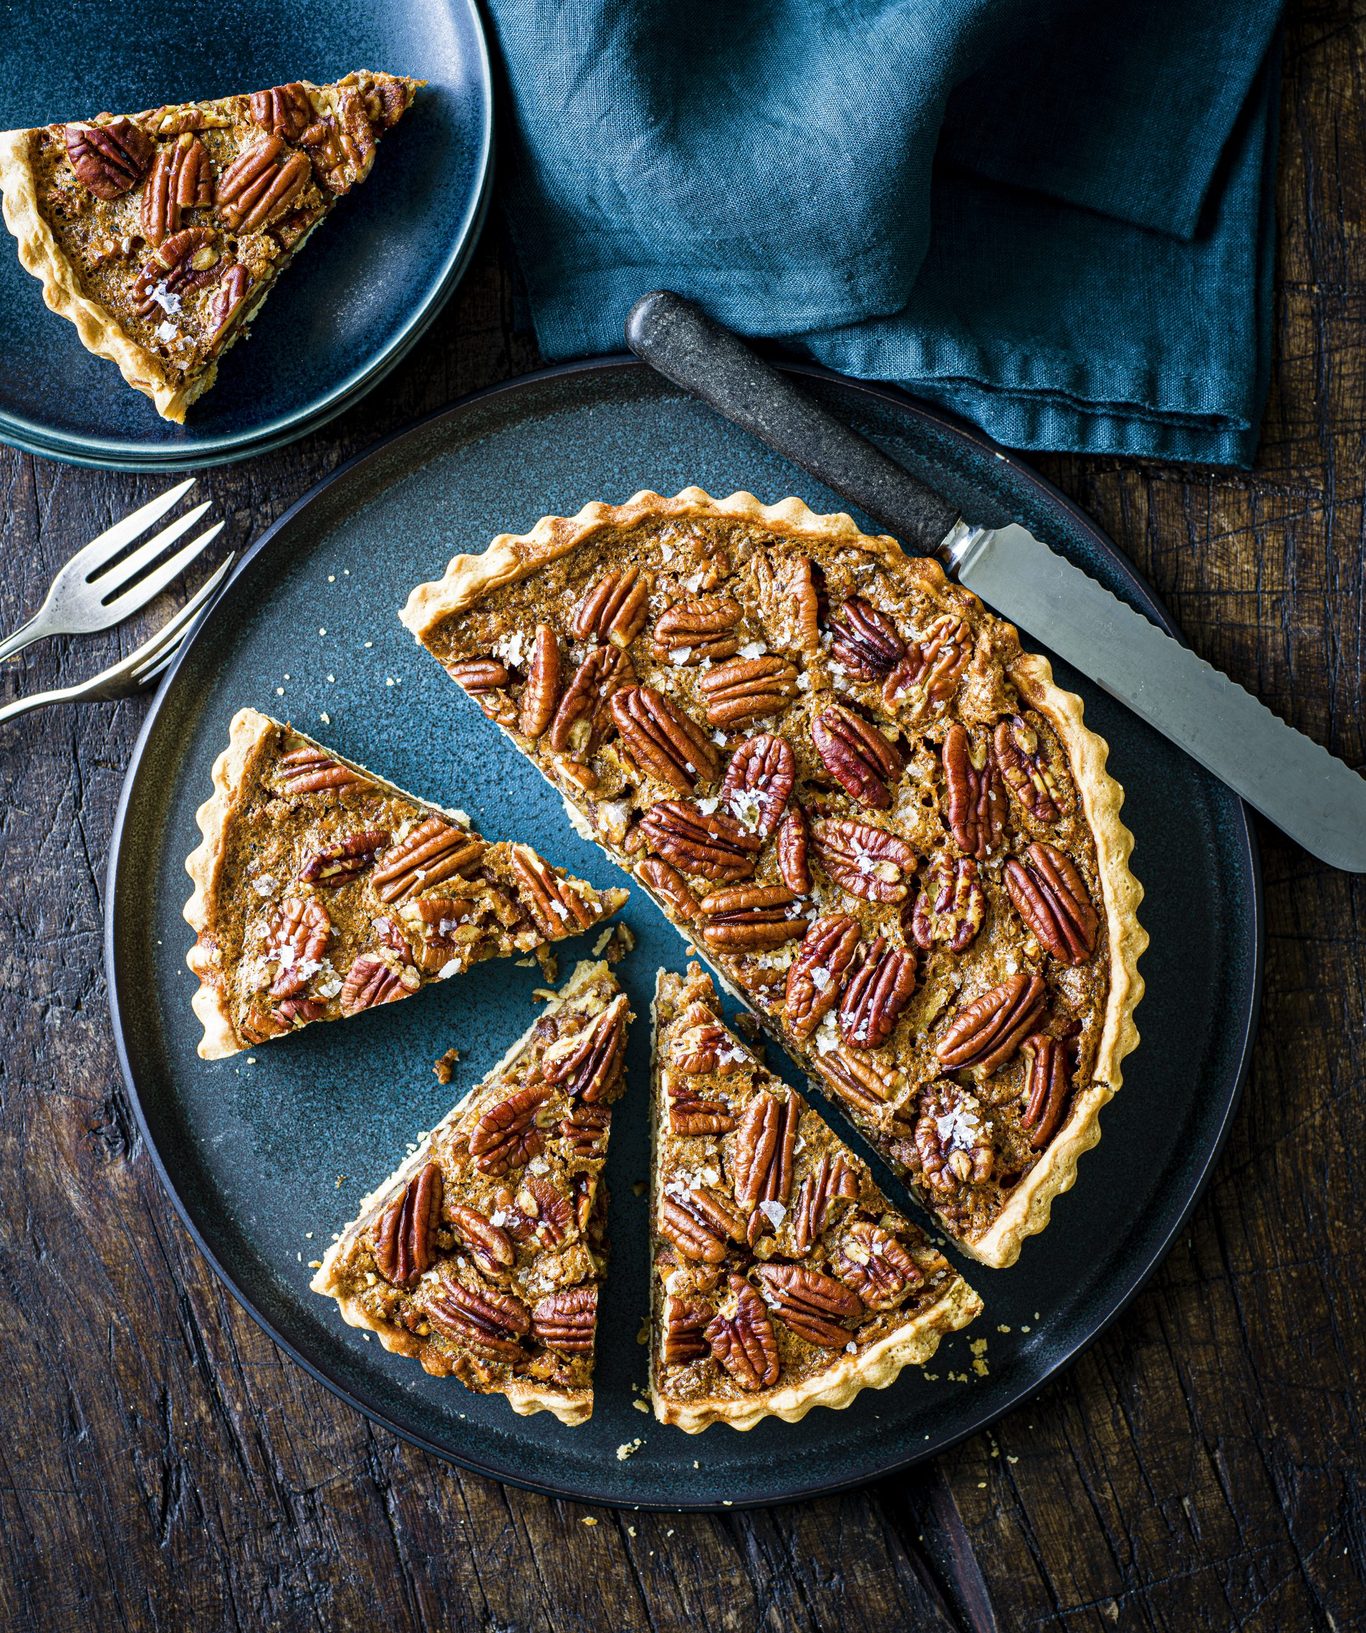
Classic Pecan Pie Recipe: A Rich, Buttery Dessert to Share

pecan pie recipe

Classic Pecan Pie Recipe

With its crisp pastry case, buttery pecan filling and rich caramel flavour, pecan pie makes a wonderful dessert for autumn celebrations or a special weekend treat. This version combines golden syrup and maple syrup for a filling that is sweet, gently toasty and easy to make with ingredients available in the UK.

At a glance

  • Preparation time: 25 minutes, plus chilling
  • Cooking time: 50–60 minutes
  • Serves: 8
  • Oven: 180°C conventional / 160°C fan / Gas Mark 4

Ingredients

For the pastry

  • 250g plain flour, plus extra for dusting
  • 125g cold unsalted butter, cut into cubes
  • 2–3 tablespoons cold water
  • A pinch of salt

For the filling

  • 250g pecan halves
  • 100g unsalted butter
  • 180g soft dark brown sugar
  • 180ml golden syrup
  • 60ml maple syrup
  • 3 large eggs
  • 1 teaspoon vanilla extract
  • ¼ teaspoon salt

Method

  1. Make the pastry. Put the flour and salt in a bowl. Rub in the cold butter with your fingertips until the mixture resembles breadcrumbs. Add the cold water a little at a time, mixing until the dough just comes together. Shape it into a disc, wrap and chill for 30 minutes.
  2. Prepare the pastry case. On a lightly floured surface, roll out the pastry and use it to line a 23cm tart tin. Trim the edges and prick the base with a fork. Chill for 15 minutes. Meanwhile, heat the oven to 180°C conventional / 160°C fan / Gas Mark 4.
  3. Bake the case blind. Line the pastry with baking paper and fill with baking beans or dried pulses. Bake for 15 minutes, then carefully remove the paper and weights and bake for a further 5 minutes. Set aside to cool slightly.
  4. Make the filling. Melt the butter and leave it to cool for a few minutes. In a bowl, whisk the eggs, brown sugar, golden syrup, maple syrup, vanilla and salt until combined. Slowly whisk in the melted butter.
  5. Assemble the pie. Arrange the pecans in the pastry case, reserving a few for the top if you like. Pour over the filling and gently arrange the reserved pecans on the surface.
  6. Bake. Bake for 35–45 minutes, until the edges are set and the centre still has a slight wobble. If the pastry edges brown too quickly, cover them loosely with foil.
  7. Cool before serving. Leave the pie to cool completely in its tin so the filling can set. Serve at room temperature, or gently warmed.

Tips for a great pecan pie

  • For an even deeper flavour, toast the pecans in a dry frying pan for a few minutes before adding them to the pie. Let them cool first.
  • Don’t worry if the centre looks a little soft when the pie comes out of the oven. It will firm up as it cools.
  • For neat slices, allow the pie to cool fully and use a sharp knife, wiping it clean between cuts.
  • Serve with lightly whipped cream, vanilla ice cream or a spoonful of crème fraîche to balance the sweetness.

Storing

Cover and refrigerate leftover pecan pie for up to four days. Bring slices to room temperature before serving, or warm them briefly in a low oven.


Essential FAQs for Perfecting Your Pecan Pie Recipe

  1. What ingredients do I need to make pecan pie?
  2. How do I make pecan pie from scratch?
  3. How long should I bake pecan pie?
  4. How can I tell when pecan pie is cooked?
  5. Should I blind-bake the pastry for pecan pie?
  6. Can I make pecan pie without golden syrup?
  7. Why has my pecan pie not set?
  8. Can I make pecan pie ahead of time?
  9. How should I store leftover pecan pie?

What ingredients do I need to make pecan pie?

To make pecan pie, you’ll need pecan halves, eggs, butter, soft brown sugar, golden syrup and a little maple syrup for the rich, sweet filling, along with vanilla extract and a pinch of salt. You’ll also need pastry ingredients: plain flour, cold unsalted butter and a little cold water. For convenience, you can use a ready-made shortcrust pastry case instead.

How do I make pecan pie from scratch?

To make pecan pie from scratch, prepare a simple shortcrust pastry with flour, cold butter, a pinch of salt and just enough cold water to bring it together, then chill, roll out and bake it blind until lightly golden. Fill the pastry case with pecan halves and a mixture of beaten eggs, brown sugar, melted butter, golden syrup, maple syrup, vanilla and a pinch of salt. Bake at 180°C (160°C fan) until the edges are set and the centre has a slight wobble, then leave the pie to cool completely so the filling firms up before slicing.

How long should I bake pecan pie?

Bake pecan pie at 180°C (160°C fan/Gas Mark 4) for around 35–45 minutes, or until the edges are set and the centre still has a slight wobble. If the pastry starts to brown too quickly, loosely cover the edges with foil. The filling will continue to set as the pie cools, so let it cool completely before slicing.

How can I tell when pecan pie is cooked?

Pecan pie is ready when the edges are set and lightly puffed, while the centre still has a slight wobble when you gently shake the tin. It should not look liquid or slosh about; the filling will continue to firm up as it cools. You can also insert a knife near the centre—if it comes out mostly clean, the pie is cooked. If the pastry is browning too quickly, cover the edges loosely with foil and continue baking. Allow the pie to cool completely before slicing for the neatest portions.

Should I blind-bake the pastry for pecan pie?

Yes, blind-baking the pastry is recommended, as it helps the base stay crisp beneath the rich, moist filling. Line the chilled pastry case with baking paper, fill it with baking beans or dried pulses and bake for about 15 minutes; remove the weights and paper, then bake for a further 5 minutes before adding the filling. This gives the pastry a head start and helps prevent a soggy bottom.

Can I make pecan pie without golden syrup?

Yes. You can replace the golden syrup with the same amount of maple syrup, honey or light corn syrup. Maple syrup gives a lovely flavour, while honey tastes more pronounced; either may make the filling slightly softer, so bake until the edges are set and the centre still has a gentle wobble. Allow the pie to cool completely before slicing so the filling can firm up.

Why has my pecan pie not set?

Pecan pie may not have set because it was underbaked, or because the filling was too warm and had not had enough time to cool. The centre should still have a slight wobble when the pie comes out of the oven, but it will firm up as it cools; leave it to cool completely before slicing. If it remains runny, return it to the oven and bake in short increments until the edges are set and the centre is only gently wobbly. Check that your oven is at the correct temperature, as an oven that runs cool can affect the baking time.

Can I make pecan pie ahead of time?

Yes. Pecan pie is ideal for making ahead, as it needs time to cool and set before slicing. Bake it a day in advance, let it cool completely, then cover and keep it in the fridge. Bring it to room temperature before serving, or warm it gently in a low oven. For the freshest pastry, avoid adding toppings until just before serving.

How should I store leftover pecan pie?

Store leftover pecan pie in an airtight container or cover it tightly with cling film and keep it in the fridge for up to four days. Let slices come to room temperature before serving, or warm them briefly in a low oven.

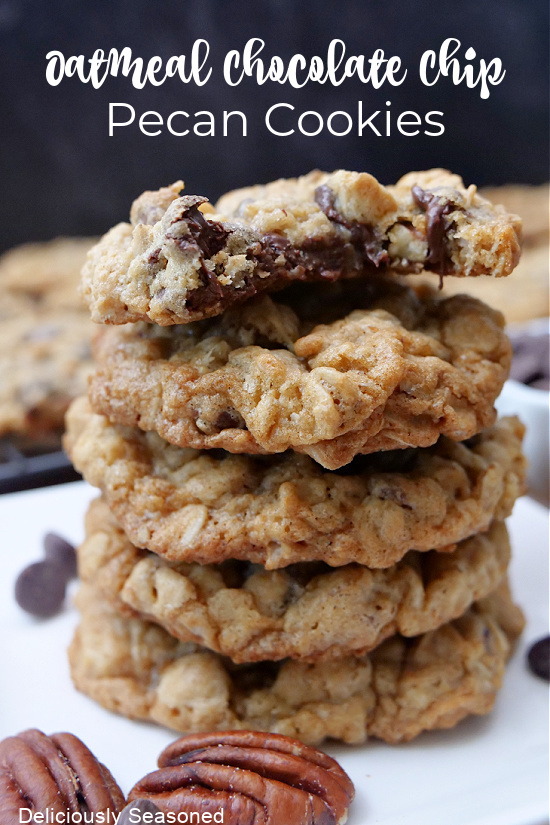
The Best Oatmeal Chocolate Chip Cookies: Chewy, Chocolatey and Easy to Bake

oatmeal chocolate chip cookies

Oatmeal Chocolate Chip Cookies

Chewy in the middle, lightly crisp at the edges and packed with chocolate, oatmeal chocolate chip cookies are a comforting favourite. Rolled oats give them a hearty texture, while brown sugar adds a gentle caramel flavour. They are simple to make and just as welcome with a cup of tea as they are as an afternoon treat.

What makes a good oatmeal chocolate chip cookie?

The secret is a balance of texture and flavour. Rolled oats add substance without making the cookies heavy, and a mixture of brown and caster sugar helps create soft centres with golden edges. Chilling the dough before baking is optional, but it can help the cookies hold their shape and develop a richer flavour.

Ingredients

  • 150g unsalted butter, softened
  • 100g soft brown sugar
  • 75g caster sugar
  • 1 large egg
  • 1 teaspoon vanilla extract
  • 125g plain flour
  • ½ teaspoon bicarbonate of soda
  • ½ teaspoon fine salt
  • 150g rolled oats
  • 150g chocolate chips or chopped chocolate

Method

  1. Heat the oven to 180°C (160°C fan, Gas Mark 4). Line two baking trays with baking paper.
  2. Beat the softened butter with the brown and caster sugars until creamy. Mix in the egg and vanilla extract.
  3. In a separate bowl, combine the flour, bicarbonate of soda and salt. Stir this into the butter mixture until just combined.
  4. Fold in the rolled oats and chocolate. Avoid overmixing, which can make the cookies tougher.
  5. For thicker cookies, cover and chill the dough for 30 minutes. This step can be skipped if time is short.
  6. Roll the dough into balls, using about one tablespoon for each, and place them on the trays with plenty of space between them. Gently flatten each ball slightly.
  7. Bake for 10–12 minutes, until the edges are golden and the centres still look a little soft.
  8. Leave the cookies on the trays for five minutes, then transfer them to a wire rack to cool.

Tips for the best results

Use rolled oats for a chewy texture; instant oats tend to produce a softer, less distinct crumb. Dark, milk or white chocolate all work well, and chopped chocolate creates lovely pockets that melt into the dough. For extra flavour, add a pinch of cinnamon or a handful of chopped walnuts.

Take the cookies out while their centres are still slightly soft. They will continue to set as they cool, leaving them tender rather than dry. Store them in an airtight container at room temperature for up to five days, or freeze the unbaked dough balls for freshly baked cookies whenever the craving strikes.


Oatmeal Chocolate Chip Cookies: 9 Frequently Asked Questions

  1. How do you make oatmeal chocolate chip cookies?
  2. What ingredients do you need for oatmeal chocolate chip cookies?
  3. Can you use porridge oats instead of rolled oats in oatmeal chocolate chip cookies?
  4. Why are my oatmeal chocolate chip cookies spreading too much?
  5. How do you keep oatmeal chocolate chip cookies soft and chewy?
  6. Should you chill oatmeal chocolate chip cookie dough before baking?
  7. How long should oatmeal chocolate chip cookies bake for?
  8. Can you freeze oatmeal chocolate chip cookie dough?
  9. How should you store oatmeal chocolate chip cookies to keep them fresh?

How do you make oatmeal chocolate chip cookies?

To make oatmeal chocolate chip cookies, cream softened butter with brown and caster sugar, then beat in an egg and a little vanilla extract. Stir in plain flour, bicarbonate of soda and salt, followed by rolled oats and chocolate chips. Spoon the dough into balls on a lined baking tray, leaving space for them to spread, and bake at 180°C (160°C fan) for about 10–12 minutes, until the edges are golden but the centres are still soft. Leave them to cool on the tray for a few minutes before transferring to a rack.

What ingredients do you need for oatmeal chocolate chip cookies?

Oatmeal chocolate chip cookies typically need rolled oats, plain flour, butter, brown and caster sugar, an egg, vanilla extract, bicarbonate of soda and a little salt. Chocolate chips or chopped chocolate provide the chocolatey pieces, while optional extras such as cinnamon, nuts or raisins can add flavour and texture.

Can you use porridge oats instead of rolled oats in oatmeal chocolate chip cookies?

Yes, you can use porridge oats instead of rolled oats in oatmeal chocolate chip cookies. As porridge oats are usually finer, they’ll give the cookies a softer, less chewy texture and may absorb moisture more quickly. For the closest result, use the same weight and avoid instant porridge sachets, which may contain added sugar, salt or flavourings.

Why are my oatmeal chocolate chip cookies spreading too much?

Oatmeal chocolate chip cookies may spread too much if the butter is too warm or melted, the dough hasn’t been chilled, or there is too little flour or too much sugar. Make sure to measure the ingredients accurately, use softened butter rather than runny butter, and chill the dough for 30 minutes before baking. It can also help to check that the oven is fully preheated and to bake the cookies on a cool tray, as a warm tray can cause the dough to spread before it sets.

How do you keep oatmeal chocolate chip cookies soft and chewy?

To keep oatmeal chocolate chip cookies soft and chewy, avoid overbaking them: take them out when the edges are golden but the centres still look slightly soft, as they will continue to set on the tray. Using more brown sugar than caster sugar helps retain moisture, while rolled oats give the cookies their chewy texture. Store the cooled cookies in an airtight container to keep them fresh.

Chilling oatmeal chocolate chip cookie dough is optional, but it can improve the cookies. A rest of around 30 minutes in the fridge helps the oats absorb moisture and firms the butter, so the cookies are less likely to spread too much and may have a chewier texture and deeper flavour. If you prefer a thinner, softer cookie or are short on time, you can bake the dough straight away; keep an eye on them, as they may need slightly less time in the oven.

How long should oatmeal chocolate chip cookies bake for?

Oatmeal chocolate chip cookies usually take 10–12 minutes to bake in an oven preheated to 180°C (160°C fan). They are ready when the edges are lightly golden but the centres still look slightly soft; they will continue to set as they cool. For evenly baked cookies, leave space between them on the baking tray and check them towards the end of the cooking time, as ovens and cookie sizes can vary.

Yes, oatmeal chocolate chip cookie dough freezes well. Shape it into individual balls and arrange them on a lined tray, then freeze until firm before transferring them to a sealed freezer-safe container or bag. They’ll keep for up to three months. Bake straight from frozen, adding a couple of minutes to the usual baking time, and check that the edges are golden and the centres are just set.

How should you store oatmeal chocolate chip cookies to keep them fresh?

Store oatmeal chocolate chip cookies in an airtight container at room temperature, once they have cooled completely. They should stay soft and fresh for around five days; adding a small piece of bread to the container can help prevent them from drying out. For longer storage, freeze the cookies in a sealed freezer-safe container for up to three months, then thaw at room temperature before serving.

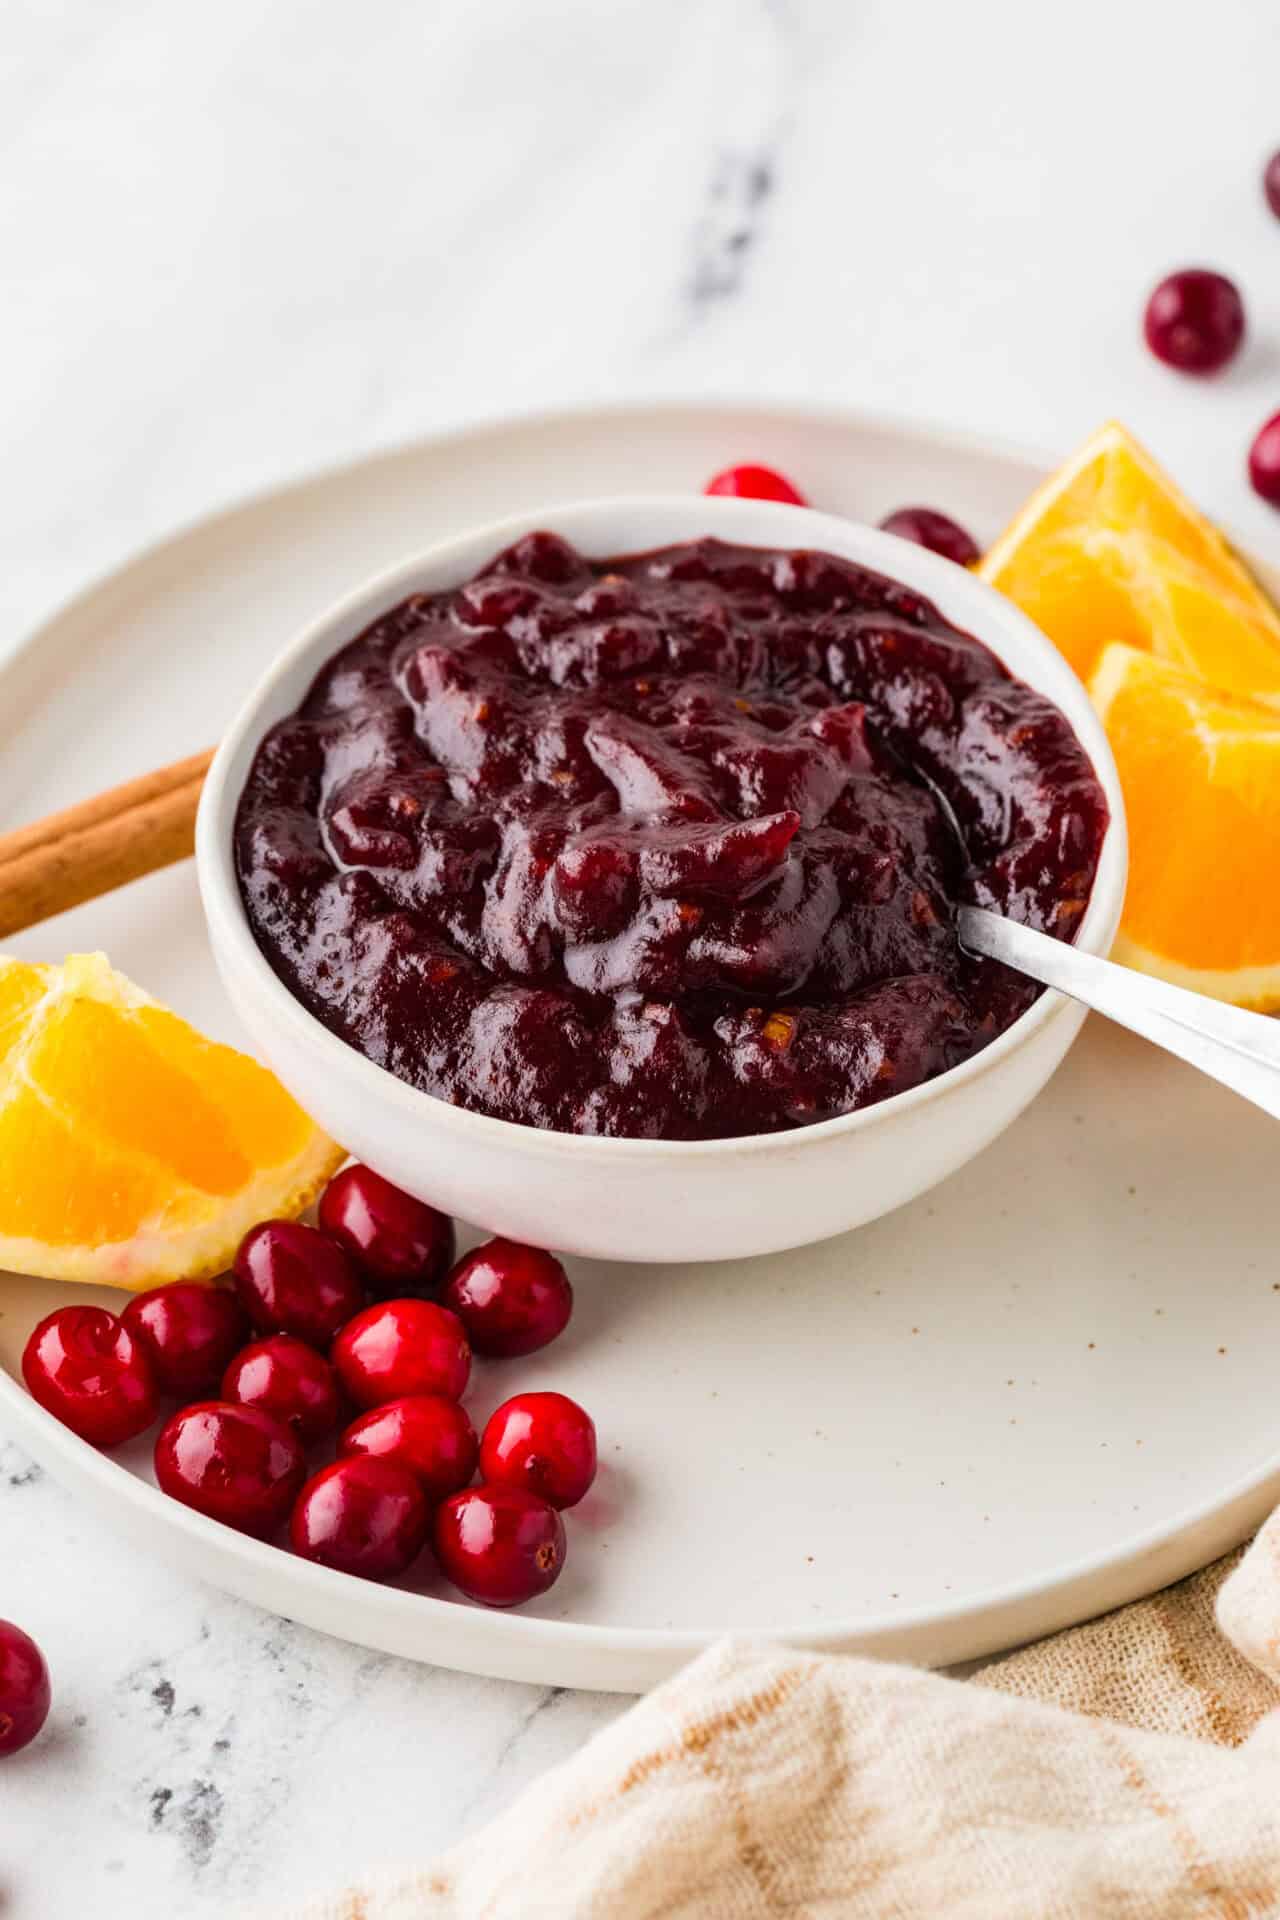
Easy Homemade Cranberry Sauce Recipe for a Festive Feast

cranberry sauce recipe

Easy Homemade Cranberry Sauce

Bright, tangy and gently sweet, cranberry sauce is a classic accompaniment to roast turkey, chicken and other festive dishes. It is quick to make at home, needs just a handful of ingredients and can be prepared ahead of time.

Ingredients

  • 300g fresh or frozen cranberries
  • 150g caster sugar
  • 150ml water
  • Finely grated zest of 1 orange
  • 1 tablespoon orange juice
  • A pinch of salt

Method

  1. Put the sugar and water into a medium saucepan. Warm over a low heat, stirring until the sugar has dissolved.
  2. Add the cranberries, orange zest, orange juice and salt. Bring the mixture to a gentle simmer.
  3. Cook for 10–15 minutes, stirring occasionally, until most of the berries have burst and the sauce has thickened. It will become thicker as it cools.
  4. Taste and adjust the sweetness or sharpness if needed. Add a little more sugar for a sweeter sauce, or a squeeze of orange juice for extra brightness.
  5. Remove from the heat and leave to cool. Spoon into a serving bowl, or transfer to a clean container and refrigerate.

Tips for the Best Cranberry Sauce

Frozen cranberries can be used straight from the freezer; they may need a few extra minutes to soften. For a smoother sauce, mash the berries with a fork or briefly blend the cooked mixture. For a chunkier texture, stop cooking as soon as the berries have burst and the sauce looks glossy.

You can also add a cinnamon stick while the sauce simmers, then remove it before serving. A little finely grated ginger or a splash of port makes a warming variation.

Make-Ahead and Storage

Cranberry sauce is ideal for making ahead. Once cooled, cover and keep it in the fridge for up to one week. Serve chilled or bring it to room temperature before serving. Stir well after refrigeration, as the sauce will set slightly.

Serving Suggestions

Serve this homemade cranberry sauce with roast turkey, chicken or baked ham. It is also delicious in sandwiches, alongside a cheeseboard, or spooned over leftover roast vegetables.


8 Tips for Perfect Homemade Cranberry Sauce

  1. Use fresh or frozen cranberries; no need to thaw frozen ones.
  2. Rinse fresh cranberries and discard any bruised berries.
  3. Add orange zest and juice for a bright citrus flavour.
  4. Adjust the sugar to balance the berries’ sharpness.
  5. Simmer gently until most berries burst and the sauce thickens.
  6. Stir often to stop the sauce catching on the pan.
  7. Remember it thickens further as it cools.
  8. Make it ahead and refrigerate in a covered container.

Use fresh or frozen cranberries; no need to thaw frozen ones.

Fresh and frozen cranberries both work well in this recipe. If using frozen berries, add them straight to the pan without thawing first. They may take a little longer to soften and burst as the sauce simmers, so cook until the berries have broken down and the mixture has thickened to your liking.

Rinse fresh cranberries and discard any bruised berries.

Rinse the fresh cranberries under cold running water, then pick through them and discard any that are bruised, shrivelled or damaged. This quick check helps ensure your sauce has a fresh flavour and an even texture.

Add orange zest and juice for a bright citrus flavour.

Adding orange zest and juice gives cranberry sauce a bright, fresh citrus flavour that complements the berries’ natural sharpness. The zest brings fragrant orange oils, while the juice adds gentle sweetness and tang. Stir both into the pan as the cranberries simmer, then taste and adjust the balance to suit your preference.

Adjust the sugar to balance the berries’ sharpness.

Taste the sauce as it cooks and adjust the sugar to suit your preference. Cranberries can be quite sharp, so add a little more sugar if the flavour is too tart, stirring until it dissolves before tasting again. For a less sweet sauce with a brighter, tangier flavour, use less sugar. Keep in mind that the sauce will taste slightly sharper when warm and thicken as it cools.

Simmer gently until most berries burst and the sauce thickens.

Simmer the cranberries gently, stirring occasionally, until most of the berries have burst and the mixture has thickened. This usually takes around 10–15 minutes. Keep in mind that the sauce will become thicker as it cools, so take it off the heat while it is still slightly looser than you’d like.

Stir often to stop the sauce catching on the pan.

Stir the cranberry sauce regularly as it simmers to prevent the fruit and sugar from sticking to the bottom of the pan and catching. A gentle, frequent stir also helps the cranberries cook evenly and the sauce thicken to a smooth, glossy consistency.

Remember it thickens further as it cools.

Keep in mind that cranberry sauce will thicken further as it cools, so take it off the heat while it is still slightly looser than you’d like. This helps prevent it from becoming too firm once chilled.

Make it ahead and refrigerate in a covered container.

Cranberry sauce is easy to prepare ahead, making it one less thing to do on the day. Once it has cooled, transfer it to a clean, covered container and refrigerate for up to a week. The sauce will thicken as it chills, so give it a good stir before serving, and let it come to room temperature if you prefer a softer texture.

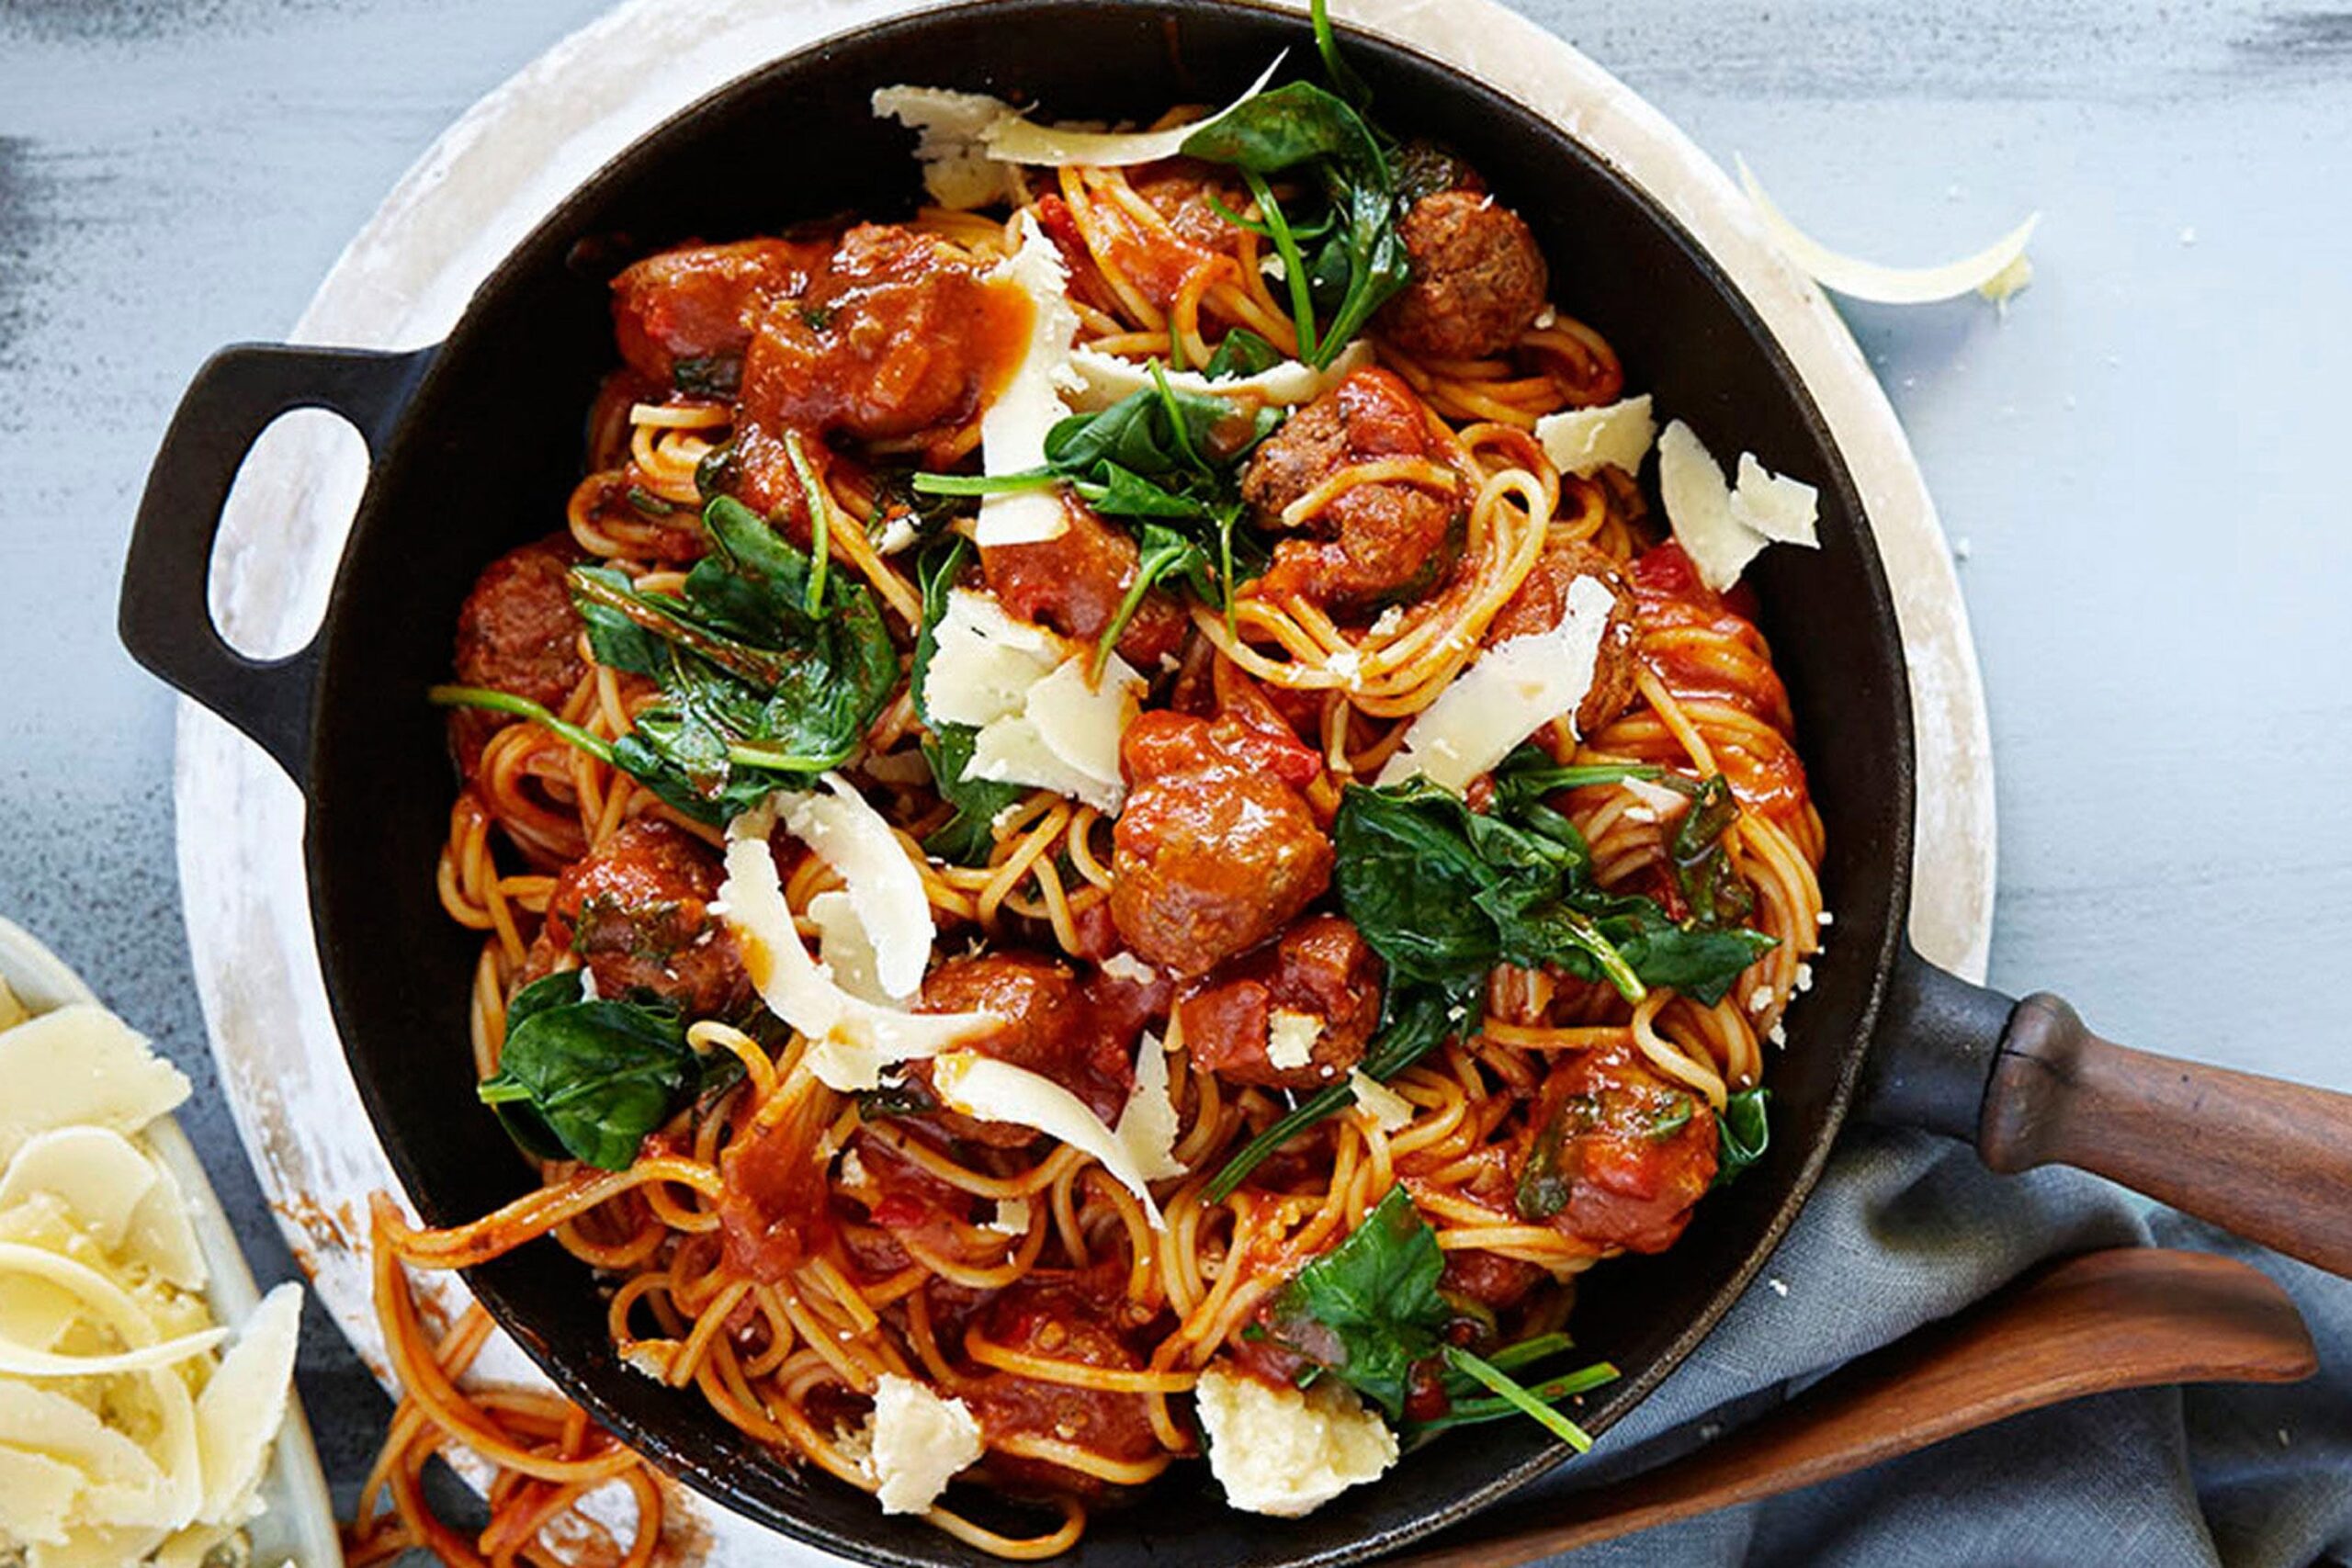
Spaghetti and Meatballs: A Comforting Classic for Every Table

spaghetti and meatballs

Spaghetti and Meatballs: A Comforting Classic

Few dishes feel as welcoming as a bowl of spaghetti and meatballs. Long strands of pasta, a rich tomato sauce and tender, savoury meatballs make a combination that is hearty, satisfying and easy to share. It is now familiar around the world, but the dish is especially associated with Italian-American cooking.

A dish with a story

Meatballs and pasta both have deep roots in Italian cooking, but serving large meatballs with spaghetti in a generous portion of tomato sauce is more closely linked to Italian-American kitchens. In the late nineteenth and early twentieth centuries, Italian immigrants in the United States adapted familiar recipes using ingredients that were more readily available to them. Over time, the pairing became a much-loved dish in its own right.

There is no single definitive recipe. Families and cooks vary the meat, seasonings, sauce and cooking method, making spaghetti and meatballs a dish that is easy to personalise.

What makes a great plate?

Good meatballs should be tender rather than dense. A mixture of beef and pork is popular, while breadcrumbs and egg help hold the mixture together. Finely chopped onion, garlic, herbs and grated Parmesan add flavour. Mixing gently is important: working the meat too much can make the finished meatballs firm.

The sauce is just as important. A simple tomato sauce made with onion, garlic, tinned tomatoes and herbs gives the meatballs time to cook gently while adding depth to the dish. Simmering them in the sauce helps keep them moist and allows the flavours to mingle.

An easy recipe for spaghetti and meatballs

Ingredients

  • 400g spaghetti
  • 500g minced beef, or a mixture of beef and pork
  • 50g fresh breadcrumbs
  • 1 egg, lightly beaten
  • 1 small onion, finely grated or chopped
  • 1 garlic clove, crushed
  • 2 tablespoons grated Parmesan, plus extra to serve
  • 1 tablespoon chopped parsley
  • 1 tablespoon olive oil
  • 700ml passata or tinned chopped tomatoes
  • 1 teaspoon dried oregano
  • Salt and black pepper

Method

  1. Put the minced meat, breadcrumbs, egg, half the onion, half the garlic, Parmesan and parsley in a bowl. Season with salt and pepper, then mix gently until combined.
  2. Shape the mixture into small meatballs. Try to make them roughly the same size so they cook evenly.
  3. Heat the olive oil in a large, deep frying pan or saucepan. Brown the meatballs in batches, turning them carefully. They do not need to be cooked through at this stage. Transfer them to a plate.
  4. Add the remaining onion and garlic to the pan and cook gently until softened. Stir in the passata or tomatoes and oregano. Season to taste.
  5. Return the meatballs to the pan. Cover partially and simmer gently for 20–25 minutes, or until the meatballs are cooked through and the sauce has thickened.
  6. Meanwhile, cook the spaghetti in a large pan of salted boiling water according to the packet instructions. Drain, reserving a little of the pasta water.
  7. Toss the spaghetti with some of the sauce, adding a splash of pasta water if needed. Serve with the meatballs, extra sauce and grated Parmesan.

Ways to make it your own

For a lighter version, use turkey or chicken mince. A vegetarian alternative can be made with lentils, beans or plant-based mince. You can also add a pinch of chilli flakes to the sauce, swap parsley for basil, or finish the dish with a drizzle of olive oil.

Spaghetti and meatballs is best served straight away, while the pasta is hot and the sauce is glossy. Add a green salad or some crusty bread, and you have a relaxed, satisfying meal made for sharing.


7 Tips for Perfect Spaghetti and Meatballs

  1. Use beef and pork for juicy meatballs.
  2. Add breadcrumbs to keep meatballs tender.
  3. Season the mixture well with salt and pepper.
  4. Brown meatballs before simmering them in sauce.
  5. Cook spaghetti until just al dente.
  6. Salt the pasta water generously.
  7. Toss spaghetti with sauce before serving.

Use beef and pork for juicy meatballs.

For tender, juicy meatballs, combine beef and pork. Beef brings a rich, savoury flavour, while pork adds extra fat to keep the meatballs moist as they cook. Mix the mince gently with your other ingredients, as overworking it can make the meatballs dense.

Add breadcrumbs to keep meatballs tender.

Add breadcrumbs to your meatball mixture to help keep the finished meatballs tender and moist. They absorb some of the liquid as the meat cooks, helping to prevent the meat from becoming dense or dry. For an especially soft texture, soak the breadcrumbs briefly in milk before mixing them with the mince.

Season the mixture well with salt and pepper.

Season the meatball mixture generously with salt and freshly ground black pepper before shaping it. Proper seasoning brings out the flavour of the meat and other ingredients, while mixing it through evenly helps every meatball taste delicious. If you are unsure about the seasoning, cook a small piece of the mixture in a pan, taste it, and adjust before forming the rest.

Brown meatballs before simmering them in sauce.

Brown the meatballs in a little oil before adding them to the sauce. This creates a golden, flavourful crust and adds savoury depth to the dish. They do not need to cook through at this stage; let them finish gently in the sauce so they stay tender and absorb its rich tomato flavour.

Cook spaghetti until just al dente.

Cook the spaghetti until it is just al dente: tender but still slightly firm in the centre. Check it a minute or two before the packet’s recommended cooking time, as pasta can quickly become too soft. Drain it promptly, reserving a little cooking water to help the sauce cling to the strands.

Salt the pasta water generously.

Salt the pasta water generously to season the spaghetti from the inside as it cooks. Add the salt once the water is boiling, then stir in the pasta. This simple step brings out the pasta’s flavour and helps balance the rich tomato sauce and savoury meatballs.

Toss spaghetti with sauce before serving.

Toss the cooked spaghetti with the sauce just before serving so every strand is evenly coated and full of flavour. A splash of reserved pasta water can help the sauce cling to the spaghetti, making each mouthful deliciously glossy.

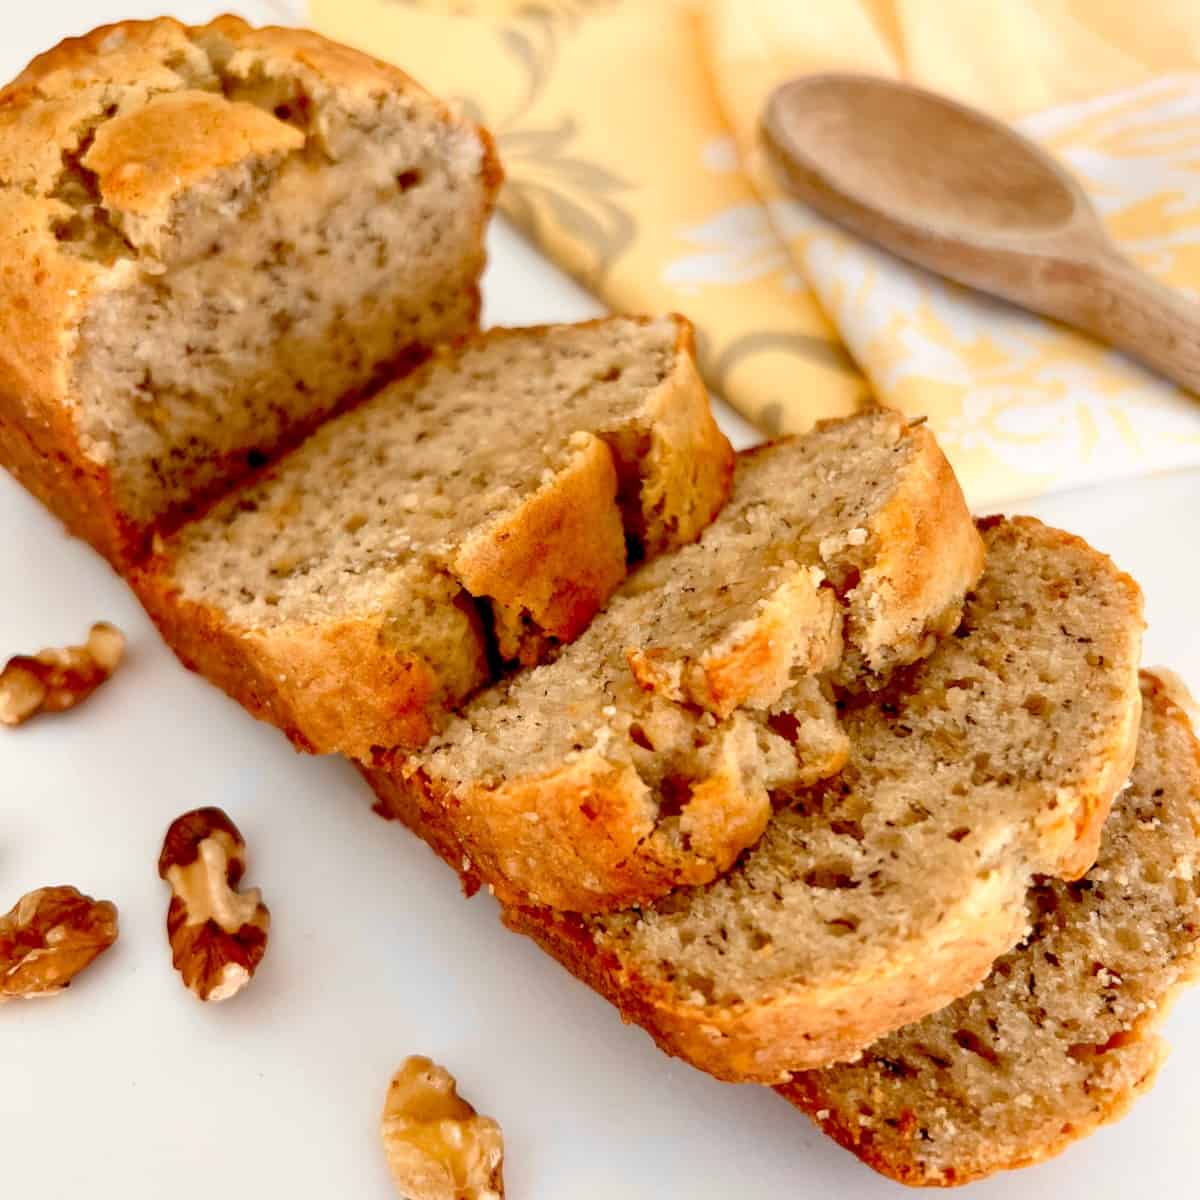
The Best Banana Bread Recipe for a Moist, Delicious Loaf

best banana bread recipe

The Best Banana Bread Recipe

Moist, tender and full of ripe banana flavour, this easy banana bread is a comforting favourite that makes the most of overripe bananas. It takes only a few minutes to prepare and is delicious served warm, toasted or simply sliced with a cup of tea.

Ingredients

Makes one loaf (about 10 slices)

  • 100g unsalted butter, melted and cooled slightly
  • 150g soft brown sugar
  • 2 large eggs
  • 1 teaspoon vanilla extract
  • 3 very ripe bananas, peeled and mashed (about 300g)
  • 250g plain flour
  • 1 teaspoon bicarbonate of soda
  • ½ teaspoon baking powder
  • ¼ teaspoon fine salt
  • 2 tablespoons milk

Optional additions: 75g chopped walnuts or chocolate chips, or ½ teaspoon ground cinnamon.

Method

  1. Heat the oven to 180°C (160°C fan)/Gas Mark 4. Grease and line a 900g (2lb) loaf tin with baking paper.
  2. In a large bowl, whisk together the melted butter and sugar. Beat in the eggs and vanilla extract, then stir in the mashed bananas.
  3. In a separate bowl, combine the flour, bicarbonate of soda, baking powder and salt. Add the dry ingredients to the banana mixture and fold together gently until just combined. Stir in the milk. If using nuts, chocolate chips or cinnamon, fold them in now.
  4. Spoon the mixture into the prepared tin and level the top. Bake for 50–60 minutes, until risen and golden. A skewer inserted into the centre should come out clean or with a few moist crumbs.
  5. Leave the loaf to cool in the tin for 10 minutes, then transfer it to a wire rack to cool completely before slicing.

Tips for Perfect Banana Bread

  • Use very ripe bananas. Bananas with plenty of brown spots are sweeter and easier to mash, giving the loaf its characteristic flavour and moisture.
  • Mix gently. Fold the flour in only until no dry streaks remain. Overmixing can make the loaf dense.
  • Check before the end of baking. If the top is browning too quickly, cover it loosely with foil for the final 10–15 minutes.
  • Let it cool before slicing. This helps the loaf set and makes neater slices.

How to Store Banana Bread

Once completely cool, keep the loaf in an airtight container at room temperature for up to three days. It can also be frozen, whole or in slices, for up to three months. Wrap it well and defrost at room temperature before serving.

Enjoy a slice as it is, or warm it gently and serve with butter. For an extra treat, toast a slice and top it with a little honey or peanut butter.


Best Banana Bread Recipe: Secrets, Common Mistakes and Bakery-Style Tips

  1. What is the secret to making good banana bread?
  2. What is the number one mistake made when making banana bread?
  3. What is the best banana bread recipe in the UK?
  4. What one ingredient makes banana bread taste like it’s from a bakery?

What is the secret to making good banana bread?

The secret to good banana bread is using very ripe bananas, ideally with plenty of brown spots, as they add natural sweetness and moisture. Measure the ingredients accurately, and fold the flour into the wet mixture just until combined to keep the loaf tender rather than dense. Finally, bake it until a skewer inserted into the centre comes out clean or with a few moist crumbs, then let it cool before slicing.

What is the number one mistake made when making banana bread?

The number one mistake when making banana bread is overmixing the batter. Once the flour has been added, fold the ingredients together gently and stop as soon as no dry streaks remain. Overworking the mixture develops the gluten in the flour, which can leave the loaf tough and dense rather than soft and tender.

What is the best banana bread recipe in the UK?

The best banana bread recipe in the UK is one that makes a moist, tender loaf with plenty of ripe banana flavour. This simple version combines mashed overripe bananas, melted butter and soft brown sugar, with plain flour and bicarbonate of soda for a light rise. Bake it at 180°C (160°C fan)/Gas Mark 4 until golden and a skewer inserted in the centre comes out clean. Add walnuts or chocolate chips if you like, and let the loaf cool before slicing.

What one ingredient makes banana bread taste like it’s from a bakery?

Browned butter is the secret ingredient that gives banana bread a rich, bakery-style flavour. Gently heat the butter until its milk solids turn golden brown and smell nutty, then let it cool before adding it to the batter. Its toasted, caramel-like notes pair beautifully with ripe bananas and make the loaf taste especially indulgent.

Sweet Potato Pie: A Comforting Southern Classic

sweet potato pie

Sweet Potato Pie: A Comforting Southern Classic

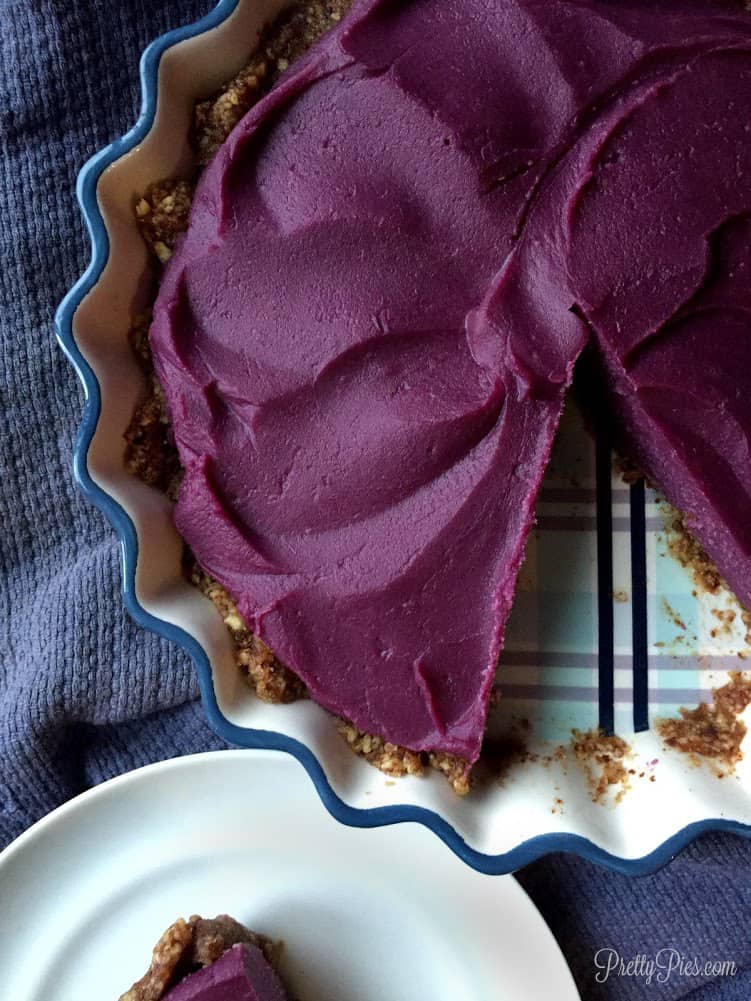
Sweet potato pie is a beloved dessert from the southern United States, where it has long been part of family gatherings and holiday meals. Smooth, gently spiced and naturally sweet, it is often compared with pumpkin pie. But sweet potato brings its own distinctive flavour: mellow, earthy and rich, with a soft texture that makes every slice feel wonderfully comforting.

A little history

Sweet potatoes have been grown and enjoyed in the Americas for centuries. In the southern states, they became an important and versatile ingredient, used in everything from savoury dishes to puddings and pies. Sweet potato pie is especially associated with African American cooking and the culinary traditions of the American South, where recipes have been passed down and adapted across generations.

Today, it is a familiar feature of Thanksgiving tables and other celebrations, though it is just as welcome as a simple weekend dessert. Some families favour a deeply spiced filling, while others let the flavour of the sweet potato take centre stage.

What makes a good sweet potato pie?

A classic pie starts with cooked sweet potatoes, mashed until smooth and combined with eggs, sugar, butter and milk or cream. Cinnamon and nutmeg are common additions; vanilla is often included, too. The filling is poured into a pastry case and baked until set, leaving the centre tender and custard-like.

For the best texture, cook the sweet potatoes until completely soft, then mash or blend them thoroughly. Baking them in their skins can give the filling a concentrated flavour, while boiling is a quicker option. If the mash seems watery, allow it to cool and drain away any excess liquid before mixing the filling.

An easy sweet potato pie recipe

Ingredients

  • 1 unbaked 23 cm shortcrust pastry case
  • 500 g cooked, peeled sweet potato
  • 100 g soft brown sugar
  • 50 g butter, melted
  • 2 medium eggs
  • 120 ml evaporated milk or double cream
  • 1 teaspoon vanilla extract
  • 1 teaspoon ground cinnamon
  • ¼ teaspoon ground nutmeg
  • A pinch of salt

Method

  1. Heat the oven to 180°C (160°C fan). Place the pastry case on a baking tray.
  2. Mash the cooked sweet potato until smooth. For an extra silky filling, blend it briefly.
  3. In a bowl, whisk together the sugar, melted butter, eggs, milk or cream, vanilla, spices and salt. Stir in the sweet potato until evenly combined.
  4. Pour the filling into the pastry case and smooth the top. Bake for 45–55 minutes, until the edges are set and the centre has only a slight wobble.
  5. Leave the pie to cool before slicing. The filling will firm up as it rests.

Serving and variations

Sweet potato pie is delicious at room temperature or slightly chilled. Serve it plain, with softly whipped cream, or alongside a scoop of vanilla ice cream. A little orange zest can brighten the filling, while ginger or allspice adds extra warmth. For a less sweet pie, reduce the sugar slightly and let the sweet potato’s natural sweetness shine through.

Whether served at a festive meal or enjoyed with a cup of tea, sweet potato pie is a simple, generous dessert with a story rooted in home cooking. Its appeal lies in the balance of buttery pastry, smooth filling and fragrant spice—and in the many family traditions carried in every slice.


Sweet Potato Pie FAQs: Flavour, Preparation, Baking, Storage and Freezing

  1. What does sweet potato pie taste like?
  2. How do you make sweet potato pie from scratch?
  3. Should sweet potatoes be baked or boiled for pie?
  4. How can you tell when sweet potato pie is fully baked?
  5. How should sweet potato pie be stored, and how long does it keep?
  6. Can you freeze sweet potato pie?

What does sweet potato pie taste like?

Sweet potato pie has a smooth, creamy texture and a gently sweet, earthy flavour, with a hint of nuttiness from the sweet potato. Warm spices such as cinnamon and nutmeg often add a fragrant, comforting note, while the buttery pastry provides a crisp contrast to the soft filling. Its flavour is sometimes compared with pumpkin pie, but sweet potato pie is typically richer and less sharply spiced.

How do you make sweet potato pie from scratch?

To make sweet potato pie from scratch, prepare a shortcrust pastry case and bake or boil sweet potatoes until tender. Mash the peeled potatoes until smooth, then mix with eggs, melted butter, sugar, milk or cream, vanilla and warming spices such as cinnamon and nutmeg. Pour the filling into the pastry case and bake at 180°C (160°C fan) for about 45–55 minutes, until the edges are set and the centre has a slight wobble. Leave the pie to cool before serving so the filling can firm up.

Should sweet potatoes be baked or boiled for pie?

Either method works, but baking sweet potatoes is often best for pie because it concentrates their natural sweetness and keeps the flesh less watery, helping create a rich, smooth filling. Boiling is quicker and perfectly suitable, though the potatoes may absorb extra moisture; drain them well and let them cool before mashing. Whichever method you choose, cook the potatoes until very tender and mash them thoroughly for an even texture.

How can you tell when sweet potato pie is fully baked?

Sweet potato pie is fully baked when the edges of the filling are set and the centre still has a slight wobble when you gently shake the tin. A knife inserted about 2.5 cm from the centre should come out mostly clean, though the very middle may remain soft; it will firm up as the pie cools. Avoid waiting until the entire surface is completely firm, as the filling can become dry or overbaked.

How should sweet potato pie be stored, and how long does it keep?

Because sweet potato pie contains eggs and dairy, let it cool, then cover it and refrigerate it within two hours of baking. It will keep in the fridge for around 3–4 days. For longer storage, wrap it well and freeze it for up to 2 months; thaw it overnight in the fridge before serving.

Can you freeze sweet potato pie?

Yes, sweet potato pie can be frozen, either whole or in individual slices. Let it cool completely, then wrap it tightly in cling film and a layer of foil, or place it in an airtight freezer-safe container. Freeze for up to three months and defrost overnight in the fridge. For the best texture, avoid freezing pies topped with cream; add any toppings after thawing. Reheat gently in the oven if you prefer to serve it warm.

Chocolate Crinkle Cookies: A Fudgy, Crackled Favourite for Every Occasion

chocolate crinkle cookies

Chocolate Crinkle Cookies: Little Bites of Fudgy Joy

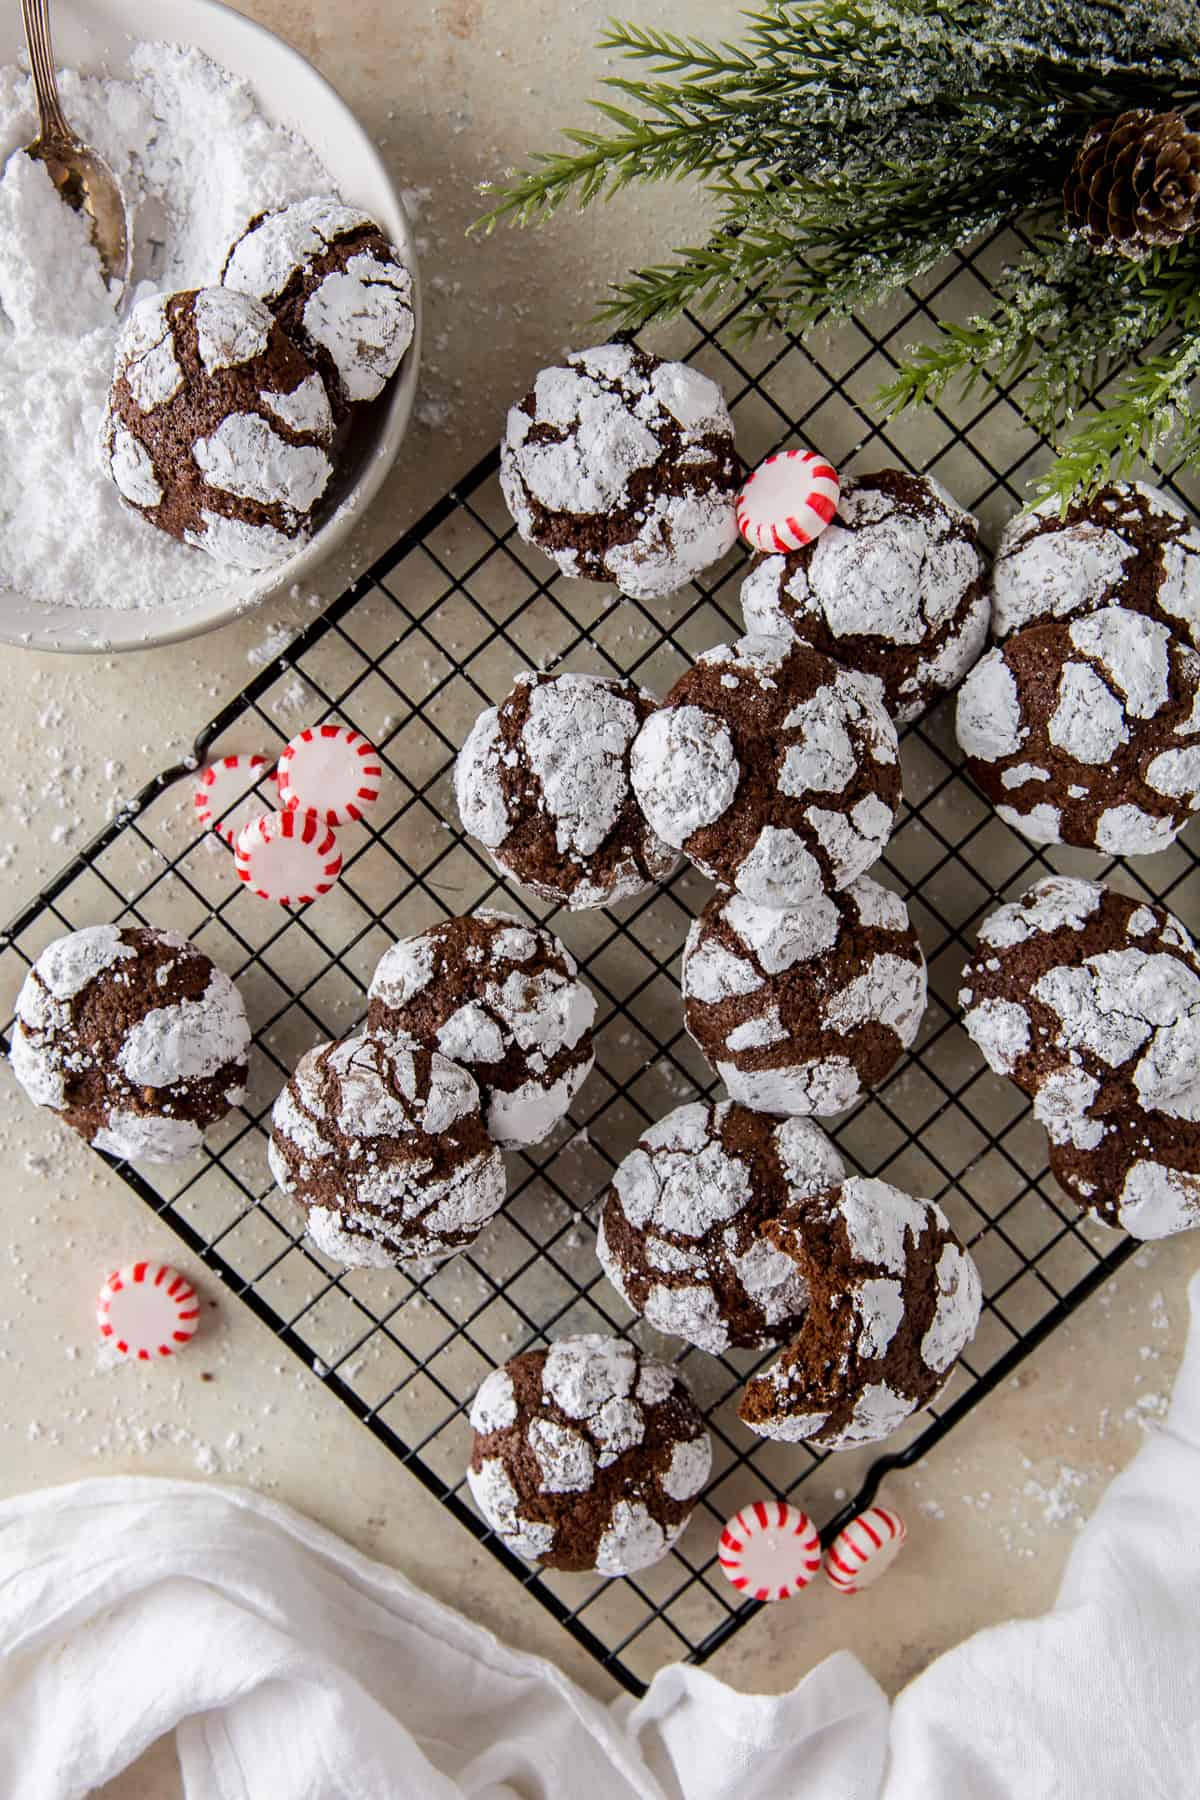
With their soft, chocolate-rich centres and snowy, cracked tops, chocolate crinkle cookies are as lovely to look at as they are to eat. As they bake, the dark dough spreads and splits, revealing a dusting of icing sugar beneath. The result is a striking, craggy finish and a soft, brownie-like middle.

These cookies are a popular treat during the festive season, but there is no need to save them for a special occasion. They are simple to make, need no special equipment and pair beautifully with a cup of tea or coffee.

What makes them crinkle?

The distinctive cracked surface comes from rolling the chilled dough in icing sugar before baking. The outside of each ball begins to set in the oven while the dough beneath continues to spread. As it expands, the sugar-coated surface breaks into pale patches and dark chocolate cracks.

Chilling the dough is important. It makes the mixture easier to handle and helps the cookies keep their shape long enough to develop their characteristic crinkles.

Chocolate crinkle cookie recipe

This recipe makes about 20 cookies.

Ingredients

  • 200g caster sugar
  • 60ml neutral-flavoured oil, such as sunflower oil
  • 2 large eggs
  • 1 teaspoon vanilla extract
  • 60g cocoa powder
  • 125g plain flour
  • 1 teaspoon baking powder
  • ¼ teaspoon salt
  • About 75g icing sugar, for coating

Method

  1. In a large bowl, whisk together the caster sugar and oil. Beat in the eggs, one at a time, then stir in the vanilla extract.
  2. Sift in the cocoa powder, flour, baking powder and salt. Mix until a thick, sticky dough forms.
  3. Cover the bowl and chill the dough for at least 2 hours, or until firm enough to roll. It can also be chilled overnight.
  4. Heat the oven to 180°C (160°C fan) and line two baking trays with baking paper. Put the icing sugar in a shallow bowl.
  5. Roll the dough into balls about the size of a walnut. Coat each ball generously in icing sugar, then arrange them on the trays with space between each one.
  6. Bake for 10–12 minutes. The edges should look set, while the centres will still be soft. Leave the cookies on the trays for a few minutes before transferring them to a wire rack to cool.

Tips for the best results

  • Chill thoroughly: If the dough becomes sticky while you are rolling it, return it to the fridge for a little longer.
  • Use plenty of icing sugar: A generous coating helps create a clear contrast between the white surface and dark cracks.
  • Do not overbake: The cookies will continue to firm up as they cool. Taking them out while the centres are still soft keeps them fudgy.
  • Try a flavour twist: A little orange zest, a pinch of espresso powder or a small amount of ground cinnamon can complement the cocoa.

Serving and storing

Chocolate crinkle cookies are delicious once cooled, but they are especially tempting when the centres are still a little warm. Serve them on their own, alongside fresh fruit, or with a scoop of vanilla ice cream for an easy dessert.

Store the cooled cookies in an airtight container at room temperature for up to five days. For freshly baked cookies whenever the mood strikes, roll the dough into balls and freeze them before coating. Defrost in the fridge, roll in icing sugar and bake as directed.

Simple, rich and wonderfully crackled, chocolate crinkle cookies are a cheerful addition to any baking tin—and a reliable favourite for chocolate lovers of all ages.


6 Reasons to Love Chocolate Crinkle Cookies

  1. Rich chocolate flavour.
  2. Soft, fudgy centres.
  3. Delightful crackled tops.
  4. Easy to make at home.
  5. Lovely with tea or coffee.
  6. Perfect for sharing.


Four Drawbacks of Chocolate Crinkle Cookies

  1. Can be very sweet.
  2. Dough needs chilling time.
  3. Easy to overbake and dry out.
  4. Icing sugar can make a mess.

Rich chocolate flavour.

Chocolate crinkle cookies deliver a wonderfully rich chocolate flavour in every bite. Cocoa powder gives the dough its deep, indulgent taste, while the soft, fudgy centre makes each cookie feel almost like a little brownie. Their sweetness is balanced by the cocoa’s gentle bitterness, creating a treat that satisfies chocolate cravings without needing elaborate ingredients or toppings.

Soft, fudgy centres.

One of the best things about chocolate crinkle cookies is their soft, fudgy centres. While the outside bakes into a delicate, lightly crisp shell, the middle stays rich and tender, with a texture reminiscent of a brownie. That contrast makes every bite especially satisfying and keeps the cookies deliciously moist.

Delightful crackled tops.

One of the most appealing features of chocolate crinkle cookies is their delightful crackled tops. As the cookies bake, the dough expands and splits through its coating of icing sugar, creating a beautiful pattern of snowy white and rich chocolate brown. Each cookie has its own distinctive finish, making them as charming to serve as they are delicious to eat.

Easy to make at home.

Chocolate crinkle cookies are easy to make at home, even for beginner bakers. The ingredients are simple and readily available, and the dough comes together without any special equipment. After chilling, roll it into balls, coat them in icing sugar and bake until the tops crack. It’s a straightforward process that delivers impressive-looking, fudgy cookies with very little fuss.

Lovely with tea or coffee.

Chocolate crinkle cookies are a lovely companion to a cup of tea or coffee. Their soft, fudgy centres and rich cocoa flavour pair beautifully with a hot drink, making them an inviting treat for an afternoon break or a relaxed catch-up with friends.

Perfect for sharing.

Chocolate crinkle cookies are perfect for sharing, whether you’re taking a tin to a family gathering, bringing a homemade treat to work or offering something sweet to friends over tea. Their bite-sized shape makes them easy to serve, and their snowy, cracked tops look inviting arranged on a plate. Since the recipe makes a generous batch, there’s usually enough for everyone to enjoy.

Can be very sweet.

Chocolate crinkle cookies can be very sweet, particularly because the rich cocoa dough is coated in icing sugar before baking. For those who prefer a more balanced flavour, reduce the sugar slightly or use dark, unsweetened cocoa powder to bring out the chocolate’s natural bitterness.

Dough needs chilling time.

One drawback of chocolate crinkle cookies is that the dough needs time to chill before baking. This step makes it easier to handle and helps the cookies keep their shape, but it means you cannot enjoy them straight away. Remember to plan ahead, or make the dough in advance and leave it in the fridge until you are ready to bake.

Easy to overbake and dry out.

Chocolate crinkle cookies can be easy to overbake, as their dark colour makes it difficult to judge when they are done. Leave them in the oven for too long and their soft, fudgy centres can quickly turn dry and crumbly. For the best texture, take them out when the edges look set but the middles are still slightly soft; they will continue to firm up as they cool.

Icing sugar can make a mess.

One small drawback of chocolate crinkle cookies is the icing sugar, which can quickly dust the worktop, your hands and even the floor. Rolling each piece of sticky dough in sugar is part of what gives the cookies their signature snowy, cracked finish, but it can be a messy job. Using a shallow bowl and lining the baking tray with baking paper can help keep the clean-up to a minimum.

Travel Guides Australia: Your Essential Guide to Exploring Down Under

travel guides australia

Travel Guides to Australia: Plan a Trip Down Under

Australia offers an extraordinary mix of lively cities, ancient landscapes, tropical coastlines and distinctive wildlife. From the cafés and galleries of Melbourne to the red deserts of the Outback, there is plenty to explore. The country is vast, however, so a rewarding visit starts with choosing a region and allowing enough time to experience it.

Choose the right region

Rather than trying to see everything in one trip, focus on the places that best match your interests:

  • Sydney and New South Wales: See Sydney Harbour, explore the city’s neighbourhoods and beaches, or take a trip to the Blue Mountains.
  • Victoria: Discover Melbourne’s food, arts and sporting culture, then follow the Great Ocean Road for coastal scenery.
  • Queensland: Visit the Great Barrier Reef, the rainforests of the Wet Tropics or the beaches around the Whitsundays. Conditions vary by season, so check local guidance before swimming or boating.
  • South Australia: Enjoy Adelaide’s food and wine scene, or travel to Kangaroo Island for wildlife and rugged coastline.
  • Western Australia: Explore Perth and its beaches, or plan a longer journey to the state’s remote coastal and inland regions.
  • The Northern Territory: Experience the landscapes and cultural significance of places such as Uluru-Kata Tjuta National Park and Kakadu National Park.
  • Tasmania: Take in mountain scenery, walking trails, historic sites and fresh local produce.

When to go

Australia’s seasons are the reverse of those in the Northern Hemisphere: summer runs from December to February, autumn from March to May, winter from June to August, and spring from September to November. The climate differs considerably between regions. Northern Australia has a tropical wet season and a drier season, while the south experiences cooler winters and warmer summers. Inland areas can have extreme temperatures.

Before booking, check the typical conditions for the specific places you plan to visit. School holidays and major events can make popular destinations busier, and accommodation may need to be reserved well in advance.

Getting around

Distances in Australia can be much greater than they appear on a map. Domestic flights are useful for travelling between distant cities, while trains and coaches serve some popular routes. Hiring a car offers flexibility in many regions, but long-distance driving requires careful planning. Check fuel availability, road conditions and journey times, and avoid driving when tired. In remote areas, let someone know your route and expected arrival time.

In cities, public transport is often the easiest way to get around. Local transport cards, ticketing systems and services vary, so consult the relevant operator before travelling.

Practical planning tips

  • Check entry requirements: Confirm the visa or travel authorisation requirements that apply to your passport before departure, using official Australian government information.
  • Allow time for distances: A multi-region itinerary can involve long flights or full days on the road. Fewer stops often make for a more relaxed trip.
  • Pack for changing conditions: Sun protection is important in every season. Bring suitable clothing for the climate and activities in each region.
  • Book key activities ahead: Popular tours, national park accommodation and major events can sell out, particularly during busy periods.
  • Consider travel insurance: Choose cover that suits your plans, including any activities such as diving, hiking or driving.
  • Look after the environment: Follow park rules, stay on marked tracks and never feed wildlife.

Respecting Country and culture

Australia’s Aboriginal and Torres Strait Islander peoples have diverse cultures and continuing connections to Country. Visitors can learn more through Indigenous-led tours, cultural centres and community-approved experiences. Follow local guidance at cultural sites, respect photography restrictions and remember that some places may hold deep significance for Traditional Owners.

Make your Australia trip your own

The best travel guide is one that leaves room for both planning and discovery. Choose a manageable itinerary, check local conditions and take time to connect with the places you visit. Whether your ideal trip involves city life, coastal walks, wildlife or vast open landscapes, Australia rewards travellers who explore at a thoughtful pace.


9 Tips for Choosing and Using Travel Guides to Australia

  1. Choose a guide updated for your travel dates.
  2. Check entry rules and visa advice before booking.
  3. Use regional guides to plan long-distance routes.
  4. Compare seasonal weather across states.
  5. Look for public transport and driving guidance.
  6. Check maps for remote areas with limited signal.
  7. Prioritise guides with local safety advice.
  8. Use park guides for permits and trail details.
  9. Save key information offline before you go.

Choose a guide updated for your travel dates.

Choose a travel guide that has been updated close to your travel dates, as opening hours, transport services, entry fees and local conditions can change. Check that its recommendations are still current, especially for remote areas, national parks and seasonal activities, and confirm important details with official sources before you set off.

Check entry rules and visa advice before booking.

Before booking your trip to Australia, check the latest entry requirements and visa advice for your nationality using official Australian government sources. Make sure you understand which visa or travel authorisation you need, how long it may take to obtain, and whether your passport details and planned activities meet the conditions. Requirements can change, so confirm them again before departure.

Use regional guides to plan long-distance routes.

Use regional travel guides to plan long-distance routes across Australia, where distances between towns and attractions can be much greater than they appear on a map. A guide focused on the area can help you choose practical stops, estimate driving times and find fuel, accommodation and points of interest along the way. Check current road conditions and local advice before setting off, especially when travelling through remote areas.

Compare seasonal weather across states.

When planning a trip around Australia, compare seasonal weather across states, as conditions can differ dramatically between regions. The tropical north has distinct wet and dry seasons, while southern states tend to have cooler winters and warmer summers; inland areas can also experience extreme heat. Check forecasts and seasonal advice for each destination before booking, and plan your route, activities and clothing accordingly.

Look for public transport and driving guidance.

When using travel guides for Australia, look for clear advice on public transport and driving, as the best way to get around varies by destination. Cities often have buses, trains, trams or ferries, while regional and remote areas may be easier to explore by car. Check routes, fares, road conditions and journey times in advance, and remember that distances can be much greater than they appear on a map.

Check maps for remote areas with limited signal.

When travelling through Australia’s remote areas, check your maps before setting off, as mobile signal and internet access can be limited or unavailable. Download offline maps, plan your route and note fuel stops, supplies and accommodation in advance. For longer journeys, tell someone where you are going and when you expect to arrive.

Prioritise guides with local safety advice.

When choosing travel guides to Australia, prioritise those with practical, up-to-date local safety advice. Conditions can vary widely between regions, so look for guidance on beach and water safety, wildlife, extreme heat, bushfires, road trips and remote-area travel. Reliable local advice can help you prepare for changing conditions, make informed decisions and enjoy your trip with greater confidence.

Use park guides for permits and trail details.

When exploring Australia’s national parks, use official park guides to check whether permits are required and to find up-to-date trail details. Guides can provide information on track difficulty, walking times, closures, facilities and local safety advice, helping you choose a suitable route and prepare properly. Check the relevant park authority’s website before setting out, as conditions and access can change.

Save key information offline before you go.

Save key information offline before you go, especially if your Australian itinerary includes remote areas where mobile coverage may be limited. Download maps, booking confirmations, transport details and emergency contacts to your phone, and keep a written copy of essential information as a back-up. That way, you can find your way and access important details even without an internet connection.