Delicious Turkey Breast Recipe: A Must-Try for Your Next Meal!
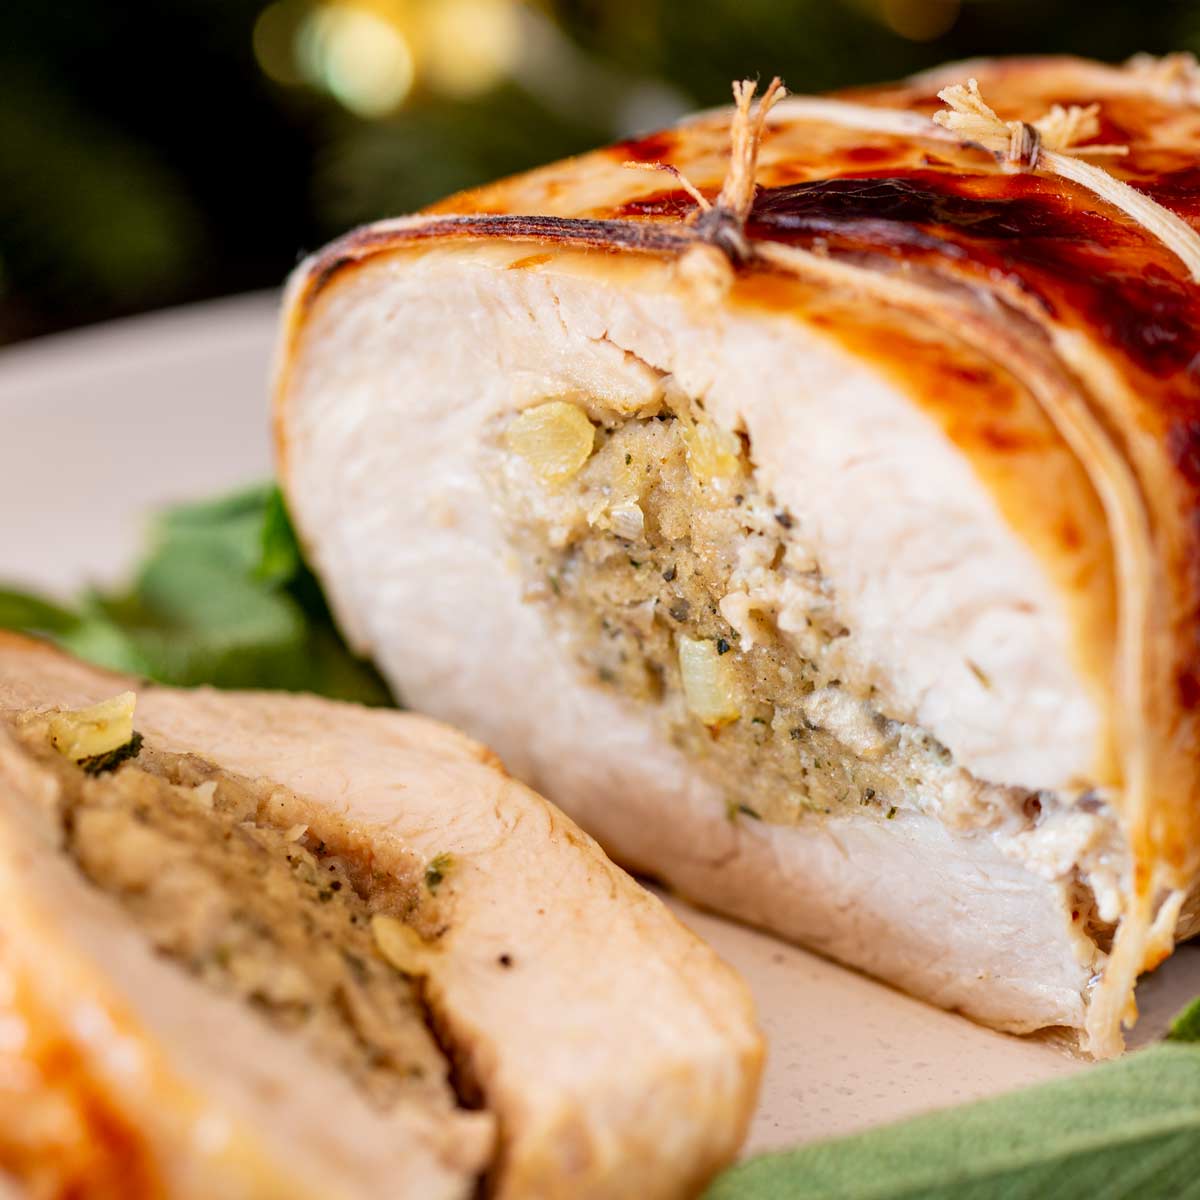
turkey breast recipe

The Perfect Turkey Breast Recipe

Looking for a delicious and simple turkey breast recipe to impress your guests or enjoy with your family? Look no further! This recipe combines juicy turkey breast with a flavorful seasoning blend that will have everyone coming back for seconds.

Ingredients:

  • 1 boneless turkey breast
  • 2 tablespoons olive oil
  • 1 teaspoon garlic powder
  • 1 teaspoon paprika
  • Salt and pepper to taste
  • Fresh herbs for garnish (optional)

Instructions:

  1. Preheat your oven to 180°C (350°F).
  2. In a small bowl, mix together the olive oil, garlic powder, paprika, salt, and pepper to create a seasoning paste.
  3. Place the turkey breast in a roasting pan and rub the seasoning paste all over the meat, ensuring it is evenly coated.
  4. Cover the roasting pan with foil and bake in the preheated oven for about 1 hour or until the internal temperature of the turkey reaches 75°C (165°F).
  5. Once cooked, remove the foil and allow the turkey breast to rest for 10 minutes before slicing.
  6. Garnish with fresh herbs if desired and serve hot.

This succulent turkey breast recipe is perfect for any occasion, whether it’s a festive dinner or a casual weekday meal. The combination of tender meat and aromatic seasonings is sure to delight your taste buds. Give this recipe a try and enjoy a mouthwatering dish that will have everyone asking for more!

Bon appétit!


Eight Reasons to Choose Turkey Breast: A Juicy, Versatile, and Healthy Recipe

  1. Juicy and tender turkey breast meat that is low in fat.
  2. Versatile recipe that can be easily adapted with different seasonings and herbs.
  3. Quick and simple preparation, perfect for busy weeknights or special occasions.
  4. Healthy option for a protein-rich meal that is also delicious.
  5. Budget-friendly choice compared to whole turkey roasts.
  6. Great option for smaller gatherings or when cooking for a smaller group.
  7. Leftovers can be used in sandwiches, salads, or other dishes for added convenience.
  8. Impressive presentation that will impress your guests without requiring extensive cooking skills.


Challenges of Cooking Turkey Breast: Avoiding Dryness, Blandness, and Extended Preparation Time

  1. Turkey breast can dry out easily if overcooked.
  2. It may lack the richness and depth of flavour compared to darker meat cuts.
  3. Some people find turkey breast to be less juicy than other parts of the turkey.
  4. Cooking a large turkey breast can require longer preparation and cooking times.
  5. Seasoning and marinating are crucial to prevent the meat from being bland or tasteless.

Juicy and tender turkey breast meat that is low in fat.

Indulge in the succulent delight of our turkey breast recipe, boasting juicy and tender meat that is not only a culinary delight but also a healthier choice. With its low-fat content, this dish offers a guilt-free option for those looking to enjoy a delicious meal without compromising on their dietary goals. Savour every bite of the lean and flavourful turkey breast, knowing that you are treating yourself to a wholesome and satisfying dining experience.

Versatile recipe that can be easily adapted with different seasonings and herbs.

This turkey breast recipe offers a versatile culinary experience, allowing for easy adaptation with a variety of seasonings and herbs. Whether you prefer a zesty lemon and herb infusion or a smoky barbecue rub, the flexibility of this recipe enables you to customise the flavours to suit your taste preferences. With the ability to experiment with different combinations, you can create unique and exciting variations of this dish each time you prepare it, adding a touch of creativity to your dining experience.

Quick and simple preparation, perfect for busy weeknights or special occasions.

Indulge in the convenience of this turkey breast recipe, offering a quick and straightforward preparation process that is ideal for hectic weeknights or memorable special occasions. With minimal effort required, you can effortlessly whip up a delectable dish that is sure to impress your loved ones. Whether you are short on time during the week or looking to create a delightful meal for a celebratory gathering, this recipe’s ease and efficiency make it a go-to choice for any occasion.

Healthy option for a protein-rich meal that is also delicious.

Indulge in a guilt-free and nutritious dining experience with our turkey breast recipe. This dish offers a healthy option for a protein-rich meal that is not only delicious but also satisfying. Turkey breast is lean, packed with essential nutrients, and low in fat, making it an ideal choice for those looking to maintain a balanced diet without compromising on taste. Treat yourself to a flavoursome and wholesome meal that will leave you feeling nourished and content.

Budget-friendly choice compared to whole turkey roasts.

For those looking to enjoy a delicious turkey meal without breaking the bank, opting for a turkey breast recipe is a budget-friendly choice compared to whole turkey roasts. Turkey breasts are typically more affordable and require less preparation time, making them a practical option for smaller gatherings or everyday meals. Despite being cost-effective, turkey breasts still offer the same succulent and flavourful experience as larger roasts, making them a smart and tasty choice for those seeking a wallet-friendly yet satisfying dining option.

Great option for smaller gatherings or when cooking for a smaller group.

When considering the advantages of a turkey breast recipe, one notable benefit is its suitability for smaller gatherings or when cooking for a smaller group. Unlike a whole turkey, which can be overwhelming to prepare and serve for fewer people, a turkey breast offers a more manageable portion size that is perfect for intimate dinners or occasions with limited guests. This makes it an ideal choice for those looking to enjoy a traditional turkey dish without the excess leftovers, ensuring a delicious and satisfying meal tailored to the needs of a smaller party.

Leftovers can be used in sandwiches, salads, or other dishes for added convenience.

Make the most of your turkey breast recipe by enjoying the convenience of using leftovers in a variety of ways. Whether it’s adding slices to sandwiches for a quick and satisfying meal, incorporating them into refreshing salads for a healthy twist, or experimenting with new dishes to elevate your culinary creations, the versatility of leftover turkey breast ensures that you can savour its delicious flavours beyond the initial serving. Embrace the flexibility and ease that come with repurposing leftovers to enhance your dining experience.

Impressive presentation that will impress your guests without requiring extensive cooking skills.

Elevate your dining experience with this turkey breast recipe’s impressive presentation that is sure to impress your guests, all without the need for extensive cooking skills. The beautifully seasoned and perfectly cooked turkey breast not only delights the palate but also adds a touch of elegance to any meal. With minimal effort, you can create a dish that looks and tastes like it was prepared by a professional chef, leaving your guests impressed and satisfied.

Turkey breast can dry out easily if overcooked.

When preparing a turkey breast, one must be cautious of the risk of it drying out if overcooked. Due to its lean nature, turkey breast has a tendency to lose moisture and become dry if left in the oven for too long or at high temperatures. To ensure a juicy and tender outcome, it is essential to monitor the cooking time carefully and use a meat thermometer to achieve the ideal internal temperature without overcooking. By being mindful of this potential drawback, one can savour the succulence of perfectly cooked turkey breast without falling victim to dryness.

It may lack the richness and depth of flavour compared to darker meat cuts.

While turkey breast is a lean and healthy option, one potential drawback is that it may lack the richness and depth of flavour found in darker meat cuts such as the thighs or drumsticks. Dark meat tends to be more succulent and carries a deeper flavour profile due to its higher fat content. However, with the right seasoning and cooking techniques, turkey breast can still be incredibly delicious and satisfying. Adding herbs, spices, or marinades can help enhance the taste of the lean meat, ensuring a tasty dish despite its potential for less intense flavour compared to darker cuts.

Some people find turkey breast to be less juicy than other parts of the turkey.

While turkey breast is a popular choice for its lean and healthy qualities, some individuals may find it to be less juicy compared to other parts of the turkey. Due to its lower fat content, turkey breast has a tendency to dry out more easily during cooking, potentially resulting in a less succulent texture. However, with the right cooking techniques and seasoning, such as brining or using a marinade, it is possible to enhance the juiciness and flavour of turkey breast, ensuring a delightful dining experience for all.

Cooking a large turkey breast can require longer preparation and cooking times.

When considering the preparation of a large turkey breast, one must acknowledge that the process may necessitate extended preparation and cooking durations. The size of the turkey breast directly impacts the time required for seasoning, roasting, and ensuring thorough cooking throughout. With larger cuts of meat, it is essential to allow ample time for marinating and cooking to achieve optimal tenderness and flavour. While the longer cooking times may test one’s patience, the end result of a perfectly cooked and succulent turkey breast is well worth the wait.

Seasoning and marinating are crucial to prevent the meat from being bland or tasteless.

To ensure that your turkey breast is bursting with flavour and not bland or tasteless, proper seasoning and marinating are essential steps in the cooking process. By infusing the meat with a well-balanced blend of herbs, spices, and seasonings, you can enhance its natural taste and create a delicious depth of flavour that will leave your taste buds tingling. Taking the time to season and marinate your turkey breast is a simple yet crucial technique that can elevate the overall dining experience and ensure a mouthwatering outcome with every bite.

Delectable Chicken Breast Recipes for a Memorable Dinner Feast

chicken breast recipes for dinner

Delicious Chicken Breast Recipes for Dinner

Chicken breast is a versatile and lean protein that can be transformed into a variety of mouth-watering dishes for dinner. Whether you prefer grilled, baked, or sautéed chicken, there’s a recipe out there to suit your taste buds. Here are three delectable chicken breast recipes to inspire your next dinner:

Lemon Herb Grilled Chicken Breast

Marinate chicken breasts in a mixture of lemon juice, olive oil, garlic, and fresh herbs such as rosemary and thyme. Grill the chicken until perfectly charred and juicy. Serve with a side of roasted vegetables for a wholesome meal.

Creamy Parmesan Baked Chicken Breast

Dip seasoned chicken breasts in a creamy mixture of parmesan cheese, mayonnaise, and breadcrumbs. Bake in the oven until the chicken is cooked through and the topping is golden brown. Pair with a green salad or pasta for a comforting dinner.

Spicy Honey Garlic Sautéed Chicken Breast

Sauté chicken breasts in a hot pan with a spicy honey garlic sauce made from soy sauce, honey, garlic, and red pepper flakes. Cook until the sauce thickens and coats the chicken beautifully. Serve over steamed rice or quinoa for an explosion of flavours.

These tantalising chicken breast recipes are sure to elevate your dinner game and impress your family or guests. Get creative in the kitchen and experiment with different seasonings and ingredients to customise these recipes to your liking.

Enjoy the deliciousness of perfectly cooked chicken breasts with these simple yet flavourful recipes!


Essential FAQs on Preparing Chicken Breast for Dinner: Tips, Substitutions, and Techniques

  1. 1. How long should I marinate chicken breast before cooking?
  2. 2. What are some healthy cooking methods for chicken breast?
  3. 3. Can I substitute chicken breast with other cuts of chicken in recipes?
  4. 4. How do I know when chicken breast is cooked thoroughly?
  5. 5. Are there any low-carb recipes using chicken breast for dinner?
  6. 6. Can I freeze cooked chicken breasts for later use?
  7. 7. What are some popular seasoning blends for seasoning grilled or bakedchicken breasts?
  8. 8.Can I use a slow cooker to cookchickenbreastsfor dinnerrecipes?

1. How long should I marinate chicken breast before cooking?

When it comes to marinating chicken breast before cooking, the ideal marinating time can vary depending on the recipe and the flavours you want to infuse into the meat. In general, it is recommended to marinate chicken breast for at least 30 minutes to allow the marinade to penetrate the meat and enhance its taste. However, for more intense flavour profiles, you can marinate chicken breast for up to 24 hours in the refrigerator. Be cautious not to over-marinate, as acidic ingredients in the marinade can break down the proteins in the chicken if left for too long. Experiment with different marinating times to find what works best for your desired taste preferences when preparing delicious chicken breast recipes for dinner.

2. What are some healthy cooking methods for chicken breast?

When it comes to preparing chicken breast in a healthy way for dinner, there are several cooking methods to consider. Grilling or baking chicken breast without excessive oil helps retain its natural flavours while keeping the dish low in added fats. Poaching chicken breast in broth or water is another healthy option that ensures the meat stays moist and tender without the need for additional oils. Additionally, opting for methods like steaming or stir-frying with minimal oil and plenty of vegetables can create a nutritious and balanced meal. These healthier cooking techniques for chicken breast allow you to enjoy a delicious dinner without compromising on taste or nutrition.

3. Can I substitute chicken breast with other cuts of chicken in recipes?

When it comes to substituting chicken breast with other cuts of chicken in recipes, it is indeed possible, but it may alter the texture and flavour of the dish. Chicken thighs, for example, are juicier and more flavourful than chicken breast, making them a suitable substitute in recipes where a richer taste is desired. Drumsticks or wings can also be used in place of chicken breast, but cooking times may vary. It’s essential to consider the characteristics of the alternative cut of chicken and adjust cooking methods accordingly to ensure a delicious outcome.

4. How do I know when chicken breast is cooked thoroughly?

When determining if chicken breast is cooked thoroughly, it is essential to rely on a reliable method to ensure both safety and optimal taste. The most accurate way to check for doneness is by using a meat thermometer. Insert the thermometer into the thickest part of the chicken breast, ensuring it does not touch any bone. The internal temperature should reach at least 75°C (165°F) for the chicken to be fully cooked and safe to eat. Additionally, cutting into the thickest part of the chicken breast and checking that the juices run clear without any pinkness is another visual indicator of doneness. By following these guidelines, you can confidently prepare delicious and perfectly cooked chicken breast dishes for a satisfying dinner.

5. Are there any low-carb recipes using chicken breast for dinner?

For those seeking low-carb options for dinner, there are plenty of delicious recipes using chicken breast that fit the bill. From grilled chicken with a side of steamed vegetables to chicken Caesar salad without croutons, the possibilities are endless. You can also try making chicken breast stuffed with spinach and feta cheese or enjoy a creamy chicken Alfredo with zucchini noodles instead of pasta. These low-carb chicken breast recipes not only cater to your dietary needs but also satisfy your taste buds with their delightful flavours and textures.

6. Can I freeze cooked chicken breasts for later use?

When it comes to the question of whether you can freeze cooked chicken breasts for later use, the answer is a resounding yes. Freezing cooked chicken breasts is a convenient way to extend their shelf life and have a quick protein option on hand for future meals. Make sure to cool the cooked chicken breasts completely before transferring them to an airtight container or freezer bag. Properly stored in the freezer, cooked chicken breasts can last for up to three months without compromising their taste or texture. Simply thaw them in the refrigerator overnight before reheating and incorporating them into your favourite chicken breast recipes for dinner.

When it comes to seasoning grilled or baked chicken breasts, there are several popular blends that can elevate the flavour profile of the dish. Some commonly used seasoning blends include a classic mix of garlic powder, onion powder, paprika, salt, and pepper for a well-rounded taste. Alternatively, you can opt for a zesty combination of lemon pepper, oregano, and thyme for a refreshing and aromatic twist. For those craving a bit of heat, a blend of cayenne pepper, chili powder, and cumin can add a spicy kick to your chicken breasts. Experimenting with different seasoning blends is key to discovering your favourite flavour profile when preparing grilled or baked chicken breasts for a delicious dinner.

8.Can I use a slow cooker to cookchickenbreastsfor dinnerrecipes?

Using a slow cooker to cook chicken breasts for dinner recipes is a convenient and popular method for many home cooks. Slow cooking chicken breasts in a crockpot can result in tender, juicy meat that easily shreds or slices for various dishes. By adding seasonings, vegetables, and liquids to the slow cooker along with the chicken breasts, you can create flavourful and effortless meals. The slow cooker allows the chicken to cook slowly over several hours, infusing it with delicious flavours and ensuring a moist texture. Whether you’re preparing a creamy chicken stew or flavourful shredded chicken tacos, using a slow cooker can simplify your dinner preparation while delivering tasty results.

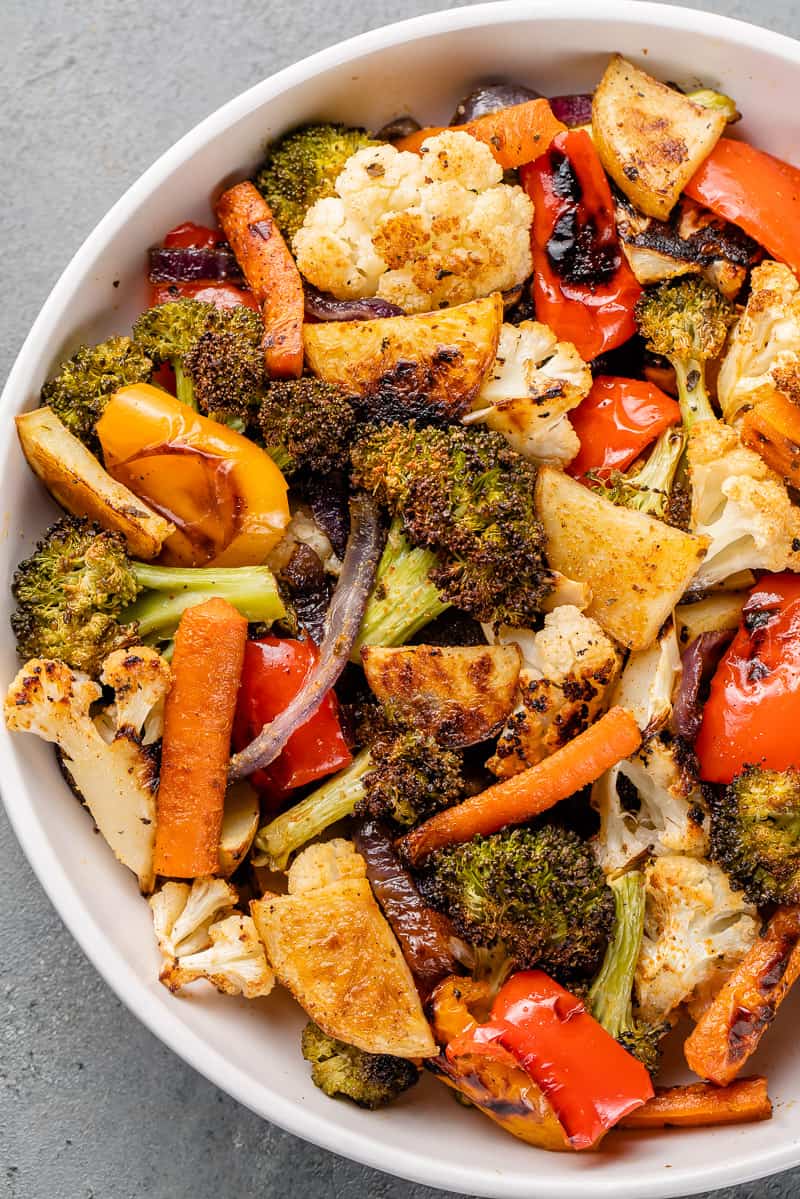
Delightful Roasted Vegetables Recipe: A Flavourful Dish for Every Occasion

roasted vegetables recipe

The Perfect Roasted Vegetables Recipe

Roasted vegetables are a delicious and nutritious addition to any meal. Not only are they easy to prepare, but they also bring out the natural flavours of the vegetables, creating a mouth-watering dish that is sure to impress. Here’s a simple yet flavourful roasted vegetables recipe that you can try at home:

Ingredients:

  • Assorted vegetables (such as bell peppers, zucchini, carrots, cherry tomatoes, and red onions)
  • Olive oil
  • Garlic powder
  • Dried herbs (such as thyme, rosemary, or oregano)
  • Salt and pepper to taste

Instructions:

  1. Preheat your oven to 200°C.
  2. Cut the vegetables into bite-sized pieces and place them in a large mixing bowl.
  3. Drizzle olive oil over the vegetables and toss them until evenly coated.
  4. Sprinkle garlic powder, dried herbs, salt, and pepper over the vegetables and mix well.
  5. Spread the seasoned vegetables in a single layer on a baking tray lined with parchment paper.
  6. Roast in the preheated oven for 25-30 minutes or until the vegetables are tender and slightly caramelised.
  7. Remove from the oven and let cool slightly before serving.

These roasted vegetables can be enjoyed on their own as a healthy snack or served as a side dish with your favourite main course. The combination of flavours and textures will leave you wanting more!

Experiment with different vegetable combinations and seasonings to create your own signature roasted vegetable dish that will delight your taste buds every time.

So why not give this roasted vegetables recipe a try today? Your family and friends will thank you for it!


Eight Reasons to Love Roasted Vegetables: A Nutritious and Versatile Delight

  1. 1. Nutritious
  2. 2. Versatile
  3. 3. Easy Preparation
  4. 4. Flavourful
  5. 5. Colourful Presentation
  6. 6. Textural Contrast
  7. 7. Customisable Seasonings
  8. 8. Crowd-Pleaser


Challenges of Roasting Vegetables: Time, Texture, and Nutrient Retention

  1. Roasting vegetables can take some time, as they typically require around 25-30 minutes in the oven to cook thoroughly.
  2. Certain vegetables may release moisture during roasting, which can affect the crispiness of the dish.
  3. Overcooking roasted vegetables can lead to a mushy texture and loss of some nutrients.

1. Nutritious

Roasting vegetables is not only a delicious way to enjoy them but also a highly nutritious cooking method. By roasting vegetables, they retain more nutrients compared to other cooking methods, such as boiling or frying. The gentle heat of the oven helps preserve the vitamins and minerals in the vegetables, ensuring that you get the maximum nutritional benefit from your meal. So, by including roasted vegetables in your diet, you can savour their rich flavours while also nourishing your body with a powerhouse of essential nutrients.

2. Versatile

The versatility of this roasted vegetables recipe is truly a standout feature. By allowing you to use a wide range of vegetables, from colourful bell peppers to hearty carrots and everything in between, it offers endless possibilities for customisation based on your personal preferences. Whether you prefer a medley of flavours or have specific vegetable favourites, this recipe adapts effortlessly to accommodate your tastes, ensuring that each dish is uniquely tailored to suit your palate.

3. Easy Preparation

With the roasted vegetables recipe, one of its key benefits is the easy preparation process. By simply chopping the vegetables, seasoning them, and popping them in the oven to roast, minimal effort is required to achieve a delicious outcome. This hassle-free method makes it a convenient choice for busy individuals looking to create a tasty and nutritious dish without spending hours in the kitchen. The straightforward steps ensure that anyone can enjoy the flavoursome results of roasted vegetables with ease.

4. Flavourful

Roasting vegetables is a culinary technique that brings out the best in them, making them incredibly flavourful. By subjecting the vegetables to high heat, their natural sugars caramelise, resulting in a delightful sweetness and depth of flavour that is truly irresistible. This process not only intensifies the taste of the vegetables but also creates a rich and complex profile that adds a delicious twist to any dish. The enhanced flavours achieved through roasting make it a preferred cooking method for those looking to elevate the taste of their vegetables and create a memorable dining experience.

5. Colourful Presentation

The colourful presentation of roasted vegetables is undeniably one of its standout features. The vibrant hues of assorted vegetables, from the rich reds of bell peppers to the bright oranges of carrots and the deep greens of zucchini, not only add a pop of colour to the plate but also enhance the overall visual appeal of any dish. Incorporating roasted vegetables into your meal not only pleases the palate but also delights the eyes, making for a visually stunning and appetising dining experience.

6. Textural Contrast

The roasted vegetables recipe offers a delightful textural experience with its perfect balance of crispy edges and tender insides. As the vegetables roast in the oven, they develop a caramelised exterior that adds a satisfying crunch, while retaining their juicy and soft interior. This contrast in textures creates a harmonious blend that enhances the overall enjoyment of the dish, making each bite a true culinary delight.

7. Customisable Seasonings

One of the advantages of this roasted vegetables recipe is its customisable seasonings. By allowing you to experiment with various herbs and spices, you have the freedom to tailor the flavours to your liking. Whether you prefer a hint of thyme, a kick of paprika, or a sprinkle of cumin, the ability to personalise the seasonings ensures that each batch of roasted vegetables is uniquely delicious and perfectly suited to your taste buds.

8. Crowd-Pleaser

Roasted vegetables have a unique ability to please a crowd, appealing to both adults and children alike. This versatility makes them an ideal side dish for any meal, as their delicious flavours and crispy textures are universally enjoyed. Whether served alongside a hearty roast dinner or as a standalone snack, roasted vegetables have the power to bring smiles to the faces of all who indulge in their wholesome goodness.

Roasting vegetables can take some time, as they typically require around 25-30 minutes in the oven to cook thoroughly.

One downside of preparing roasted vegetables is the time commitment involved in the cooking process. Roasting vegetables usually demands a cooking time of approximately 25-30 minutes in the oven to ensure they are cooked through and tender. This longer cooking duration may not be ideal for those seeking quick and convenient meal options. However, the delicious flavour and texture that result from this roasting method often make the wait worthwhile for those who appreciate a well-prepared dish.

Certain vegetables may release moisture during roasting, which can affect the crispiness of the dish.

When preparing roasted vegetables, it is important to be mindful of the moisture content in certain vegetables. Some vegetables have a higher water content and may release moisture during the roasting process. This excess moisture can hinder the desired crispiness of the dish, resulting in a softer texture instead. To combat this issue, consider patting dry the vegetables before roasting or adjusting the cooking time and temperature to achieve a balance between tenderness and crispiness. By being aware of this potential drawback, you can take steps to ensure that your roasted vegetables turn out perfectly every time.

Overcooking roasted vegetables can lead to a mushy texture and loss of some nutrients.

Overcooking roasted vegetables can detract from the overall appeal of the dish, resulting in a mushy texture that lacks the desired crunch and flavour. Additionally, prolonged cooking times can cause certain nutrients in the vegetables to break down and diminish, reducing their nutritional value. It is important to keep a close eye on the roasting process to ensure that the vegetables are cooked to perfection – tender with a slight caramelization, while retaining their natural goodness and texture. By avoiding overcooking, you can preserve both the taste and nutritional benefits of roasted vegetables for a truly satisfying culinary experience.

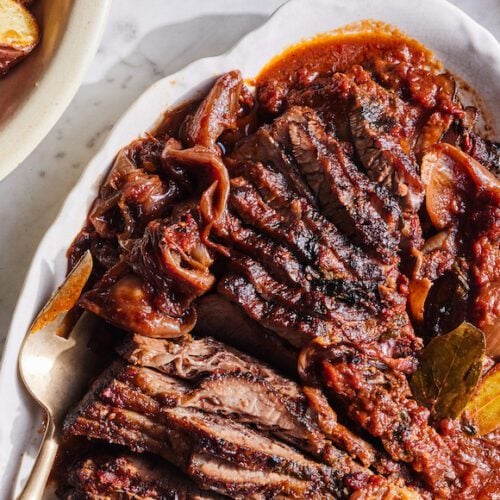
Savour the Flavour: A Delectable Brisket Recipe for Your Next Feast

brisket recipe

The Perfect Brisket Recipe for a Delicious Meal

Brisket is a classic dish that never fails to impress with its tender texture and rich flavour. Whether you’re hosting a family gathering or simply craving a hearty meal, this brisket recipe is sure to satisfy your taste buds.

Ingredients:

  • 1 4-5 pound beef brisket
  • 2 tablespoons olive oil
  • 1 onion, chopped
  • 4 cloves garlic, minced
  • 2 cups beef broth
  • 1 cup red wine
  • 2 tablespoons Worcestershire sauce
  • Salt and pepper to taste
  • Fresh herbs for garnish (optional)

Instructions:

  1. Preheat your oven to 160°C.
  2. In a large oven-safe pot or Dutch oven, heat the olive oil over medium-high heat. Sear the brisket on all sides until browned, then remove from the pot and set aside.
  3. Add the chopped onion and garlic to the pot and sauté until softened.
  4. Pour in the beef broth, red wine, and Worcestershire sauce. Season with salt and pepper.
  5. Add the seared brisket back into the pot. Cover with a lid or foil.
  6. lI>Bake in the preheated oven for about 3-4 hours, or until the brisket is fork-tender.lI

    lIemove from the oven and let it rest for 10-15 minutes before slicing.lI

    Serve the brisket slices with the cooking liquid spooned over them.lI

    Garnish with fresh herbs if desired.l

Enjoy this mouth-watering brisket recipe with your favourite sides for a memorable dining experience!l


Top 6 FAQs for Perfecting Your Brisket Recipe

  1. 1. How long does it take to cook brisket?
  2. 2. What is the best way to season brisket?
  3. 3. Can I cook brisket in a slow cooker?
  4. 4. Should I trim the fat off the brisket before cooking?
  5. 5. What temperature should I set my oven for cooking brisket?
  6. 6. How do I know when the brisket is done cooking?

1. How long does it take to cook brisket?

When cooking brisket, the duration can vary depending on the cooking method chosen. Typically, a beef brisket needs to be cooked low and slow to achieve that melt-in-your-mouth tenderness. On average, it can take around 3-4 hours in the oven at 160°C for a 4-5 pound brisket to become fork-tender. However, some recipes may call for longer cooking times if using a smoker or slow cooker. The key is to cook the brisket until it reaches the desired level of doneness and can easily be shredded or sliced for serving. Patience is essential when preparing this delectable dish to ensure a flavoursome outcome that will delight your taste buds.

2. What is the best way to season brisket?

When it comes to seasoning brisket, the best way is to keep it simple yet flavourful. A classic combination of salt, pepper, and garlic powder works wonders in enhancing the natural taste of the beef. You can also experiment with adding paprika, onion powder, or even a hint of cayenne for a kick of heat. The key is to generously coat the brisket with your chosen seasonings, ensuring that every inch is covered for a well-balanced flavour profile. Remember to let the brisket sit with the seasonings for some time before cooking to allow the flavours to penetrate the meat effectively.

3. Can I cook brisket in a slow cooker?

Cooking brisket in a slow cooker is a popular method that many home cooks swear by for achieving tender and flavourful results. The slow, low-temperature cooking process allows the brisket to become incredibly succulent and easy to shred. By placing the brisket in a slow cooker along with your choice of seasonings and liquids, you can let it simmer gently for hours until it reaches the desired level of tenderness. This convenient cooking technique is perfect for busy individuals who want to enjoy a delicious brisket meal without constant monitoring.

4. Should I trim the fat off the brisket before cooking?

When preparing a brisket recipe, the decision to trim the fat off the brisket before cooking is a matter of personal preference and cooking style. Some chefs believe that leaving a layer of fat on the brisket can enhance the flavour and juiciness of the meat during cooking, while others prefer to trim excess fat for a leaner end result. Ultimately, whether you choose to trim the fat or not depends on your desired level of tenderness and richness in the final dish. It’s recommended to consider your own taste preferences and cooking techniques when making this decision.

5. What temperature should I set my oven for cooking brisket?

When cooking brisket in the oven, it is recommended to set the temperature to around 160°C (320°F). This moderate heat allows the brisket to cook slowly and evenly, resulting in a tender and flavourful dish. By cooking the brisket at this temperature for several hours, you can achieve the perfect texture and ensure that the meat is cooked to perfection. Remember to cover the brisket while baking to retain moisture and enhance its succulence.

6. How do I know when the brisket is done cooking?

Knowing when a brisket is done cooking is crucial to achieving the perfect texture and flavour. A common indicator of doneness is the tenderness of the meat. You can test this by inserting a fork or meat thermometer into the thickest part of the brisket. If it easily slides in and out with little resistance, the brisket is likely done. Another method is to check for the internal temperature, which should reach around 93°C for a well-cooked brisket. Additionally, the meat should have a rich aroma and a caramelised exterior when fully cooked. By paying attention to these cues, you can ensure that your brisket is cooked to perfection every time.

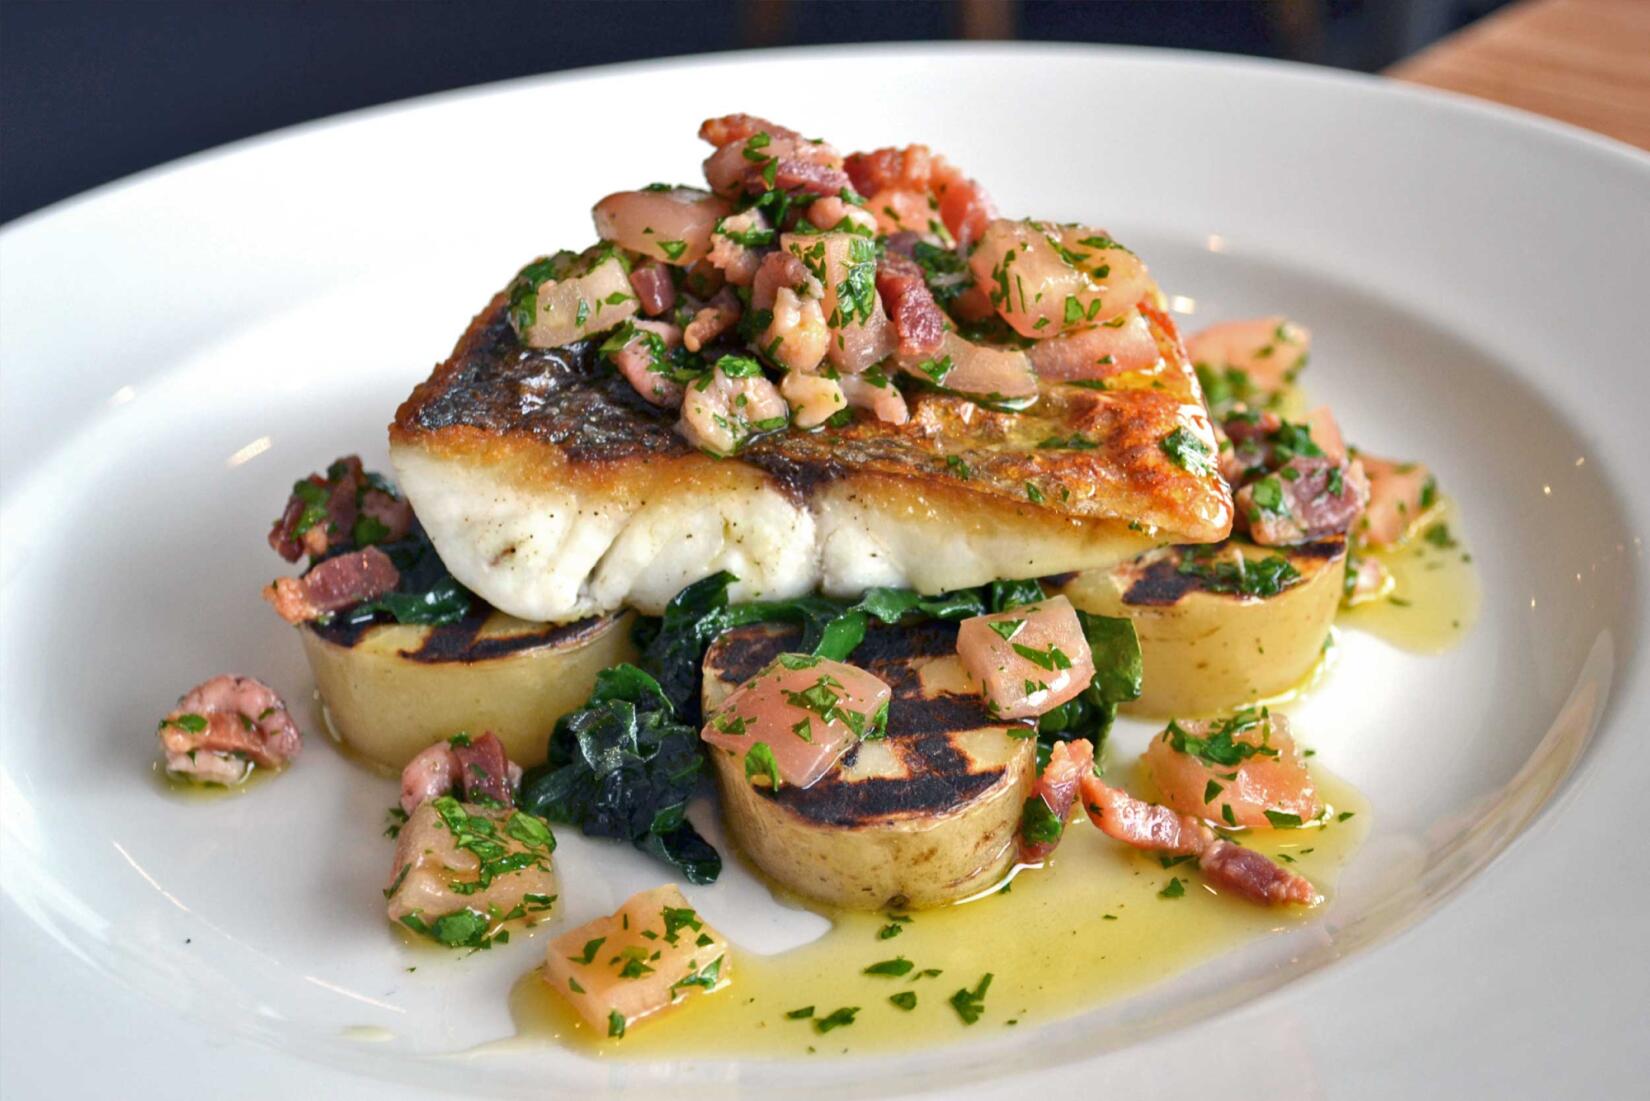
Delightful Sea Bass Recipe for Seafood Enthusiasts

sea bass recipe

The Perfect Sea Bass Recipe for Seafood Lovers

Sea bass is a versatile and delicious fish that is a favourite among seafood enthusiasts. Its delicate flavour and flaky texture make it a popular choice for many culinary creations. If you’re looking to impress your guests or simply treat yourself to a gourmet meal, this sea bass recipe is sure to delight your taste buds.

Ingredients:

  • 2 fresh sea bass fillets
  • 2 tablespoons of olive oil
  • 1 lemon, sliced
  • A handful of fresh parsley, chopped
  • Salt and pepper to taste

Instructions:

  1. Preheat your oven to 200°C (390°F).
  2. Place the sea bass fillets on a baking tray lined with parchment paper.
  3. Drizzle the fillets with olive oil and season with salt and pepper.
  4. Place lemon slices on top of the fillets for added flavour.
  5. Bake in the preheated oven for 15-20 minutes or until the fish is cooked through and flakes easily with a fork.
  6. Sprinkle freshly chopped parsley over the sea bass before serving.

This simple yet elegant sea bass recipe pairs beautifully with a side of roasted vegetables or a light salad. Whether you’re hosting a dinner party or enjoying a quiet evening at home, this dish is sure to elevate your dining experience. Bon appétit!

Note: Feel free to experiment with additional herbs and seasonings to customise this recipe to your liking.


9 Essential Tips for Perfecting Your Sea Bass Recipe

  1. Choose fresh sea bass for the best flavour
  2. Season the sea bass generously with salt and pepper
  3. Consider stuffing the sea bass with herbs or lemon slices for extra flavour
  4. Use high-quality olive oil when cooking sea bass
  5. Grill or bake the sea bass for a healthier cooking method
  6. Avoid overcooking the sea bass to prevent it from becoming dry
  7. Serve the sea bass with a squeeze of lemon juice for a refreshing touch
  8. Pair the sea bass with light side dishes like steamed vegetables or a fresh salad
  9. Experiment with different herbs and spices to create unique flavour profiles

Choose fresh sea bass for the best flavour

When preparing a sea bass recipe, it is crucial to select fresh sea bass to achieve the best flavour possible. The quality of the fish greatly impacts the overall taste and texture of the dish. Opting for fresh sea bass ensures a delicate and rich flavour profile that truly shines in every bite. By prioritising freshness in your ingredients, you can elevate your sea bass recipe to a gourmet level that will impress even the most discerning seafood connoisseurs.

Season the sea bass generously with salt and pepper

To enhance the flavour profile of your sea bass dish, it is recommended to season the fish generously with salt and pepper. The seasoning not only adds depth and richness to the delicate taste of the sea bass but also helps to create a delicious crust when cooked. By ensuring that each fillet is adequately seasoned, you can elevate the overall dining experience and bring out the natural freshness of this exquisite seafood.

Consider stuffing the sea bass with herbs or lemon slices for extra flavour

For an extra burst of flavour in your sea bass dish, consider stuffing the fish with fragrant herbs or zesty lemon slices before cooking. This simple yet effective tip can elevate the taste profile of the sea bass, infusing it with additional aromas and nuances that will delight your palate. Whether you opt for a blend of fresh herbs like dill and parsley or prefer the citrusy tang of lemon, this method of stuffing adds a delicious twist to your seafood experience. Give it a try and savour the enhanced flavours that this easy technique brings to your sea bass recipe.

Use high-quality olive oil when cooking sea bass

When preparing a delectable sea bass dish, it is essential to use high-quality olive oil. The choice of olive oil can significantly impact the overall flavour and texture of the fish. Opting for a premium olive oil not only enhances the taste of the sea bass but also adds a subtle richness that complements its delicate nature. Investing in quality ingredients, such as top-notch olive oil, can elevate your sea bass recipe to a gourmet level, ensuring a culinary experience that is truly unforgettable.

Grill or bake the sea bass for a healthier cooking method

For a healthier cooking approach when preparing sea bass, consider grilling or baking the fish. These methods help retain the natural flavours of the sea bass without the need for excessive oils or fats. Grilling imparts a smoky charred taste to the fish, while baking ensures a moist and tender texture. By opting for grilling or baking, you can enjoy a delicious sea bass dish that is not only nutritious but also full of flavour.

Avoid overcooking the sea bass to prevent it from becoming dry

To ensure a succulent and flavourful sea bass dish, it is crucial to avoid overcooking the fish. Overcooking can lead to dry and tough sea bass, compromising its delicate texture and taste. By closely monitoring the cooking time and removing the sea bass from heat as soon as it is cooked through, you can preserve its moistness and tenderness, allowing the natural flavours to shine through. Remember, a perfectly cooked sea bass will melt in your mouth with each delectable bite.

Serve the sea bass with a squeeze of lemon juice for a refreshing touch

Enhance the delightful flavours of the sea bass recipe by serving it with a generous squeeze of fresh lemon juice. The zesty citrus notes will provide a refreshing and tangy contrast to the rich, flaky fish, elevating the dish to a whole new level of culinary excellence. This simple addition not only adds a burst of brightness to each bite but also complements the natural taste of the sea bass, creating a harmonious balance of flavours that is sure to impress your palate.

Pair the sea bass with light side dishes like steamed vegetables or a fresh salad

For a well-balanced and wholesome meal, consider pairing your delectable sea bass dish with light and refreshing side dishes such as steamed vegetables or a crisp, fresh salad. The lightness of these sides complements the delicate flavour of the sea bass, creating a harmonious dining experience that is both satisfying and nourishing. By incorporating these healthy accompaniments, you can elevate the overall taste profile of your meal while ensuring a satisfying and well-rounded culinary delight.

Experiment with different herbs and spices to create unique flavour profiles

For those seeking to elevate their sea bass culinary experience, a valuable tip is to experiment with an array of herbs and spices. By incorporating diverse flavour enhancers, such as dill, thyme, or paprika, one can create unique and tantalising profiles that add depth and character to the dish. Whether aiming for a zesty Mediterranean twist or a fragrant Asian fusion, the possibilities are endless when it comes to customising sea bass recipes to suit individual tastes and preferences.

Authentic Empanada Recipe: A Taste of Latin Flavour

empanada recipe

The Perfect Empanada Recipe: A Taste of Latin Flavour

Empanadas are a beloved dish in Latin American cuisine, known for their delicious fillings and crispy pastry shells. Whether you prefer them baked or fried, empanadas are a versatile treat that can be enjoyed as a snack or a meal. Here, we share a classic empanada recipe that will transport your taste buds to the vibrant streets of Latin America.

Ingredients:

  • 2 cups all-purpose flour
  • 1/2 teaspoon salt
  • 1/2 cup cold unsalted butter, cubed
  • 1/4 – 1/2 cup cold water
  • 1 tablespoon olive oil
  • 1 small onion, finely chopped
  • 2 cloves garlic, minced
  • 1 red bell pepper, diced
  • 250g ground beef or chicken
  • 1 teaspoon cumin
  • Salt and pepper to taste
  • 1/4 cup pitted green olives, sliced
  • 2 hard-boiled eggs, chopped

Instructions:

  1. Prepare the Dough:
  2. – In a large bowl, combine the flour and salt.

    – Add the cubed butter and rub it into the flour mixture until it resembles breadcrumbs.

    – Slowly add the cold water and mix until the dough comes together.

    – Shape the dough into a ball, wrap it in cling film, and refrigerate for 30 minutes.

  3. Make the Filling:
  4. – In a pan, heat olive oil over medium heat.

    – Add the onion and garlic, sauté until softened.

    – Stir in the bell pepper and cook for another 3-4 minutes.

    – Add the ground beef or chicken, cumin, salt, and pepper. Cook until browned.

    – Remove from heat and stir in olives and chopped eggs.

  5. Assemble the Empanadas:
  6. – Preheat oven to 200°C (180°C fan).

    – Roll out the dough on a floured surface to about 0.5cm thickness.

    – Using a round cutter or a small plate as a guide, cut out circles from the dough.

    – Spoon some filling onto each circle.

    – Fold over to create half-moon shapes and seal by pressing edges with a fork.

  7. Cooking Options:
  8. – To bake: Place empanadas on a baking tray lined with parchment paper. Brush with egg wash. Bake for 20-25 minutes until golden brown.

    – To fry: Heat oil in a deep pan. Fry empanadas until crispy and golden on both sides.

  9. Serve & Enjoy:
  10. – Serve hot with your favourite dipping sauce or salsa.

    – Enjoy these homemade empanadas as a delightful snack or meal that captures the essence of Latin American cuisine.

Gather your friends and family to savour these homemade empanadas filled with flavourful ingredients that will surely satisfy your cravings for authentic Latin cuisine.


Empanada Recipe FAQs: Dough Types, Cooking Methods, Common Mistakes, and Pastry Tips

  1. What dough are empanadas made of?
  2. Is it better to fry or bake empanadas?
  3. What are common empanada mistakes?
  4. What pastry is best for empanadas?
  5. Is empanada dough the same as pizza dough?

What dough are empanadas made of?

Empanadas are typically made with a simple dough consisting of all-purpose flour, salt, cold butter, and water. This dough is easy to work with and can be shaped into the perfect pastry shell for enclosing the delicious fillings that make empanadas so irresistible. The combination of these basic ingredients results in a crispy yet tender crust that complements the savoury or sweet fillings inside. Whether baked or fried, the dough used for empanadas plays a crucial role in creating a delightful culinary experience that captures the essence of this popular Latin American dish.

Is it better to fry or bake empanadas?

When it comes to preparing empanadas, the choice between frying and baking often depends on personal preference and dietary considerations. Frying empanadas typically results in a crispy, golden exterior that many find irresistible, while baking offers a healthier alternative with a slightly lighter texture. Frying may enhance the overall richness of the dish, while baking can be a convenient and less messy option. Ultimately, whether you fry or bake your empanadas, both methods can yield delicious results that cater to different tastes and dietary needs.

What are common empanada mistakes?

When preparing empanadas, there are common mistakes that can affect the final outcome of this beloved Latin American dish. One frequent error is overfilling the empanadas, which can lead to leaks during baking or frying. Another common mistake is not properly sealing the edges of the empanadas, resulting in filling spilling out during cooking. Additionally, using a dough that is too thick or too thin can impact the texture and overall taste of the empanadas. It’s essential to follow the recipe closely and pay attention to details such as dough consistency and filling distribution to ensure a successful batch of delicious empanadas.

What pastry is best for empanadas?

When it comes to choosing the best pastry for empanadas, many enthusiasts swear by a simple dough made with all-purpose flour, butter, and water. This classic pastry recipe yields a crisp and flaky shell that perfectly complements the savoury fillings of traditional empanadas. The key is to achieve a balance between a sturdy crust that holds the filling together and a light texture that melts in your mouth with each bite. Experimenting with different types of dough, such as those incorporating lard or even puff pastry, can also add unique textures and flavours to your empanadas, catering to personal preferences and culinary creativity. Ultimately, the best pastry for empanadas is one that enhances the overall taste experience while staying true to the dish’s cultural roots.

Is empanada dough the same as pizza dough?

When it comes to empanadas and pizza, the dough used for each dish differs in texture and composition. Empanada dough is typically more flaky and sturdy, designed to hold the filling securely without becoming soggy. On the other hand, pizza dough is softer and more elastic, ideal for stretching into a thin crust that bakes to perfection in a hot oven. While both doughs share basic ingredients like flour and water, their ratios and preparation methods vary significantly to suit the specific requirements of each culinary delight.

Elevate Your BBQ Game with the Ultimate Grilled Chicken Marinade

grilled chicken marinade

The Perfect Grilled Chicken Marinade: Elevate Your BBQ Game

Grilling season is upon us, and what better way to impress your guests than with a mouth-watering grilled chicken dish marinated to perfection? A good marinade can take your chicken from bland to flavourful, tender, and juicy. Let’s explore the key ingredients and steps to create the ultimate grilled chicken marinade.

Ingredients:

  • 4 boneless, skinless chicken breasts
  • 1/4 cup olive oil
  • 2 cloves of garlic, minced
  • 2 tablespoons soy sauce
  • 1 tablespoon honey
  • 1 teaspoon paprika
  • Salt and pepper to taste

Instructions:

  1. In a bowl, whisk together the olive oil, minced garlic, soy sauce, honey, paprika, salt, and pepper.
  2. Place the chicken breasts in a resealable plastic bag or shallow dish.
  3. Pour the marinade over the chicken, ensuring it is evenly coated. Seal the bag or cover the dish with plastic wrap and refrigerate for at least 30 minutes (or up to 24 hours for maximum flavour).
  4. Preheat your grill to medium-high heat.
  5. Remove the chicken from the marinade and discard any excess marinade.
  6. Grill the chicken for about 6-7 minutes per side or until fully cooked (internal temperature of 75°C).
  7. Once done, let the chicken rest for a few minutes before serving to allow the juices to redistribute.

This simple yet delicious grilled chicken marinade is sure to be a hit at your next barbecue gathering. The combination of savoury soy sauce, sweet honey, and aromatic garlic creates a harmonious blend of flavours that will leave everyone asking for seconds. So fire up that grill, marinate your chicken, and get ready to elevate your BBQ game!

Bon appétit!


Essential FAQs for Perfectly Marinated Grilled Chicken

  1. 1. How long should I marinate chicken for grilling?
  2. 2. What are the key ingredients for a grilled chicken marinade?
  3. 3. Can I use a store-bought marinade for grilled chicken?
  4. 4. Is it better to marinate chicken in the fridge or at room temperature?
  5. 5. How can I prevent my grilled chicken from drying out?
  6. 6. Are there any alternatives to olive oil in a marinade?
  7. 7. Should I pierce the chicken before marinating it?
  8. 8. Can I reuse leftover marinade?

1. How long should I marinate chicken for grilling?

When it comes to marinating chicken for grilling, the duration plays a crucial role in enhancing the flavour and tenderness of the meat. The ideal marinating time for chicken typically ranges from 30 minutes to 24 hours. While a minimum of 30 minutes allows the flavours to penetrate the surface of the chicken, longer marination periods, such as overnight, can intensify the taste and texture. It is essential to strike a balance between marinating adequately for optimal flavour infusion without over-marinating, which can result in a mushy texture. Experimenting with different marinating times can help you find the perfect balance to achieve deliciously grilled chicken every time.

2. What are the key ingredients for a grilled chicken marinade?

When it comes to creating a delicious grilled chicken marinade, the key ingredients play a crucial role in enhancing the flavour profile of the dish. Typically, a well-balanced marinade for grilled chicken includes olive oil for moisture, minced garlic for a robust aroma, soy sauce for savouriness, honey for sweetness, paprika for a hint of smokiness, and of course, salt and pepper to season to taste. These ingredients work together harmoniously to infuse the chicken with layers of taste that will leave your taste buds delighted.

3. Can I use a store-bought marinade for grilled chicken?

When it comes to marinating grilled chicken, a common query arises: Can I use a store-bought marinade? The answer is yes, you can certainly use a store-bought marinade for your grilled chicken. Store-bought marinades offer convenience and a variety of flavour options, making them a popular choice for those looking to save time without compromising on taste. However, it’s important to read the ingredients and nutritional information on the label to ensure the marinade aligns with your dietary preferences and requirements. Feel free to experiment with different store-bought marinades to discover your favourite flavours for that perfect grilled chicken dish.

4. Is it better to marinate chicken in the fridge or at room temperature?

When it comes to marinating chicken, it is generally recommended to marinate it in the fridge rather than at room temperature. Marinating chicken in the fridge helps to keep it at a safe temperature, preventing the growth of harmful bacteria. Additionally, refrigeration allows the flavours of the marinade to penetrate the chicken more effectively over a longer period, resulting in a more tender and flavourful end product. So, for optimal food safety and taste, it’s best to marinate your chicken in the fridge for a specified amount of time before grilling.

5. How can I prevent my grilled chicken from drying out?

To prevent your grilled chicken from drying out, it is essential to pay attention to both the cooking time and the marinade. Overcooking can lead to dry chicken, so be sure to cook it just until it reaches an internal temperature of 75°C. Additionally, using a well-balanced marinade with ingredients like olive oil, soy sauce, and honey can help lock in moisture and enhance the flavour of the chicken. Marinating the chicken for an adequate amount of time before grilling can make a significant difference in keeping the meat juicy and succulent. Remember to let the grilled chicken rest for a few minutes after cooking to allow the juices to redistribute before serving. By following these tips, you can enjoy perfectly moist and delicious grilled chicken every time.

6. Are there any alternatives to olive oil in a marinade?

When it comes to alternatives for olive oil in a marinade, there are several options that can impart unique flavours to your grilled chicken. One popular substitute is avocado oil, known for its mild taste and high smoke point, making it ideal for grilling. Another alternative is sesame oil, which adds a rich nutty flavour to the marinade. Additionally, you can consider using melted butter or coconut oil for a touch of richness and sweetness. Each alternative brings its own distinct profile to the marinade, offering versatility in customising the taste of your grilled chicken to suit your preferences.

7. Should I pierce the chicken before marinating it?

When it comes to marinating chicken, the question of whether to pierce the meat before marinating often arises. While some believe that piercing the chicken allows the marinade to penetrate deeper and enhance flavour, others argue that it can lead to loss of natural juices and result in drier meat. In general, it is not necessary to pierce the chicken before marinating, as a well-made marinade will still impart plenty of flavour without compromising the juiciness of the meat. Instead, focus on ensuring that the marinade covers the chicken evenly and allow an adequate marinating time for optimal results.

8. Can I reuse leftover marinade?

When it comes to reusing leftover marinade from grilled chicken, it is generally not recommended due to food safety concerns. Once raw chicken has been marinated in a mixture, it can introduce harmful bacteria. If you do wish to reuse the marinade for basting or as a sauce, it is crucial to boil it first to kill any bacteria present. However, for the best results and to ensure food safety, it is advisable to prepare a fresh batch of marinade if needed. Prioritising food hygiene and avoiding potential risks is key when handling leftover marinades in cooking practices.

Savoury Delights: Authentic Calzone Recipe Straight from Italy

The Perfect Calzone Recipe: A Taste of Italy

Calzone, a delicious folded pizza filled with a variety of tasty ingredients, is a popular dish that originated in Italy. This savoury treat is perfect for those craving a comforting meal that combines the flavours of pizza in a unique way.

Ingredients:

  • 500g pizza dough
  • 200g mozzarella cheese, shredded
  • 100g ricotta cheese
  • 100g pepperoni slices
  • 1 bell pepper, diced
  • 1 small onion, chopped
  • 2 cloves of garlic, minced
  • 1/2 teaspoon dried oregano
  • Salt and pepper to taste
  • Olive oil for brushing

Instructions:

  1. Preheat your oven to 200°C.
  2. In a pan, sauté the onion, bell pepper, and garlic until softened. Remove from heat and set aside.
  3. In a bowl, mix the mozzarella, ricotta, pepperoni slices, oregano, salt and pepper.
  4. Dust your work surface with flour and roll out the pizza dough into a circle or rectangle shape.
  5. Spoon the cheese mixture onto one half of the dough.
  6. Fold the other half of the dough over the filling and crimp the edges to seal.
  7. Brush the top of the calzone with olive oil and make small slits on top to allow steam to escape.
  8. Bake in the preheated oven for 20-25 minutes or until golden brown.
  9. Serve hot and enjoy your homemade calzone!

This calzone recipe offers a delightful combination of gooey cheese, savoury meats, and aromatic herbs all wrapped up in a crispy crust. Whether enjoyed as a quick meal or shared with friends and family during gatherings, calzones are sure to satisfy your cravings for Italian flavours.


9 Reasons to Love Calzones: Versatile, Portable, and Perfect for Any Occasion

  1. Versatile
  2. Portable
  3. Satisfying
  4. Family-friendly
  5. Great for gatherings
  6. Easy to make
  7. Creative option
  8. Comfort food
  9. Authentic Italian taste


Calzone Concerns: Calorie Content, Dough Difficulty, and Filling Fumbles

  1. Calzones can be high in calories and fat due to the cheese and meat fillings.
  2. Preparing the dough from scratch can be time-consuming and requires some skill.
  3. It may be challenging to get the perfect balance of ingredients inside the calzone, leading to a messy filling.

Versatile

The versatility of a calzone recipe lies in its ability to be customised to suit individual taste preferences. Whether you prefer a classic combination of cheeses and meats or opt for a vegetarian-friendly medley of veggies and herbs, the beauty of making calzones is that you can tailor the fillings to create a personalised culinary experience. This flexibility allows you to experiment with different ingredients, textures, and flavours, ensuring that each calzone you make is uniquely suited to your palate.

Portable

Calzones offer the convenience of portability, making them a perfect choice for those on the move. The folded nature of calzones allows for easy handling and eating without the need for utensils, making them ideal for a quick meal on the go. Whether you’re rushing to work or heading out for a picnic, calzones provide a delicious and satisfying option that can be enjoyed anywhere, anytime.

Satisfying

Indulge in the satisfying experience of a calzone, where the harmonious blend of cheese, meats, and veggies creates a hearty and fulfilling meal. With each bite, you are treated to a medley of flavours that come together to satisfy your cravings and leave you feeling content. The richness of the cheese, the savouriness of the meats, and the freshness of the veggies all contribute to making calzones a truly satisfying culinary delight that is perfect for any occasion.

Family-friendly

Calzones are undeniably family-friendly, appealing to both kids and adults with their delicious flavours and comforting appeal. The versatility of calzones allows for endless variations to suit different tastes, making them a crowd-pleaser at family gatherings or weeknight dinners. Whether filled with classic ingredients like cheese and pepperoni or customised with favourite toppings, calzones bring everyone together around the table to enjoy a satisfying and tasty meal that is sure to please even the pickiest eaters.

Great for gatherings

Calzones are a fantastic choice for gatherings and social events, making them ideal for sharing at parties or potlucks. Their convenient handheld nature and ability to be easily sliced into portions make them a crowd-pleasing option for feeding a group of people. Whether served as a main dish or cut into smaller pieces for appetisers, calzones offer a delicious and satisfying meal that can cater to various tastes and preferences, making them a versatile and practical choice for any social gathering.

Easy to make

Creating calzones is a breeze thanks to the convenience of pre-made pizza dough. With this time-saving ingredient, assembling these delicious folded pizzas becomes a quick and straightforward process. Whether you’re a seasoned cook or a beginner in the kitchen, the ease of using pre-made dough allows you to enjoy homemade calzones without the hassle of making dough from scratch. This pro of the calzone recipe makes it an accessible and convenient choice for anyone looking to whip up a satisfying meal in no time.

Creative option

For those seeking culinary creativity, the calzone recipe offers a fantastic opportunity to experiment with various ingredients and create unique flavour combinations. From swapping out traditional toppings for more unconventional choices to incorporating seasonal produce or artisanal cheeses, the calzone allows home cooks to showcase their inventiveness in the kitchen. Whether it’s adding a twist with spicy chorizo, earthy mushrooms, or sweet caramelized onions, the versatility of the calzone recipe encourages exploration and personalization, resulting in a truly bespoke dining experience that caters to individual tastes and preferences.

Comfort food

Calzones offer a comforting and indulgent eating experience that is hard to resist. The warm, cheesy filling enveloped in a crispy crust creates a sense of satisfaction and contentment with every bite. Whether enjoyed on a cozy night in or as a treat during gatherings, calzones have a way of soothing the soul and satisfying cravings for hearty, flavoursome food. This comforting aspect of calzones makes them a beloved choice for those seeking a delicious and fulfilling meal that brings joy with every bite.

Authentic Italian taste

Indulge in the authentic Italian taste of a calzone with this classic recipe. By following the steps to create this savoury delight, you can experience the rich flavours and traditional essence of Italy right in your own kitchen. From the gooey cheese to the perfectly seasoned fillings, each bite of the calzone offers a delicious reminder of the culinary heritage and warmth of Italian cuisine. Embrace the opportunity to savour a taste of Italy with every mouthful of this homemade calzone, bringing a touch of Mediterranean charm to your dining table.

Calzones can be high in calories and fat due to the cheese and meat fillings.

Calzones, while undeniably delicious, can pose a nutritional challenge as they tend to be high in calories and fat content, primarily attributed to the generous amounts of cheese and meat fillings they contain. The rich and savoury nature of these ingredients contributes to the indulgent taste of the calzone but also means that it may not be the most health-conscious choice for those watching their calorie and fat intake. It’s important to enjoy calzones in moderation and perhaps consider lighter ingredient options or portion sizes to balance out the calorie and fat content while still savouring this delectable Italian treat.

Preparing the dough from scratch can be time-consuming and requires some skill.

Preparing the dough from scratch for a calzone recipe can be seen as a drawback due to the time and skill it demands. Crafting the perfect pizza dough requires patience, precision, and a good understanding of the dough-making process. For those looking for a quick and convenient meal option, the time-consuming nature of preparing homemade dough may deter them from attempting this recipe. Additionally, mastering the art of dough-making can be challenging for beginners or those with limited experience in working with yeast-based recipes. However, despite these challenges, the satisfaction of creating a calzone from scratch and the delicious results it yields make the effort worthwhile for those willing to invest time and effort into perfecting their dough-making skills.

It may be challenging to get the perfect balance of ingredients inside the calzone, leading to a messy filling.

When preparing a calzone, one potential drawback is the difficulty in achieving the ideal balance of ingredients inside the folded dough. This challenge can result in a messy filling that may leak out during baking or serving. Ensuring that the filling is evenly distributed and not overly packed can help mitigate this issue, allowing for a neater and more enjoyable eating experience. Despite this con, mastering the art of calzone-making through practice and attention to detail can lead to delicious results that are well worth the effort.

Delightful Pumpkin Recipes to Spice Up Your Autumn Menu

pumpkin recipes

The Versatile Pumpkin: Delicious Recipes to Try

Pumpkin, a quintessential autumn ingredient, is not only perfect for carving into jack-o’-lanterns but also for creating a variety of mouth-watering dishes. From soups to desserts, the humble pumpkin can be transformed into culinary delights that will satisfy your taste buds. Here are some delightful pumpkin recipes you must try:

Pumpkin Soup

Warm up on a chilly evening with a comforting bowl of creamy pumpkin soup. Flavoured with aromatic spices like cinnamon and nutmeg, this soup is a true autumn classic.

Roasted Pumpkin Salad

Toss chunks of roasted pumpkin with fresh greens, toasted nuts, and a tangy vinaigrette for a healthy and satisfying salad that bursts with flavour and texture.

Pumpkin Risotto

Creamy arborio rice cooked with pureed pumpkin, Parmesan cheese, and a hint of sage creates a luxurious and hearty dish that is perfect for a cosy night in.

Spiced Pumpkin Bread

This moist and fragrant pumpkin bread is infused with warm spices like ginger and cloves, making it an irresistible treat for breakfast or afternoon tea.

Pumpkin Cheesecake

A velvety smooth cheesecake made with a spiced pumpkin filling on a buttery graham cracker crust is the ultimate indulgent dessert for any occasion.

Whether you prefer savoury or sweet dishes, there is no shortage of creative ways to incorporate pumpkin into your cooking repertoire. Embrace the versatility of this seasonal ingredient and let its rich flavour elevate your culinary creations!


Eight Creative Ways to Incorporate Pumpkin into Your Cooking

  1. Roast pumpkin with a drizzle of olive oil for a simple and delicious side dish.
  2. Use pumpkin puree in baking recipes like cakes, muffins, and pies for added moisture and flavour.
  3. Make a creamy pumpkin soup by blending roasted pumpkin with stock, cream, and seasonings.
  4. Try making homemade pumpkin spice blend with cinnamon, nutmeg, ginger, cloves, and allspice for seasonal recipes.
  5. Roast pumpkin seeds with seasoning for a crunchy snack or salad topper.
  6. Add diced pumpkin to curries or stews for a hearty and nutritious addition.
  7. Experiment with sweet and savoury flavour combinations by pairing pumpkin with ingredients like maple syrup, bacon, sage, or feta cheese.
  8. Freeze leftover cooked pumpkin in portions to use later in smoothies or oatmeal.

Roast pumpkin with a drizzle of olive oil for a simple and delicious side dish.

Enhance the natural sweetness and earthy flavour of pumpkin by roasting it with a drizzle of olive oil. This simple yet effective cooking method brings out the best in the pumpkin, creating a delicious side dish that is both wholesome and satisfying. The olive oil adds a subtle richness to the roasted pumpkin, making it a versatile accompaniment to any meal. Try this easy tip for a delightful way to enjoy the vibrant taste of pumpkin in a fuss-free manner.

Use pumpkin puree in baking recipes like cakes, muffins, and pies for added moisture and flavour.

Enhance the texture and taste of your baked goods by incorporating pumpkin puree into recipes such as cakes, muffins, and pies. The natural sweetness and moisture of pumpkin puree not only add depth to the flavour but also create a soft and tender crumb in your treats. Whether you’re looking to infuse a subtle autumnal essence or simply boost the overall richness of your bakes, utilising pumpkin puree is a versatile and delicious way to elevate your baking creations.

Make a creamy pumpkin soup by blending roasted pumpkin with stock, cream, and seasonings.

For a comforting autumn meal, try creating a velvety pumpkin soup by blending roasted pumpkin with flavourful stock, rich cream, and a medley of seasonings. This simple yet indulgent recipe transforms humble pumpkin into a creamy delight that is sure to warm both body and soul. The combination of roasted pumpkin’s natural sweetness with the savoury depth of stock and the luxurious touch of cream results in a soup that is both comforting and satisfying. Perfect for chilly evenings or festive gatherings, this creamy pumpkin soup is a delightful way to savour the flavours of the season.

Try making homemade pumpkin spice blend with cinnamon, nutmeg, ginger, cloves, and allspice for seasonal recipes.

Elevate your autumn culinary creations by experimenting with a homemade pumpkin spice blend. Combine fragrant cinnamon, warming nutmeg, zesty ginger, aromatic cloves, and sweet allspice to create a versatile seasoning that will add depth and warmth to your seasonal recipes. Whether you’re baking pumpkin pies, brewing spiced lattes, or whipping up pumpkin soups, this custom blend will infuse your dishes with a delightful medley of flavours that capture the essence of fall.

Roast pumpkin seeds with seasoning for a crunchy snack or salad topper.

Enhance your pumpkin culinary experience by utilising every part of this versatile ingredient. After carving out your pumpkin for cooking, don’t discard the seeds! Instead, roast them with a sprinkle of seasoning for a delightful crunchy snack or a flavourful salad topper. The roasted pumpkin seeds add a satisfying crunch and a burst of savoury goodness to your dishes, elevating them to a whole new level of deliciousness. So next time you prepare a pumpkin recipe, remember to save and roast the seeds for an extra special treat that will leave your taste buds wanting more.

Add diced pumpkin to curries or stews for a hearty and nutritious addition.

Enhance the heartiness and nutritional value of your curries or stews by incorporating diced pumpkin into the mix. The tender texture of pumpkin complements the rich flavours of spices and other ingredients, adding a delightful sweetness to the dish. Not only does this addition lend a comforting depth to your meal, but it also provides a boost of vitamins and fibre, making it a wholesome choice for a satisfying and nourishing meal.

Experiment with sweet and savoury flavour combinations by pairing pumpkin with ingredients like maple syrup, bacon, sage, or feta cheese.

Discover a world of culinary possibilities by exploring the delightful interplay of sweet and savoury flavours in your pumpkin recipes. Elevate your dishes by combining the earthy sweetness of pumpkin with ingredients such as rich maple syrup, crispy bacon, fragrant sage, or tangy feta cheese. These unexpected pairings will add depth and complexity to your creations, transforming simple pumpkin dishes into gourmet delights that will tantalise your taste buds.

Freeze leftover cooked pumpkin in portions to use later in smoothies or oatmeal.

When it comes to making the most of your pumpkin recipes, a handy tip is to freeze any leftover cooked pumpkin in convenient portions. By freezing it, you can easily incorporate this versatile ingredient into future creations like smoothies or oatmeal. Whether blended into a creamy breakfast smoothie or stirred into hearty oatmeal for added flavour and nutrition, having frozen pumpkin on hand ensures that you can enjoy its delicious taste long after the autumn season has passed.

Authentic Pizza Recipe: A Taste of Italy in Your Kitchen

pizza recipe

The Perfect Pizza Recipe

Who can resist the delicious combination of gooey cheese, tangy tomato sauce, and a crispy crust? Pizza is a beloved dish enjoyed by people all around the world. Making your own pizza at home is not only fun but also allows you to customize it to your liking. Here’s a simple yet mouth-watering pizza recipe that will have you coming back for more.

Ingredients:

  • 300g strong white bread flour
  • 1 tsp instant yeast
  • 1 tsp salt
  • 1 tbsp olive oil
  • 200ml passata
  • A handful of fresh basil leaves
  • 125g mozzarella, torn into small pieces
  • A handful of cherry tomatoes, halved
  • A drizzle of olive oil
  • Salt and pepper to taste

Instructions:

  1. In a bowl, mix the flour, yeast, and salt. Add the olive oil and 200ml warm water. Mix until it forms a dough.
  2. Knead the dough on a floured surface for about 10 minutes until smooth and elastic. Place in a lightly oiled bowl, cover with a tea towel, and leave to rise for 1 hour.
  3. Preheat your oven to 240°C/fan 220°C/gas mark 8. Roll out the dough on a floured surface to your desired thickness.


    Spread the passata over the base, leaving a small border for the crust. Tear the basil leaves over the sauce.


    Scatter over the mozzarella pieces and cherry tomatoes. Drizzle with olive oil and season with salt and pepper.


    Bake in the preheated oven for 8-10 minutes or until the crust is golden and crispy.


Essential Tips and FAQs for Perfecting Your Homemade Pizza Recipe

  1. 1. How do I make pizza dough from scratch?
  2. 2. What is the best flour to use for pizza dough?
  3. 3. How long should I let the pizza dough rise?
  4. 4. Can I use a different sauce instead of passata for my pizza?
  5. 5. What are some popular pizza topping combinations?
  6. 6. How can I achieve a crispy crust on my homemade pizza?
  7. 7. Is it necessary to preheat the oven before baking the pizza?

1. How do I make pizza dough from scratch?

For those eager to create their own pizza dough from scratch, the process is simpler than you might think. To start, combine strong white bread flour with instant yeast and a pinch of salt in a bowl. Add a generous drizzle of olive oil and warm water to the mixture, stirring until it forms a cohesive dough. Knead the dough on a floured surface for around 10 minutes until it becomes smooth and elastic. Let the dough rise in a lightly oiled bowl for about an hour until it doubles in size. Once risen, roll out the dough to your desired thickness before adding your favourite toppings for a truly homemade pizza experience.

2. What is the best flour to use for pizza dough?

When it comes to making the perfect pizza dough, choosing the right flour is crucial. The best flour to use for pizza dough is strong white bread flour. This type of flour has a higher protein content compared to all-purpose flour, which helps create a chewy and elastic texture in the dough once baked. Strong white bread flour also provides better structure and rise, resulting in a crispy yet airy crust that complements the toppings beautifully. Its versatility and ability to hold up well to high temperatures make it a popular choice among pizza enthusiasts looking to achieve that authentic pizzeria taste at home.

3. How long should I let the pizza dough rise?

When it comes to letting pizza dough rise, the ideal duration can vary depending on the recipe and desired crust texture. In general, allowing the pizza dough to rise for about 1 to 2 hours at room temperature can help develop flavour and create a light and airy crust. However, some recipes may call for longer proofing times in the fridge to enhance the dough’s structure and taste. It’s essential to follow the specific instructions provided in your chosen recipe to achieve the perfect balance of flavours and textures in your homemade pizza.

4. Can I use a different sauce instead of passata for my pizza?

For those looking to experiment with different flavours, substituting passata with an alternative sauce can offer a unique twist to your pizza recipe. While passata provides a traditional tomato base, options like pesto, barbecue sauce, or even a creamy white sauce can add a whole new dimension of taste to your pizza. The choice of sauce can greatly influence the overall flavour profile of the dish, allowing for endless creative possibilities to cater to individual preferences and culinary creativity.

When it comes to popular pizza topping combinations, the options are endless and can cater to a wide range of tastes. Classic choices like pepperoni and mushroom, margherita with fresh basil and mozzarella, or Hawaiian with ham and pineapple are always crowd-pleasers. For those craving a more gourmet experience, toppings like prosciutto and arugula, BBQ chicken with red onions, or a Mediterranean mix of olives, feta cheese, and sun-dried tomatoes offer a delicious twist. Whether you prefer traditional flavours or more adventurous blends, experimenting with different topping combinations is part of the fun of creating your perfect pizza.

6. How can I achieve a crispy crust on my homemade pizza?

To achieve a crispy crust on your homemade pizza, there are a few key tips to keep in mind. Firstly, make sure to preheat your oven to a high temperature, around 240°C/fan 220°C/gas mark 8, as this will help create that desired crispiness. Secondly, roll out your pizza dough thinly and evenly to ensure even cooking and a crunchy base. Additionally, using a pizza stone or baking tray preheated in the oven can help mimic the effect of a traditional pizza oven and result in a crispier crust. Finally, avoid overloading your pizza with toppings, as excess moisture can make the crust soggy – instead, opt for a balance of ingredients that enhance flavour without compromising texture. By following these steps, you can enjoy a delicious homemade pizza with a perfectly crispy crust every time.

7. Is it necessary to preheat the oven before baking the pizza?

Preheating the oven before baking a pizza is crucial to achieving the perfect result. By preheating the oven, you ensure that the cooking temperature is consistent from the moment you place the pizza inside. This helps in creating a crispy crust while ensuring that the toppings cook evenly. Without preheating, the pizza may not cook properly, resulting in a soggy or undercooked base. Therefore, to enjoy a delicious and well-cooked pizza, it is highly recommended to preheat your oven before baking.