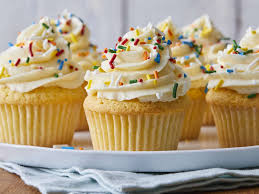
Indulge in the Ultimate Cream Cheese Frosting Recipe for Your Baked Delights
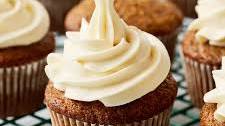
cream cheese frosting recipe

Cream Cheese Frosting Recipe

The Perfect Cream Cheese Frosting Recipe

Looking for a delicious and creamy frosting to top your cakes or cupcakes? Try this amazing cream cheese frosting recipe that will elevate your baked treats to the next level!

Ingredients:

  • 225g cream cheese, softened
  • 115g unsalted butter, softened
  • 450g icing sugar, sifted
  • 1 teaspoon vanilla extract

Instructions:

  1. In a mixing bowl, beat the cream cheese and butter together until smooth and creamy.
  2. Add the vanilla extract and mix well.
  3. Sift in the icing sugar gradually while continuing to beat the mixture until smooth and fluffy.
  4. Your cream cheese frosting is now ready to be used! Spread it generously on your cakes or cupcakes for a delectable finish.

Whether you’re decorating a carrot cake, red velvet cupcakes, or cinnamon rolls, this cream cheese frosting is sure to impress with its rich flavour and luxurious texture. Enjoy!


Top 5 FAQs on Perfecting and Storing Cream Cheese Frosting

  1. 1. How do I make cream cheese frosting without lumps?
  2. 2. Can I use salted butter for cream cheese frosting?
  3. 3. How should I store cream cheese frosting?
  4. 4. Can I add flavourings like lemon or orange to cream cheese frosting?
  5. 5. Is it possible to make cream cheese frosting ahead of time?

1. How do I make cream cheese frosting without lumps?

To make cream cheese frosting without lumps, it is crucial to ensure that both the cream cheese and butter are softened at room temperature before starting the process. This allows for easier blending and smoother consistency. When beating the cream cheese and butter together, do so gradually and at a low speed to prevent overmixing, which can lead to lumps. Sifting the icing sugar before adding it to the mixture also helps in achieving a smoother texture. By following these steps meticulously, you can create a velvety cream cheese frosting that is free of any unwanted lumps, ensuring a perfect finish for your cakes and cupcakes.

2. Can I use salted butter for cream cheese frosting?

Using salted butter in cream cheese frosting is a matter of personal preference. While some bakers prefer the slight hint of saltiness that salted butter can add to the frosting, others opt for unsalted butter to have more control over the overall saltiness of the final product. If you choose to use salted butter, consider reducing the amount of additional salt in the recipe to avoid an overly salty taste. Ultimately, experimenting with different types of butter can help you discover the perfect balance of flavours for your cream cheese frosting.

3. How should I store cream cheese frosting?

When it comes to storing cream cheese frosting, it is best to keep it refrigerated in an airtight container. This helps maintain its freshness and prevents any potential spoilage. Make sure to cover the frosting tightly to avoid absorbing any odours from the fridge. If stored properly, cream cheese frosting can typically last for up to a week in the refrigerator, allowing you to enjoy its creamy goodness whenever you need it for your sweet treats.

4. Can I add flavourings like lemon or orange to cream cheese frosting?

Adding flavourings like lemon or orange to cream cheese frosting can be a delightful way to enhance the taste profile of your frosting. The citrusy notes of lemon or orange can complement the creamy richness of the cream cheese, creating a refreshing and zesty twist. When incorporating these flavours, it is recommended to add them gradually and taste as you go to achieve the desired balance. Whether you prefer a hint of citrus or a bold burst of flavour, experimenting with lemon or orange in your cream cheese frosting can result in a delicious and unique topping for your baked goods.

5. Is it possible to make cream cheese frosting ahead of time?

Yes, it is definitely possible to make cream cheese frosting ahead of time. In fact, preparing the frosting in advance can be quite convenient, especially if you have a busy schedule or are planning to decorate a cake or cupcakes for a special occasion. Simply store the cream cheese frosting in an airtight container in the refrigerator for up to 3-4 days. Before using it, allow the frosting to come to room temperature and give it a good stir to restore its creamy consistency. This make-ahead option allows you to save time without compromising on the delicious taste and texture of your frosting.

Delicious Pancake Recipe: A Flipping Good Breakfast Treat!

pancake recipe

The Perfect Pancake Recipe

Pancakes are a beloved breakfast treat enjoyed by people all around the world. Whether you like them thin and crispy or thick and fluffy, this versatile dish is always a crowd-pleaser. Here’s a classic pancake recipe that will have you flipping with joy!

Ingredients:

  • 1 cup all-purpose flour
  • 2 tablespoons sugar
  • 1 teaspoon baking powder
  • 1/2 teaspoon baking soda
  • 1/4 teaspoon salt
  • 1 cup buttermilk
  • 1 large egg
  • 2 tablespoons unsalted butter, melted
  • Butter or oil for cooking

Instructions:

  1. In a large bowl, whisk together the flour, sugar, baking powder, baking soda, and salt.
  2. In a separate bowl, whisk together the buttermilk, egg, and melted butter.
  3. Pour the wet ingredients into the dry ingredients and stir until just combined. Be careful not to overmix; lumps are okay.
  4. Heat a non-stick pan or griddle over medium heat and add a small amount of butter or oil.
  5. Spoon about 1/4 cup of batter onto the pan for each pancake.
  6. >

    li>Cook until bubbles form on the surface of the pancake, then flip and cook for another minute or until golden brown.

    >

    li>Repeat with the remaining batter.

p>Serve your pancakes hot with your favourite toppings such as maple syrup, fresh berries, whipped cream or chocolate sauce. Enjoy!

p>This recipe makes approximately 8-10 pancakes depending on size. Feel free to double or halve the ingredients to suit your needs. Happy flipping!


8 Essential Tips for Perfect Pancakes Every Time

  1. Use a non-stick frying pan to cook the pancakes.
  2. Preheat the pan on medium heat before pouring the batter.
  3. Ensure the batter is smooth and free of lumps for fluffy pancakes.
  4. Flip the pancake when bubbles appear on the surface and the edges look set.
  5. Add a little butter or oil to the pan between batches to prevent sticking.
  6. Serve pancakes warm with your favourite toppings like maple syrup, fruits, or whipped cream.
  7. Experiment with different flavours such as vanilla extract or cinnamon in the batter.
  8. For a healthier option, consider using whole wheat flour or adding oats to the batter.

Use a non-stick frying pan to cook the pancakes.

When preparing pancakes, it is advisable to use a non-stick frying pan for cooking. This choice of cookware helps ensure that the pancakes cook evenly and do not stick to the surface, making flipping them easier and preventing any unwanted tearing or breakage. The non-stick properties of the pan also require less oil or butter for greasing, resulting in healthier and more aesthetically pleasing pancakes. By utilising a non-stick frying pan, you can enhance your pancake-making experience and achieve delicious, perfectly cooked pancakes with minimal effort.

Preheat the pan on medium heat before pouring the batter.

For the perfect pancakes, it’s essential to preheat the pan on medium heat before pouring the batter. This step ensures that the pancakes cook evenly and develop a golden-brown exterior while remaining fluffy on the inside. By preheating the pan, you create a hot surface that allows the batter to start cooking immediately, resulting in delicious pancakes with a consistent texture. Remember, a well-heated pan is key to achieving pancake perfection every time.

Ensure the batter is smooth and free of lumps for fluffy pancakes.

To achieve fluffy pancakes, it is crucial to ensure that the batter is smooth and free of lumps. By whisking together the dry and wet ingredients until just combined, you can prevent overmixing, which can result in tough pancakes. A smooth batter allows for even distribution of leavening agents like baking powder and baking soda, leading to those light and airy pancakes we all love. So take your time to mix the batter gently but thoroughly to guarantee a delightful stack of fluffy pancakes every time.

Flip the pancake when bubbles appear on the surface and the edges look set.

When preparing your pancakes using this recipe, a helpful tip is to flip them at the right moment. Look for bubbles forming on the surface and observe the edges to appear set. This visual cue indicates that it’s time to gently flip the pancake, ensuring that both sides are cooked to golden perfection. Mastering the art of timing will result in deliciously fluffy pancakes that are evenly cooked throughout.

Add a little butter or oil to the pan between batches to prevent sticking.

To ensure your pancakes cook to perfection without sticking, a handy tip is to add a small amount of butter or oil to the pan between batches. This simple step not only helps prevent the pancakes from sticking but also adds a delicious hint of flavour to each batch. By greasing the pan lightly, you can achieve beautifully golden and evenly cooked pancakes every time.

Serve pancakes warm with your favourite toppings like maple syrup, fruits, or whipped cream.

To enhance your pancake experience, consider serving them warm with a delightful array of toppings. Whether you prefer the classic drizzle of maple syrup, the freshness of seasonal fruits, or the indulgence of whipped cream, customizing your pancakes with these delicious additions can elevate your breakfast or brunch to a whole new level. The combination of fluffy pancakes and your favourite toppings creates a symphony of flavours that is sure to delight your taste buds.

Experiment with different flavours such as vanilla extract or cinnamon in the batter.

Enhance your pancake experience by experimenting with various flavours in the batter. Adding a splash of vanilla extract can impart a subtle sweetness and aromatic depth to your pancakes, while a sprinkle of cinnamon can infuse warm and comforting notes. These simple additions can elevate the taste profile of your pancakes, making each bite a delightful and flavourful sensation. Don’t be afraid to get creative in the kitchen and discover new combinations that suit your taste preferences.

For a healthier option, consider using whole wheat flour or adding oats to the batter.

For a healthier twist on your pancake recipe, you can opt for whole wheat flour or incorporate oats into the batter. Whole wheat flour adds a nutty flavour and extra fibre, while oats provide a hearty texture and additional nutrients. These simple swaps not only enhance the nutritional value of your pancakes but also offer a deliciously wholesome alternative for a guilt-free indulgence.

Delightful Cupcake Recipe: A Sweet Treat for Every Occasion

cupcake recipe

The Perfect Cupcake Recipe

Indulge your sweet tooth with our delicious cupcake recipe that is sure to impress your friends and family. Whether you’re a baking enthusiast or a novice in the kitchen, these cupcakes are easy to make and guaranteed to satisfy your cravings.

Ingredients:

  • 150g self-raising flour
  • 150g caster sugar
  • 150g unsalted butter, softened
  • 3 eggs
  • 1 tsp vanilla extract
  • A pinch of salt
  • 100g icing sugar for decoration

Instructions:

  1. Preheat your oven to 180°C and line a cupcake tray with paper cases.
  2. In a mixing bowl, cream together the butter and sugar until light and fluffy.
  3. Add the eggs one at a time, beating well after each addition. Stir in the vanilla extract.
  4. Sift in the flour and salt, then gently fold into the mixture until just combined. Be careful not to overmix.
  5. Spoon the batter into the paper cases, filling each one about two-thirds full.
  6. Bake in the preheated oven for 15-20 minutes or until a skewer inserted into the centre comes out clean.

    Once baked, remove from the oven and allow to cool completely on a wire rack.

    Sift icing sugar over the cupcakes for decoration before serving.

Enjoy!

These delightful cupcakes are perfect for any occasion. Whether you’re hosting a party or simply treating yourself, this recipe is sure to be a hit. Get creative with different toppings or fillings to make them your own!


8 Essential Tips for Perfect Cupcakes Every Time

  1. Ensure all ingredients are at room temperature before starting.
  2. Use a good quality, high-fat butter for a moist and rich texture.
  3. Do not overmix the batter to avoid dense cupcakes.
  4. Fill cupcake liners only two-thirds full to allow room for rising.
  5. Preheat your oven to the correct temperature for even baking.
  6. Rotate your cupcake tray halfway through baking for uniform browning.
  7. Allow cupcakes to cool completely before frosting to prevent melting.
  8. Get creative with decorations like sprinkles, fruits, or edible flowers.

Ensure all ingredients are at room temperature before starting.

To achieve the perfect texture and consistency in your cupcakes, it is essential to ensure that all ingredients are at room temperature before beginning the baking process. When ingredients like butter, eggs, and milk are at room temperature, they blend together more easily, resulting in a smoother batter. This step not only helps to create a uniform mixture but also promotes even baking, leading to cupcakes that are moist and delicious. So remember to plan ahead and allow your ingredients to come to room temperature before diving into this delightful cupcake recipe for optimal results.

Use a good quality, high-fat butter for a moist and rich texture.

For a truly indulgent and decadent cupcake experience, it is essential to use a high-quality, high-fat butter in your recipe. The richness and moisture that this type of butter provides will elevate the texture of your cupcakes, resulting in a melt-in-your-mouth sensation with every bite. Investing in good quality butter is a simple yet effective way to ensure that your cupcakes turn out moist, rich, and utterly delicious.

Do not overmix the batter to avoid dense cupcakes.

To ensure light and fluffy cupcakes, it is crucial not to overmix the batter. Overmixing can lead to dense cupcakes as it develops the gluten in the flour, resulting in a tough texture. To achieve the perfect consistency, gently fold the ingredients together until just combined. This simple tip will help you create cupcakes that are moist, airy, and utterly irresistible.

Fill cupcake liners only two-thirds full to allow room for rising.

When preparing your cupcakes, it’s essential to fill the cupcake liners only two-thirds full. This tip ensures that there is ample space for the batter to rise and expand during baking, resulting in perfectly fluffy and well-formed cupcakes. By following this guideline, you can achieve a desirable cupcake texture and shape, making your sweet treats visually appealing and delightful to eat. Remember, a little attention to detail goes a long way in creating bakery-worthy cupcakes at home.

Preheat your oven to the correct temperature for even baking.

To ensure your cupcakes turn out perfectly baked and with a consistent texture, it is essential to preheat your oven to the correct temperature before placing them inside. Preheating allows the cupcakes to start baking immediately at the desired temperature, promoting even cooking throughout. This step not only helps in achieving a uniform rise and golden crust but also ensures that the cupcakes are cooked through without being under or overdone. So, remember to preheat your oven to the recommended temperature stated in the recipe for delicious and evenly baked cupcakes every time.

Rotate your cupcake tray halfway through baking for uniform browning.

To ensure even browning and consistent baking of your cupcakes, a helpful tip is to rotate your cupcake tray halfway through the baking process. By rotating the tray, you allow each cupcake to be exposed to the heat of the oven more evenly, resulting in a beautifully golden-brown finish across all your cupcakes. This simple technique can make a significant difference in the appearance and taste of your baked treats, ensuring that they come out perfectly every time.

Allow cupcakes to cool completely before frosting to prevent melting.

To ensure that your cupcakes turn out perfectly, it’s essential to allow them to cool completely before frosting. This step is crucial in preventing the frosting from melting or sliding off the cupcakes. By giving the cupcakes enough time to cool, you’ll not only achieve a better texture but also maintain the integrity of your delicious creations. Patience is key when it comes to baking, and taking the time to let your cupcakes cool will result in a beautifully finished treat that is sure to impress.

Get creative with decorations like sprinkles, fruits, or edible flowers.

Elevate your cupcakes to the next level by embracing creativity in your decorations. Whether you opt for colourful sprinkles, fresh fruits, or delicate edible flowers, adding a touch of flair to your cupcakes can transform them into works of art. Experiment with different combinations and arrangements to create visually stunning treats that not only taste delicious but also delight the eyes. Let your imagination run wild and turn your cupcakes into a showcase of your personal style and creativity.