Fluffy Perfection: White Rice Recipe for Every Meal
white rice recipe

The Perfect White Rice Recipe

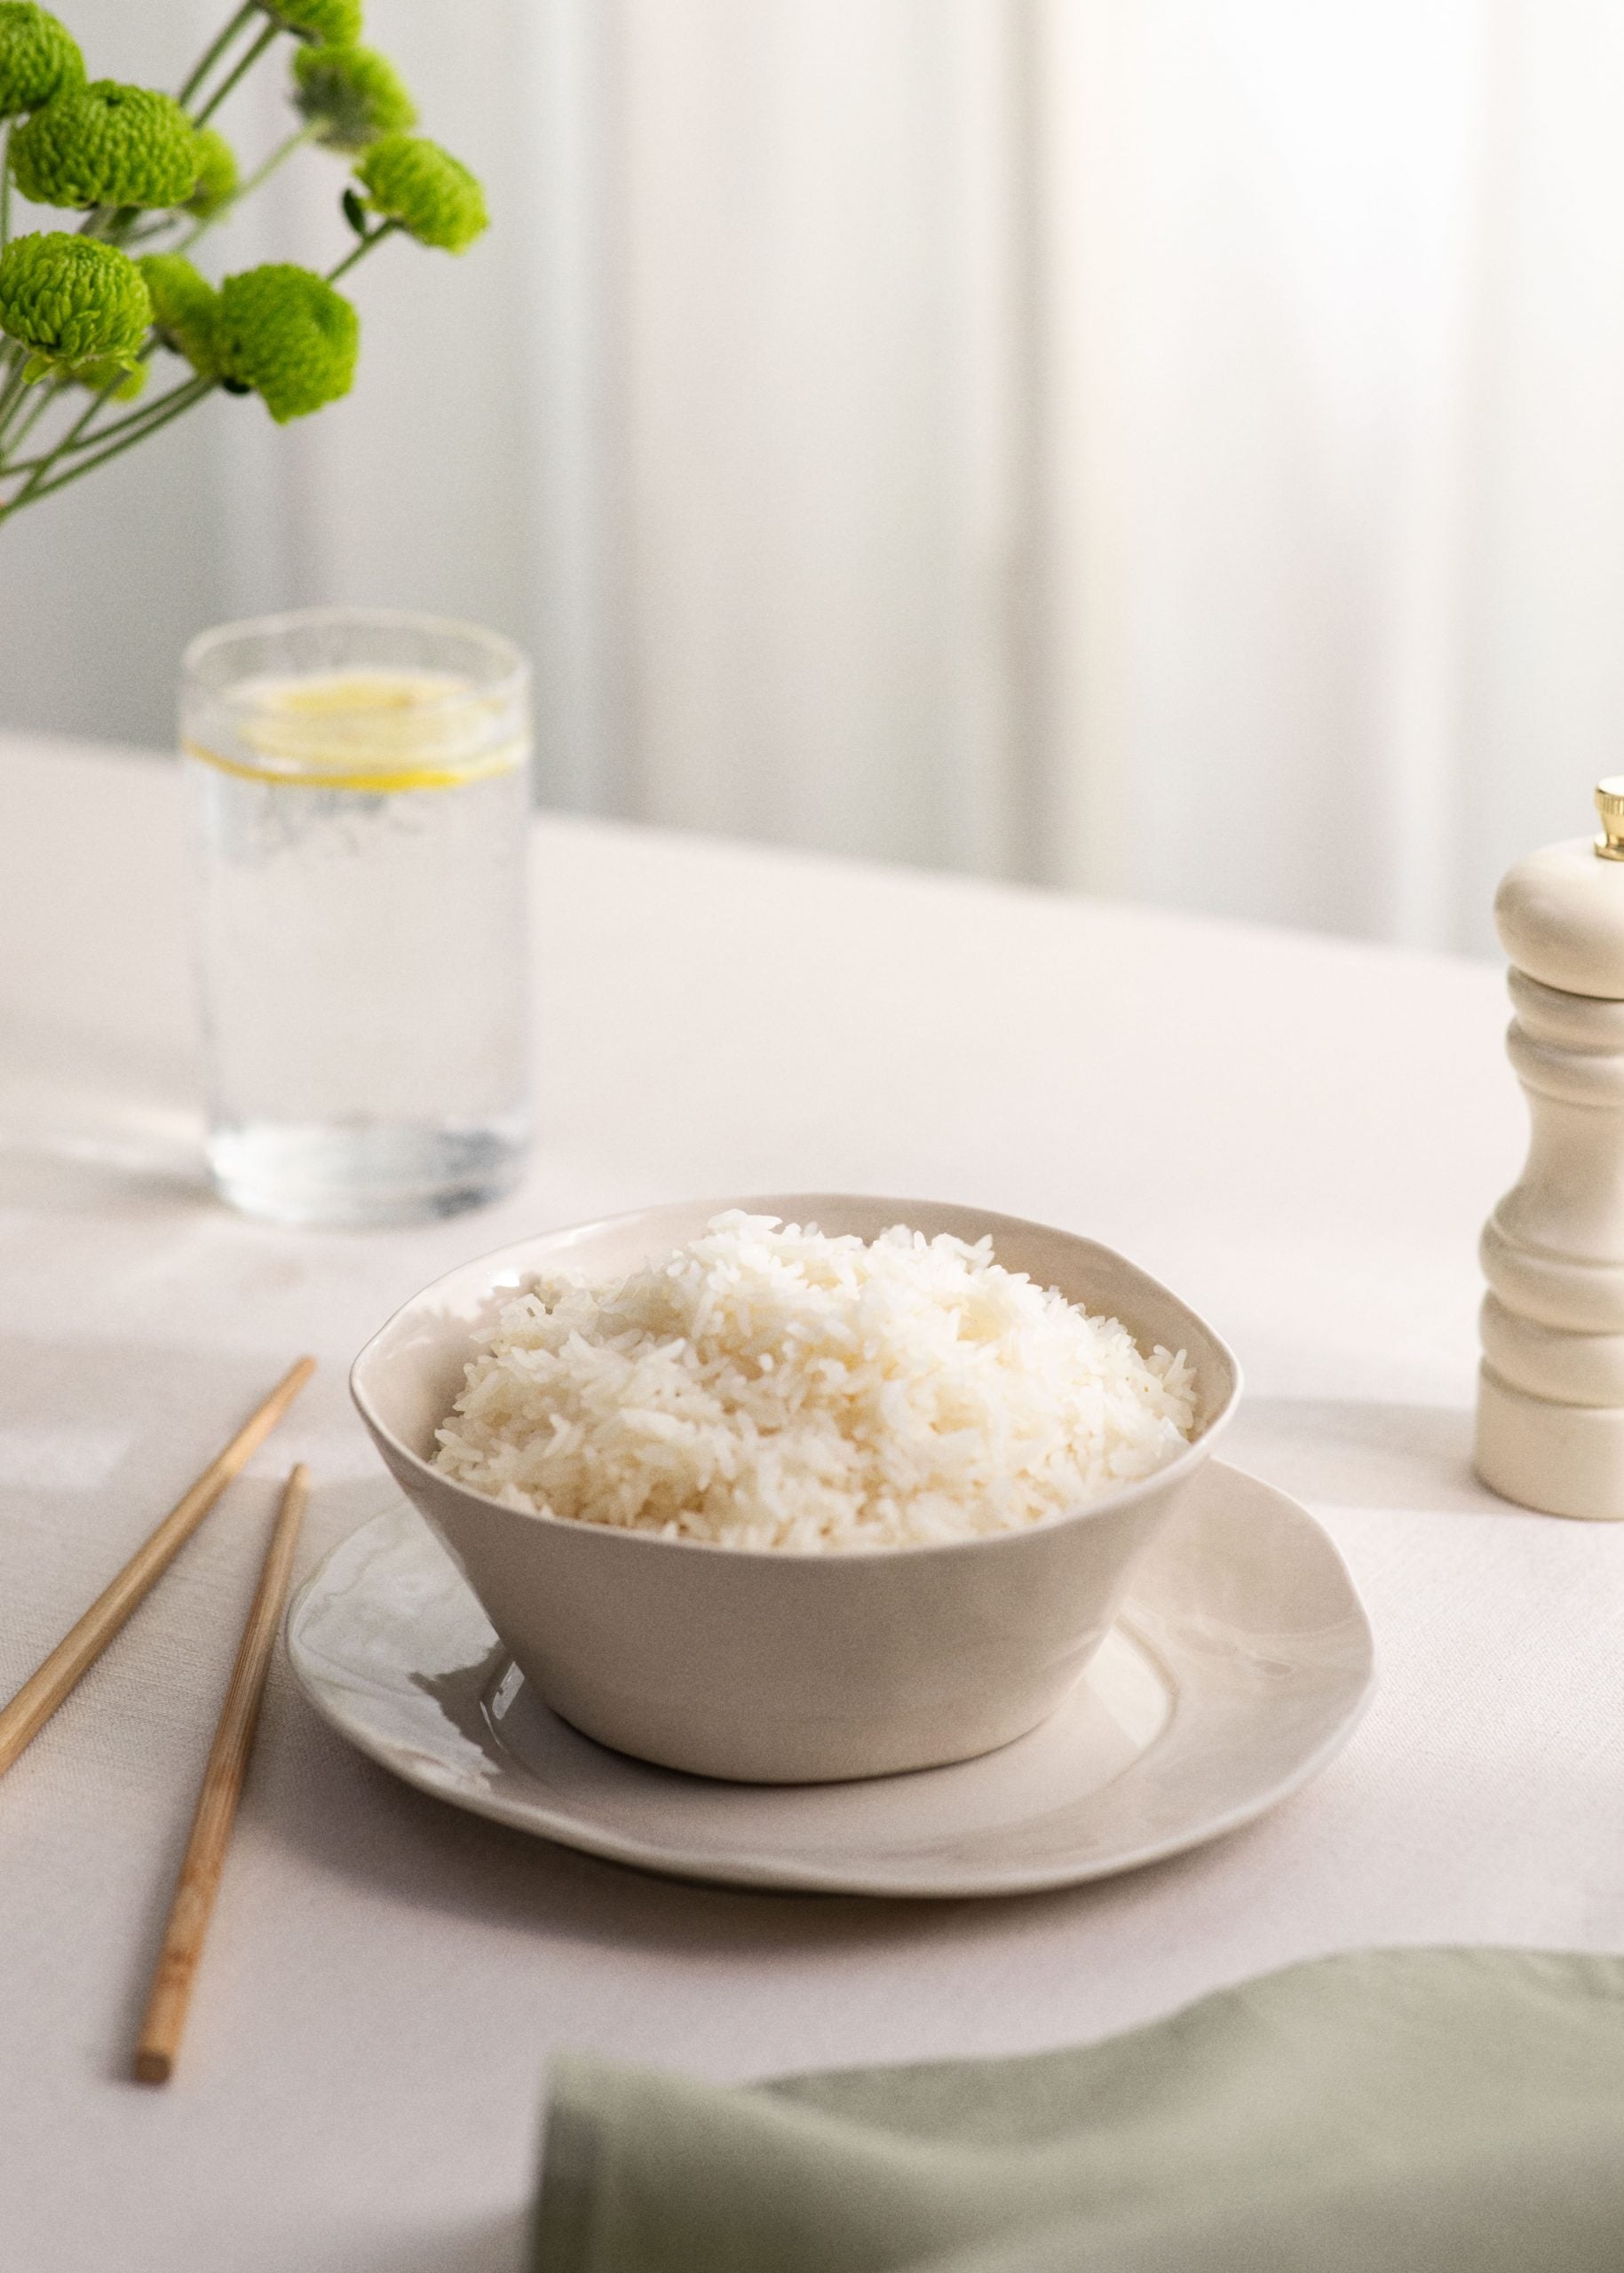
White rice is a versatile and delicious staple that complements a wide variety of dishes. Whether you’re serving it alongside a flavourful curry or as a base for stir-fried vegetables, mastering the art of cooking white rice is essential for any home cook. Follow this simple recipe to achieve fluffy, perfectly cooked white rice every time.

Ingredients:

  • 1 cup of white rice
  • 2 cups of water
  • Pinch of salt (optional)

Instructions:

  1. Rinse the rice under cold water until the water runs clear. This helps remove excess starch and prevents the rice from becoming too sticky.
  2. In a saucepan, combine the rinsed rice, water, and salt (if using). Bring to a boil over high heat.
  3. Once boiling, reduce the heat to low and cover the saucepan with a tight-fitting lid. Let the rice simmer for about 15-20 minutes or until all the water is absorbed.
  4. Remove the saucepan from the heat and let it sit, covered, for an additional 5 minutes to allow the steam to finish cooking the rice.
  5. Fluff the rice with a fork to separate the grains and serve hot.

Enjoy your perfectly cooked white rice as a side dish or as part of your favourite meal. Experiment with adding herbs, spices, or even vegetables to customise this basic recipe to suit your taste preferences. With just a few simple steps, you can elevate any meal with fluffy, fragrant white rice.

Whether you’re a novice cook or seasoned chef, this white rice recipe is sure to become a go-to in your culinary repertoire. Bon appétit!


7 Essential Tips for Perfectly Cooked White Rice

  1. Rinse the rice before cooking to remove excess starch and improve texture.
  2. Use a ratio of 1
  3. Add a pinch of salt to enhance the flavour of the rice.
  4. Avoid stirring the rice while it’s cooking to prevent it from becoming mushy.
  5. Let the rice rest for a few minutes after cooking to allow any excess moisture to evaporate.
  6. Consider adding a knob of butter or a splash of olive oil for extra richness and flavour.
  7. Fluff the cooked rice with a fork before serving to separate the grains.

Rinse the rice before cooking to remove excess starch and improve texture.

Rinsing the rice before cooking is a crucial step that can significantly enhance the texture and overall quality of your white rice dish. By washing the rice under cold water until it runs clear, you effectively remove excess starch, which helps prevent the grains from sticking together during cooking. This simple yet essential tip not only improves the texture of the rice but also ensures that each grain cooks up fluffy and separate, resulting in a perfectly light and delicious final dish.

Use a ratio of 1

When preparing white rice, a key tip to remember is to use a ratio of 1:2 for rice to water. This means for every cup of white rice, you should add two cups of water. Maintaining this ratio ensures that the rice cooks evenly and absorbs the right amount of moisture, resulting in perfectly fluffy grains. By following this simple guideline, you can achieve consistently delicious white rice that pairs perfectly with a variety of dishes.

Add a pinch of salt to enhance the flavour of the rice.

Enhance the flavour of your white rice by adding a pinch of salt to the cooking water. This simple tip can elevate the taste of the rice, bringing out its natural flavours and creating a more balanced dish. The salt not only enhances the overall taste but also helps to season each grain of rice, ensuring that every bite is delicious. Next time you cook white rice, don’t forget this small but impactful addition to take your dish to the next level.

Avoid stirring the rice while it’s cooking to prevent it from becoming mushy.

To ensure your white rice turns out perfectly fluffy and not mushy, it is crucial to resist the temptation to stir it while it’s cooking. Stirring the rice can disrupt the cooking process and release excess starch, leading to a sticky, clumpy texture. By allowing the rice to simmer undisturbed with the lid on, you give it the opportunity to absorb the water evenly and cook to perfection. Remember, patience is key when preparing white rice – resist stirring and let it steam gently for a flawless result every time.

Let the rice rest for a few minutes after cooking to allow any excess moisture to evaporate.

Allowing the cooked white rice to rest for a few minutes after cooking is a crucial tip to ensure the perfect texture and consistency. This resting period allows any excess moisture to evaporate, resulting in fluffy and well-separated grains. By giving the rice time to settle, you enhance its overall quality and prevent it from becoming overly sticky or mushy. Patience in this final step can make a significant difference in the final outcome of your white rice dish, ensuring a delightful dining experience with each bite.

Consider adding a knob of butter or a splash of olive oil for extra richness and flavour.

Enhance the richness and flavour of your white rice by incorporating a knob of butter or a splash of olive oil into the cooking process. These additions not only elevate the taste profile of the rice but also contribute a luxurious texture that will delight your taste buds. Whether you prefer the creamy richness of butter or the fruity notes of olive oil, this simple tip can transform your basic white rice into a decadent and irresistible accompaniment to any meal.

Fluff the cooked rice with a fork before serving to separate the grains.

To enhance the texture and presentation of your cooked white rice, a crucial tip is to gently fluff it with a fork before serving. This simple yet effective step helps to separate the individual grains, preventing them from clumping together and ensuring a light and fluffy consistency. By taking a moment to fluff the rice, you not only improve its appearance but also create a more enjoyable eating experience, allowing each grain to stand out and absorb flavours more effectively. Remember, the art of fluffing with a fork can make a significant difference in elevating your white rice dish to perfection.
Traditional Sinigang Recipe: A Taste of Filipino Comfort Food

sinigang recipe

The Perfect Sinigang Recipe: A Taste of Filipino Comfort Food

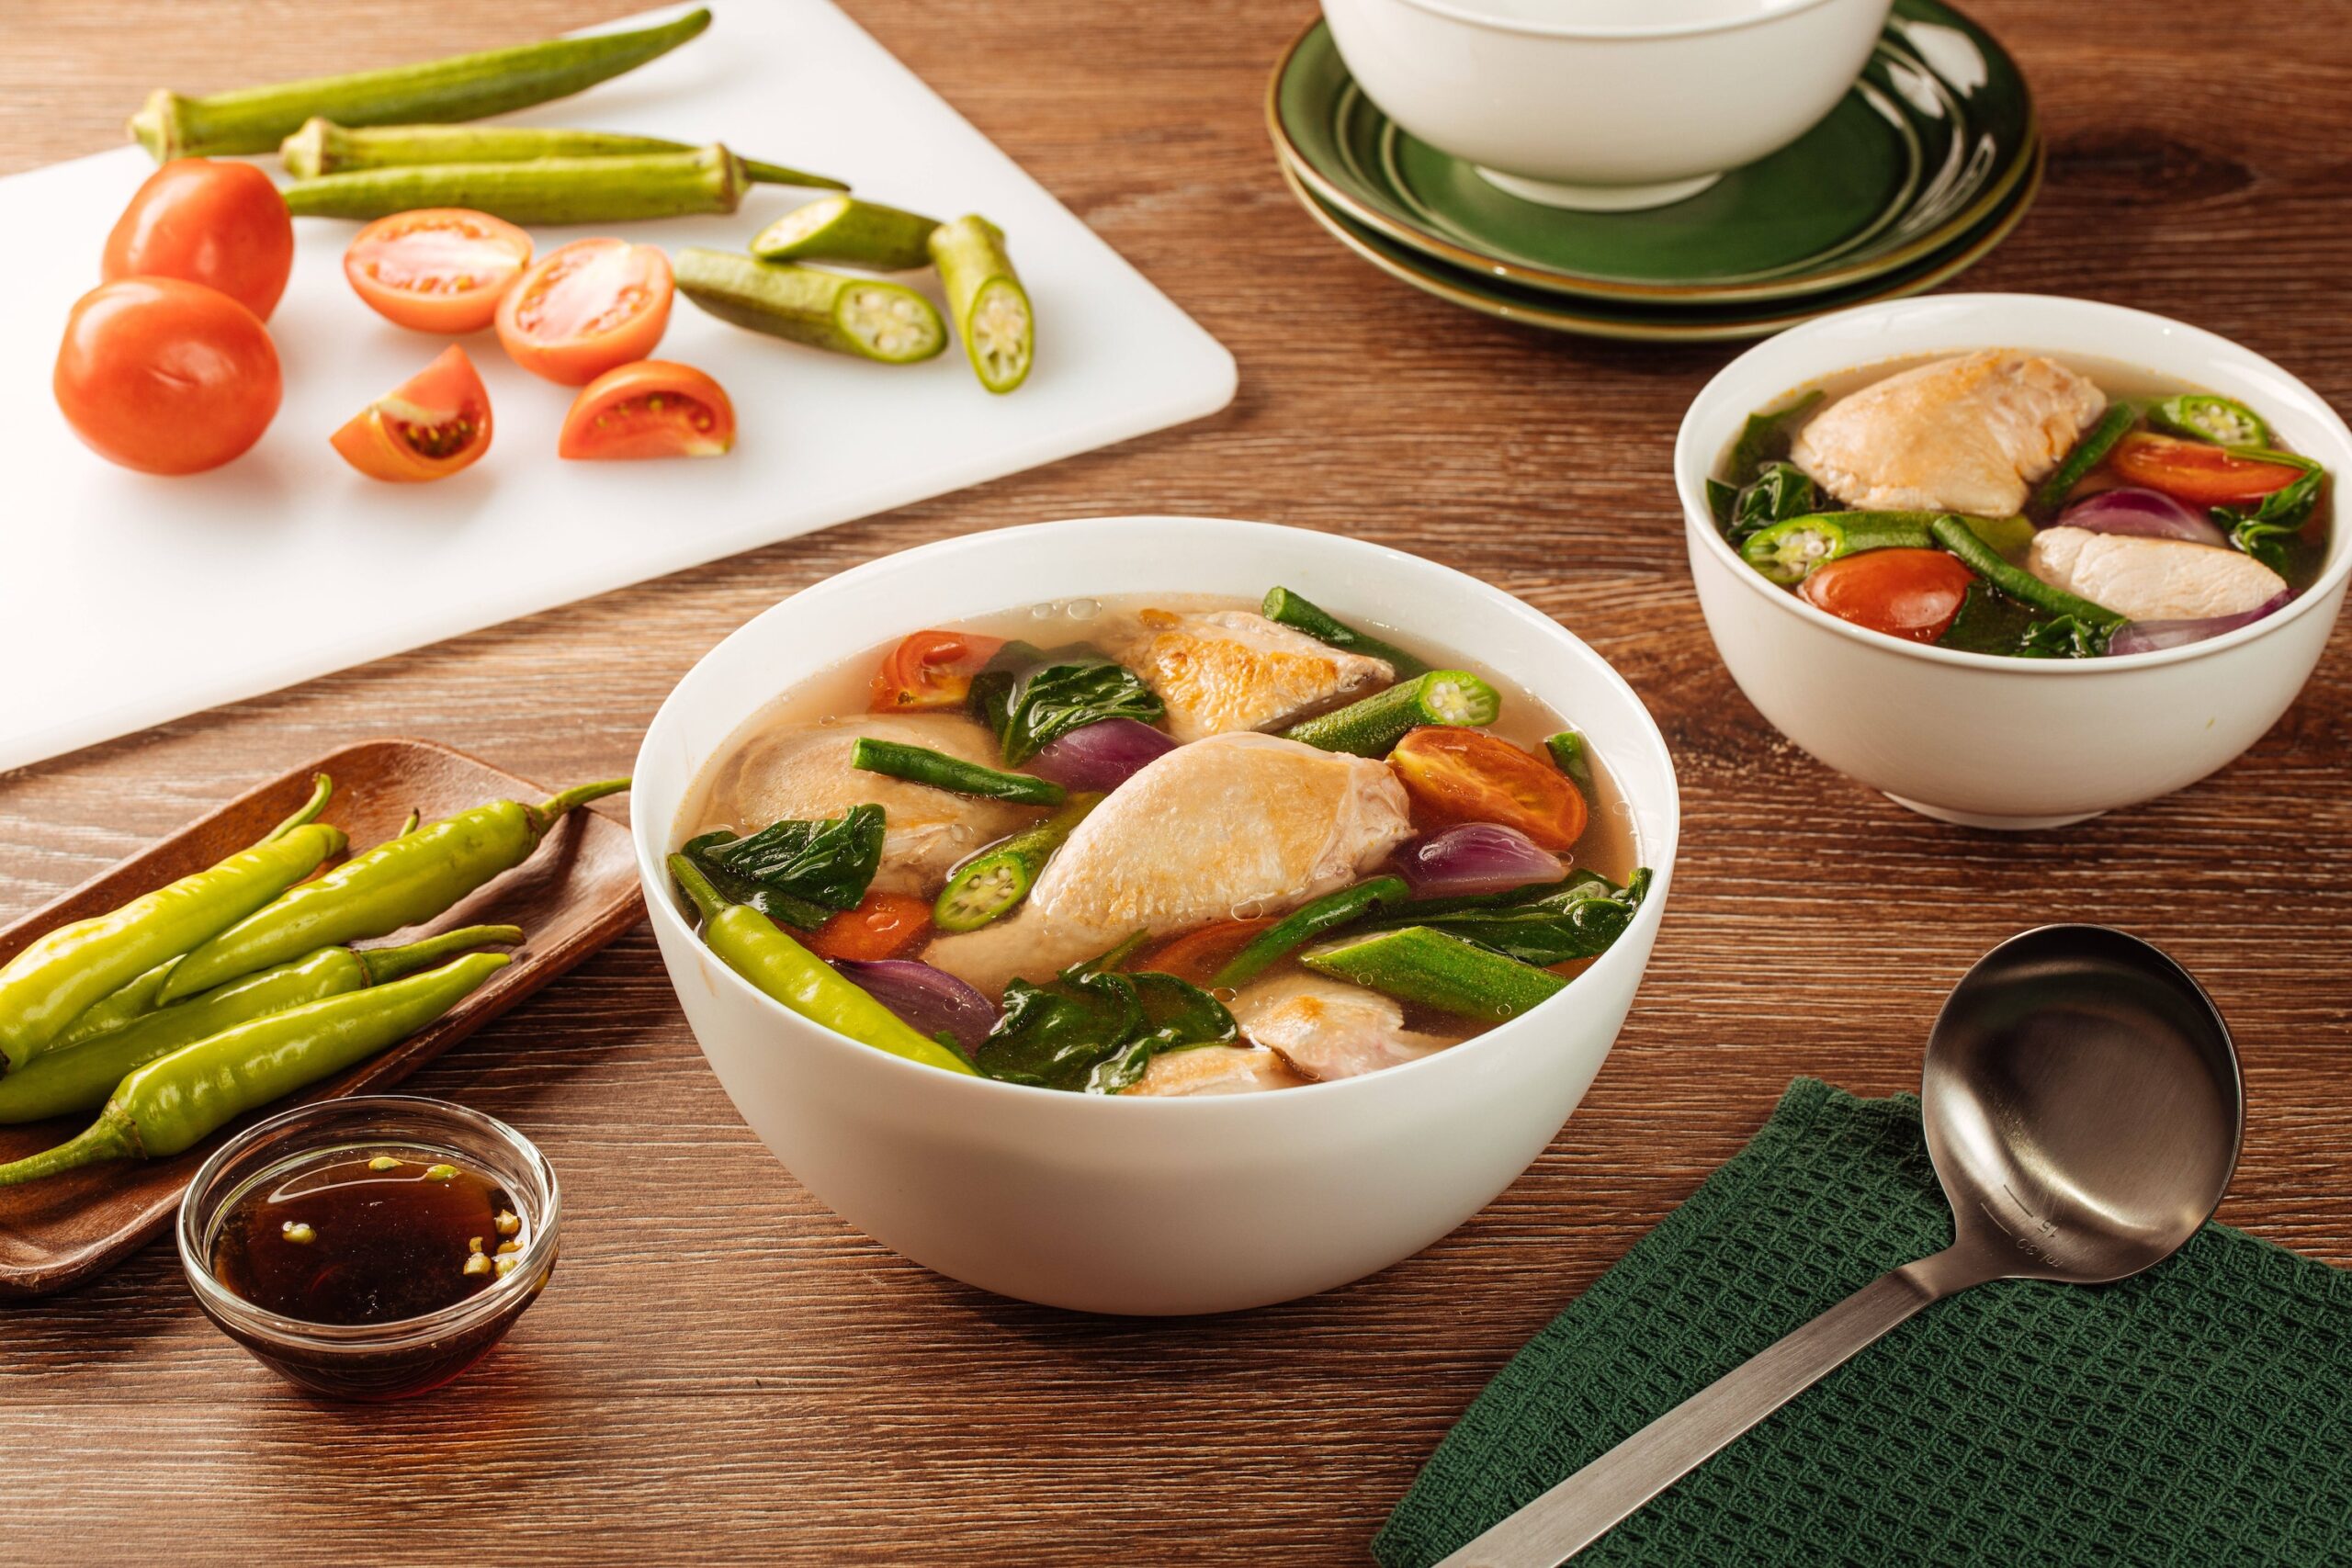
Sinigang is a beloved Filipino dish known for its sour and savoury flavour profile that warms the soul. This traditional soup is a staple in Filipino households, often enjoyed during family gatherings or on rainy days. Let’s explore how to create the perfect sinigang that will transport you to the heart of Filipino cuisine.

Ingredients:

  • 500g pork ribs or belly
  • 1 large onion, quartered
  • 2 medium tomatoes, quartered
  • 1 radish, sliced
  • 1 eggplant, sliced
  • 10-12 pieces of string beans, cut into 2-inch lengths
  • 2 pieces of green chillies (optional)
  • 1 pack of sinigang mix (tamarind soup base)
  • Salt and pepper to taste

Instructions:

  1. In a large pot, bring water to a boil and add the pork ribs or belly. Let it simmer until the meat is tender.
  2. Add the onions and tomatoes to the pot. Let them cook until they become soft and fragrant.

  3. Add the sinigang mix to the pot and stir well to dissolve.

  4. Add the radish, eggplant, string beans, and green chillies. Let them simmer until all vegetables are cooked but still slightly crunchy.

  5. Season with salt and pepper according to your taste.

  6. Serve hot with steamed rice.

    Variations:

    Sinigang can be made with different types of meat such as shrimp, fish or beef. You can also adjust the sourness level by adding more tamarind mix or fresh tamarind pods. Some people like to add leafy greens like water spinach or kangkong for added freshness.

    Whether you’re a seasoned fan of Filipino cuisine or trying sinigang for the first time, this dish is sure to delight your taste buds with its unique blend of flavours. Give this recipe a try and experience the comfort and warmth of sinigang in your own home.

    Bon appétit!


9 Reasons to Love Sinigang: A Versatile, Comforting, and Authentic Filipino Dish

  1. Deliciously tangy and savoury flavour profile.
  2. Versatile recipe that can be made with different types of meat.
  3. Comforting and warming, perfect for cold or rainy days.
  4. Easy to prepare with simple ingredients.
  5. Healthy dish packed with a variety of vegetables.
  6. Customisable sourness level to suit personal taste preferences.
  7. Great way to experience authentic Filipino cuisine at home.
  8. Suitable for family gatherings or intimate meals.
  9. Pairs perfectly with steamed rice for a satisfying meal.


Challenges in Preparing Traditional Sinigang: Time, Ingredients, and Taste Preferences

  1. Preparation can be time-consuming due to the need to cook the meat until tender.
  2. Finding traditional ingredients like tamarind soup base may be challenging in some regions.
  3. The sourness level of sinigang may not appeal to those who prefer milder flavours.

Deliciously tangy and savoury flavour profile.

The sinigang recipe boasts a deliciously tangy and savoury flavour profile that sets it apart as a truly comforting and satisfying dish. The perfect balance of sourness from the tamarind base, combined with the rich savouriness of the pork or other meat, creates a symphony of tastes that excite the palate. Each spoonful offers a burst of tanginess followed by a deep umami richness, making sinigang a culinary delight that is both refreshing and deeply satisfying.

Versatile recipe that can be made with different types of meat.

One of the standout advantages of the sinigang recipe is its versatility in accommodating various types of meat. Whether you prefer pork, shrimp, fish, or beef, sinigang can be easily tailored to suit your taste preferences and dietary choices. This flexibility allows individuals to explore different flavour profiles and textures while still enjoying the comforting and tangy essence that defines this beloved Filipino dish.

Comforting and warming, perfect for cold or rainy days.

Sinigang’s comforting and warming qualities make it the perfect dish to enjoy on cold or rainy days. The sour and savoury broth, infused with a medley of vegetables and tender meat, provides a soothing sensation that warms both the body and the soul. Whether seeking solace from the chill of winter or looking for a culinary embrace during a rainy afternoon, sinigang offers a delicious respite that brings comfort with every spoonful.

Easy to prepare with simple ingredients.

One of the key advantages of the sinigang recipe is its ease of preparation using simple ingredients. With just a few basic components like pork ribs or belly, vegetables, and a sinigang mix, you can create a delicious and comforting soup that captures the essence of Filipino cuisine. This accessibility makes sinigang a popular choice for home cooks looking to whip up a satisfying meal without the need for complex or hard-to-find ingredients. The straightforward nature of this recipe ensures that anyone can enjoy the delightful flavours of sinigang with minimal effort and maximum flavour.

Healthy dish packed with a variety of vegetables.

Sinigang stands out as a healthy dish due to its abundance of vegetables that not only enhance its flavour but also contribute to its nutritional value. Packed with a diverse array of vegetables such as radish, eggplant, string beans, and more, sinigang offers a colourful and nutrient-rich dining experience. These vegetables provide essential vitamins, minerals, and dietary fibre, making sinigang a wholesome choice for those looking to enjoy a delicious meal while prioritising their health.

Customisable sourness level to suit personal taste preferences.

One of the standout advantages of the sinigang recipe is its customisable sourness level, allowing individuals to tailor the dish to their personal taste preferences. Whether you prefer a more tangy and sharp flavour or a milder, subtle sourness, sinigang offers flexibility in adjusting the amount of tamarind mix or fresh tamarind pods used in the broth. This adaptability ensures that each serving of sinigang can be uniquely crafted to satisfy individual palates, making it a versatile and appealing dish for a wide range of taste preferences.

Great way to experience authentic Filipino cuisine at home.

Indulging in a sinigang recipe is a wonderful opportunity to immerse yourself in the authentic flavours of Filipino cuisine right in the comfort of your own home. This traditional dish encapsulates the essence of Filipino cooking with its perfect balance of sourness and savoury notes, offering a genuine taste of the Philippines that is sure to transport you to the bustling streets and vibrant markets of this culinary-rich nation. Embrace the warmth and hospitality of Filipino culture by savouring a bowl of sinigang, a dish that not only satisfies your taste buds but also nourishes your soul with its comforting and familiar embrace.

Suitable for family gatherings or intimate meals.

Sinigang recipe is a versatile dish that is perfect for both family gatherings and intimate meals. Its comforting and flavourful nature makes it ideal for bringing loved ones together around the dining table, creating a sense of warmth and togetherness. Whether shared during a festive celebration with extended family or enjoyed in a cozy setting with close friends, sinigang’s ability to cater to different occasions makes it a go-to choice for those looking to create memorable dining experiences that foster connection and joy.

Pairs perfectly with steamed rice for a satisfying meal.

Sinigang’s delightful sour and savoury broth pairs perfectly with fluffy steamed rice, creating a harmonious and satisfying meal that is sure to please your taste buds. The tender meat, vibrant vegetables, and tangy tamarind base of the sinigang complement the simplicity of steamed rice, offering a well-rounded dining experience that is both comforting and fulfilling. Whether enjoyed on a chilly evening or as a hearty lunch option, the combination of sinigang and steamed rice is a classic Filipino favourite that never fails to bring joy to the table.

Preparation can be time-consuming due to the need to cook the meat until tender.

One potential downside of preparing sinigang is the time-consuming process required to cook the meat until it reaches the desired tenderness. This step can demand patience and attention to ensure that the meat is perfectly cooked and infused with flavour. However, while this aspect of the recipe may require some extra time and effort, the end result of tender, succulent meat in a rich and tangy broth makes it well worth the wait. The slow cooking process also allows the flavours to meld together, creating a deeply satisfying dish that embodies the essence of Filipino comfort food.

Finding traditional ingredients like tamarind soup base may be challenging in some regions.

In certain regions, one potential drawback of preparing a sinigang recipe is the difficulty in sourcing traditional ingredients like tamarind soup base. The unique flavour of sinigang largely depends on this key ingredient, which can pose a challenge for those living in areas where it may not be readily available. However, with some creativity and resourcefulness, alternative options or substitutes can be explored to recreate the distinct sourness that defines this beloved Filipino dish.

The sourness level of sinigang may not appeal to those who prefer milder flavours.

For individuals who lean towards milder flavours, the pronounced sourness of sinigang may present a challenge. This traditional Filipino dish is renowned for its tangy and sharp taste, derived from the tamarind base. The sourness can be quite intense for those unaccustomed to such bold flavours, potentially overshadowing the subtler notes of other ingredients in the dish. Adjusting the level of sourness in sinigang may be necessary to cater to varying taste preferences and ensure a more balanced flavour profile that aligns with individual palates.

Savour the Tradition: Authentic Menudo Recipe for a Taste of Mexico

menudo recipe

The Authentic Menudo Recipe: A Taste of Mexican Tradition

Menudo, a hearty and flavourful Mexican dish, is a beloved staple in many households and restaurants across Mexico. This traditional soup is known for its rich broth, tender tripe, and aromatic spices that come together to create a truly comforting and satisfying meal.

Ingredients:

  • 2 pounds of beef tripe, cleaned and cut into small pieces
  • 1 onion, chopped
  • 4 cloves of garlic, minced
  • 2 teaspoons of dried oregano
  • 1 teaspoon of cumin powder
  • Salt and pepper to taste
  • Chilli peppers (optional for added heat)
  • Fresh cilantro for garnish

Instructions:

  1. In a large pot, combine the beef tripe, onion, garlic, oregano, cumin powder, salt, pepper, and enough water to cover the ingredients.
  2. Cover the pot and simmer over low heat for about 3-4 hours or until the tripe is tender.
  3. If desired, add chilli peppers to taste for a spicy kick.
  4. Serve hot in bowls garnished with fresh cilantro leaves.

Menudo is often enjoyed with a side of warm tortillas or crusty bread. Its robust flavours and comforting warmth make it an ideal dish for gatherings or cold winter days. Whether you’re a fan of Mexican cuisine or looking to explore new flavours, trying out this authentic menudo recipe is sure to be a delightful culinary adventure.

Buen provecho!


7 Essential Tips for Perfecting a Traditional Menudo Recipe

  1. Use fresh tripe for the best flavour and texture.
  2. Soak the tripe in cold water with vinegar to help remove any strong odours.
  3. Cook the tripe until tender to ensure it is not tough or chewy.
  4. Include a variety of spices like oregano, cumin, and bay leaves for a rich flavour profile.
  5. Add hominy for a traditional touch and extra texture.
  6. Serve menudo with lime wedges, chopped onions, and cilantro for freshness and brightness.
  7. Allow the flavours to meld by simmering the menudo slowly over low heat.

Use fresh tripe for the best flavour and texture.

For the best flavour and texture in your menudo dish, it is essential to use fresh tripe. Fresh tripe not only enhances the overall taste of the soup but also ensures a tender and succulent texture that truly elevates the dining experience. By opting for fresh tripe, you can capture the authentic essence of this traditional Mexican recipe and savour every delicious bite with its rich and aromatic flavours.

Soak the tripe in cold water with vinegar to help remove any strong odours.

To enhance the preparation of your menudo dish, a helpful tip is to soak the beef tripe in cold water with vinegar before cooking. This step assists in eliminating any strong odours that may be present, ensuring a cleaner and more pleasant cooking process. By taking the time to soak the tripe in this solution, you can improve the overall flavour and aroma of your menudo, resulting in a more enjoyable dining experience for you and your guests.

Cook the tripe until tender to ensure it is not tough or chewy.

To achieve the perfect texture in your menudo dish, it is crucial to cook the tripe until tender. This step is essential in ensuring that the tripe is not tough or chewy, but instead becomes soft and succulent, allowing it to absorb the rich flavours of the broth and spices. By simmering the tripe slowly over low heat for several hours, you can transform this humble ingredient into a delectably tender component that enhances the overall taste and enjoyment of your menudo soup.

Include a variety of spices like oregano, cumin, and bay leaves for a rich flavour profile.

Enhance the depth of flavour in your menudo by incorporating a diverse selection of spices such as aromatic oregano, earthy cumin, and fragrant bay leaves. These spices not only add complexity to the broth but also infuse each bite with a harmonious blend of savoury notes. By carefully balancing these seasonings, you can elevate the taste profile of your menudo, creating a truly satisfying and authentic Mexican culinary experience.

Add hominy for a traditional touch and extra texture.

For a traditional touch and enhanced texture in your menudo recipe, consider adding hominy to the simmering broth. Hominy, made from dried maize kernels that have been treated with an alkali solution, brings a unique flavour and chewy texture to the dish. This addition not only stays true to the authentic Mexican roots of menudo but also elevates the overall dining experience by providing a satisfying contrast to the tender tripe and robust spices.

Serve menudo with lime wedges, chopped onions, and cilantro for freshness and brightness.

Enhance the vibrant flavours of your menudo by serving it with zesty lime wedges, crisp chopped onions, and fragrant cilantro. These fresh and aromatic garnishes not only add a burst of brightness to the dish but also complement the rich and savoury broth, creating a harmonious balance of flavours. The tangy acidity of the lime, the sharpness of the onions, and the herbal notes of cilantro elevate the overall dining experience, making each spoonful a refreshing and delightful taste sensation.

Allow the flavours to meld by simmering the menudo slowly over low heat.

To enhance the depth and richness of your menudo, it is essential to allow the flavours to meld together harmoniously. By simmering the dish slowly over low heat, the spices, aromatics, and tender tripe have ample time to infuse into the broth, creating a delectable and well-balanced flavour profile. This patient approach ensures that each ingredient contributes its unique essence, resulting in a truly authentic and satisfying menudo experience.

Savour the Flavour: A Delectable Polenta Recipe to Delight Your Palate

polenta recipe

The Perfect Polenta Recipe: A Taste of Italy

Polenta, a traditional Italian dish made from cornmeal, is a versatile and comforting staple that has been enjoyed for centuries. Its creamy texture and rich flavour make it a favourite in many households. Whether served as a creamy side dish or allowed to set and then grilled or fried, polenta is sure to delight your taste buds.

Ingredients:

  • 1 cup of polenta cornmeal
  • 4 cups of water
  • Salt, to taste
  • Butter, for added richness (optional)
  • Grated Parmesan cheese, for garnish

Instructions:

  1. In a large saucepan, bring the water to a boil.
  2. Slowly pour in the polenta cornmeal while whisking continuously to prevent lumps from forming.
  3. Reduce the heat to low and simmer the polenta, stirring frequently, until it thickens and the grains are tender (this usually takes about 30-40 minutes).
  4. Add salt to taste and stir in butter for extra creaminess if desired.
  5. Once cooked to your desired consistency, remove the polenta from heat and serve hot.

Your creamy and delicious polenta is now ready to be enjoyed! For added flavour, sprinkle some grated Parmesan cheese on top before serving. Whether paired with hearty stews, roasted vegetables, or grilled meats, this classic Italian dish is sure to impress your family and friends.

Experiment with different toppings such as sautéed mushrooms, roasted tomatoes, or fresh herbs to create your own unique twist on this timeless recipe. Buon appetito!

Note: Leftover polenta can be refrigerated and sliced into squares or wedges before grilling or pan-frying for a crispy alternative.


Everything You Need to Know About Preparing Polenta: Top 9 FAQs

  1. 1. What is polenta and where does it originate from?
  2. 2. What type of cornmeal should I use to make polenta?
  3. 3. How do I prevent lumps when cooking polenta?
  4. 4. Can I make polenta in advance and reheat it later?
  5. 5. What are some popular seasonings or additions to enhance the flavour of polenta?
  6. 6. Is there a difference between instant polenta and traditional polenta?
  7. 7. Can I use chicken or vegetable broth instead of water for cooking polenta?
  8. 8. Are there any gluten-free variations of the classic polenta recipe?
  9. 9. How can I achieve different textures with polenta, such as creamy, firm, or grilled?

1. What is polenta and where does it originate from?

Polenta is a traditional Italian dish that has its roots in Northern Italy, particularly in regions like Lombardy and Veneto. It is made from cornmeal, which is cooked to create a creamy and versatile dish with a rich flavour. Originating from humble beginnings as a peasant food, polenta has evolved into a beloved staple in Italian cuisine and beyond. Its history dates back centuries, where it was a dietary staple for many Italian families due to its affordability and filling nature. Today, polenta continues to be enjoyed in various forms, whether served soft as a porridge-like side dish or allowed to set and then grilled or fried for a crispy texture.

2. What type of cornmeal should I use to make polenta?

When preparing polenta, the type of cornmeal you use plays a crucial role in achieving the desired texture and flavour. For traditional Italian-style polenta, it is recommended to use coarse-ground cornmeal, also known as polenta cornmeal. This variety has a slightly coarser texture compared to regular cornmeal, which helps create that signature creamy yet slightly grainy consistency that is characteristic of a well-made polenta dish. Opting for high-quality, stone-ground cornmeal will enhance the overall taste and authenticity of your polenta recipe, ensuring a truly satisfying culinary experience.

3. How do I prevent lumps when cooking polenta?

When cooking polenta, preventing lumps is crucial to achieving a smooth and creamy texture. To avoid lumps in your polenta, it is essential to gradually add the cornmeal to the boiling water while whisking continuously. This method helps the cornmeal incorporate smoothly and evenly into the water, preventing clumps from forming. Additionally, stirring the polenta frequently during the cooking process ensures that the grains are evenly cooked and hydrated. By following these steps and maintaining a consistent whisking and stirring motion, you can successfully prevent lumps and achieve a velvety-smooth polenta that is perfect for any meal.

4. Can I make polenta in advance and reheat it later?

Yes, you can make polenta in advance and reheat it later. To reheat polenta, simply add a bit of water or broth to the cooked polenta to loosen it up, then heat it gently on the stovetop, stirring occasionally until it reaches your desired consistency. You can also reheat polenta in the microwave by covering it with a damp paper towel and heating in short intervals, stirring in between to ensure even warming. Reheating polenta may alter its texture slightly, but with proper care and attention, you can enjoy a delicious dish that retains much of its original flavour and creaminess.

When it comes to enhancing the flavour of polenta, there are numerous popular seasonings and additions that can elevate this classic dish. Some common choices include incorporating ingredients like garlic, fresh herbs such as rosemary or thyme, grated Parmesan or Pecorino cheese for a savoury kick, or even a drizzle of truffle oil for a touch of luxury. For those looking to add a bit of heat, red pepper flakes or paprika can provide a spicy contrast to the creamy texture of the polenta. Experimenting with different flavour combinations allows you to tailor your polenta to suit your personal taste preferences and create a truly memorable dining experience.

6. Is there a difference between instant polenta and traditional polenta?

When it comes to preparing polenta, one common question that arises is about the difference between instant polenta and traditional polenta. Instant polenta is pre-cooked and dehydrated cornmeal, which significantly reduces the cooking time compared to traditional polenta. While traditional polenta requires a longer cooking process to achieve a creamy texture and develop its full flavour, instant polenta offers a quicker alternative for those looking to save time in the kitchen. However, some argue that traditional polenta has a superior taste and texture due to the slow cooking method, allowing the cornmeal to fully absorb the liquid and develop a richer flavour profile. Ultimately, the choice between instant and traditional polenta depends on personal preference and the desired outcome of the dish.

7. Can I use chicken or vegetable broth instead of water for cooking polenta?

For those looking to elevate the flavour of their polenta, using chicken or vegetable broth instead of water is a popular choice. By substituting water with broth, you can infuse your polenta with additional depth and richness, enhancing its overall taste profile. The broth adds a savoury element that complements the cornmeal base, creating a more complex and satisfying dish. Whether you opt for chicken or vegetable broth, this simple swap can take your polenta recipe to the next level, providing a delicious twist on this classic Italian favourite.

8. Are there any gluten-free variations of the classic polenta recipe?

For those looking for gluten-free alternatives, there are indeed variations of the classic polenta recipe that cater to specific dietary needs. By using certified gluten-free cornmeal, individuals with gluten sensitivities can enjoy a delicious and safe version of polenta without compromising on taste or texture. Simply ensure that all ingredients used in the recipe are gluten-free to create a dish that is both traditional and suitable for those following a gluten-free diet.

9. How can I achieve different textures with polenta, such as creamy, firm, or grilled?

To achieve different textures with polenta, such as creamy, firm, or grilled, you can adjust the cooking method and ingredients used. For a creamy texture, cook the polenta in a higher ratio of water to cornmeal and stir frequently until it reaches a smooth consistency. To make firm polenta suitable for slicing and grilling, use less water and allow the mixture to set in a dish before cutting into desired shapes. For grilled polenta, chill cooked and set polenta in the refrigerator until firm, then slice into pieces and grill until crispy on the outside. By experimenting with cooking techniques and ratios, you can easily create various textures to suit your preferences and culinary needs when preparing polenta.

Flipping Fantastic: Exploring the World of Pancakes

pancakes

The Delicious World of Pancakes

Pancakes, a beloved breakfast staple enjoyed by people around the globe, have a rich history and endless variations that cater to every palate. Whether you prefer them thin and crepe-like or thick and fluffy, there is a pancake for everyone.

Originating from ancient Greece and Rome, pancakes have evolved over centuries to become a versatile dish that can be sweet or savoury, simple or elaborate. In the UK, pancakes are traditionally enjoyed on Shrove Tuesday, also known as Pancake Day, where families gather to flip and feast on these delectable treats.

One of the most popular toppings for pancakes in the UK is classic lemon and sugar, providing a perfect balance of tangy and sweet flavours. For those with a sweet tooth, maple syrup, chocolate spread, or fresh berries are delightful accompaniments that elevate the pancake experience.

For those looking for a savoury twist, toppings like crispy bacon, melted cheese, or smoked salmon can turn pancakes into a satisfying meal any time of day. Experimenting with different ingredients such as herbs, spices, and vegetables opens up a world of creative possibilities for pancake enthusiasts.

Whether you enjoy them as a leisurely weekend brunch or a quick weekday breakfast on-the-go, pancakes never fail to bring joy and comfort with every bite. So next time you’re craving something delicious and comforting, whip up a batch of pancakes and indulge in this timeless culinary delight.


Everything You Need to Know About Pancakes: Recipes, Tips, and Traditions

  1. 1. How do you make pancakes from scratch?
  2. 2. What is the difference between American pancakes and British pancakes?
  3. 3. Can you freeze pancakes?
  4. 4. What are some creative pancake toppings?
  5. 5. Are there any vegan or gluten-free pancake recipes?
  6. 6. How can I make fluffy pancakes?
  7. 7. What is the history of Pancake Day in the UK?
  8. 8. Are there any healthy pancake recipes?

1. How do you make pancakes from scratch?

When it comes to making pancakes from scratch, the process is surprisingly simple and rewarding. To start, you’ll need basic ingredients like flour, eggs, milk, and a pinch of salt. Begin by whisking the dry ingredients together before adding in the wet ingredients to form a smooth batter. Heat a non-stick pan or griddle, ladle the batter onto the surface, and cook until bubbles form on the top before flipping to cook the other side. The key is patience and a watchful eye to achieve that perfect golden-brown hue. Once cooked, serve your homemade pancakes with your favourite toppings for a delicious breakfast or snack that will surely impress your taste buds.

2. What is the difference between American pancakes and British pancakes?

When comparing American pancakes to British pancakes, the key differences lie in their texture and thickness. American pancakes are typically thicker and fluffier, thanks to the addition of baking powder or baking soda in the batter, which helps them rise. They often have a lighter, cake-like consistency and are commonly served stacked with butter and maple syrup. On the other hand, British pancakes are thinner and more akin to crepes, with a delicate and slightly chewy texture. They are usually enjoyed with simple toppings like lemon juice and sugar or jam. These distinctions in preparation and presentation contribute to the unique characteristics that define American and British pancakes, offering diverse options for pancake enthusiasts to savour.

3. Can you freeze pancakes?

Freezing pancakes is a convenient way to enjoy this breakfast favourite at any time. Whether you have leftover pancakes or want to prepare a batch in advance, freezing them can help extend their shelf life. To freeze pancakes, simply allow them to cool completely, then stack them with parchment paper in between to prevent sticking. Place the stack in an airtight container or freezer bag before storing in the freezer. When ready to enjoy, simply reheat the frozen pancakes in a toaster, microwave, or oven for a quick and delicious meal on-the-go.

4. What are some creative pancake toppings?

When it comes to creative pancake toppings, the options are truly endless. From indulgent combinations like Nutella and sliced bananas to more adventurous choices such as savoury bacon and avocado, there is something to suit every taste bud. For a burst of freshness, try topping your pancakes with a mix of fresh berries and a drizzle of honey. If you’re feeling nostalgic, a dollop of whipped cream and sprinkles will bring back childhood memories. Don’t be afraid to experiment with unconventional pairings like peanut butter and jelly or even smoked salmon and cream cheese for a unique twist on the classic pancake experience.

5. Are there any vegan or gluten-free pancake recipes?

For those with dietary restrictions or preferences, there are plenty of vegan and gluten-free pancake recipes available that cater to a variety of needs. Vegan pancakes can be made using plant-based alternatives such as almond milk, flaxseed eggs, and coconut oil, resulting in fluffy and delicious pancakes without any animal products. Similarly, gluten-free pancake recipes often utilise ingredients like rice flour, almond flour, or gluten-free oats to create pancakes that are safe for individuals with gluten sensitivities or celiac disease. With these alternative recipes, everyone can enjoy the simple pleasure of indulging in a stack of pancakes without compromising on taste or dietary requirements.

6. How can I make fluffy pancakes?

To achieve fluffy pancakes, there are a few key tips to keep in mind. Firstly, ensure that your pancake batter is not overmixed; a few lumps are okay as overmixing can lead to dense pancakes. Secondly, let the batter rest for a few minutes before cooking to allow the leavening agents to work their magic. When cooking, use medium heat on a preheated griddle or pan and wait for bubbles to form on the surface before flipping. This will result in light and airy pancakes that are sure to impress your taste buds.

7. What is the history of Pancake Day in the UK?

Pancake Day, also known as Shrove Tuesday, holds a significant place in the cultural and culinary calendar of the UK. This tradition dates back centuries and is rooted in the Christian observance of Lent. Shrove Tuesday falls on the day before Ash Wednesday, marking the beginning of the Lenten season leading up to Easter. Pancakes became associated with this day as a way for people to use up rich ingredients like eggs, milk, and sugar before the fasting period of Lent began. The act of making and consuming pancakes on this day symbolises indulgence and celebration before the solemnity of Lent. Today, Pancake Day in the UK is a time-honoured custom where families and communities come together to enjoy delicious pancakes in various forms, carrying on this historical tradition with joy and festivity.

8. Are there any healthy pancake recipes?

When it comes to pancakes, there are indeed healthy recipe options available for those looking to enjoy this classic dish without compromising on nutrition. By incorporating ingredients like whole wheat flour, oats, Greek yogurt, and fresh fruits into the batter, you can create pancakes that are not only delicious but also packed with fibre, protein, and vitamins. Opting for toppings such as natural nut butter, honey, or unsweetened yogurt can further enhance the health benefits of your pancakes. With a little creativity and some mindful ingredient choices, you can indulge in a nutritious stack of pancakes guilt-free.