Savour the Tradition: Authentic Menudo Recipe for a Taste of Mexico
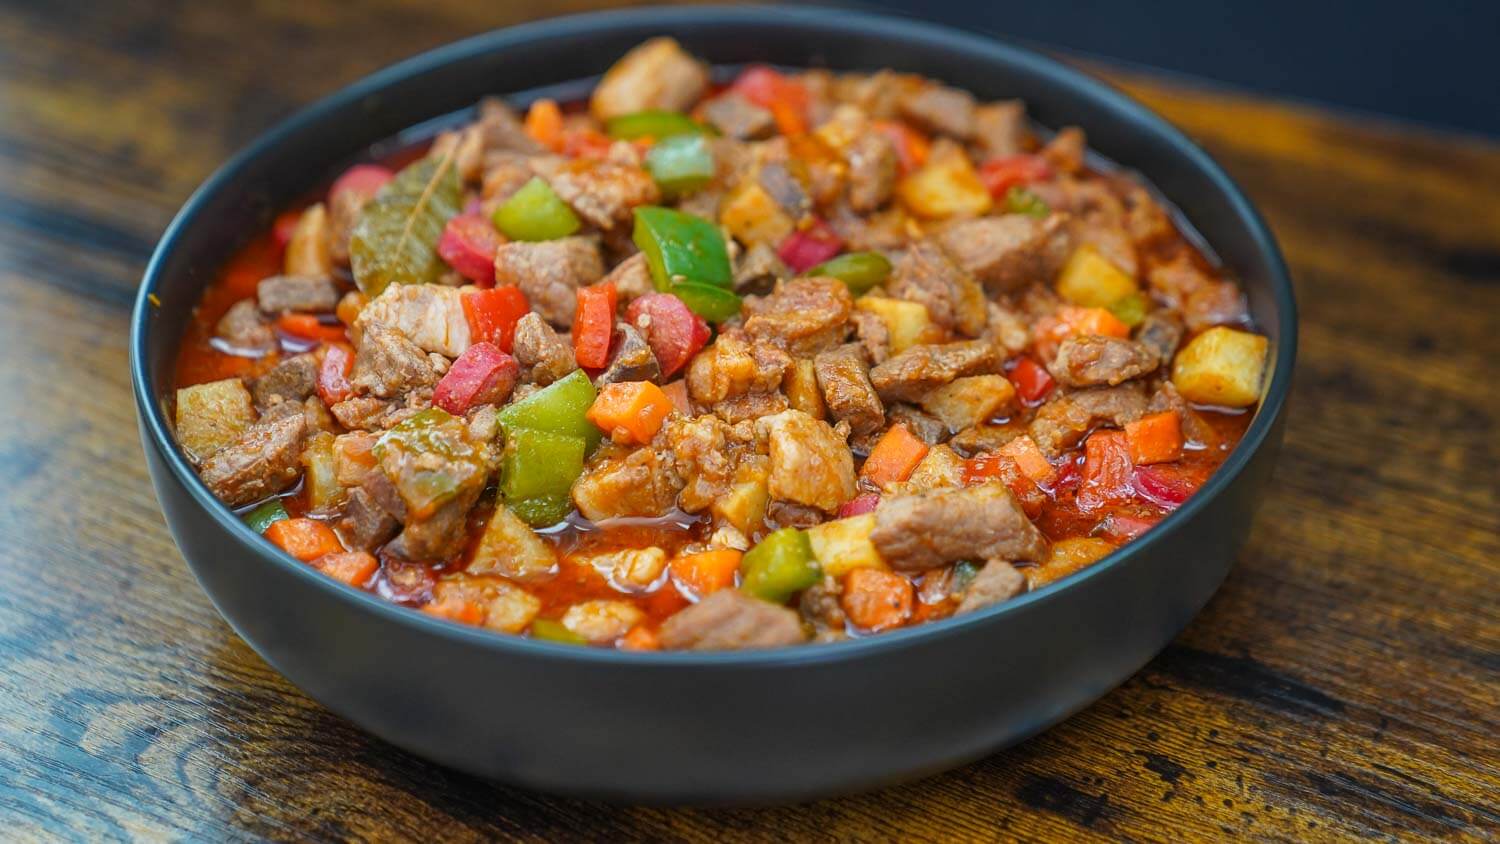
menudo recipe

The Authentic Menudo Recipe: A Taste of Mexican Tradition

Menudo, a hearty and flavourful Mexican dish, is a beloved staple in many households and restaurants across Mexico. This traditional soup is known for its rich broth, tender tripe, and aromatic spices that come together to create a truly comforting and satisfying meal.

Ingredients:

  • 2 pounds of beef tripe, cleaned and cut into small pieces
  • 1 onion, chopped
  • 4 cloves of garlic, minced
  • 2 teaspoons of dried oregano
  • 1 teaspoon of cumin powder
  • Salt and pepper to taste
  • Chilli peppers (optional for added heat)
  • Fresh cilantro for garnish

Instructions:

  1. In a large pot, combine the beef tripe, onion, garlic, oregano, cumin powder, salt, pepper, and enough water to cover the ingredients.
  2. Cover the pot and simmer over low heat for about 3-4 hours or until the tripe is tender.
  3. If desired, add chilli peppers to taste for a spicy kick.
  4. Serve hot in bowls garnished with fresh cilantro leaves.

Menudo is often enjoyed with a side of warm tortillas or crusty bread. Its robust flavours and comforting warmth make it an ideal dish for gatherings or cold winter days. Whether you’re a fan of Mexican cuisine or looking to explore new flavours, trying out this authentic menudo recipe is sure to be a delightful culinary adventure.

Buen provecho!


7 Essential Tips for Perfecting a Traditional Menudo Recipe

  1. Use fresh tripe for the best flavour and texture.
  2. Soak the tripe in cold water with vinegar to help remove any strong odours.
  3. Cook the tripe until tender to ensure it is not tough or chewy.
  4. Include a variety of spices like oregano, cumin, and bay leaves for a rich flavour profile.
  5. Add hominy for a traditional touch and extra texture.
  6. Serve menudo with lime wedges, chopped onions, and cilantro for freshness and brightness.
  7. Allow the flavours to meld by simmering the menudo slowly over low heat.

Use fresh tripe for the best flavour and texture.

For the best flavour and texture in your menudo dish, it is essential to use fresh tripe. Fresh tripe not only enhances the overall taste of the soup but also ensures a tender and succulent texture that truly elevates the dining experience. By opting for fresh tripe, you can capture the authentic essence of this traditional Mexican recipe and savour every delicious bite with its rich and aromatic flavours.

Soak the tripe in cold water with vinegar to help remove any strong odours.

To enhance the preparation of your menudo dish, a helpful tip is to soak the beef tripe in cold water with vinegar before cooking. This step assists in eliminating any strong odours that may be present, ensuring a cleaner and more pleasant cooking process. By taking the time to soak the tripe in this solution, you can improve the overall flavour and aroma of your menudo, resulting in a more enjoyable dining experience for you and your guests.

Cook the tripe until tender to ensure it is not tough or chewy.

To achieve the perfect texture in your menudo dish, it is crucial to cook the tripe until tender. This step is essential in ensuring that the tripe is not tough or chewy, but instead becomes soft and succulent, allowing it to absorb the rich flavours of the broth and spices. By simmering the tripe slowly over low heat for several hours, you can transform this humble ingredient into a delectably tender component that enhances the overall taste and enjoyment of your menudo soup.

Include a variety of spices like oregano, cumin, and bay leaves for a rich flavour profile.

Enhance the depth of flavour in your menudo by incorporating a diverse selection of spices such as aromatic oregano, earthy cumin, and fragrant bay leaves. These spices not only add complexity to the broth but also infuse each bite with a harmonious blend of savoury notes. By carefully balancing these seasonings, you can elevate the taste profile of your menudo, creating a truly satisfying and authentic Mexican culinary experience.

Add hominy for a traditional touch and extra texture.

For a traditional touch and enhanced texture in your menudo recipe, consider adding hominy to the simmering broth. Hominy, made from dried maize kernels that have been treated with an alkali solution, brings a unique flavour and chewy texture to the dish. This addition not only stays true to the authentic Mexican roots of menudo but also elevates the overall dining experience by providing a satisfying contrast to the tender tripe and robust spices.

Serve menudo with lime wedges, chopped onions, and cilantro for freshness and brightness.

Enhance the vibrant flavours of your menudo by serving it with zesty lime wedges, crisp chopped onions, and fragrant cilantro. These fresh and aromatic garnishes not only add a burst of brightness to the dish but also complement the rich and savoury broth, creating a harmonious balance of flavours. The tangy acidity of the lime, the sharpness of the onions, and the herbal notes of cilantro elevate the overall dining experience, making each spoonful a refreshing and delightful taste sensation.

Allow the flavours to meld by simmering the menudo slowly over low heat.

To enhance the depth and richness of your menudo, it is essential to allow the flavours to meld together harmoniously. By simmering the dish slowly over low heat, the spices, aromatics, and tender tripe have ample time to infuse into the broth, creating a delectable and well-balanced flavour profile. This patient approach ensures that each ingredient contributes its unique essence, resulting in a truly authentic and satisfying menudo experience.
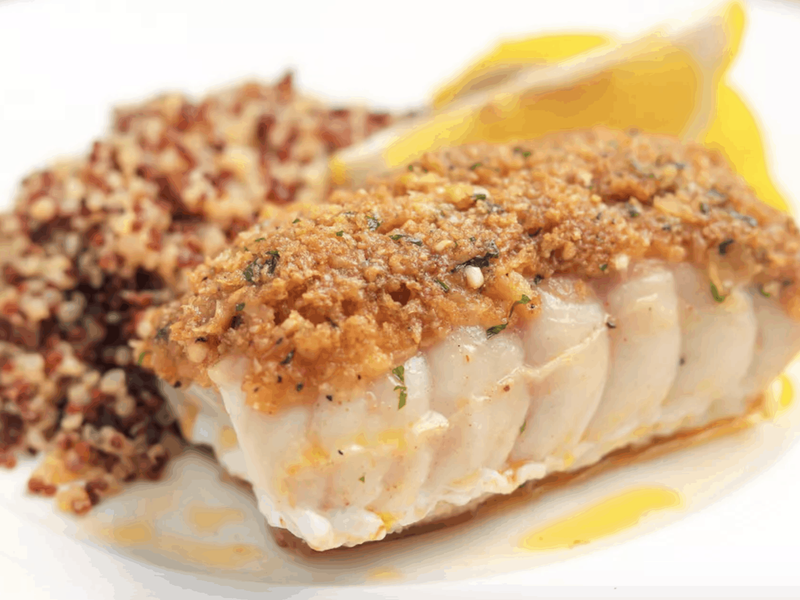
Savour the Flavours: A Delectable Red Snapper Recipe

red snapper recipe

The Perfect Red Snapper Recipe

If you’re looking for a delicious and easy-to-make seafood dish, then this red snapper recipe is just what you need. Red snapper is a popular fish known for its sweet and mild flavour, making it a favourite among seafood lovers.

Ingredients:

  • 2 red snapper fillets
  • 2 tablespoons of olive oil
  • 1 lemon, sliced
  • 2 cloves of garlic, minced
  • Salt and pepper to taste
  • Fresh herbs (such as parsley or dill) for garnish

Instructions:

  1. Preheat your oven to 180°C (350°F).
  2. Place the red snapper fillets on a baking tray lined with parchment paper.
  3. Drizzle the fillets with olive oil and season with salt, pepper, and minced garlic.
  4. Place lemon slices on top of the fillets.
  5. Bake in the preheated oven for 15-20 minutes or until the fish is cooked through and flakes easily with a fork.
  6. Garnish with fresh herbs before serving.

This red snapper recipe pairs well with steamed vegetables or a side salad. It’s perfect for a quick weeknight dinner or a special occasion. Enjoy the delicate flavours of this delectable fish dish!

Try this recipe today and impress your family and friends with a mouth-watering meal that showcases the natural goodness of red snapper.

Bon appétit!


Top Tips for Cooking Red Snapper: FAQs and Expert Advice

  1. How to cook fish for diabetes type 2?
  2. What do you soak red snapper in before cooking?
  3. How is snapper supposed to be cooked?
  4. What goes well with red snapper?
  5. How to cook snapper Jamie Oliver?
  6. What are common red snapper cooking mistakes?

How to cook fish for diabetes type 2?

For individuals with type 2 diabetes, cooking fish can be a healthy and delicious choice. When preparing fish for those with diabetes, it is important to focus on methods that retain the natural flavours and nutrients of the fish while avoiding added sugars or unhealthy fats. Grilling, baking, or steaming fish are excellent cooking techniques that help maintain the fish’s nutritional value without the need for excessive oils or sauces. Incorporating herbs and spices for flavour instead of salt or sugary marinades can enhance the taste without compromising on health benefits. By choosing fresh fish and mindful cooking methods, individuals with type 2 diabetes can enjoy a nutritious meal that supports their dietary needs.

What do you soak red snapper in before cooking?

Before cooking red snapper, it is common to soak the fish in a marinade or brine to enhance its flavour and texture. A popular method is to soak red snapper fillets in a mixture of citrus juice (such as lemon or lime), olive oil, herbs, and seasonings. This soaking process not only infuses the fish with delicious flavours but also helps tenderize it, resulting in a more succulent and tasty dish. Experimenting with different marinades can add depth and complexity to your red snapper recipe, ensuring a memorable dining experience.

How is snapper supposed to be cooked?

When it comes to cooking snapper, the key is to preserve its delicate flavour and texture. Snapper can be cooked in various ways, including baking, grilling, or pan-searing. The most important thing is not to overcook it, as this can result in a dry and tough dish. Whether you choose to bake your snapper with herbs and lemon, grill it with a smoky char, or pan-sear it for a crispy skin, the goal is to cook it just until it flakes easily with a fork. By keeping the cooking time short and using simple seasonings that enhance rather than overpower the fish, you can enjoy the natural sweetness and tenderness of snapper in every bite.

What goes well with red snapper?

When it comes to pairing side dishes with red snapper, there are several delicious options that complement the fish’s delicate flavour. Some popular choices include steamed vegetables such as asparagus or green beans, a fresh garden salad with a tangy vinaigrette dressing, or a serving of fluffy jasmine rice. The light and flaky texture of red snapper can also be enhanced by roasted potatoes or a citrus-infused quinoa salad. Ultimately, the key is to choose side dishes that enhance rather than overpower the natural taste of the red snapper, creating a well-rounded and satisfying meal for any occasion.

How to cook snapper Jamie Oliver?

When it comes to cooking snapper, following a recipe by renowned chef Jamie Oliver can elevate your culinary experience. Jamie Oliver’s recipes often focus on fresh, simple ingredients that bring out the natural flavours of the fish. To cook snapper Jamie Oliver style, you can expect a combination of vibrant herbs, zesty citrus, and expertly balanced seasonings that create a dish bursting with deliciousness. Whether you’re grilling, baking, or pan-searing your snapper, Jamie Oliver’s recipes are sure to inspire you to create a memorable dining experience that celebrates the beauty of this versatile seafood.

What are common red snapper cooking mistakes?

When preparing red snapper, there are a few common cooking mistakes to avoid to ensure a perfect dish. Overcooking the fish is a prevalent error that can result in dry and tough meat. It’s essential to cook red snapper just until it flakes easily with a fork to preserve its delicate texture and flavour. Another mistake is not seasoning the fish adequately, which can lead to a bland taste. Proper seasoning with salt, pepper, and herbs enhances the natural flavours of red snapper. Lastly, overcrowding the pan while cooking can cause the fillets to steam rather than sear properly, affecting the dish’s overall presentation and taste. By being mindful of these common mistakes, you can elevate your red snapper recipe to a culinary delight.

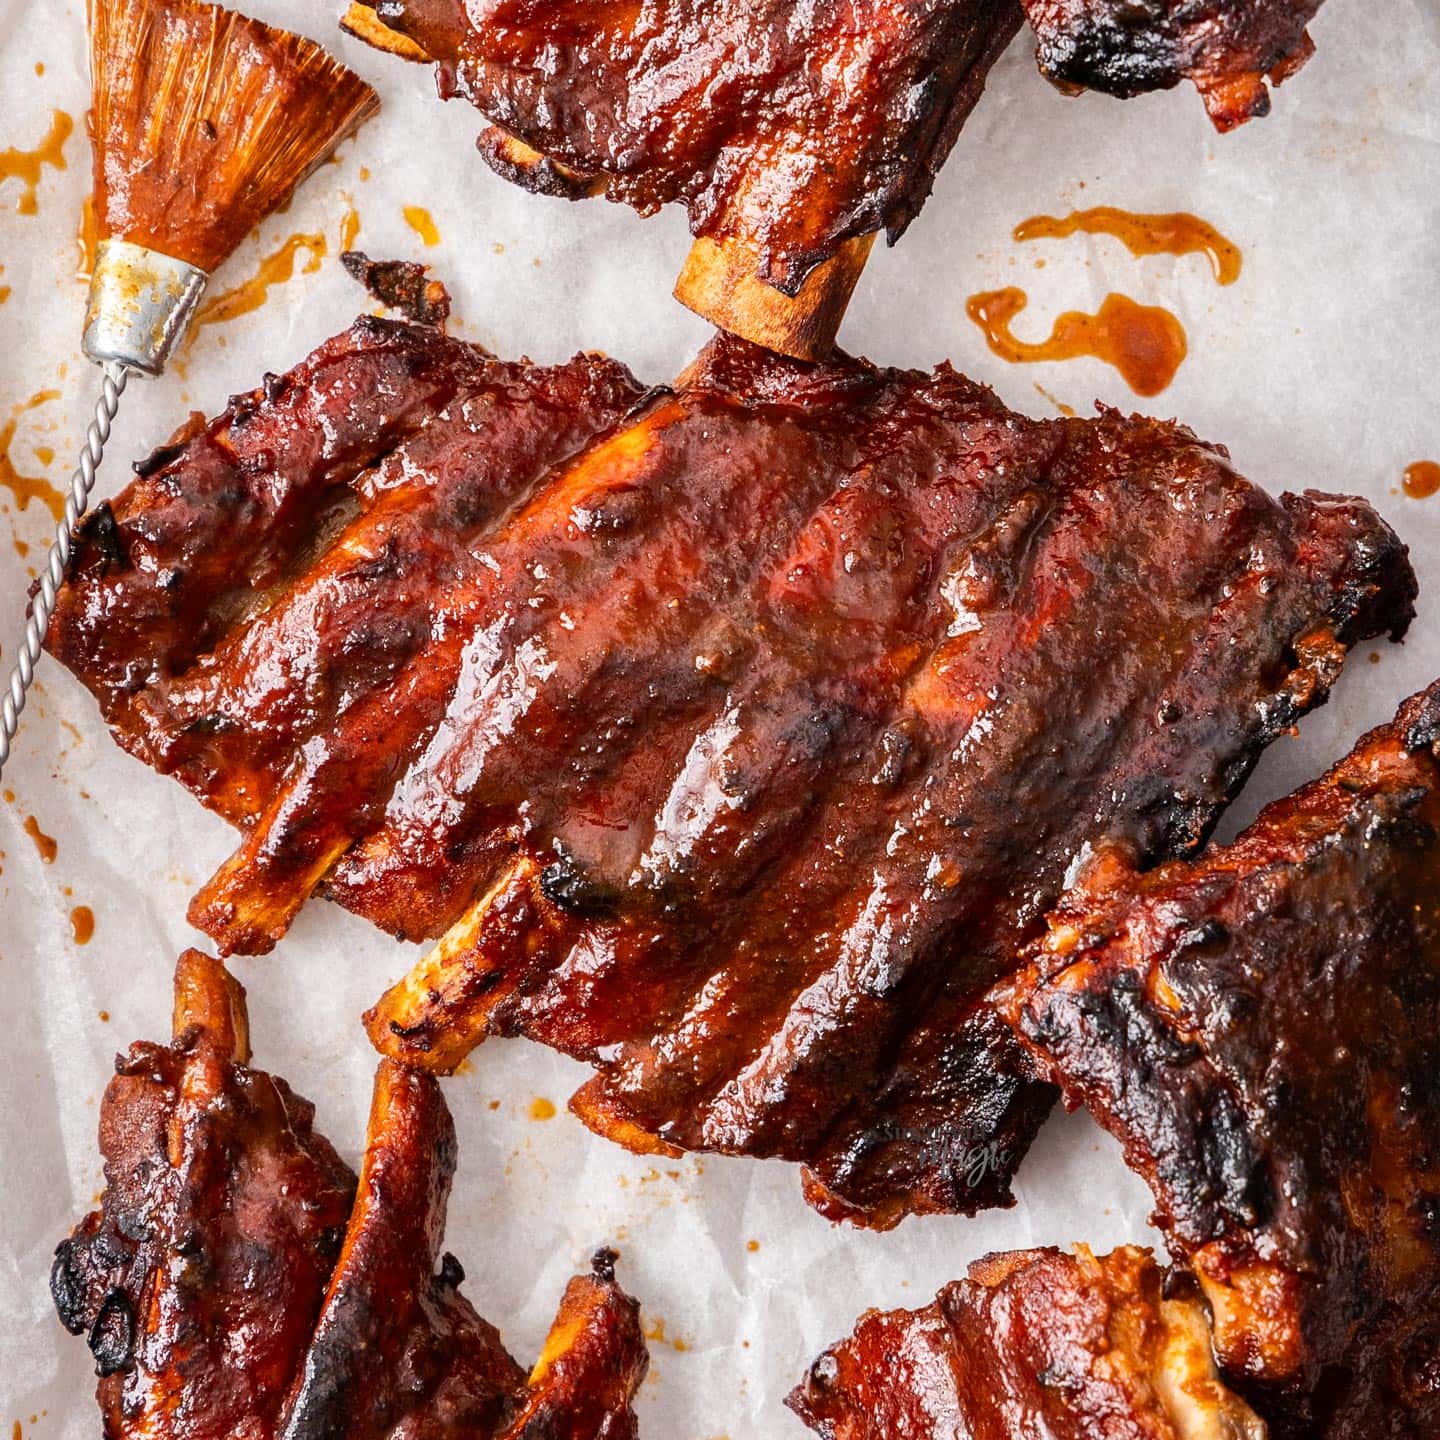
Delicious Spare Ribs Recipe: A Mouth-Watering Culinary Delight

spare ribs recipe

The Ultimate Spare Ribs Recipe

Spare ribs are a classic dish that never fails to impress. Whether you’re hosting a barbecue or simply craving some hearty comfort food, this spare ribs recipe is sure to hit the spot. Follow these steps to create tender, flavourful spare ribs that will have your taste buds dancing.

Ingredients:

  • 2 lbs of spare ribs
  • 1 cup of barbecue sauce
  • 2 cloves of garlic, minced
  • 1 teaspoon of paprika
  • Salt and pepper to taste

Instructions:

  1. Preheat your oven to 160°C (320°F).
  2. In a bowl, mix together the barbecue sauce, minced garlic, paprika, salt, and pepper.
  3. Place the spare ribs in a baking dish and generously coat them with the sauce mixture. Make sure the ribs are evenly covered.
  4. Cover the baking dish with foil and bake in the preheated oven for 2 hours. This slow cooking method will ensure that the meat becomes tender and juicy.
  5. After 2 hours, remove the foil and increase the oven temperature to 200°C (390°F). Baste the spare ribs with any remaining sauce and continue baking for another 30 minutes or until they are caramelised and slightly crispy on the edges.
  6. Once cooked, remove the spare ribs from the oven and let them rest for a few minutes before serving. Garnish with some fresh herbs or additional barbecue sauce if desired.
  7. Enjoy your delicious spare ribs with your favourite sides and savour every bite of this mouth-watering dish!

Whether you’re a seasoned chef or just starting out in the kitchen, this spare ribs recipe is simple yet incredibly satisfying. Treat yourself to a delectable meal that will have everyone asking for seconds!


Essential FAQs for Perfecting Your Spare Ribs Recipe

  1. How long does it take to cook spare ribs?
  2. What is the best way to season spare ribs?
  3. Can I grill spare ribs instead of baking them?
  4. Do I need to remove the membrane from the back of the ribs before cooking?
  5. What are some popular side dishes to serve with spare ribs?
  6. How can I make my spare ribs more tender?
  7. Is there a vegetarian or vegan alternative to spare ribs?
  8. What type of barbecue sauce works best for spare ribs?
  9. How do I know when spare ribs are cooked through?

How long does it take to cook spare ribs?

When it comes to cooking spare ribs, the duration can vary depending on the method used. Typically, spare ribs are cooked low and slow to achieve maximum tenderness and flavour. In an oven set at 160°C (320°F), spare ribs usually take around 2 hours covered in foil, followed by an additional 30 minutes uncovered at a higher temperature of 200°C (390°F) to achieve that perfect caramelisation. This gradual cooking process allows the meat to become succulent and juicy, ensuring a mouth-watering dining experience. Remember, patience is key when cooking spare ribs to perfection!

What is the best way to season spare ribs?

When it comes to seasoning spare ribs, the best way is to create a flavourful blend that enhances the natural taste of the meat. A common approach is to use a combination of spices like paprika, garlic, salt, and pepper along with a generous amount of barbecue sauce for that classic smoky flavour. Marinating the spare ribs for a few hours or overnight allows the seasonings to penetrate the meat, resulting in tender and succulent ribs. Experimenting with different herbs and spices can also add depth and complexity to the dish, ensuring each bite is a burst of deliciousness.

Can I grill spare ribs instead of baking them?

Grilling spare ribs is a popular alternative to baking them, offering a smoky flavour and charred texture that many people enjoy. To grill spare ribs, simply prepare them as usual with your desired seasoning or marinade, then place them on a preheated grill over indirect heat. Cook the ribs low and slow, periodically basting them with sauce for added flavour. Grilling spare ribs can result in deliciously tender meat with a slightly crispy exterior, perfect for those who prefer the taste of barbecue-infused dishes. Experimenting with different cooking methods can help you discover your preferred way of preparing spare ribs to suit your taste preferences.

Do I need to remove the membrane from the back of the ribs before cooking?

One frequently asked question when preparing spare ribs is whether it is necessary to remove the membrane from the back of the ribs before cooking. While opinions may vary among chefs and home cooks, many recommend removing the membrane to ensure that the seasonings and flavours penetrate the meat more effectively during the cooking process. By peeling off this tough membrane, you can also achieve a more tender and succulent texture in your spare ribs. However, if you prefer a bit of chewiness or find it challenging to remove the membrane, leaving it on is also an option – just be aware that it may affect the overall taste and tenderness of the dish.

When serving spare ribs, there are several popular side dishes that complement this savoury dish perfectly. Coleslaw, with its crunchy texture and tangy dressing, provides a refreshing contrast to the rich flavours of the ribs. Baked beans, slow-cooked to perfection with a hint of sweetness, add a comforting touch to the meal. For a lighter option, a fresh garden salad tossed with vinaigrette dressing offers a healthy and vibrant accompaniment. Cornbread, with its golden crust and moist interior, is another classic choice that pairs well with spare ribs. These side dishes enhance the overall dining experience and create a well-rounded feast for everyone to enjoy.

How can I make my spare ribs more tender?

To make your spare ribs more tender, it is essential to employ cooking methods that allow for slow and gentle heat application. One effective technique is to cook the spare ribs in an oven at a low temperature for an extended period. This slow cooking process helps break down the tough connective tissues in the meat, resulting in a more tender and juicy texture. Additionally, marinating the spare ribs overnight in a flavourful mixture or using a tenderizing marinade can further enhance their tenderness. By taking these steps and ensuring proper cooking time, you can elevate your spare ribs to a melt-in-your-mouth perfection that will delight your taste buds.

Is there a vegetarian or vegan alternative to spare ribs?

For those seeking a vegetarian or vegan alternative to spare ribs, there are creative options available that capture the essence of this beloved dish without using meat. Plant-based substitutes such as seitan, tofu, or jackfruit can be used to mimic the texture and flavour of spare ribs. By marinating these alternatives in a smoky barbecue sauce and slow-cooking them to perfection, you can enjoy a delicious and cruelty-free version of spare ribs that satisfies your cravings while aligning with your dietary preferences. Experimenting with different ingredients and seasonings allows you to tailor the recipe to your taste, offering a satisfying meat-free alternative for those looking to indulge in a classic spare ribs experience.

What type of barbecue sauce works best for spare ribs?

When it comes to choosing the best barbecue sauce for spare ribs, the options are plentiful, catering to a range of tastes and preferences. Some prefer a tangy and sweet sauce with a hint of smokiness, while others may opt for a spicy and bold flavour profile. Popular choices include traditional hickory-smoked barbecue sauce, honey mustard-based sauces, or even Asian-inspired marinades for a unique twist. Ultimately, the best barbecue sauce for spare ribs is one that complements the richness of the meat and enhances its natural flavours, so feel free to experiment with different varieties to find your perfect match.

How do I know when spare ribs are cooked through?

Knowing when spare ribs are cooked through is crucial to achieving the perfect texture and flavour. One common method to determine if spare ribs are done is by checking the meat’s internal temperature. Using a meat thermometer, insert it into the thickest part of the rib without touching the bone. The ribs are ready when they reach an internal temperature of 75°C (165°F). Additionally, you can test for doneness by gently pulling on a rib bone – if it starts to separate easily from the meat, they are likely cooked through. Another indicator is the meat shrinking back from the ends of the bones. By using these methods in combination, you can ensure that your spare ribs are tender, juicy, and cooked to perfection every time.

Delectable Chicken Breast Recipes for a Memorable Dinner Feast

chicken breast recipes for dinner

Delicious Chicken Breast Recipes for Dinner

Chicken breast is a versatile and lean protein that can be transformed into a variety of mouth-watering dishes for dinner. Whether you prefer grilled, baked, or sautéed chicken, there’s a recipe out there to suit your taste buds. Here are three delectable chicken breast recipes to inspire your next dinner:

Lemon Herb Grilled Chicken Breast

Marinate chicken breasts in a mixture of lemon juice, olive oil, garlic, and fresh herbs such as rosemary and thyme. Grill the chicken until perfectly charred and juicy. Serve with a side of roasted vegetables for a wholesome meal.

Creamy Parmesan Baked Chicken Breast

Dip seasoned chicken breasts in a creamy mixture of parmesan cheese, mayonnaise, and breadcrumbs. Bake in the oven until the chicken is cooked through and the topping is golden brown. Pair with a green salad or pasta for a comforting dinner.

Spicy Honey Garlic Sautéed Chicken Breast

Sauté chicken breasts in a hot pan with a spicy honey garlic sauce made from soy sauce, honey, garlic, and red pepper flakes. Cook until the sauce thickens and coats the chicken beautifully. Serve over steamed rice or quinoa for an explosion of flavours.

These tantalising chicken breast recipes are sure to elevate your dinner game and impress your family or guests. Get creative in the kitchen and experiment with different seasonings and ingredients to customise these recipes to your liking.

Enjoy the deliciousness of perfectly cooked chicken breasts with these simple yet flavourful recipes!


Essential FAQs on Preparing Chicken Breast for Dinner: Tips, Substitutions, and Techniques

  1. 1. How long should I marinate chicken breast before cooking?
  2. 2. What are some healthy cooking methods for chicken breast?
  3. 3. Can I substitute chicken breast with other cuts of chicken in recipes?
  4. 4. How do I know when chicken breast is cooked thoroughly?
  5. 5. Are there any low-carb recipes using chicken breast for dinner?
  6. 6. Can I freeze cooked chicken breasts for later use?
  7. 7. What are some popular seasoning blends for seasoning grilled or bakedchicken breasts?
  8. 8.Can I use a slow cooker to cookchickenbreastsfor dinnerrecipes?

1. How long should I marinate chicken breast before cooking?

When it comes to marinating chicken breast before cooking, the ideal marinating time can vary depending on the recipe and the flavours you want to infuse into the meat. In general, it is recommended to marinate chicken breast for at least 30 minutes to allow the marinade to penetrate the meat and enhance its taste. However, for more intense flavour profiles, you can marinate chicken breast for up to 24 hours in the refrigerator. Be cautious not to over-marinate, as acidic ingredients in the marinade can break down the proteins in the chicken if left for too long. Experiment with different marinating times to find what works best for your desired taste preferences when preparing delicious chicken breast recipes for dinner.

2. What are some healthy cooking methods for chicken breast?

When it comes to preparing chicken breast in a healthy way for dinner, there are several cooking methods to consider. Grilling or baking chicken breast without excessive oil helps retain its natural flavours while keeping the dish low in added fats. Poaching chicken breast in broth or water is another healthy option that ensures the meat stays moist and tender without the need for additional oils. Additionally, opting for methods like steaming or stir-frying with minimal oil and plenty of vegetables can create a nutritious and balanced meal. These healthier cooking techniques for chicken breast allow you to enjoy a delicious dinner without compromising on taste or nutrition.

3. Can I substitute chicken breast with other cuts of chicken in recipes?

When it comes to substituting chicken breast with other cuts of chicken in recipes, it is indeed possible, but it may alter the texture and flavour of the dish. Chicken thighs, for example, are juicier and more flavourful than chicken breast, making them a suitable substitute in recipes where a richer taste is desired. Drumsticks or wings can also be used in place of chicken breast, but cooking times may vary. It’s essential to consider the characteristics of the alternative cut of chicken and adjust cooking methods accordingly to ensure a delicious outcome.

4. How do I know when chicken breast is cooked thoroughly?

When determining if chicken breast is cooked thoroughly, it is essential to rely on a reliable method to ensure both safety and optimal taste. The most accurate way to check for doneness is by using a meat thermometer. Insert the thermometer into the thickest part of the chicken breast, ensuring it does not touch any bone. The internal temperature should reach at least 75°C (165°F) for the chicken to be fully cooked and safe to eat. Additionally, cutting into the thickest part of the chicken breast and checking that the juices run clear without any pinkness is another visual indicator of doneness. By following these guidelines, you can confidently prepare delicious and perfectly cooked chicken breast dishes for a satisfying dinner.

5. Are there any low-carb recipes using chicken breast for dinner?

For those seeking low-carb options for dinner, there are plenty of delicious recipes using chicken breast that fit the bill. From grilled chicken with a side of steamed vegetables to chicken Caesar salad without croutons, the possibilities are endless. You can also try making chicken breast stuffed with spinach and feta cheese or enjoy a creamy chicken Alfredo with zucchini noodles instead of pasta. These low-carb chicken breast recipes not only cater to your dietary needs but also satisfy your taste buds with their delightful flavours and textures.

6. Can I freeze cooked chicken breasts for later use?

When it comes to the question of whether you can freeze cooked chicken breasts for later use, the answer is a resounding yes. Freezing cooked chicken breasts is a convenient way to extend their shelf life and have a quick protein option on hand for future meals. Make sure to cool the cooked chicken breasts completely before transferring them to an airtight container or freezer bag. Properly stored in the freezer, cooked chicken breasts can last for up to three months without compromising their taste or texture. Simply thaw them in the refrigerator overnight before reheating and incorporating them into your favourite chicken breast recipes for dinner.

When it comes to seasoning grilled or baked chicken breasts, there are several popular blends that can elevate the flavour profile of the dish. Some commonly used seasoning blends include a classic mix of garlic powder, onion powder, paprika, salt, and pepper for a well-rounded taste. Alternatively, you can opt for a zesty combination of lemon pepper, oregano, and thyme for a refreshing and aromatic twist. For those craving a bit of heat, a blend of cayenne pepper, chili powder, and cumin can add a spicy kick to your chicken breasts. Experimenting with different seasoning blends is key to discovering your favourite flavour profile when preparing grilled or baked chicken breasts for a delicious dinner.

8.Can I use a slow cooker to cookchickenbreastsfor dinnerrecipes?

Using a slow cooker to cook chicken breasts for dinner recipes is a convenient and popular method for many home cooks. Slow cooking chicken breasts in a crockpot can result in tender, juicy meat that easily shreds or slices for various dishes. By adding seasonings, vegetables, and liquids to the slow cooker along with the chicken breasts, you can create flavourful and effortless meals. The slow cooker allows the chicken to cook slowly over several hours, infusing it with delicious flavours and ensuring a moist texture. Whether you’re preparing a creamy chicken stew or flavourful shredded chicken tacos, using a slow cooker can simplify your dinner preparation while delivering tasty results.

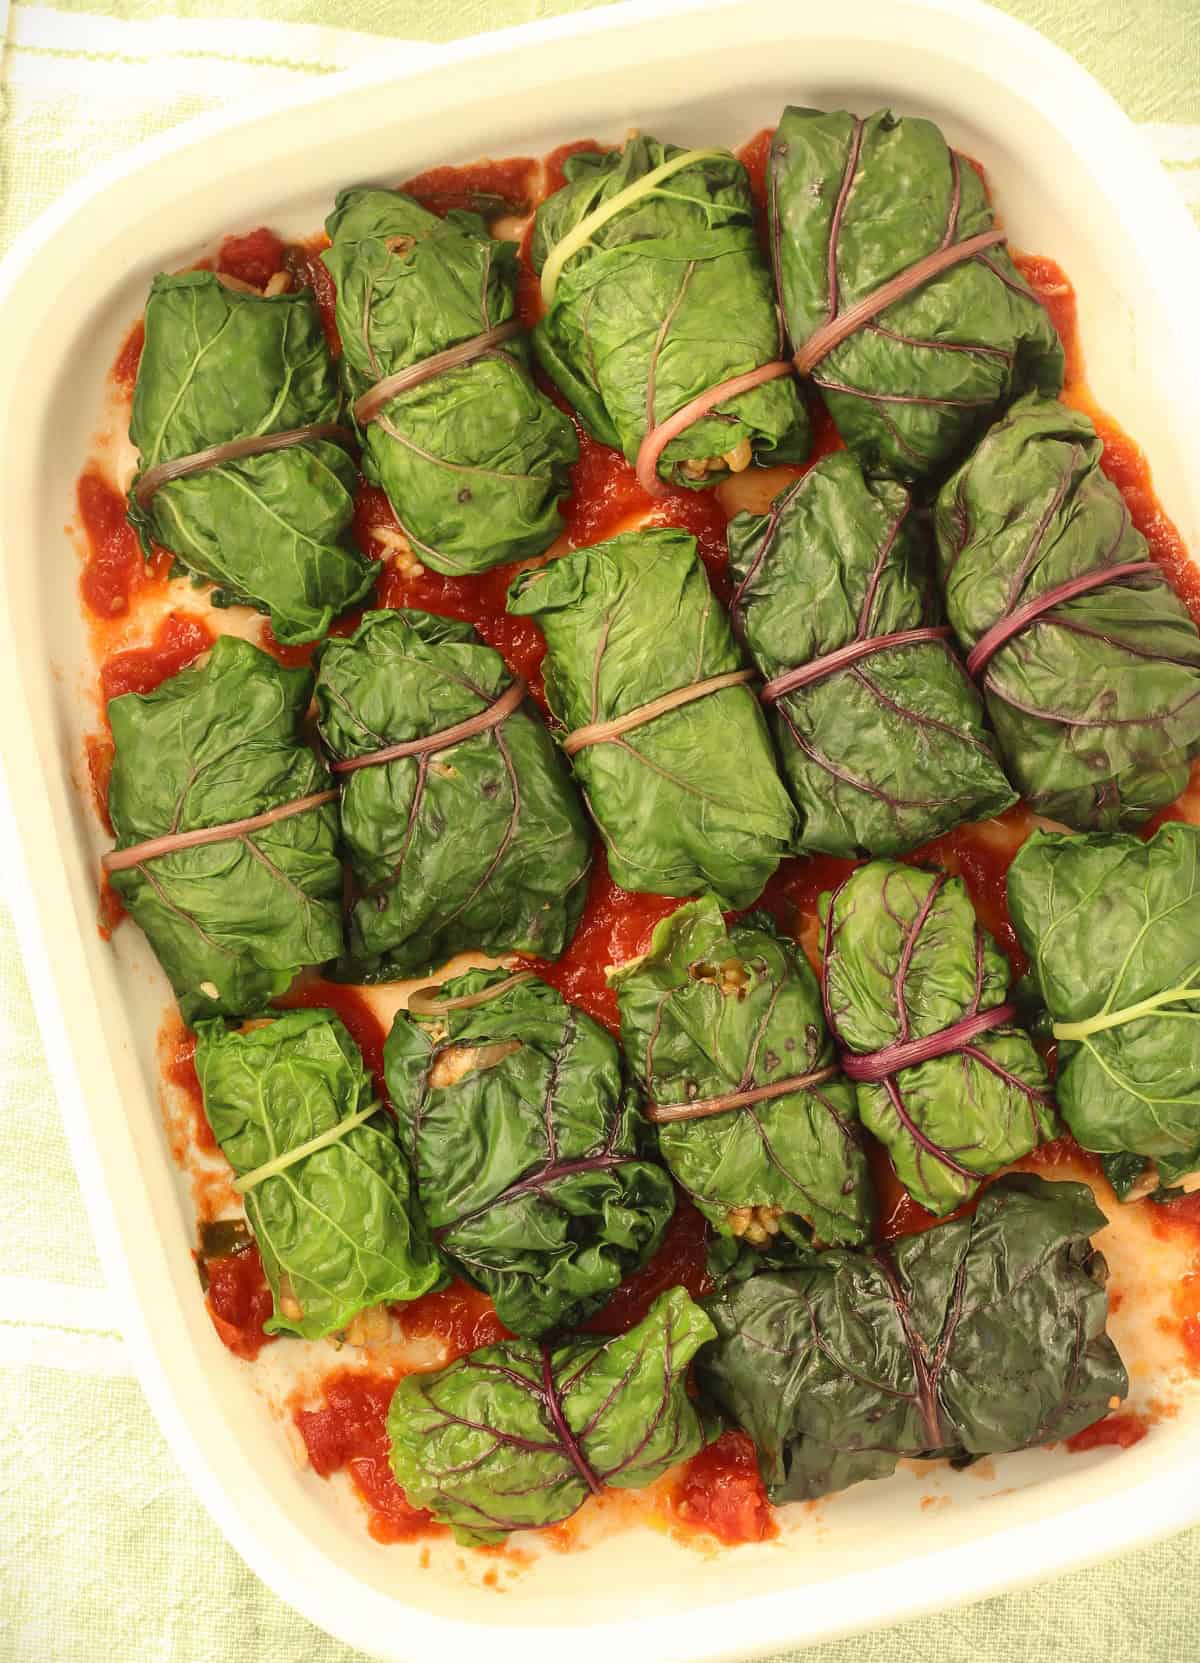
Delightful Swiss Chard Recipes to Elevate Your Culinary Creations

swiss chard recipes

The Versatile and Nutritious Swiss Chard: Delicious Recipes to Try

Swiss chard, with its vibrant green leaves and colourful stems, is a versatile leafy green that is not only delicious but also packed with nutrients. Whether you’re looking to incorporate more greens into your diet or simply want to try something new, Swiss chard is a fantastic ingredient to work with. Here are some delightful Swiss chard recipes to inspire your culinary adventures:

Sauteed Swiss Chard with Garlic and Lemon

Heat olive oil in a pan, add minced garlic and chopped Swiss chard leaves. Cook until the leaves are wilted. Squeeze fresh lemon juice over the top and season with salt and pepper. This simple yet flavourful dish makes a perfect side for any meal.

Swiss Chard and Feta Stuffed Chicken Breast

Butterfly chicken breasts and stuff them with a mixture of sauteed Swiss chard, crumbled feta cheese, and chopped sun-dried tomatoes. Secure with toothpicks, season with herbs and spices, then bake until the chicken is cooked through. Serve with a side salad for a wholesome meal.

Swiss Chard Pesto Pasta

In a food processor, blend blanched Swiss chard leaves, toasted pine nuts, garlic, Parmesan cheese, and olive oil until smooth. Toss the pesto with cooked pasta of your choice and garnish with cherry tomatoes for a colourful and tasty dish.

Swiss Chard and Lentil Soup

Cook onions, carrots, celery, lentils, vegetable broth, and chopped Swiss chard stems in a pot until the lentils are tender. Add in the chopped Swiss chard leaves towards the end of cooking for added freshness. Season with herbs and spices for a comforting bowl of soup.

Experimenting with Swiss chard in your cooking can lead to exciting flavour combinations and nutritious meals that will delight your taste buds. Whether you enjoy it raw in salads or cooked in hearty dishes, Swiss chard is sure to become a staple in your kitchen.


Essential Guide to Swiss Chard: Preparation, Recipes, Storage, and Health Benefits

  1. 1. How do I prepare Swiss chard for cooking?
  2. 2. What are some popular Swiss chard recipes?
  3. 3. Can I eat Swiss chard raw in salads?
  4. 4. Are there any vegan Swiss chard recipes available?
  5. 5. How can I store fresh Swiss chard to keep it fresh longer?
  6. 6. What are the health benefits of including Swiss chard in my diet?

1. How do I prepare Swiss chard for cooking?

When preparing Swiss chard for cooking, start by washing the leaves thoroughly under running water to remove any dirt or debris. Trim off the tough ends of the stems and separate them from the leaves. You can use both the stems and leaves in your recipes, but they may require different cooking times. If you prefer a softer texture, consider blanching the leaves in boiling water for a few minutes before incorporating them into your dish. For the stems, you can chop them into smaller pieces for sautéing or roasting. Swiss chard is a versatile ingredient that can be enjoyed in a variety of ways once properly cleaned and prepped for cooking.

Swiss chard, a versatile and nutrient-rich leafy green, lends itself to a variety of popular recipes that showcase its vibrant colours and earthy flavour. Some well-loved Swiss chard recipes include sautéed Swiss chard with garlic and lemon, Swiss chard and feta stuffed chicken breast, Swiss chard pesto pasta, and Swiss chard and lentil soup. These dishes not only highlight the versatility of Swiss chard but also offer a delicious way to incorporate this nutritious ingredient into your meals. Whether you prefer simple sautés or more elaborate preparations, there is a Swiss chard recipe to suit every palate.

3. Can I eat Swiss chard raw in salads?

Swiss chard can indeed be enjoyed raw in salads, adding a vibrant burst of colour and a unique flavour profile to your dish. The tender leaves of Swiss chard offer a slightly earthy taste with a hint of sweetness, making it a refreshing addition to salads. To prepare Swiss chard for a salad, simply wash the leaves thoroughly, remove the tough stems, and tear or chop the leaves into bite-sized pieces. Pair it with your favourite salad ingredients such as cherry tomatoes, cucumbers, nuts, and a zesty dressing for a nutritious and delicious salad that showcases the versatility of Swiss chard.

4. Are there any vegan Swiss chard recipes available?

For those following a vegan diet or simply looking for plant-based options, there is a plethora of delicious vegan Swiss chard recipes to explore. From hearty Swiss chard and chickpea curry to flavourful Swiss chard and mushroom stir-fry, the versatility of this leafy green allows for endless culinary creativity without the need for animal products. Whether you prefer your Swiss chard in soups, salads, or main dishes, there are plenty of vegan-friendly recipes that showcase the vibrant flavours and nutritional benefits of this versatile ingredient.

5. How can I store fresh Swiss chard to keep it fresh longer?

To store fresh Swiss chard and extend its freshness, begin by trimming any wilted or yellow leaves and cutting off the ends of the stems. Next, place the Swiss chard in a container or a plastic bag lined with a damp paper towel to maintain moisture. Store it in the vegetable crisper drawer of the refrigerator, where it can stay fresh for up to 5-7 days. Remember to check on it periodically and discard any leaves that show signs of spoilage. Proper storage techniques can help preserve the quality of Swiss chard for longer periods, ensuring that you can enjoy its vibrant flavour and nutritional benefits in your recipes.

6. What are the health benefits of including Swiss chard in my diet?

Including Swiss chard in your diet offers a plethora of health benefits. This leafy green vegetable is rich in vitamins A, C, and K, as well as minerals like magnesium, potassium, and iron. Swiss chard is also packed with antioxidants that help combat inflammation and support overall immune function. Its high fibre content promotes digestive health and can aid in weight management. Additionally, the presence of phytonutrients in Swiss chard contributes to its anti-cancer properties, making it a valuable addition to a balanced and nutritious diet.

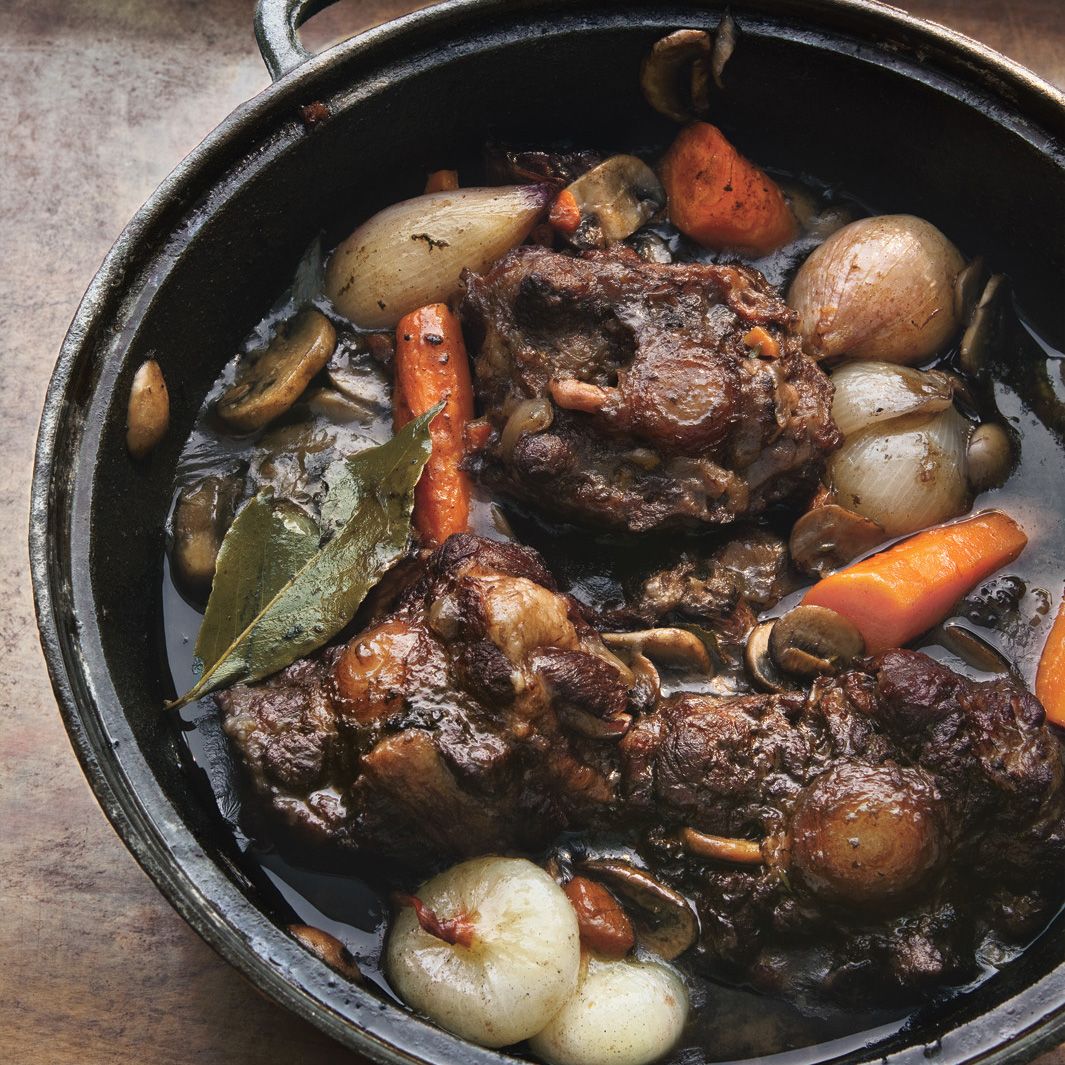
Hearty Oxtail Recipe: A Delicious Dish to Savour

oxtail recipe

The Perfect Oxtail Recipe: A Hearty and Delicious Dish

Oxtail is a cut of beef that is known for its rich, flavourful meat. When cooked properly, oxtail becomes tender and succulent, making it a popular choice for hearty stews and braised dishes. Here, we present a delicious oxtail recipe that will surely impress your family and friends.

Ingredients:

  • 2 kg oxtail pieces
  • 2 onions, chopped
  • 3 carrots, sliced
  • 3 celery sticks, chopped
  • 4 cloves of garlic, minced
  • 2 bay leaves
  • 1 sprig of thyme
  • 500ml beef stock
  • 400g chopped tomatoes
  • Salt and pepper to taste
  • Olive oil for cooking

Instructions:

  1. Season the oxtail pieces with salt and pepper.
  2. In a large pot, heat some olive oil over medium-high heat. Brown the oxtail pieces on all sides until they are nicely seared. Remove the oxtail from the pot and set aside.
  3. In the same pot, add the onions, carrots, celery, and garlic. Cook until the vegetables are softened.
  4. Return the oxtail to the pot and add the bay leaves, thyme, beef stock, and chopped tomatoes. Bring to a simmer.


  5. Cover the pot with a lid and let it simmer gently for about 3-4 hours or until the oxtail is tender.


  6. Taste and adjust seasoning with salt and pepper as needed.


  7. Serve the oxtail hot with your choice of side dishes such as mashed potatoes or crusty bread.


This oxtail recipe is perfect for a cosy night in or a special occasion. The slow cooking process allows the flavours to develop beautifully, resulting in a dish that is both comforting and impressive. Try this recipe today and savour the deliciousness of tender oxtail stew!


Top 6 FAQs About Cooking and Enjoying Oxtail

  1. Why does my stomach hurt after eating oxtail?
  2. How to make simple oxtail stew?
  3. What do you soak oxtails in before cooking?
  4. How does it take to cook oxtail?
  5. What’s the best way to cook an oxtail?
  6. What kind of meat is oxtail?

Why does my stomach hurt after eating oxtail?

If you experience stomach discomfort after eating oxtail, it may be due to the richness and fattiness of the meat. Oxtail is a cut known for its high fat content, which can be heavy on the digestive system for some individuals. To reduce the likelihood of stomach issues, it is advisable to consume oxtail in moderation and pair it with lighter side dishes that can help balance out the richness of the meat. Additionally, ensuring that the oxtail is cooked thoroughly and properly may also aid in easier digestion. If stomach discomfort persists, it is recommended to consult a healthcare professional for personalised advice and guidance.

How to make simple oxtail stew?

For those seeking a straightforward and delicious oxtail dish, making a simple oxtail stew is the perfect choice. To create this hearty stew, start by browning seasoned oxtail pieces in a pot. Then, sauté onions, carrots, celery, and garlic until softened before adding the oxtail back to the pot along with bay leaves, thyme, beef stock, and chopped tomatoes. Let the stew simmer gently for a few hours until the oxtail becomes tender and flavourful. Adjust seasoning to taste and serve hot with your preferred accompaniments for a comforting meal that is sure to satisfy.

What do you soak oxtails in before cooking?

Before cooking oxtails, it is common practice to soak them in cold water for at least 1-2 hours. This soaking process helps to remove any excess blood or impurities from the meat, resulting in a cleaner and clearer broth or sauce when cooking. Some people also add a splash of vinegar or lemon juice to the soaking water to further aid in the cleansing process. By taking the time to soak oxtails before cooking, you can ensure that your final dish is not only delicious but also free from any unwanted flavors or textures.

How does it take to cook oxtail?

Cooking oxtail requires patience and time to achieve the desired tenderness and flavour. Typically, oxtail needs to be cooked slowly over a low heat for an extended period to allow the tough meat to become tender and succulent. On average, oxtail can take around 3-4 hours of simmering to reach the perfect consistency. This slow cooking process allows the meat to absorb the flavours of the seasonings and ingredients in the dish, resulting in a rich and delicious final product that is well worth the wait.

What’s the best way to cook an oxtail?

When it comes to cooking oxtail, the best way to achieve tender, flavourful meat is through slow braising or stewing. This method allows the tough connective tissues in the oxtail to break down slowly, resulting in a melt-in-your-mouth texture and rich taste. By searing the oxtail first to enhance its flavour and then simmering it with aromatic vegetables, herbs, and liquids over low heat for several hours, you can create a delicious dish that showcases the unique qualities of this cut of beef. Patience is key when cooking oxtail, as allowing it to cook slowly and gently will yield the best results in terms of both texture and taste.

What kind of meat is oxtail?

Oxtail is a flavoursome and gelatin-rich meat that comes from the tail of cattle. Despite its name, oxtail does not necessarily come from oxen but can be sourced from various types of beef cattle. The meat is prized for its rich flavour and tender texture when cooked slowly, making it a popular choice for hearty stews and braised dishes. Oxtail is often used in traditional recipes around the world, adding depth and complexity to dishes with its unique taste and succulent quality.

Savour the Flavour: A Delectable Brisket Recipe for Your Next Feast

brisket recipe

The Perfect Brisket Recipe for a Delicious Meal

Brisket is a classic dish that never fails to impress with its tender texture and rich flavour. Whether you’re hosting a family gathering or simply craving a hearty meal, this brisket recipe is sure to satisfy your taste buds.

Ingredients:

  • 1 4-5 pound beef brisket
  • 2 tablespoons olive oil
  • 1 onion, chopped
  • 4 cloves garlic, minced
  • 2 cups beef broth
  • 1 cup red wine
  • 2 tablespoons Worcestershire sauce
  • Salt and pepper to taste
  • Fresh herbs for garnish (optional)

Instructions:

  1. Preheat your oven to 160°C.
  2. In a large oven-safe pot or Dutch oven, heat the olive oil over medium-high heat. Sear the brisket on all sides until browned, then remove from the pot and set aside.
  3. Add the chopped onion and garlic to the pot and sauté until softened.
  4. Pour in the beef broth, red wine, and Worcestershire sauce. Season with salt and pepper.
  5. Add the seared brisket back into the pot. Cover with a lid or foil.
  6. lI>Bake in the preheated oven for about 3-4 hours, or until the brisket is fork-tender.lI

    lIemove from the oven and let it rest for 10-15 minutes before slicing.lI

    Serve the brisket slices with the cooking liquid spooned over them.lI

    Garnish with fresh herbs if desired.l

Enjoy this mouth-watering brisket recipe with your favourite sides for a memorable dining experience!l


Top 6 FAQs for Perfecting Your Brisket Recipe

  1. 1. How long does it take to cook brisket?
  2. 2. What is the best way to season brisket?
  3. 3. Can I cook brisket in a slow cooker?
  4. 4. Should I trim the fat off the brisket before cooking?
  5. 5. What temperature should I set my oven for cooking brisket?
  6. 6. How do I know when the brisket is done cooking?

1. How long does it take to cook brisket?

When cooking brisket, the duration can vary depending on the cooking method chosen. Typically, a beef brisket needs to be cooked low and slow to achieve that melt-in-your-mouth tenderness. On average, it can take around 3-4 hours in the oven at 160°C for a 4-5 pound brisket to become fork-tender. However, some recipes may call for longer cooking times if using a smoker or slow cooker. The key is to cook the brisket until it reaches the desired level of doneness and can easily be shredded or sliced for serving. Patience is essential when preparing this delectable dish to ensure a flavoursome outcome that will delight your taste buds.

2. What is the best way to season brisket?

When it comes to seasoning brisket, the best way is to keep it simple yet flavourful. A classic combination of salt, pepper, and garlic powder works wonders in enhancing the natural taste of the beef. You can also experiment with adding paprika, onion powder, or even a hint of cayenne for a kick of heat. The key is to generously coat the brisket with your chosen seasonings, ensuring that every inch is covered for a well-balanced flavour profile. Remember to let the brisket sit with the seasonings for some time before cooking to allow the flavours to penetrate the meat effectively.

3. Can I cook brisket in a slow cooker?

Cooking brisket in a slow cooker is a popular method that many home cooks swear by for achieving tender and flavourful results. The slow, low-temperature cooking process allows the brisket to become incredibly succulent and easy to shred. By placing the brisket in a slow cooker along with your choice of seasonings and liquids, you can let it simmer gently for hours until it reaches the desired level of tenderness. This convenient cooking technique is perfect for busy individuals who want to enjoy a delicious brisket meal without constant monitoring.

4. Should I trim the fat off the brisket before cooking?

When preparing a brisket recipe, the decision to trim the fat off the brisket before cooking is a matter of personal preference and cooking style. Some chefs believe that leaving a layer of fat on the brisket can enhance the flavour and juiciness of the meat during cooking, while others prefer to trim excess fat for a leaner end result. Ultimately, whether you choose to trim the fat or not depends on your desired level of tenderness and richness in the final dish. It’s recommended to consider your own taste preferences and cooking techniques when making this decision.

5. What temperature should I set my oven for cooking brisket?

When cooking brisket in the oven, it is recommended to set the temperature to around 160°C (320°F). This moderate heat allows the brisket to cook slowly and evenly, resulting in a tender and flavourful dish. By cooking the brisket at this temperature for several hours, you can achieve the perfect texture and ensure that the meat is cooked to perfection. Remember to cover the brisket while baking to retain moisture and enhance its succulence.

6. How do I know when the brisket is done cooking?

Knowing when a brisket is done cooking is crucial to achieving the perfect texture and flavour. A common indicator of doneness is the tenderness of the meat. You can test this by inserting a fork or meat thermometer into the thickest part of the brisket. If it easily slides in and out with little resistance, the brisket is likely done. Another method is to check for the internal temperature, which should reach around 93°C for a well-cooked brisket. Additionally, the meat should have a rich aroma and a caramelised exterior when fully cooked. By paying attention to these cues, you can ensure that your brisket is cooked to perfection every time.

The Ultimate Best Lasagna Recipe: A Delicious Italian Classic

best lasagna recipe

The Ultimate Best Lasagna Recipe

Lasagna is a classic Italian dish that never fails to impress. Layers of rich tomato sauce, creamy cheese, and perfectly cooked pasta come together to create a hearty and comforting meal that is loved by many. If you’re looking to make the best lasagna ever, look no further than this tried-and-tested recipe.

Ingredients:

  • 500g minced beef
  • 1 onion, finely chopped
  • 2 cloves of garlic, minced
  • 800g canned chopped tomatoes
  • 2 tablespoons tomato puree
  • 1 teaspoon dried oregano
  • Salt and pepper to taste
  • 250g lasagna sheets
  • 500g ricotta cheese
  • 200g grated mozzarella cheese
  • 50g grated Parmesan cheese

Instructions:

    Step 1: In a large pan, brown the minced beef over medium heat. Add the onion and garlic and cook until softened.

    Step 2: Stir in the canned tomatoes, tomato puree, oregano, salt, and pepper. Simmer for 20 minutes until the sauce thickens.

    Step 3: Preheat the oven to 180°C (350°F). Spread a thin layer of the meat sauce in a baking dish.

    Step 4: Place a layer of lasagna sheets on top of the sauce. Spread a layer of ricotta cheese over the pasta sheets.

    Step 5: Repeat the layers until all ingredients are used up, finishing with a layer of meat sauce on top.

    Step 6: Sprinkle mozzarella and Parmesan cheese over the top layer. Cover with foil and bake for 30 minutes.


    Step 7: Remove the foil and bake for an additional 15 minutes until the cheese is golden brown.


    < strong > Step 8: Let it cool slightly before serving. Enjoy your delicious homemade lasagna!


    Whether you’re cooking for family dinner or hosting a gathering with friends, this best lasagna recipe is sure to be a hit. The layers of flavour and cheesy goodness will have everyone coming back for more!


    < em > Buon appetito!


    < em > Serves: 6-8 | Preparation time: 30 minutes | Cooking time: 1 hour


    7 Essential Tips for Crafting the Perfect Lasagne

    1. Use a combination of beef and pork mince for a richer flavour.
    2. Make your own tomato sauce using fresh tomatoes for a more authentic taste.
    3. Layer the lasagna with a generous amount of creamy bechamel sauce for richness.
    4. Don’t forget to season each layer with salt, pepper, and herbs for depth of flavour.
    5. Let the lasagna rest after baking to allow the flavours to meld together before serving.
    6. Top the lasagna with a mixture of mozzarella and Parmesan cheese for a gooey and flavourful finish.
    7. Serve the lasagna with garlic bread and a fresh green salad for a complete meal.

    Use a combination of beef and pork mince for a richer flavour.

    For a truly indulgent twist on the best lasagna recipe, consider using a combination of beef and pork mince. The blend of these two meats adds depth and richness to the dish, elevating its flavour profile to new heights. The beef brings its robust taste, while the pork introduces a subtle sweetness that complements the tomato sauce beautifully. This simple yet effective tip can take your lasagna from delicious to extraordinary, ensuring each bite is packed with a harmonious balance of savoury goodness.

    Make your own tomato sauce using fresh tomatoes for a more authentic taste.

    For a truly authentic and flavourful lasagna experience, consider making your own tomato sauce using fresh tomatoes. By opting for fresh ingredients, you can elevate the taste of your dish and bring out the natural sweetness of the tomatoes. This homemade sauce will not only add a vibrant and rich flavour to your lasagna but also infuse it with a delicious freshness that is unmatched by store-bought alternatives. Embrace the simplicity and purity of using fresh tomatoes in your sauce to achieve an authentic and mouth-watering lasagna that will impress even the most discerning palates.

    Layer the lasagna with a generous amount of creamy bechamel sauce for richness.

    For an extra touch of indulgence and richness in your lasagna, consider layering it with a generous amount of creamy béchamel sauce. This velvety sauce adds a luxurious texture and a subtle hint of nutty flavour that perfectly complements the hearty meat sauce and gooey cheese layers. The béchamel sauce not only enhances the overall creaminess of the dish but also elevates the taste to a whole new level, making each bite a truly decadent experience. Don’t hold back on this essential layer for a lasagna that is guaranteed to impress your taste buds with its lusciousness.

    Don’t forget to season each layer with salt, pepper, and herbs for depth of flavour.

    When following the best lasagna recipe, it is crucial not to overlook the importance of seasoning. To enhance the depth of flavour in every layer, remember to generously season with salt, pepper, and fragrant herbs. This simple yet essential step ensures that each bite of lasagna is bursting with deliciousness and perfectly balanced in taste. By seasoning diligently throughout the assembly process, you elevate the overall culinary experience and create a truly unforgettable dish that will leave everyone craving more.

    Let the lasagna rest after baking to allow the flavours to meld together before serving.

    Allowing the lasagna to rest after baking is a crucial tip to enhance its flavours. This resting period allows the layers of rich tomato sauce, creamy cheese, and perfectly cooked pasta to meld together harmoniously, resulting in a more delicious and cohesive dish. By giving the lasagna some time to settle, you allow the flavours to deepen and intensify, ensuring that each mouthful is a delightful explosion of taste. So, exercise patience and let your lasagna rest before serving to truly savour all the wonderful flavours it has to offer.

    Top the lasagna with a mixture of mozzarella and Parmesan cheese for a gooey and flavourful finish.

    For a gooey and flavourful finish to the best lasagna recipe, top the layers with a decadent mixture of mozzarella and Parmesan cheese. The combination of these cheeses adds a rich and melty texture that enhances the overall taste of the dish. As the lasagna bakes in the oven, the cheeses meld together to create a golden, bubbling crust that is irresistible. This final touch elevates the lasagna to a whole new level of indulgence, making each bite a deliciously cheesy experience.

    Serve the lasagna with garlic bread and a fresh green salad for a complete meal.

    Enhance your dining experience with the perfect accompaniments to the best lasagna recipe. Serve the decadent layers of lasagna alongside warm, garlic-infused bread and a crisp, fresh green salad. The combination of rich flavours from the lasagna, the savoury kick of garlic bread, and the refreshing crunch of a vibrant salad creates a harmonious and satisfying meal that is sure to delight your taste buds. Embrace this culinary trio for a complete dining experience that balances indulgence with freshness.

Simple and Delicious: Easy Lasagna Recipe for a Perfect Meal

easy lasagna recipe

Easy Lasagna Recipe

Lasagna is a classic Italian dish that never fails to impress. With layers of pasta, rich meat sauce, creamy cheese, and savoury seasonings, it’s a comforting meal that is perfect for gatherings or a cozy night in. If you’re looking to whip up a delicious lasagna without spending hours in the kitchen, this easy recipe is just what you need.

Ingredients:

  • 500g ground beef
  • 1 onion, chopped
  • 2 cloves of garlic, minced
  • 800g canned diced tomatoes
  • 2 tbsp tomato paste
  • 1 tsp dried oregano
  • Salt and pepper to taste
  • 250g lasagna noodles
  • 250g ricotta cheese
  • 200g mozzarella cheese, shredded
  • 50g Parmesan cheese, grated

Instructions:

  1. In a large saucepan, cook the ground beef over medium heat until browned. Add the chopped onion and garlic, and cook until softened.
  2. Add the canned tomatoes, tomato paste, oregano, salt, and pepper to the beef mixture. Simmer for 20 minutes to allow the flavours to meld together.
  3. Cook the lasagna noodles according to package instructions until al dente. Drain and set aside.
  4. Assemble the Lasagna:

    i. Preheat your oven to 180°C.

    ii. In a baking dish, spread a layer of meat sauce on the bottom.

    iii. Place a layer of lasagna noodles on top of the meat sauce.

    iv. Spread half of the ricotta cheese over the noodles.

    v. Sprinkle half of the mozzarella and Parmesan cheeses over the ricotta.

    vi. Repeat these layers until all ingredients are used up, ending with a layer of cheese on top.

    vii. Cover with foil and bake for 25 minutes.

    viii. Remove foil and bake for an additional 25 minutes until bubbly and golden brown.

    ix. Allow it to rest for 10 minutes before serving.

This easy lasagna recipe is sure to become a family favourite. Serve it with a side salad and garlic bread for a complete meal that will have everyone asking for seconds!


Lazy Lasagna: Quick and Easy Steps for Layering the Perfect Lasagne

  1. What is lazy lasagna?
  2. How to make quick easy lasagne?
  3. How to make lasagne step by step?
  4. What are the correct layers for lasagna?

What is lazy lasagna?

Lazy lasagna, also known as “cheater’s lasagna” or “skillet lasagna,” is a simplified version of the traditional baked lasagna. This quick and easy recipe typically involves cooking the pasta, meat sauce, and cheese all in one skillet or pot on the stovetop, eliminating the need for layering ingredients in a baking dish and baking it in the oven. Lazy lasagna is a convenient alternative for those who crave the flavours of classic lasagna but want to save time and effort in the kitchen. It offers a deliciously satisfying meal with minimal preparation and cleanup, making it a popular choice for busy weeknights or when craving comfort food without the fuss.

How to make quick easy lasagne?

When it comes to making a quick and easy lasagne, the key is to streamline the cooking process without compromising on flavour. Opting for pre-cooked lasagne sheets can significantly cut down on preparation time, as they eliminate the need for boiling the pasta separately. Additionally, using a store-bought pasta sauce or a quick homemade version can help simplify the recipe further. By layering these convenient ingredients with a tasty meat sauce and cheeses, you can create a delicious lasagne in no time. This approach allows you to enjoy the comforting flavours of lasagne without spending hours in the kitchen, making it a perfect solution for busy weeknights or last-minute gatherings.

How to make lasagne step by step?

For those seeking a step-by-step guide on how to make lasagne, the process can be broken down into simple and manageable steps. Begin by browning ground beef with onions and garlic, then simmering with tomatoes and seasonings to create a flavourful meat sauce. Cook lasagna noodles until al dente, then layer them in a baking dish with ricotta, mozzarella, and Parmesan cheeses. Repeat these layers until the dish is assembled, then bake until bubbly and golden brown. Allowing the lasagne to rest before serving ensures that each bite is deliciously satisfying. This methodical approach guarantees a delectable lasagne that will impress family and friends alike.

What are the correct layers for lasagna?

When preparing lasagna, layering is key to achieving a delicious and well-balanced dish. The correct layers for lasagna typically consist of a bottom layer of meat sauce, followed by a layer of lasagna noodles, then a spread of ricotta cheese, and finally a generous sprinkling of mozzarella and Parmesan cheeses. This sequence is repeated until all the ingredients are used up, with the top layer being cheese for that perfectly gooey and golden finish. Each layer contributes its unique flavour and texture, creating a harmonious blend that makes lasagna such a beloved comfort food choice.

Authentic Empanada Recipe: A Taste of Latin Flavour

empanada recipe

The Perfect Empanada Recipe: A Taste of Latin Flavour

Empanadas are a beloved dish in Latin American cuisine, known for their delicious fillings and crispy pastry shells. Whether you prefer them baked or fried, empanadas are a versatile treat that can be enjoyed as a snack or a meal. Here, we share a classic empanada recipe that will transport your taste buds to the vibrant streets of Latin America.

Ingredients:

  • 2 cups all-purpose flour
  • 1/2 teaspoon salt
  • 1/2 cup cold unsalted butter, cubed
  • 1/4 – 1/2 cup cold water
  • 1 tablespoon olive oil
  • 1 small onion, finely chopped
  • 2 cloves garlic, minced
  • 1 red bell pepper, diced
  • 250g ground beef or chicken
  • 1 teaspoon cumin
  • Salt and pepper to taste
  • 1/4 cup pitted green olives, sliced
  • 2 hard-boiled eggs, chopped

Instructions:

  1. Prepare the Dough:
  2. – In a large bowl, combine the flour and salt.

    – Add the cubed butter and rub it into the flour mixture until it resembles breadcrumbs.

    – Slowly add the cold water and mix until the dough comes together.

    – Shape the dough into a ball, wrap it in cling film, and refrigerate for 30 minutes.

  3. Make the Filling:
  4. – In a pan, heat olive oil over medium heat.

    – Add the onion and garlic, sauté until softened.

    – Stir in the bell pepper and cook for another 3-4 minutes.

    – Add the ground beef or chicken, cumin, salt, and pepper. Cook until browned.

    – Remove from heat and stir in olives and chopped eggs.

  5. Assemble the Empanadas:
  6. – Preheat oven to 200°C (180°C fan).

    – Roll out the dough on a floured surface to about 0.5cm thickness.

    – Using a round cutter or a small plate as a guide, cut out circles from the dough.

    – Spoon some filling onto each circle.

    – Fold over to create half-moon shapes and seal by pressing edges with a fork.

  7. Cooking Options:
  8. – To bake: Place empanadas on a baking tray lined with parchment paper. Brush with egg wash. Bake for 20-25 minutes until golden brown.

    – To fry: Heat oil in a deep pan. Fry empanadas until crispy and golden on both sides.

  9. Serve & Enjoy:
  10. – Serve hot with your favourite dipping sauce or salsa.

    – Enjoy these homemade empanadas as a delightful snack or meal that captures the essence of Latin American cuisine.

Gather your friends and family to savour these homemade empanadas filled with flavourful ingredients that will surely satisfy your cravings for authentic Latin cuisine.


Empanada Recipe FAQs: Dough Types, Cooking Methods, Common Mistakes, and Pastry Tips

  1. What dough are empanadas made of?
  2. Is it better to fry or bake empanadas?
  3. What are common empanada mistakes?
  4. What pastry is best for empanadas?
  5. Is empanada dough the same as pizza dough?

What dough are empanadas made of?

Empanadas are typically made with a simple dough consisting of all-purpose flour, salt, cold butter, and water. This dough is easy to work with and can be shaped into the perfect pastry shell for enclosing the delicious fillings that make empanadas so irresistible. The combination of these basic ingredients results in a crispy yet tender crust that complements the savoury or sweet fillings inside. Whether baked or fried, the dough used for empanadas plays a crucial role in creating a delightful culinary experience that captures the essence of this popular Latin American dish.

Is it better to fry or bake empanadas?

When it comes to preparing empanadas, the choice between frying and baking often depends on personal preference and dietary considerations. Frying empanadas typically results in a crispy, golden exterior that many find irresistible, while baking offers a healthier alternative with a slightly lighter texture. Frying may enhance the overall richness of the dish, while baking can be a convenient and less messy option. Ultimately, whether you fry or bake your empanadas, both methods can yield delicious results that cater to different tastes and dietary needs.

What are common empanada mistakes?

When preparing empanadas, there are common mistakes that can affect the final outcome of this beloved Latin American dish. One frequent error is overfilling the empanadas, which can lead to leaks during baking or frying. Another common mistake is not properly sealing the edges of the empanadas, resulting in filling spilling out during cooking. Additionally, using a dough that is too thick or too thin can impact the texture and overall taste of the empanadas. It’s essential to follow the recipe closely and pay attention to details such as dough consistency and filling distribution to ensure a successful batch of delicious empanadas.

What pastry is best for empanadas?

When it comes to choosing the best pastry for empanadas, many enthusiasts swear by a simple dough made with all-purpose flour, butter, and water. This classic pastry recipe yields a crisp and flaky shell that perfectly complements the savoury fillings of traditional empanadas. The key is to achieve a balance between a sturdy crust that holds the filling together and a light texture that melts in your mouth with each bite. Experimenting with different types of dough, such as those incorporating lard or even puff pastry, can also add unique textures and flavours to your empanadas, catering to personal preferences and culinary creativity. Ultimately, the best pastry for empanadas is one that enhances the overall taste experience while staying true to the dish’s cultural roots.

Is empanada dough the same as pizza dough?

When it comes to empanadas and pizza, the dough used for each dish differs in texture and composition. Empanada dough is typically more flaky and sturdy, designed to hold the filling securely without becoming soggy. On the other hand, pizza dough is softer and more elastic, ideal for stretching into a thin crust that bakes to perfection in a hot oven. While both doughs share basic ingredients like flour and water, their ratios and preparation methods vary significantly to suit the specific requirements of each culinary delight.