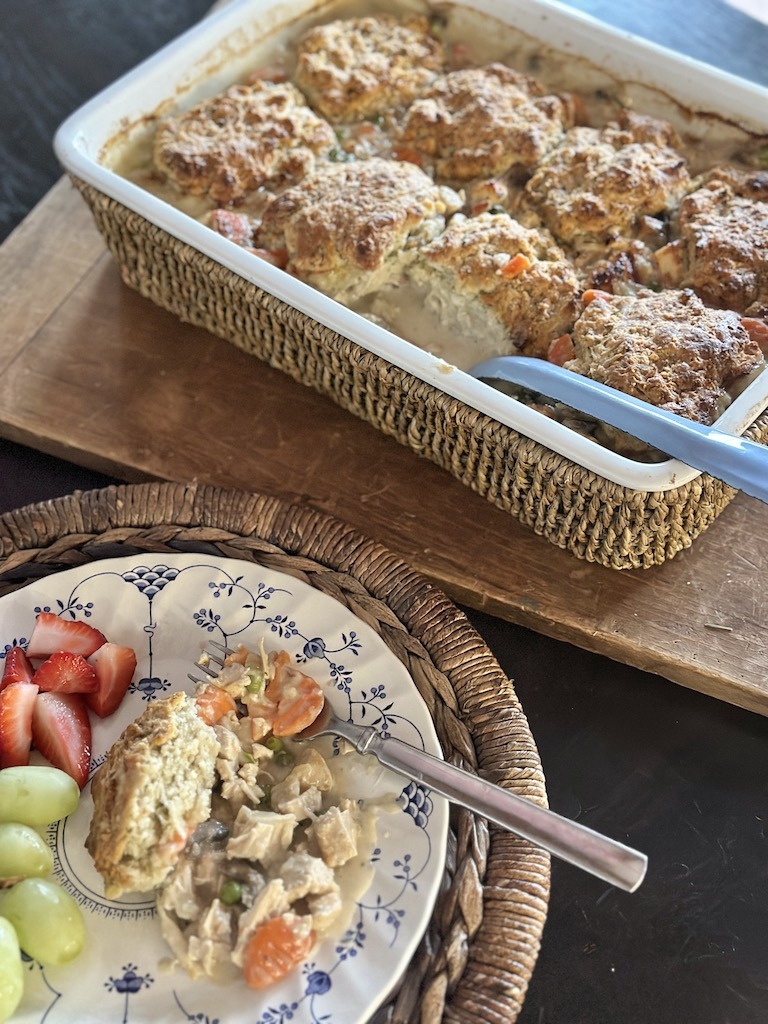
Easy Chicken Pot Pie: A Simple, Comforting Family Favourite

easy chicken pot pie

Easy Chicken Pot Pie

Golden, crisp pastry and a creamy chicken filling make this easy chicken pot pie a comforting favourite. Using cooked chicken and ready-rolled puff pastry keeps preparation simple, so it is ideal for a relaxed family dinner or a way to use up leftovers.

Prep time: 15 minutes

Cooking time: 30 minutes

Serves: 4

Ingredients

  • 1 tbsp olive oil or butter
  • 1 small onion, finely chopped
  • 2 carrots, peeled and diced
  • 150g frozen peas
  • 30g butter
  • 30g plain flour
  • 300ml chicken stock
  • 150ml milk
  • 350g cooked chicken, shredded or chopped
  • 1 tsp dried thyme
  • Salt and freshly ground black pepper
  • 1 sheet ready-rolled puff pastry, chilled
  • 1 egg, beaten, for glazing

Method

  1. Heat the oven. Preheat it to 200°C (180°C fan/Gas Mark 6). Lightly grease a medium pie dish.
  2. Cook the vegetables. Heat the oil or a little butter in a saucepan over a medium heat. Add the onion and carrots and cook for 5–7 minutes, stirring occasionally, until beginning to soften.
  3. Make the sauce. Add the butter. Once melted, stir in the flour and cook for 1 minute. Gradually pour in the stock, stirring well to keep the sauce smooth. Add the milk and thyme, then simmer gently for a few minutes until thickened.
  4. Add the filling. Stir in the cooked chicken and peas. Season with salt and pepper, then spoon the mixture into the prepared pie dish.
  5. Add the pastry. Lay the pastry over the dish and trim away any excess. Press the edges down to seal, then cut a small slit in the centre to let steam escape. Brush the top with beaten egg.
  6. Bake. Cook for 25–30 minutes, until the pastry is puffed and deep golden and the filling is piping hot. Leave to stand for a few minutes before serving.

Easy Variations

Use leftover roast chicken or shop-bought cooked chicken. You can swap the peas for sweetcorn, add sliced mushrooms with the onion, or use leftover cooked vegetables. For a richer filling, replace some of the milk with cream.

Helpful Tips

  • Let the filling cool slightly before adding the pastry. This helps the pastry stay crisp and makes it easier to handle.
  • If the pastry browns before the filling is hot, cover it loosely with foil and continue baking.
  • For individual pies, divide the filling between ovenproof dishes and cut the pastry to fit each one.
  • Refrigerate leftovers promptly and use within two days. Reheat until piping hot throughout.

Serve your chicken pot pie with mashed potatoes, steamed greens or a crisp green salad for a satisfying, fuss-free meal.


7 Reasons Why Easy Chicken Pot Pie is the Ultimate Comfort Dish

  1. Quick and easy to prepare
  2. Uses convenient ready-rolled pastry
  3. A comforting family favourite
  4. Great for leftover chicken
  5. Easy to customise with vegetables
  6. Crisp, golden pastry topping
  7. Makes a satisfying one-dish meal


Considerations Before Making Easy Chicken Pot Pie: 6 Potential Drawbacks

  1. Ready-made pastry may contain additives.
  2. The creamy filling can be high in calories.
  3. It takes time to bake and cool.
  4. The pastry can become soggy underneath.
  5. Suitable only if you have cooked chicken ready.
  6. Leftovers may lose their crisp pastry texture.

Quick and easy to prepare

One of the best things about an easy chicken pot pie is how quickly it comes together. With cooked chicken, a few simple ingredients and ready-rolled pastry, you can prepare the filling in minutes and let the oven do the rest. It’s a handy choice for a comforting, satisfying meal without spending hours in the kitchen.

Uses convenient ready-rolled pastry

Ready-rolled pastry makes this chicken pot pie especially easy to prepare, saving time and effort in the kitchen. Simply unroll it, place it over the filling and trim the edges for a golden, flaky topping—no mixing, rolling or extra equipment required.

A comforting family favourite

Easy chicken pot pie is a comforting family favourite, bringing everyone together over tender chicken, a creamy filling and golden, flaky pastry. Its familiar, hearty flavours make it a welcome choice for chilly evenings, relaxed Sunday dinners or whenever the family fancies a satisfying home-cooked meal.

Great for leftover chicken

Easy chicken pot pie is a brilliant way to use up leftover roast chicken. Simply shred or chop the cooked meat and stir it into the creamy filling, turning yesterday’s dinner into a comforting new meal while helping to reduce food waste.

Easy to customise with vegetables

One of the best things about easy chicken pot pie is how simple it is to customise with vegetables. Add peas, carrots, sweetcorn, mushrooms or green beans, or use up leftover cooked vegetables from another meal. Choose your favourites, adjust the quantities to suit your taste and make the most of whatever you have in the fridge.

Crisp, golden pastry topping

A crisp, golden pastry topping gives easy chicken pot pie its irresistible finishing touch. As it bakes, the pastry turns beautifully flaky on the outside while staying light and tender underneath, creating a delicious contrast with the creamy chicken filling. It looks inviting straight from the oven and adds plenty of satisfying crunch to every spoonful.

Makes a satisfying one-dish meal

Easy chicken pot pie makes a satisfying one-dish meal, bringing tender chicken, vegetables and a creamy sauce together beneath a golden pastry crust. It’s filling and comforting on its own, so there’s less need to prepare several separate dishes—though you can add a simple green salad or extra vegetables if you like.

Ready-made pastry may contain additives.

Ready-made pastry is a convenient time-saver, but some varieties may contain additives such as preservatives, emulsifiers or flavourings. Check the ingredient list if you prefer to avoid these, and compare brands, as recipes can vary. For a simpler option, choose pastry with fewer ingredients or make your own at home.

The creamy filling can be high in calories.

One drawback of easy chicken pot pie is that its creamy filling can be high in calories, particularly when made with butter, milk or cream and served beneath a generous pastry topping. For a lighter version, use reduced-fat milk, add extra vegetables and keep an eye on portion sizes.

It takes time to bake and cool.

One drawback of easy chicken pot pie is that, although it is quick to prepare, it still needs around 25–30 minutes in the oven, followed by a few minutes to cool before serving. That wait can be inconvenient on busy evenings, especially when everyone is hungry and dinner needs to be on the table quickly.

The pastry can become soggy underneath.

One drawback of an easy chicken pot pie is that the pastry can become soggy underneath, especially if the filling is very moist or still hot when the pastry is added. To help keep the base crisp, let the filling cool slightly, avoid adding too much liquid and bake the pie in a fully preheated oven until the pastry is golden and cooked through.

Suitable only if you have cooked chicken ready.

One drawback of this easy chicken pot pie is that it relies on cooked chicken being ready to use. If you only have raw chicken, you’ll need to cook it first, adding extra time and preparation to the recipe.

Leftovers may lose their crisp pastry texture.

One drawback of easy chicken pot pie is that the pastry can lose its crisp, flaky texture once the pie has been stored. Moisture from the creamy filling tends to soften the crust, so leftovers may not be quite as appealing as they are fresh from the oven. Reheating in the oven can help crisp the pastry again, although it may not fully restore its original texture.

Classic Cottage Pie Recipe: A Comforting British Family Favourite

cottage pie recipe

Classic Cottage Pie Recipe

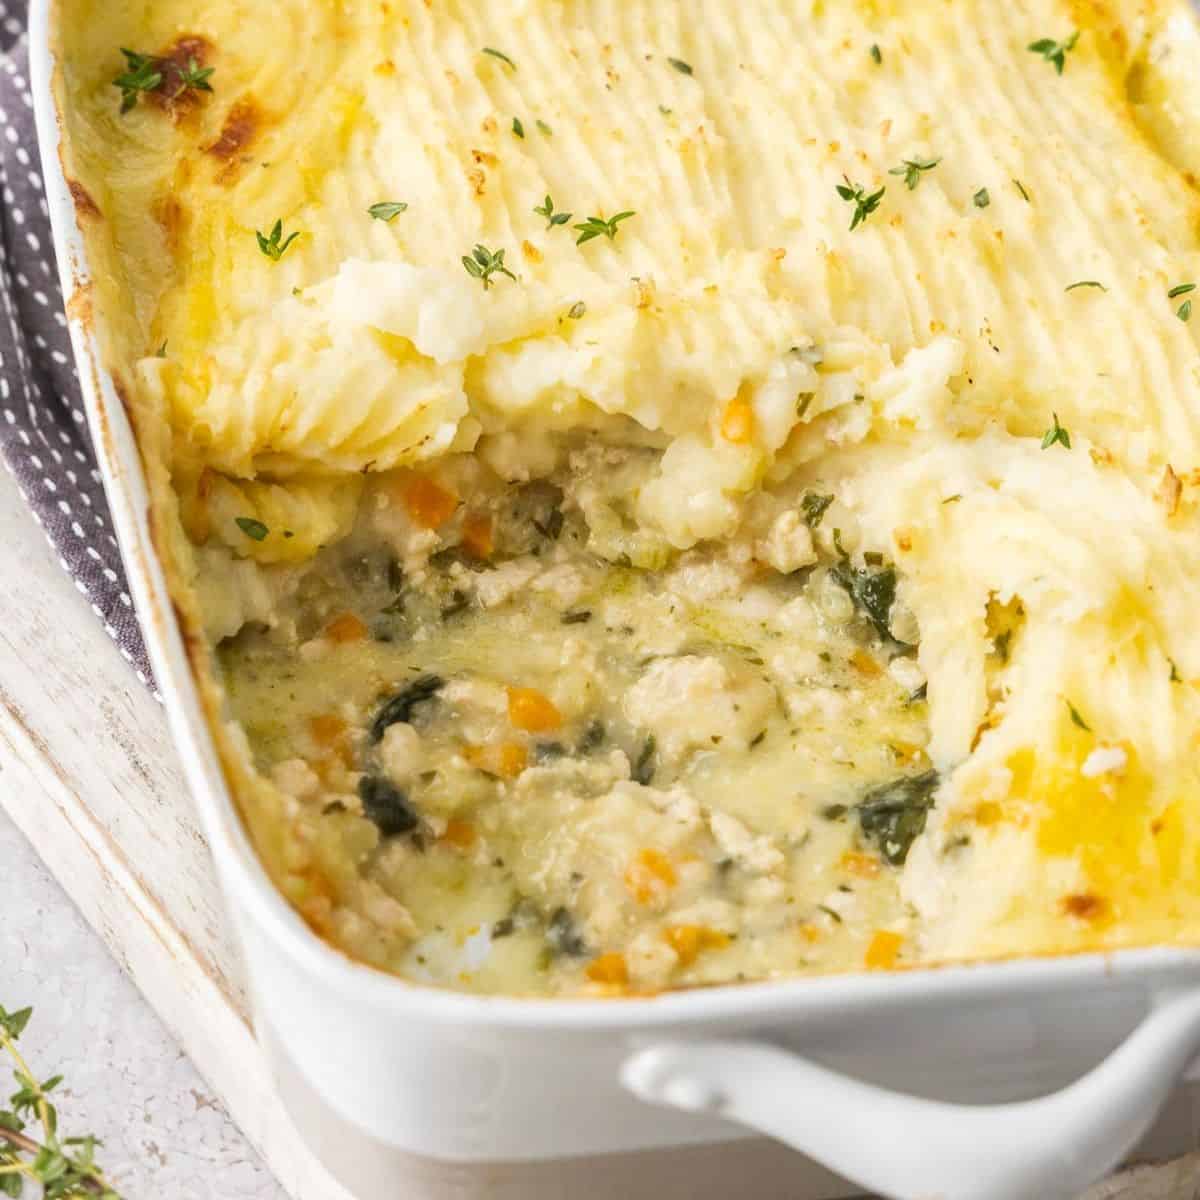
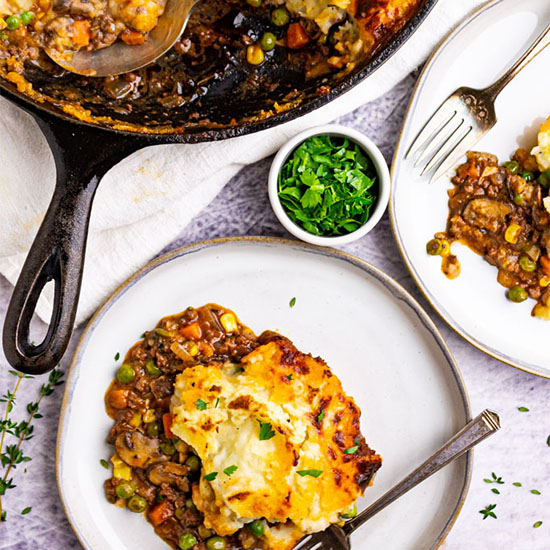
Cottage pie is a comforting British favourite: savoury minced beef cooked with vegetables in a rich gravy, then topped with creamy mashed potato and baked until golden. It is often confused with shepherd’s pie, but the traditional distinction is simple: cottage pie is made with beef, while shepherd’s pie is made with lamb.

This recipe serves four to six and is ideal for a relaxed family meal. It can also be made ahead and baked when you are ready to eat.

Preparation and cooking time

  • Preparation: 25 minutes
  • Cooking: 50 minutes
  • Serves: 4–6

Ingredients

For the filling

  • 1 tablespoon vegetable oil
  • 1 onion, finely chopped
  • 2 carrots, diced
  • 500g beef mince
  • 2 tablespoons tomato purée
  • 1 tablespoon plain flour
  • 1 teaspoon Worcestershire sauce
  • 400ml beef stock
  • 100g frozen peas
  • 1 teaspoon dried thyme, or a few fresh sprigs
  • Salt and freshly ground black pepper

For the potato topping

  • 900g floury potatoes, such as Maris Piper or King Edward, peeled and cut into chunks
  • 50g butter
  • About 100ml milk, warmed
  • 50g mature Cheddar, grated (optional)
  • Salt and freshly ground black pepper

Method

  1. Cook the potatoes. Put the potatoes in a large pan of cold, salted water. Bring to the boil, then simmer for 15–20 minutes, or until tender. Drain well and leave them to steam-dry for a minute.
  2. Make the filling. Meanwhile, heat the oil in a large frying pan or saucepan over a medium heat. Add the onion and carrots and cook for 6–8 minutes, stirring occasionally, until softened.
  3. Add the beef mince and cook for 5–7 minutes, breaking it up with a spoon, until browned. Stir in the tomato purée and flour and cook for a minute.
  4. Pour in the beef stock and add the Worcestershire sauce and thyme. Stir well, bring to a gentle simmer and cook for 20–25 minutes, until the sauce has thickened. Stir in the peas for the final few minutes. Season to taste.
  5. Mash the potatoes. Mash the drained potatoes with the butter and enough warm milk to make a smooth, fluffy mash. Season with salt and pepper. Stir in the grated Cheddar, if using.
  6. Assemble the pie. Heat the oven to 200°C (180°C fan)/400°F/gas mark 6. Spoon the beef filling into an ovenproof dish. Spread the mash evenly over the top, taking it right to the edges. Roughen the surface with a fork to help it turn golden.
  7. Bake. Place the dish on a baking tray and bake for 25–30 minutes, until bubbling around the edges and golden on top. Leave it to stand for 5 minutes before serving.

Tips for a delicious cottage pie

  • Allow the filling to simmer until thick. If it is too runny, the potato topping may sink into it.
  • For extra flavour, add a splash of red wine with the stock, or stir in a teaspoon of mustard.
  • Make the topping crispier by brushing it with a little melted butter before baking.
  • Serve with steamed greens, cabbage or green beans.

Make-ahead and storage

The filling can be prepared a day ahead and kept covered in the fridge. Assemble the pie once the filling has cooled, then refrigerate it until needed. Add a little extra baking time if cooking it straight from the fridge, and make sure it is piping hot all the way through.

Leftovers can be stored in a covered container in the fridge for up to three days. Reheat thoroughly until steaming hot. Cottage pie can also be frozen; for the best texture, freeze it before baking, then defrost it in the fridge before cooking.


Everything You Need to Know About Making the Perfect Cottage Pie: FAQs Answered

  1. What is the difference between cottage pie and shepherd’s pie?
  2. What ingredients do you need to make cottage pie?
  3. How do you make the mashed potato topping creamy?
  4. How long should cottage pie bake in the oven?
  5. Can you make cottage pie ahead of time?
  6. Can cottage pie be frozen?
  7. How do you stop cottage pie filling from becoming watery?
  8. What should you serve with cottage pie?

What is the difference between cottage pie and shepherd’s pie?

The main difference between cottage pie and shepherd’s pie is the meat: cottage pie is traditionally made with minced beef, while shepherd’s pie uses minced lamb. Both are topped with mashed potato and baked until golden, and their fillings often include vegetables, gravy and herbs.

What ingredients do you need to make cottage pie?

To make cottage pie, you’ll need beef mince, onion, carrots, peas, beef stock, tomato purée, Worcestershire sauce and a little flour to thicken the filling. Season it with salt, pepper and thyme, then top with mashed potatoes made from floury potatoes, butter and milk. Mature Cheddar is optional, but adds a savoury finish to the topping.

How do you make the mashed potato topping creamy?

For a creamy mashed potato topping, use floury potatoes such as Maris Piper or King Edward, and cook them until completely tender. Drain them well and let them steam-dry briefly, then mash while hot with butter and warm milk, adding the milk gradually until the mash is smooth and fluffy. Avoid overworking the potatoes, as this can make them gluey. Season well, and stir in a little grated Cheddar or a spoonful of cream for extra richness, if you like.

How long should cottage pie bake in the oven?

Cottage pie should usually bake in a preheated oven at 200°C (180°C fan)/400°F/gas mark 6 for 25–30 minutes, until the filling is bubbling around the edges and the potato topping is golden. If the pie has been chilled, allow a little extra time and check that it is piping hot all the way through before serving.

Can you make cottage pie ahead of time?

Yes, cottage pie is ideal for making ahead. Prepare the filling and mashed potato, assemble the pie, then cover and refrigerate it for up to 24 hours before baking. You can also bake it in advance and reheat it until piping hot throughout. If baking straight from the fridge, allow a little extra time in the oven, and check that the centre is thoroughly heated before serving.

Can cottage pie be frozen?

Yes, cottage pie freezes well. For the best results, let it cool completely, then cover it tightly or transfer it to a freezer-safe container and freeze for up to three months. You can freeze it before or after baking, though freezing before baking usually gives the potato topping a better texture. Defrost overnight in the fridge, then bake until piping hot throughout. If reheating a cooked pie, make sure it is thoroughly hot before serving.

How do you stop cottage pie filling from becoming watery?

To stop cottage pie filling from becoming watery, simmer it uncovered until the sauce has reduced and thickened before adding it to the baking dish. A little plain flour stirred into the browned mince can help, too. Avoid adding too much stock, and let frozen vegetables thaw and drain before using them. The filling should be moist but not runny; if it looks thin, cook it for a few more minutes before topping with mash.

What should you serve with cottage pie?

Cottage pie pairs beautifully with simple vegetables that balance its rich, savoury filling. Try serving it with steamed green beans, peas, broccoli or cabbage, or add roasted carrots for extra sweetness. A crisp green salad can make the meal feel lighter, while a little extra gravy is always welcome.

Easy Teriyaki Sauce Recipe: A Glossy, Savoury-Sweet Homemade Favourite

teriyaki sauce recipe

Easy Teriyaki Sauce Recipe

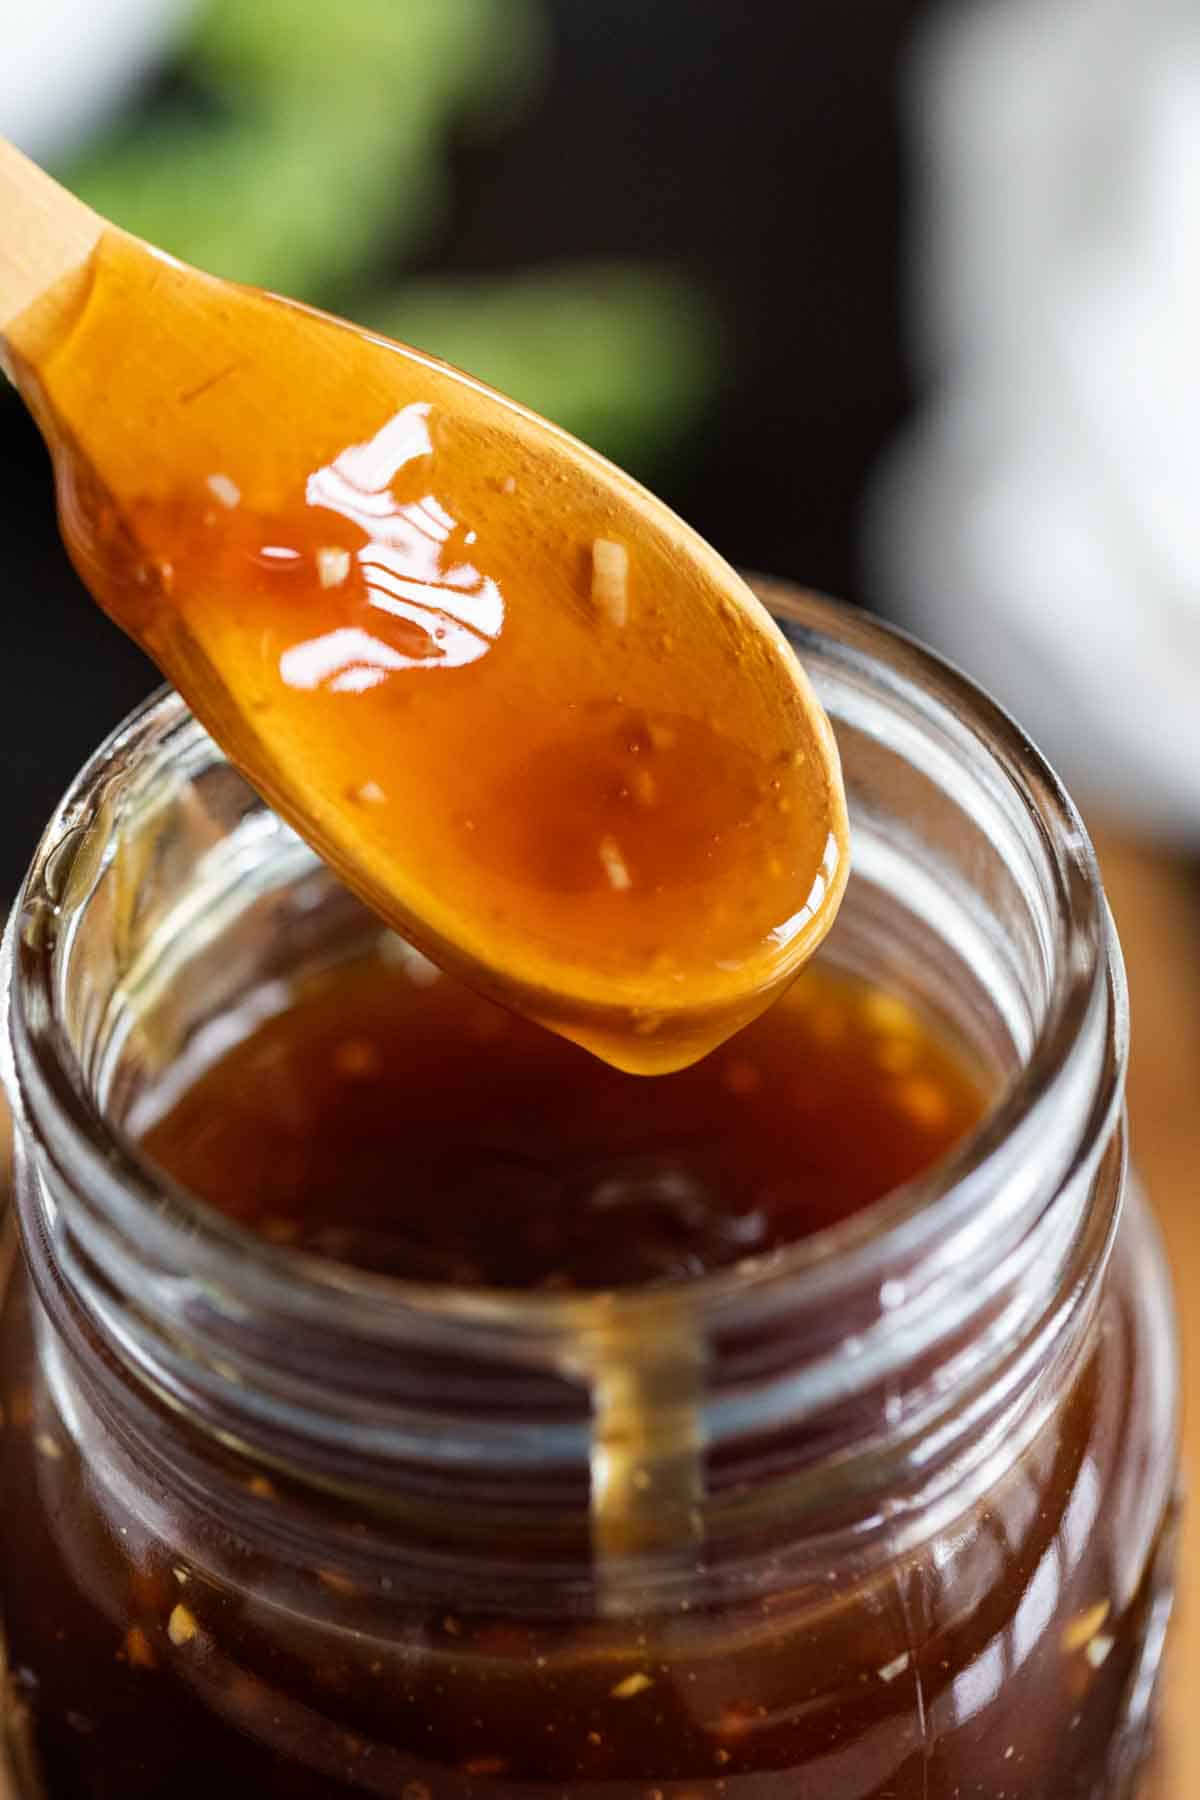
Glossy, savoury and gently sweet, homemade teriyaki sauce is simple to make and far more versatile than its reputation as a glaze suggests. Use it to coat grilled chicken, salmon, tofu or vegetables, or serve it as a dipping sauce. This quick recipe uses a handful of ingredients and takes about 15 minutes.

What is teriyaki sauce?

Teriyaki refers to a Japanese cooking method in which food is grilled or broiled and coated with a shiny glaze. The sauce is commonly made with soy sauce, mirin, sake and sugar. As it simmers, it reduces to a savoury-sweet glaze that clings beautifully to food.

Ingredients

  • 120 ml soy sauce
  • 120 ml mirin
  • 60 ml sake
  • 2 tablespoons caster sugar, or to taste
  • 1 teaspoon finely grated fresh ginger, optional
  • 1 small garlic clove, finely grated, optional

For a thicker sauce (optional): mix 1 teaspoon cornflour with 1 tablespoon cold water.

Method

  1. Put the soy sauce, mirin, sake and sugar in a small saucepan. Add the ginger and garlic, if using.
  2. Set the pan over a medium heat and stir until the sugar dissolves.
  3. Bring the mixture to a gentle simmer. Cook for 8–12 minutes, stirring occasionally, until it has reduced slightly and looks glossy. It will thicken further as it cools.
  4. For a thicker, more pourable sauce, stir in the cornflour mixture. Simmer for 1–2 minutes, stirring constantly, until the sauce reaches your preferred consistency.
  5. Remove from the heat. Strain out the ginger and garlic if you would like a smooth sauce, then leave to cool before using or storing.

Tips for the best teriyaki sauce

  • Adjust the sweetness: start with 2 tablespoons of sugar, then add a little more if you prefer a sweeter glaze.
  • Let it reduce: simmering concentrates the flavour and creates a glossy finish. Avoid boiling it rapidly, as it can reduce too far or taste too salty.
  • Use cornflour only if needed: a traditional-style sauce thickens through reduction, while cornflour gives a quicker, thicker result.
  • Choose low-salt soy sauce if preferred: this makes it easier to control the saltiness, especially when using the sauce as a dip.
  • For a gluten-free version: use certified gluten-free tamari and check that the mirin and sake are suitable.

How to use it

Brush the sauce over food towards the end of cooking so the sugars do not burn. It works particularly well with grilled chicken, salmon, prawns, tofu and aubergine. You can also stir a spoonful through fried rice or noodles, or serve it in a small bowl as a dip.

Storage

Once cooled, transfer the sauce to a clean, sealed jar and refrigerate. Use within one week, and always use a clean spoon when serving. If the sauce has been in contact with raw meat or fish, do not return it to the jar; discard it or bring it to a full boil before serving.


Essential Guide to Homemade Teriyaki Sauce: Ingredients, Preparation, and Pairing Tips

  1. What ingredients do you need to make teriyaki sauce?
  2. How do you make teriyaki sauce from scratch?
  3. How can you thicken homemade teriyaki sauce?
  4. Can you make teriyaki sauce without mirin or sake?
  5. How long does homemade teriyaki sauce keep in the fridge?
  6. What foods go well with teriyaki sauce?

What ingredients do you need to make teriyaki sauce?

To make a simple teriyaki sauce, you’ll need soy sauce, mirin, sake and sugar. These ingredients create its characteristic savoury-sweet flavour and glossy finish. Freshly grated ginger and garlic are optional additions for extra depth, while a little cornflour mixed with cold water can be used to thicken the sauce if desired.

How do you make teriyaki sauce from scratch?

To make teriyaki sauce from scratch, combine soy sauce, mirin, sake and sugar in a small saucepan. Warm over a medium heat, stirring until the sugar dissolves, then simmer gently for 8–12 minutes until the sauce reduces and turns glossy. For a thicker sauce, stir in a little cornflour mixed with cold water and simmer for another minute or two. Let it cool before using; it will thicken further as it cools.

How can you thicken homemade teriyaki sauce?

To thicken homemade teriyaki sauce, simmer it gently until it reduces and becomes glossy; it will thicken further as it cools. For a quicker, thicker result, mix one teaspoon of cornflour with one tablespoon of cold water, then stir it into the simmering sauce a little at a time. Cook for a minute or two, stirring, until it reaches the consistency you like.

Can you make teriyaki sauce without mirin or sake?

Yes, you can make teriyaki sauce without mirin or sake. For a mirin substitute, use an equal amount of water or apple juice with a little extra sugar; for sake, use water or unsalted stock. The flavour will be slightly different, but soy sauce, sugar, ginger and garlic will still make a tasty glaze. Adjust the sweetness to taste, then simmer until the sauce reaches your preferred consistency.

How long does homemade teriyaki sauce keep in the fridge?

Homemade teriyaki sauce will usually keep in the fridge for up to one week when stored in a clean, airtight container. Let it cool before refrigerating, and use a clean spoon each time you serve it. If it has been in contact with raw meat, fish or their juices, don’t pour it back into the container; discard it, or boil it thoroughly before using.

What foods go well with teriyaki sauce?

Teriyaki sauce pairs well with grilled or pan-fried chicken, salmon, beef and prawns, as well as tofu and vegetables such as broccoli, aubergine and peppers. It also adds a savoury-sweet flavour to rice bowls, stir-fries and noodles. Brush it onto food near the end of cooking so the sugars do not burn, or serve it on the side as a dip.

Chuck Roast Recipes: Three Comforting Ways to Cook a Flavourful Cut

chuck roast recipes

Chuck Roast Recipes: Three Comforting Ways to Cook This Flavourful Cut

Chuck roast is a well-marbled cut of beef from the shoulder. It can be a little tough when cooked quickly, but long, gentle cooking breaks down its connective tissue and makes the meat tender, rich and full of flavour. That makes it ideal for Sunday lunch, slow-cooker suppers and dishes that can be prepared ahead.

For the best results, brown the beef before braising, keep it moist and cook it until a fork slides easily into the meat. The recipes below offer three simple ways to enjoy chuck roast: a classic pot roast, slow-cooked shredded beef and a warming red-wine braise.

Classic Chuck Roast Pot Roast

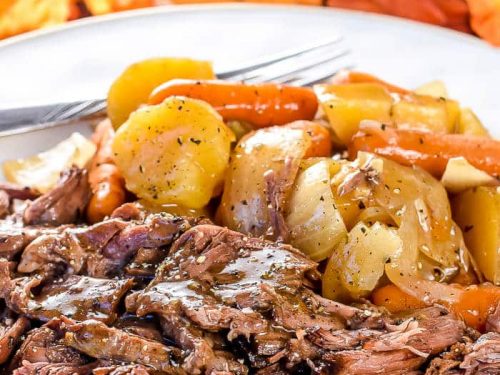
This traditional one-pot meal combines tender beef with potatoes, carrots and a savoury cooking liquid. Serve it straight from the casserole dish, with the juices spooned over the top.

Ingredients

  • 1.5 kg chuck roast
  • Salt and freshly ground black pepper
  • 2 tablespoons vegetable oil
  • 1 large onion, cut into wedges
  • 2 tablespoons plain flour
  • 2 tablespoons tomato purée
  • 500 ml beef stock
  • 2 sprigs of fresh thyme
  • 2 bay leaves
  • 500 g waxy potatoes, halved if large
  • 300 g carrots, cut into thick chunks

Method

  1. Heat the oven to 160°C, or 140°C fan. Pat the beef dry and season it generously with salt and pepper.
  2. Heat the oil in a large, ovenproof casserole over a medium-high heat. Brown the beef on all sides, then transfer it to a plate.
  3. Add the onion to the casserole and cook for 3–4 minutes. Stir in the flour and tomato purée, then gradually pour in the stock, scraping up any browned bits from the base.
  4. Return the beef to the casserole. Add the thyme and bay leaves. The liquid should come about halfway up the meat; add a little water if needed.
  5. Cover and cook in the oven for 2½ hours. Add the potatoes and carrots, then cook for a further 60–90 minutes, until the beef is very tender and the vegetables are cooked through.
  6. Remove the herbs and let the roast rest for 10 minutes before slicing or pulling it apart. Spoon over the cooking juices to serve.

Slow-Cooker Shredded Chuck Roast

Shredded beef is a versatile option for sandwiches, tacos, baked potatoes or rice bowls. A slow cooker keeps the preparation straightforward: brown the meat first for extra flavour, then let it cook gently until it falls apart.

Ingredients

  • 1.5 kg chuck roast
  • Salt and freshly ground black pepper
  • 1 tablespoon vegetable oil
  • 1 onion, finely sliced
  • 250 ml beef stock
  • 2 tablespoons Worcestershire sauce
  • 1 tablespoon tomato purée
  • 1 teaspoon smoked paprika
  • 1 teaspoon dried oregano

Method

  1. Season the beef with salt and pepper. Heat the oil in a frying pan and brown the joint on all sides.
  2. Put the onion in the slow cooker and place the beef on top. Whisk together the stock, Worcestershire sauce, tomato purée, smoked paprika and oregano, then pour the mixture around the meat.
  3. Cover and cook on low for 8–10 hours or on high for 4–6 hours, until the beef is tender enough to shred easily.
  4. Transfer the beef to a board and shred it with two forks. Stir it back into the cooking juices and taste for seasoning.

Serve the shredded beef in soft rolls with coleslaw, or spoon it into warm tortillas with salsa and fresh coriander. Refrigerate leftovers promptly and use them within three days.

Chuck Roast Braised with Red Wine

Red wine, stock and aromatic vegetables create a deeply savoury sauce in this slow-braised version. It works well for a relaxed dinner with mashed potatoes or crusty bread.

Ingredients

  • 1.5 kg chuck roast
  • Salt and freshly ground black pepper
  • 2 tablespoons olive oil
  • 1 onion, chopped
  • 2 carrots, chopped
  • 2 celery sticks, chopped
  • 2 tablespoons plain flour
  • 300 ml dry red wine
  • 300 ml beef stock
  • 2 sprigs of rosemary
  • 2 bay leaves

Method

  1. Heat the oven to 160°C, or 140°C fan. Season the beef. Warm the olive oil in a heavy casserole and brown the meat thoroughly on all sides. Set aside.
  2. Add the onion, carrots and celery to the casserole and cook for about 5 minutes, stirring occasionally. Sprinkle over the flour and stir for 1 minute.
  3. Pour in the wine a little at a time, scraping the base of the pan. Add the stock, rosemary and bay leaves, then return the beef to the casserole.
  4. Cover and braise for 3–3½ hours, turning the beef once, until it is tender. If the sauce seems thin, remove the meat when cooked and simmer the liquid uncovered until it reaches the consistency you like.
  5. Rest the beef for 10 minutes, then slice or pull it into pieces. Serve with the sauce and your choice of potatoes or bread.

Tips for Tender Chuck Roast

  • Brown the meat well. A deep brown crust adds flavour to both the beef and the cooking liquid.
  • Cook it gently. Chuck roast is best suited to low, slow cooking rather than a quick, high-temperature roast.
  • Allow enough time. The beef is ready when it is tender throughout, not simply when it reaches a particular cooking time. Larger or thicker joints may need longer.
  • Keep some liquid in the pot. Braising does not require the meat to be fully submerged, but there should be enough liquid to create steam and prevent the base from drying out.
  • Rest before serving. A short rest makes the meat easier to carve and gives the juices time to settle.

Whether you choose a classic pot roast, convenient slow-cooker beef or a wine-rich braise, chuck roast rewards patient cooking. Make a little extra and the leftovers can become sandwiches, pies or a quick meal tossed through pasta the next day.


Frequently Asked Questions About Cooking Chuck Roast: Tips and Techniques for Tender, Delicious Meals

  1. What is chuck roast called in the UK?
  2. What is the best way to cook chuck roast so it becomes tender?
  3. How long should chuck roast cook in the oven?
  4. Can you cook chuck roast in a slow cooker?
  5. Should chuck roast be seared before slow cooking or braising?
  6. What temperature should chuck roast reach to become fall-apart tender?
  7. What can you serve with chuck roast?

What is chuck roast called in the UK?

In the UK, “chuck roast” is not a widely used name for a standard supermarket cut. The closest equivalent is usually beef chuck or shoulder of beef; for a slow-cooked joint, ask a butcher for a boneless beef shoulder suitable for braising. “Braising steak” comes from a similar area, but it is often sold in slices or pieces rather than as a roasting joint.

What is the best way to cook chuck roast so it becomes tender?

The best way to make chuck roast tender is to cook it slowly with a little liquid, using a covered casserole in a low oven or a slow cooker. First, pat the beef dry and brown it on all sides to build flavour. Add stock or another braising liquid, cover and cook gently until the meat is fork-tender and easy to pull apart—usually around 3–4 hours in a low oven, or 8–10 hours on a slow-cooker’s low setting, depending on the size of the joint. Avoid rushing the cooking: chuck contains connective tissue that needs time to soften.

How long should chuck roast cook in the oven?

Chuck roast is best cooked slowly in a covered casserole at 160°C (140°C fan) for around 3–4 hours, depending on the size and thickness of the joint. Add enough stock or other braising liquid to keep the meat moist, and check that it is fork-tender before serving; if it still feels firm, return it to the oven and continue cooking in 30-minute intervals.

Can you cook chuck roast in a slow cooker?

Yes, chuck roast is ideal for a slow cooker. Its marbling and connective tissue break down during long, gentle cooking, leaving the beef tender and easy to pull apart. For extra flavour, brown the joint in a hot pan first, then add it to the slow cooker with a little stock, seasoning and any vegetables or herbs you like. Cook on low for around 8–10 hours or on high for 4–6 hours, until the meat is fork-tender; timings can vary depending on the size of the joint and your appliance.

Should chuck roast be seared before slow cooking or braising?

Searing chuck roast before slow cooking or braising is recommended, though not essential. Browning the meat in a hot pan develops a rich, savoury crust that adds depth to the finished dish and its cooking liquid. Pat the roast dry first, season it, then sear it on all sides; transfer it to the slow cooker or braising pot and continue with the recipe. If you’re short on time, you can skip this step—the beef will still become tender when cooked slowly, but the flavour may be less complex.

What temperature should chuck roast reach to become fall-apart tender?

For chuck roast to become fall-apart tender, aim for an internal temperature of about 90–96°C. At this range, the connective tissue has had time to break down, although cooking time and the size of the joint also matter. Rather than relying on temperature alone, check that a fork or probe slides into the meat easily; if it still feels firm, continue cooking gently and check again.

What can you serve with chuck roast?

Chuck roast pairs well with sides that soak up its rich, savoury juices. Try mashed potatoes, roast potatoes, buttered noodles or crusty bread, alongside vegetables such as carrots, green beans, peas or cabbage. For a lighter balance, serve it with a crisp green salad. If the roast is cooked with potatoes and carrots, add a simple extra side such as steamed greens or bread.

Armenia’s Historical Monuments: A Journey Through the Past

Armenia’s Historical Monuments: Stone Witnesses to a Remarkable Past

Armenia’s history can be read in its landscapes. Across the country, ancient temples, medieval monasteries, churches and fortresses stand among mountains and valleys, reflecting centuries of faith, creativity and change. Built from local stone and shaped by distinctive architectural traditions, these monuments are more than reminders of the past: many remain places of worship, learning and community life today.

Garni: A Temple from the Ancient World

Near Yerevan, the Temple of Garni rises above the Azat River gorge. Its classical columns make it unlike Armenia’s familiar medieval churches, and it is widely recognised as the only surviving Greco-Roman colonnaded temple in the country. The temple is generally dated to the first century AD and is thought to have been dedicated to a pre-Christian deity. Its setting, with steep cliffs and sweeping views, makes the site especially striking.

Geghard: A Monastery Carved into the Rock

Not far from Garni stands the monastery of Geghard, a UNESCO World Heritage Site set within a dramatic mountain gorge. Parts of the complex are carved directly into the surrounding rock, creating chapels and chambers with a quiet, enclosed atmosphere. The monastery’s name is traditionally associated with the Holy Lance, a relic said to have been kept there. Geghard’s buildings and setting show how closely Armenian religious architecture is connected to the natural landscape.

Etchmiadzin and Zvartnots: Early Christian Heritage

Armenia adopted Christianity as its state religion in the early fourth century, and its churches preserve some of the most important evidence of this early Christian history. Etchmiadzin Cathedral, in the city of Vagharshapat, is traditionally regarded as the oldest cathedral in the world. It remains a major spiritual centre for the Armenian Apostolic Church.

Nearby are the remains of Zvartnots Cathedral, built in the seventh century. Though the building was destroyed by an earthquake several centuries later, its circular ruins reveal the ambition of its original design. Together, Etchmiadzin and Zvartnots help tell the story of Armenia’s early Christian architecture and its influence on later generations.

Haghpat and Sanahin: Monasteries of Learning

In northern Armenia, the monasteries of Haghpat and Sanahin overlook the Debed River valley. Both were founded in the tenth century and are recognised by UNESCO for their architectural and cultural importance. Their churches, libraries, bell towers and khachkars reflect a period when monasteries served not only as religious centres but also as places of scholarship, manuscript production and education.

The khachkar, or carved stone cross, is one of Armenia’s most distinctive forms of memorial art. These finely worked stones can be found across the country, often in monastery courtyards and historic cemeteries. Each design is different, combining crosses with intricate patterns of leaves, rosettes and interlacing lines.

Noravank and Tatev: Monuments in the Mountains

Noravank Monastery is known for its warm-toned stone buildings and its location among the red cliffs of Vayots Dzor. The complex includes the Church of the Holy Mother of God, whose narrow external staircase has become one of Armenia’s most recognisable architectural features. The monastery was also an important centre of learning and the arts in the medieval period.

Further south, Tatev Monastery stands on a plateau above the Vorotan Gorge. Founded in the ninth century, it once served as a religious and educational centre. The vast gorge and surrounding mountains make Tatev’s setting as memorable as its architecture. The monastery is also a reminder of the ingenuity required to build and sustain communities in Armenia’s rugged terrain.

Preserving the Past

Armenia’s historical monuments have endured earthquakes, conflict, changing borders and the passage of time. Their preservation depends on careful restoration, responsible tourism and respect for their religious and cultural significance. Visitors can help by following local guidance, treating sacred spaces with care and avoiding damage to ancient stonework.

From Garni’s classical columns to the rock-cut chambers of Geghard, Armenia’s monuments reveal a rich and varied past. Each site offers a different perspective on the country’s history, while together they form an extraordinary cultural landscape—one that continues to inspire those who encounter it.


Celebrating Historical Monuments: Preserving Heritage and Inspiring Discovery

  1. Preserve history for future generations.
  2. Showcase remarkable architecture and craftsmanship.
  3. Help us understand past cultures and beliefs.
  4. Attract visitors and support local communities.
  5. Create a strong sense of place and identity.
  6. Inspire learning, curiosity and discovery.


Challenges Facing Historical Monuments: Maintenance Costs, Tourism Impact, and Accessibility Issues

  1. They can be costly to maintain.
  2. Tourism may cause overcrowding and damage.
  3. Access can be difficult for some visitors.

Preserve history for future generations.

Historical monuments preserve the stories, achievements and traditions of earlier generations, giving future generations a tangible link to the past. By protecting these places, we help people learn how communities lived, what they valued and how societies changed over time. Their lasting presence keeps history visible and meaningful, allowing it to be explored and passed on for years to come.

Showcase remarkable architecture and craftsmanship.

Historical monuments showcase remarkable architecture and craftsmanship, revealing the skill, creativity and vision of the people who built them. From finely carved stonework and intricate decorative details to ingenious structural designs, each feature offers a glimpse into the techniques and artistic traditions of its time. Preserving these monuments allows future generations to appreciate this expertise and understand how architecture reflects a society’s culture and history.

Help us understand past cultures and beliefs.

Historical monuments offer a window into the cultures and beliefs of people who lived before us. Their architecture, carvings, inscriptions and decorations reveal what communities valued, how they worshipped and how they organised daily life. By studying these places, we can better understand the ideas and traditions that shaped the past—and how they continue to influence the world today.

Attract visitors and support local communities.

Historical monuments attract visitors who come to explore their architecture, stories and cultural significance. This interest can support local communities by creating opportunities for guides, cafés, accommodation providers, craftspeople and other small businesses. When tourism is managed responsibly, it can also encourage investment in local services and help fund the care and preservation of these important sites.

Create a strong sense of place and identity.

Historical monuments create a strong sense of place and identity by connecting people with the stories, traditions and events that have shaped their community. Recognisable landmarks can become symbols of a town or region, fostering shared pride and belonging. They also give visitors a glimpse of what makes a place distinctive, helping its history remain part of everyday life.

Inspire learning, curiosity and discovery.

Historical monuments inspire learning, curiosity and discovery by bringing the past to life. Exploring an ancient temple, church or fortress encourages visitors to ask how it was built, who used it and what life was like at the time. In Armenia, monuments such as Garni and Geghard offer a vivid introduction to the country’s history, architecture and traditions, turning a visit into an opportunity to learn beyond the pages of a book.

They can be costly to maintain.

Historical monuments can be costly to maintain, as their age and delicate materials often require specialist repairs, skilled craftspeople and regular conservation work. Weather, pollution and heavy visitor numbers can accelerate deterioration, while restoration must be carried out carefully to preserve each site’s original character. These expenses can place a significant burden on public funds and local communities.

Tourism may cause overcrowding and damage.

Tourism can bring welcome attention and income to historical monuments, but large numbers of visitors may also cause overcrowding and physical damage. Constant foot traffic can wear down floors and pathways, while touching fragile surfaces, leaving litter or ignoring access rules can harm historic features. Crowds may also disrupt worship and make it harder for visitors to appreciate a site. Careful visitor management and responsible behaviour help protect these irreplaceable places for future generations.

Access can be difficult for some visitors.

Access to historical monuments can be difficult for some visitors. Many are located in remote areas, reached by uneven paths, steep steps or long walks, while historic buildings may lack ramps, lifts and accessible facilities. These challenges can make visits especially demanding for people with limited mobility, families with young children and older visitors. Planning ahead and checking access information can help, but improvements are often needed to make these important places welcoming to everyone.

Traditional Shepherd’s Pie Recipe: A Taste of British Comfort

shepherd's pie recipe

The Classic Shepherd’s Pie Recipe

Shepherd’s Pie is a comforting and hearty dish that has been a favourite in British households for generations. Made with minced lamb or beef, topped with creamy mashed potatoes, this dish is the epitome of comfort food.

Ingredients:

  • 500g minced lamb or beef
  • 1 onion, finely chopped
  • 2 carrots, diced
  • 2 cloves of garlic, minced
  • 400g tin of chopped tomatoes
  • 200ml beef stock
  • 1 tbsp Worcestershire sauce
  • Salt and pepper to taste
  • 900g potatoes, peeled and chopped
  • 50g butter
  • 100ml milk

Instructions:

  1. In a large pan, brown the minced meat over medium heat. Add the onions, carrots, and garlic, and cook until softened.
  2. Pour in the chopped tomatoes and beef stock. Add Worcestershire sauce, salt, and pepper. Simmer for 20-30 minutes until the mixture thickens.


Five Essential Tips for the Perfect Shepherd’s Pie

  1. Use minced lamb for a traditional shepherd’s pie flavour.
  2. Add Worcestershire sauce for an extra depth of flavour.
  3. Top the pie with creamy mashed potatoes for a comforting finish.
  4. Include finely chopped carrots and peas in the filling for added texture and nutrients.
  5. Bake the shepherd’s pie until the top is golden brown and crispy.

Use minced lamb for a traditional shepherd’s pie flavour.

For an authentic and traditional taste in your shepherd’s pie, opt for minced lamb as the key ingredient. Minced lamb brings a rich and distinctive flavour that is synonymous with classic shepherd’s pie recipes. The unique savour of lamb adds depth to the dish, enhancing its overall appeal and making each bite a delightful experience. Choose minced lamb to capture the true essence of this beloved British comfort food.

Add Worcestershire sauce for an extra depth of flavour.

For an extra depth of flavour in your Shepherd’s Pie, consider adding Worcestershire sauce to the meat mixture. This classic condiment enhances the savoury profile of the dish, adding a rich and tangy note that complements the minced lamb or beef perfectly. Just a tablespoon of Worcestershire sauce can elevate the overall taste and make your Shepherd’s Pie even more delicious and satisfying.

Top the pie with creamy mashed potatoes for a comforting finish.

To enhance the comforting appeal of your shepherd’s pie, ensure to top it with a generous layer of creamy mashed potatoes. This final touch not only adds a velvety texture to the dish but also creates a satisfying and homely finish that perfectly complements the savoury meat filling. The creamy mashed potatoes provide a delightful contrast to the rich flavours below, making each bite a truly comforting experience.

Include finely chopped carrots and peas in the filling for added texture and nutrients.

For an extra layer of texture and nutrients in your shepherd’s pie, consider adding finely chopped carrots and peas to the filling. Not only do these colourful vegetables enhance the visual appeal of the dish, but they also provide a boost of vitamins and fibre. The carrots add a subtle sweetness, while the peas contribute a pop of freshness, creating a well-balanced and wholesome filling that complements the savoury meat perfectly.

Bake the shepherd’s pie until the top is golden brown and crispy.

For a perfect finishing touch to your shepherd’s pie, bake it in the oven until the top is beautifully golden brown and crispy. This not only adds a delightful crunch to each bite but also enhances the visual appeal of the dish. The contrast between the creamy mashed potatoes and the crispy top creates a textural sensation that will have your taste buds dancing with joy. Be sure to keep an eye on it while baking to achieve that ideal balance of crispiness without burning.

Savoury Delights: Authentic Italian Wedding Soup Recipe

italian wedding soup recipe

Delicious Italian Wedding Soup Recipe

Italian wedding soup is a classic dish that combines savory meatballs, hearty greens, and flavorful broth. This comforting soup is perfect for any occasion and is sure to warm your soul. Here’s a simple recipe to help you recreate this Italian favourite in your own kitchen.

Ingredients:

  • 500g ground beef
  • 1/2 cup breadcrumbs
  • 1/4 cup grated Parmesan cheese
  • 1 egg
  • 1 small onion, finely chopped
  • 2 cloves of garlic, minced
  • Salt and pepper to taste
  • 8 cups chicken broth
  • 2 cups chopped spinach or kale
  • 1/2 cup orzo pasta

Instructions:

  1. In a bowl, combine the ground beef, breadcrumbs, Parmesan cheese, egg, onion, garlic, salt, and pepper. Mix well and form small meatballs.
  2. In a large pot, bring the chicken broth to a simmer. Add the meatballs and cook for about 10 minutes until they are cooked through.
  3. Add the chopped spinach or kale and orzo pasta to the pot. Simmer for an additional 10 minutes until the greens are wilted and the pasta is cooked.
  4. Your delicious Italian wedding soup is now ready to be served. Ladle into bowls and garnish with extra Parmesan cheese if desired. Enjoy!


Discover the Delight of Italian Wedding Soup: A Hearty, Customisable Recipe Perfect for Any Gathering

  1. 1. Comforting and hearty soup that is perfect for cold weather.
  2. 2. Easy-to-follow recipe with simple ingredients that are readily available.
  3. 3. Versatile dish that can be customised with different greens or pasta shapes.
  4. 4. The combination of meatballs, greens, and broth creates a delicious and balanced flavour profile.
  5. 5. Ideal for gatherings or family meals as it can be prepared in large batches.


Challenges of Preparing Traditional Italian Wedding Soup: Time, Ingredient Availability, and Freshness Concerns

  1. Preparation can be time-consuming due to making the meatballs from scratch.
  2. Some ingredients may not be readily available in all supermarkets.
  3. Leftovers may not retain the same freshness and flavour compared to when freshly cooked.

1. Comforting and hearty soup that is perfect for cold weather.

Indulge in the warmth and heartiness of Italian wedding soup, a comforting dish that is ideal for chilly weather. This soul-soothing soup not only fills your belly but also warms you from the inside out, making it a perfect choice for those cold winter days. The combination of savoury meatballs, nourishing greens, and flavourful broth creates a satisfying meal that brings a sense of comfort and coziness with every spoonful.

2. Easy-to-follow recipe with simple ingredients that are readily available.

This Italian wedding soup recipe offers the advantage of being easy to follow, using simple ingredients that are easily accessible. With basic components like ground beef, breadcrumbs, and broth, this recipe allows for a straightforward preparation process without the need for specialized or hard-to-find items. By utilising common ingredients that can be found in most kitchens or local grocery stores, this recipe ensures convenience and practicality for anyone looking to recreate this comforting and flavourful dish at home.

3. Versatile dish that can be customised with different greens or pasta shapes.

Italian wedding soup is a versatile dish that offers the flexibility to be customised according to personal preferences. One of its key advantages is the ability to experiment with various greens, such as spinach, kale, or escarole, to add different textures and flavours. Additionally, you can choose to use different pasta shapes like orzo, small shells, or ditalini to tailor the soup to your liking. This adaptability allows for endless variations of the traditional recipe, making it a delightful and personalised culinary experience for every cook and diner.

4. The combination of meatballs, greens, and broth creates a delicious and balanced flavour profile.

The Italian wedding soup recipe offers a delightful advantage with its harmonious blend of meatballs, greens, and broth. This combination results in a delicious and well-balanced flavour profile that tantalizes the taste buds. The savoury meatballs provide richness, while the hearty greens bring a fresh and vibrant element to the dish. Paired with the comforting broth, this medley of ingredients creates a satisfying and appetising culinary experience that is sure to please any palate.

5. Ideal for gatherings or family meals as it can be prepared in large batches.

Italian wedding soup is an ideal choice for gatherings or family meals due to its versatility in being prepared in large batches. This convenient aspect allows for easy scaling of the recipe to accommodate a larger number of guests without compromising on flavour or quality. Whether you’re hosting a special occasion or simply enjoying a cosy meal with loved ones, the ability to make a generous amount of this hearty soup ensures that everyone can savour its delicious taste together.

Preparation can be time-consuming due to making the meatballs from scratch.

Creating the meatballs from scratch for the Italian wedding soup recipe can be a time-consuming aspect of the preparation process. Crafting each meatball with care and ensuring they are perfectly seasoned and shaped requires patience and attention to detail. However, the effort put into making homemade meatballs is well worth it, as it adds a personal touch to the dish and enhances its flavour profile. While it may take a bit more time, the end result of a delicious and authentic Italian wedding soup is truly rewarding.

Some ingredients may not be readily available in all supermarkets.

One potential drawback of preparing an Italian wedding soup is that some of the ingredients required may not be readily available in all supermarkets. This can pose a challenge for individuals who prefer to source all their cooking essentials from a single store or those living in areas with limited access to specialty ingredients. However, with a bit of planning and exploration, alternative options or online shopping can often help overcome this obstacle, ensuring that you can still enjoy this delicious and comforting dish in the comfort of your own home.

Leftovers may not retain the same freshness and flavour compared to when freshly cooked.

When it comes to Italian wedding soup, one potential downside to consider is that leftovers may not maintain the same level of freshness and flavour as when the dish is freshly cooked. Due to the nature of the ingredients and broth, reheating the soup can sometimes result in a slight change in taste and texture. It is recommended to enjoy this soup fresh for the best culinary experience, although reheating leftovers can still offer a comforting meal with a slightly altered profile.

Traditional Apple Pie Recipe: A Taste of Home

apple pie recipe

Delicious Apple Pie Recipe

Delicious Apple Pie Recipe

If you’re looking for a classic dessert that never fails to please, then an apple pie is the perfect choice. With its buttery crust and sweet, cinnamon-spiced apple filling, this homemade treat is sure to become a family favourite.

Ingredients:

  • 6-7 medium-sized apples, peeled and sliced
  • 1 cup sugar
  • 2 tablespoons all-purpose flour
  • 1 teaspoon ground cinnamon
  • 1/4 teaspoon salt
  • 1 tablespoon lemon juice
  • Pastry for a double-crust pie (store-bought or homemade)
  • 2 tablespoons butter, cut into small pieces

Instructions:

  1. Preheat your oven to 200°C (400°F).
  2. In a large bowl, combine the sliced apples, sugar, flour, cinnamon, salt, and lemon juice. Toss until the apples are evenly coated.
  3. Roll out half of the pastry and line a 9-inch pie dish with it. Trim any excess dough hanging over the edges.
  4. Pour the apple mixture into the pastry-lined dish and dot with butter pieces.

  • Roll out the remaining pastry and place it over the apple filling. Trim and crimp the edges to seal the pie.

  • Cut slits in the top crust to allow steam to escape during baking.

  • Bake in the preheated oven for 45-50 minutes or until the crust is golden brown and the filling is bubbly.

  • Allow the pie to cool slightly before serving. Enjoy your delicious homemade apple pie!

  • .


    Essential Tips and Tricks for Perfecting Your Apple Pie Recipe

    1. 1. How do I make a homemade apple pie crust?
    2. 2. What are the best apples to use for apple pie?
    3. 3. Can I add other fruits to my apple pie filling?
    4. 4. How do I prevent my apple pie from becoming too watery?
    5. 5. Can I make an apple pie in advance and freeze it?
    6. 6. Is it necessary to peel the apples before making the pie?
    7. 7. What is the ideal thickness for rolling out the pastry for an apple pie?
    8. 8. Are there any alternative ingredients that can be used to replace sugar in the recipe?

    1. How do I make a homemade apple pie crust?

    For those wondering how to make a homemade apple pie crust, it’s easier than you think! To start, combine flour, salt, and cold butter in a bowl, then use a pastry cutter or your fingertips to blend the mixture until it resembles coarse crumbs. Gradually add ice water and mix until the dough comes together. Divide the dough into two portions, shape them into discs, wrap in plastic wrap, and chill in the fridge for at least an hour. When ready to use, roll out one disc for the bottom crust, fill with your apple pie filling, then cover with the second rolled-out disc for the top crust. Trim and crimp the edges before baking to golden perfection. Enjoy your delicious homemade apple pie with a flaky and buttery crust!

    2. What are the best apples to use for apple pie?

    When it comes to making the perfect apple pie, choosing the right apples is crucial to achieving a delicious outcome. The best apples for apple pie are those that strike a balance between sweet and tart flavours and hold their shape well during baking. Popular choices include Granny Smith apples for their tartness, Honeycrisp for their sweetness, and Jonagold for a combination of both. Experimenting with a mix of different apple varieties can also add depth to the flavour profile of your pie, ensuring a harmonious blend of tastes in every bite.

    3. Can I add other fruits to my apple pie filling?

    When it comes to making apple pie, the question of adding other fruits to the filling often arises. While traditional apple pie recipes typically focus on the delicious combination of apples, sugar, and spices, some adventurous bakers like to experiment with adding other fruits for a unique twist. Popular choices include berries like raspberries or blueberries, which can add a tart sweetness to complement the apples. Pears or peaches are also excellent options that can enhance the overall flavour profile of the pie. Ultimately, the decision to add other fruits comes down to personal preference and creativity in the kitchen.

    4. How do I prevent my apple pie from becoming too watery?

    To prevent your apple pie from becoming too watery, it is essential to take a few key steps during the preparation process. One effective method is to pre-cook the apples slightly before assembling the pie. This helps to release some of the moisture from the fruit, reducing the chances of a soggy bottom crust. Additionally, incorporating a thickening agent like flour or cornstarch into the apple filling can help absorb excess liquid and create a more stable consistency. Lastly, ensuring that there are proper vents or slits in the top crust allows steam to escape during baking, preventing condensation and potential sogginess. By following these tips, you can enjoy a perfectly balanced and delicious apple pie with a crisp crust and flavourful filling.

    5. Can I make an apple pie in advance and freeze it?

    Yes, you can make an apple pie in advance and freeze it for later. To freeze an apple pie, assemble the pie as usual but do not bake it. Instead, wrap the unbaked pie tightly in plastic wrap or aluminum foil to prevent freezer burn. You can then store the wrapped pie in the freezer for up to 4-6 months. When you’re ready to bake the frozen pie, simply place it in a preheated oven and add a few extra minutes to the baking time to ensure that the filling is cooked through. Freezing an apple pie is a convenient way to have a homemade dessert on hand whenever you need it.

    6. Is it necessary to peel the apples before making the pie?

    When preparing an apple pie, whether or not to peel the apples is a matter of personal preference. While some recipes call for peeled apples to achieve a smoother texture in the filling, leaving the peels on can add a rustic appearance and extra nutrients to the pie. The decision to peel or not to peel ultimately depends on your desired taste and texture for the final dish.

    7. What is the ideal thickness for rolling out the pastry for an apple pie?

    When it comes to rolling out pastry for an apple pie, the ideal thickness plays a crucial role in achieving the perfect balance between a flaky crust and a well-cooked filling. Generally, aiming for a thickness of around 1/8 to 1/4 inch (3-6 mm) is recommended. This thickness allows the pastry to hold its shape while baking, ensuring that it is sturdy enough to support the juicy apple filling yet remains tender and delicious. It’s important to roll out the pastry evenly to maintain consistency throughout the pie and create a harmonious texture with each bite.

    8. Are there any alternative ingredients that can be used to replace sugar in the recipe?

    For those looking to reduce their sugar intake or explore alternative sweeteners, there are several options that can be used as substitutes in an apple pie recipe. One popular choice is to use honey or maple syrup as a natural sweetener, adding a unique flavour profile to the dessert. Another option is to opt for a sugar substitute like stevia or erythritol for a lower-calorie alternative. Experimenting with different sweeteners can provide a healthier twist to the traditional apple pie while still maintaining its delicious taste and appeal.

    Delightful Pumpkin Pie Recipe for a Taste of Autumn

    pumpkin pie recipe

    The Perfect Pumpkin Pie Recipe

    There’s nothing quite like the warm, comforting taste of pumpkin pie on a crisp autumn day. Whether you’re preparing for a festive gathering or simply craving a seasonal treat, this classic recipe is sure to delight your taste buds.

    Ingredients:

    • 1 1/2 cups pumpkin puree
    • 1 can (14 oz) sweetened condensed milk
    • 2 eggs
    • 1 teaspoon ground cinnamon
    • 1/2 teaspoon ground ginger
    • 1/4 teaspoon ground nutmeg
    • 1/4 teaspoon salt
    • 1 unbaked 9-inch pie crust

    Instructions:

    1. Preheat your oven to 425°F (220°C).
    2. In a large mixing bowl, combine the pumpkin puree, sweetened condensed milk, eggs, spices, and salt. Mix until smooth and well combined.
    3. Pour the mixture into the unbaked pie crust and spread it evenly.
    4. Bake the pie in the preheated oven for 15 minutes.
    5. Reduce the oven temperature to 350°F (180°C) and continue baking for another 35-40 minutes or until the filling is set.

    Serving Suggestions:

    This pumpkin pie is delicious on its own, but you can take it to the next level by serving it with a dollop of whipped cream or a scoop of vanilla ice cream. Sprinkle some cinnamon on top for an extra touch of flavour.

    Enjoy this homemade pumpkin pie with loved ones and savour the taste of autumn in every bite!


    Top 5 Tips for Perfecting Your Pumpkin Pie Recipe

    1. Use fresh pumpkin puree for the best flavour and texture.
    2. Add warming spices like cinnamon, nutmeg, and ginger for a delicious autumnal taste.
    3. Pre-bake the pie crust before adding the filling to prevent it from becoming soggy.
    4. Let the pie cool completely before serving to allow the flavours to develop fully.
    5. Serve with a dollop of whipped cream or a scoop of vanilla ice cream for a delightful finishing touch.

    Use fresh pumpkin puree for the best flavour and texture.

    For the best flavour and texture in your pumpkin pie, it is recommended to use fresh pumpkin puree. By using fresh pumpkin, you can enhance the natural sweetness and richness of the pie, resulting in a more authentic and delectable dessert. Fresh pumpkin puree adds a depth of flavour that canned versions may lack, giving your pie a homemade touch that will surely impress your taste buds and those who indulge in this seasonal treat.

    Add warming spices like cinnamon, nutmeg, and ginger for a delicious autumnal taste.

    Enhance the flavour of your pumpkin pie by incorporating a medley of warming spices such as cinnamon, nutmeg, and ginger. These aromatic additions not only infuse your dessert with a delightful autumnal essence but also elevate its overall taste profile. The combination of these spices adds depth and richness to each bite, creating a truly comforting and seasonal treat that is bound to be a hit at any gathering or as a special indulgence for yourself.

    Pre-bake the pie crust before adding the filling to prevent it from becoming soggy.

    To ensure a perfect pumpkin pie with a crisp and flaky crust, it is recommended to pre-bake the pie crust before adding the filling. This crucial step helps prevent the crust from becoming soggy as it bakes with the pumpkin mixture. By pre-baking the crust, you create a barrier that maintains the texture and integrity of the pastry, resulting in a delightful contrast to the creamy pumpkin filling. This simple tip ensures that every slice of your pumpkin pie is met with a satisfying crunch and delicious flavour combination.

    Let the pie cool completely before serving to allow the flavours to develop fully.

    To truly savour the delightful flavours of a freshly baked pumpkin pie, it is essential to exercise patience and allow the pie to cool completely before serving. This crucial step not only enhances the texture of the pie but also allows the rich blend of spices and pumpkin to meld together, resulting in a more harmonious and fully developed taste experience. By giving the pie ample time to cool, you are ensuring that each bite is a delicious celebration of autumn’s finest flavours.

    Serve with a dollop of whipped cream or a scoop of vanilla ice cream for a delightful finishing touch.

    Enhance the indulgent experience of enjoying a slice of freshly baked pumpkin pie by adding a generous dollop of airy whipped cream or a scoop of creamy vanilla ice cream. The contrasting textures and flavours create a harmonious balance that elevates the dessert to new heights, offering a delightful and satisfying finishing touch to each bite. Whether served at a festive gathering or as a cosy treat at home, this simple addition adds an extra layer of decadence to an already beloved autumn classic.

    Delicious Sunday Roast: Mouthwatering Rib Roast Recipe

    rib roast recipe

    The Perfect Rib Roast Recipe for a Delicious Sunday Roast

    There’s nothing quite like the aroma of a succulent rib roast filling your kitchen on a lazy Sunday afternoon. This classic dish is a favourite for gatherings and special occasions, and with the right recipe, you can easily recreate this culinary masterpiece at home.

    Ingredients:

    • 1 bone-in rib roast (about 4-5 kg)
    • 4 cloves of garlic, minced
    • 2 tablespoons of olive oil
    • Salt and pepper to taste
    • Fresh herbs (rosemary, thyme) for seasoning

    Instructions:

    1. Preheat your oven to 220°C.
    2. In a small bowl, mix the minced garlic, olive oil, salt, and pepper to create a paste.
    3. Rub the garlic paste all over the rib roast, ensuring it is evenly coated.
    4. Place the seasoned roast in a roasting pan with the bone side down.
    5. Add fresh herbs on top of the roast for extra flavour.
    6. Roast the meat in the preheated oven for about 15 minutes to achieve a nice sear.
    7. Reduce the oven temperature to 160°C and continue roasting for about 2-3 hours or until a meat thermometer reads your desired level of doneness (around 55-60°C for medium-rare).
    8. Once cooked to perfection, remove the roast from the oven and let it rest for 20-30 minutes before carving.

    Serve your beautifully roasted rib with Yorkshire pudding, roasted vegetables, and gravy for a traditional Sunday feast that will impress your guests. Enjoy!

    This rib roast recipe is sure to become a staple in your culinary repertoire, perfect for creating memorable meals with loved ones. Give it a try and savour the delicious flavours of this classic dish!


    Essential FAQs for Perfecting Your Rib Roast Recipe

    1. What is the best method to cook a rib roast?
    2. What is the secret to making perfect prime rib?
    3. What temperature do you cook a rib roast?
    4. What is the 500 rule for prime rib roast?
    5. What’s the difference between a rib roast and a prime rib?
    6. What is the cooking time for a standing rib roast?

    What is the best method to cook a rib roast?

    When it comes to cooking a rib roast, the best method is to start with a high-heat sear to lock in the juices and then finish it off with a slow roast at a lower temperature. This two-step process ensures that the meat is cooked evenly and remains tender and flavourful. By using fresh herbs, garlic, and seasoning to enhance the flavours, you can create a mouth-watering rib roast that will be the star of any meal. Remember to allow the roast to rest before carving to ensure maximum juiciness. With this tried-and-tested method, you can achieve a perfectly cooked rib roast that will delight your taste buds every time.

    What is the secret to making perfect prime rib?

    For those seeking the secret to crafting the perfect prime rib, attention to detail and quality ingredients are key. The secret lies in selecting a high-quality bone-in rib roast, allowing it to come to room temperature before cooking, and generously seasoning it with a blend of garlic, herbs, salt, and pepper. Achieving the ideal level of doneness by monitoring the internal temperature is crucial, ensuring a juicy and tender result. Letting the roast rest after cooking allows the juices to redistribute, enhancing its flavour. By following these steps diligently and with care, one can unlock the secret to creating a perfect prime rib that will delight diners with its succulence and rich taste.

    What temperature do you cook a rib roast?

    When cooking a rib roast, the recommended temperature for achieving a perfect result is to start with a high heat of around 220°C to create a nice sear on the meat. After the initial searing, it is advised to reduce the oven temperature to 160°C for the remainder of the cooking time. This lower temperature allows the rib roast to cook evenly and retain its juicy tenderness, ensuring that it reaches the desired level of doneness. Monitoring the internal temperature of the roast with a meat thermometer is also crucial to ensure it is cooked to your preference, typically around 55-60°C for a medium-rare finish. By following these temperature guidelines, you can enjoy a beautifully cooked rib roast that is both flavourful and succulent.

    What is the 500 rule for prime rib roast?

    The 500 rule for prime rib roast is a handy guideline used by many chefs to determine the cooking time for a rib roast based on its weight. According to this rule, you should initially sear the roast at 500°F (260°C) for a specific period, usually around 5-7 minutes per pound of meat. After searing, you then reduce the oven temperature to a lower setting for the remaining cooking time to ensure that the roast cooks evenly and retains its juiciness. By following the 500 rule, you can achieve a perfectly cooked prime rib roast with a deliciously caramelized exterior and tender, juicy interior that will delight your taste buds.

    What’s the difference between a rib roast and a prime rib?

    When it comes to the culinary world, the distinction between a rib roast and a prime rib often sparks curiosity among food enthusiasts. The key disparity lies in their preparation and presentation. A rib roast refers to the cut of beef before it is cooked, typically featuring a bone-in structure that adds flavour during roasting. On the other hand, prime rib is the term used for the same cut after it has been cooked to perfection, showcasing juicy and tender meat that is often served as a luxurious main course. Understanding this subtle contrast can enhance your appreciation for these delectable dishes and elevate your dining experience.

    What is the cooking time for a standing rib roast?

    When preparing a standing rib roast, the cooking time is a crucial factor in achieving the perfect level of doneness. Typically, a standing rib roast requires approximately 15 minutes of initial high-temperature roasting to create a sear on the meat. After this initial step, the oven temperature should be reduced to around 160°C for the remainder of the cooking process. The total cooking time for a standing rib roast can vary depending on factors such as the size of the roast and desired level of doneness, but as a general guideline, it may take about 2-3 hours for the roast to reach medium-rare doneness. Using a meat thermometer to monitor the internal temperature is recommended to ensure that your standing rib roast is cooked to perfection.