High Protein Breakfast Ideas for a Filling Start to the Day
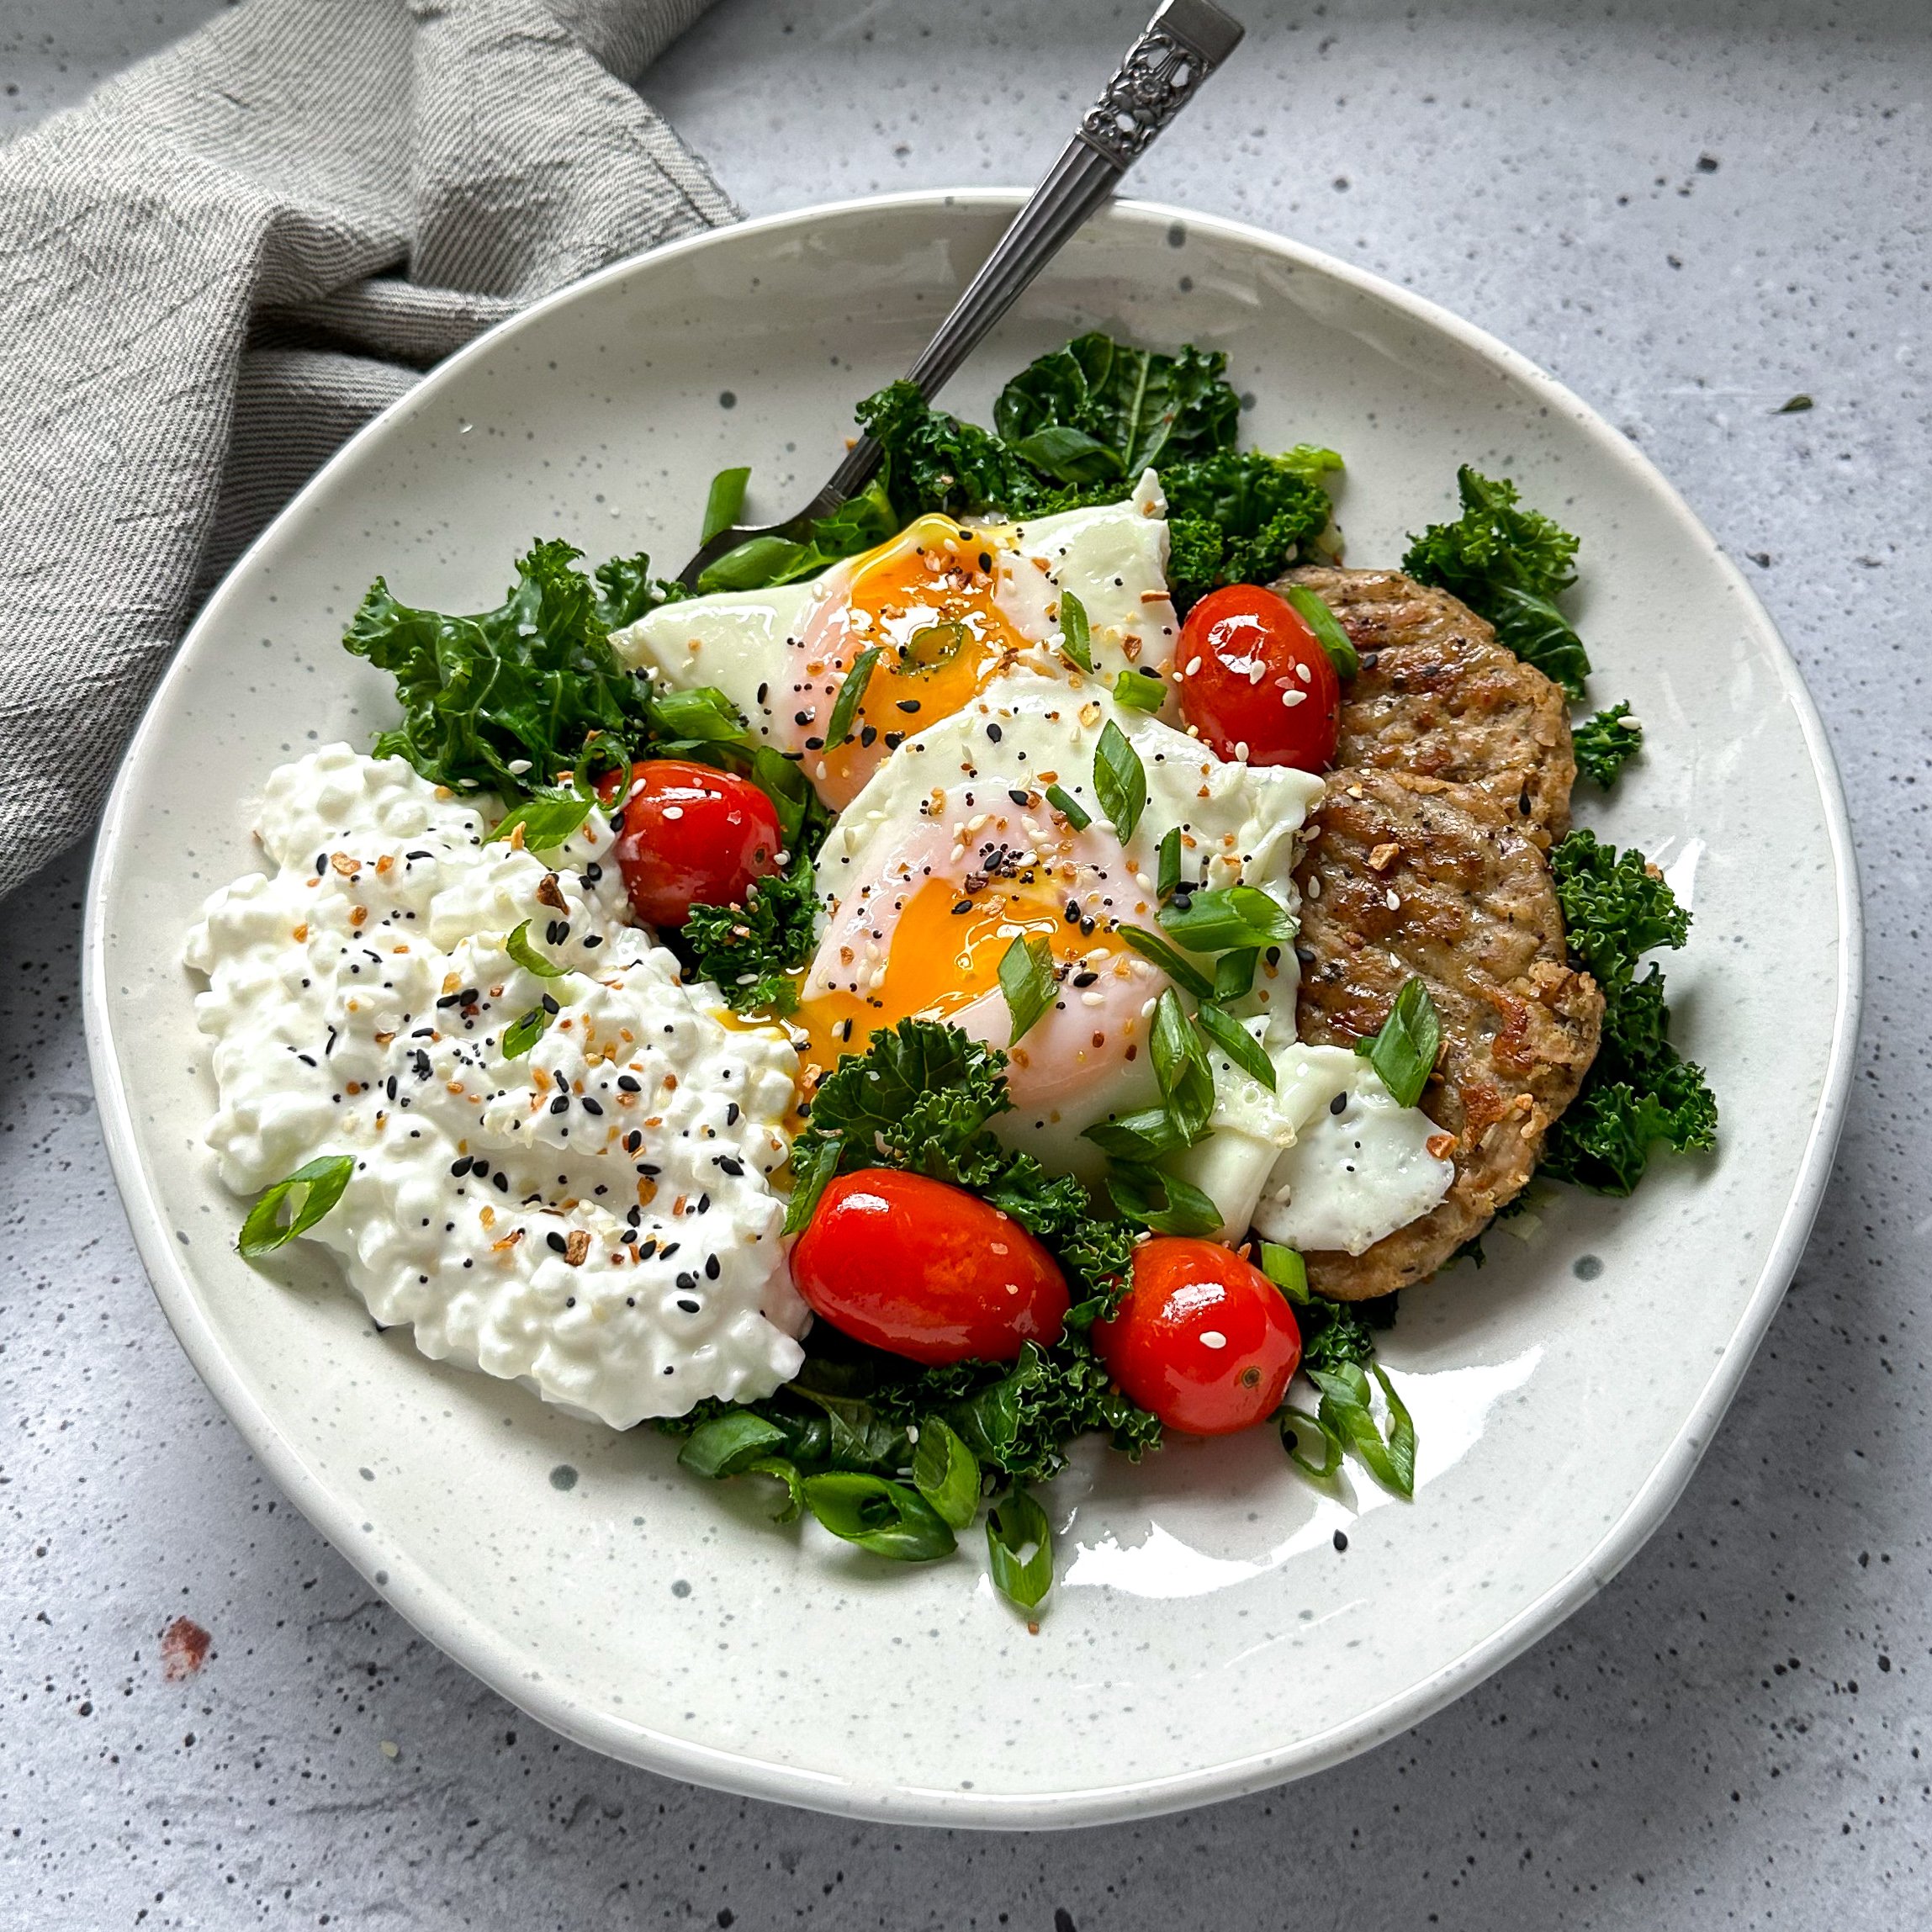
high protein breakfast

High-Protein Breakfast: Simple Ideas to Start the Day

A high-protein breakfast can be a satisfying way to begin the day. Protein helps build and maintain muscles and is needed for many other functions in the body. Including a source of protein in your morning meal may also help it feel more filling, especially when paired with fibre-rich foods such as fruit, vegetables or wholegrains.

There is no single perfect breakfast for everyone. Your appetite, routine, food preferences and overall diet all matter. The ideas below can be adapted to suit different tastes and budgets.

What counts as a high-protein breakfast?

A high-protein breakfast includes a substantial protein source, such as eggs, dairy, fish, meat, tofu, beans or lentils. The amount of protein in a meal will depend on the ingredients and portion sizes, so check food labels if you want to keep track.

It can help to build a balanced plate rather than focusing on protein alone. Add wholegrain carbohydrates for energy and fibre, and include fruit or vegetables where you can.

High-protein breakfast ideas

  • Greek yoghurt with oats and fruit: Choose plain Greek yoghurt and top it with oats, berries and a small handful of nuts or seeds.
  • Eggs on wholemeal toast: Scrambled, boiled or poached eggs pair well with wholemeal toast, tomatoes, mushrooms or spinach.
  • Cottage cheese on toast: Add sliced tomatoes, cucumber or avocado for extra flavour and texture.
  • Smoked salmon and eggs: Serve with rye or wholemeal bread and a side of greens. Smoked fish can be high in salt, so enjoy it as part of a varied diet.
  • Tofu scramble: Crumble tofu into a pan with vegetables and seasoning, then serve with toast or warm flatbread.
  • Beans on wholemeal toast: Beans provide protein as well as fibre, making this a filling and affordable option.
  • Overnight oats with yoghurt: Mix oats with milk or fortified soya drink and yoghurt, then leave in the fridge overnight. Add fruit and seeds before serving.
  • Breakfast wrap: Fill a wholemeal wrap with eggs, beans or tofu, plus vegetables and a little cheese or salsa.

Plant-based protein options

A protein-rich breakfast does not have to include meat, fish or dairy. Tofu, beans, lentils, nuts, seeds and soya products can all contribute protein. Fortified soya drinks and soya yoghurt are useful alternatives to dairy; compare labels, as protein content and added sugars vary between products.

For a more substantial plant-based meal, combine a protein source with wholegrains. For example, try beans with wholemeal toast, tofu with brown rice, or soya yoghurt with oats and nuts.

Making breakfast work on busy mornings

A nutritious breakfast need not take long to prepare. Try boiling eggs in advance, preparing overnight oats the evening before, or keeping yoghurt, fruit and nuts ready to combine. Leftovers can also work well: a portion of beans, tofu or vegetables can be reheated and served with toast.

If you are not hungry first thing, you do not have to force yourself to eat immediately. A breakfast you can take with you, or a later first meal, may fit your routine better.

Keep the bigger picture in mind

Protein is one part of a healthy diet. A breakfast with a mix of protein, fibre and other nourishing ingredients can offer variety and help keep you satisfied, but no single meal determines your overall health. Choose foods you enjoy and can include comfortably in your usual routine.

If you have specific dietary needs or a health condition that affects what you eat, a registered dietitian or other qualified healthcare professional can provide advice tailored to you.


6 Tips for a Protein-Packed Breakfast to Start Your Day Right

  1. Add eggs to wholegrain toast for a filling start.
  2. Choose Greek yoghurt with nuts and berries.
  3. Stir protein-rich seeds into porridge.
  4. Try cottage cheese with fruit or toast.
  5. Make a quick omelette with leftover vegetables.
  6. Check labels on breakfast cereals for protein and added sugar.

Add eggs to wholegrain toast for a filling start.

Add eggs to wholegrain toast for a simple, filling start to the day. Eggs provide protein, while wholegrain bread adds fibre and steady-release carbohydrates. Serve with tomatoes, mushrooms or spinach for extra flavour and a portion of vegetables.

Choose Greek yoghurt with nuts and berries.

Choose Greek yoghurt with nuts and berries for a quick, satisfying high-protein breakfast. Greek yoghurt provides protein, while nuts add crunch and healthy fats, and berries bring natural sweetness, fibre and flavour. For extra texture, sprinkle over a few oats or seeds.

Stir protein-rich seeds into porridge.

Stir protein-rich seeds, such as chia, hemp or pumpkin seeds, into your porridge for an easy breakfast boost. They add a pleasant crunch and pair well with fruit, yoghurt or a little nut butter. Start with a small spoonful and adjust to taste, as seeds can also add plenty of fibre and energy.

Try cottage cheese with fruit or toast.

Try cottage cheese with fruit or toast for a quick, versatile high-protein breakfast. Pair it with berries or sliced peach for a fresh, lightly sweet option, or spread it on wholemeal toast and add tomatoes or cucumber for something savoury. Choose the combination you enjoy most, and check the label if you’d like to compare protein levels between brands.

Make a quick omelette with leftover vegetables.

Make a quick omelette with leftover vegetables for an easy, protein-rich breakfast that helps reduce food waste. Beat a couple of eggs, pour them into a heated non-stick pan, then add chopped cooked vegetables such as spinach, peppers, mushrooms or courgette. Cook until the eggs are set, fold and serve with wholemeal toast for a more filling meal.

Check labels on breakfast cereals for protein and added sugar.

Check the labels on breakfast cereals for both protein and added sugar, as products can vary considerably. Compare the figures per 100 g to make a fair comparison, and check the serving size too. Choose a cereal with more protein and less added sugar where possible, then serve it with milk, yoghurt, nuts or seeds for an extra protein boost.
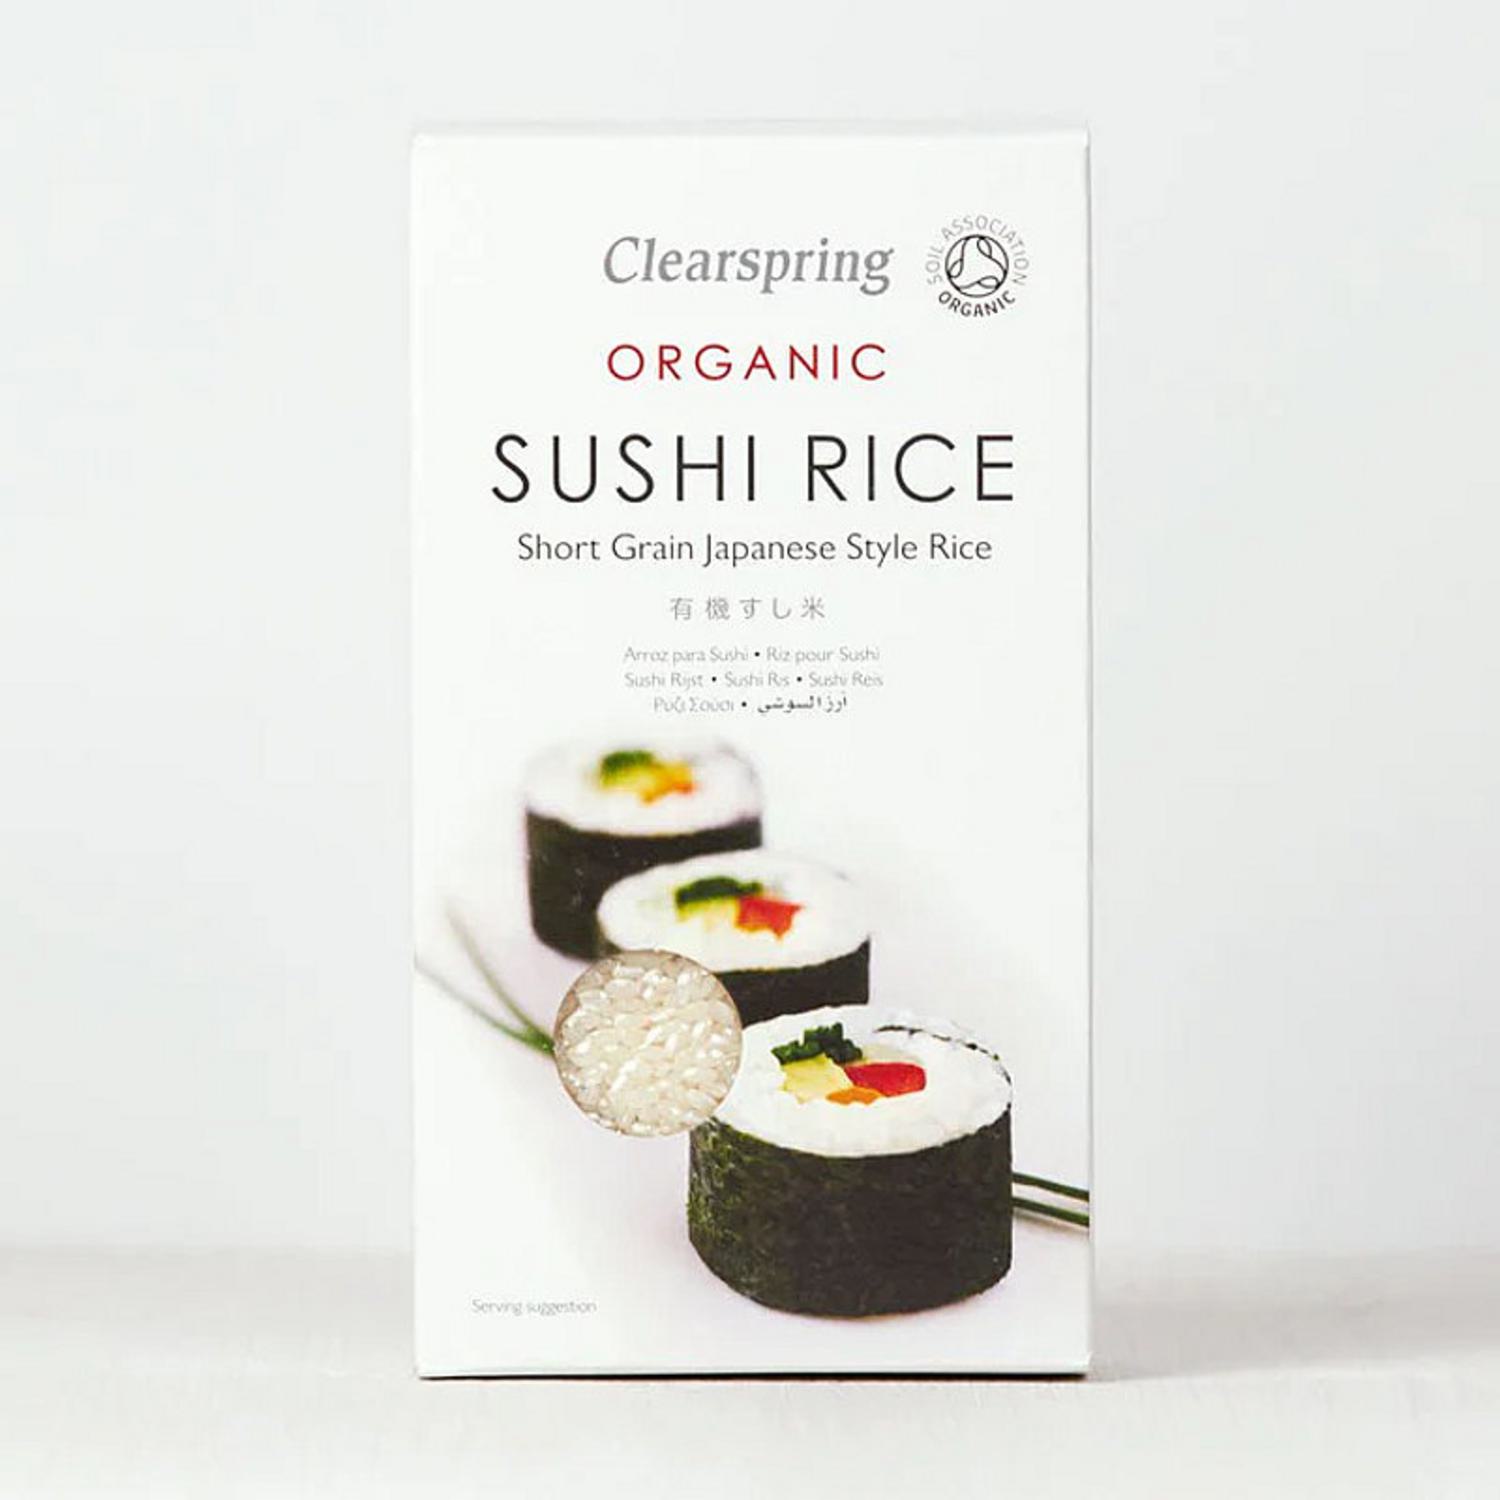

The Essence of Sushi Rice: A Culinary Journey Through Japan’s Finest Grain

sushi rice

The Art of Sushi Rice: A Culinary Masterpiece

Sushi, a beloved Japanese delicacy, is not just about fresh fish and colourful toppings. At the heart of every sushi roll lies a crucial element that often goes unnoticed but plays a pivotal role in the overall taste and texture – sushi rice.

Sushi rice, also known as shari or sumeshi, is more than just steamed rice. It is a carefully crafted blend of short-grain Japanese rice, vinegar, sugar, and salt. The art of making sushi rice involves precise measurements and meticulous technique to achieve the perfect balance of flavours.

What sets sushi rice apart from regular steamed rice is its seasoning. The combination of vinegar, sugar, and salt not only enhances the taste but also gives the rice its characteristic glossy sheen and sticky texture that holds the sushi roll together.

When preparing sushi rice, it is essential to use high-quality Japanese short-grain rice known for its sticky consistency when cooked. The rice is rinsed multiple times to remove excess starch before being cooked in water. Once cooked, it is seasoned with a mixture of rice vinegar, sugar, and salt while still hot.

The seasoned sushi rice serves as the foundation for various types of sushi – from nigiri (hand-pressed sushi) to maki (sushi rolls). Its subtle tanginess complements the fresh seafood or other toppings placed on top, creating a harmonious blend of flavours with each bite.

In Japanese culinary tradition, mastering the art of sushi rice is considered a mark of skill and expertise. Sushi chefs spend years honing their craft to achieve the perfect balance of flavours and textures that elevate each bite into a culinary masterpiece.

Next time you savour a piece of sushi, take a moment to appreciate the humble yet essential ingredient that binds it all together – the meticulously prepared sushi rice.


The Benefits of Sushi Rice: Texture, Flavour, Versatility, and Culinary Artistry

  1. Sushi rice has a sticky texture that holds the sushi roll together, making it easy to eat.
  2. The seasoning of sushi rice with vinegar, sugar, and salt adds a delightful tangy flavour to each bite.
  3. High-quality Japanese short-grain rice used for sushi rice is known for its excellent stickiness when cooked.
  4. Sushi rice is versatile and serves as the base for various types of sushi, from nigiri to maki rolls.
  5. The glossy sheen of sushi rice enhances the visual appeal of sushi dishes.
  6. Mastering the art of preparing sushi rice showcases culinary skill and attention to detail.


Considerations When Eating Sushi Rice: High Carbohydrates, Calorie Density, and Allergen Risks

  1. High in Carbohydrates
  2. Calorie Dense
  3. Potential Allergen

Sushi rice has a sticky texture that holds the sushi roll together, making it easy to eat.

The sticky texture of sushi rice is a key advantage that enhances the overall dining experience. By holding the sushi roll together effectively, this unique characteristic makes it effortless and enjoyable to eat. The cohesive nature of sushi rice ensures that each bite maintains its form, allowing diners to relish the flavours and textures without worrying about the roll falling apart. This practical aspect adds to the appeal of sushi as a convenient and satisfying culinary choice for those seeking a seamless dining experience.

The seasoning of sushi rice with vinegar, sugar, and salt adds a delightful tangy flavour to each bite.

The artful seasoning of sushi rice with a blend of vinegar, sugar, and salt introduces a delightful tangy essence to every bite. This harmonious combination not only enhances the overall taste of the sushi but also contributes to its unique character, offering a refreshing and nuanced flavour profile that complements the fresh ingredients and elevates the dining experience.

High-quality Japanese short-grain rice used for sushi rice is known for its excellent stickiness when cooked.

High-quality Japanese short-grain rice, favoured for sushi rice preparation, boasts a remarkable stickiness once cooked. This unique characteristic of the rice variety plays a vital role in the art of sushi-making, as it enables the grains to bind together seamlessly, creating the perfect texture for sushi rolls and nigiri. The inherent stickiness of this rice variety not only enhances the structural integrity of the sushi but also contributes to the overall dining experience by ensuring that each bite is cohesive and satisfying.

Sushi rice is versatile and serves as the base for various types of sushi, from nigiri to maki rolls.

Sushi rice’s versatility shines as it serves as the fundamental component for a wide array of sushi creations, ranging from traditional nigiri to popular maki rolls. Its sticky texture and subtly seasoned flavour make it the perfect canvas for showcasing an assortment of fresh toppings and fillings, allowing for endless creativity in crafting diverse sushi dishes. Whether elegantly hand-pressed into nigiri or tightly rolled into colourful maki rolls, sushi rice’s adaptability and ability to harmonize with different ingredients truly make it a cornerstone of Japanese culinary artistry.

The glossy sheen of sushi rice enhances the visual appeal of sushi dishes.

The glossy sheen of sushi rice serves as more than just a visual enhancement to sushi dishes; it is a testament to the meticulous preparation and skilled craftsmanship involved in creating these culinary delights. This lustrous finish not only adds an element of sophistication to the presentation but also signals the quality and attention to detail that goes into every sushi roll. The shiny appearance of the rice entices diners, inviting them to indulge in a sensory experience that is not only delicious but visually captivating as well.

Mastering the art of preparing sushi rice showcases culinary skill and attention to detail.

Mastering the art of preparing sushi rice showcases culinary skill and attention to detail. The precision required in measuring the ingredients, the delicate balance of vinegar, sugar, and salt, and the meticulous technique of cooking and seasoning the rice all demonstrate a chef’s dedication to their craft. The ability to create perfectly seasoned sushi rice not only enhances the overall flavour profile of sushi dishes but also reflects a deep understanding of Japanese culinary traditions. Attention to detail in every step of the rice preparation process is essential to ensure that each grain is infused with just the right amount of flavour, resulting in a harmonious blend that elevates the entire sushi dining experience.

High in Carbohydrates

One drawback of sushi rice is its high carbohydrate content, making it a less ideal choice for individuals adhering to low-carb diets. The combination of rice, vinegar, sugar, and salt used in sushi rice results in a significant carbohydrate load per serving. For those watching their carb intake, opting for alternatives like cauliflower rice or seaweed wraps can provide a lower-carb option while still enjoying the flavours of sushi. It’s important for individuals mindful of their carbohydrate consumption to consider the impact of sushi rice on their dietary preferences and make informed choices accordingly.

Calorie Dense

One drawback of sushi rice is its calorie density. The addition of sugar in the seasoning process can significantly increase the calorie content of the rice. Consuming sushi rice excessively may contribute to weight gain, as the extra calories from the sugar can add up quickly. It’s important for individuals mindful of their calorie intake to be aware of this aspect when enjoying sushi, and to practice moderation to maintain a balanced diet.

Potential Allergen

For some individuals, sushi rice may pose a potential con as it contains ingredients that could trigger allergic reactions. The seasoning of sushi rice often includes vinegar, which can be problematic for those with vinegar allergies. Additionally, certain types of rice used in sushi preparation may also be allergenic to some individuals. These allergens have the potential to cause adverse reactions in sensitive individuals, highlighting the importance of being mindful of ingredient choices when enjoying sushi dishes.

Delightful Homemade Cake Recipe: A Guide to Baking Sweet Perfection

cake recipe

The Perfect Victoria Sponge Cake Recipe

Indulge in the classic delight of a homemade Victoria Sponge cake with this simple and delicious recipe. Whether you’re hosting a tea party or simply craving a sweet treat, this cake is sure to impress.

Ingredients:

  • 200g unsalted butter, softened
  • 200g caster sugar
  • 4 medium eggs
  • 200g self-raising flour
  • 1 tsp baking powder
  • 2 tbsp milk
  • Raspberry jam and whipped cream, to fill
  • Icing sugar, for dusting

Instructions:

  1. Preheat your oven to 180°C (160°C fan) and grease two 20cm round cake tins.
  2. In a large bowl, cream together the butter and sugar until light and fluffy.
  3. Add the eggs one at a time, beating well after each addition.
  4. Sift in the flour and baking powder, then gently fold into the mixture until well combined. Add the milk to loosen the batter slightly.

    li>Divide the batter evenly between the prepared cake tins and smooth the tops with a spatula.

    li>Bake in the preheated oven for 20-25 minutes or until golden and springy to the touch.

    li>Allow the cakes to cool in their tins for 5 minutes before transferring them to a wire rack to cool completely.

    li>To assemble the cake, spread raspberry jam on one layer and whipped cream on top of it. Place the second layer on top.

    li>Dust with icing sugar before serving. Enjoy your delicious homemade Victoria Sponge cake!

This Victoria Sponge cake is a timeless classic that never fails to impress. With its light and fluffy texture complemented by sweet jam and cream filling, it’s perfect for any occasion. So why not roll up your sleeves, preheat that oven, and treat yourself to a slice of homemade goodness?

Bon appétit!


Essential Tips and Tricks for Perfecting Your Cake Baking Skills: Answers to Common Questions

  1. 1. How do I make a basic sponge cake?
  2. 2. What are the essential ingredients for a classic Victoria Sponge cake?
  3. 3. Can I substitute self-raising flour with plain flour in a cake recipe?
  4. 4. How can I prevent my cake from being too dry?
  5. 5. What is the best method for creaming butter and sugar when baking a cake?
  6. 6. How do I know when my cake is fully baked and ready to be taken out of the oven?
  7. 7. Is it necessary to preheat the oven before baking a cake?
  8. 8. What are some creative ideas for decorating a homemade cake?
  9. 9. Are there any tips for storing leftover cake to keep it fresh?

1. How do I make a basic sponge cake?

For those wondering how to make a basic sponge cake, the process is surprisingly straightforward. Start by creaming together softened butter and caster sugar until light and fluffy. Then, gradually add eggs one at a time, ensuring each is well incorporated. Sift in self-raising flour and baking powder, gently folding them into the mixture. A touch of milk can be added to achieve the desired consistency. Divide the batter between cake tins, bake until golden and springy, then allow to cool before filling with jam and cream. This simple recipe results in a light, airy sponge cake that is perfect for any occasion.

2. What are the essential ingredients for a classic Victoria Sponge cake?

When it comes to baking a classic Victoria Sponge cake, the essential ingredients you’ll need include unsalted butter for richness, caster sugar for sweetness, eggs for structure, self-raising flour for lightness, baking powder for a bit of lift, and a touch of milk to bring everything together. These key components come together to create a soft and moist sponge that serves as the perfect base for layering with raspberry jam and whipped cream. Mastering the balance of these ingredients is crucial in achieving that quintessential Victoria Sponge cake texture and flavour that everyone loves.

3. Can I substitute self-raising flour with plain flour in a cake recipe?

When it comes to baking cakes, the choice between self-raising flour and plain flour can impact the texture and rise of your final product. While self-raising flour already contains a raising agent, such as baking powder, plain flour does not. If you find yourself without self-raising flour, you can create a substitute by adding baking powder to plain flour. However, it’s essential to adjust the quantities carefully to ensure the right balance of ingredients for your cake recipe. Experimenting with different flour options can lead to variations in texture and density, so it’s advisable to follow the recipe closely for best results.

4. How can I prevent my cake from being too dry?

To prevent your cake from turning out too dry, there are a few key tips to keep in mind. Firstly, make sure not to overmix the batter, as this can result in a tough and dry texture. Be sure to measure your ingredients accurately and follow the recipe instructions closely. Additionally, avoid overbaking the cake by regularly checking it towards the end of the baking time and using a toothpick to test for doneness. If the toothpick comes out clean with a few crumbs attached, it’s ready to be taken out of the oven. Lastly, consider adding ingredients like sour cream, buttermilk, or applesauce to help maintain moisture in your cake. By following these guidelines, you can ensure a moist and delicious cake every time you bake.

5. What is the best method for creaming butter and sugar when baking a cake?

When baking a cake, the best method for creaming butter and sugar is to ensure that the butter is at room temperature for optimal results. Start by placing softened unsalted butter and caster sugar in a mixing bowl. Using an electric mixer or wooden spoon, beat the butter and sugar together until light and fluffy. This process incorporates air into the mixture, resulting in a lighter texture for your cake. It is essential to cream the butter and sugar adequately to create a smooth and uniform base for your cake batter, which will ultimately contribute to a moist and tender crumb in the finished cake.

6. How do I know when my cake is fully baked and ready to be taken out of the oven?

To determine if your cake is fully baked and ready to be taken out of the oven, you can use a few simple techniques. Firstly, check the colour of the cake – it should be golden brown and evenly baked. You can also insert a skewer or toothpick into the centre of the cake; if it comes out clean with no wet batter sticking to it, your cake is likely done. Additionally, gently press the top of the cake – if it springs back when touched, it’s a good indicator that it’s fully baked. Remember that every oven is different, so keep an eye on your cake towards the end of the baking time to ensure it is not overcooked.

7. Is it necessary to preheat the oven before baking a cake?

Preheating the oven before baking a cake is essential for achieving the best results. A preheated oven ensures that the cake batter starts to cook immediately upon entering the oven, helping the cake rise evenly and develop the desired texture. Without preheating, the baking time and temperature may be inconsistent, leading to an undercooked or unevenly baked cake. Therefore, to ensure your cake bakes perfectly and turns out delicious every time, it is highly recommended to preheat your oven before starting the baking process.

8. What are some creative ideas for decorating a homemade cake?

When it comes to decorating a homemade cake, the possibilities are endless for unleashing your creativity. Some innovative ideas include using fresh fruits like berries or citrus slices as vibrant toppings, creating intricate designs with piped buttercream frosting, or adding edible flowers for a touch of elegance. Alternatively, you can experiment with chocolate ganache drips, colourful sprinkles, or even personalised fondant decorations to make your cake truly unique and visually stunning. Let your imagination run wild and have fun turning your homemade creation into a work of art that not only tastes delicious but also looks absolutely spectacular.

9. Are there any tips for storing leftover cake to keep it fresh?

When it comes to storing leftover cake to maintain its freshness, there are a few handy tips to keep in mind. Firstly, ensure that the cake is completely cooled before storing it. Once cooled, wrap the cake tightly in cling film or place it in an airtight container to prevent it from drying out. For cakes with frosting, refrigeration may be necessary to preserve the frosting’s texture. If you plan to store the cake for an extended period, consider freezing individual slices wrapped in parchment paper and placed in a freezer-safe bag. By following these storage tips, you can enjoy your leftover cake for longer while still savoring its delicious taste and texture.

Tour Guides: Discover a Destination Through Local Stories

tour guides

Tour Guides: Bringing a Destination to Life

A memorable journey is about more than the places you visit. It is also shaped by the stories you hear, the people you meet and the details you might otherwise miss. A knowledgeable tour guide can bring all of these elements together, helping visitors understand a destination beyond its landmarks and photographs.

What does a tour guide do?

Tour guides introduce visitors to a place and help them explore it with confidence. Depending on the tour, they may explain local history, point out architectural features, share cultural traditions or offer practical advice. They can also help organise the route, answer questions and make sure the group has time to enjoy the experience.

The best guides do more than recite facts. They connect information to the places around them, adapting their explanations to the interests of the group. A walk through an old town, for example, might become a conversation about its changing communities, local customs and everyday life.

Why choose a local guide?

Local guides often offer valuable insight into the character of a destination. They may know the history behind a modest-looking building, recommend a family-run café or explain the significance of a festival or custom. Their knowledge can add depth to a visit and help travellers see beyond the most familiar sights.

In a country such as Armenia, a guide can help visitors make connections between ancient heritage and contemporary life. Historical sites, monasteries, landscapes and cities each have their own stories, and a well-informed guide can place them in context while sharing perspectives rooted in local experience.

Choosing the right tour

Before booking, consider what you would like from the experience. Some tours focus on history or architecture, while others explore food, nature, crafts or neighbourhood life. Check the tour’s length, group size, meeting point and accessibility, and make sure the language is suitable for everyone taking part.

It is also worth reading recent reviews and checking what is included in the price. If you have particular interests or requirements, ask the guide in advance whether the itinerary can be adapted. A good guide will be clear about what the tour offers and happy to answer reasonable questions.

Making the most of your experience

  • Arrive at the meeting point on time and wear comfortable footwear.
  • Bring water and weather-appropriate clothing, especially for outdoor excursions.
  • Ask questions: a conversation can make the tour more rewarding.
  • Be considerate when visiting religious or culturally significant places.
  • Follow guidance about photography, local customs and access to private spaces.

A richer way to explore

Tour guides can turn a collection of sights into a more meaningful journey. Through their knowledge, stories and recommendations, they help visitors understand not only what they are seeing, but why it matters. Whether exploring a historic city, a mountain landscape or a local market, choosing the right guide can make a trip more engaging and memorable.


Essential Tips for Choosing and Enjoying a Tour Guide Experience

  1. Choose a guide with strong local knowledge.
  2. Check reviews before booking.
  3. Ask about group size and pace.
  4. Wear comfortable shoes and weather-appropriate clothes.
  5. Arrive on time at the meeting point.
  6. Tip only if it feels deserved.

Choose a guide with strong local knowledge.

Choose a guide with strong local knowledge to gain a deeper understanding of the places you visit. A local guide can share the stories behind historic sites, explain customs and traditions, and point you towards neighbourhoods or experiences you might otherwise miss. Their first-hand insight can help you see a destination through the eyes of the people who live there.

Check reviews before booking.

Before booking a tour, take a few minutes to read recent reviews from other travellers. Look for comments on the guide’s knowledge, communication, punctuality and ability to make the experience engaging. Reviews can also reveal practical details, such as whether the pace is suitable or the tour matches its description. Consider several opinions rather than relying on a single review, and check that feedback relates to the specific tour you plan to book.

Ask about group size and pace.

Ask about the group size and pace before booking a tour. Smaller groups can make it easier to hear the guide, ask questions and explore places without feeling rushed, while larger groups may offer a more sociable atmosphere. Check how much walking is involved, whether there are regular breaks and how quickly the itinerary moves between stops, so you can choose a tour that suits your interests and comfort level.

Wear comfortable shoes and weather-appropriate clothes.

Wear comfortable shoes and weather-appropriate clothing to make the most of your tour. You may be walking or standing for long periods, and the weather can change during the day, particularly on outdoor excursions. Check the forecast beforehand and choose practical layers to stay comfortable throughout.

Arrive on time at the meeting point.

Arrive at the meeting point on time so the tour can begin as planned and the group does not have to wait. Check the location and route in advance, and allow extra time for traffic or getting lost. If you are delayed, contact the guide as soon as possible.

Tip only if it feels deserved.

Tipping your tour guide is a personal choice, not an obligation. If the guide made your experience especially informative, enjoyable or welcoming, a tip can be a thoughtful way to show appreciation. Consider local customs and what you can comfortably afford; a sincere thank-you is always welcome, too.

Delicious Ground Turkey Recipes to Elevate Your Culinary Experience

ground turkey recipes

The Versatility of Ground Turkey: Delicious Recipes to Try

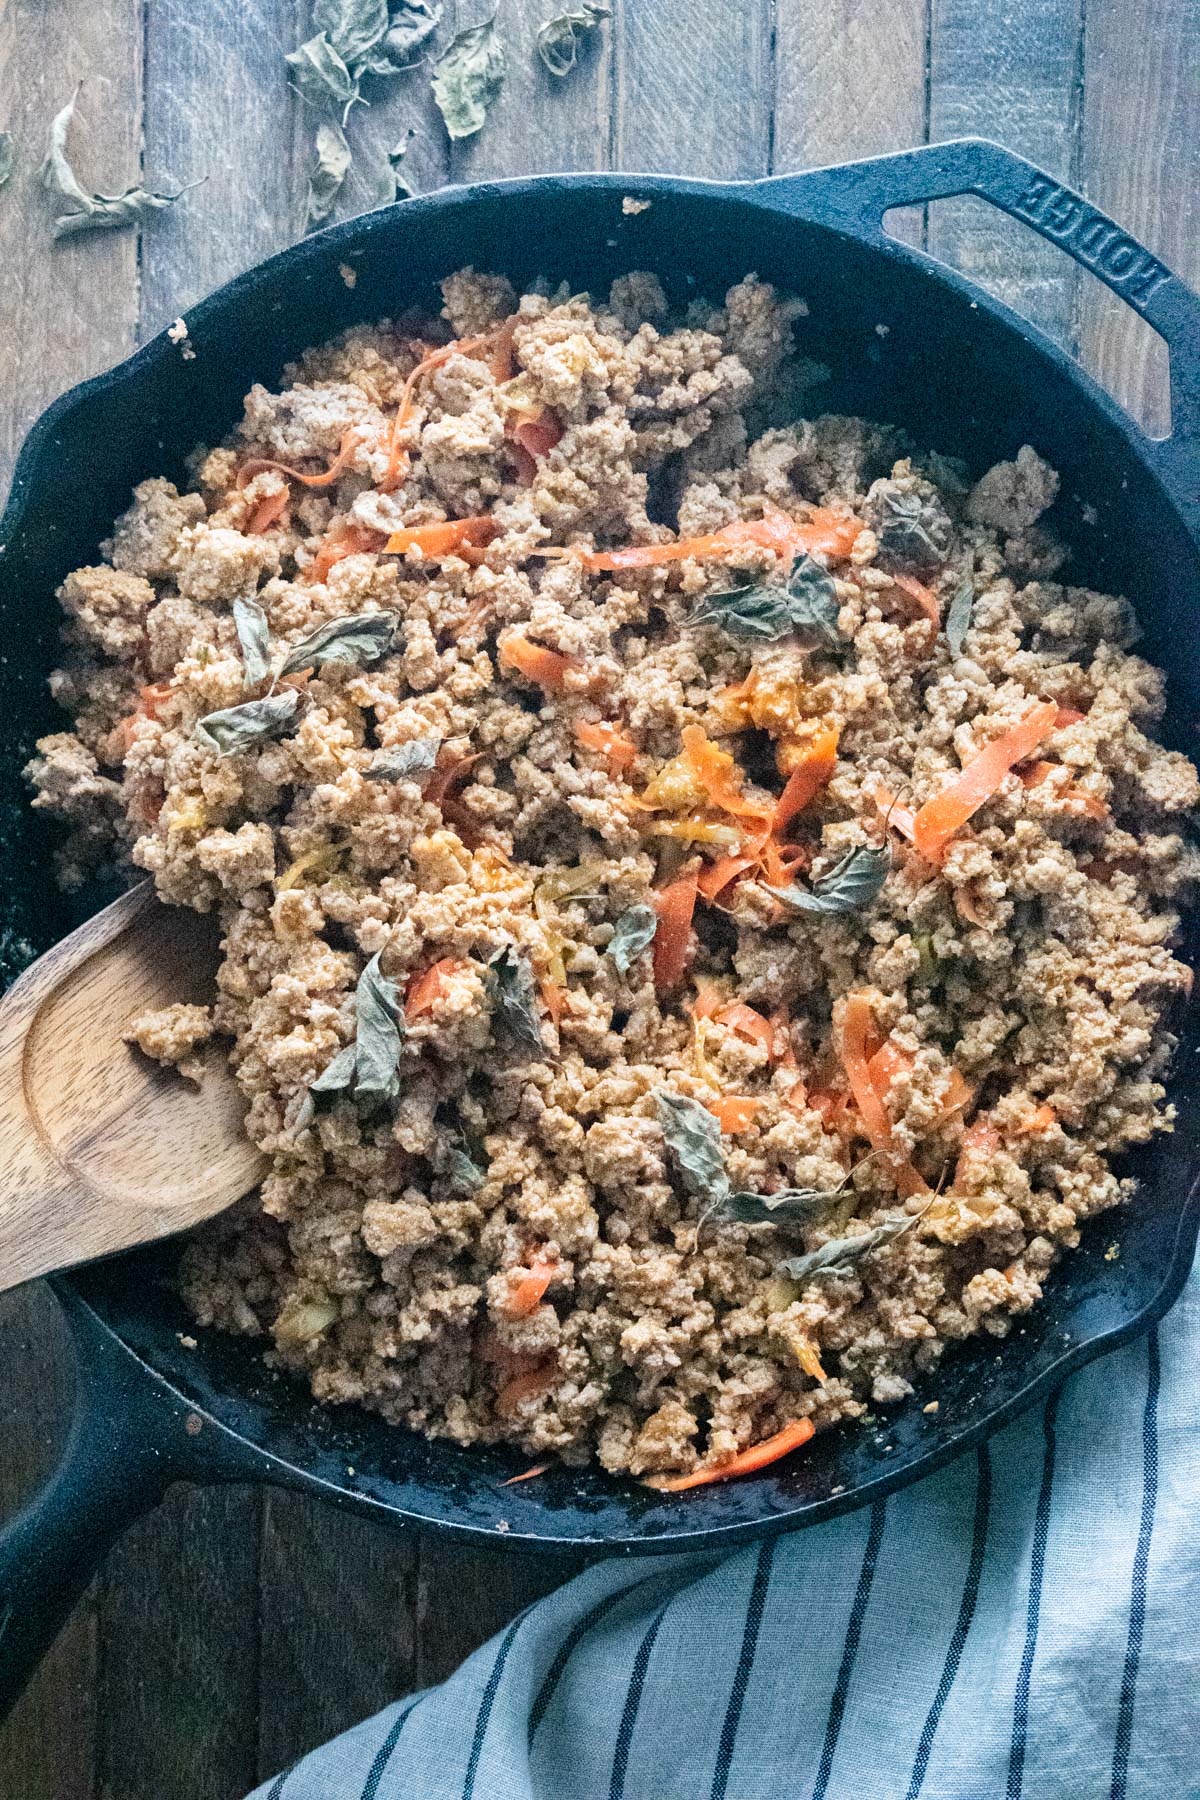
Ground turkey is a lean and flavourful alternative to beef that can be used in a variety of dishes. Whether you’re looking to cut down on red meat or simply want to try something different, ground turkey is a versatile ingredient that can be the star of many delicious meals. Here are some mouth-watering recipes to inspire your next culinary adventure:

Turkey Meatballs in Marinara Sauce

These tender turkey meatballs simmered in a rich marinara sauce are a comforting and satisfying meal. Serve them over pasta or with crusty bread for a hearty dinner that the whole family will love.

Turkey Taco Lettuce Wraps

For a lighter twist on traditional tacos, try filling crisp lettuce leaves with seasoned ground turkey, fresh salsa, avocado slices, and a dollop of sour cream. These taco lettuce wraps are not only delicious but also low-carb and packed with flavour.

Turkey Stuffed Peppers

Bell peppers stuffed with a savoury mixture of ground turkey, rice, tomatoes, and spices make for a colourful and nutritious meal. Baked until tender and topped with melted cheese, these stuffed peppers are sure to become a favourite in your recipe rotation.

Spicy Turkey Burgers

Elevate your burger game by swapping beef for seasoned ground turkey patties. Add some heat with jalapeños or sriracha sauce for an extra kick of flavour. Serve these spicy turkey burgers on toasted buns with your favourite toppings for a delicious twist on a classic.

With these creative and tasty recipes, you can explore the endless possibilities of cooking with ground turkey. Whether you’re craving comfort food or looking for healthier alternatives, ground turkey is sure to delight your taste buds and inspire you to get creative in the kitchen.


Top 5 FAQs on Cooking with Ground Turkey: Seasoning, Substitutions, and Kid-Friendly Recipes

  1. 1. How do I season ground turkey for recipes?
  2. 2. What are some healthy ground turkey recipe options?
  3. 3. Can I substitute ground turkey for beef in recipes?
  4. 4. How do I cook ground turkey to ensure it stays moist and flavourful?
  5. 5. What are some popular ground turkey recipes that kids would enjoy?

1. How do I season ground turkey for recipes?

Seasoning ground turkey is essential to enhance its flavour and create delicious recipes. To season ground turkey effectively, start by incorporating a mix of herbs and spices such as garlic powder, onion powder, paprika, cumin, oregano, and thyme. Salt and pepper are also key seasonings that help bring out the natural taste of the turkey. Experiment with different flavour profiles by adding ingredients like Worcestershire sauce, soy sauce, chili flakes, or fresh herbs like parsley or cilantro. Remember to taste the seasoned mixture before cooking to adjust the seasoning levels according to your preference. By taking the time to season ground turkey thoughtfully, you can elevate your dishes and enjoy a burst of delicious flavours in every bite.

2. What are some healthy ground turkey recipe options?

When looking for healthy options using ground turkey, there are plenty of delicious recipes to choose from. You can try making turkey lettuce wraps filled with fresh veggies and herbs for a light and nutritious meal. Another great option is turkey chili packed with protein and fibre from beans and vegetables. For a low-carb alternative, consider making turkey zucchini boats filled with a flavourful mixture of turkey, spices, and cheese. These recipes not only offer a healthier twist on traditional dishes but also showcase the versatility of ground turkey in creating satisfying meals that are both tasty and good for you.

3. Can I substitute ground turkey for beef in recipes?

When it comes to substituting ground turkey for beef in recipes, the answer is a resounding yes. Ground turkey is a versatile and healthy alternative to beef that can be used in various dishes, from meatballs to burgers to tacos. While the flavour and texture may differ slightly, ground turkey can easily replace beef in most recipes with delicious results. Just be mindful of the leaner nature of ground turkey, which may require adjustments in cooking time and seasoning to ensure a tasty outcome. Whether you’re looking to reduce your red meat intake or simply try something new, swapping ground turkey for beef opens up a world of culinary possibilities.

4. How do I cook ground turkey to ensure it stays moist and flavourful?

When cooking ground turkey to maintain its moisture and flavour, there are a few key tips to keep in mind. Firstly, consider using lean ground turkey with a slightly higher fat content to prevent dryness. Cooking the turkey over medium heat and avoiding overcooking can help retain its juiciness. Incorporating ingredients like onions, garlic, herbs, or spices while cooking can enhance the flavour profile. Additionally, adding a splash of broth or sauce during the cooking process can help keep the ground turkey moist. By following these guidelines and experimenting with different seasonings, you can ensure that your ground turkey dishes are both succulent and delicious.

When it comes to popular ground turkey recipes that kids would enjoy, there are several delicious options to consider. Turkey meatballs with a tangy marinara sauce, turkey taco lettuce wraps filled with fresh toppings, turkey-stuffed peppers bursting with flavour, and spicy turkey burgers for a fun twist on a classic are all kid-friendly choices that combine the lean protein of ground turkey with exciting flavours and textures. These recipes not only appeal to children’s taste buds but also provide a nutritious and satisfying meal option that the whole family can enjoy together.

Indulge in the Classic Comfort of Chicken Pot Pie

chicken pot pie

The Comforting Classic: Chicken Pot Pie

Chicken pot pie is a beloved dish that has been comforting families for generations. This savoury pie, filled with tender chicken, vegetables, and a creamy sauce, is the epitome of home-cooked goodness.

The origins of chicken pot pie can be traced back to medieval England, where it was known as “potage.” Over time, the dish evolved into the familiar pie we know today, with a flaky pastry crust that encases a hearty filling.

One of the key elements of a delicious chicken pot pie is the filling. Typically, diced chicken is combined with carrots, peas, onions, and celery in a rich and flavourful sauce made from broth and cream. Seasoned with herbs like thyme and parsley, the filling is then poured into a pastry-lined dish and topped with another layer of pastry before being baked to golden perfection.

When the bubbling pie emerges from the oven, its irresistible aroma fills the kitchen, beckoning everyone to gather around the table. The first bite reveals a symphony of textures and flavours – the tender chicken, the sweetness of the vegetables, and the buttery richness of the crust.

Chicken pot pie is not just a meal; it’s a reminder of simpler times and cherished traditions. Whether enjoyed on a cold winter’s night or as part of a family gathering, this classic dish never fails to bring comfort and joy to those who savour it.

So next time you’re craving some old-fashioned comfort food, why not whip up a batch of homemade chicken pot pie? With its timeless appeal and heartwarming flavours, it’s sure to become a favourite in your household too.


9 Essential Tips for the Perfect Chicken Pot Pie

  1. Ensure the chicken is cooked through before adding it to the pie
  2. Use a mix of white and dark meat for a more flavourful filling
  3. Add some chopped vegetables like carrots, peas, and celery for extra texture
  4. Season the filling well with herbs like thyme, rosemary, and parsley
  5. Consider using puff pastry for a flakier crust
  6. Brush the top of the pie with egg wash before baking for a golden finish
  7. Let the pie cool slightly before serving to allow the filling to set
  8. Serve with a side salad or steamed greens for a balanced meal
  9. Store any leftovers in an airtight container in the fridge

Ensure the chicken is cooked through before adding it to the pie

It is crucial to ensure that the chicken is thoroughly cooked before adding it to the chicken pot pie. Properly cooked chicken not only enhances the safety of the dish but also contributes to its overall taste and texture. By cooking the chicken until it is tender and no longer pink inside, you guarantee that each bite of the pie is not only delicious but also safe to eat. This simple yet essential tip ensures that your chicken pot pie is a delightful and satisfying culinary experience for all who enjoy it.

Use a mix of white and dark meat for a more flavourful filling

For a more flavourful filling in your chicken pot pie, consider using a mix of white and dark meat. Combining the tender white meat with the richer, more robust flavour of dark meat adds depth and complexity to the filling. The contrast in textures and tastes creates a harmonious balance that elevates the overall taste experience of this classic dish. Give this tip a try to enhance the savouriness of your chicken pot pie and delight your taste buds with every bite.

Add some chopped vegetables like carrots, peas, and celery for extra texture

To enhance the texture and flavour of your chicken pot pie, consider incorporating a medley of chopped vegetables such as carrots, peas, and celery. These colourful additions not only provide a delightful crunch but also infuse the filling with a burst of freshness. The combination of tender chicken with the vibrant vegetables creates a harmonious balance that elevates the overall dining experience, making each bite a satisfying and wholesome delight.

Season the filling well with herbs like thyme, rosemary, and parsley

To enhance the flavour profile of your chicken pot pie, it is recommended to season the filling generously with a blend of aromatic herbs such as thyme, rosemary, and parsley. These herbs not only add depth and complexity to the dish but also infuse it with a delightful fragrance that will tantalise your taste buds. The combination of thyme’s earthy notes, rosemary’s piney essence, and parsley’s fresh undertones creates a harmonious balance that elevates the overall taste of the pie. Don’t underestimate the power of herbs in transforming a simple chicken pot pie into a culinary masterpiece that is sure to impress even the most discerning palates.

Consider using puff pastry for a flakier crust

When making chicken pot pie, a helpful tip to achieve a flakier crust is to consider using puff pastry. The light and airy layers of puff pastry can add a delightful crunch and texture to the pie, enhancing the overall eating experience. By opting for puff pastry as the crust for your chicken pot pie, you can elevate this classic dish to new heights of deliciousness, making each bite a truly indulgent treat.

Brush the top of the pie with egg wash before baking for a golden finish

To achieve a beautifully golden finish on your chicken pot pie, a simple yet effective tip is to brush the top of the pie with an egg wash before baking. This technique not only adds a glossy sheen to the pastry but also helps create that perfect crisp and golden crust that is both visually appealing and deliciously satisfying. The egg wash seals in the flavours and textures of the filling while enhancing the overall presentation of the dish, making each bite as delightful to look at as it is to taste.

Let the pie cool slightly before serving to allow the filling to set

Allowing the chicken pot pie to cool slightly before serving is a crucial tip that enhances the overall dining experience. By giving the pie a few moments to rest, the filling has the opportunity to set and thicken, ensuring that each slice holds together beautifully. This simple step not only helps in serving neat portions but also allows the flavours to meld together, resulting in a more cohesive and satisfying bite. So, exercise a bit of patience and let the pie cool for a few minutes before indulging in its delicious warmth.

Serve with a side salad or steamed greens for a balanced meal

For a well-rounded dining experience, consider pairing your delectable chicken pot pie with a refreshing side salad or a serving of steamed greens. The crispness of the salad or the vibrant colours of the greens not only complement the richness of the pie but also add a healthy and nutritious element to your meal. This combination provides a perfect balance of flavours and textures, ensuring that every bite is not only satisfying but also nourishing.

Store any leftovers in an airtight container in the fridge

To keep your chicken pot pie fresh and delicious for longer, remember to store any leftovers in an airtight container in the fridge. This simple tip helps maintain the flavours and textures of the pie, ensuring that you can enjoy another comforting serving whenever you’re ready. Proper storage not only preserves the taste but also keeps the dish safe to eat for an extended period, allowing you to savour every bite of this classic favourite.

The Vital Role of Specialists in Today’s Society

specialist

The Importance of Specialists in Today’s World

In a world that is becoming increasingly complex and interconnected, the role of specialists has never been more crucial. A specialist is an individual who possesses in-depth knowledge, skills, and expertise in a specific field or subject matter. These experts play a vital role in various industries and sectors, contributing to advancements, innovation, and problem-solving.

Specialists bring a unique perspective and depth of understanding to their respective fields. Whether it’s in medicine, technology, finance, or any other discipline, their specialised knowledge allows them to tackle complex issues with precision and efficiency. By focusing their efforts on a particular area, specialists can offer insights and solutions that generalists may overlook.

Moreover, specialists often drive progress and innovation through their dedicated research and experimentation. Their expertise enables them to push boundaries, discover new possibilities, and develop cutting-edge solutions that benefit society as a whole. Without specialists pushing the limits of knowledge and skill within their fields, many breakthroughs and advancements would not be possible.

Collaboration between specialists from different disciplines also leads to interdisciplinary approaches that can address multifaceted challenges. By bringing together experts with diverse backgrounds and specialisations, new ideas emerge, leading to comprehensive solutions that consider various perspectives.

Overall, the presence of specialists enriches our world by fostering excellence, driving innovation, and solving complex problems. As we continue to navigate an ever-evolving landscape shaped by technology and global interconnectedness, the expertise of specialists remains essential for progress and prosperity.


Unveiling the Impact of Specialists: Expertise, Innovation, and Collaborative Solutions

  1. Specialists possess in-depth knowledge and expertise in their specific field.
  2. They offer precise and efficient solutions to complex issues.
  3. Specialists drive progress and innovation through dedicated research and experimentation.
  4. Their specialised skills lead to breakthroughs and advancements that benefit society.
  5. Collaboration with specialists from different disciplines results in comprehensive solutions.
  6. The presence of specialists enriches the world by fostering excellence and problem-solving.


Challenges of Specialisation: Narrow Focus, Dependency, and Isolation

  1. Narrow Focus
  2. Dependency
  3. Isolation

Specialists possess in-depth knowledge and expertise in their specific field.

Specialists, with their in-depth knowledge and expertise in a specific field, play a critical role in driving advancements and innovation. Their specialised understanding allows them to delve deeply into the intricacies of their domain, gaining insights that generalists may not possess. This depth of knowledge enables specialists to offer precise solutions, make informed decisions, and contribute significantly to the progress and development of their field. By honing their expertise, specialists become invaluable resources for tackling complex challenges and pushing the boundaries of what is possible within their area of specialisation.

They offer precise and efficient solutions to complex issues.

Specialists play a crucial role in offering precise and efficient solutions to complex issues by leveraging their in-depth knowledge and expertise in a specific field. Their focused understanding allows them to identify key factors, analyse intricate details, and devise targeted strategies to address challenges effectively. By honing their skills within a particular area, specialists can navigate complexities with accuracy and speed, providing tailored solutions that generalists may struggle to achieve. This precision and efficiency not only streamline problem-solving processes but also lead to more effective outcomes that benefit individuals, organisations, and society as a whole.

Specialists drive progress and innovation through dedicated research and experimentation.

Specialists play a crucial role in driving progress and innovation through their commitment to dedicated research and experimentation. By focusing their expertise on a specific field, specialists are able to delve deep into complex problems, explore new ideas, and push the boundaries of knowledge. Their relentless pursuit of understanding and discovery leads to breakthroughs that shape the future of their respective industries. Through rigorous experimentation and analysis, specialists pave the way for advancements that benefit society as a whole, demonstrating the invaluable impact of their specialised skills on driving innovation forward.

Their specialised skills lead to breakthroughs and advancements that benefit society.

Specialists, with their honed expertise and focused skills, have the remarkable ability to drive breakthroughs and advancements that ultimately benefit society at large. By delving deeply into a specific field or subject matter, specialists can uncover innovative solutions, develop cutting-edge technologies, and make significant contributions to various industries. Their relentless pursuit of excellence and mastery enables them to push the boundaries of knowledge, leading to transformative discoveries that have a positive impact on society’s progress and well-being.

Collaboration with specialists from different disciplines results in comprehensive solutions.

Collaboration with specialists from different disciplines yields comprehensive solutions that integrate diverse perspectives and expertise. By bringing together individuals with unique backgrounds and knowledge, interdisciplinary teamwork can address complex challenges from multiple angles, leading to innovative and holistic approaches. This collaborative effort not only enhances problem-solving capabilities but also encourages creativity and out-of-the-box thinking, ultimately resulting in more effective and well-rounded solutions that consider a wide range of factors.

The presence of specialists enriches the world by fostering excellence and problem-solving.

Specialists play a crucial role in enriching the world by fostering excellence and problem-solving. Their deep expertise and focused knowledge allow them to tackle complex challenges with precision and innovative solutions. By dedicating themselves to a specific field or subject matter, specialists bring a level of mastery that elevates standards of excellence and pushes the boundaries of what is possible. Through their specialised skills, they not only enhance existing practices but also pioneer new approaches that drive progress and advancement across various industries and disciplines.

Narrow Focus

Specialists, while invaluable in their depth of knowledge and expertise, may encounter a significant drawback in the form of a narrow focus. Their intense concentration on a particular area can lead to a limited perspective, hindering their ability to see the broader implications or make interdisciplinary connections. This tunnel vision could result in specialists overlooking crucial insights from related fields or failing to grasp the interconnected nature of complex issues. As a consequence, there is a risk that specialists may inadvertently overlook innovative solutions or fail to address challenges from a holistic standpoint.

Dependency

Dependency on specialists can pose a significant challenge in various industries and organisations. Relying heavily on these experts can lead to bottlenecks in decision-making processes and project timelines, particularly when key specialists are unavailable. The absence of crucial experts may hinder progress, delay projects, and impede the smooth flow of operations. This over-reliance on specialists can create vulnerabilities and dependencies that may limit flexibility and adaptability in dynamic environments. Organizations must strike a balance between leveraging specialist expertise and ensuring contingency plans are in place to mitigate the risks associated with dependency on specific individuals.

Isolation

Specialisation, while valuable for deepening expertise in a specific field, can also have its drawbacks. One significant con of being a specialist is the potential for isolation from broader trends or developments outside one’s area of focus. This isolation can hinder adaptability and limit the specialist’s ability to have a holistic understanding of complex issues that may require interdisciplinary perspectives. By being deeply entrenched in a narrow field, specialists may miss out on valuable insights and innovations occurring in related or unrelated fields, potentially limiting their capacity to innovate and adapt to changing circumstances effectively.

Savour the Flavour: A Delectable Roasted Garlic Recipe

roasted garlic recipe

The Perfect Roasted Garlic Recipe

Roasted garlic is a simple yet incredibly versatile ingredient that can elevate the flavour of any dish. Whether spread on crusty bread, mixed into mashed potatoes, or added to pasta sauces, roasted garlic adds a delicious depth of flavour that is hard to resist. Here’s a foolproof recipe to create your own roasted garlic at home:

Ingredients:

  • Whole garlic bulbs
  • Olive oil
  • Salt and pepper

Instructions:

  1. Preheat your oven to 200°C (400°F).
  2. Cut off the top of each garlic bulb to expose the cloves.
  3. Drizzle olive oil over the exposed cloves, ensuring each bulb is well-coated.
  4. Sprinkle with salt and pepper for seasoning.
  5. Wrap each bulb in foil and place them on a baking tray.
  6. Bake in the preheated oven for about 30-40 minutes, or until the garlic cloves are soft and caramelised.
  7. Allow the roasted garlic to cool slightly before squeezing out the creamy cloves from their skins.

Your roasted garlic is now ready to be used in a variety of dishes. Enjoy its rich, sweet flavour and aroma as it enhances your culinary creations!

Experiment with adding roasted garlic to soups, salads, marinades, or even as a topping for pizza. The possibilities are endless when it comes to incorporating this delicious ingredient into your cooking repertoire.

Try this easy roasted garlic recipe today and discover the magic it brings to your favourite dishes!


Mastering Roasted Garlic: 6 Essential Tips for Perfect Flavour

  1. Preheat the oven to 200°C (400°F) before roasting garlic.
  2. Cut off the top of the garlic bulb to expose the cloves before roasting.
  3. Drizzle olive oil over the exposed cloves for added flavour.
  4. Wrap the garlic bulb in foil before placing it in the oven to prevent burning.
  5. Roast the garlic for about 30-40 minutes until it becomes soft and caramelised.
  6. Allow the roasted garlic to cool slightly before squeezing out the softened cloves.

Preheat the oven to 200°C (400°F) before roasting garlic.

To ensure the perfect roasted garlic, it is essential to preheat the oven to 200°C (400°F) before beginning the roasting process. This initial step sets the ideal temperature for caramelising the garlic cloves, resulting in a soft and flavourful outcome. By preheating the oven, you create the optimal environment for transforming raw garlic into a delectably sweet and aromatic ingredient that will elevate your dishes with its rich taste.

Cut off the top of the garlic bulb to expose the cloves before roasting.

To enhance the flavour and aroma of your roasted garlic, a crucial tip is to cut off the top of the garlic bulb to expose the cloves before placing it in the oven. By doing so, you allow the heat to penetrate each clove evenly, resulting in a beautifully caramelised and creamy texture. This simple step not only ensures that the garlic cooks thoroughly but also intensifies its sweet and mellow flavour, creating a truly irresistible ingredient for your culinary creations.

Drizzle olive oil over the exposed cloves for added flavour.

To enhance the flavour profile of your roasted garlic, a key tip is to generously drizzle olive oil over the exposed cloves before baking. The olive oil not only helps to infuse the garlic with a rich, nutty taste but also aids in achieving a beautifully caramelised finish. This simple yet crucial step ensures that each clove is coated evenly, resulting in a lusciously creamy texture and a more pronounced depth of flavour in every bite.

Wrap the garlic bulb in foil before placing it in the oven to prevent burning.

To ensure that your roasted garlic turns out perfectly every time, it’s essential to wrap the garlic bulb in foil before placing it in the oven. This simple step not only helps to retain moisture and prevent the cloves from burning but also allows the garlic to cook evenly, resulting in a creamy and caramelised texture. By enclosing the garlic in foil, you create a gentle cooking environment that enhances the flavour and aroma of the roasted cloves. So remember, wrapping your garlic bulb in foil is a key tip for achieving deliciously roasted garlic without any risk of burning.

Roast the garlic for about 30-40 minutes until it becomes soft and caramelised.

To achieve the perfect roasted garlic, it is essential to roast the garlic bulbs for approximately 30-40 minutes until they reach a soft and caramelised consistency. This cooking process allows the natural sugars in the garlic to caramelise, enhancing its sweetness and depth of flavour. The result is tender cloves that can be easily squeezed out from their skins, ready to be incorporated into a wide range of dishes for a deliciously rich and aromatic touch.

Allow the roasted garlic to cool slightly before squeezing out the softened cloves.

To fully enjoy the rich and creamy texture of the roasted garlic cloves, it is essential to exercise patience and allow the garlic to cool slightly before gently squeezing out the softened cloves from their skins. This step not only ensures that the cloves maintain their delicate consistency but also allows the flavours to intensify, resulting in a more pronounced and satisfying taste. By taking the time to let the roasted garlic cool before handling it, you can savour every aromatic nuance and fully appreciate the depth of flavour it brings to your culinary creations.

Savour the Flavour: Authentic Bulalo Recipe for a Taste of Filipino Comfort

bulalo recipe

The Perfect Bulalo Recipe: A Taste of Filipino Comfort Food

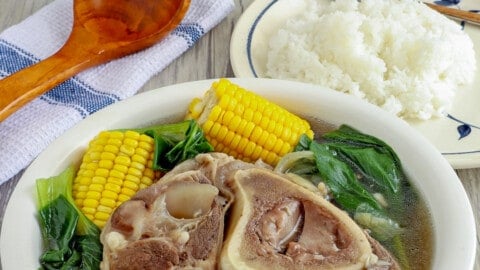
Originating from the Philippines, bulalo is a hearty and flavourful beef soup that warms both the body and soul. This traditional dish is beloved for its rich broth, tender beef shanks, and assortment of vegetables. Here’s how you can recreate this comforting meal in your own kitchen.

Ingredients:

  • 2 lbs beef shank, cut into serving pieces
  • 1 medium onion, quartered
  • 3 cloves garlic, crushed
  • 2 litres water
  • 2 corn cobs, cut into thirds
  • 1 small cabbage, quartered
  • 3 medium potatoes, peeled and halved
  • Salt and pepper to taste

Instructions:

  1. In a large pot, bring water to a boil.
  2. Add beef shank, onion, garlic, salt, and pepper. Simmer for 2-3 hours or until the beef is tender.
  3. Add more water if needed to maintain desired broth consistency.
  4. Add potatoes and cook until tender.
  5. Add corn cobs and cabbage. Simmer for another 5-10 minutes.
  6. Serve hot with steamed rice on the side.

Whether enjoyed on a chilly evening or as a comforting meal during gatherings with loved ones, bulalo is sure to delight your taste buds. Embrace the warmth and heartiness of this Filipino classic by trying out this recipe today!


Discover the Comfort and Flavour of Bulalo: A Hearty Beef Soup Recipe with a Taste of Filipino Culture

  1. 1. Hearty and comforting beef soup.
  2. 2. Rich and flavourful broth that is perfect for warming up.
  3. 3. Tender and succulent beef shanks add a meaty texture to the dish.
  4. 4. Assortment of vegetables like corn, cabbage, and potatoes provide a balanced meal.
  5. 5. Easy-to-follow recipe that can be prepared at home.
  6. 6. Ideal for gatherings or family meals due to its generous serving size.
  7. 7. Versatile dish that can be adjusted to suit personal preferences in terms of seasoning and ingredients.
  8. 8. Offers a taste of Filipino cuisine and culture, introducing new flavours to your palate.


Challenges of Preparing Bulalo: Time, Fat Content, Dietary Restrictions, and Broth Skimming

  1. Long cooking time required to tenderize the beef shank.
  2. High in fat content due to the use of beef shank.
  3. May not be suitable for vegetarians or individuals on a low-sodium diet.
  4. Requires careful skimming of excess fat from the broth for a healthier dish.

1. Hearty and comforting beef soup.

The bulalo recipe offers a delightful pro with its hearty and comforting beef soup. This traditional Filipino dish is renowned for its rich and flavourful broth that is sure to warm both the body and soul. The tender beef shanks, paired with an array of vegetables, create a satisfying and nourishing meal that brings a sense of comfort and contentment with every spoonful. Whether enjoyed on a cold day or as a gathering with loved ones, the bulalo’s heartiness makes it a perfect choice for those seeking a fulfilling and soothing dining experience.

2. Rich and flavourful broth that is perfect for warming up.

Indulge in the comforting allure of bulalo with its standout feature of a rich and flavourful broth that promises to warm you up from the inside out. This hearty soup boasts a depth of taste that comes from simmering beef shanks, onions, and garlic for hours, creating a savoury base that is both soothing and satisfying. With each spoonful, the aromatic essence of the broth envelops your senses, making it an ideal choice for those seeking a soul-nourishing meal on chilly days or simply craving a taste of Filipino comfort food.

3. Tender and succulent beef shanks add a meaty texture to the dish.

The inclusion of tender and succulent beef shanks in the bulalo recipe enhances the overall texture of the dish, providing a rich and meaty element that complements the hearty broth and vegetables. The slow cooking process allows the beef shanks to become incredibly tender, making each bite a satisfying and flavourful experience. This meaty addition not only adds depth to the dish but also elevates its overall taste, making bulalo a truly comforting and indulgent meal for any occasion.

4. Assortment of vegetables like corn, cabbage, and potatoes provide a balanced meal.

The inclusion of a variety of vegetables such as corn, cabbage, and potatoes in the bulalo recipe not only enhances the flavour profile of the dish but also offers a well-rounded and balanced meal. These nutritious vegetables add depth to the broth and complement the tender beef shanks, creating a harmonious blend of textures and tastes. With its combination of hearty ingredients, bulalo provides a wholesome dining experience that is both satisfying and nourishing.

5. Easy-to-follow recipe that can be prepared at home.

Indulge in the culinary delight of bulalo with this easy-to-follow recipe that can be effortlessly prepared at home. Whether you’re a seasoned cook or a novice in the kitchen, recreating this traditional Filipino dish is a breeze. With simple ingredients and clear instructions, you can savour the rich flavours of bulalo without the need for advanced cooking skills. Treat yourself and your loved ones to a homemade bowl of comfort with this accessible recipe that brings warmth and satisfaction to your dining table.

6. Ideal for gatherings or family meals due to its generous serving size.

Bulalo’s generous serving size makes it an ideal dish for gatherings or family meals. Its hearty portions ensure that everyone around the table can enjoy a satisfying and comforting meal together. Whether shared during festive celebrations or casual get-togethers, bulalo brings people closer through its delicious flavours and communal dining experience. The abundance of this traditional Filipino soup fosters a sense of warmth and togetherness, making it a perfect choice for creating lasting memories with loved ones.

7. Versatile dish that can be adjusted to suit personal preferences in terms of seasoning and ingredients.

Bulalo is a versatile dish that offers the flexibility to be adjusted according to individual preferences when it comes to seasoning and ingredients. Whether you prefer a richer broth, spicier flavours, or a specific selection of vegetables, this Filipino comfort food can easily accommodate your personal taste. By allowing for customisation, bulalo becomes not just a traditional recipe, but a canvas for culinary creativity and personalisation, making it a beloved dish that can be tailored to suit various palates and dietary needs.

8. Offers a taste of Filipino cuisine and culture, introducing new flavours to your palate.

Indulging in a bowl of bulalo not only satisfies your hunger but also offers a delightful taste of Filipino cuisine and culture. This traditional dish introduces new and exciting flavours to your palate, allowing you to experience the unique blend of ingredients that make Filipino food so special. From the rich broth to the tender beef shanks and hearty vegetables, bulalo encapsulates the essence of Filipino culinary traditions, inviting you on a culinary journey that is both delicious and enlightening.

Long cooking time required to tenderize the beef shank.

One drawback of preparing bulalo is the extended cooking time needed to tenderize the beef shank. Due to the toughness of the cut, the meat requires a prolonged simmering period to achieve that melt-in-your-mouth texture that is characteristic of a well-made bulalo. While the wait may be lengthy, the end result of succulent and flavourful beef shank in a hearty broth makes it a worthwhile and comforting dish for those who appreciate the time and effort put into creating this Filipino favourite.

High in fat content due to the use of beef shank.

Indulging in the deliciousness of bulalo comes with a con to consider – its high fat content attributed to the use of beef shank. While the marbled fat adds depth and flavour to the broth, it also contributes to the richness of the dish. For those mindful of their fat intake, moderation and balance in enjoying this Filipino comfort food may be key. Consider opting for leaner cuts of beef or adjusting portion sizes to savour the essence of bulalo while being mindful of dietary preferences.

May not be suitable for vegetarians or individuals on a low-sodium diet.

While bulalo is a delightful and nourishing dish loved by many, it may not be suitable for vegetarians or individuals following a low-sodium diet. The main ingredients of bulalo, such as beef shanks and broth, are not compatible with vegetarian dietary preferences. Additionally, the rich flavour of bulalo often comes from the use of salt and seasoning, which may not align with the restrictions of a low-sodium diet. It’s important for individuals with specific dietary needs to consider alternative options that cater to their requirements while still enjoying delicious meals.

Requires careful skimming of excess fat from the broth for a healthier dish.

To ensure a healthier final dish, one significant con of preparing bulalo is the need for meticulous skimming of excess fat from the broth. This process can be time-consuming and requires attention to detail to achieve a lighter and more nutritious soup. However, by taking the extra step to remove the fat, you can elevate the overall health benefits of the dish and create a more balanced and wholesome dining experience.

Delightful Tinola Recipe: A Taste of Filipino Comfort

tinola recipe

The Delightful Tinola Recipe: A Taste of Filipino Comfort

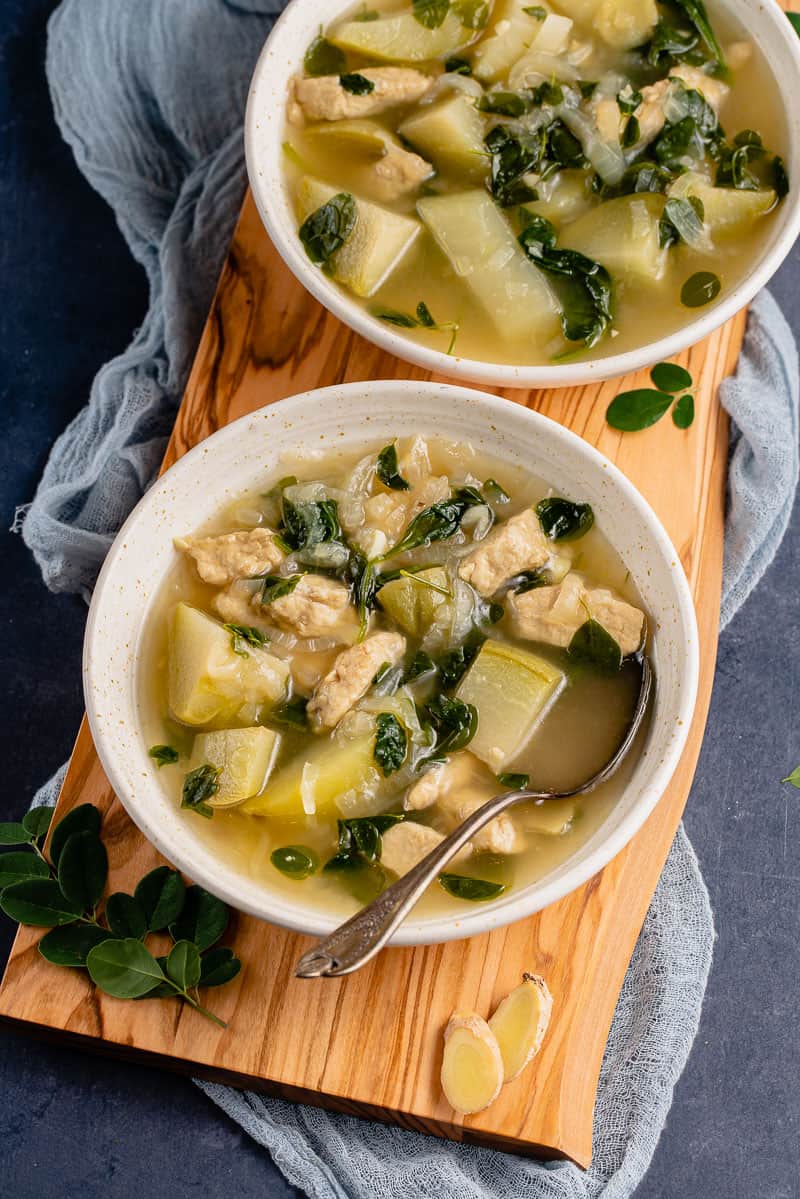
When it comes to Filipino comfort food, few dishes evoke the feeling of home quite like Tinola. This traditional soup is a staple in many Filipino households, loved for its light yet flavourful broth and tender chicken pieces.

Ingredients:

  • 1 whole chicken, cut into pieces
  • 2 tablespoons cooking oil
  • 4 cloves garlic, minced
  • 1 onion, sliced
  • Thumb-sized ginger, sliced thinly
  • 2-3 cups water or chicken broth
  • Green papaya or chayote, peeled and cut into chunks
  • Fish sauce and pepper to taste
  • Fresh spinach leaves for garnish

Instructions:

  1. In a pot, sauté garlic, onion, and ginger in cooking oil until fragrant.
  2. Add the chicken pieces and cook until lightly browned.
  3. Pour water or chicken broth into the pot and bring to a boil. Simmer until the chicken is tender.
  4. Add the green papaya or chayote chunks and cook until they are soft but not mushy.
  5. Season with fish sauce and pepper to taste.
  6. Garnish with fresh spinach leaves before serving hot. Enjoy your comforting bowl of Tinola!

Tinola is best enjoyed with steamed rice on the side. Its clear broth infused with ginger and garlic flavours is soothing to both the stomach and soul. Whether served during rainy days or family gatherings, Tinola never fails to bring warmth and satisfaction to those who partake in its savoury goodness.

So why not try your hand at making this beloved Filipino dish? With simple ingredients and easy steps, Tinola can easily become a regular feature on your dining table – a reminder of home-cooked comfort no matter where you may be.


Understanding Tinola: A Guide to Ingredients, Variations, and Cultural Significance

  1. What is the soup that Filipinos eat when sick?
  2. What ingredient is tinola?
  3. What is the English term for tinola?
  4. What are the ingredients in tinola?
  5. Do you put patis in tinola?
  6. Is tinola sayote or papaya better?

What is the soup that Filipinos eat when sick?

In Filipino culture, the soup that is often consumed when feeling under the weather is Tinola. This traditional dish is believed to have comforting and healing properties, making it a popular choice for those who are sick or feeling unwell. With its light yet nourishing broth, tender chicken pieces, and aromatic ginger-infused flavour, Tinola is not only a delicious meal but also a source of warmth and comfort during times of illness. Its soothing qualities and easy-to-digest ingredients make it a go-to option for providing relief and sustenance to both body and soul.

What ingredient is tinola?

Tinola, a popular Filipino dish known for its comforting qualities, typically consists of a few key ingredients that contribute to its distinctive flavour profile. The main components of a traditional tinola recipe include chicken pieces, ginger, garlic, onion, and either green papaya or chayote. These ingredients come together in a light and savoury broth that is seasoned with fish sauce and pepper to taste. The combination of these simple yet flavourful elements is what makes tinola a beloved dish in Filipino cuisine, cherished for its nourishing qualities and ability to evoke feelings of warmth and home.

What is the English term for tinola?

In Filipino cuisine, the traditional dish known as Tinola does not have a direct English translation for its name. However, Tinola is commonly referred to as a Filipino chicken soup with ginger and green papaya or chayote. The essence of Tinola lies in its light and aromatic broth infused with the flavours of ginger and garlic, creating a comforting and nourishing meal that is cherished by many. While there may not be an exact English equivalent for the term “Tinola,” its unique blend of ingredients and distinctive taste make it a beloved dish in Filipino culinary culture.

What are the ingredients in tinola?

One of the most frequently asked questions about Tinola is regarding its ingredients. The key components of this beloved Filipino dish include a whole chicken, garlic, onion, ginger, green papaya or chayote, water or chicken broth, fish sauce, pepper, and fresh spinach leaves for garnish. These simple yet essential ingredients come together to create a light and flavourful soup that is both comforting and nourishing. Each element plays a crucial role in enhancing the overall taste and aroma of Tinola, making it a true culinary delight for those who savour its traditional flavours.

Do you put patis in tinola?

In the preparation of Tinola, a traditional Filipino dish, the use of patis, a type of fish sauce, is a common practice that adds depth and savoury flavour to the broth. While some recipes may call for patis as an essential ingredient, its inclusion in Tinola can vary based on personal preference and regional variations. The addition of patis enhances the overall umami profile of the dish, complementing the chicken and vegetables with its distinctive taste. Ultimately, whether or not to put patis in Tinola is a matter of individual taste and culinary tradition, allowing for flexibility in adapting this beloved recipe to suit different palates.

Is tinola sayote or papaya better?

When it comes to the choice between using sayote (chayote) or papaya in Tinola, it ultimately boils down to personal preference. Sayote, with its mild flavour and crunchy texture, adds a refreshing element to the soup. On the other hand, papaya offers a softer texture and a slightly sweeter taste that some may find appealing. Both vegetables work well in enhancing the overall taste and texture of Tinola, so it’s worth experimenting with both options to see which one resonates more with your palate. Ultimately, whether you opt for sayote or papaya, the essence of Tinola lies in its comforting broth and tender chicken, making it a beloved Filipino dish cherished for its simplicity and heartwarming flavours.