Chuck Roast Recipes: Three Comforting Ways to Cook a Flavourful Cut

chuck roast recipes

Chuck Roast Recipes: Three Comforting Ways to Cook This Flavourful Cut

Chuck roast is a well-marbled cut of beef from the shoulder. It can be a little tough when cooked quickly, but long, gentle cooking breaks down its connective tissue and makes the meat tender, rich and full of flavour. That makes it ideal for Sunday lunch, slow-cooker suppers and dishes that can be prepared ahead.

For the best results, brown the beef before braising, keep it moist and cook it until a fork slides easily into the meat. The recipes below offer three simple ways to enjoy chuck roast: a classic pot roast, slow-cooked shredded beef and a warming red-wine braise.

Classic Chuck Roast Pot Roast

This traditional one-pot meal combines tender beef with potatoes, carrots and a savoury cooking liquid. Serve it straight from the casserole dish, with the juices spooned over the top.

Ingredients

  • 1.5 kg chuck roast
  • Salt and freshly ground black pepper
  • 2 tablespoons vegetable oil
  • 1 large onion, cut into wedges
  • 2 tablespoons plain flour
  • 2 tablespoons tomato purée
  • 500 ml beef stock
  • 2 sprigs of fresh thyme
  • 2 bay leaves
  • 500 g waxy potatoes, halved if large
  • 300 g carrots, cut into thick chunks

Method

  1. Heat the oven to 160°C, or 140°C fan. Pat the beef dry and season it generously with salt and pepper.
  2. Heat the oil in a large, ovenproof casserole over a medium-high heat. Brown the beef on all sides, then transfer it to a plate.
  3. Add the onion to the casserole and cook for 3–4 minutes. Stir in the flour and tomato purée, then gradually pour in the stock, scraping up any browned bits from the base.
  4. Return the beef to the casserole. Add the thyme and bay leaves. The liquid should come about halfway up the meat; add a little water if needed.
  5. Cover and cook in the oven for 2½ hours. Add the potatoes and carrots, then cook for a further 60–90 minutes, until the beef is very tender and the vegetables are cooked through.
  6. Remove the herbs and let the roast rest for 10 minutes before slicing or pulling it apart. Spoon over the cooking juices to serve.

Slow-Cooker Shredded Chuck Roast

Shredded beef is a versatile option for sandwiches, tacos, baked potatoes or rice bowls. A slow cooker keeps the preparation straightforward: brown the meat first for extra flavour, then let it cook gently until it falls apart.

Ingredients

  • 1.5 kg chuck roast
  • Salt and freshly ground black pepper
  • 1 tablespoon vegetable oil
  • 1 onion, finely sliced
  • 250 ml beef stock
  • 2 tablespoons Worcestershire sauce
  • 1 tablespoon tomato purée
  • 1 teaspoon smoked paprika
  • 1 teaspoon dried oregano

Method

  1. Season the beef with salt and pepper. Heat the oil in a frying pan and brown the joint on all sides.
  2. Put the onion in the slow cooker and place the beef on top. Whisk together the stock, Worcestershire sauce, tomato purée, smoked paprika and oregano, then pour the mixture around the meat.
  3. Cover and cook on low for 8–10 hours or on high for 4–6 hours, until the beef is tender enough to shred easily.
  4. Transfer the beef to a board and shred it with two forks. Stir it back into the cooking juices and taste for seasoning.

Serve the shredded beef in soft rolls with coleslaw, or spoon it into warm tortillas with salsa and fresh coriander. Refrigerate leftovers promptly and use them within three days.

Chuck Roast Braised with Red Wine

Red wine, stock and aromatic vegetables create a deeply savoury sauce in this slow-braised version. It works well for a relaxed dinner with mashed potatoes or crusty bread.

Ingredients

  • 1.5 kg chuck roast
  • Salt and freshly ground black pepper
  • 2 tablespoons olive oil
  • 1 onion, chopped
  • 2 carrots, chopped
  • 2 celery sticks, chopped
  • 2 tablespoons plain flour
  • 300 ml dry red wine
  • 300 ml beef stock
  • 2 sprigs of rosemary
  • 2 bay leaves

Method

  1. Heat the oven to 160°C, or 140°C fan. Season the beef. Warm the olive oil in a heavy casserole and brown the meat thoroughly on all sides. Set aside.
  2. Add the onion, carrots and celery to the casserole and cook for about 5 minutes, stirring occasionally. Sprinkle over the flour and stir for 1 minute.
  3. Pour in the wine a little at a time, scraping the base of the pan. Add the stock, rosemary and bay leaves, then return the beef to the casserole.
  4. Cover and braise for 3–3½ hours, turning the beef once, until it is tender. If the sauce seems thin, remove the meat when cooked and simmer the liquid uncovered until it reaches the consistency you like.
  5. Rest the beef for 10 minutes, then slice or pull it into pieces. Serve with the sauce and your choice of potatoes or bread.

Tips for Tender Chuck Roast

  • Brown the meat well. A deep brown crust adds flavour to both the beef and the cooking liquid.
  • Cook it gently. Chuck roast is best suited to low, slow cooking rather than a quick, high-temperature roast.
  • Allow enough time. The beef is ready when it is tender throughout, not simply when it reaches a particular cooking time. Larger or thicker joints may need longer.
  • Keep some liquid in the pot. Braising does not require the meat to be fully submerged, but there should be enough liquid to create steam and prevent the base from drying out.
  • Rest before serving. A short rest makes the meat easier to carve and gives the juices time to settle.

Whether you choose a classic pot roast, convenient slow-cooker beef or a wine-rich braise, chuck roast rewards patient cooking. Make a little extra and the leftovers can become sandwiches, pies or a quick meal tossed through pasta the next day.


Frequently Asked Questions About Cooking Chuck Roast: Tips and Techniques for Tender, Delicious Meals

  1. What is chuck roast called in the UK?
  2. What is the best way to cook chuck roast so it becomes tender?
  3. How long should chuck roast cook in the oven?
  4. Can you cook chuck roast in a slow cooker?
  5. Should chuck roast be seared before slow cooking or braising?
  6. What temperature should chuck roast reach to become fall-apart tender?
  7. What can you serve with chuck roast?

What is chuck roast called in the UK?

In the UK, “chuck roast” is not a widely used name for a standard supermarket cut. The closest equivalent is usually beef chuck or shoulder of beef; for a slow-cooked joint, ask a butcher for a boneless beef shoulder suitable for braising. “Braising steak” comes from a similar area, but it is often sold in slices or pieces rather than as a roasting joint.

What is the best way to cook chuck roast so it becomes tender?

The best way to make chuck roast tender is to cook it slowly with a little liquid, using a covered casserole in a low oven or a slow cooker. First, pat the beef dry and brown it on all sides to build flavour. Add stock or another braising liquid, cover and cook gently until the meat is fork-tender and easy to pull apart—usually around 3–4 hours in a low oven, or 8–10 hours on a slow-cooker’s low setting, depending on the size of the joint. Avoid rushing the cooking: chuck contains connective tissue that needs time to soften.

How long should chuck roast cook in the oven?

Chuck roast is best cooked slowly in a covered casserole at 160°C (140°C fan) for around 3–4 hours, depending on the size and thickness of the joint. Add enough stock or other braising liquid to keep the meat moist, and check that it is fork-tender before serving; if it still feels firm, return it to the oven and continue cooking in 30-minute intervals.

Can you cook chuck roast in a slow cooker?

Yes, chuck roast is ideal for a slow cooker. Its marbling and connective tissue break down during long, gentle cooking, leaving the beef tender and easy to pull apart. For extra flavour, brown the joint in a hot pan first, then add it to the slow cooker with a little stock, seasoning and any vegetables or herbs you like. Cook on low for around 8–10 hours or on high for 4–6 hours, until the meat is fork-tender; timings can vary depending on the size of the joint and your appliance.

Should chuck roast be seared before slow cooking or braising?

Searing chuck roast before slow cooking or braising is recommended, though not essential. Browning the meat in a hot pan develops a rich, savoury crust that adds depth to the finished dish and its cooking liquid. Pat the roast dry first, season it, then sear it on all sides; transfer it to the slow cooker or braising pot and continue with the recipe. If you’re short on time, you can skip this step—the beef will still become tender when cooked slowly, but the flavour may be less complex.

What temperature should chuck roast reach to become fall-apart tender?

For chuck roast to become fall-apart tender, aim for an internal temperature of about 90–96°C. At this range, the connective tissue has had time to break down, although cooking time and the size of the joint also matter. Rather than relying on temperature alone, check that a fork or probe slides into the meat easily; if it still feels firm, continue cooking gently and check again.

What can you serve with chuck roast?

Chuck roast pairs well with sides that soak up its rich, savoury juices. Try mashed potatoes, roast potatoes, buttered noodles or crusty bread, alongside vegetables such as carrots, green beans, peas or cabbage. For a lighter balance, serve it with a crisp green salad. If the roast is cooked with potatoes and carrots, add a simple extra side such as steamed greens or bread.
Airfryer Recipes for Quick, Crispy Everyday Meals

airfryer recipes

Easy Air Fryer Recipes for Every Day

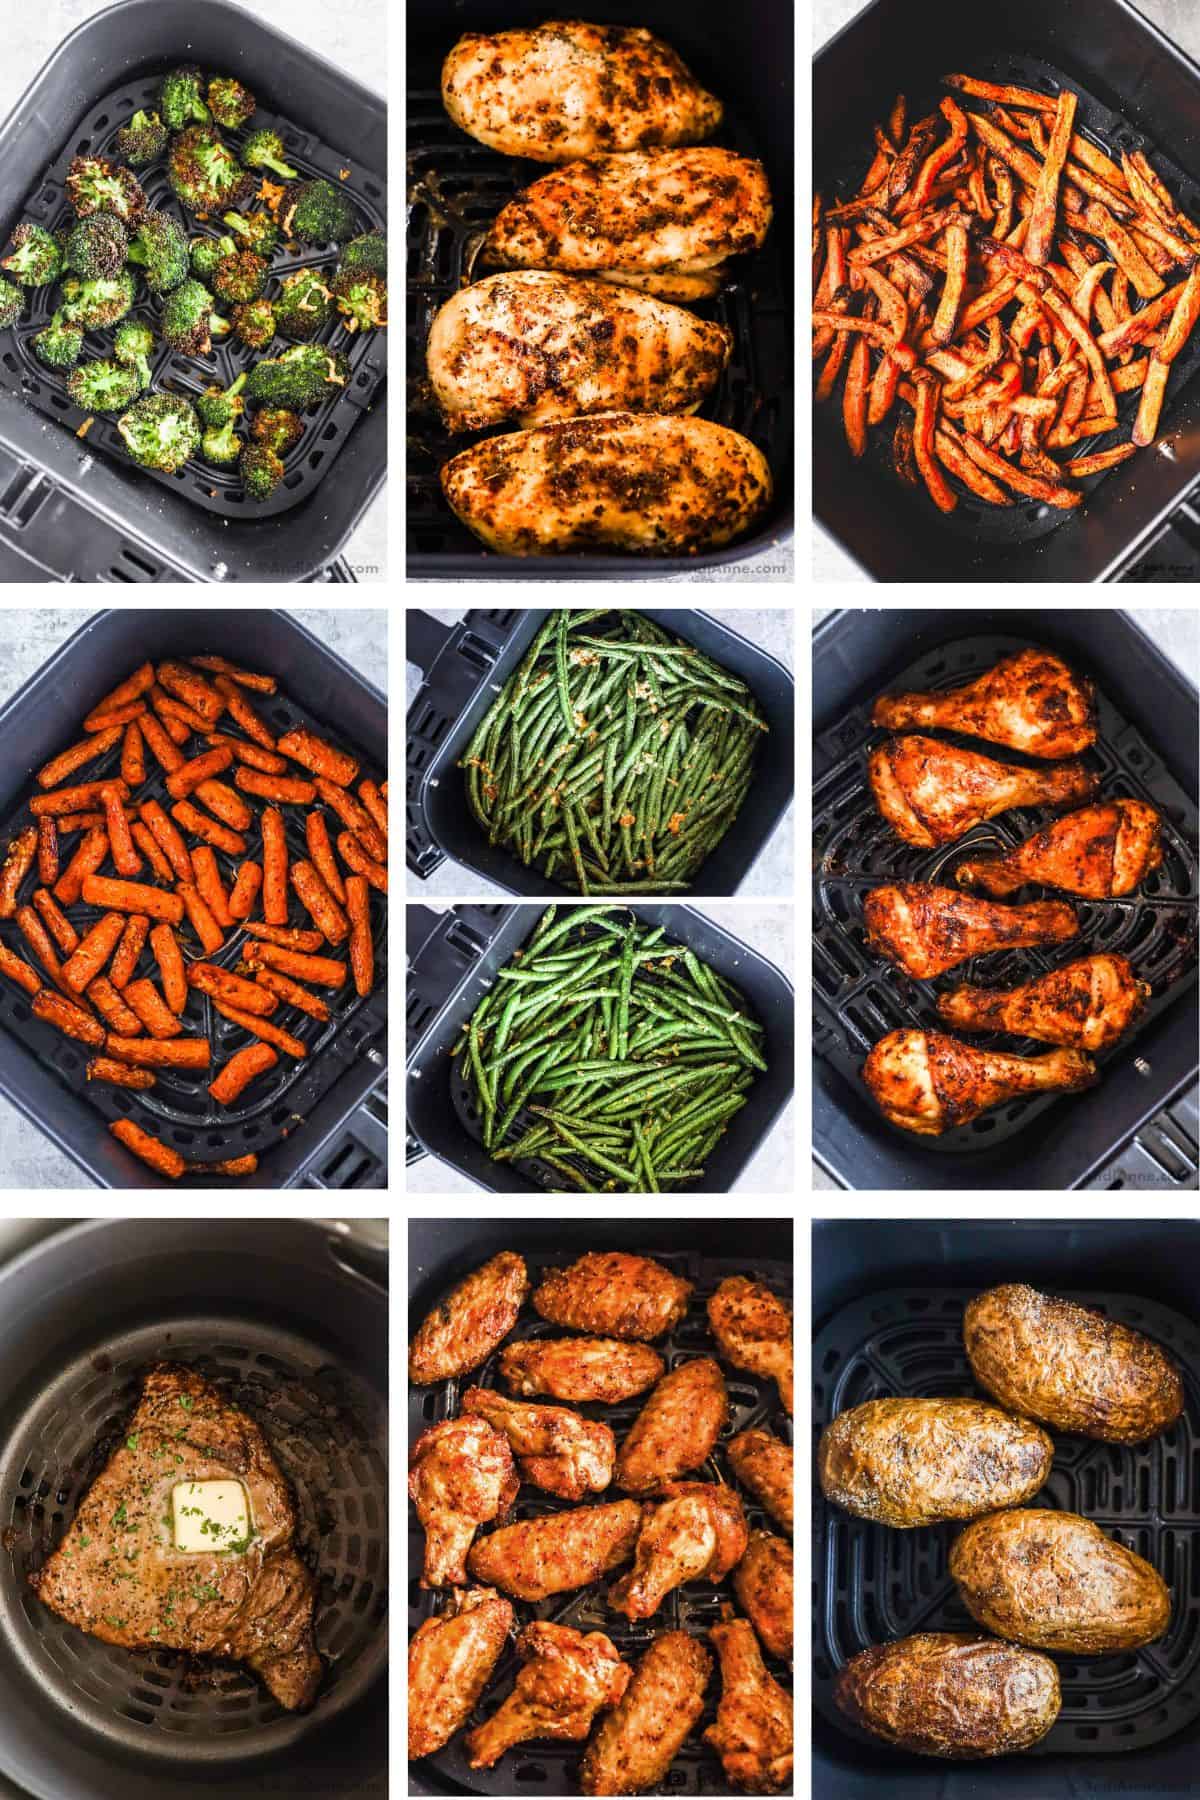
An air fryer can make everyday cooking quicker and simpler, from crisp potatoes to tender salmon and colourful roasted vegetables. It circulates hot air around the food, helping it brown with little or no oil. The best results come from cooking in a single layer, turning or shaking food part-way through, and checking it early: air fryers vary in size and performance.

Before you start

  • Preheat your air fryer if the manufacturer recommends it.
  • Leave space between pieces so hot air can circulate. Cook in batches if needed.
  • Use a small amount of oil for foods that benefit from extra browning, but avoid pouring oil directly into the drawer.
  • Treat the cooking times below as a guide and check your food as it cooks.

Crisp air fryer chips

These homemade chips are golden on the outside and fluffy in the middle.

Serves: 2

Ingredients:

  • 500g floury potatoes, such as Maris Piper
  • 1 tablespoon olive or vegetable oil
  • Salt and black pepper

Method:

  1. Peel the potatoes, if you like, and cut them into evenly sized chips.
  2. Rinse under cold water, then dry thoroughly with a clean tea towel. Toss with the oil.
  3. Air fry at 200°C for 20–25 minutes, shaking the basket two or three times, until golden and tender.
  4. Season with salt and pepper before serving.

For extra-crisp chips, soak the cut potatoes in cold water for 20–30 minutes before drying them well.

Lemon and herb salmon

A quick main course that pairs well with salad, rice or air-fried vegetables.

Serves: 2

Ingredients:

  • 2 salmon fillets
  • 1 teaspoon olive oil
  • ½ lemon, juiced, plus wedges to serve
  • ½ teaspoon dried mixed herbs
  • Black pepper

Method:

  1. Pat the salmon dry. Rub with the oil, lemon juice, herbs and a little black pepper.
  2. Place the fillets skin-side down in the air fryer basket.
  3. Cook at 180°C for 8–12 minutes, depending on their thickness, until the fish is opaque and flakes easily.
  4. Serve with lemon wedges.

Garlic and paprika chicken thighs

Smoky paprika and garlic give these chicken thighs plenty of flavour, while the air fryer helps crisp the skin.

Serves: 2

Ingredients:

  • 4 bone-in, skin-on chicken thighs
  • 1 teaspoon olive oil
  • 1 teaspoon smoked paprika
  • ½ teaspoon garlic granules
  • Salt and black pepper

Method:

  1. Pat the chicken dry. Mix the oil, paprika, garlic granules, salt and pepper, then rub over the thighs.
  2. Arrange the thighs in a single layer, skin-side down.
  3. Cook at 190°C for about 20–25 minutes, turning halfway through.
  4. Check that the thickest part of each thigh has reached 75°C and that the meat is cooked through before serving.

Roasted Mediterranean vegetables

A colourful side dish that is also delicious stirred through couscous or pasta.

Serves: 2–3

Ingredients:

  • 1 red pepper, cut into chunks
  • 1 courgette, cut into half-moons
  • 1 small red onion, cut into wedges
  • 150g cherry tomatoes
  • 1 tablespoon olive oil
  • 1 teaspoon dried oregano
  • Salt and black pepper

Method:

  1. Toss the vegetables with the oil, oregano, salt and pepper.
  2. Air fry at 190°C for 10–15 minutes, shaking the basket once or twice, until tender and lightly browned.
  3. Serve warm, or leave to cool and add to a salad.

Cinnamon and apple bites

For a simple pudding, warm apple pieces with cinnamon and serve with yoghurt or custard.

Serves: 2

Ingredients:

  • 2 eating apples, cored and cut into bite-sized pieces
  • ½ teaspoon ground cinnamon
  • 1 teaspoon honey or maple syrup (optional)

Method:

  1. Toss the apple pieces with the cinnamon and, if using, the honey or maple syrup.
  2. Place in a small heatproof dish that fits in your air fryer.
  3. Cook at 180°C for 8–12 minutes, stirring once, until soft and lightly browned.
  4. Serve warm with yoghurt, custard or a scoop of ice cream.

Make the most of your air fryer

Once you know how your appliance cooks, it is easy to adapt favourite dishes. Cut ingredients to a similar size for more even cooking, keep wet batters and loose seasonings under control, and clean the basket after use to prevent lingering flavours. With a few simple ingredients and a little experimentation, air fryer recipes can make weeknight meals both convenient and satisfying.


Air Fryer Recipes: 7 Frequently Asked Questions Answered

  1. What foods can you cook in an air fryer?
  2. Do you need to use oil in air fryer recipes?
  3. How do you convert oven cooking times and temperatures for an air fryer?
  4. Can you cook frozen food in an air fryer?
  5. How do you stop food sticking to the air fryer basket?
  6. How do you make chips crispy in an air fryer?
  7. How do you know when food is safely cooked in an air fryer?

What foods can you cook in an air fryer?

You can cook a wide range of foods in an air fryer, including chips, roast vegetables, chicken, fish, sausages, tofu and even some cakes or other baked treats. It works particularly well for foods that benefit from a crisp, browned finish, whether fresh or frozen. Cooking times vary between models, so check food as it cooks, and avoid putting loose wet batter or large amounts of liquid in the basket.

Do you need to use oil in air fryer recipes?

No, you don’t always need oil when cooking with an air fryer, as hot air does most of the work. However, a small amount can help fresh ingredients such as potatoes and vegetables brown and crisp, and can stop lean foods from drying out. Frozen foods that are already coated in oil usually need none. If a recipe calls for oil, lightly toss or brush it over the ingredients rather than pouring it into the air fryer basket.

How do you convert oven cooking times and temperatures for an air fryer?

As a general guide, reduce the oven temperature by about 20°C and shorten the cooking time by around 20% when adapting a recipe for an air fryer. For example, if a dish is cooked in a conventional oven at 200°C for 30 minutes, try air frying it at 180°C for about 24 minutes. These are only starting points: air fryers vary, and smaller portions may cook faster, so check the food early, turn or shake it if needed, and make sure it is thoroughly cooked before serving.

Can you cook frozen food in an air fryer?

Yes, many frozen foods can be cooked straight from frozen in an air fryer, including chips, vegetables and some breaded foods. You may need to add a few minutes to the cooking time, so check the packaging where available and follow the air fryer manufacturer’s guidance. Arrange food in a single layer for even cooking, shake or turn it part-way through, and make sure it is piping hot all the way through before serving.

How do you stop food sticking to the air fryer basket?

To stop food sticking to the air fryer basket, make sure it is clean and dry before cooking, then lightly coat the basket or the food with a little oil. Avoid using aerosol cooking sprays, which can damage some non-stick coatings; instead, apply oil with a brush or refillable sprayer. Arrange food in a single layer and turn it only once it has browned and released more easily. For delicate foods, use a suitably sized piece of perforated baking paper, following your air fryer’s instructions and never placing it in the basket while preheating.

How do you make chips crispy in an air fryer?

For crispy air fryer chips, cut potatoes into evenly sized pieces, soak them in cold water for 20–30 minutes, then drain and dry them thoroughly. Toss with a small amount of oil and arrange in a single layer, leaving space for the hot air to circulate. Cook at around 200°C for 20–25 minutes, shaking the basket a few times, until golden and crisp; adjust the time to suit your air fryer and the thickness of the chips.

How do you know when food is safely cooked in an air fryer?

The most reliable way to check food cooked in an air fryer is to use a clean food thermometer in the thickest part, avoiding bones. Follow the recipe or packaging instructions; as a general UK safety guide, food should reach 70°C for 2 minutes, or an equivalent combination such as 75°C for 30 seconds. Don’t rely on colour or crispness alone, as food can look cooked before the centre is safe.

Armenia’s Historical Monuments: A Journey Through the Past

Armenia’s Historical Monuments: Stone Witnesses to a Remarkable Past

Armenia’s history can be read in its landscapes. Across the country, ancient temples, medieval monasteries, churches and fortresses stand among mountains and valleys, reflecting centuries of faith, creativity and change. Built from local stone and shaped by distinctive architectural traditions, these monuments are more than reminders of the past: many remain places of worship, learning and community life today.

Garni: A Temple from the Ancient World

Near Yerevan, the Temple of Garni rises above the Azat River gorge. Its classical columns make it unlike Armenia’s familiar medieval churches, and it is widely recognised as the only surviving Greco-Roman colonnaded temple in the country. The temple is generally dated to the first century AD and is thought to have been dedicated to a pre-Christian deity. Its setting, with steep cliffs and sweeping views, makes the site especially striking.

Geghard: A Monastery Carved into the Rock

Not far from Garni stands the monastery of Geghard, a UNESCO World Heritage Site set within a dramatic mountain gorge. Parts of the complex are carved directly into the surrounding rock, creating chapels and chambers with a quiet, enclosed atmosphere. The monastery’s name is traditionally associated with the Holy Lance, a relic said to have been kept there. Geghard’s buildings and setting show how closely Armenian religious architecture is connected to the natural landscape.

Etchmiadzin and Zvartnots: Early Christian Heritage

Armenia adopted Christianity as its state religion in the early fourth century, and its churches preserve some of the most important evidence of this early Christian history. Etchmiadzin Cathedral, in the city of Vagharshapat, is traditionally regarded as the oldest cathedral in the world. It remains a major spiritual centre for the Armenian Apostolic Church.

Nearby are the remains of Zvartnots Cathedral, built in the seventh century. Though the building was destroyed by an earthquake several centuries later, its circular ruins reveal the ambition of its original design. Together, Etchmiadzin and Zvartnots help tell the story of Armenia’s early Christian architecture and its influence on later generations.

Haghpat and Sanahin: Monasteries of Learning

In northern Armenia, the monasteries of Haghpat and Sanahin overlook the Debed River valley. Both were founded in the tenth century and are recognised by UNESCO for their architectural and cultural importance. Their churches, libraries, bell towers and khachkars reflect a period when monasteries served not only as religious centres but also as places of scholarship, manuscript production and education.

The khachkar, or carved stone cross, is one of Armenia’s most distinctive forms of memorial art. These finely worked stones can be found across the country, often in monastery courtyards and historic cemeteries. Each design is different, combining crosses with intricate patterns of leaves, rosettes and interlacing lines.

Noravank and Tatev: Monuments in the Mountains

Noravank Monastery is known for its warm-toned stone buildings and its location among the red cliffs of Vayots Dzor. The complex includes the Church of the Holy Mother of God, whose narrow external staircase has become one of Armenia’s most recognisable architectural features. The monastery was also an important centre of learning and the arts in the medieval period.

Further south, Tatev Monastery stands on a plateau above the Vorotan Gorge. Founded in the ninth century, it once served as a religious and educational centre. The vast gorge and surrounding mountains make Tatev’s setting as memorable as its architecture. The monastery is also a reminder of the ingenuity required to build and sustain communities in Armenia’s rugged terrain.

Preserving the Past

Armenia’s historical monuments have endured earthquakes, conflict, changing borders and the passage of time. Their preservation depends on careful restoration, responsible tourism and respect for their religious and cultural significance. Visitors can help by following local guidance, treating sacred spaces with care and avoiding damage to ancient stonework.

From Garni’s classical columns to the rock-cut chambers of Geghard, Armenia’s monuments reveal a rich and varied past. Each site offers a different perspective on the country’s history, while together they form an extraordinary cultural landscape—one that continues to inspire those who encounter it.


Celebrating Historical Monuments: Preserving Heritage and Inspiring Discovery

  1. Preserve history for future generations.
  2. Showcase remarkable architecture and craftsmanship.
  3. Help us understand past cultures and beliefs.
  4. Attract visitors and support local communities.
  5. Create a strong sense of place and identity.
  6. Inspire learning, curiosity and discovery.


Challenges Facing Historical Monuments: Maintenance Costs, Tourism Impact, and Accessibility Issues

  1. They can be costly to maintain.
  2. Tourism may cause overcrowding and damage.
  3. Access can be difficult for some visitors.

Preserve history for future generations.

Historical monuments preserve the stories, achievements and traditions of earlier generations, giving future generations a tangible link to the past. By protecting these places, we help people learn how communities lived, what they valued and how societies changed over time. Their lasting presence keeps history visible and meaningful, allowing it to be explored and passed on for years to come.

Showcase remarkable architecture and craftsmanship.

Historical monuments showcase remarkable architecture and craftsmanship, revealing the skill, creativity and vision of the people who built them. From finely carved stonework and intricate decorative details to ingenious structural designs, each feature offers a glimpse into the techniques and artistic traditions of its time. Preserving these monuments allows future generations to appreciate this expertise and understand how architecture reflects a society’s culture and history.

Help us understand past cultures and beliefs.

Historical monuments offer a window into the cultures and beliefs of people who lived before us. Their architecture, carvings, inscriptions and decorations reveal what communities valued, how they worshipped and how they organised daily life. By studying these places, we can better understand the ideas and traditions that shaped the past—and how they continue to influence the world today.

Attract visitors and support local communities.

Historical monuments attract visitors who come to explore their architecture, stories and cultural significance. This interest can support local communities by creating opportunities for guides, cafés, accommodation providers, craftspeople and other small businesses. When tourism is managed responsibly, it can also encourage investment in local services and help fund the care and preservation of these important sites.

Create a strong sense of place and identity.

Historical monuments create a strong sense of place and identity by connecting people with the stories, traditions and events that have shaped their community. Recognisable landmarks can become symbols of a town or region, fostering shared pride and belonging. They also give visitors a glimpse of what makes a place distinctive, helping its history remain part of everyday life.

Inspire learning, curiosity and discovery.

Historical monuments inspire learning, curiosity and discovery by bringing the past to life. Exploring an ancient temple, church or fortress encourages visitors to ask how it was built, who used it and what life was like at the time. In Armenia, monuments such as Garni and Geghard offer a vivid introduction to the country’s history, architecture and traditions, turning a visit into an opportunity to learn beyond the pages of a book.

They can be costly to maintain.

Historical monuments can be costly to maintain, as their age and delicate materials often require specialist repairs, skilled craftspeople and regular conservation work. Weather, pollution and heavy visitor numbers can accelerate deterioration, while restoration must be carried out carefully to preserve each site’s original character. These expenses can place a significant burden on public funds and local communities.

Tourism may cause overcrowding and damage.

Tourism can bring welcome attention and income to historical monuments, but large numbers of visitors may also cause overcrowding and physical damage. Constant foot traffic can wear down floors and pathways, while touching fragile surfaces, leaving litter or ignoring access rules can harm historic features. Crowds may also disrupt worship and make it harder for visitors to appreciate a site. Careful visitor management and responsible behaviour help protect these irreplaceable places for future generations.

Access can be difficult for some visitors.

Access to historical monuments can be difficult for some visitors. Many are located in remote areas, reached by uneven paths, steep steps or long walks, while historic buildings may lack ramps, lifts and accessible facilities. These challenges can make visits especially demanding for people with limited mobility, families with young children and older visitors. Planning ahead and checking access information can help, but improvements are often needed to make these important places welcoming to everyone.

Ground Beef Dinner Ideas: Easy, Tasty Meals for Every Night of the Week

ground beef dinner ideas

Ground Beef Dinner Ideas for Every Night of the Week

Ground beef, known as beef mince in the UK, is a handy ingredient for quick, satisfying dinners. It cooks quickly, takes on flavours beautifully and works in everything from comforting classics to fresh, lighter meals. Whether you have a pack in the fridge or are planning the week’s meals, these ideas can help turn it into something delicious.

Classic spaghetti bolognese

Cook beef mince with onion, carrot and celery, then add garlic, chopped tomatoes and a little stock. Let the sauce simmer until rich and tender, and serve with spaghetti. A splash of milk or a pinch of dried herbs can round out the flavour. Make extra for an easy lunch the next day.

Beef tacos

Brown the mince with onion, cumin, paprika and chilli powder, then spoon it into warm tortillas or crisp taco shells. Add shredded lettuce, tomato, grated cheese and a dollop of yoghurt or sour cream. Put the toppings on the table and let everyone build their own.

Cottage pie

For a comforting family meal, simmer mince with onion, carrots, peas and gravy, then top with mashed potato. Bake until the filling is bubbling and the potato is golden. Cottage pie is also a good way to use up leftover vegetables or mash.

Beef-stuffed peppers

Mix browned mince with cooked rice, chopped tomatoes, herbs and a little grated cheese. Spoon the mixture into halved peppers and bake until the peppers are tender. Serve with a green salad for a colourful, well-rounded dinner.

Beef and bean chilli

Brown the mince with onion and garlic, then add tomatoes, kidney beans, chilli and spices. Simmer until the flavours come together and serve with rice, baked potatoes or warm flatbreads. Adjust the chilli to suit your taste, and add sweetcorn or extra beans if you like.

Homemade beef burgers

Season the mince with salt and pepper, shape it gently into patties and cook until thoroughly done. Serve in toasted buns with lettuce, sliced tomato, cheese and your favourite sauce. Roasted potato wedges make an easy side.

Quick beef noodle stir-fry

Brown the mince in a hot pan, then add sliced vegetables such as peppers, carrots and spring onions. Stir in cooked noodles and a simple sauce made with soy sauce, garlic and a little honey or ginger. It is a quick option for using up vegetables in the fridge.

Beef meatballs

Combine mince with breadcrumbs, an egg and seasoning, then roll into small balls. Cook them in tomato sauce and serve with pasta, rice or crusty bread. You can add finely grated onion or herbs to the mixture for extra flavour.

Simple tips for better beef mince dinners

  • Brown it well: Give the mince room in the pan and cook in batches if needed. A good sear adds savoury flavour.
  • Build flavour: Onion, garlic, herbs, spices and tomato paste are easy ways to make a simple mince dish more interesting.
  • Make it go further: Add lentils, beans, grated vegetables or mushrooms to stretch a meal and add texture.
  • Plan for leftovers: Cooked mince dishes can often be refrigerated and reheated for another meal. Cool leftovers promptly and follow food-safety guidance.
  • Cook safely: Follow the instructions on the packaging and make sure minced beef is cooked thoroughly, with no pink meat remaining.

From a quick stir-fry to a slow-simmered cottage pie, beef mince can be adapted to suit different tastes, budgets and schedules. Keep a few store-cupboard staples on hand, and you will have plenty of easy dinner possibilities ready to go.


Beef Mince Dinner Ideas: 7 Frequently Asked Questions

  1. What to make for dinner tonight with beef mince?
  2. What is the healthiest way to cook ground beef?
  3. What can I make with ground beef and nothing else?
  4. What is the best idea for dinner?
  5. What is the best way to eat ground beef?
  6. What is a cowboy dinner?
  7. What is the most popular meal for dinner?

What to make for dinner tonight with beef mince?

If you’re wondering what to make for dinner tonight with beef mince, try a quick beef and tomato pasta, tacos or a noodle stir-fry. For a cosy meal, turn it into cottage pie or a simple chilli with beans. Brown the mince with onion and garlic, add your favourite seasoning and vegetables, then serve with pasta, rice, potatoes or wraps—whatever you have to hand.

What is the healthiest way to cook ground beef?

The healthiest way to cook ground beef (beef mince) is to choose a lean option, then brown it in a non-stick pan with little or no added oil, or grill it so excess fat can drain away. Drain off any rendered fat, avoid charring the meat, and cook it thoroughly; in the UK, the Food Standards Agency advises cooking minced meat until steaming hot throughout, with no pink meat remaining. For a balanced meal, serve it with plenty of vegetables and wholegrains.

What can I make with ground beef and nothing else?

If you have only ground beef (beef mince), you can simply brown it in a non-stick pan, breaking it up as it cooks; it should release enough fat to prevent sticking. Cook it thoroughly, with no pink remaining, and eat it as it is. It won’t be especially seasoned, but it makes a simple, filling meal—and if you find even a pinch of salt or pepper, that will improve the flavour.

What is the best idea for dinner?

The best dinner idea depends on your tastes and how much time you have, but beef mince tacos are a quick, versatile choice. Brown the mince with onion and spices, then serve it in warm tortillas with salad, grated cheese and yoghurt or salsa. For a comforting meal, cottage pie is another dependable favourite.

What is the best way to eat ground beef?

There’s no single best way to eat ground beef (beef mince): it’s delicious in tacos, pasta sauce, chilli, burgers or a comforting cottage pie. For a tasty, balanced meal, brown it with onions, garlic and your favourite herbs or spices, then serve with vegetables and rice, pasta or potatoes. Cook mince thoroughly until steaming hot all the way through, following the instructions on the packaging.

What is a cowboy dinner?

A cowboy dinner is a hearty, informal meal inspired by American ranch and campfire cooking. There is no single set recipe, but it often combines ground beef with beans, sweetcorn, tomatoes and potatoes, seasoned with spices such as chilli, paprika or cumin. It may be cooked in one pan or baked as a casserole, making it a filling, easy-to-prepare dinner.

There is no single dinner that is most popular everywhere, as tastes vary by country, culture and household. However, familiar favourites such as pasta, burgers, tacos and casseroles are enjoyed in many places. For an easy ground beef dinner, spaghetti bolognese is a particularly popular choice: it is comforting, simple to prepare and easy to adapt with vegetables, herbs or different seasonings.

Easy Homemade Bread Recipe for Beginners

bread recipe

How to Make Homemade Bread

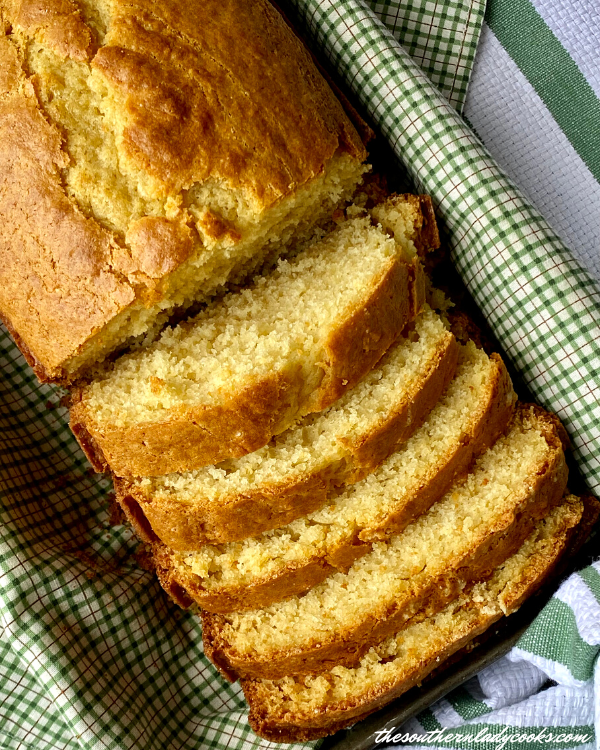
There is something special about a loaf of bread fresh from the oven: a crisp, golden crust, a soft centre and the comforting smell of warm dough. This straightforward recipe is ideal for beginners and uses just a handful of everyday ingredients.

Ingredients

  • 500g strong white bread flour, plus extra for dusting
  • 7g sachet fast-action dried yeast
  • 10g fine salt
  • About 320ml lukewarm water
  • 1 tablespoon olive oil, plus a little extra for greasing

Method

  1. Combine the dry ingredients. Put the flour into a large mixing bowl. Add the yeast and salt, keeping them apart at first, then stir to combine.
  2. Make the dough. Pour in most of the lukewarm water and the olive oil. Mix with a wooden spoon or your hands, adding the remaining water a little at a time until you have a soft, slightly tacky dough. You may not need all the water.
  3. Knead. Turn the dough out on to a lightly floured surface. Knead for about 8–10 minutes, until smooth and elastic. Alternatively, use a stand mixer fitted with a dough hook for around 5–7 minutes.
  4. Leave to rise. Lightly oil a clean bowl and place the dough inside. Cover with a clean tea towel or lightly oiled cling film. Leave in a warm place for about 1–1½ hours, or until roughly doubled in size.
  5. Shape the loaf. Gently press the air out of the dough, then shape it into a round or oval loaf. Place it on a baking tray lined with baking paper, or in a greased loaf tin.
  6. Prove again. Cover loosely and leave to rise for 30–45 minutes, until the dough looks puffy. Meanwhile, heat the oven to 220°C (200°C fan)/Gas Mark 7.
  7. Bake. If you like, dust the loaf lightly with flour and make a shallow cut across the top with a sharp knife. Bake for 25–30 minutes, until deeply golden. The loaf should sound hollow when tapped underneath.
  8. Cool before slicing. Transfer the loaf to a wire rack and leave it to cool. Cutting into it while it is still very hot can make the centre seem doughy.

Tips for a Better Loaf

  • Use lukewarm rather than hot water; very hot water can stop the yeast from working properly.
  • If the dough feels dry, add a little more water. If it is too sticky to handle, dust your hands and work surface with a small amount of flour.
  • Rising times vary depending on the temperature of your kitchen. Look for the dough to increase in size rather than relying only on the clock.
  • For a crispier crust, place an oven-safe dish of hot water on the bottom shelf of the oven while the loaf bakes. Take care when handling the hot dish and steam.

Serving and Storing

Enjoy the bread warm with butter, or serve it alongside soup, cheese or a favourite sandwich filling. Once completely cool, store the loaf in a bread bin or paper bag for a couple of days. It can also be sliced and frozen, with individual slices taken out as needed.

With a little kneading and patience, simple ingredients become a satisfying homemade loaf—perfect for sharing at the table.


Top Tips for Perfecting Your Homemade Bread Recipe

  1. Weigh ingredients for accuracy.
  2. Use lukewarm water to wake the yeast.
  3. Keep salt separate from the yeast at first.
  4. Knead until the dough feels smooth and elastic.
  5. Let the dough rise until doubled in size.
  6. Shape the loaf gently to keep some air inside.
  7. Preheat the oven fully before baking.
  8. Cool the loaf before slicing.

Weigh ingredients for accuracy.

For reliable results, weigh your ingredients rather than relying on cups or guesswork. Small differences in the amount of flour or water can change the texture of the dough and affect how well the loaf rises. Use digital kitchen scales for the best accuracy, and measure each ingredient before you begin.

Use lukewarm water to wake the yeast.

Use lukewarm water to help activate the yeast and get your dough rising. Water that feels comfortably warm to the touch is ideal; if it is too hot, it can damage the yeast, while cold water may slow its activity. Add it gradually as you mix, as the amount needed can vary slightly depending on the flour.

Keep salt separate from the yeast at first.

When making bread, keep the salt and yeast separate until you add the liquid and begin mixing. Salt can slow down yeast activity if it sits in direct contact with it, which may affect how well the dough rises. Adding them to different parts of the flour first helps the yeast get off to a good start and supports a light, well-risen loaf.

Knead until the dough feels smooth and elastic.

Knead the dough until it feels smooth and elastic—this usually takes about 8–10 minutes by hand. Press it with the heel of your hand, fold it over and turn it as you work. The dough is ready when it springs back gently after being pressed and stretches without tearing easily. This develops the gluten, helping the loaf rise well and giving it a light, even texture.

Let the dough rise until doubled in size.

Let the dough rise in a warm, draught-free place until it has roughly doubled in size. This usually takes about 1–1½ hours, though the timing can vary with the temperature of your kitchen. Rather than relying only on the clock, check that the dough looks noticeably larger and feels light and airy before shaping it.

Shape the loaf gently to keep some air inside.

When shaping your loaf, handle the dough gently to preserve some of the air created during proving. Avoid pressing or kneading it too firmly; instead, use light movements to form the dough into your desired shape. This helps the bread rise well in the oven and gives it a lighter, softer texture.

Preheat the oven fully before baking.

Preheat the oven fully before baking so the loaf goes into an oven at the correct temperature from the start. This helps the bread rise evenly and develop a crisp, golden crust. Wait until the oven has reached the temperature stated in the recipe before putting the dough in.

Cool the loaf before slicing.

Let the loaf cool on a wire rack before slicing. As it rests, the crumb finishes setting and excess steam escapes, helping the bread keep its texture. Cutting into it while it is still hot can make the centre seem gummy and cause the slices to squash.

Traditional Shepherd’s Pie Recipe: A Taste of British Comfort

shepherd's pie recipe

The Classic Shepherd’s Pie Recipe

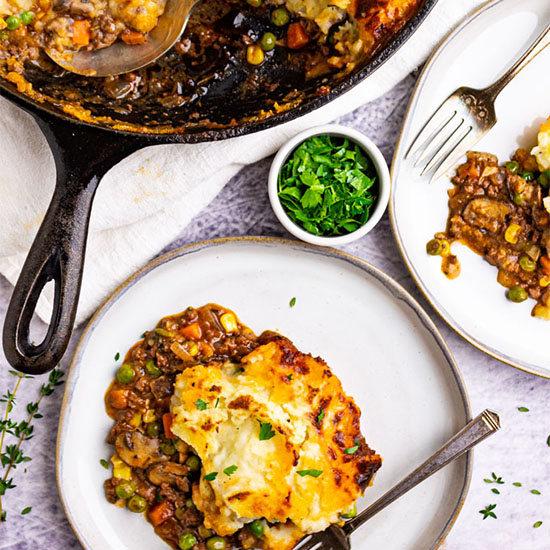
Shepherd’s Pie is a comforting and hearty dish that has been a favourite in British households for generations. Made with minced lamb or beef, topped with creamy mashed potatoes, this dish is the epitome of comfort food.

Ingredients:

  • 500g minced lamb or beef
  • 1 onion, finely chopped
  • 2 carrots, diced
  • 2 cloves of garlic, minced
  • 400g tin of chopped tomatoes
  • 200ml beef stock
  • 1 tbsp Worcestershire sauce
  • Salt and pepper to taste
  • 900g potatoes, peeled and chopped
  • 50g butter
  • 100ml milk

Instructions:

  1. In a large pan, brown the minced meat over medium heat. Add the onions, carrots, and garlic, and cook until softened.
  2. Pour in the chopped tomatoes and beef stock. Add Worcestershire sauce, salt, and pepper. Simmer for 20-30 minutes until the mixture thickens.


Five Essential Tips for the Perfect Shepherd’s Pie

  1. Use minced lamb for a traditional shepherd’s pie flavour.
  2. Add Worcestershire sauce for an extra depth of flavour.
  3. Top the pie with creamy mashed potatoes for a comforting finish.
  4. Include finely chopped carrots and peas in the filling for added texture and nutrients.
  5. Bake the shepherd’s pie until the top is golden brown and crispy.

Use minced lamb for a traditional shepherd’s pie flavour.

For an authentic and traditional taste in your shepherd’s pie, opt for minced lamb as the key ingredient. Minced lamb brings a rich and distinctive flavour that is synonymous with classic shepherd’s pie recipes. The unique savour of lamb adds depth to the dish, enhancing its overall appeal and making each bite a delightful experience. Choose minced lamb to capture the true essence of this beloved British comfort food.

Add Worcestershire sauce for an extra depth of flavour.

For an extra depth of flavour in your Shepherd’s Pie, consider adding Worcestershire sauce to the meat mixture. This classic condiment enhances the savoury profile of the dish, adding a rich and tangy note that complements the minced lamb or beef perfectly. Just a tablespoon of Worcestershire sauce can elevate the overall taste and make your Shepherd’s Pie even more delicious and satisfying.

Top the pie with creamy mashed potatoes for a comforting finish.

To enhance the comforting appeal of your shepherd’s pie, ensure to top it with a generous layer of creamy mashed potatoes. This final touch not only adds a velvety texture to the dish but also creates a satisfying and homely finish that perfectly complements the savoury meat filling. The creamy mashed potatoes provide a delightful contrast to the rich flavours below, making each bite a truly comforting experience.

Include finely chopped carrots and peas in the filling for added texture and nutrients.

For an extra layer of texture and nutrients in your shepherd’s pie, consider adding finely chopped carrots and peas to the filling. Not only do these colourful vegetables enhance the visual appeal of the dish, but they also provide a boost of vitamins and fibre. The carrots add a subtle sweetness, while the peas contribute a pop of freshness, creating a well-balanced and wholesome filling that complements the savoury meat perfectly.

Bake the shepherd’s pie until the top is golden brown and crispy.

For a perfect finishing touch to your shepherd’s pie, bake it in the oven until the top is beautifully golden brown and crispy. This not only adds a delightful crunch to each bite but also enhances the visual appeal of the dish. The contrast between the creamy mashed potatoes and the crispy top creates a textural sensation that will have your taste buds dancing with joy. Be sure to keep an eye on it while baking to achieve that ideal balance of crispiness without burning.

Best Travel Guide Books for Every Kind of Traveller

best travel guide books

The Best Travel Guide Books for Every Kind of Traveller

A good travel guide can do more than point you towards a hotel or landmark. It can help you understand a place, plan a realistic itinerary and discover experiences you might otherwise miss. The best choice depends on how you like to travel: some books are practical and concise, while others focus on history, culture or independent exploration.

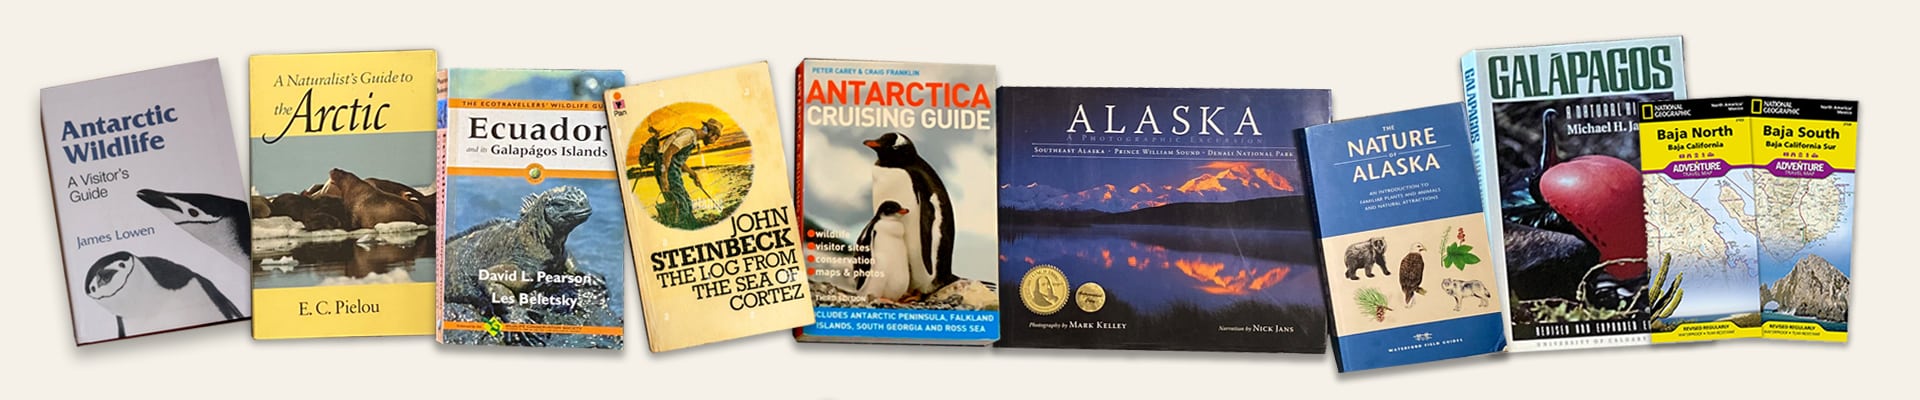
Here are some of the most useful travel guidebook series, and the kind of traveller each one suits.

Lonely Planet: best all-rounders

Lonely Planet guides are a reliable starting point for many trips. They typically combine practical advice with suggested itineraries, transport information, maps and recommendations for places to eat and stay. Their broad coverage makes them useful for both first-time visitors and travellers planning a longer journey.

Choose a Lonely Planet guide if you want one book that covers the essentials. As with any guidebook, check the publication date before travelling, especially if you are relying on details such as opening hours, prices or transport routes.

Rough Guides: best for independent travel

Rough Guides are particularly helpful for travellers who want a strong sense of a destination’s character alongside practical planning advice. Their guides often provide detailed cultural and historical context, as well as ideas for exploring beyond the most familiar sights.

They are a good option for independent travellers who enjoy doing a little research and shaping their own itinerary rather than following a tightly planned tour.

DK Eyewitness: best for visual planning

DK Eyewitness guides stand out for their photographs, illustrations and clear visual layouts. They can make it easier to compare sights and get a feel for a destination before setting off. Many editions also include neighbourhood maps and suggested routes.

These guides are especially handy for city breaks and for travellers who prefer maps and images to long blocks of text. Their visual approach can also be useful when deciding what to prioritise on a short trip.

Bradt Guides: best for less-visited destinations

Bradt Guides have a reputation for covering destinations that receive less attention from mainstream travel publishers. Depending on the destination, a guide may offer detailed information on local culture, wildlife, transport and practicalities that can be harder to find in a general travel book.

If you are planning a trip somewhere off the usual tourist trail, Bradt is well worth considering. Check that the guide covers the places and activities you have in mind, as coverage can vary between destinations.

Rick Steves: best for European sightseeing

Rick Steves’ guidebooks are geared towards independent travellers exploring Europe. They focus on practical sightseeing, with suggested routes, advice on using public transport and explanations of major attractions. The approach is especially suited to visitors who want to make the most of their time at museums, historic sites and city landmarks.

These books are most useful when the destination falls within the series’ coverage. For places outside that range, another publisher may offer more comprehensive local information.

Blue Guides: best for history and culture

Blue Guides are a strong choice for readers who want more than a quick overview of a destination’s main attractions. They are known for their detailed coverage of art, architecture and history, making them particularly valuable for culturally focused trips.

They may be more detailed than some travellers need for a relaxed holiday, but they are excellent companions for those who enjoy understanding the stories behind the places they visit.

Insight Guides: best for inspiration

Insight Guides combine destination information with photography and background on local history, society and culture. They are often as useful during the dreaming and planning stages as they are on the trip itself.

Choose one if you want a handsome, informative introduction to a destination, or if you are looking for inspiration before settling on an itinerary.

How to choose the right guidebook

  • Match the book to your trip: A city-break guide may be more useful than a country-wide overview if you are visiting one place for only a few days.
  • Check the edition date: Travel details can change. Look for the latest available edition, particularly for transport, prices and opening times.
  • Think about your reading style: Choose a visual guide for quick browsing, or a more text-heavy guide for deeper cultural and historical detail.
  • Consider the level of detail: A compact guide is easy to carry, while a comprehensive one may be better for planning a longer trip.
  • Use more than one source: A guidebook is a helpful foundation, but check official websites and recent local information for details that may have changed.

Final thoughts

There is no single best travel guidebook for everyone. Lonely Planet and Rough Guides are dependable choices for broad, practical coverage; DK Eyewitness is excellent for visual planning; Bradt serves travellers heading to less-visited places; and Rick Steves and Blue Guides suit particular interests in European sightseeing and cultural history.

Before buying, think about what you need most from a guide: efficient planning, local context, destination inspiration or detailed sightseeing advice. The right book is the one that helps you travel with confidence while leaving plenty of room for discovery.


Top Advantages of Using Travel Guide Books: Enhancing Your Journey with Expert Tips and Insights

  1. Help plan routes and itineraries
  2. Offer practical local travel advice
  3. Provide maps and useful reference points
  4. Share cultural and historical context
  5. Highlight sights beyond the usual tourist trail
  6. Make trip planning easier and more inspiring


Six Drawbacks of Relying on Travel Guidebooks

  1. Information can become outdated quickly.
  2. Guidebooks add weight to your luggage.
  3. Some recommendations may feel generic.
  4. Popular spots can be overemphasised.
  5. Local details may be limited.
  6. They cannot replace current local advice.

Help plan routes and itineraries

Travel guidebooks make it easier to plan routes and itineraries by bringing key sights, useful maps and suggested journeys together in one place. They can help you group nearby attractions, estimate how long to spend in each area and choose practical ways to get around. Whether you are organising a short city break or a longer trip, a guidebook offers a helpful starting point for building a balanced itinerary—while leaving room to explore at your own pace.

Offer practical local travel advice

One of the main advantages of the best travel guidebooks is their practical local advice. They can explain how to get around using public transport, which areas are easiest to explore on foot, and what local customs or etiquette to keep in mind. Many also include useful tips on opening times, booking popular attractions, finding places to eat and avoiding common tourist pitfalls. This on-the-ground guidance helps travellers feel more prepared and make confident choices while exploring.

Provide maps and useful reference points

Travel guidebooks provide maps and useful reference points that make it easier to find your way around an unfamiliar destination. Clear street plans, transport diagrams and marked landmarks can help you plan routes, estimate distances and spot nearby attractions. Having these details together in one book is also handy when you are offline or want a quick overview without switching between apps.

Share cultural and historical context

Travel guidebooks can bring a destination to life by explaining the history, traditions and social customs behind the places you visit. Understanding the stories behind a monument, the origins of a local dish or the meaning of a festival makes sightseeing more rewarding and helps you engage with local culture respectfully.

Highlight sights beyond the usual tourist trail

A good travel guidebook can help you look beyond the well-known landmarks and discover the places that give a destination its distinctive character. Alongside popular attractions, it may point you towards quiet neighbourhoods, independent cafés, local markets, lesser-known museums and scenic walks that are easy to overlook. These suggestions can lead to more personal experiences and a better sense of everyday life, helping your trip feel less like a checklist and more like an exploration.

Make trip planning easier and more inspiring

The best travel guidebooks make planning easier by bringing practical details, suggested itineraries and useful local insights together in one place. They can also spark inspiration, introducing you to neighbourhoods, landmarks and experiences you might not have considered. With ideas to help shape your days and information to support your decisions, a guidebook can turn the early stages of planning into an enjoyable part of the trip.

Information can become outdated quickly.

One drawback of even the best travel guidebooks is that their information can become outdated quickly. Restaurants close, prices change, transport routes are revised and attractions may alter their opening hours or booking requirements after a book is published. Always check time-sensitive details with official websites or recent local sources before you travel, rather than relying on the guidebook alone.

Guidebooks add weight to your luggage.

One drawback of travel guidebooks is the extra weight they add to your luggage. A comprehensive guide can be bulky, and carrying it around all day may be inconvenient, particularly when travelling with hand luggage or moving between destinations. Consider taking only the relevant pages, choosing a compact edition or using a digital version to lighten your load.

Some recommendations may feel generic.

Some recommendations in travel guidebooks can feel generic, especially when they focus on popular attractions, well-known restaurants or standard itineraries. This may make it harder to find places that match your interests or offer a more local experience. Use guidebook suggestions as a starting point, then look for recent recommendations from local sources and travellers with similar tastes.

Travel guidebooks can place too much emphasis on popular attractions, directing large numbers of visitors to the same well-known sights, restaurants and neighbourhoods. As a result, these places may feel crowded or overly commercial, while quieter local favourites receive little attention. Use a guidebook as a starting point, then ask residents for recommendations and leave time to explore beyond the most famous spots.

Local details may be limited.

Even the best travel guidebooks may offer only limited local detail. They need to cover a wide range of sights and practical information, so lesser-known neighbourhoods, small businesses and community-run experiences can be overlooked. As a result, travellers may miss places that locals value or find that recommendations do not reflect recent changes. Supplementing a guidebook with local websites, recent reviews or advice from residents can help fill in the gaps.

They cannot replace current local advice.

Travel guidebooks can be invaluable for planning, but they cannot replace up-to-date local advice. Details such as opening hours, transport services, prices and neighbourhood conditions may change after a book is published. Before making plans, check official websites and seek recent recommendations from people who know the area, such as local residents or accommodation staff.

Savoury Delights: Authentic Italian Wedding Soup Recipe

italian wedding soup recipe

Delicious Italian Wedding Soup Recipe

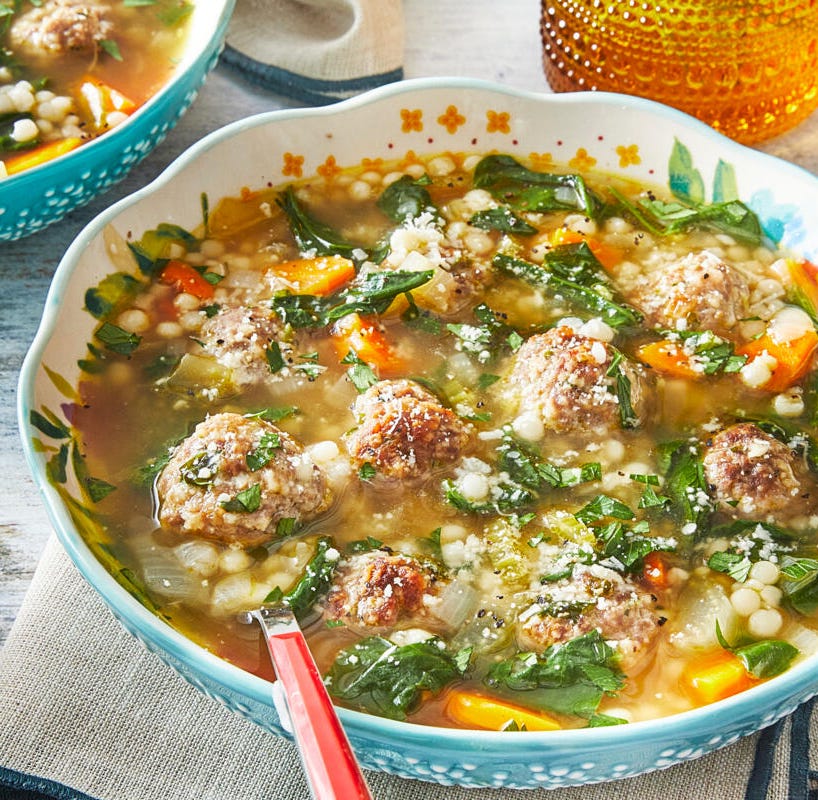
Italian wedding soup is a classic dish that combines savory meatballs, hearty greens, and flavorful broth. This comforting soup is perfect for any occasion and is sure to warm your soul. Here’s a simple recipe to help you recreate this Italian favourite in your own kitchen.

Ingredients:

  • 500g ground beef
  • 1/2 cup breadcrumbs
  • 1/4 cup grated Parmesan cheese
  • 1 egg
  • 1 small onion, finely chopped
  • 2 cloves of garlic, minced
  • Salt and pepper to taste
  • 8 cups chicken broth
  • 2 cups chopped spinach or kale
  • 1/2 cup orzo pasta

Instructions:

  1. In a bowl, combine the ground beef, breadcrumbs, Parmesan cheese, egg, onion, garlic, salt, and pepper. Mix well and form small meatballs.
  2. In a large pot, bring the chicken broth to a simmer. Add the meatballs and cook for about 10 minutes until they are cooked through.
  3. Add the chopped spinach or kale and orzo pasta to the pot. Simmer for an additional 10 minutes until the greens are wilted and the pasta is cooked.
  4. Your delicious Italian wedding soup is now ready to be served. Ladle into bowls and garnish with extra Parmesan cheese if desired. Enjoy!


Discover the Delight of Italian Wedding Soup: A Hearty, Customisable Recipe Perfect for Any Gathering

  1. 1. Comforting and hearty soup that is perfect for cold weather.
  2. 2. Easy-to-follow recipe with simple ingredients that are readily available.
  3. 3. Versatile dish that can be customised with different greens or pasta shapes.
  4. 4. The combination of meatballs, greens, and broth creates a delicious and balanced flavour profile.
  5. 5. Ideal for gatherings or family meals as it can be prepared in large batches.


Challenges of Preparing Traditional Italian Wedding Soup: Time, Ingredient Availability, and Freshness Concerns

  1. Preparation can be time-consuming due to making the meatballs from scratch.
  2. Some ingredients may not be readily available in all supermarkets.
  3. Leftovers may not retain the same freshness and flavour compared to when freshly cooked.

1. Comforting and hearty soup that is perfect for cold weather.

Indulge in the warmth and heartiness of Italian wedding soup, a comforting dish that is ideal for chilly weather. This soul-soothing soup not only fills your belly but also warms you from the inside out, making it a perfect choice for those cold winter days. The combination of savoury meatballs, nourishing greens, and flavourful broth creates a satisfying meal that brings a sense of comfort and coziness with every spoonful.

2. Easy-to-follow recipe with simple ingredients that are readily available.

This Italian wedding soup recipe offers the advantage of being easy to follow, using simple ingredients that are easily accessible. With basic components like ground beef, breadcrumbs, and broth, this recipe allows for a straightforward preparation process without the need for specialized or hard-to-find items. By utilising common ingredients that can be found in most kitchens or local grocery stores, this recipe ensures convenience and practicality for anyone looking to recreate this comforting and flavourful dish at home.

3. Versatile dish that can be customised with different greens or pasta shapes.

Italian wedding soup is a versatile dish that offers the flexibility to be customised according to personal preferences. One of its key advantages is the ability to experiment with various greens, such as spinach, kale, or escarole, to add different textures and flavours. Additionally, you can choose to use different pasta shapes like orzo, small shells, or ditalini to tailor the soup to your liking. This adaptability allows for endless variations of the traditional recipe, making it a delightful and personalised culinary experience for every cook and diner.

4. The combination of meatballs, greens, and broth creates a delicious and balanced flavour profile.

The Italian wedding soup recipe offers a delightful advantage with its harmonious blend of meatballs, greens, and broth. This combination results in a delicious and well-balanced flavour profile that tantalizes the taste buds. The savoury meatballs provide richness, while the hearty greens bring a fresh and vibrant element to the dish. Paired with the comforting broth, this medley of ingredients creates a satisfying and appetising culinary experience that is sure to please any palate.

5. Ideal for gatherings or family meals as it can be prepared in large batches.

Italian wedding soup is an ideal choice for gatherings or family meals due to its versatility in being prepared in large batches. This convenient aspect allows for easy scaling of the recipe to accommodate a larger number of guests without compromising on flavour or quality. Whether you’re hosting a special occasion or simply enjoying a cosy meal with loved ones, the ability to make a generous amount of this hearty soup ensures that everyone can savour its delicious taste together.

Preparation can be time-consuming due to making the meatballs from scratch.

Creating the meatballs from scratch for the Italian wedding soup recipe can be a time-consuming aspect of the preparation process. Crafting each meatball with care and ensuring they are perfectly seasoned and shaped requires patience and attention to detail. However, the effort put into making homemade meatballs is well worth it, as it adds a personal touch to the dish and enhances its flavour profile. While it may take a bit more time, the end result of a delicious and authentic Italian wedding soup is truly rewarding.

Some ingredients may not be readily available in all supermarkets.

One potential drawback of preparing an Italian wedding soup is that some of the ingredients required may not be readily available in all supermarkets. This can pose a challenge for individuals who prefer to source all their cooking essentials from a single store or those living in areas with limited access to specialty ingredients. However, with a bit of planning and exploration, alternative options or online shopping can often help overcome this obstacle, ensuring that you can still enjoy this delicious and comforting dish in the comfort of your own home.

Leftovers may not retain the same freshness and flavour compared to when freshly cooked.

When it comes to Italian wedding soup, one potential downside to consider is that leftovers may not maintain the same level of freshness and flavour as when the dish is freshly cooked. Due to the nature of the ingredients and broth, reheating the soup can sometimes result in a slight change in taste and texture. It is recommended to enjoy this soup fresh for the best culinary experience, although reheating leftovers can still offer a comforting meal with a slightly altered profile.

Best Travel Guides: How to Choose the Right Guide for Your Trip

best travel guides

Best Travel Guides: How to Find the Right One for Your Trip

A good travel guide can turn a holiday from a list of places to visit into a richer, more rewarding experience. It can help you plan an itinerary, find local favourites, understand a destination’s history and avoid common travel hassles. But there is no single best guide for every traveller: the right choice depends on where you are going and how you like to travel.

Popular travel guidebooks

Lonely Planet

Lonely Planet guides are known for broad destination coverage, practical planning advice and suggestions for different budgets. They can be useful for independent travellers exploring several regions, although it is worth checking the publication date for details that may change frequently.

Rough Guides

Rough Guides combine practical information with cultural and historical context. They are a strong option for travellers who want to understand a place as well as decide what to see and do.

DK Eyewitness

DK Eyewitness guides stand out for their photographs, illustrations and maps. Their visual approach makes them especially handy for planning sightseeing days and getting a feel for a destination before you arrive.

Bradt Guides

Bradt specialises in destinations that may receive less coverage from larger publishers. Its guides often offer detailed local insight and can be particularly useful for travellers seeking wildlife, culture or less-visited places.

Rick Steves

Rick Steves guides focus mainly on Europe and are particularly popular with independent visitors. They offer practical advice on sightseeing, transport and making the most of a limited amount of time.

Michelin Green Guides

Michelin Green Guides are a useful choice for travellers interested in heritage, architecture and places of cultural or natural significance. Their ratings can help with sightseeing decisions, though personal interests should always come first.

What to look for in a travel guide

  • Up-to-date information: Opening hours, prices, transport routes and entry requirements can change. Check the edition date and verify important details before travelling.
  • The right level of detail: A guide to an entire country may be ideal for a long trip, while a city guide can be more practical for a weekend break.
  • Useful maps: Clear maps can make it easier to plan routes, understand neighbourhoods and get around without relying on a constant internet connection.
  • Your travel style: Look for advice that suits your priorities, whether that means family activities, accessible travel, food, hiking, history or travelling on a budget.
  • Local perspective: Guides that include regional voices and cultural context can offer a more thoughtful picture of a destination.

Printed books, apps or online guides?

Printed guidebooks are easy to browse, do not need charging and can be useful when mobile coverage is unreliable. Their main drawback is that information can become out of date.

Digital guides are convenient to carry and can be updated more easily. Some include searchable maps and saved recommendations, but features may depend on an internet connection or a paid subscription. Download essential maps and information before setting off.

Many travellers use a combination: a book or downloadable guide for background and itinerary planning, alongside official websites and current local information for practical details.

How to choose the best guide for you

Start by deciding what you need help with. If you are planning a multi-stop journey, choose a guide with strong transport and route-planning advice. For a short city break, look for neighbourhood maps and carefully selected highlights. If you are travelling somewhere less familiar, prioritise cultural guidance, safety information and detailed local coverage.

Before buying, browse a sample chapter or read recent reviews. Check that the guide covers the places you intend to visit, and compare its approach with your own interests. A highly rated guide is only the best choice if it fits your trip.

Make the most of your guide

Use a travel guide as a starting point rather than a strict itinerary. Mark the places that interest you, check time-sensitive information with reliable local sources, and leave room for unexpected discoveries. The best travel guide is ultimately the one that helps you travel with confidence while still allowing you to explore at your own pace.


Top Tips for Selecting the Ideal Travel Guide

  1. Choose a guide updated within the past year.
  2. Match the guide to your travel style and budget.
  3. Check that it covers the places you plan to visit.
  4. Look for practical details on transport, costs and opening times.
  5. Use local advice to check recommendations and recent changes.

Choose a guide updated within the past year.

Choose a travel guide that has been updated within the past year, especially if you rely on it for practical details. Restaurant recommendations, opening hours, transport routes, prices and entry requirements can change quickly, so a recent edition is more likely to reflect what you’ll find on arrival. Even with a current guide, check time-sensitive information with official websites before you travel.

Match the guide to your travel style and budget.

Choose a travel guide that suits both the way you like to explore and what you plan to spend. If you prefer independent adventures, look for practical advice on public transport, local neighbourhoods and low-cost places to eat; if comfort and convenience matter more, seek recommendations for guided tours, quality accommodation and easy-to-follow itineraries. Check that the guide covers your budget, from free attractions and affordable stays to special experiences, so its suggestions feel useful rather than out of reach.

Check that it covers the places you plan to visit.

Before choosing a travel guide, check that it covers the places you plan to visit. Some guides focus on a whole country, while others offer more detailed advice for particular cities or regions. Make sure the areas you want to explore are included, with useful information on local transport, attractions and places to eat, so you can plan your trip with confidence.

Look for practical details on transport, costs and opening times.

When choosing a travel guide, look for practical details that make planning easier, including how to get around, typical transport fares, entrance fees and opening times. This information can help you budget realistically, plan your days and avoid arriving at a museum or attraction after it has closed. As prices and schedules can change, check important details with official websites or local sources before you travel.

Use local advice to check recommendations and recent changes.

Use local advice to check recommendations and recent changes before you set off. Residents, tourism offices and trusted local websites can point you towards newly opened attractions, seasonal events and worthwhile places that guidebooks may miss. They can also confirm practical details such as opening hours, transport disruptions or temporary closures, helping you make informed plans and avoid unexpected setbacks.

Traditional Apple Pie Recipe: A Taste of Home

apple pie recipe

Delicious Apple Pie Recipe

Delicious Apple Pie Recipe

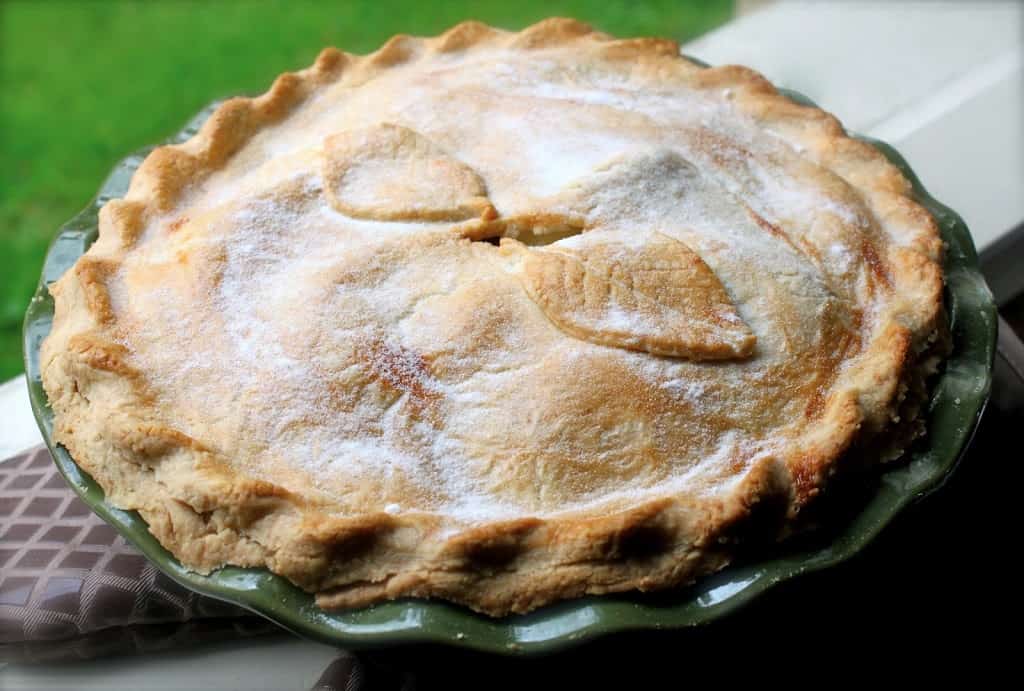
If you’re looking for a classic dessert that never fails to please, then an apple pie is the perfect choice. With its buttery crust and sweet, cinnamon-spiced apple filling, this homemade treat is sure to become a family favourite.

Ingredients:

  • 6-7 medium-sized apples, peeled and sliced
  • 1 cup sugar
  • 2 tablespoons all-purpose flour
  • 1 teaspoon ground cinnamon
  • 1/4 teaspoon salt
  • 1 tablespoon lemon juice
  • Pastry for a double-crust pie (store-bought or homemade)
  • 2 tablespoons butter, cut into small pieces

Instructions:

  1. Preheat your oven to 200°C (400°F).
  2. In a large bowl, combine the sliced apples, sugar, flour, cinnamon, salt, and lemon juice. Toss until the apples are evenly coated.
  3. Roll out half of the pastry and line a 9-inch pie dish with it. Trim any excess dough hanging over the edges.
  4. Pour the apple mixture into the pastry-lined dish and dot with butter pieces.

  • Roll out the remaining pastry and place it over the apple filling. Trim and crimp the edges to seal the pie.

  • Cut slits in the top crust to allow steam to escape during baking.

  • Bake in the preheated oven for 45-50 minutes or until the crust is golden brown and the filling is bubbly.

  • Allow the pie to cool slightly before serving. Enjoy your delicious homemade apple pie!

  • .


    Essential Tips and Tricks for Perfecting Your Apple Pie Recipe

    1. 1. How do I make a homemade apple pie crust?
    2. 2. What are the best apples to use for apple pie?
    3. 3. Can I add other fruits to my apple pie filling?
    4. 4. How do I prevent my apple pie from becoming too watery?
    5. 5. Can I make an apple pie in advance and freeze it?
    6. 6. Is it necessary to peel the apples before making the pie?
    7. 7. What is the ideal thickness for rolling out the pastry for an apple pie?
    8. 8. Are there any alternative ingredients that can be used to replace sugar in the recipe?

    1. How do I make a homemade apple pie crust?

    For those wondering how to make a homemade apple pie crust, it’s easier than you think! To start, combine flour, salt, and cold butter in a bowl, then use a pastry cutter or your fingertips to blend the mixture until it resembles coarse crumbs. Gradually add ice water and mix until the dough comes together. Divide the dough into two portions, shape them into discs, wrap in plastic wrap, and chill in the fridge for at least an hour. When ready to use, roll out one disc for the bottom crust, fill with your apple pie filling, then cover with the second rolled-out disc for the top crust. Trim and crimp the edges before baking to golden perfection. Enjoy your delicious homemade apple pie with a flaky and buttery crust!

    2. What are the best apples to use for apple pie?

    When it comes to making the perfect apple pie, choosing the right apples is crucial to achieving a delicious outcome. The best apples for apple pie are those that strike a balance between sweet and tart flavours and hold their shape well during baking. Popular choices include Granny Smith apples for their tartness, Honeycrisp for their sweetness, and Jonagold for a combination of both. Experimenting with a mix of different apple varieties can also add depth to the flavour profile of your pie, ensuring a harmonious blend of tastes in every bite.

    3. Can I add other fruits to my apple pie filling?

    When it comes to making apple pie, the question of adding other fruits to the filling often arises. While traditional apple pie recipes typically focus on the delicious combination of apples, sugar, and spices, some adventurous bakers like to experiment with adding other fruits for a unique twist. Popular choices include berries like raspberries or blueberries, which can add a tart sweetness to complement the apples. Pears or peaches are also excellent options that can enhance the overall flavour profile of the pie. Ultimately, the decision to add other fruits comes down to personal preference and creativity in the kitchen.

    4. How do I prevent my apple pie from becoming too watery?

    To prevent your apple pie from becoming too watery, it is essential to take a few key steps during the preparation process. One effective method is to pre-cook the apples slightly before assembling the pie. This helps to release some of the moisture from the fruit, reducing the chances of a soggy bottom crust. Additionally, incorporating a thickening agent like flour or cornstarch into the apple filling can help absorb excess liquid and create a more stable consistency. Lastly, ensuring that there are proper vents or slits in the top crust allows steam to escape during baking, preventing condensation and potential sogginess. By following these tips, you can enjoy a perfectly balanced and delicious apple pie with a crisp crust and flavourful filling.

    5. Can I make an apple pie in advance and freeze it?

    Yes, you can make an apple pie in advance and freeze it for later. To freeze an apple pie, assemble the pie as usual but do not bake it. Instead, wrap the unbaked pie tightly in plastic wrap or aluminum foil to prevent freezer burn. You can then store the wrapped pie in the freezer for up to 4-6 months. When you’re ready to bake the frozen pie, simply place it in a preheated oven and add a few extra minutes to the baking time to ensure that the filling is cooked through. Freezing an apple pie is a convenient way to have a homemade dessert on hand whenever you need it.

    6. Is it necessary to peel the apples before making the pie?

    When preparing an apple pie, whether or not to peel the apples is a matter of personal preference. While some recipes call for peeled apples to achieve a smoother texture in the filling, leaving the peels on can add a rustic appearance and extra nutrients to the pie. The decision to peel or not to peel ultimately depends on your desired taste and texture for the final dish.

    7. What is the ideal thickness for rolling out the pastry for an apple pie?

    When it comes to rolling out pastry for an apple pie, the ideal thickness plays a crucial role in achieving the perfect balance between a flaky crust and a well-cooked filling. Generally, aiming for a thickness of around 1/8 to 1/4 inch (3-6 mm) is recommended. This thickness allows the pastry to hold its shape while baking, ensuring that it is sturdy enough to support the juicy apple filling yet remains tender and delicious. It’s important to roll out the pastry evenly to maintain consistency throughout the pie and create a harmonious texture with each bite.

    8. Are there any alternative ingredients that can be used to replace sugar in the recipe?

    For those looking to reduce their sugar intake or explore alternative sweeteners, there are several options that can be used as substitutes in an apple pie recipe. One popular choice is to use honey or maple syrup as a natural sweetener, adding a unique flavour profile to the dessert. Another option is to opt for a sugar substitute like stevia or erythritol for a lower-calorie alternative. Experimenting with different sweeteners can provide a healthier twist to the traditional apple pie while still maintaining its delicious taste and appeal.