Travel Guides Australia: Your Essential Guide to Exploring Down Under

travel guides australia

Travel Guides to Australia: Plan a Trip Down Under

Australia offers an extraordinary mix of lively cities, ancient landscapes, tropical coastlines and distinctive wildlife. From the cafés and galleries of Melbourne to the red deserts of the Outback, there is plenty to explore. The country is vast, however, so a rewarding visit starts with choosing a region and allowing enough time to experience it.

Choose the right region

Rather than trying to see everything in one trip, focus on the places that best match your interests:

  • Sydney and New South Wales: See Sydney Harbour, explore the city’s neighbourhoods and beaches, or take a trip to the Blue Mountains.
  • Victoria: Discover Melbourne’s food, arts and sporting culture, then follow the Great Ocean Road for coastal scenery.
  • Queensland: Visit the Great Barrier Reef, the rainforests of the Wet Tropics or the beaches around the Whitsundays. Conditions vary by season, so check local guidance before swimming or boating.
  • South Australia: Enjoy Adelaide’s food and wine scene, or travel to Kangaroo Island for wildlife and rugged coastline.
  • Western Australia: Explore Perth and its beaches, or plan a longer journey to the state’s remote coastal and inland regions.
  • The Northern Territory: Experience the landscapes and cultural significance of places such as Uluru-Kata Tjuta National Park and Kakadu National Park.
  • Tasmania: Take in mountain scenery, walking trails, historic sites and fresh local produce.

When to go

Australia’s seasons are the reverse of those in the Northern Hemisphere: summer runs from December to February, autumn from March to May, winter from June to August, and spring from September to November. The climate differs considerably between regions. Northern Australia has a tropical wet season and a drier season, while the south experiences cooler winters and warmer summers. Inland areas can have extreme temperatures.

Before booking, check the typical conditions for the specific places you plan to visit. School holidays and major events can make popular destinations busier, and accommodation may need to be reserved well in advance.

Getting around

Distances in Australia can be much greater than they appear on a map. Domestic flights are useful for travelling between distant cities, while trains and coaches serve some popular routes. Hiring a car offers flexibility in many regions, but long-distance driving requires careful planning. Check fuel availability, road conditions and journey times, and avoid driving when tired. In remote areas, let someone know your route and expected arrival time.

In cities, public transport is often the easiest way to get around. Local transport cards, ticketing systems and services vary, so consult the relevant operator before travelling.

Practical planning tips

  • Check entry requirements: Confirm the visa or travel authorisation requirements that apply to your passport before departure, using official Australian government information.
  • Allow time for distances: A multi-region itinerary can involve long flights or full days on the road. Fewer stops often make for a more relaxed trip.
  • Pack for changing conditions: Sun protection is important in every season. Bring suitable clothing for the climate and activities in each region.
  • Book key activities ahead: Popular tours, national park accommodation and major events can sell out, particularly during busy periods.
  • Consider travel insurance: Choose cover that suits your plans, including any activities such as diving, hiking or driving.
  • Look after the environment: Follow park rules, stay on marked tracks and never feed wildlife.

Respecting Country and culture

Australia’s Aboriginal and Torres Strait Islander peoples have diverse cultures and continuing connections to Country. Visitors can learn more through Indigenous-led tours, cultural centres and community-approved experiences. Follow local guidance at cultural sites, respect photography restrictions and remember that some places may hold deep significance for Traditional Owners.

Make your Australia trip your own

The best travel guide is one that leaves room for both planning and discovery. Choose a manageable itinerary, check local conditions and take time to connect with the places you visit. Whether your ideal trip involves city life, coastal walks, wildlife or vast open landscapes, Australia rewards travellers who explore at a thoughtful pace.


9 Tips for Choosing and Using Travel Guides to Australia

  1. Choose a guide updated for your travel dates.
  2. Check entry rules and visa advice before booking.
  3. Use regional guides to plan long-distance routes.
  4. Compare seasonal weather across states.
  5. Look for public transport and driving guidance.
  6. Check maps for remote areas with limited signal.
  7. Prioritise guides with local safety advice.
  8. Use park guides for permits and trail details.
  9. Save key information offline before you go.

Choose a guide updated for your travel dates.

Choose a travel guide that has been updated close to your travel dates, as opening hours, transport services, entry fees and local conditions can change. Check that its recommendations are still current, especially for remote areas, national parks and seasonal activities, and confirm important details with official sources before you set off.

Check entry rules and visa advice before booking.

Before booking your trip to Australia, check the latest entry requirements and visa advice for your nationality using official Australian government sources. Make sure you understand which visa or travel authorisation you need, how long it may take to obtain, and whether your passport details and planned activities meet the conditions. Requirements can change, so confirm them again before departure.

Use regional guides to plan long-distance routes.

Use regional travel guides to plan long-distance routes across Australia, where distances between towns and attractions can be much greater than they appear on a map. A guide focused on the area can help you choose practical stops, estimate driving times and find fuel, accommodation and points of interest along the way. Check current road conditions and local advice before setting off, especially when travelling through remote areas.

Compare seasonal weather across states.

When planning a trip around Australia, compare seasonal weather across states, as conditions can differ dramatically between regions. The tropical north has distinct wet and dry seasons, while southern states tend to have cooler winters and warmer summers; inland areas can also experience extreme heat. Check forecasts and seasonal advice for each destination before booking, and plan your route, activities and clothing accordingly.

Look for public transport and driving guidance.

When using travel guides for Australia, look for clear advice on public transport and driving, as the best way to get around varies by destination. Cities often have buses, trains, trams or ferries, while regional and remote areas may be easier to explore by car. Check routes, fares, road conditions and journey times in advance, and remember that distances can be much greater than they appear on a map.

Check maps for remote areas with limited signal.

When travelling through Australia’s remote areas, check your maps before setting off, as mobile signal and internet access can be limited or unavailable. Download offline maps, plan your route and note fuel stops, supplies and accommodation in advance. For longer journeys, tell someone where you are going and when you expect to arrive.

Prioritise guides with local safety advice.

When choosing travel guides to Australia, prioritise those with practical, up-to-date local safety advice. Conditions can vary widely between regions, so look for guidance on beach and water safety, wildlife, extreme heat, bushfires, road trips and remote-area travel. Reliable local advice can help you prepare for changing conditions, make informed decisions and enjoy your trip with greater confidence.

Use park guides for permits and trail details.

When exploring Australia’s national parks, use official park guides to check whether permits are required and to find up-to-date trail details. Guides can provide information on track difficulty, walking times, closures, facilities and local safety advice, helping you choose a suitable route and prepare properly. Check the relevant park authority’s website before setting out, as conditions and access can change.

Save key information offline before you go.

Save key information offline before you go, especially if your Australian itinerary includes remote areas where mobile coverage may be limited. Download maps, booking confirmations, transport details and emergency contacts to your phone, and keep a written copy of essential information as a back-up. That way, you can find your way and access important details even without an internet connection.

Armenian Traditional Dishes: A Taste of History and Hospitality

armenian traditional dishes

Armenian Traditional Dishes: A Taste of History and Hospitality

Armenian cuisine is shaped by centuries of history, the country’s varied landscapes and the customs of its people. Meals often bring family and friends together, with generous shared dishes made from seasonal produce, grains, herbs and locally raised meat. Recipes vary from one region and household to another, but hospitality is a constant: guests are warmly welcomed and rarely leave the table hungry.

Khorovats: Armenian Barbecue

Khorovats is a much-loved Armenian barbecue, usually made with pieces of pork, lamb or beef cooked over hot coals. Vegetables such as aubergines, peppers and tomatoes may be grilled alongside the meat, then served with fresh herbs, lavash and salads. Khorovats is especially associated with outdoor gatherings and celebrations, where preparing and sharing the meal can be as important as eating it.

Tolma: Stuffed Leaves and Vegetables

Tolma—also known in many places as dolma—is made by wrapping a savoury filling in vine leaves or cabbage. The filling often combines minced meat, rice, herbs and spices, although meat-free versions are also popular. Peppers, tomatoes and aubergines can be stuffed in a similar way. Tolma is a familiar dish at family meals and festive occasions, with recipes differing across Armenia and the wider region.

Harissa: A Slow-Cooked Comfort Food

Harissa is a hearty dish of wheat and meat, traditionally chicken or lamb, cooked slowly until the ingredients become soft and creamy. It is stirred until the grains and meat come together into a thick porridge-like texture. The dish has a strong place in Armenian food traditions and is often prepared for communal occasions. Despite its name, Armenian harissa is quite different from the spicy North African chilli paste.

Lavash: Bread at the Heart of the Table

Lavash is a thin, soft flatbread baked in a traditional underground clay oven called a tonir. It is used to accompany meals, wrap grilled meat and herbs, or scoop up dips and other dishes. Lavash can also be dried and stored, then softened with water when needed. Its preparation and sharing are recognised by UNESCO as part of the Intangible Cultural Heritage of Humanity, reflecting the bread’s importance in Armenian life.

Ghapama: A Festive Pumpkin Dish

Ghapama is a whole pumpkin filled with a mixture of rice, dried fruit, nuts and, sometimes, honey or butter. It is baked until tender and often served as a striking centrepiece at celebrations. The contrast between sweet fruit, crunchy nuts and soft pumpkin makes ghapama a distinctive example of Armenia’s love of combining simple ingredients in generous, celebratory dishes.

Jingalov Hats: Herbs Wrapped in Bread

Jingalov hats is a flatbread filled with a mixture of finely chopped greens and herbs. The exact combination depends on the season and what is available, and may include wild herbs, leafy vegetables and spring onions. The dough is rolled thin, filled, folded and cooked on a hot griddle. This speciality is particularly associated with Artsakh and is a delicious reminder of the role that fresh greens play in Armenian cooking.

Spas: A Cooling Yoghurt Soup

Spas is a comforting soup made with yoghurt, wheat or grains, and herbs. It can be served warm in colder weather or chilled during the summer. Its tangy flavour and simple ingredients make it a refreshing contrast to richer meat dishes, and family recipes may vary in texture and seasoning.

Gata: A Sweet Treat for Sharing

Gata is a traditional Armenian pastry with a soft or flaky dough and a sweet filling, often made from flour, butter and sugar. It comes in many regional shapes and styles, from round loaves to smaller individual pastries. Gata is commonly served with tea or coffee and is a popular choice for holidays and family gatherings.

A Cuisine Made for Sharing

Armenian traditional dishes tell stories of place, season and family. From smoky khorovats and carefully prepared tolma to freshly baked lavash and sweet gata, the food is deeply connected to the pleasure of welcoming others. Trying these dishes offers more than a taste of Armenia: it offers a glimpse into a culture where cooking, sharing and hospitality go hand in hand.


Traditional Armenian Dishes: Frequently Asked Questions

  1. What are the most popular traditional Armenian dishes?
  2. What ingredients are commonly used in Armenian cuisine?
  3. What is the difference between Armenian tolma and dolma?
  4. Is traditional Armenian food spicy?
  5. What Armenian dishes are traditionally served at celebrations?

Some of the most popular traditional Armenian dishes include khorovats, a barbecue of grilled meat and vegetables; tolma, vine leaves or vegetables filled with rice, herbs and often minced meat; and harissa, a slow-cooked dish of wheat and meat. Lavash, a thin traditional flatbread, is served with many meals, while jingalov hats is a herb-filled flatbread especially associated with Artsakh. For something sweet, gata—a buttery pastry with a sweet filling—is a favourite. Recipes and ingredients vary across Armenia, with many dishes made for sharing at family gatherings.

What ingredients are commonly used in Armenian cuisine?

Armenian cuisine commonly uses fresh herbs and vegetables, grains such as wheat and rice, pulses, fruit, nuts and dairy products, alongside lamb, pork, beef and poultry. Garlic, onions, herbs such as coriander and parsley, and spices add flavour, while yoghurt and cheese feature in many dishes. Ingredients vary by region and season, but traditional cooking often celebrates simple, locally available produce.

What is the difference between Armenian tolma and dolma?

Armenian tolma and dolma belong to the same family of stuffed dishes, and the names are often used interchangeably. “Tolma” is the name commonly used in Armenia, while “dolma” is widely used in neighbouring cuisines and beyond; both may refer to vine leaves, cabbage or vegetables filled with rice, herbs and sometimes minced meat. There is no single strict distinction between them, as ingredients and preparation vary by region and family.

Is traditional Armenian food spicy?

Traditional Armenian food is generally flavourful rather than very spicy. Dishes are often seasoned with herbs, garlic, onion, black pepper and spices such as paprika, while fresh ingredients and slow cooking bring out their natural flavours. Some recipes can have a little heat, and spicy condiments may be served alongside, but chilli is not usually the main feature. As with any cuisine, recipes vary between regions and households.

What Armenian dishes are traditionally served at celebrations?

At Armenian celebrations, tables are often filled with dishes made for sharing. Khorovats (barbecued meat), tolma (vine leaves or vegetables stuffed with rice, herbs and sometimes meat), and lavash are popular choices, often served alongside salads, fresh herbs and seasonal vegetables. Festive meals may also include ghapama, a pumpkin filled with rice, dried fruit and nuts, while gata is commonly enjoyed as a sweet treat with tea or coffee. Traditions vary between families and regions, but generous hospitality is always part of the occasion.

Easy Omelette Recipe: A Quick and Delicious Meal

omelette recipe

How to Make the Perfect Omelette

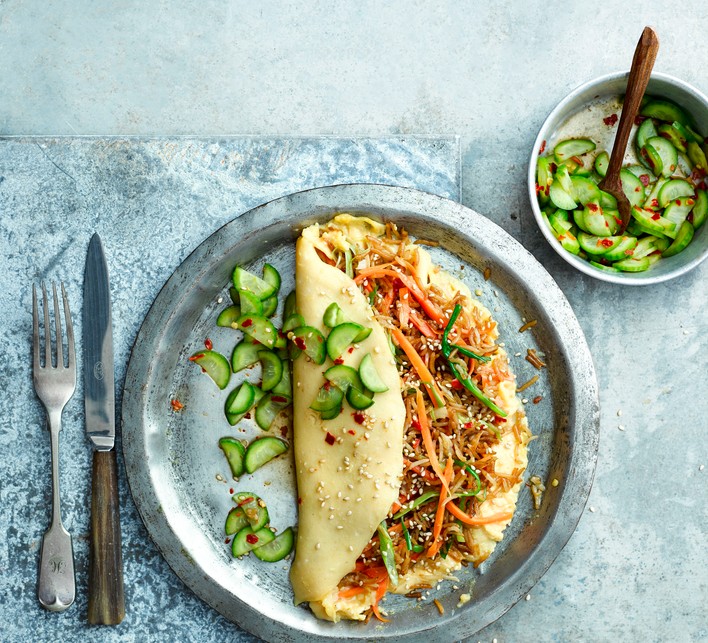
A good omelette is quick, satisfying and easy to customise. With just a few ingredients and a little care, you can make one that is soft, tender and full of flavour. Enjoy it plain, or add cheese, herbs or vegetables for a more substantial meal.

Ingredients

  • 2 or 3 large eggs
  • 1 tablespoon milk or water (optional)
  • A pinch of salt and freshly ground black pepper
  • 1 teaspoon butter
  • 25g grated cheese, such as Cheddar (optional)
  • Chopped fresh herbs, such as chives or parsley (optional)

Method

  1. Crack the eggs into a bowl. Add the milk or water, if using, and season with salt and pepper. Beat with a fork until the yolks and whites are just combined.
  2. Warm a non-stick frying pan over a medium heat. Add the butter and swirl it around the pan until melted and lightly foaming.
  3. Pour in the eggs. Leave them for a few seconds, then gently draw the mixture from the edges towards the centre with a spatula. Tilt the pan so the uncooked egg runs into the gaps.
  4. When the omelette is mostly set but still slightly soft on top, scatter over the cheese and herbs, if using.
  5. Fold the omelette in half with the spatula and slide it onto a plate. Serve straight away.

Tips for a Better Omelette

Use a properly heated pan, but avoid cooking over a high heat, which can make the eggs tough. For a soft, tender result, take the omelette off the heat while it is still just a little glossy on top; it will continue cooking from its own heat.

If you are adding vegetables such as mushrooms, peppers or spinach, cook them separately first to soften them and remove excess moisture. Add them to the omelette shortly before folding.

Variations to Try

  • Cheese and chive: Add grated Cheddar and finely chopped chives.
  • Mushroom and spinach: Fry sliced mushrooms until golden, then stir in a handful of spinach until wilted.
  • Tomato and basil: Add a few chopped cherry tomatoes and fresh basil leaves.

Serve your omelette with toast, a green salad or simply on its own for a quick breakfast, lunch or light supper.


7 Reasons to Love This Easy Omelette Recipe

  1. Quick to prepare
  2. Uses simple ingredients
  3. Easy to customise
  4. A good source of protein
  5. Suitable for breakfast, lunch or supper
  6. Works well with leftovers
  7. Requires minimal washing-up


Five Drawbacks of Making an Omelette

  1. Can be easy to overcook.
  2. Needs attention while cooking.
  3. May stick to the pan.
  4. Not ideal for batch cooking.
  5. Some fillings can make it soggy.

Quick to prepare

One of the biggest advantages of an omelette is how quick it is to prepare. With just a few everyday ingredients and a frying pan, you can have a tasty meal ready in around ten minutes. It’s an ideal choice for busy mornings, a speedy lunch or a simple supper when you don’t have much time to cook.

Uses simple ingredients

One of the best things about an omelette is that it uses simple, everyday ingredients. Eggs, a little butter and basic seasoning are all you need to make a tasty meal, while optional extras such as cheese, herbs or leftover vegetables can be added if you have them. This makes an omelette an easy, affordable choice when you want something satisfying without a complicated shopping list.

Easy to customise

One of the best things about an omelette is how easy it is to customise. Add grated cheese, fresh herbs, cooked vegetables or leftover ingredients to suit your taste and make use of what you have in the fridge. You can keep it simple with just a few additions or combine different flavours for a more filling meal.

A good source of protein

An omelette is a good source of protein, thanks to its main ingredient: eggs. Protein helps the body grow and repair tissue, and can also make meals feel more satisfying. Enjoy your omelette on its own or pair it with vegetables and wholegrain toast for a balanced meal.

Suitable for breakfast, lunch or supper

One of the best things about an omelette is its versatility: it makes a quick, filling meal at any time of day. Serve it with toast for breakfast, pair it with a fresh salad for lunch, or add vegetables and potatoes for a simple supper.

Works well with leftovers

An omelette is a brilliant way to use up leftovers and reduce food waste. Add cooked vegetables, roast potatoes, cheese, herbs or small pieces of meat from the fridge, and turn them into a quick, satisfying meal. Just make sure any leftovers are stored safely and heated through properly while the eggs cook.

Requires minimal washing-up

One of the best things about an omelette is that it requires minimal washing-up. You can mix the eggs in a single bowl and cook them in one frying pan, so there are fewer dishes to clean afterwards. That makes an omelette a practical choice for a quick meal, especially on busy days.

Can be easy to overcook.

One drawback of an omelette is that it can be easy to overcook. Eggs set quickly in a hot pan, and even a little too much time on the heat can leave them dry, firm or rubbery instead of soft and tender. For the best results, cook over a medium heat and remove the omelette while the centre is still slightly soft; it will continue to set on the plate.

Needs attention while cooking.

An omelette needs your attention while it cooks, as eggs set quickly and can become dry or overcooked if left unattended. You’ll need to watch the pan and gently move the eggs as they cook, so it may not be the best choice when you’re looking for a completely hands-off meal.

May stick to the pan.

One potential drawback when making an omelette is that it may stick to the pan, making it difficult to fold neatly and serve in one piece. This is more likely if the pan is not non-stick, the heat is too high or there is not enough butter or oil. Use a clean, well-heated non-stick pan and lightly coat the surface with fat to help prevent sticking.

Not ideal for batch cooking.

Omelettes are best cooked and eaten straight away, so they’re not ideal for batch cooking. Once cooled and reheated, they can lose their soft, tender texture and become dry or rubbery. For the best results, make each omelette fresh when you’re ready to serve it.

Some fillings can make it soggy.

Some fillings, particularly watery vegetables such as tomatoes, mushrooms and courgettes, can release moisture as they cook and leave an omelette soggy. To avoid this, cook fillings separately first and drain off any excess liquid before adding them to the eggs.

Healthy Crockpot Recipes for Easy, Nourishing Meals

healthy crockpot recipes

Healthy Crockpot Recipes for Easy, Nourishing Meals

A slow cooker can make healthy cooking simpler. Add a handful of wholesome ingredients, choose a cooking time and let the flavours develop while you get on with your day. Beans, vegetables, lean protein and wholegrains all work well in slow-cooked meals, making it easy to prepare satisfying dishes with plenty of fibre and little fuss.

These recipes use familiar ingredients and make approximately four portions. Cooking times can vary between appliances, so follow your slow cooker’s instructions and check that food is thoroughly cooked before serving.

Lentil, Tomato and Vegetable Stew

This hearty, plant-based stew is full of vegetables and fibre-rich lentils. Serve it on its own or with wholemeal bread.

Ingredients

  • 200 g dried green or brown lentils, rinsed
  • 1 onion, chopped
  • 2 carrots, diced
  • 2 sticks of celery, diced
  • 1 courgette, diced
  • 1 x 400 g tin chopped tomatoes
  • 750 ml low-salt vegetable stock
  • 1 tsp ground cumin
  • ½ tsp smoked paprika
  • 2 handfuls of spinach
  • Black pepper, to taste

Method

  1. Add the lentils, onion, carrots, celery, courgette, tomatoes, stock, cumin and paprika to the slow cooker. Stir well.
  2. Cover and cook on low for 6–8 hours or on high for 3–4 hours, until the lentils and vegetables are tender.
  3. Stir in the spinach just before serving and season with black pepper.

Chicken, Bean and Vegetable Chilli

Lean chicken, beans and vegetables make this a filling alternative to a traditional mince chilli. Add extra chilli flakes if you like more heat.

Ingredients

  • 500 g skinless chicken breast or thigh fillets
  • 1 onion, chopped
  • 1 red pepper, diced
  • 1 carrot, grated
  • 1 x 400 g tin chopped tomatoes
  • 1 x 400 g tin kidney beans, drained and rinsed
  • 150 ml low-salt chicken stock
  • 2 tsp mild chilli powder
  • 1 tsp ground cumin
  • 1 tsp smoked paprika
  • Juice of ½ lime

Method

  1. Place the chicken, onion, pepper, carrot, tomatoes, beans, stock and spices in the slow cooker. Stir to combine.
  2. Cover and cook on low for 6–7 hours or on high for 3–4 hours, until the chicken is cooked through.
  3. Shred the chicken with two forks, stir it back into the chilli and finish with lime juice. Serve with brown rice or a baked potato.

Vegetable and Chickpea Curry

This gently spiced curry is an easy way to use up vegetables. Choose light coconut milk for a creamy texture, or use extra stock for a lighter, tomato-based sauce.

Ingredients

  • 1 onion, chopped
  • 2 carrots, sliced
  • 1 cauliflower, cut into small florets
  • 1 x 400 g tin chickpeas, drained and rinsed
  • 1 x 400 g tin chopped tomatoes
  • 200 ml light coconut milk or vegetable stock
  • 2 tsp mild curry powder
  • 1 tsp ground ginger
  • 100 g frozen peas
  • Fresh coriander, to serve (optional)

Method

  1. Add the onion, carrots, cauliflower, chickpeas, tomatoes, coconut milk or stock, curry powder and ginger to the slow cooker. Mix well.
  2. Cover and cook on low for 5–6 hours or on high for 2½–3½ hours, until the vegetables are tender.
  3. Stir in the peas for the final 20–30 minutes. Serve with brown rice and fresh coriander, if using.

Apple, Pear and Cinnamon Porridge

Slow-cooked oats make a comforting breakfast. Prepare the ingredients the evening before, then cook according to your appliance’s instructions. Some slow cookers may need a shorter cooking time, so check the porridge as it cooks.

Ingredients

  • 200 g rolled oats
  • 800 ml milk or unsweetened fortified plant-based drink
  • 1 apple, cored and diced
  • 1 pear, cored and diced
  • ½ tsp ground cinnamon
  • 2 tbsp chopped walnuts or pumpkin seeds, to serve (optional)

Method

  1. Combine the oats, milk or plant-based drink, apple, pear and cinnamon in the slow cooker.
  2. Cover and cook on low for around 2–3 hours, checking towards the end to prevent the oats becoming too thick or sticking. Cooking times vary by appliance.
  3. Stir well and serve with a small handful of nuts or seeds, if desired.

Tips for Healthier Slow-Cooker Meals

  • Load up on vegetables: Add onions, carrots, peppers, leafy greens or frozen vegetables to boost flavour and fibre.
  • Choose filling ingredients: Beans, lentils and wholegrains can make meals more satisfying.
  • Keep an eye on salt: Choose low-salt stock and tinned foods where possible, and season to taste at the end.
  • Trim excess fat: Use lean cuts of meat and remove visible fat before cooking.
  • Be careful with liquid: Slow cookers retain moisture, so recipes often need less liquid than conventional cooking.

Slow-Cooker Food Safety

For best results, use thawed ingredients unless your appliance’s instructions say otherwise, and avoid filling the cooker beyond its recommended limit. Keep the lid on during cooking, as lifting it lets heat escape. Once a meal is ready, serve it promptly or cool leftovers quickly and refrigerate them. Reheat leftovers until steaming hot throughout; do not use the slow cooker to reheat food.

With a little preparation, these healthy crockpot recipes can make weeknight dinners and relaxed breakfasts easier to plan. Adjust the vegetables, herbs and spices to suit your tastes, and keep a few simple ingredients on hand for a nourishing meal with minimal effort.


Healthy Slow Cooker Recipes: Frequently Asked Questions

  1. What are the healthiest ingredients to use in crockpot recipes?
  2. How can I make crockpot meals lower in salt and saturated fat?
  3. Can you put raw chicken in a crockpot?
  4. How long should healthy crockpot recipes cook for?
  5. Can frozen vegetables be used in crockpot recipes?
  6. How should I store and reheat crockpot leftovers safely?

What are the healthiest ingredients to use in crockpot recipes?

The healthiest crockpot recipes start with plenty of vegetables, such as carrots, peppers, tomatoes and leafy greens, alongside fibre-rich beans, lentils or chickpeas. For extra protein, choose lean chicken, turkey, fish added near the end of cooking, or plant-based options such as tofu. Wholegrains like barley or brown rice can make meals more satisfying, while herbs, spices, garlic and citrus add flavour without relying on excess salt. Choose low-salt stock and tinned ingredients, and use richer additions such as oil or coconut milk in moderation.

How can I make crockpot meals lower in salt and saturated fat?

To make crockpot meals lower in salt, choose reduced-salt stock and tinned ingredients, rinse canned beans, and build flavour with herbs, spices, garlic, citrus or vinegar instead of adding extra salt. To reduce saturated fat, use lean cuts of meat, remove visible fat and poultry skin, or swap some meat for beans or lentils. Use lighter alternatives to cream, full-fat cheese and coconut milk, such as low-fat yoghurt stirred in after cooking or a tomato-based sauce.

Can you put raw chicken in a crockpot?

Yes, raw chicken can be cooked in a crockpot, provided it is fully thawed first and the slow cooker is used according to the manufacturer’s instructions. Place the chicken straight into the cooker with the other ingredients, keep the lid on while it cooks, and avoid using a delayed-start setting. Before serving, check that the thickest part has reached 75°C and that the chicken is thoroughly cooked.

How long should healthy crockpot recipes cook for?

Healthy crockpot recipes typically cook for 6–8 hours on low or 3–4 hours on high, but the exact time depends on the ingredients, recipe and slow cooker. Follow the recipe and your appliance’s instructions, and check that meat is thoroughly cooked before serving. Try to keep the lid on during cooking, as lifting it can add to the cooking time.

Can frozen vegetables be used in crockpot recipes?

Yes, frozen vegetables can usually be added straight to crockpot recipes, making them a convenient, nutritious option. They may release extra liquid and become softer than fresh vegetables, so add them towards the end of cooking if you prefer them firmer, or reduce other liquid slightly if needed. Follow your slow cooker’s instructions, and avoid adding frozen meat unless the manufacturer specifically says it is safe to do so.

How should I store and reheat crockpot leftovers safely?

Transfer leftovers to shallow containers and refrigerate within 1–2 hours; keep them at 5°C or below and eat within 48 hours, or freeze them for longer storage. Defrost frozen portions in the fridge before reheating, and reheat only what you need until it is steaming hot all the way through. Reheat leftovers only once, and don’t use the slow cooker to reheat them.

Easy Chicken Pot Pie: A Simple, Comforting Family Favourite

easy chicken pot pie

Easy Chicken Pot Pie

Golden, crisp pastry and a creamy chicken filling make this easy chicken pot pie a comforting favourite. Using cooked chicken and ready-rolled puff pastry keeps preparation simple, so it is ideal for a relaxed family dinner or a way to use up leftovers.

Prep time: 15 minutes

Cooking time: 30 minutes

Serves: 4

Ingredients

  • 1 tbsp olive oil or butter
  • 1 small onion, finely chopped
  • 2 carrots, peeled and diced
  • 150g frozen peas
  • 30g butter
  • 30g plain flour
  • 300ml chicken stock
  • 150ml milk
  • 350g cooked chicken, shredded or chopped
  • 1 tsp dried thyme
  • Salt and freshly ground black pepper
  • 1 sheet ready-rolled puff pastry, chilled
  • 1 egg, beaten, for glazing

Method

  1. Heat the oven. Preheat it to 200°C (180°C fan/Gas Mark 6). Lightly grease a medium pie dish.
  2. Cook the vegetables. Heat the oil or a little butter in a saucepan over a medium heat. Add the onion and carrots and cook for 5–7 minutes, stirring occasionally, until beginning to soften.
  3. Make the sauce. Add the butter. Once melted, stir in the flour and cook for 1 minute. Gradually pour in the stock, stirring well to keep the sauce smooth. Add the milk and thyme, then simmer gently for a few minutes until thickened.
  4. Add the filling. Stir in the cooked chicken and peas. Season with salt and pepper, then spoon the mixture into the prepared pie dish.
  5. Add the pastry. Lay the pastry over the dish and trim away any excess. Press the edges down to seal, then cut a small slit in the centre to let steam escape. Brush the top with beaten egg.
  6. Bake. Cook for 25–30 minutes, until the pastry is puffed and deep golden and the filling is piping hot. Leave to stand for a few minutes before serving.

Easy Variations

Use leftover roast chicken or shop-bought cooked chicken. You can swap the peas for sweetcorn, add sliced mushrooms with the onion, or use leftover cooked vegetables. For a richer filling, replace some of the milk with cream.

Helpful Tips

  • Let the filling cool slightly before adding the pastry. This helps the pastry stay crisp and makes it easier to handle.
  • If the pastry browns before the filling is hot, cover it loosely with foil and continue baking.
  • For individual pies, divide the filling between ovenproof dishes and cut the pastry to fit each one.
  • Refrigerate leftovers promptly and use within two days. Reheat until piping hot throughout.

Serve your chicken pot pie with mashed potatoes, steamed greens or a crisp green salad for a satisfying, fuss-free meal.


7 Reasons Why Easy Chicken Pot Pie is the Ultimate Comfort Dish

  1. Quick and easy to prepare
  2. Uses convenient ready-rolled pastry
  3. A comforting family favourite
  4. Great for leftover chicken
  5. Easy to customise with vegetables
  6. Crisp, golden pastry topping
  7. Makes a satisfying one-dish meal


Considerations Before Making Easy Chicken Pot Pie: 6 Potential Drawbacks

  1. Ready-made pastry may contain additives.
  2. The creamy filling can be high in calories.
  3. It takes time to bake and cool.
  4. The pastry can become soggy underneath.
  5. Suitable only if you have cooked chicken ready.
  6. Leftovers may lose their crisp pastry texture.

Quick and easy to prepare

One of the best things about an easy chicken pot pie is how quickly it comes together. With cooked chicken, a few simple ingredients and ready-rolled pastry, you can prepare the filling in minutes and let the oven do the rest. It’s a handy choice for a comforting, satisfying meal without spending hours in the kitchen.

Uses convenient ready-rolled pastry

Ready-rolled pastry makes this chicken pot pie especially easy to prepare, saving time and effort in the kitchen. Simply unroll it, place it over the filling and trim the edges for a golden, flaky topping—no mixing, rolling or extra equipment required.

A comforting family favourite

Easy chicken pot pie is a comforting family favourite, bringing everyone together over tender chicken, a creamy filling and golden, flaky pastry. Its familiar, hearty flavours make it a welcome choice for chilly evenings, relaxed Sunday dinners or whenever the family fancies a satisfying home-cooked meal.

Great for leftover chicken

Easy chicken pot pie is a brilliant way to use up leftover roast chicken. Simply shred or chop the cooked meat and stir it into the creamy filling, turning yesterday’s dinner into a comforting new meal while helping to reduce food waste.

Easy to customise with vegetables

One of the best things about easy chicken pot pie is how simple it is to customise with vegetables. Add peas, carrots, sweetcorn, mushrooms or green beans, or use up leftover cooked vegetables from another meal. Choose your favourites, adjust the quantities to suit your taste and make the most of whatever you have in the fridge.

Crisp, golden pastry topping

A crisp, golden pastry topping gives easy chicken pot pie its irresistible finishing touch. As it bakes, the pastry turns beautifully flaky on the outside while staying light and tender underneath, creating a delicious contrast with the creamy chicken filling. It looks inviting straight from the oven and adds plenty of satisfying crunch to every spoonful.

Makes a satisfying one-dish meal

Easy chicken pot pie makes a satisfying one-dish meal, bringing tender chicken, vegetables and a creamy sauce together beneath a golden pastry crust. It’s filling and comforting on its own, so there’s less need to prepare several separate dishes—though you can add a simple green salad or extra vegetables if you like.

Ready-made pastry may contain additives.

Ready-made pastry is a convenient time-saver, but some varieties may contain additives such as preservatives, emulsifiers or flavourings. Check the ingredient list if you prefer to avoid these, and compare brands, as recipes can vary. For a simpler option, choose pastry with fewer ingredients or make your own at home.

The creamy filling can be high in calories.

One drawback of easy chicken pot pie is that its creamy filling can be high in calories, particularly when made with butter, milk or cream and served beneath a generous pastry topping. For a lighter version, use reduced-fat milk, add extra vegetables and keep an eye on portion sizes.

It takes time to bake and cool.

One drawback of easy chicken pot pie is that, although it is quick to prepare, it still needs around 25–30 minutes in the oven, followed by a few minutes to cool before serving. That wait can be inconvenient on busy evenings, especially when everyone is hungry and dinner needs to be on the table quickly.

The pastry can become soggy underneath.

One drawback of an easy chicken pot pie is that the pastry can become soggy underneath, especially if the filling is very moist or still hot when the pastry is added. To help keep the base crisp, let the filling cool slightly, avoid adding too much liquid and bake the pie in a fully preheated oven until the pastry is golden and cooked through.

Suitable only if you have cooked chicken ready.

One drawback of this easy chicken pot pie is that it relies on cooked chicken being ready to use. If you only have raw chicken, you’ll need to cook it first, adding extra time and preparation to the recipe.

Leftovers may lose their crisp pastry texture.

One drawback of easy chicken pot pie is that the pastry can lose its crisp, flaky texture once the pie has been stored. Moisture from the creamy filling tends to soften the crust, so leftovers may not be quite as appealing as they are fresh from the oven. Reheating in the oven can help crisp the pastry again, although it may not fully restore its original texture.

Classic Cottage Pie Recipe: A Comforting British Family Favourite

cottage pie recipe

Classic Cottage Pie Recipe

Cottage pie is a comforting British favourite: savoury minced beef cooked with vegetables in a rich gravy, then topped with creamy mashed potato and baked until golden. It is often confused with shepherd’s pie, but the traditional distinction is simple: cottage pie is made with beef, while shepherd’s pie is made with lamb.

This recipe serves four to six and is ideal for a relaxed family meal. It can also be made ahead and baked when you are ready to eat.

Preparation and cooking time

  • Preparation: 25 minutes
  • Cooking: 50 minutes
  • Serves: 4–6

Ingredients

For the filling

  • 1 tablespoon vegetable oil
  • 1 onion, finely chopped
  • 2 carrots, diced
  • 500g beef mince
  • 2 tablespoons tomato purée
  • 1 tablespoon plain flour
  • 1 teaspoon Worcestershire sauce
  • 400ml beef stock
  • 100g frozen peas
  • 1 teaspoon dried thyme, or a few fresh sprigs
  • Salt and freshly ground black pepper

For the potato topping

  • 900g floury potatoes, such as Maris Piper or King Edward, peeled and cut into chunks
  • 50g butter
  • About 100ml milk, warmed
  • 50g mature Cheddar, grated (optional)
  • Salt and freshly ground black pepper

Method

  1. Cook the potatoes. Put the potatoes in a large pan of cold, salted water. Bring to the boil, then simmer for 15–20 minutes, or until tender. Drain well and leave them to steam-dry for a minute.
  2. Make the filling. Meanwhile, heat the oil in a large frying pan or saucepan over a medium heat. Add the onion and carrots and cook for 6–8 minutes, stirring occasionally, until softened.
  3. Add the beef mince and cook for 5–7 minutes, breaking it up with a spoon, until browned. Stir in the tomato purée and flour and cook for a minute.
  4. Pour in the beef stock and add the Worcestershire sauce and thyme. Stir well, bring to a gentle simmer and cook for 20–25 minutes, until the sauce has thickened. Stir in the peas for the final few minutes. Season to taste.
  5. Mash the potatoes. Mash the drained potatoes with the butter and enough warm milk to make a smooth, fluffy mash. Season with salt and pepper. Stir in the grated Cheddar, if using.
  6. Assemble the pie. Heat the oven to 200°C (180°C fan)/400°F/gas mark 6. Spoon the beef filling into an ovenproof dish. Spread the mash evenly over the top, taking it right to the edges. Roughen the surface with a fork to help it turn golden.
  7. Bake. Place the dish on a baking tray and bake for 25–30 minutes, until bubbling around the edges and golden on top. Leave it to stand for 5 minutes before serving.

Tips for a delicious cottage pie

  • Allow the filling to simmer until thick. If it is too runny, the potato topping may sink into it.
  • For extra flavour, add a splash of red wine with the stock, or stir in a teaspoon of mustard.
  • Make the topping crispier by brushing it with a little melted butter before baking.
  • Serve with steamed greens, cabbage or green beans.

Make-ahead and storage

The filling can be prepared a day ahead and kept covered in the fridge. Assemble the pie once the filling has cooled, then refrigerate it until needed. Add a little extra baking time if cooking it straight from the fridge, and make sure it is piping hot all the way through.

Leftovers can be stored in a covered container in the fridge for up to three days. Reheat thoroughly until steaming hot. Cottage pie can also be frozen; for the best texture, freeze it before baking, then defrost it in the fridge before cooking.


Everything You Need to Know About Making the Perfect Cottage Pie: FAQs Answered

  1. What is the difference between cottage pie and shepherd’s pie?
  2. What ingredients do you need to make cottage pie?
  3. How do you make the mashed potato topping creamy?
  4. How long should cottage pie bake in the oven?
  5. Can you make cottage pie ahead of time?
  6. Can cottage pie be frozen?
  7. How do you stop cottage pie filling from becoming watery?
  8. What should you serve with cottage pie?

What is the difference between cottage pie and shepherd’s pie?

The main difference between cottage pie and shepherd’s pie is the meat: cottage pie is traditionally made with minced beef, while shepherd’s pie uses minced lamb. Both are topped with mashed potato and baked until golden, and their fillings often include vegetables, gravy and herbs.

What ingredients do you need to make cottage pie?

To make cottage pie, you’ll need beef mince, onion, carrots, peas, beef stock, tomato purée, Worcestershire sauce and a little flour to thicken the filling. Season it with salt, pepper and thyme, then top with mashed potatoes made from floury potatoes, butter and milk. Mature Cheddar is optional, but adds a savoury finish to the topping.

How do you make the mashed potato topping creamy?

For a creamy mashed potato topping, use floury potatoes such as Maris Piper or King Edward, and cook them until completely tender. Drain them well and let them steam-dry briefly, then mash while hot with butter and warm milk, adding the milk gradually until the mash is smooth and fluffy. Avoid overworking the potatoes, as this can make them gluey. Season well, and stir in a little grated Cheddar or a spoonful of cream for extra richness, if you like.

How long should cottage pie bake in the oven?

Cottage pie should usually bake in a preheated oven at 200°C (180°C fan)/400°F/gas mark 6 for 25–30 minutes, until the filling is bubbling around the edges and the potato topping is golden. If the pie has been chilled, allow a little extra time and check that it is piping hot all the way through before serving.

Can you make cottage pie ahead of time?

Yes, cottage pie is ideal for making ahead. Prepare the filling and mashed potato, assemble the pie, then cover and refrigerate it for up to 24 hours before baking. You can also bake it in advance and reheat it until piping hot throughout. If baking straight from the fridge, allow a little extra time in the oven, and check that the centre is thoroughly heated before serving.

Can cottage pie be frozen?

Yes, cottage pie freezes well. For the best results, let it cool completely, then cover it tightly or transfer it to a freezer-safe container and freeze for up to three months. You can freeze it before or after baking, though freezing before baking usually gives the potato topping a better texture. Defrost overnight in the fridge, then bake until piping hot throughout. If reheating a cooked pie, make sure it is thoroughly hot before serving.

How do you stop cottage pie filling from becoming watery?

To stop cottage pie filling from becoming watery, simmer it uncovered until the sauce has reduced and thickened before adding it to the baking dish. A little plain flour stirred into the browned mince can help, too. Avoid adding too much stock, and let frozen vegetables thaw and drain before using them. The filling should be moist but not runny; if it looks thin, cook it for a few more minutes before topping with mash.

What should you serve with cottage pie?

Cottage pie pairs beautifully with simple vegetables that balance its rich, savoury filling. Try serving it with steamed green beans, peas, broccoli or cabbage, or add roasted carrots for extra sweetness. A crisp green salad can make the meal feel lighter, while a little extra gravy is always welcome.

Easy Buttercream Frosting Recipe for Cakes and Cupcakes

buttercream frosting recipe

Easy Buttercream Frosting Recipe

Buttercream frosting is a smooth, versatile topping for cakes, cupcakes and biscuits. This simple recipe uses just a few ingredients and can be flavoured or coloured to suit the occasion. It makes enough to generously frost 12 cupcakes or fill and cover a small 20cm cake.

Ingredients

  • 250g unsalted butter, softened
  • 500g icing sugar, sifted
  • 2–3 tablespoons milk or double cream
  • 1 teaspoon vanilla extract
  • A small pinch of salt, optional

Method

  1. Put the softened butter in a large bowl. Beat with an electric mixer for 3–5 minutes, until pale, soft and fluffy. Scrape down the sides of the bowl as needed.
  2. Add the sifted icing sugar in batches, mixing on a low speed at first to prevent it from puffing out of the bowl.
  3. Once the sugar is incorporated, add the vanilla and 2 tablespoons of milk or cream. Beat for a further 2–3 minutes until light and smooth.
  4. If the frosting is too thick, add a little more milk, half a tablespoon at a time. If it is too soft, beat in a little more sifted icing sugar.
  5. Spread or pipe the buttercream onto completely cooled cakes or cupcakes.

Tips for Smooth, Fluffy Buttercream

  • Use butter that is softened but still cool to the touch. If it is oily or melting, the frosting may become too soft.
  • Sift the icing sugar to help prevent lumps.
  • Start mixing slowly after adding the sugar, then increase the speed once it is combined.
  • For a less sweet frosting, add a pinch of salt and use a little more buttercream flavouring, such as vanilla or citrus zest.

Flavour Variations

For chocolate buttercream, replace 50g of the icing sugar with 50g of sifted cocoa powder. For a citrus version, add finely grated lemon or orange zest. You can also add food colouring a little at a time until you reach the shade you want.

Storage

Buttercream can be kept in an airtight container in the fridge for up to 5 days. Before using, bring it back to room temperature and beat it briefly until smooth and fluffy. It can also be frozen for up to 2 months; defrost it in the fridge, then allow it to soften and beat again before spreading or piping.


Buttercream Icing FAQs: Ingredients, Ratios, Techniques and Storage

  1. How do you make buttercream frosting from scratch?
  2. What ingredients do you need for buttercream frosting?
  3. What is the best ratio of butter to icing sugar for buttercream?
  4. How do you make buttercream frosting fluffy and smooth?
  5. Why is my buttercream frosting too runny, and how can I thicken it?
  6. How can you make buttercream frosting less sweet?
  7. Can you make buttercream frosting without an electric mixer?
  8. How long does buttercream frosting last, and how should it be stored?
  9. Can buttercream frosting be frozen and used later?

How do you make buttercream frosting from scratch?

To make buttercream frosting from scratch, beat softened unsalted butter until pale and fluffy, then gradually add sifted icing sugar, mixing on a low speed to avoid a cloud of sugar. Add vanilla extract and a little milk or cream, then beat until smooth and light. Adjust the consistency by adding more liquid for softer frosting or more icing sugar for a firmer finish.

What ingredients do you need for buttercream frosting?

A basic buttercream frosting needs softened unsalted butter, sifted icing sugar, a little milk or double cream, and vanilla extract for flavour. You can add a pinch of salt to balance the sweetness. Adjust the amount of milk or cream to make the frosting softer for spreading or firmer for piping.

What is the best ratio of butter to icing sugar for buttercream?

A reliable starting point for buttercream is a 1:2 ratio by weight: use one part butter to two parts icing sugar. For example, 125g butter with 250g icing sugar makes a smooth, pipeable frosting. Adjust the texture with a little milk or cream if it is too stiff, or add more icing sugar if it is too soft. The ideal ratio can vary slightly depending on the recipe and how firm you want the buttercream to be.

How do you make buttercream frosting fluffy and smooth?

To make buttercream frosting fluffy and smooth, start with softened—but not melted—butter and beat it for several minutes until pale and airy. Sift the icing sugar, then add it gradually on a low speed to avoid lumps and clouds of sugar. Once combined, add the milk or cream a little at a time and beat until the frosting is light and creamy, scraping down the bowl as needed. If it feels too thick, add a small splash of milk; if it is too soft, mix in a little more sifted icing sugar.

Why is my buttercream frosting too runny, and how can I thicken it?

Buttercream can turn runny if the butter is too warm, too much milk or cream has been added, or the frosting has been overworked in a warm kitchen. To thicken it, chill the bowl for 10–15 minutes, then beat the buttercream again; if it is still too soft, gradually mix in sifted icing sugar until it reaches the desired consistency. Avoid adding too much sugar at once, as this can make the frosting overly sweet.

How can you make buttercream frosting less sweet?

To make buttercream less sweet, add a small pinch of salt, which helps balance the sugar, or mix in a little unsweetened cocoa powder, lemon juice or cream cheese for a less sugary flavour. You can also reduce the icing sugar slightly, but add it gradually and check the texture as you go, as too little may leave the frosting soft or buttery. For a noticeably less sweet option, try Swiss meringue buttercream, which is made by whisking sugar with egg whites before adding the butter.

Can you make buttercream frosting without an electric mixer?

Yes, you can make buttercream frosting without an electric mixer, although it takes a little more time and effort. Make sure the butter is softened, then beat it vigorously with a sturdy wooden spoon or balloon whisk until smooth and creamy. Gradually add the sifted icing sugar, mixing well between additions, then stir in the vanilla and milk or cream a little at a time until the frosting reaches a spreadable consistency. For the fluffiest result, keep beating for several minutes and scrape down the sides of the bowl as you go.

How long does buttercream frosting last, and how should it be stored?

Buttercream frosting can be stored in an airtight container in the fridge for up to five days, or frozen for up to two months. Bring chilled or frozen buttercream to room temperature before using, then beat it briefly until smooth and fluffy. If it has been left out, keep it in a cool place and follow the storage guidance for its ingredients; buttercream made with perishable additions may need refrigerating sooner.

Can buttercream frosting be frozen and used later?

Yes, buttercream frosting can be frozen for up to 2 months. Place it in an airtight container or freezer-safe bag, then thaw it in the fridge overnight. Before using, let it come to room temperature and beat it briefly until smooth and fluffy again. If it looks slightly separated after thawing, a few minutes of mixing should bring it back together.

Easy Low Carb Recipes for Delicious Everyday Meals

low carb recipes

Easy Low-Carb Recipes for Everyday Meals

Eating fewer carbohydrates does not mean giving up satisfying, flavourful meals. With a few simple swaps, vegetables, eggs, fish, meat, cheese, nuts and seeds can form the basis of dishes that are both filling and easy to prepare.

Low-carb eating means different things to different people, so there is no single definition that suits everyone. The recipes below focus on reducing starchy ingredients such as bread, pasta and rice while keeping plenty of flavour on the plate. They are suitable for lunch or dinner and can be adapted to your preferences.

Cheesy Courgette and Spinach Frittata

This simple frittata makes a satisfying breakfast, lunch or light supper. It is also a useful way to use up vegetables in the fridge.

Ingredients

  • 6 eggs
  • 1 medium courgette, thinly sliced
  • 2 handfuls of fresh spinach
  • 50g grated cheddar
  • 1 tablespoon olive oil
  • Salt and black pepper
  • A pinch of dried oregano, optional

Method

  1. Heat the grill to medium. Beat the eggs in a bowl and season with salt, pepper and oregano.
  2. Warm the olive oil in an ovenproof frying pan over a medium heat. Add the courgette and cook for 4–5 minutes until softened.
  3. Add the spinach and stir until wilted. Pour in the eggs and cook gently for a few minutes, drawing the edges towards the centre as they set.
  4. Scatter over the cheddar and place the pan under the grill until the top is set and golden. Check that the handle is suitable for grilling.
  5. Leave to stand for a few minutes before slicing. Serve warm or cold with a green salad.

Lemon Garlic Salmon with Roasted Broccoli

Salmon and broccoli make a straightforward, flavourful combination. Roasting the vegetables brings out their sweetness, while lemon and garlic keep the dish fresh.

Ingredients

  • 2 salmon fillets
  • 1 large head of broccoli, cut into florets
  • 2 tablespoons olive oil
  • 1 garlic clove, finely chopped
  • ½ lemon, plus extra wedges to serve
  • Salt and black pepper
  • 1 tablespoon chopped fresh parsley, optional

Method

  1. Heat the oven to 200°C (180°C fan). Put the broccoli on a baking tray, drizzle with half the olive oil and season. Roast for 10 minutes.
  2. Mix the remaining oil with the garlic and the juice of half a lemon. Place the salmon on the tray and spoon the mixture over the fillets.
  3. Return the tray to the oven for 10–15 minutes, until the salmon is cooked through and flakes easily. Cooking time will depend on the thickness of the fillets.
  4. Finish with parsley, if using, and serve with lemon wedges.

Turkey Lettuce Cups with Avocado

These crisp lettuce cups offer a lighter alternative to wraps. The filling can be made ahead and served warm or cold.

Ingredients

  • 300g turkey mince
  • 1 tablespoon olive oil
  • 1 small red pepper, finely diced
  • 2 spring onions, sliced
  • 1 tablespoon soy sauce or tamari
  • ½ teaspoon smoked paprika
  • 1 ripe avocado, sliced
  • 8 large lettuce leaves, washed and dried
  • Fresh coriander and lime wedges, to serve

Method

  1. Heat the oil in a frying pan. Add the turkey mince and cook, breaking it up with a wooden spoon, until browned and cooked through.
  2. Stir in the red pepper, spring onions, soy sauce and smoked paprika. Cook for a further 3–4 minutes, until the pepper has softened slightly.
  3. Spoon the mixture into the lettuce leaves. Top with avocado and coriander, then serve with lime wedges.

Simple Tips for Low-Carb Cooking

  • Build meals around protein and vegetables. Eggs, fish, poultry, tofu and pulses can all be useful ingredients, alongside plenty of non-starchy vegetables.
  • Try simple swaps. Use lettuce leaves instead of wraps, courgette ribbons instead of some pasta, or cauliflower in place of rice.
  • Pay attention to sauces and extras. Some ready-made sauces, dressings and marinades contain added sugar or starch, so check the label if you are keeping track of carbohydrate intake.
  • Keep meals varied. Rotate ingredients and cooking methods to make everyday meals more enjoyable and balanced.

These low-carb recipes are designed as flexible ideas rather than strict rules. Adjust the ingredients to suit your tastes, and serve them with additional vegetables or a side salad if you wish. Anyone managing a health condition or following a prescribed diet should seek guidance from a suitably qualified health professional before making significant changes to their eating habits.


Low-carb recipes: answers to 8 frequently asked questions

  1. What foods can I use in low-carb recipes?
  2. What can I use instead of pasta, rice or potatoes in low-carb meals?
  3. Are low-carb recipes suitable for vegetarians?
  4. Can low-carb recipes be made ahead and frozen?
  5. How can I make low-carb meals filling and balanced?
  6. Are low-carb recipes suitable for people with diabetes?
  7. How do I check the carbohydrate content of a recipe?
  8. Can I adapt family favourites to make them lower in carbohydrates?

What foods can I use in low-carb recipes?

Low-carb recipes can include eggs, fish, meat, tofu, cheese, nuts and seeds, along with plenty of non-starchy vegetables such as leafy greens, courgettes, broccoli, cauliflower, peppers and mushrooms. For alternatives to higher-carb staples, try cauliflower rice, courgette ribbons or lettuce leaves in place of rice, pasta or wraps. Check labels on sauces and packaged ingredients, as some contain added sugars or starches.

What can I use instead of pasta, rice or potatoes in low-carb meals?

Instead of pasta, try courgette ribbons, shredded cabbage or thinly sliced aubergine; for rice, use finely chopped cauliflower or broccoli; and in place of potatoes, serve roasted cauliflower, celeriac, turnip or extra non-starchy vegetables. Spiralised vegetables and lettuce leaves can also make handy bases for sauces and fillings. Choose the substitute that best suits the dish, and season it well with herbs, spices, olive oil or a flavourful sauce.

Are low-carb recipes suitable for vegetarians?

Yes, low-carb recipes can be suitable for vegetarians. Eggs, cheese, Greek yoghurt, tofu, tempeh, nuts and seeds can provide protein, while vegetables add colour and variety. Beans and lentils are nutritious vegetarian options, although they contain more carbohydrates, so portions may need adjusting depending on your goals. Check labels on meat-free products too, as some contain added starches or sugars.

Can low-carb recipes be made ahead and frozen?

Yes, many low-carb recipes can be made ahead and frozen in airtight, portion-sized containers. Casseroles, soups, cooked meat and egg-based dishes usually freeze well, while leafy salads and vegetables with a high water content may become soft after thawing; cream-based sauces can also separate. Cool food promptly, freeze it as soon as practical, then thaw it in the fridge and reheat until piping hot throughout.

How can I make low-carb meals filling and balanced?

To make low-carb meals filling and balanced, include a good source of protein, such as eggs, fish, chicken, tofu or beans, alongside plenty of non-starchy vegetables. Add healthy fats from ingredients such as avocado, olive oil, nuts or seeds for flavour and staying power. Vary your choices to include different colours, textures and nutrients, and adjust portions to suit your appetite and needs.

Are low-carb recipes suitable for people with diabetes?

Low-carb recipes may help some people with diabetes manage blood glucose, but they are not suitable for everyone and their effects can vary. If you have diabetes, speak to your GP or diabetes dietitian before making a significant change to your carbohydrate intake, particularly if you take insulin or medicines that can cause low blood sugar, as your treatment may need review.

How do I check the carbohydrate content of a recipe?

To check the carbohydrate content of a recipe, add together the carbohydrate values for each ingredient, using UK food labels or a reliable nutrition database, then divide the total by the number of portions. Check the quantities carefully, especially for ingredients such as sauces, flour and vegetables, and remember that UK nutrition labels list carbohydrate separately from fibre. If you change an ingredient or serving size, recalculate the total to keep your estimate accurate.

Can I adapt family favourites to make them lower in carbohydrates?

Yes, many family favourites can be adapted to be lower in carbohydrates with a few simple swaps. Try serving bolognese with courgette ribbons or roasted vegetables instead of pasta, using lettuce leaves in place of wraps, or replacing some of the rice in a dish with cauliflower rice. You can also reduce the amount of bread, potatoes or pastry and add extra vegetables, while keeping familiar flavours with herbs, spices and sauces. Changes don’t have to be all-or-nothing: adjusting a recipe gradually can help everyone find a version they enjoy.

Easy Teriyaki Sauce Recipe: A Glossy, Savoury-Sweet Homemade Favourite

teriyaki sauce recipe

Easy Teriyaki Sauce Recipe

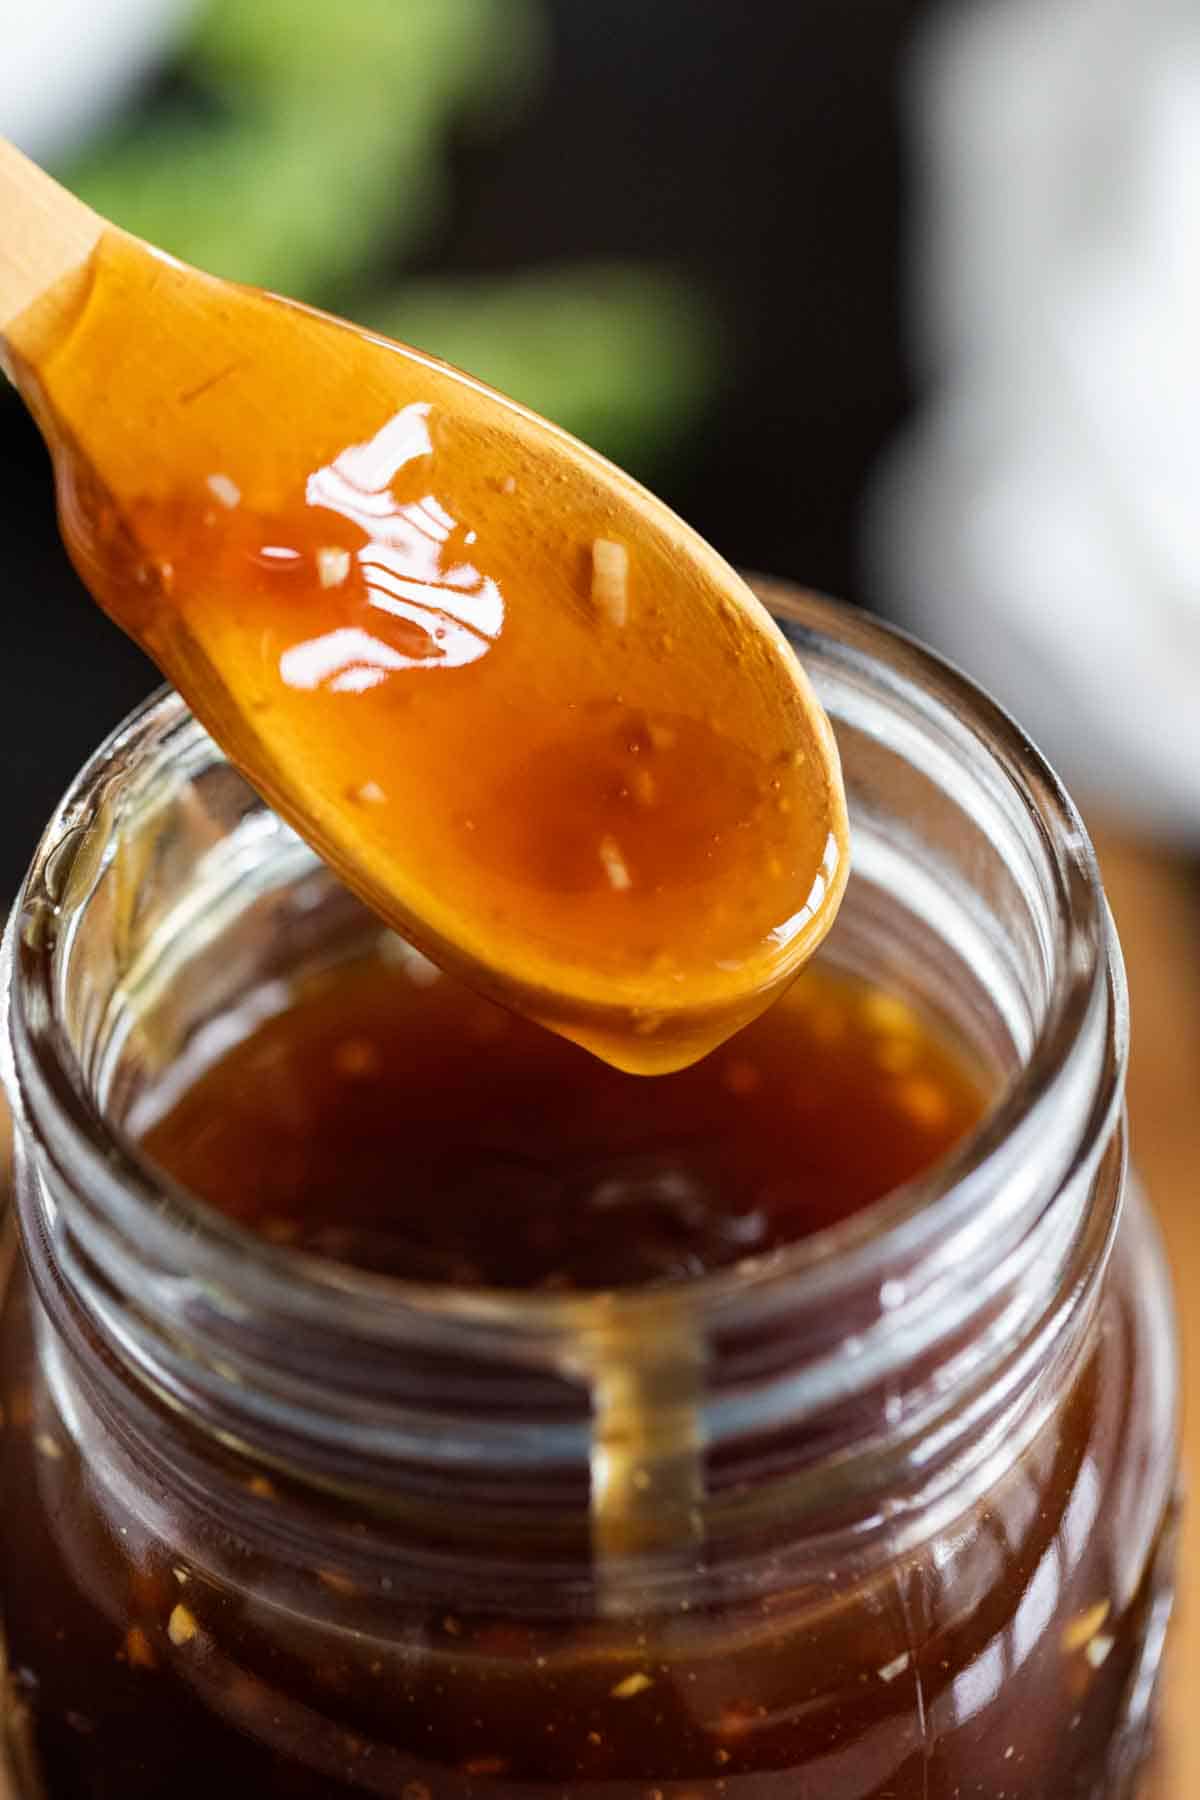
Glossy, savoury and gently sweet, homemade teriyaki sauce is simple to make and far more versatile than its reputation as a glaze suggests. Use it to coat grilled chicken, salmon, tofu or vegetables, or serve it as a dipping sauce. This quick recipe uses a handful of ingredients and takes about 15 minutes.

What is teriyaki sauce?

Teriyaki refers to a Japanese cooking method in which food is grilled or broiled and coated with a shiny glaze. The sauce is commonly made with soy sauce, mirin, sake and sugar. As it simmers, it reduces to a savoury-sweet glaze that clings beautifully to food.

Ingredients

  • 120 ml soy sauce
  • 120 ml mirin
  • 60 ml sake
  • 2 tablespoons caster sugar, or to taste
  • 1 teaspoon finely grated fresh ginger, optional
  • 1 small garlic clove, finely grated, optional

For a thicker sauce (optional): mix 1 teaspoon cornflour with 1 tablespoon cold water.

Method

  1. Put the soy sauce, mirin, sake and sugar in a small saucepan. Add the ginger and garlic, if using.
  2. Set the pan over a medium heat and stir until the sugar dissolves.
  3. Bring the mixture to a gentle simmer. Cook for 8–12 minutes, stirring occasionally, until it has reduced slightly and looks glossy. It will thicken further as it cools.
  4. For a thicker, more pourable sauce, stir in the cornflour mixture. Simmer for 1–2 minutes, stirring constantly, until the sauce reaches your preferred consistency.
  5. Remove from the heat. Strain out the ginger and garlic if you would like a smooth sauce, then leave to cool before using or storing.

Tips for the best teriyaki sauce

  • Adjust the sweetness: start with 2 tablespoons of sugar, then add a little more if you prefer a sweeter glaze.
  • Let it reduce: simmering concentrates the flavour and creates a glossy finish. Avoid boiling it rapidly, as it can reduce too far or taste too salty.
  • Use cornflour only if needed: a traditional-style sauce thickens through reduction, while cornflour gives a quicker, thicker result.
  • Choose low-salt soy sauce if preferred: this makes it easier to control the saltiness, especially when using the sauce as a dip.
  • For a gluten-free version: use certified gluten-free tamari and check that the mirin and sake are suitable.

How to use it

Brush the sauce over food towards the end of cooking so the sugars do not burn. It works particularly well with grilled chicken, salmon, prawns, tofu and aubergine. You can also stir a spoonful through fried rice or noodles, or serve it in a small bowl as a dip.

Storage

Once cooled, transfer the sauce to a clean, sealed jar and refrigerate. Use within one week, and always use a clean spoon when serving. If the sauce has been in contact with raw meat or fish, do not return it to the jar; discard it or bring it to a full boil before serving.


Essential Guide to Homemade Teriyaki Sauce: Ingredients, Preparation, and Pairing Tips

  1. What ingredients do you need to make teriyaki sauce?
  2. How do you make teriyaki sauce from scratch?
  3. How can you thicken homemade teriyaki sauce?
  4. Can you make teriyaki sauce without mirin or sake?
  5. How long does homemade teriyaki sauce keep in the fridge?
  6. What foods go well with teriyaki sauce?

What ingredients do you need to make teriyaki sauce?

To make a simple teriyaki sauce, you’ll need soy sauce, mirin, sake and sugar. These ingredients create its characteristic savoury-sweet flavour and glossy finish. Freshly grated ginger and garlic are optional additions for extra depth, while a little cornflour mixed with cold water can be used to thicken the sauce if desired.

How do you make teriyaki sauce from scratch?

To make teriyaki sauce from scratch, combine soy sauce, mirin, sake and sugar in a small saucepan. Warm over a medium heat, stirring until the sugar dissolves, then simmer gently for 8–12 minutes until the sauce reduces and turns glossy. For a thicker sauce, stir in a little cornflour mixed with cold water and simmer for another minute or two. Let it cool before using; it will thicken further as it cools.

How can you thicken homemade teriyaki sauce?

To thicken homemade teriyaki sauce, simmer it gently until it reduces and becomes glossy; it will thicken further as it cools. For a quicker, thicker result, mix one teaspoon of cornflour with one tablespoon of cold water, then stir it into the simmering sauce a little at a time. Cook for a minute or two, stirring, until it reaches the consistency you like.

Can you make teriyaki sauce without mirin or sake?

Yes, you can make teriyaki sauce without mirin or sake. For a mirin substitute, use an equal amount of water or apple juice with a little extra sugar; for sake, use water or unsalted stock. The flavour will be slightly different, but soy sauce, sugar, ginger and garlic will still make a tasty glaze. Adjust the sweetness to taste, then simmer until the sauce reaches your preferred consistency.

How long does homemade teriyaki sauce keep in the fridge?

Homemade teriyaki sauce will usually keep in the fridge for up to one week when stored in a clean, airtight container. Let it cool before refrigerating, and use a clean spoon each time you serve it. If it has been in contact with raw meat, fish or their juices, don’t pour it back into the container; discard it, or boil it thoroughly before using.

What foods go well with teriyaki sauce?

Teriyaki sauce pairs well with grilled or pan-fried chicken, salmon, beef and prawns, as well as tofu and vegetables such as broccoli, aubergine and peppers. It also adds a savoury-sweet flavour to rice bowls, stir-fries and noodles. Brush it onto food near the end of cooking so the sugars do not burn, or serve it on the side as a dip.

Chicken Marinade: An Easy Guide to Tender, Flavourful Chicken

chicken marinade

Chicken Marinade: How to Make Chicken Full of Flavour

A good chicken marinade can transform a simple meal, adding flavour and helping the meat stay tender as it cooks. Whether the chicken is destined for the grill, oven or frying pan, a balanced marinade is easy to make with everyday ingredients.

What makes a good chicken marinade?

Most marinades combine three elements:

  • Oil helps coat the chicken and carries flavours from herbs and spices.
  • Acidity, from ingredients such as lemon juice, vinegar or yoghurt, adds brightness and can gently soften the surface of the meat.
  • Seasoning, including salt, garlic, herbs and spices, gives the chicken its character.

Sweet ingredients such as honey or brown sugar can add colour and a hint of sweetness, but they may burn over high heat. If using them, cook the chicken over a moderate heat and keep an eye on it.

Easy all-purpose chicken marinade

This versatile marinade works well with chicken breasts, thighs or drumsticks.

Ingredients

  • 3 tablespoons olive oil
  • 2 tablespoons lemon juice
  • 2 garlic cloves, finely grated or crushed
  • 1 teaspoon dried oregano
  • 1 teaspoon paprika
  • ½ teaspoon salt
  • ¼ teaspoon black pepper

Method

  1. Whisk the olive oil, lemon juice, garlic, oregano, paprika, salt and pepper together in a bowl.
  2. Add the chicken and turn it so that every piece is coated. Alternatively, place the chicken and marinade in a food-safe, resealable bag.
  3. Cover and refrigerate for at least 30 minutes. For a deeper flavour, leave it for a few hours.
  4. Remove the chicken from the marinade and cook using your preferred method. Check that it is cooked through before serving.

How long should chicken marinate?

Even 30 minutes can add flavour, while two to four hours is often convenient for a more pronounced result. Chicken can generally be marinated in the fridge for up to 24 hours, but very acidic mixtures may affect the texture if left for too long. For a yoghurt-based marinade, several hours or overnight can work well.

Simple variations

  • Herby: Add chopped parsley, thyme or rosemary and a little lemon zest.
  • Smoky: Increase the paprika and add a pinch of ground cumin.
  • Spicy: Mix in chilli flakes, cayenne pepper or a little hot sauce.
  • Asian-inspired: Use soy sauce, ginger, garlic, sesame oil and a touch of honey. Reduce or omit the salt, as soy sauce is already salty.
  • Creamy and tangy: Replace the oil and lemon with plain yoghurt, garlic, lemon juice and ground spices.

Marinating and food safety

Always marinate chicken in the fridge, not on the worktop. Keep raw chicken and its juices away from ready-to-eat foods, and wash your hands, utensils and surfaces after handling it. Do not reuse marinade that has touched raw chicken as a sauce unless it has been brought to a thorough boil. It is safer to set aside a clean portion before adding the chicken.

Cook chicken until it is piping hot throughout, with no pink meat remaining and the juices running clear. If using a food thermometer, the thickest part should reach 75°C. Rest the cooked chicken briefly before serving.

A little preparation goes a long way

Chicken marinade is an easy way to vary everyday meals. Start with oil, an acidic ingredient and seasonings, then adjust the flavours to suit the dish. With a little time in the fridge and careful cooking, even a simple chicken supper can be full of flavour.


Chicken Marinade FAQs: Timing, Ingredients and Food Safety

  1. How long should you marinate chicken?
  2. Can you marinate chicken overnight?
  3. Should chicken be marinated in the fridge?
  4. What ingredients make the best chicken marinade?
  5. Can you reuse marinade that has touched raw chicken?
  6. How do you cook marinated chicken safely?

How long should you marinate chicken?

Chicken can be marinated in the fridge for as little as 30 minutes, though two to four hours gives the flavours more time to develop. For a stronger flavour, you can leave it for up to 24 hours, but highly acidic marinades containing lemon juice or vinegar may affect the texture if left too long. Always marinate chicken in the fridge, never at room temperature.

Can you marinate chicken overnight?

Yes, chicken can be marinated overnight in the fridge, and the extra time allows the flavours to develop. Keep it covered in a food-safe container, and avoid leaving it for much longer than 24 hours. If the marinade contains a lot of lemon juice, vinegar or another acidic ingredient, marinating for too long may affect the chicken’s texture. Never leave chicken to marinate at room temperature.

Should chicken be marinated in the fridge?

Yes. Chicken should always be marinated in the fridge, not at room temperature, to help prevent harmful bacteria from multiplying. Keep it covered in a food-safe container or sealed bag, and store it away from ready-to-eat foods. After marinating, discard any marinade that has touched raw chicken, unless you bring it to a thorough boil before using it as a sauce.

What ingredients make the best chicken marinade?

The best chicken marinades balance oil, acidity and flavourings. Olive oil helps coat the chicken, while lemon juice, vinegar or yoghurt adds tang and can gently tenderise the surface. Garlic, herbs, spices, salt and pepper build flavour; a little honey or brown sugar can add sweetness and help the chicken brown. Adjust the ingredients to suit your dish, and avoid marinating for too long in a highly acidic mixture, as it can affect the chicken’s texture.

Can you reuse marinade that has touched raw chicken?

No, marinade that has touched raw chicken should not be reused as a sauce or poured over cooked food, as it may contain harmful bacteria. Discard it after use, or set aside a separate portion before adding the chicken. If you want to use the used marinade, bring it to a thorough boil first; however, making a fresh sauce is the safer and simpler option.

How do you cook marinated chicken safely?

To cook marinated chicken safely, keep it refrigerated until you’re ready to cook, and discard any marinade that has touched raw chicken—or boil it thoroughly before using it as a sauce. Cook the chicken until piping hot throughout, with no pink meat and clear juices; if using a food thermometer, check that the thickest part reaches 75°C. Wash your hands and any utensils or surfaces that have come into contact with raw chicken.